
Extract Data from SFTP Files Task
What's on this page
About Extract Data from SFTP Files Task
The Extract data from SFTP files task allows you to import data from your SFTP server to use in Qualtrics. You can use this task to process just one or multiple files at a time. You can combine this task with other tasks, such as the Load data to XM Directory task, to import data into other places in Qualtrics.
Qtip: Qualtrics offers our own SFTP servers for clients through our Professional Services team. There is a cost associated with this service; however, we do guarantee that these servers will work with automations. For more information, please contact our Professional Services team.
Attention: Your SFTP account must have read, write, and delete permissions in order for this task to succeed.
Attention: You can not extract files that have "%" in the file name.
Connecting an SFTP Account
Before you can use the Extract data from SFTP Files Task, you must connect an SFTP account for Qualtrics to extract the data from. Accounts may be added by Brand Administrators for other users in the brand to use, or by individual users for their personal use.
There are 3 different authentication options:
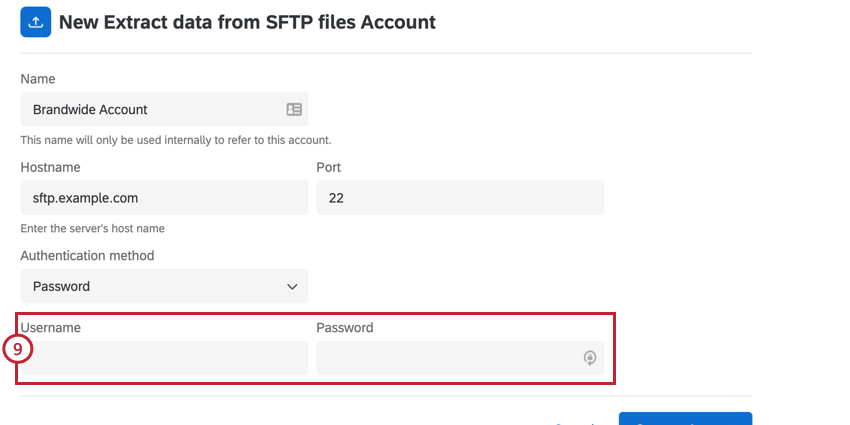
- Password: Authenticate with a username and password.
- SSH Key: Authenticate using a Secure Shell (SSH) key that you provide, or a key provided by Qualtrics.
- Encrypted SSH Key: Authenticate using an encrypted SSH key.
Qtip: When setting up an SFTP connection, we recommend your IT team Allowlist the Qualtrics IP Ranges.
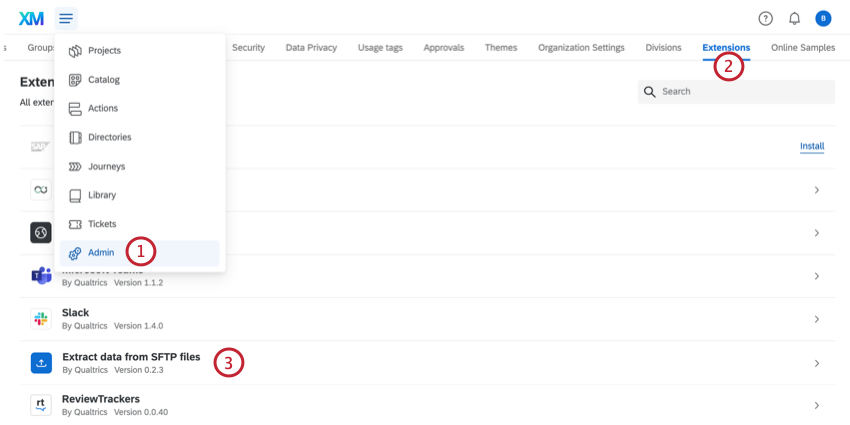
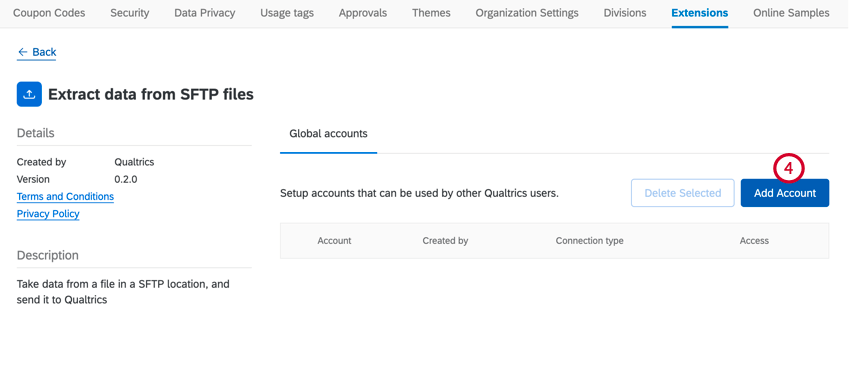
Adding an Account as a Brand Administrator
If you are a Brand Administrator, follow the steps in this section to add an SFTP account for some or all users in your license to use.
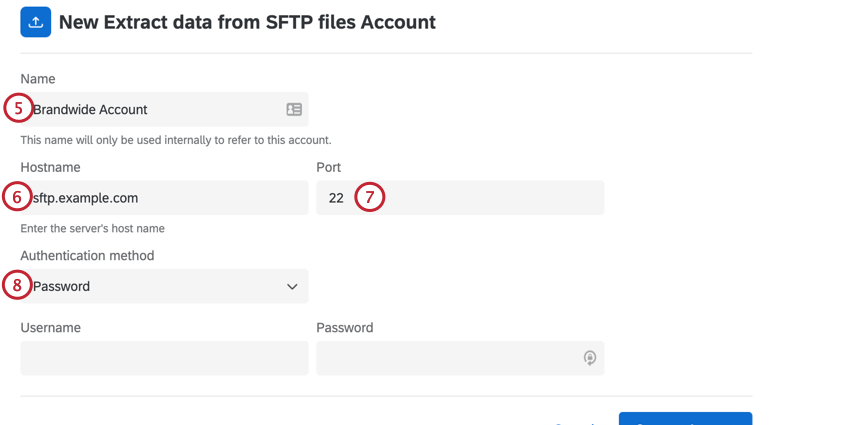
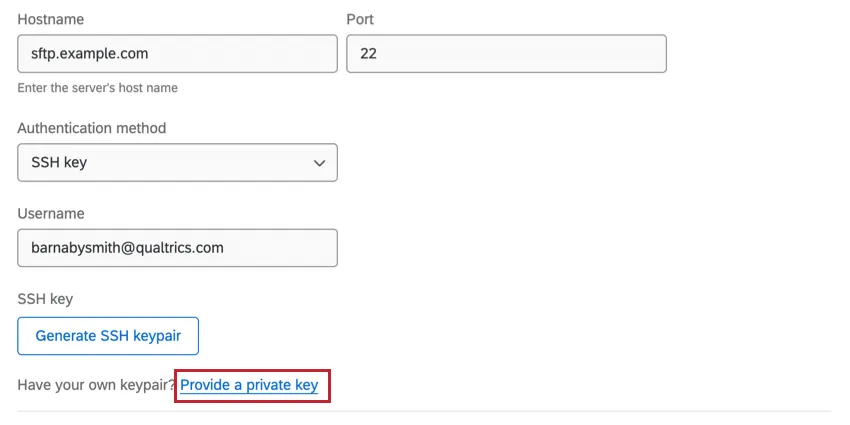
Example: Commonly these are in the format of sftp.example.com
- Password: Provide a username and password for authentication.
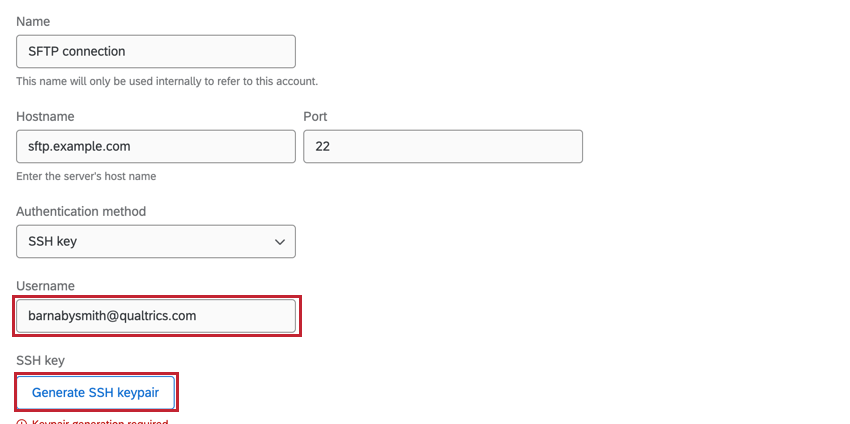
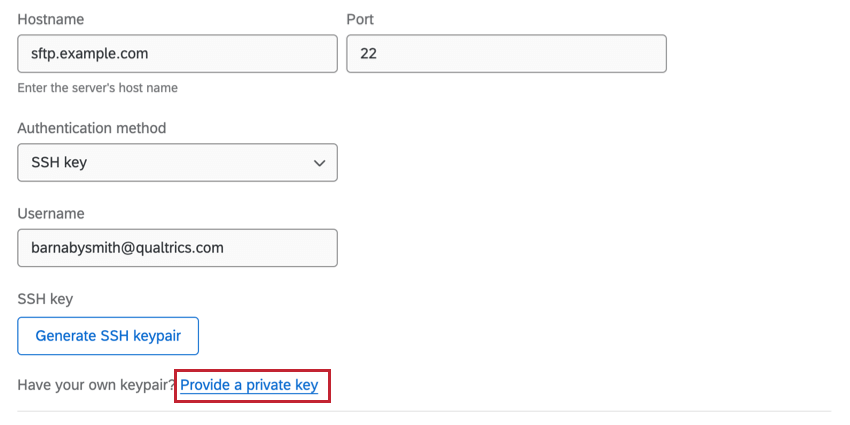
- SSH key: Provide a username and SSH key for authentication, or use an SSH key generated by Qualtrics.
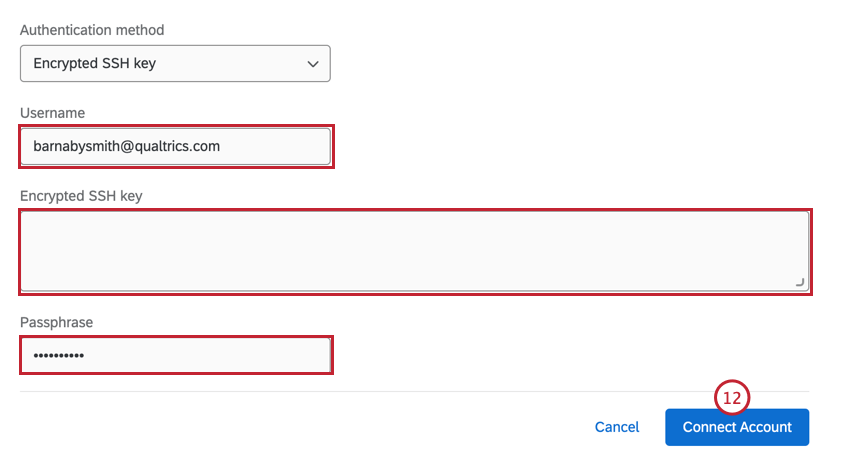
- Encrypted SSH key: Provide your own encrypted SSH key with a passphrase for authentication.
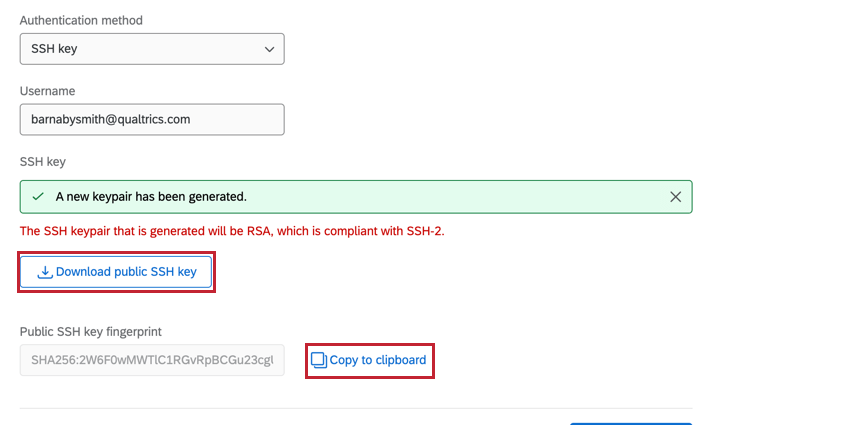
- If using an SSH key generated by Qualtrics, enter a Username and then click Generate SSH keypair.

You can then click Download public SSH key to download the public key as a .pem file to your computer. The associated private key will be stored by Qualtrics. Click Copy to clipboard to copy the key’s fingerprint to your clipboard. Save both of these in a secure place so you can reference them if needed.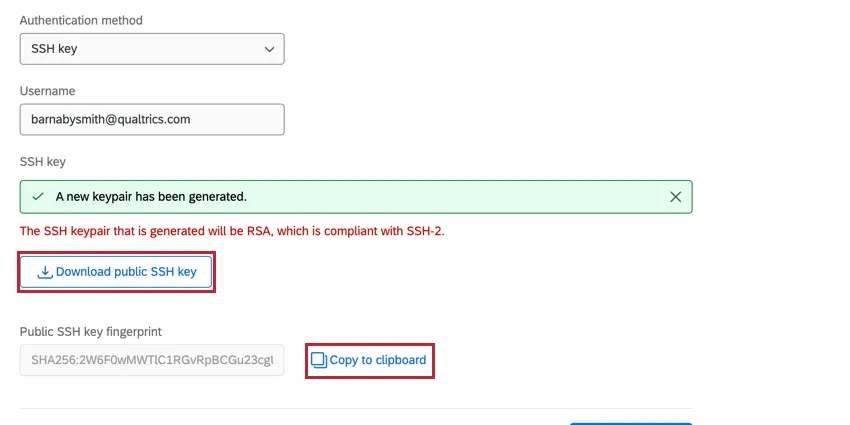
- If using your own SSH key, click Provide a private key.
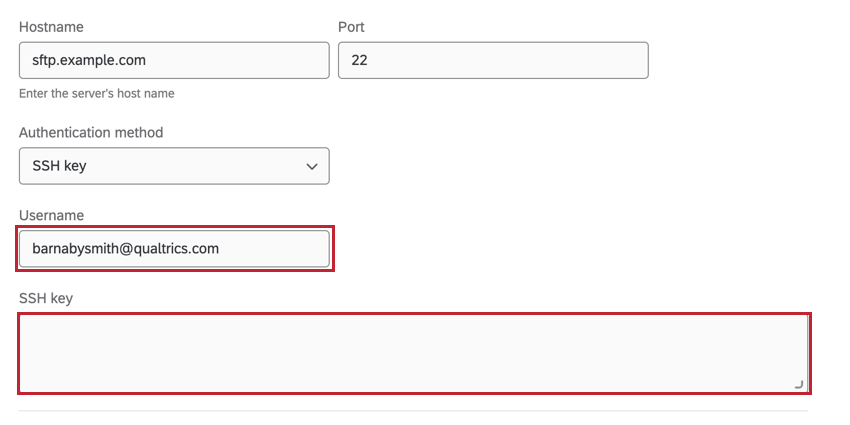
Then, enter your Username and the SSH Key.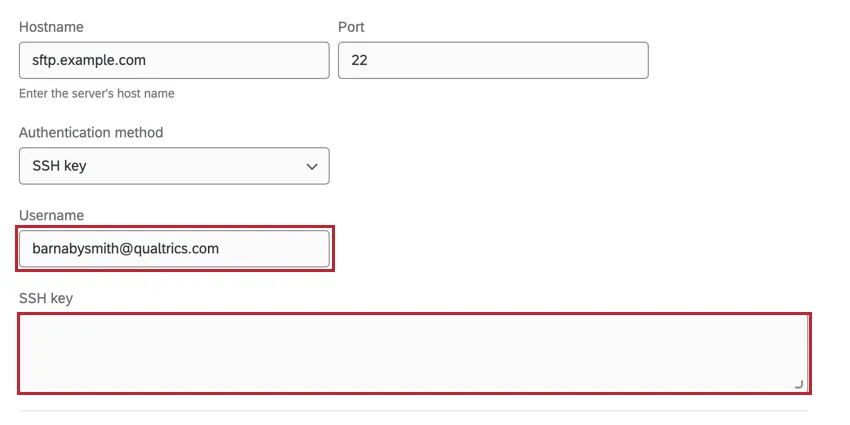 Qtip: You must enter a non password-protected private key in this box. The public key must be authorized on your SFTP server.
This key should be in a PEM-encoded format. Other formats (like a PuTTY Private Key) are not supported.Example: PEM-encoded keys are typically human-readable. This is what a key typically looks like (including the begin and end RSA key lines):
—–BEGIN RSA PRIVATE KEY—–
a1b2c3d4…
—–END RSA PRIVATE KEY—–
Adding an account as an Individual User
Follow the steps in this section to add an SFTP account for your personal use. Only you will be able to use the account that you connect.
Testing the Connection
After you’ve added an account, you can test the connection from within the Extract data from SFTP files task. At the bottom of the task, click Test connection. This will upload a small test file to your server, read its contents, and then delete the file.

Downloading public SSH keys
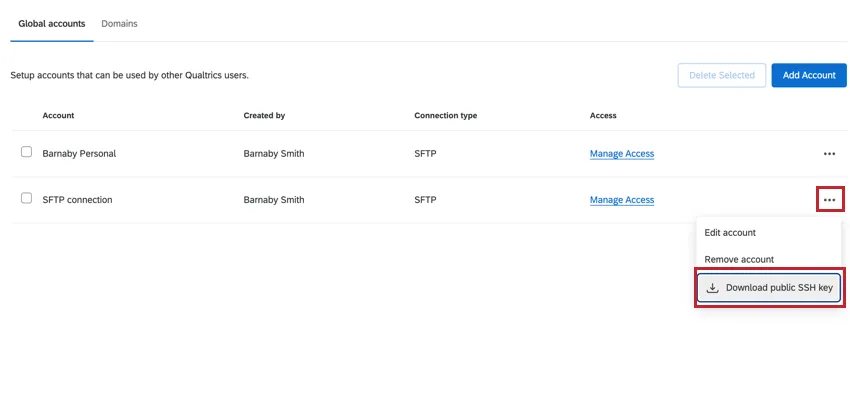
If using an SSH key generated by Qualtrics, you can download the public key for the connection. When viewing the list of SFTP accounts to use, click the three dot menu to the right of an account and then choose Download public SSH key. This will download the key to your computer as a .pem file.
Updating Qualtrics-Generated SSH Keys
If using an SSH key generated by Qualtrics, you can regenerate the key if needed. This is useful if you believe the key has been compromised or if your company requires you to rotate keys after a certain amount of time.
Attention: This action will automatically update your account SSH key and cannot be reverted. Make sure you want to regenerate the key before following the steps in this section.

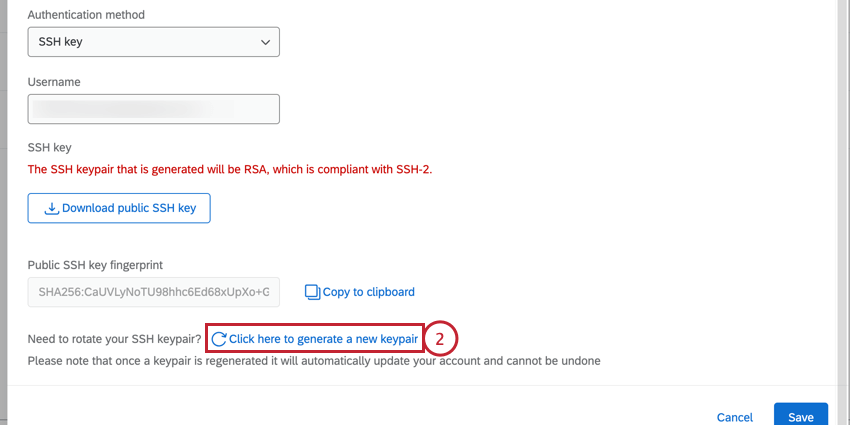
Qtip: Make sure to click Download public SSH key and Copy to clipboard to save your new SSH key.
Troubleshooting the “Extract Data from SFTP Files” Task
Here are best practices, limits, and troubleshooting advice for processing files with this task:
- File size limits: The Extract Data from SFTP Files task has a limit of 200 files per run, with each individual file having a 5 GB file size limit and a total file size limit of 10 GB for all files. If files exceed these limits, the task will fail, meaning none of the files will be processed.
- Headers required: Files need 1 row of headers to be processed. If a file is missing a header row, the file will be considered invalid.
- Files causing task failure: If you try to extract multiple files and 1 of them causes the task to fail, you need to change the file to prevent the workflow from trying to process it again, thus failing. For example, you can move the file into a different directory in your SFTP, delete it, or change the file prefix to something else.
- Escaped quotes: Backwards slashes ( \ ) are not valid escaped quotes for CSV files. Make sure you use straight quotation marks ( “” ). Do not use typographic quotes ( “ ” ).
- Line endings: If you are using a file that has only carriage return line endings, then they will be replaced with newline line endings.
- UTF-8 encoded CSVs: If you’re using a CSV, the only supported file encoding format for this task is UTF-8. Some spreadsheet software saves as Unicode UTF-8, which is different from UTF-8, if you are getting unexpected errors. Please ensure that you are exporting in UTF-8 format and not Unicode UTF-8.
Qtip: For information on general limits that apply to ETL workflows, see Workflow Limits. For any task-specific limits, refer to the information on this page.
For troubleshooting SFTP connections, see SFTP Troubleshooting.
Setting up an Extract Data from SFTP Files Task
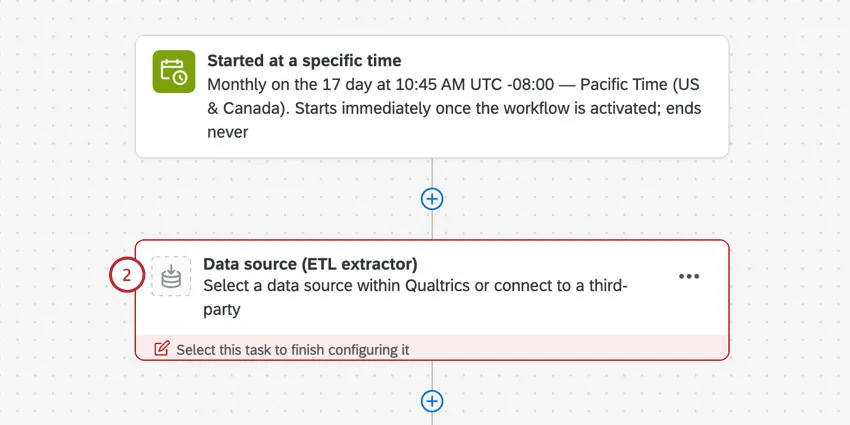
Select Data source (ETL extractor).
Choose the Extract data from SFTP files task.

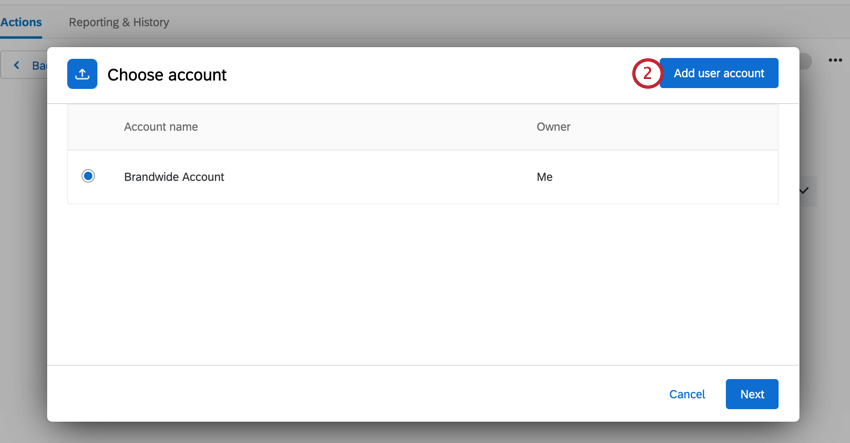
Choose the SFTP account to extract files from. Any accounts added by Brand Administrators, as well as accounts you’ve added yourself, will be listed here.
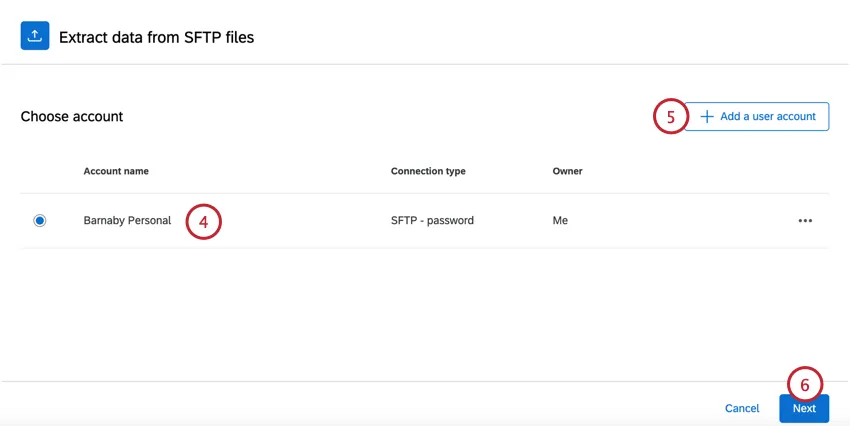
If you want to add new SFTP account credentials, click Add a user account and follow the steps in the connecting an SFTP account section.
Click Next.
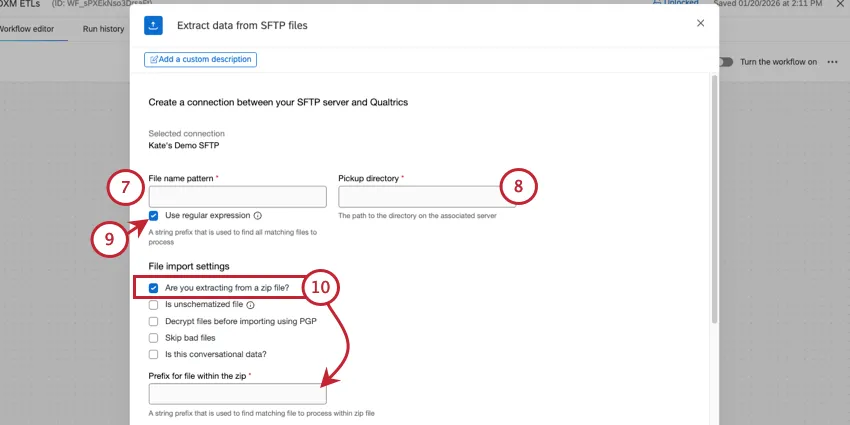
Enter the File name pattern, which is used to identify what files to process by looking at the file’s prefix. All files with your specified prefix will be processed. Enter the desired prefix into the box. You do not need to add an asterisk (*) to the end of the prefix.
Example: Let’s say I have a file called Qualtrics-DataImport.csv. I can enter “Q” or “Qualtrics” as the prefix, depending on if there are other files in the server I want to process.
Qtip: Click the Use regular expression checkbox if you’d like to use regex for your file name pattern.
Enter the Pickup directory or the directory path to find the file on the server. You may enter either a relative path or an absolute path.
Qtip: This directory path is case sensitive and must point to an existing folder or the workflow will fail. Qualtrics will not be able to access files if they’re in a higher level directory than the one specified in the pickup directory.
Example: Depending on the path you enter, potential pickup directories could be:
- /home/username/myFolder (absolute path)
- myFolder (relative path)
Click the Use regular expression checkbox if you’d like to use regex for your file name pattern.
Qtip: Only files matching the provided regular expression will be extracted. Please use RE2 regular expression syntax.
If your file is compressed, enable the Are you extracting from a zip file option. Then, enter the Prefix for file within the zip which will be used to find the correct file to import from the zip file.
Qtip: Only .zip compressions are supported. The files in the .zip file can be encrypted, but the .zip file itself cannot be (for example, filename.csv.pgp.zip is supported but filename.csv.zip.pgp is not).
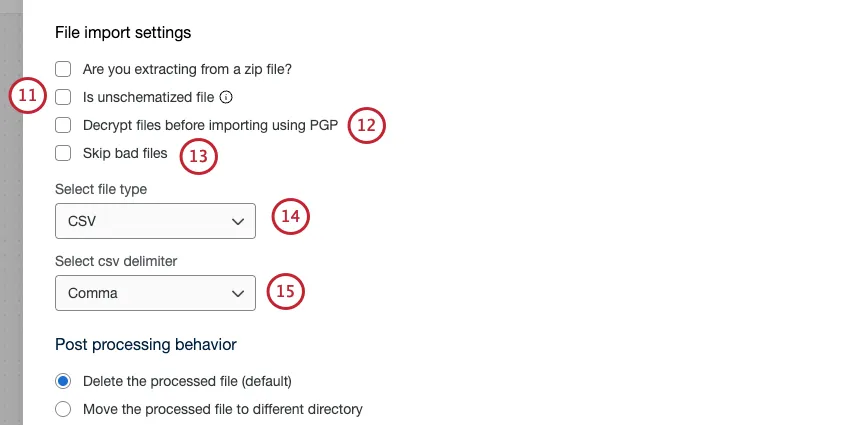
If desired, select Is unschematized file.
Qtip: A file is considered “unschematized” if it doesn’t follow the standard required formatting. For example:
- The file is an unsupported file type (see step 15 for supported types).
- The file is missing headers.
- The file has other formatting errors.
Qtip: Selecting “Is unschematized file” removes the file type, delimiter, and sample file settings.
If desired, select Decrypt files before importing using PGP. To learn more about this extra means of encryption and data protection, see PGP Encryption.
Qtip: Make sure the files you want to import are encrypted with Qualtrics’ public key before uploading them to your SFTP server. To do this, you may need to talk to your IT team.
If you’d like to skip over files that can’t be processed, select Skip bad files. If this option isn’t selected, the entire workflow will fail when it tries to process the bad file.
Qtip: “Skip bad files” will not process files that are over the maximum file size and files that can’t be opened, such as those that are corrupted in some way. While this setting reduces the chances a workflow will fail, it will not account for issues that could occur in files that can be opened, such as incorrect headers and formatting.
Select a file type. Your options include: CSV, TSV, JSON, or Excel (.xlsx or .xls).
Attention: When an Excel file type is selected, the task only reads the first tab of the document. Also, .xlsx files must be less than 1 Gigabyte and .xls files must be less than 5 Megabytes.
Qtip: JSON files must have their content enclosed in square brackets, []. For example:
[{"fruit": "Apple","size": "Large","color": "Red"}]
Attention: Only UTF-8 files without BOM can be used. Use regular spaces (not non-breaking spaces) in column headers. Non-breaking spaces look identical but cause matching failures. Excel exports often create non-breaking spaces; replace them with regular spaces.
If processing a CSV, choose the Delimiter for the file. Your options include comma, semicolon, tab, and pipe.
Choose what you’d like to happen after the file is processed. Your options include:
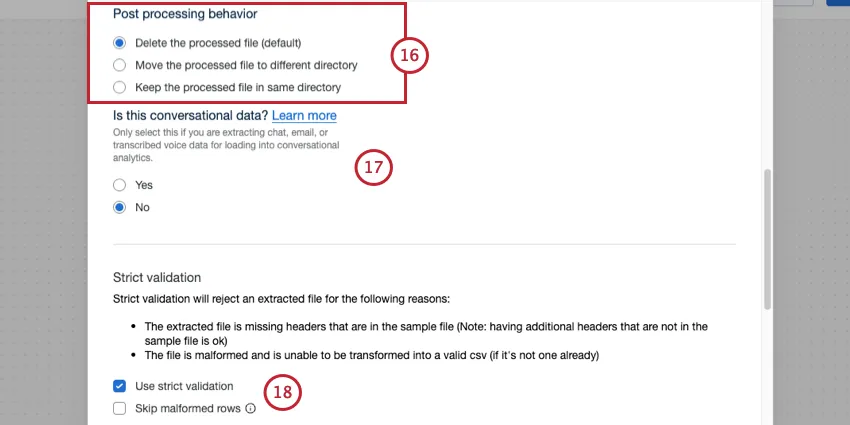
Delete the processed file: After processing the file, Qualtrics deletes it from your SFTP server. This option is enabled by default.
Qtip: Keep in mind that if multiple workflows are accessing the same files, this is still true. In other words, if one workflow deletes a file, and another workflow tries to run on the same logic, the file will already have been deleted from the SFTP, and will not be processed by any additional workflows.
- Move the processed file to different directory: If you choose this option, a field will appear where you can write the URL path for the different folder where you’d like the processed file to be saved.
- Keep the processed file: After processing the file, Qualtrics leaves the file on your SFTP server.
Attention: If your SFTP server is configured to automatically delete or move files after they are touched, the post-processing option you select may not work as intended.
Set whether your data is conversational or not, and then set it to chat or email. To learn more, see Extracting Conversational Data from an SFTP.
Qtip: Setting the task to conversational data removes the file type and delimiter settings.
Decide if you’d like to Use strict validation, which will automatically reject extracted files if there are formatting issues. Your extracted file's headers will be compared against a sample file you provide, and if any headers are missing, then the extracted file will fail validation.
Qtip: Individual rows will fail validation if they are missing values for a header. Enable Skip malformed rows to exclude any rows with formatting issues while still uploading your file.
Enable Skip malformed rows to upload your file and exclude any rows with formatting issues.
Click Choose file and upload a sample file, which will tell Qualtrics the fields you want to import, and will determine the subsequent tasks you can use with this task. The file you upload should contain the fields you want to import as part of this task.
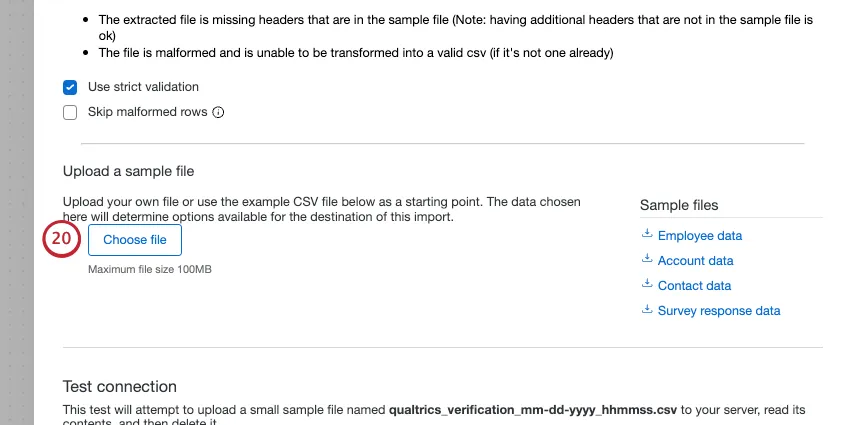
Qtip: Download the sample files in the task, or download the files in the example files section for templates on how to structure your data based on your use case.
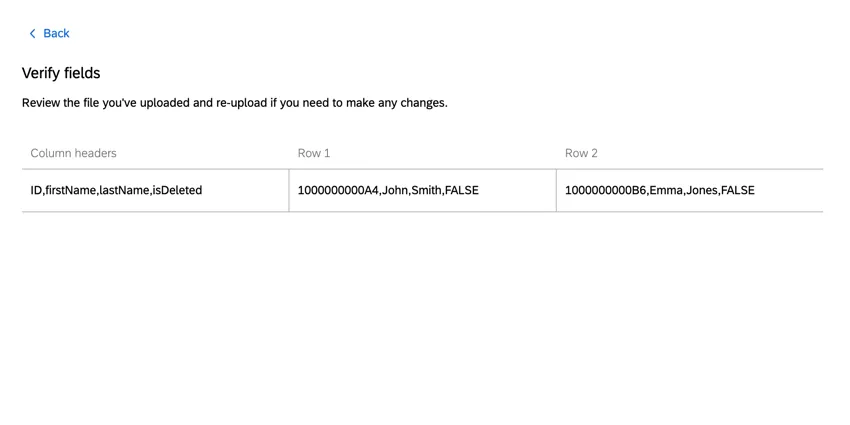
Double check that your file is importing the data correctly. If you need to change your settings, click Back at the top of the task.
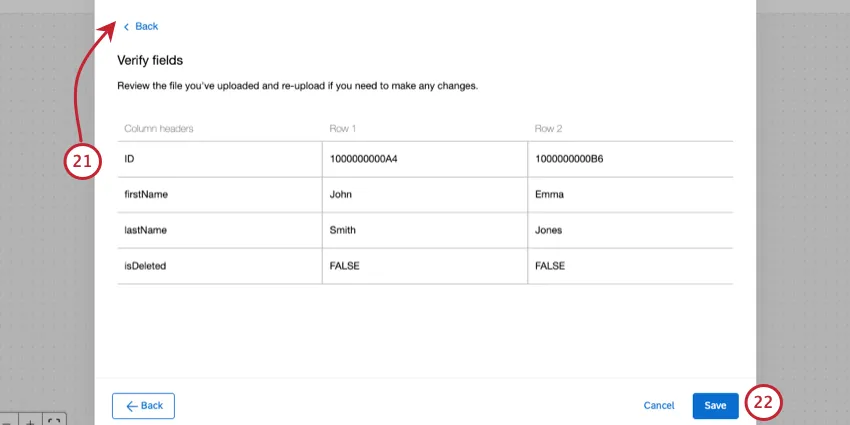
Qtip: If all your data is being imported as one column, you are using the wrong delimiter. The below screenshot demonstrates what this looks like in the task window.
If your data looks correct, click Save.
Finish building your ETL workflow. When you choose a loader task, you’re deciding the destination of the data you extracted. See available loader tasks for a list of options.
Example Files
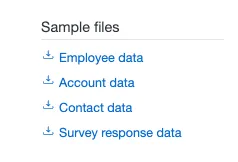
Below are example files for how to structure your data for import, depending on the type of data you want to import. Click on a file name to download the example file.
- Employee Data
- Account Data
- Contact Data
- Survey Response Data
- User Data
- Salesforce Account Team Member Data
- Chat conversational data
- Email conversational data
Extracting Conversational Data from SFTP Files
Conversational data is data from chats and emails. For example, if you have records of customer and support interactions, these would be conversational data. This kind of information can contain enriching open-ended feedback, as well as provide an opportunity to coach your customer-facing representatives on how to best serve your customers. You can perform this kind of conversational analytics once your data has been moved from your server to Qualtrics, with our host of Omnichannel Listening features.
To learn more, see Extracting Conversational Data from Files.
FAQs
Do I have access to all extensions available through the Workflows templates?
Do I have access to all extensions available through the Workflows templates?
Is there a link to all Workflows events and tasks?
Is there a link to all Workflows events and tasks?
What are Workflows templates?
What are Workflows templates?
What are workflows? / Where are actions?
What are workflows? / Where are actions?
There are no changes to workflow functionality as part of this update.
How do I add or remove an extension from my Qualtrics account?
How do I add or remove an extension from my Qualtrics account?
That's great! Thank you for your feedback!
Thank you for your feedback!