
Microsoft Excel Task
What's on this page
About the Microsoft Excel Task
Automate your workflows by bringing the data you collect into the software you and your collaborators use most. The Microsoft Excel task allows you to automatically add new survey responses as new rows to a Microsoft Excel Workbook.
Qtip: This feature is available to any user with access to workflows.
Data Edits
For this extension, survey retakes are always treated as a unique new response and added as a new row of data, rather than rewriting old data.
Any edits made to previously collected data in Qualtrics will not be reflected in Microsoft Excel.
Creating a Microsoft Excel Workbook
Attention: This task only supports workbooks stored in the OneDrive business platform and indexed by Microsoft Search. Workbooks stored in the OneDrive consumer platform and SharePoint sites are not supported.
If you plan on using an existing Excel Workbook in your task, make sure you’ve already created an Excel Workbook where you plan to import the data, and make sure you know the workbook’s name. If the workbook you’re planning to use was created by someone else, make sure they’ve given you editing access.
The Excel Workbook doesn’t need to have data in it yet, but if you plan to add to an existing worksheet (tab), it must have column headers set up before you set up your automation in Qualtrics. See the example below.
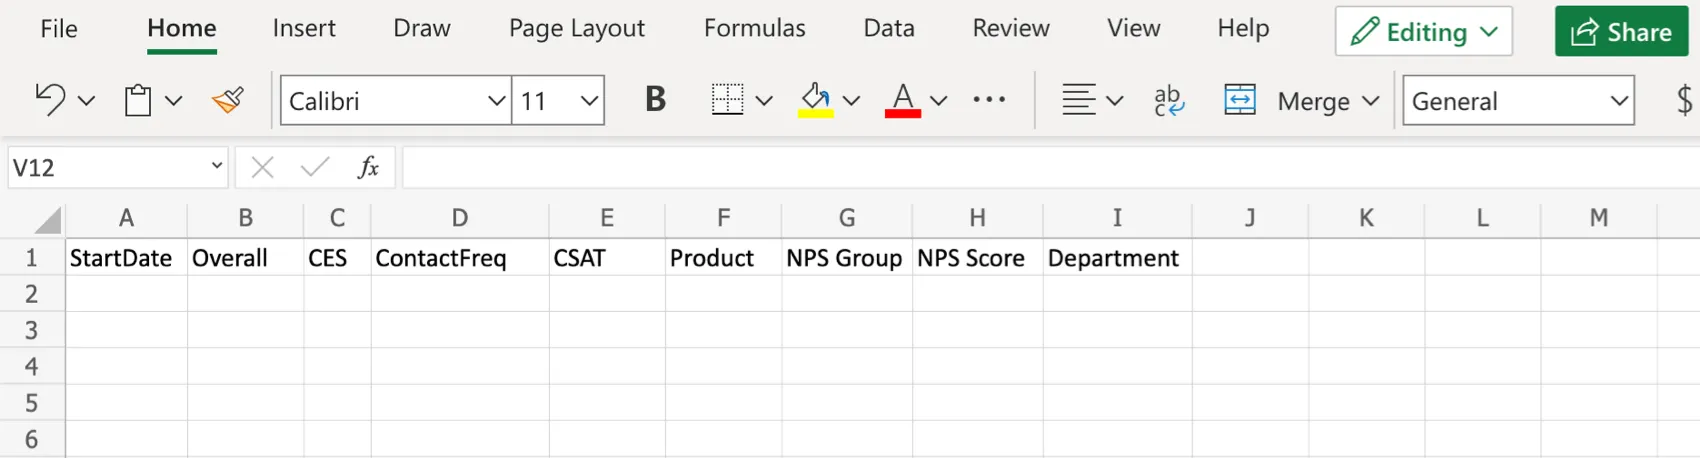
Make sure you don’t have duplicate column names in your sheet. Do not use quotes ( “ ) in column names.
Do not edit a workbook after connecting to the Qualtrics extensions, or it may not work correctly.
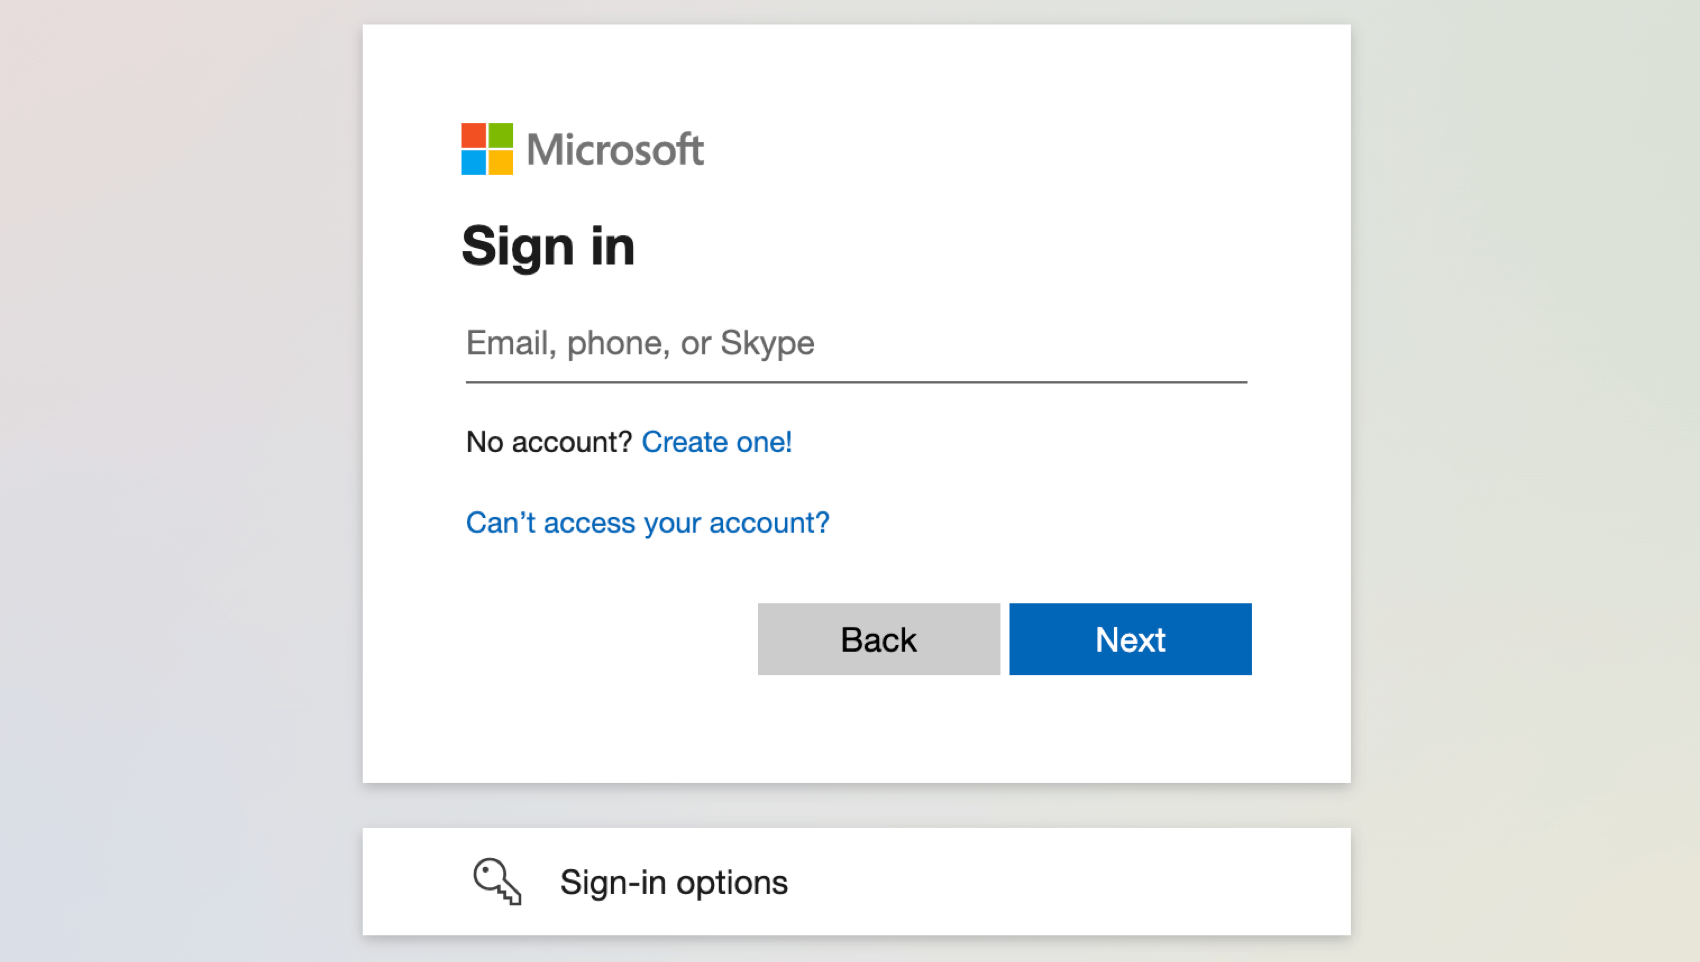
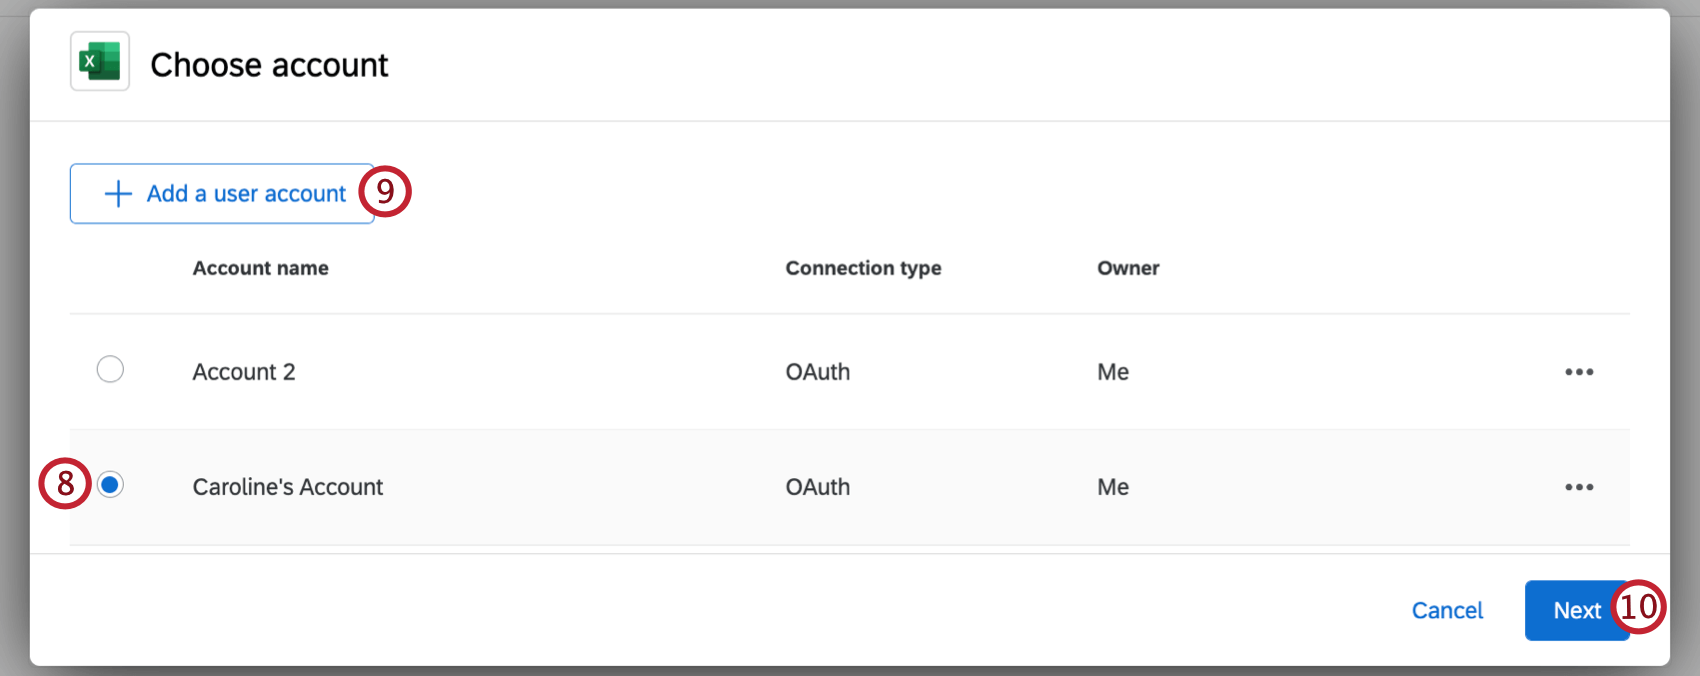
Connecting a Microsoft Account
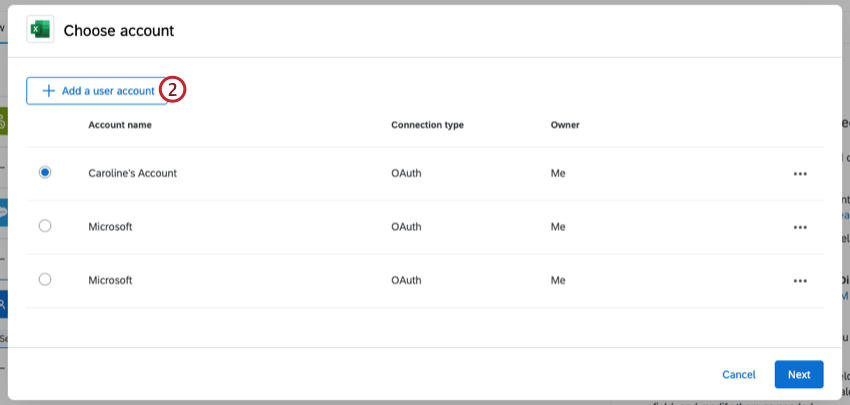
Before you can use the Microsoft Excel task, you must connect a Microsoft account for Qualtrics to import data to. Accounts may be added by Brand Administrators for other users in the brand to use, or by individual users for their personal use.
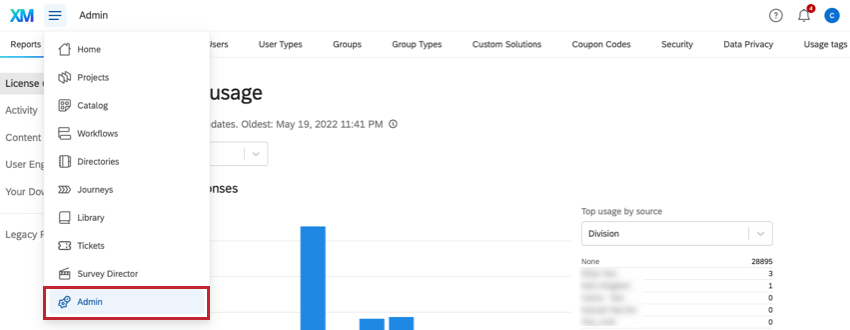
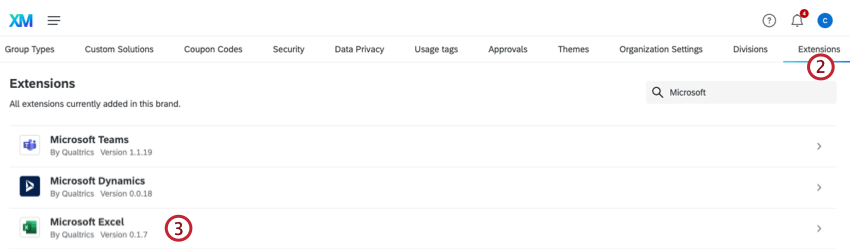
ADDING AN ACCOUNT AS A BRAND ADMINISTRATOR
If you are a Brand Administrator, follow the steps in this section to add a Microsoft account for some or all users in your license to use.
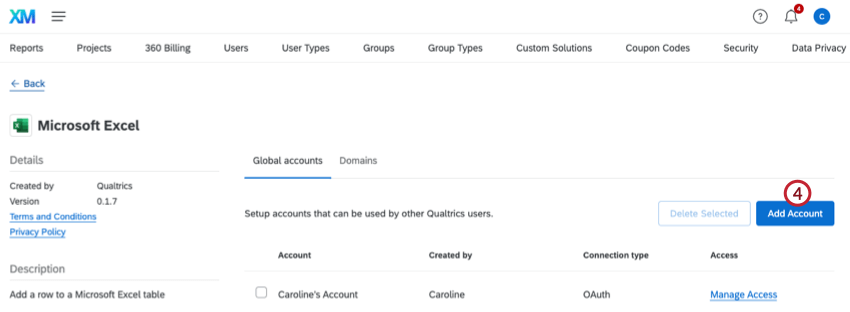
For more on managing which users have access to this account, see Determining Who Can Use an Extension Account.
Qtip: During this process, you may see an error message stating “Qualtrics needs permission to access resources in your organization that only an admin can grant. Please ask an admin to grant permission to this app before you can use it.” Please note that “admin” is referring to a Microsoft admin, not a Qualtrics Brand Administrator. You will need to speak with your IT team to allow Qualtrics to connect to Microsoft, as Qualtrics needs permission to access resources in your organization that only a Microsoft Admin can grant.
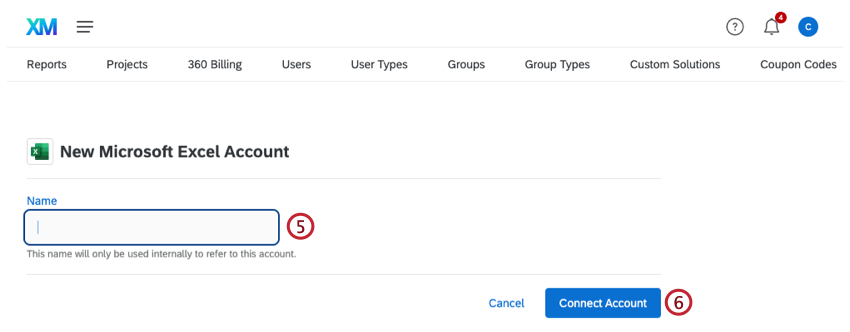
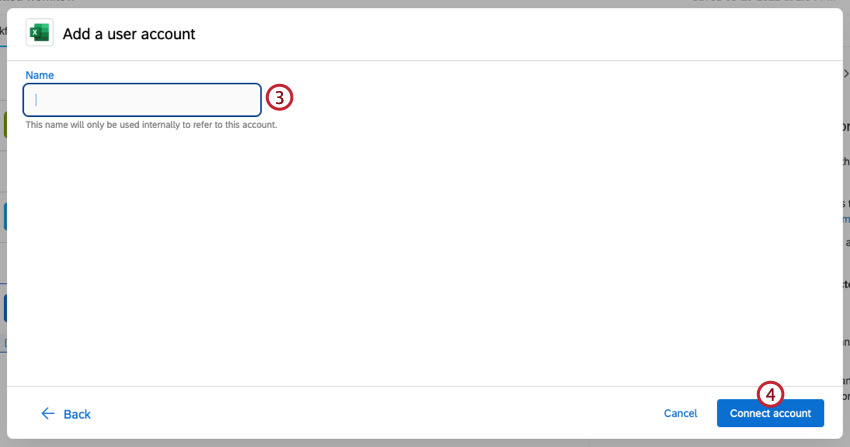
ADDING AN ACCOUNT AS AN INDIVIDUAL USER
Follow the steps in this section to add a Microsoft account for your personal use. Only you will be able to use the account that you connect to.
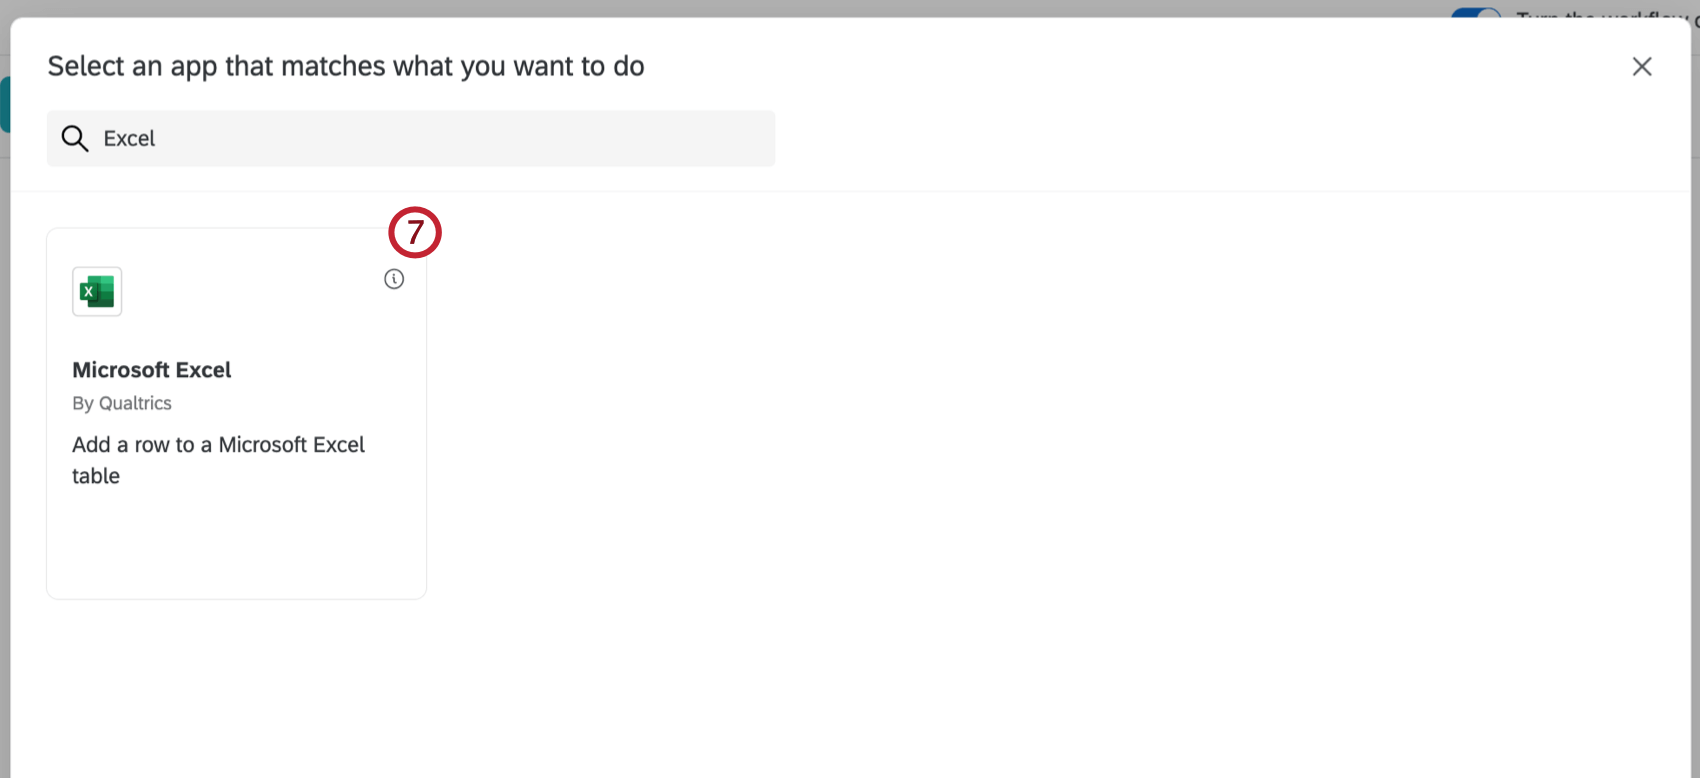
Creating a Microsoft Excel Task
When you create a Microsoft Excel Task, each time the task runs a new row will be created within your selected Excel Workbook. New rows are added to the bottom of the sheet below existing rows.
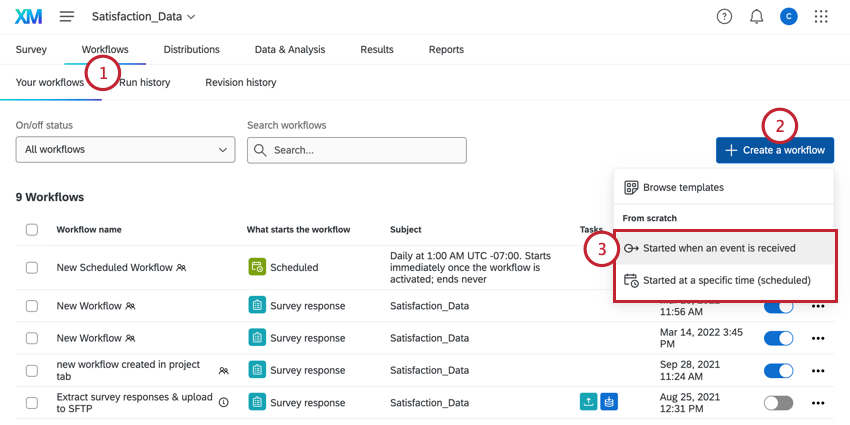
Qtip: To link this to a particular survey’s responses, we recommend starting in the Workflows tab of a survey.
Qtip: To automatically add this survey’s data to your Excel Workbook, this should be an event-based workflow.

Qtip: To automatically add this survey’s data to your Excel Workbook, this should be a survey response event with at least Newly created responses selected.
Qtip: For more information on building conditions in workflows, see Creating Conditions.
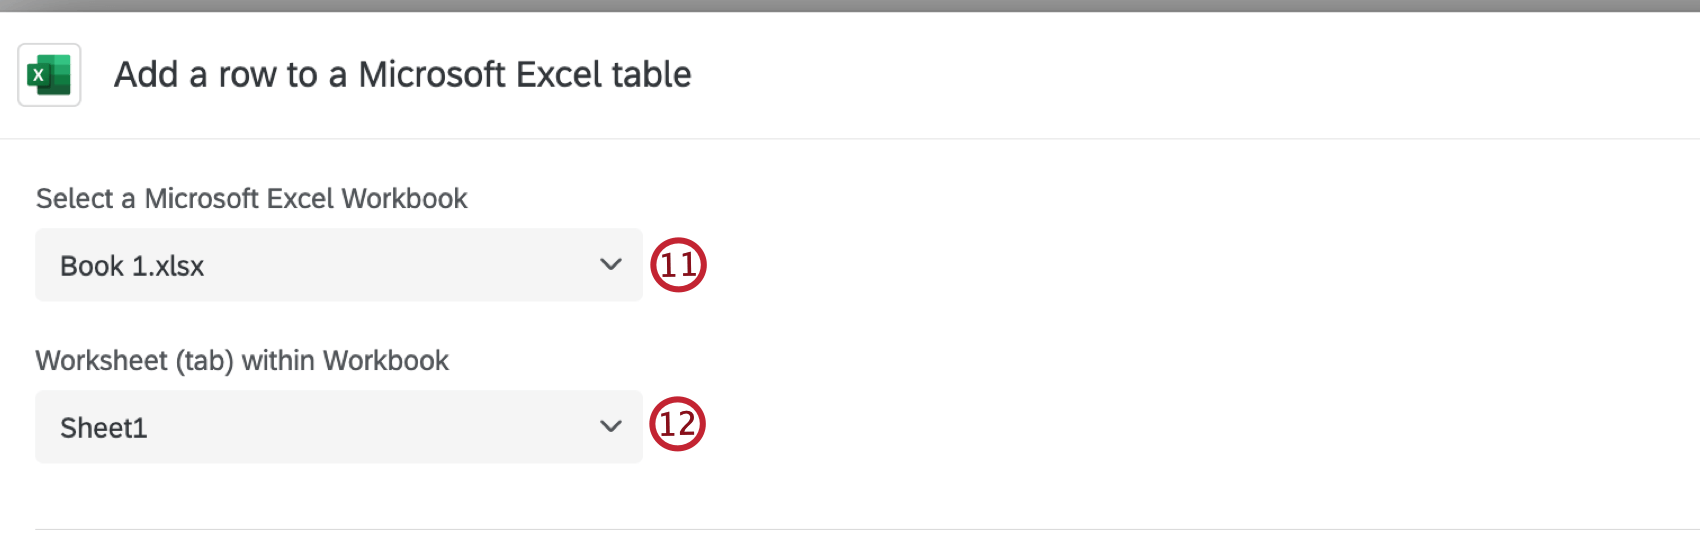
Attention: New workbooks cannot be created, you must select an existing workbook.
Qtip: It’s possible that a workbook may not show up in a search. One possible method to fix this is to ‘reindex your one drive’. Instructions on how to reindex can be found here. If this issue persists, please contact Microsoft support.
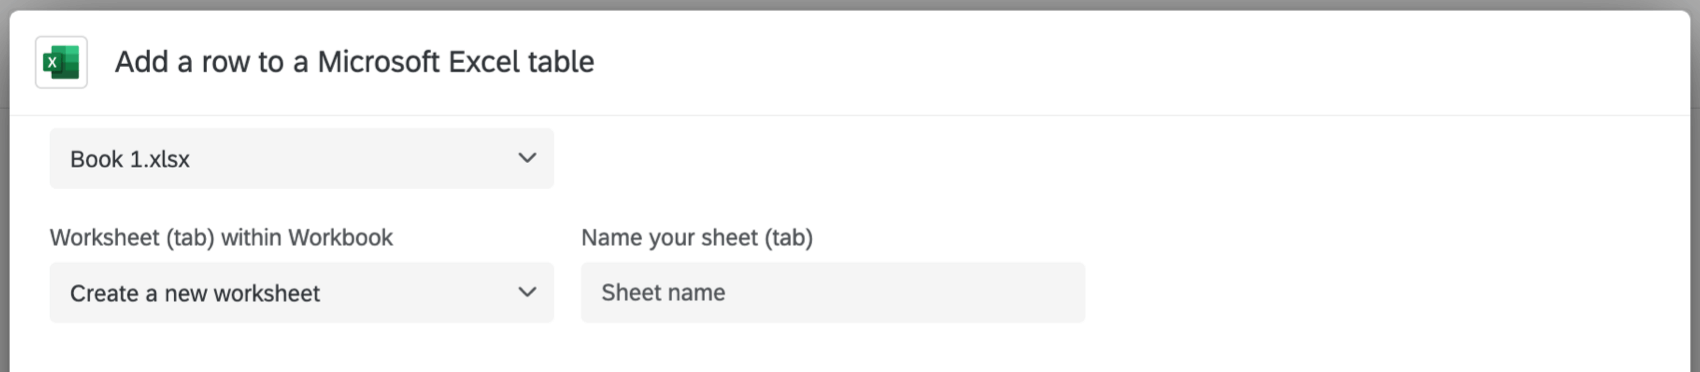
- Create a new worksheet. If you select this option, you will need to name the new worksheet.
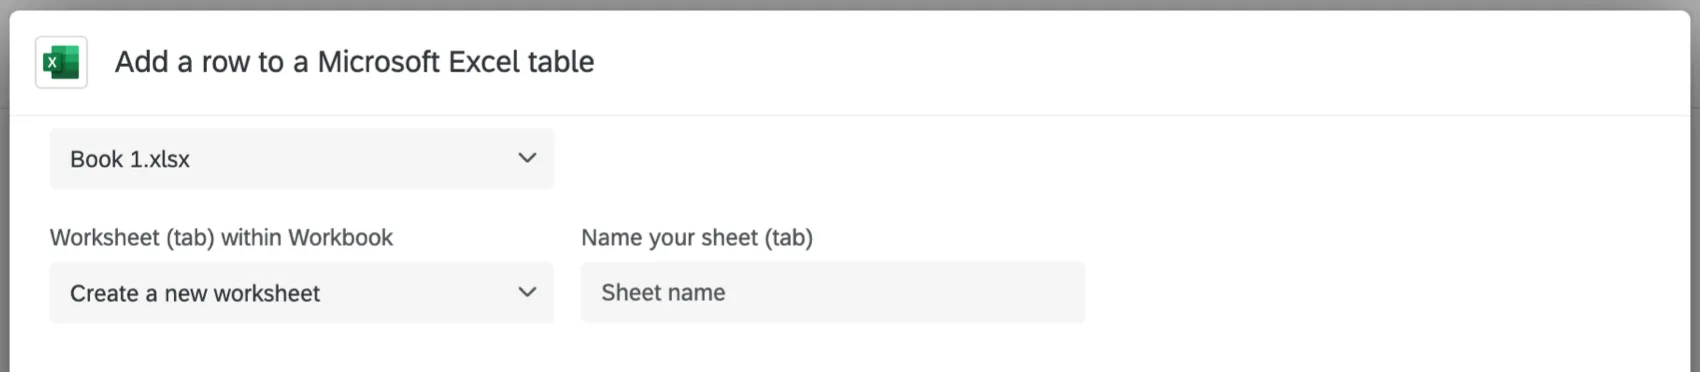
- Add the file to an existing worksheet. Make sure the worksheet already has headers inside it, and ensure there are no empty cells in the header row of the worksheet. Qtip: Don’t see the changes made in an Excel file reflected to Qualtrics yet? No problem. In Qualtrics, click Back in the lower-left of the window, then re-select the account you want to connect to. This will reload the data pulled from Excel, so any new files or columns will appear.

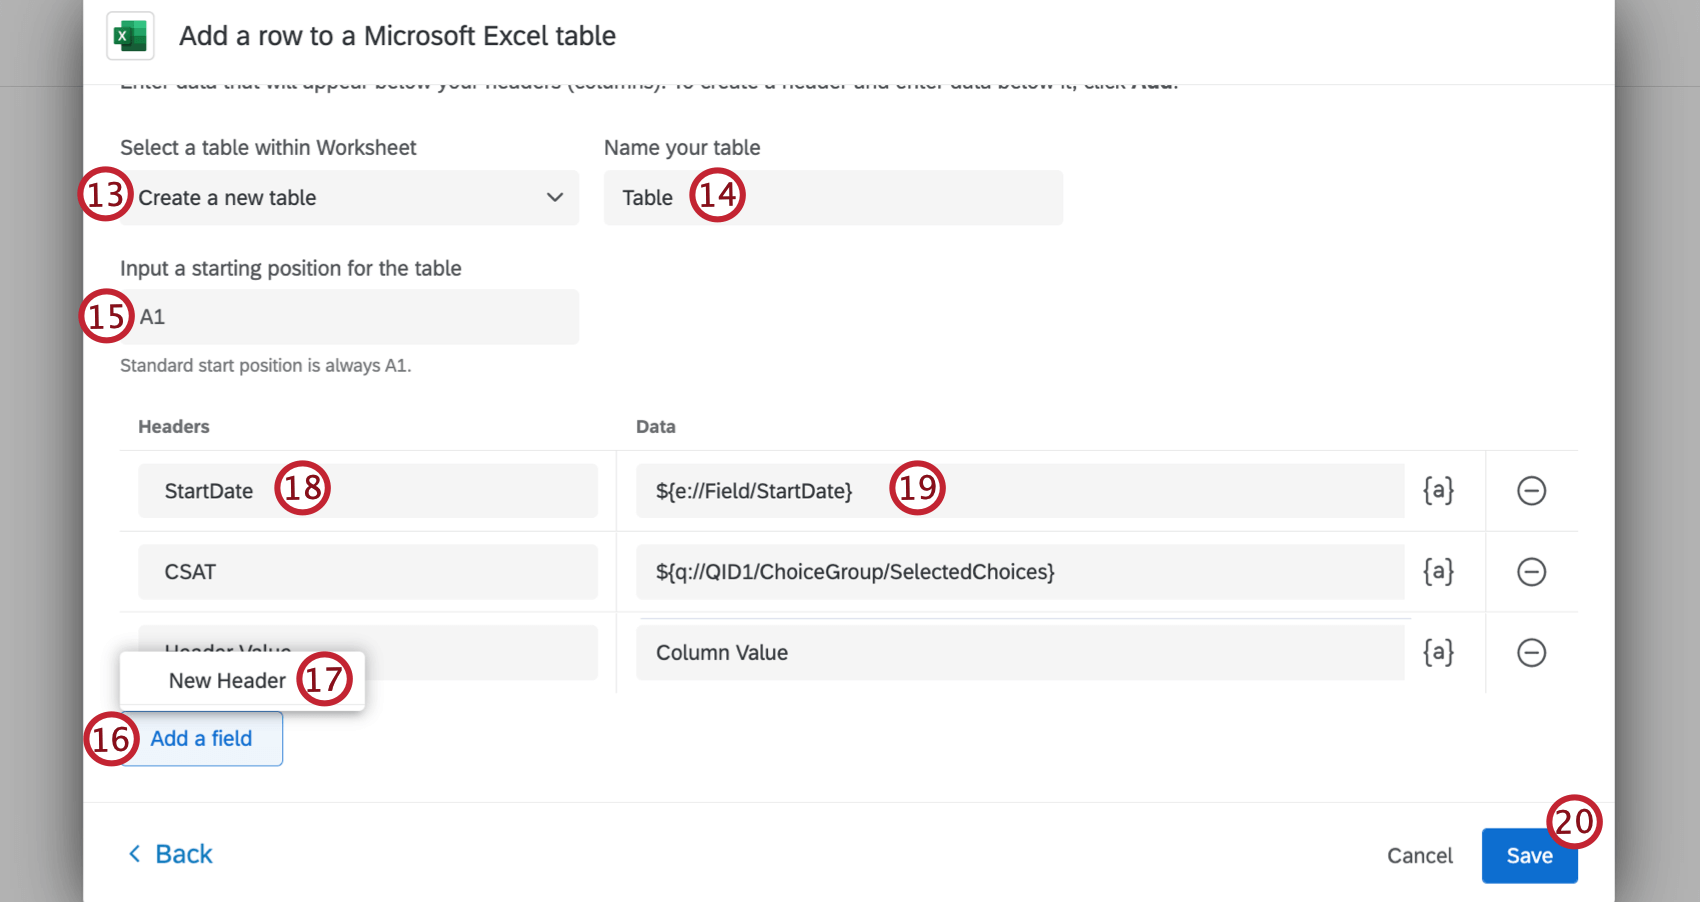
Attention: The table name cannot be empty or contain special characters.
Qtip: The standard start position is A1.
Qtip: When setting up the Excel table, be sure to input specific ranges (e.g. A1:B2). Inputting entire columns (e.g. A:B) can cause errors with Excel.
Tips for Mapping Piped Text to Columns
For more information on piped text, see the linked support page.
- Piped text can be used to pull data from the following:
- Survey questions
- Embedded data fields
- GeoIP location
- Date and time
- Panel fields
- Quotas
- Response ID (See “Response ID” column on the Understanding Your Dataset page)
- Response link (Link to the response report. Does not require any kind of login or security setting to view)
- Status (See “Status” column on the Understanding Your Dataset page)
- When you’re adding the piped text for a question, the “Selected Choices” option will dynamically paste the answer the respondent selected into the field.
- When you’re adding the piped text for a question, the “Selected Choices – Recode” option will dynamically paste the numeric value of the answer the respondent selected. Make sure your recode values are set before you collect data, though – because you’re ingesting data into Excel as it’s submitted to Qualtrics, any changes you make to recode values later will not be reflected in Excel workbooks.
- “Panel fields” refers to contact list information. This will only be relevant if you distributed your survey with a method that required a contact list. (Email, SMS, authenticator, personal links, etc.)
- You can type values in the fields instead of using piped text, but we don’t always recommend doing this, since that means every respondent will have the same value for that field. It could be useful if you are using conditions in your workflows to dynamically assign different values to different groups of respondents, but even then, it is often better to use logic and embedded data to assign values, and pipe that embedded data’s value into the Excel Workbook; that way data is saved in the survey response and the Excel Workbook, not just the Excel Workbook.
That's great! Thank you for your feedback!
Thank you for your feedback!