
Insert Media
What's on this page
About Inserting Media
Adding media to your survey can help you create a cutting-edge experience for respondents. This page outlines how to insert media (e.g., audio and video files) from your library or from audio or video hosting servers like YouTube and SoundCloud into your surveys.
Warning: Inserting media requires the Allow All HTML Markup account permission to be enabled on an account. The Allow JavaScript account permission must be enabled for proper video playback. If you have a free survey account, these permissions cannot be enabled without upgrading your account. If you are a user on a paid license and have questions about your account permissions, contact your Brand Administrator.
Supported File Types
Though Qualtrics supports the uploading of most audio or video files, web browsers aren’t as forgiving. For most file types, your survey respondents will need to have a related browser plug-in installed to correctly view the media.
Because of this, we recommend uploading your media to a file hosting site such as YouTube or SoundCloud, and then embedding the media via HTML or a URL. Both of these services dynamically load an appropriate version of your file that will work on whatever device or browser your respondent is using, ensuring the widest compatibility. In addition, both YouTube and SoundCloud support private media if security is a concern.
If you still want to upload your files directly to Qualtrics, the best file type will depend on your audience.
For audio files
For audio files, we recommend MP3 format. WAV is also widely supported, but its large file size may create a negative experience for those with slower internet connections.
For video files
The best video file format changes depending on the device and browser your respondents use to view the video. If you are unsure what file type is the best for your situation, we recommend posting your video to YouTube or Vimeo and using the sharing features to embed the video into your survey.
Qtip: You cannot insert a Private YouTube video. If you would like to host your video on YouTube but not have it appear in search results, upload it as Unlisted instead.
If you cannot use YouTube, we recommend saving your video in various file formats (MP4, MOV, and WMV being the most popular), and then creating a version of your question for each format and using display logic to show the appropriate one based on the respondent’s device and browser.
Using Display Logic to Show The Appropriate File Type
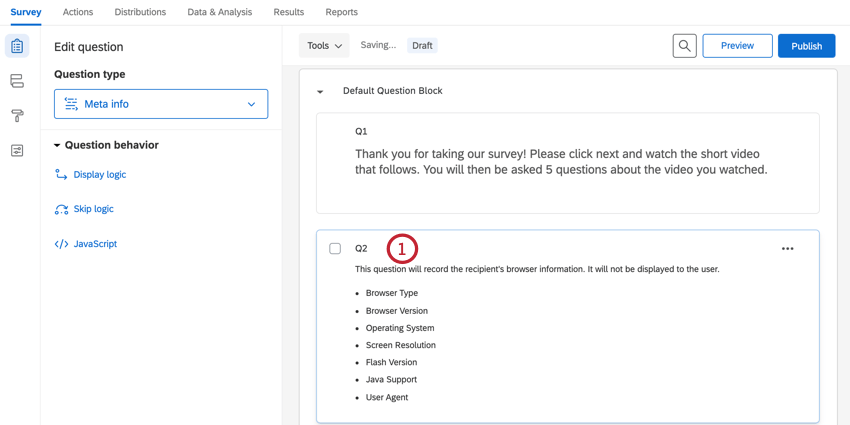
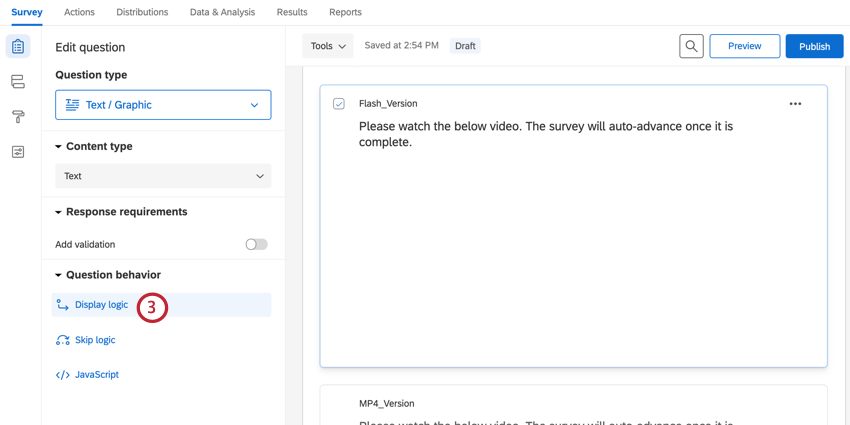
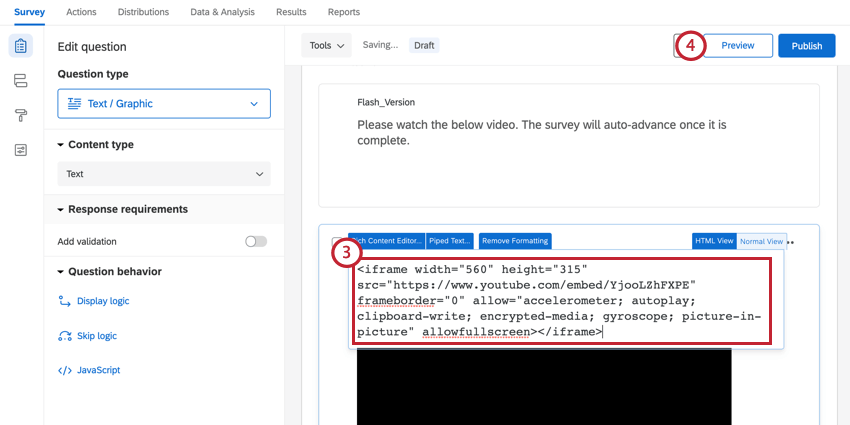
Here, we’ll cover how to display different types of files to respondents, depending on if their browser and device support Flash Player.
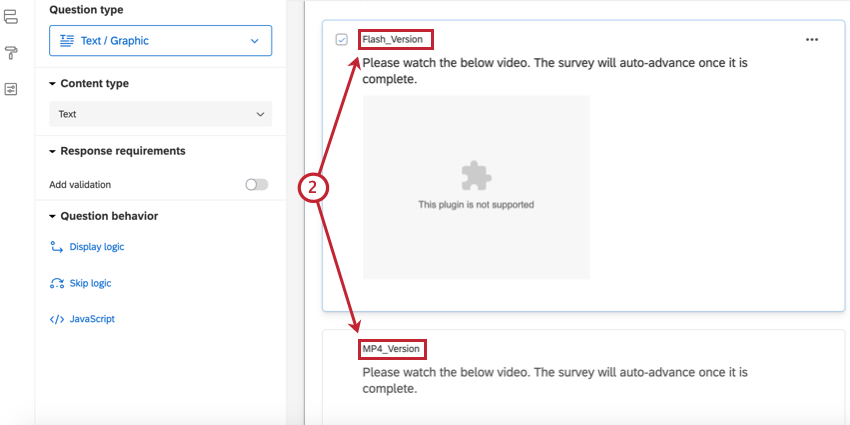
Qtip: Notice how the media does not load for the Flash version in the above screenshot. This happens because our browser does not support Flash player; this is why it is important to use multiple file formats if you choose not to post your media on a file hosting site.
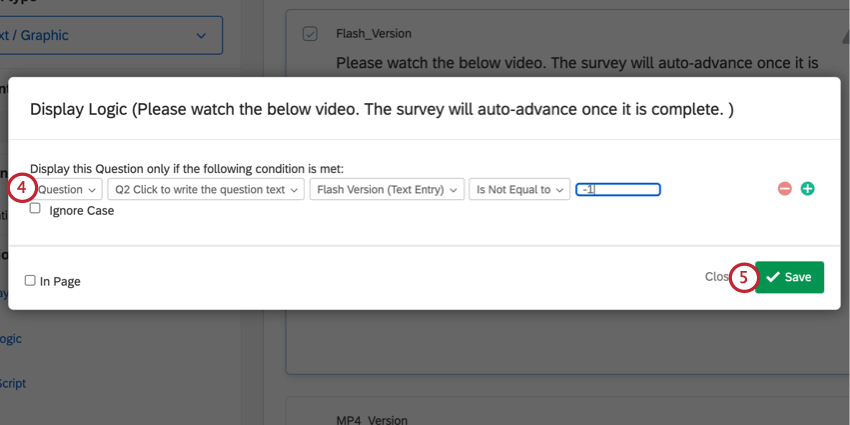
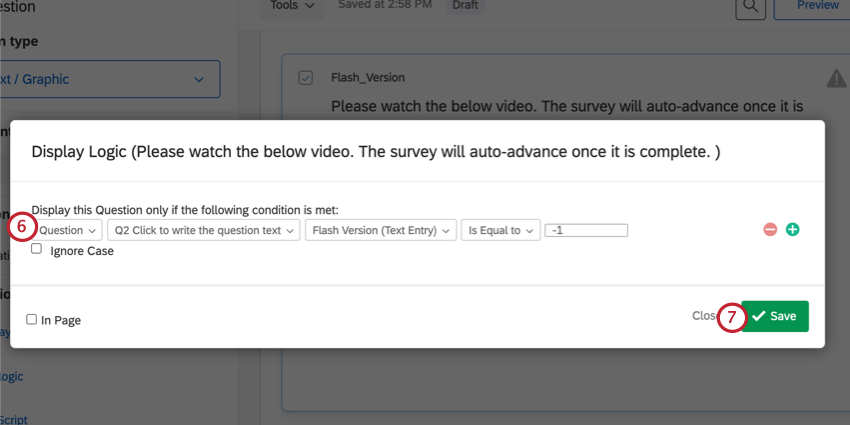
With this setup, the respondent will see whichever version of the media is best suited for their browser.
Qtip: You can do similar logic statements based on the respondent’s operating system. For example, we know that Flash video formats (FLV, F4V, and SWF) don’t run on iOS, so we can create logic to only show these videos if the respondent’s operating system is not equal to iOS.
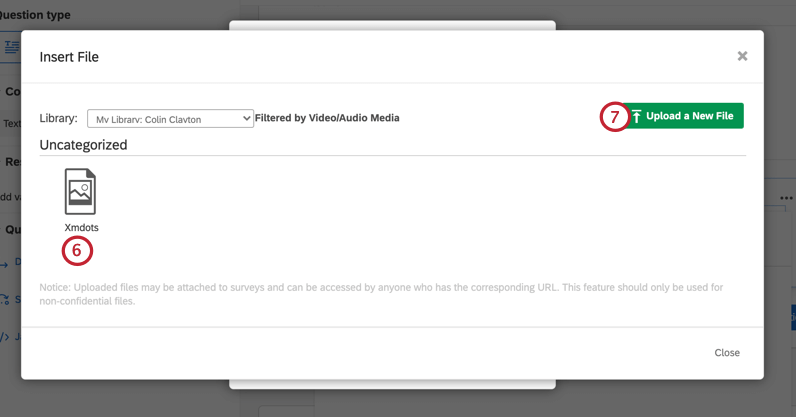
How to Add Media from Your Library
You can upload audio and video files that are 16 MB or smaller to your library and embed them directly into your survey. Refer to the supported file types section above for more information on file compatibility. This section will focus on inserting a media from your library after you’ve already uploaded them.
Qtip: If you need help uploading files to your library, see adding a file to a library.

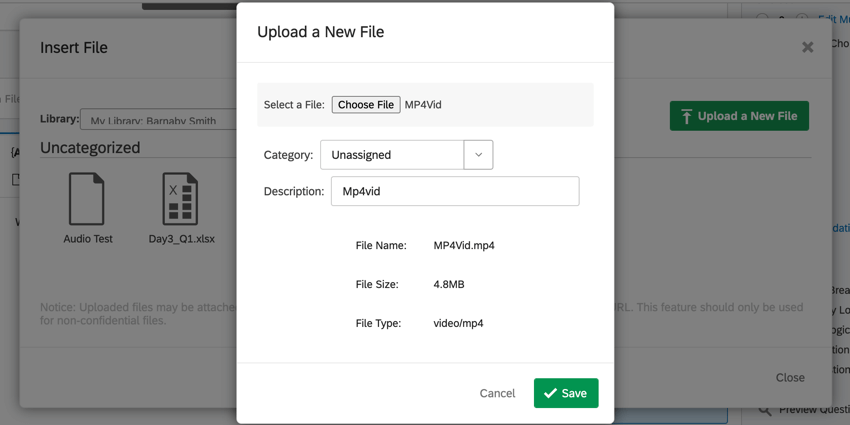
Qtip: When uploading a new file, you will choose a file from your computer, and then give the file a category and description.

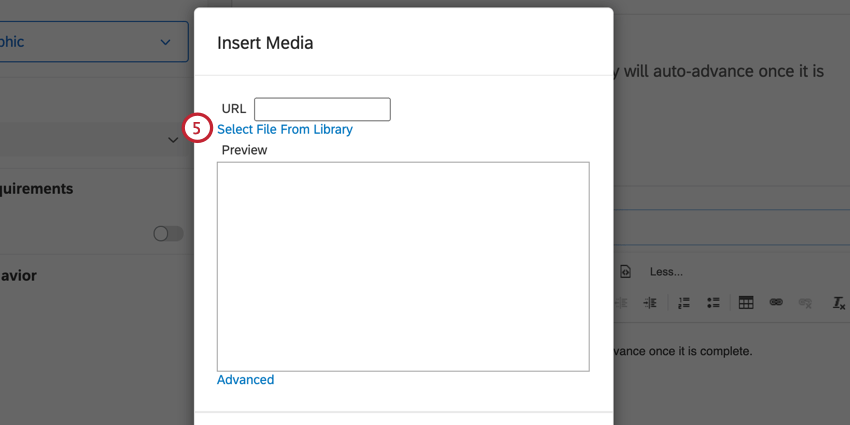
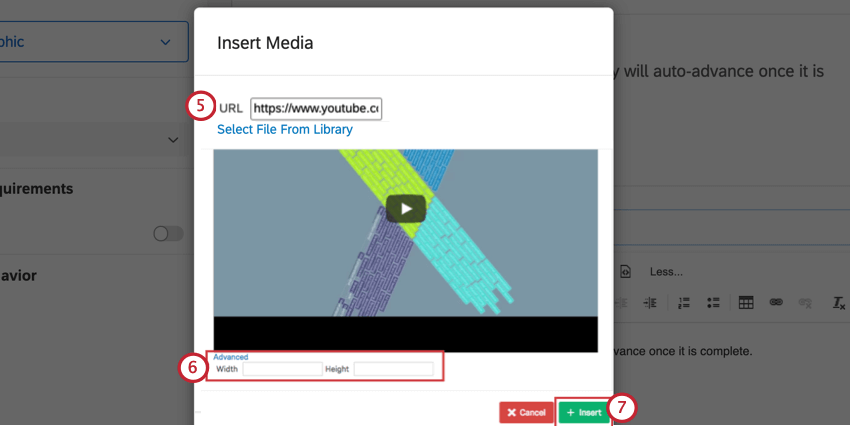
Qtip: For video files, click the blue Advanced text that appears beneath the image preview to set a different video width and height.


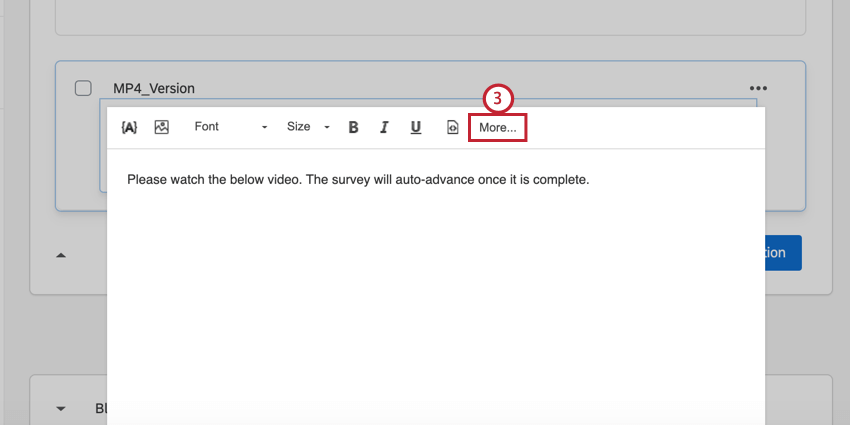
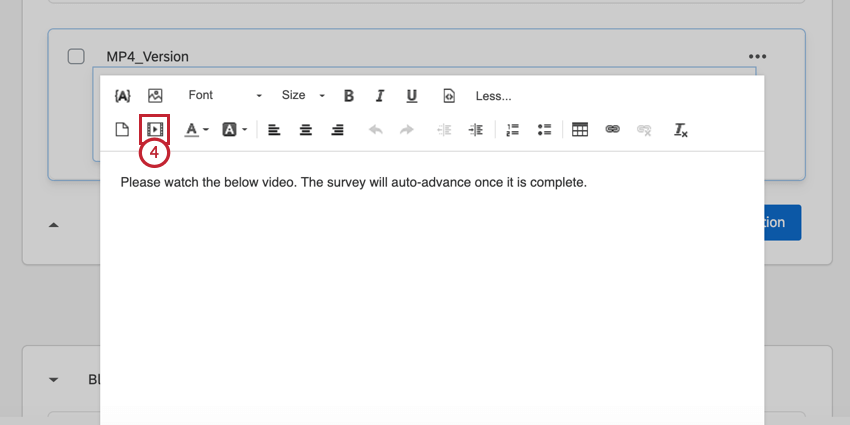
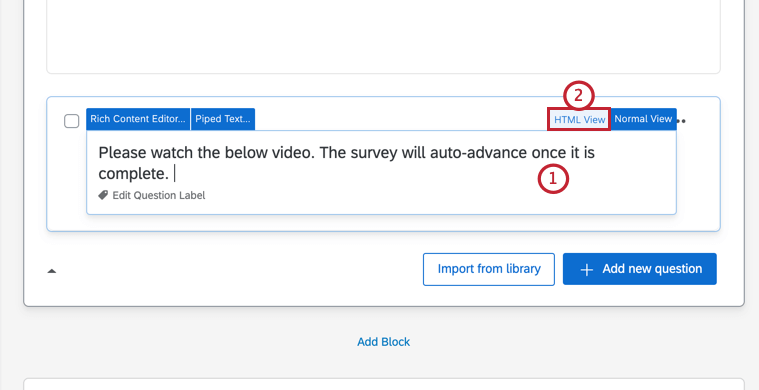
Adding Media Using HTML
You can use the embedding snippet of HTML, provided by the hosting company, to include media in your survey.
Attention: We recommend that you embed YouTube videos by using HTML.
Retrieving the HTML Code
Most media hosting companies (like YouTube) provide a code for embedding the media clips in other websites, and you can usually recognize it as the appropriate code if it starts with the word “iframe.”
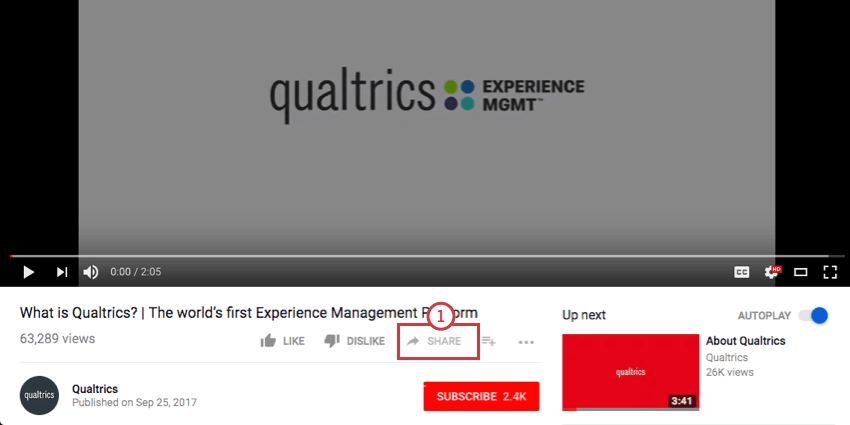
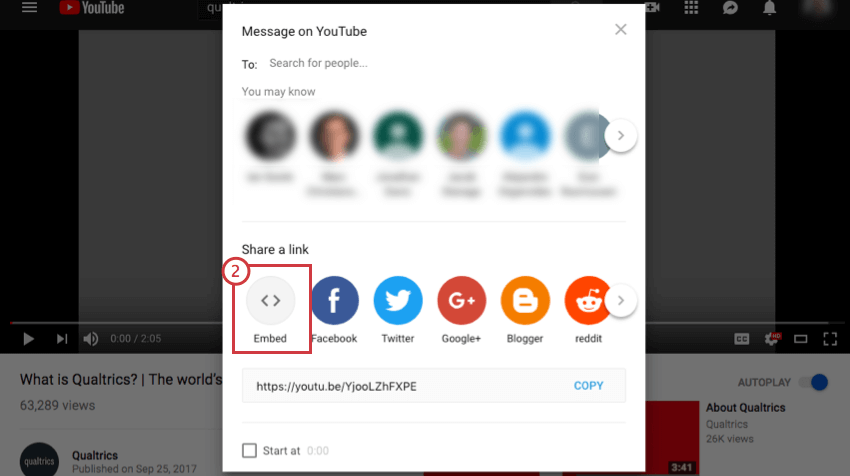
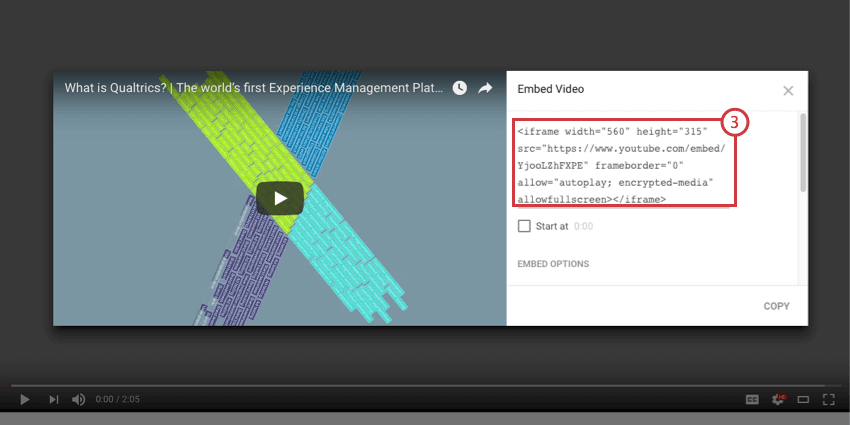
Qtip: This code, found in the Share section of most videos on youtube.com, can be used to embed the video in a survey so that the video plays even on browsers like Safari and mobile browsers that do not work well with Flash.
Adding Media Using HTML
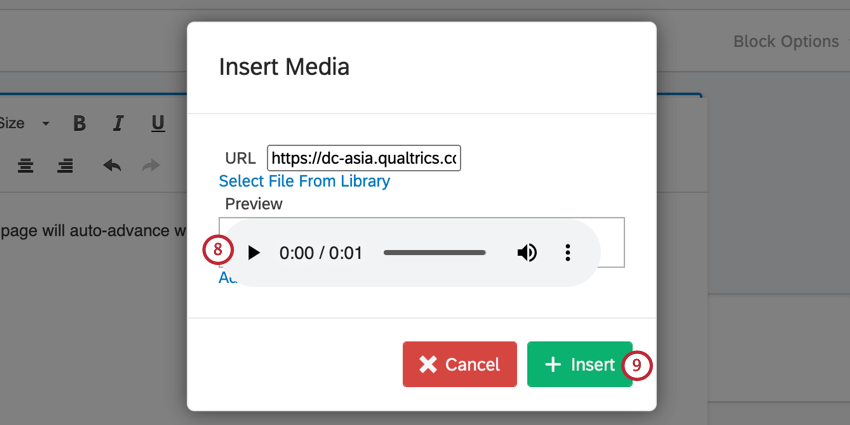
Adding Media Using a URL
If you want to host your media files outside of Qualtrics, either on your own servers or via a hosting service, follow the steps below to insert the media by using its URL.
Warning: Changes made to the hosted content will be reflected here, so be sure to only use this option for content you own yourself.
Qtip: You can only insert media from a URL that is publicly accessible. If the URL can’t be reached by Qualtrics, then the media will not display in your survey.
Qtip: Though this method will work great for files you’ve hosted on your own servers, other hosting services may not be supported. If you have difficulty with this process, try adding media using the snippet of HTML code provided by your media hosting website. This process is described above.
YouTube Tips and Tricks
Videos hosted on YouTube offer quite a few customization options that may be useful for your survey. See the following sections to find out what is available.
Qtip: As of September 25, 2018, Youtube has deprecated the ability to remove suggested videos. See this page for more information.
Making a Video Private
When using YouTube to host your video, you can mark your video as “Unlisted” to prevent people from finding the video outside of your survey. To alter the privacy of your video, view YouTube’s Video Privacy Settings.
Enabling Autoplay
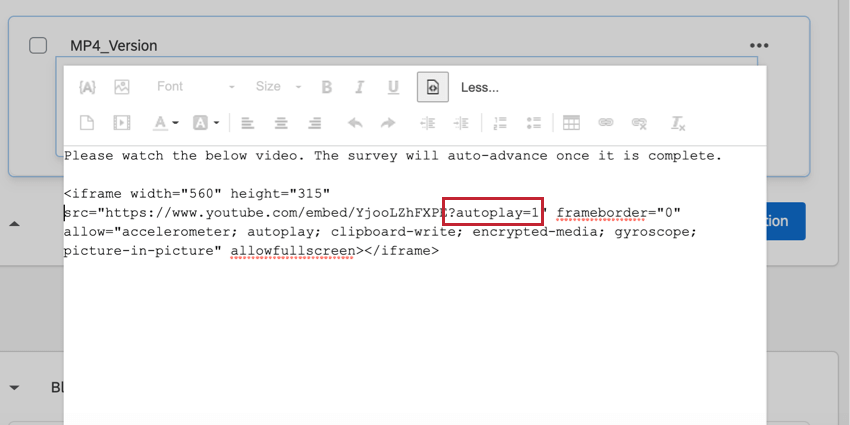
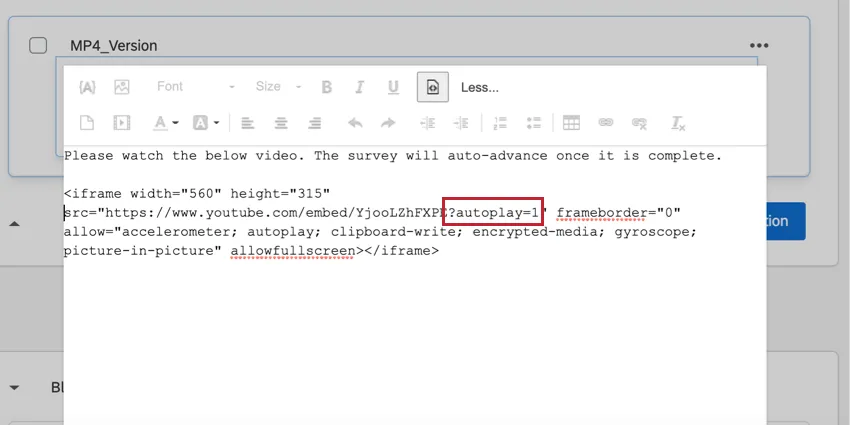
When inserting a video hosted on YouTube, you can enable autoplay to start playing the video as soon as the page loads.
In the Source view of your rich content editor, you will see the link to your clip. Add “?autoplay=1” to the end of the link if there is not another question mark (?) in the link for your clip. If there already is a question mark (?) in the link for your clip, add “&autoplay=1” instead. This will start the video as soon as a respondent opens that page of the survey.
Qtip: Look for the HTML code that is in this general format: src=”https://www.youtube.com/embed/videoID”. Insert ?autoplay=1 after the videoID and before the end quotation mark.
Qtip: Autoplay only works on desktop browsers. It does not work on mobile.
Qtip: If you are using Chrome version 66 or later, Chrome has made changes so that autoplay will not work unless the video has no sound, if the user has clicked or tapped on the site, or if the user has shown interest in media on the site in the past. Chrome has made this change to reduce unexpected playbacks and sound when a page is opened. You can read more about this update here.
FAQs
How do I insert a video and make sure it works on all browsers?
How do I insert a video and make sure it works on all browsers?
That's great! Thank you for your feedback!
Thank you for your feedback!