
Metadata (CX)
What's on this page
About Metadata (CX)
Metadata, formerly known as User Attributes, are means of adding additional information to your CX Dashboards users. For example, the default fields only include name and email, but often time you’ll want to include someone’s location, the name of their role, and other such helpful identifying information. Once Metadata is defined, this information can be used to decide what roles users are assigned to or what filters they can use on the dashboard.
Metadata is created when you add or upload users.
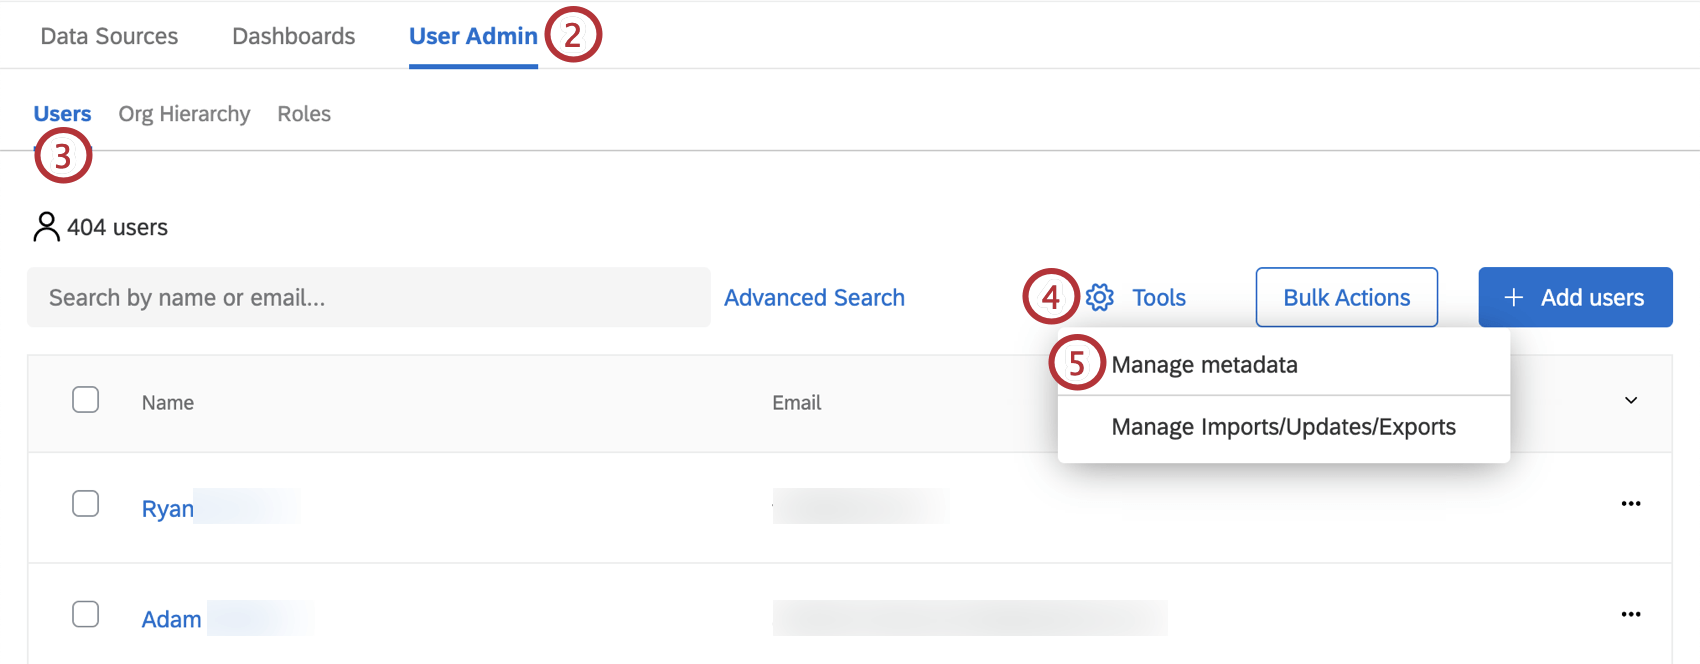
Attention: Only users with certain permissions have access to User Admin. See Getting Access to the User Admin for more details.
Qtip: This page refers to metadata in CX Dashboard projects only.
Deleting and Renaming Metadata Fields
Whenever Metadata is added to users, that field becomes available for everyone. In the Tools menu, you can remove fields from the user admin entirely or rename them.
Qtip: This section refers to fields available for all users, not how a field’s configured for one user. See the section below for editing individuals’ metadata.
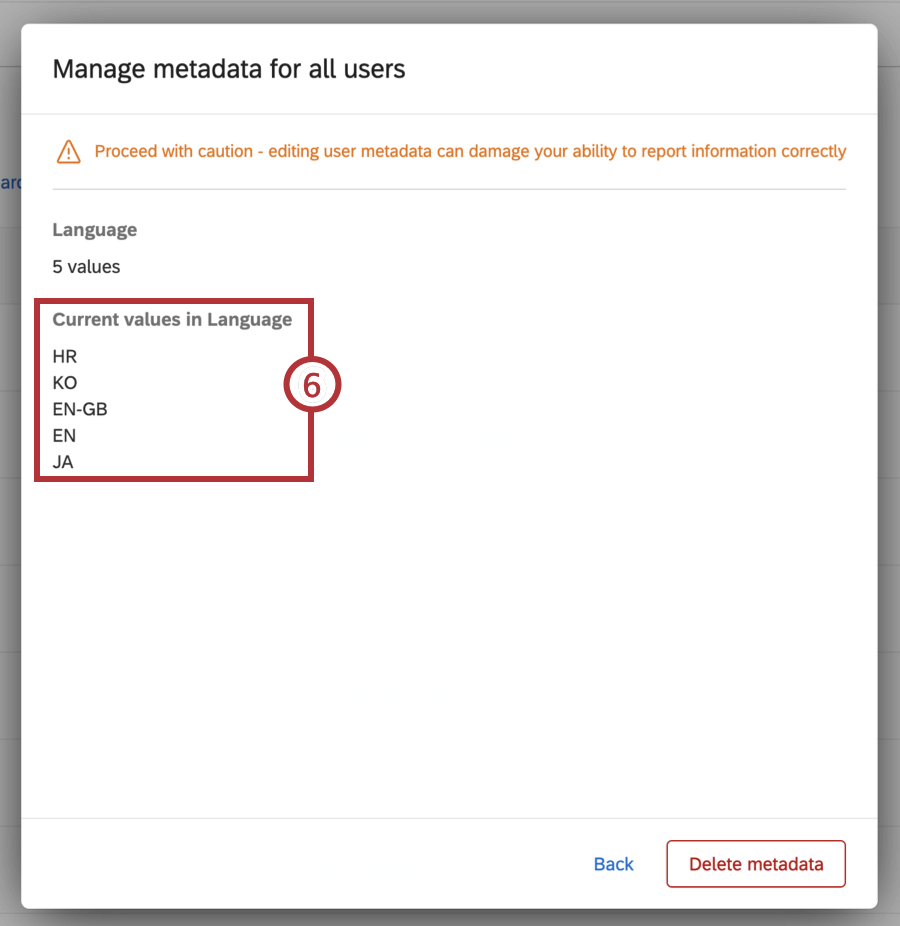
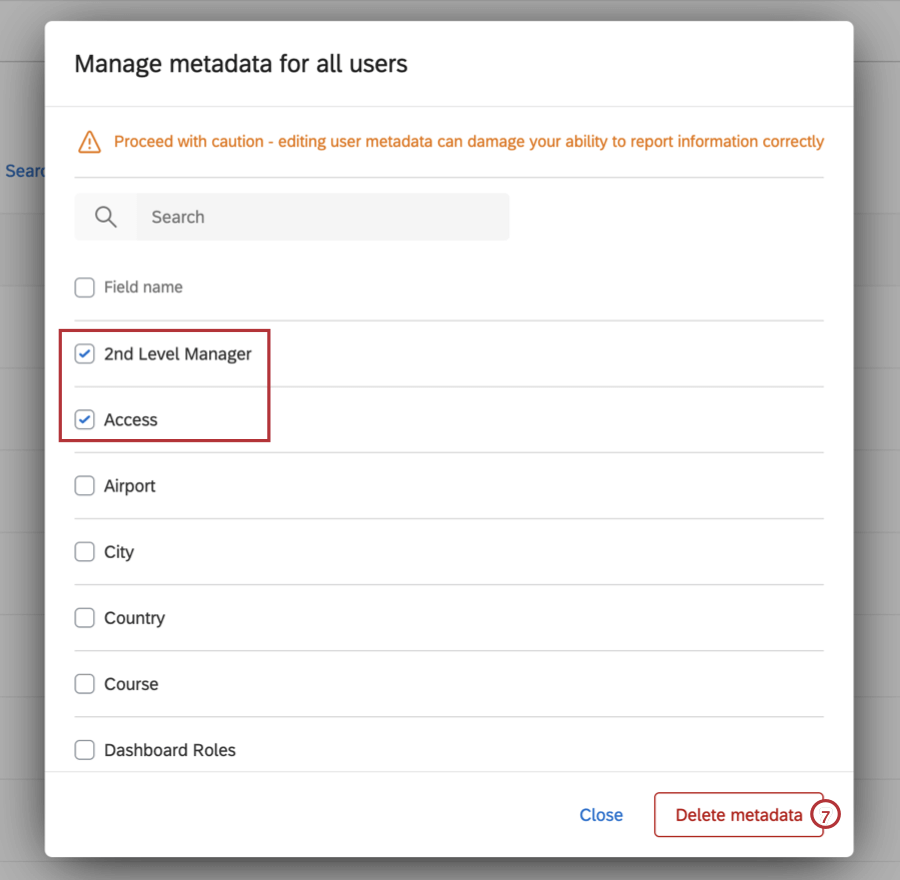
Attention: This field will be deleted from every user in the brand. You will not be able to retrieve this information once it is deleted!
Editing Individual Metadata Values
You can edit the values of metadata for individual users in the Users section of the User Admin tab.
You can navigate to the User Information Window where you’ll edit metadata in two ways:
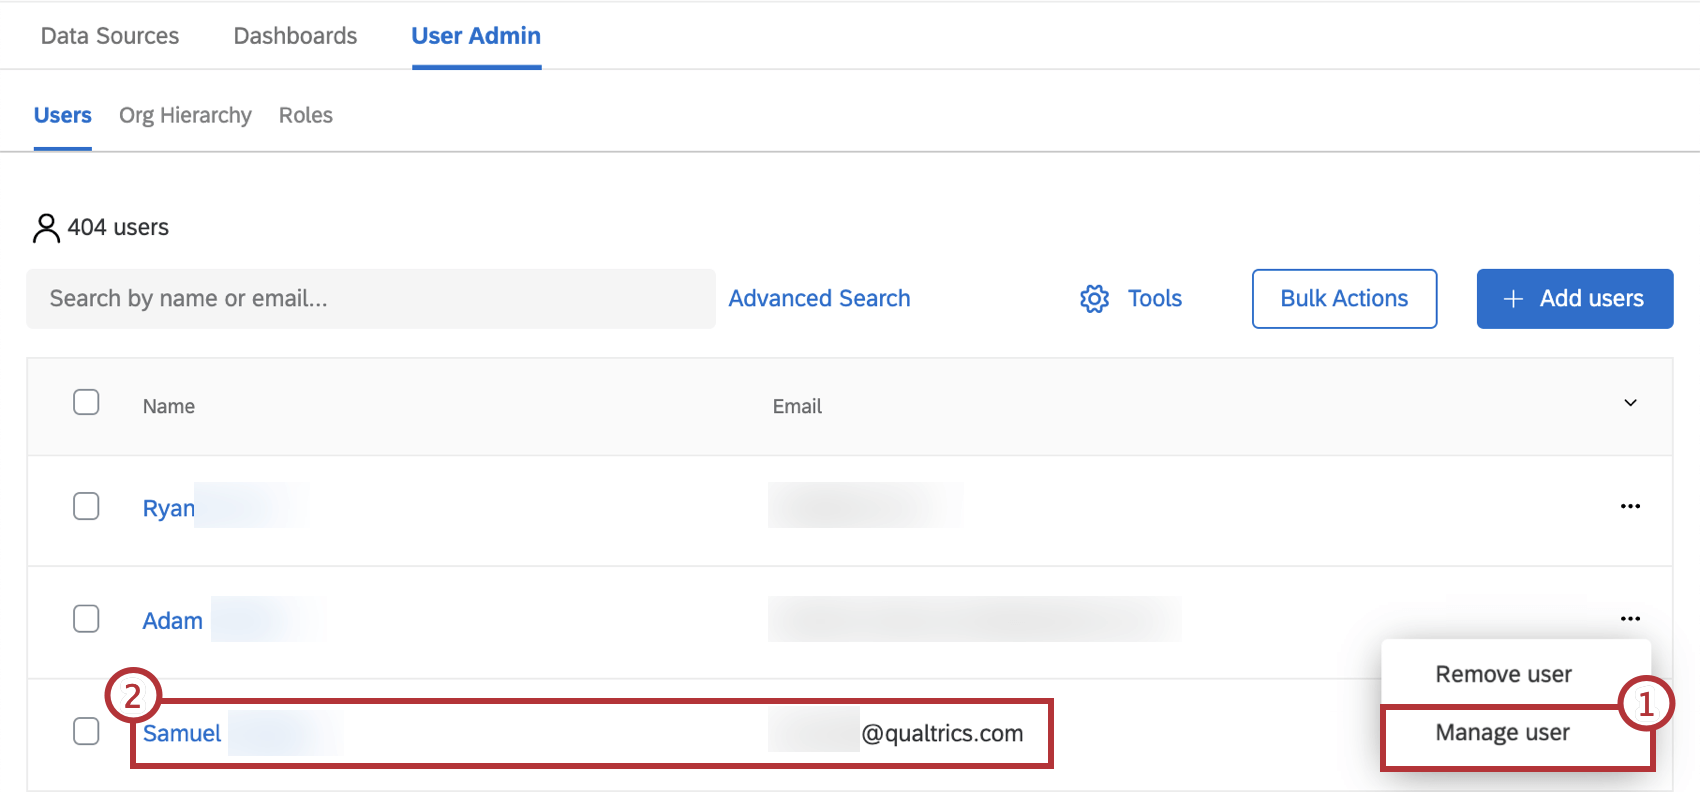
Once you have the window open, the metadata the user has is listed along the right. Here, you can do the following:
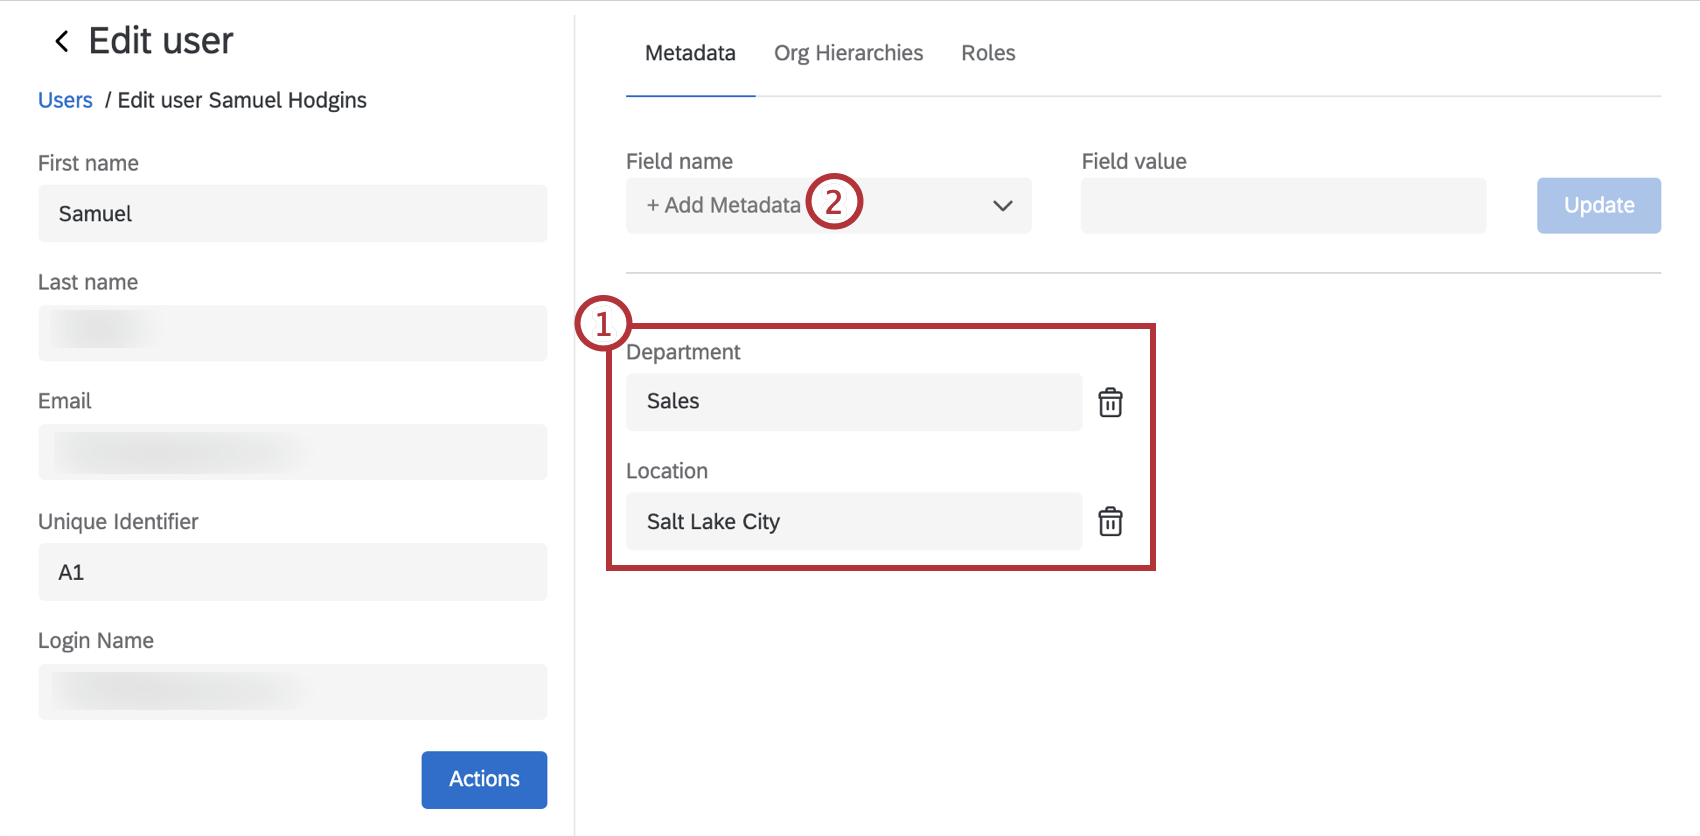
Qtip: If a user needs multiple values in a single metadata, then separate those values with two colons (::). For example, a user who should see data from two different departments might have a value of Sales::Service. You can continue to add additional metadata values following the same format. CX metadata values have a limit of 1,000 characters.
Qtip: You cannot rename fields or delete them on this window. Erase a field’s value and leave it blank to erase the value.
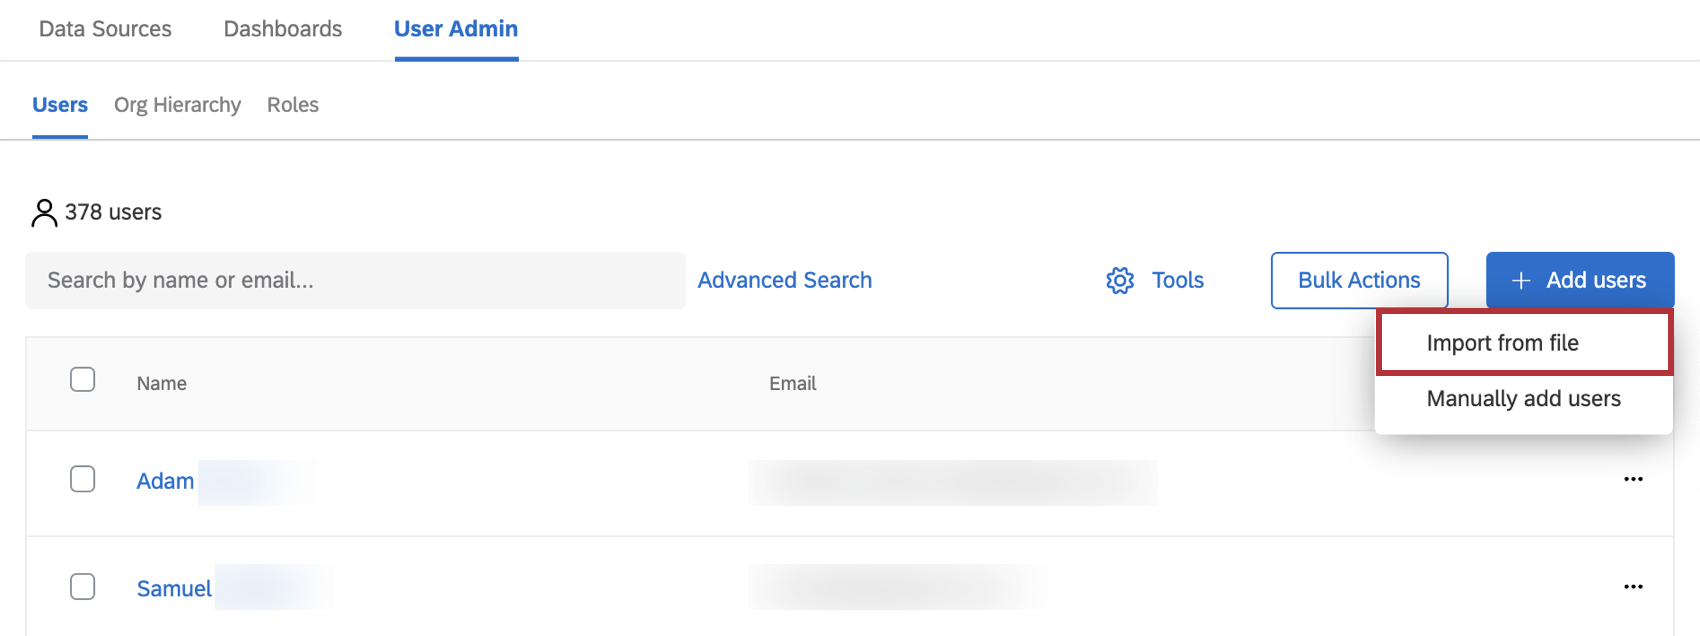
Updating Multiple Users’ Metadata Values
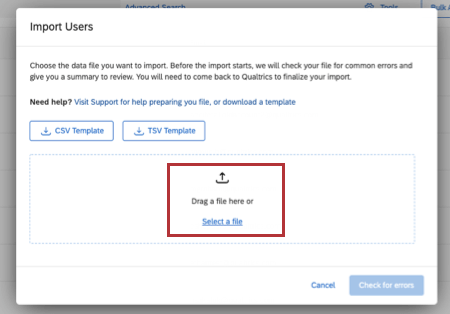
You can update many users’ metadata at once using the exporter.

Qtip: This file identifies existing users with the Username column, or, if there is no such column, the Email column. Do not change this information, or you may end up creating a new user!
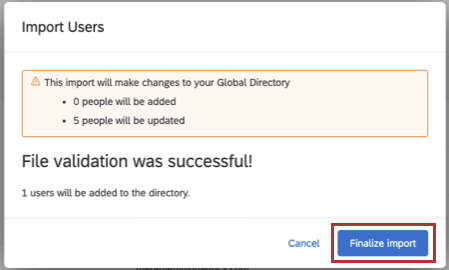
Qtip: If you leave metadata fields blank any existing values will be deleted.
Qtip: Do you want to update metadata automatically on a regular basis? Check out the Load Users into CX Directory task.
FAQs
Are Roles updated on a user after their metadata changes?
Are Roles updated on a user after their metadata changes?
If I change a role name, will it update the corresponding metadata values on my users?
If I change a role name, will it update the corresponding metadata values on my users?
That's great! Thank you for your feedback!
Thank you for your feedback!