-

Qualtrics Platform -

Customer Journey Optimizer -

XM Discover -

Qualtrics Social Connect
Making Standalone Intercepts & Creatives
About Making Standalone Intercepts and Creatives
If you already have experience with Website & App Insights, you can make standalone creatives and intercepts that can be connected together. You may prefer this approach if you want to use graphics not yet supported by our guided setup, such as a banner or a pop under. Standalone intercepts also allow you to create more complex action sets, such as different types of creatives appearing based on different criteria.
Feature Compatibility
By comparing the features that are or are not supported by standalone intercepts and creatives, you can decide whether you’d prefer to use these or the guided setup.
Supported features
Standalone intercepts and creatives support some functionality that the guided setup does not.
- Multiple action sets, with differing creatives and targets.
- Web creatives in the form of banners and pop unders.
- Mobile app creatives for prompts and notifications.
Features that Require Additional Setup
Certain features are not built into the editor of standalone intercepts and creatives, and require additional setup instead. The guides below show how you can implement common goals.
Making Standalone Creatives
Creatives can be thought of as the visual element of your Website & App Insights project; for example, a banner, a window that opens over a webpage, or even a link. Standalone creatives are different from guided intercepts because they do not have intercept options attached, and instead need to be combined with a standalone intercept.
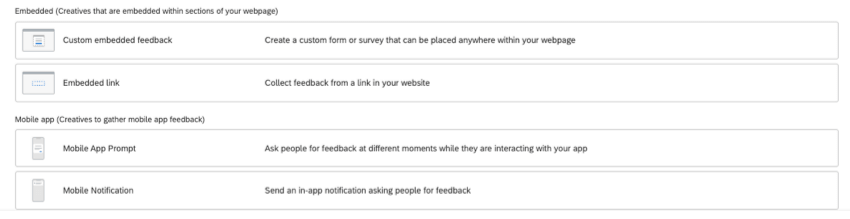
Standalone creatives include:
- Pop over
- Info bar
- Embedded link
- Slider
- Pop under
- Custom embedded feedback
- Mobile app prompt
- Mobile notification
To make one of these standalone creatives, follow these steps:
- Go to the Intercepts tab.
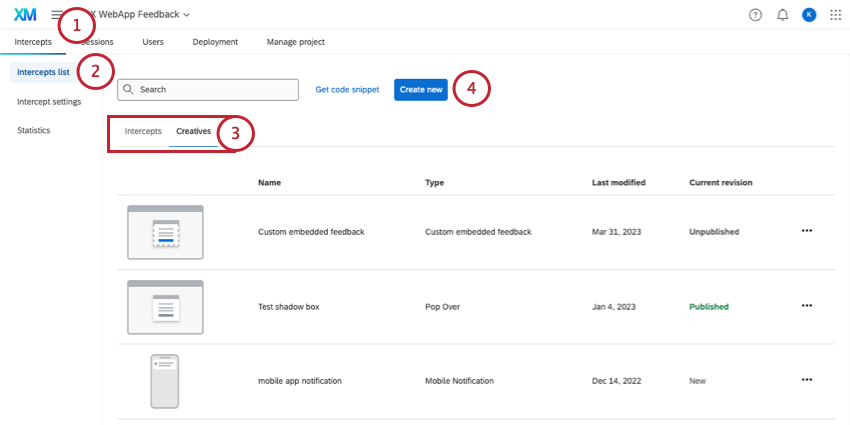
- Go to Intercepts list.
- You can visit either the Intercepts or Creatives section.
- Select Create new.
- Scroll down to Creatives.

- Select a creative.
Qtip: To help explain their purpose, creatives are grouped into three categories:
- Active: Creatives that display as dialogs or overlays on your website.
- Passive: Creatives that are always present on your website, but more subtle in how they appear, like a button off to the side.
- Embedded: Creatives embedded in sections of your website.
- Mobile app: Creatives made to collect mobile app feedback.
- Name the creative.
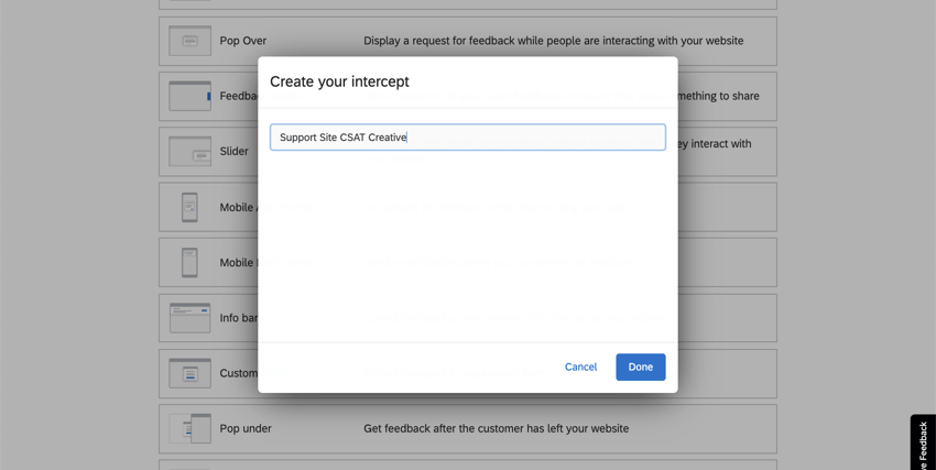
- Click Done.
- Edit your creative.
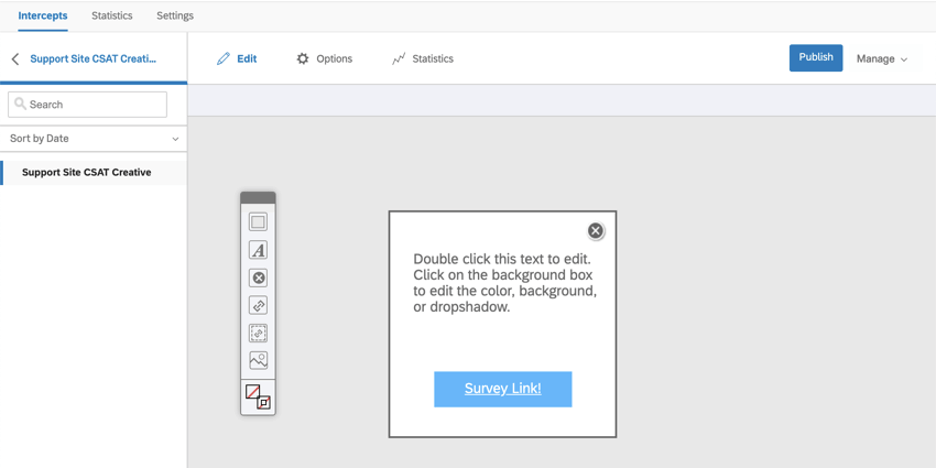 Qtip: In addition to the page on generally editing creatives, you can check your specific creative’s support page for more settings unique to that type.
 - When your edits are done, publish changes.
- Now you’re ready to create an intercept.
Making Standalone Intercepts
Intercepts can be thought of as the rules that determine when and how your project will be displayed on a website or an app. For example, you can show different elements depending on user information or portions of the URL. The intercept is where your target survey, creative(s), and the conditions of a visitor’s session come together.
- Go to the Intercepts tab.
- Go to Intercepts list.
- You can visit either the Intercepts or Creatives section.
- Select Create new.
- Scroll down to Intercepts.
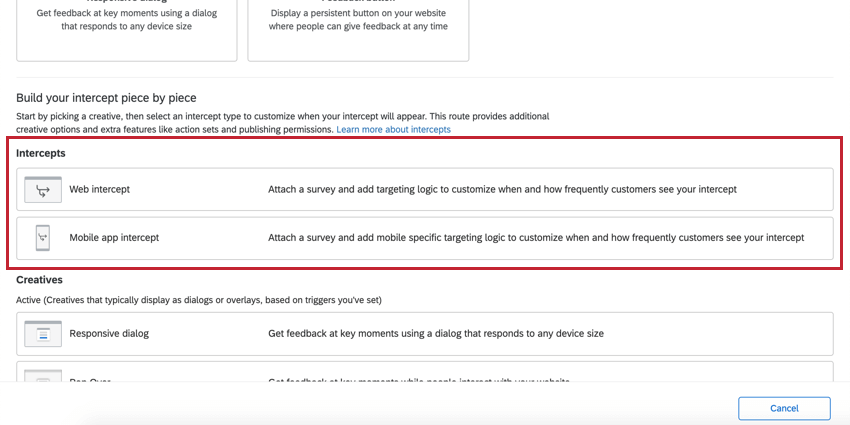
- Determine whether you are collecting website feedback (Web intercept) or running a mobile app feedback project (Mobile app intercept).
- Name your intercept.
- Click Done.
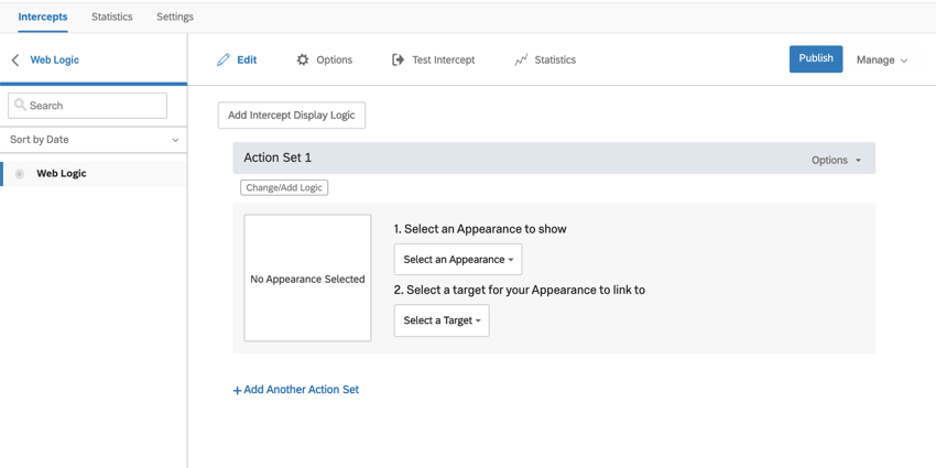
- You can now edit your intercept, customizing the conditions under which intercepts will be displayed to website visitors.
Qtip: For further guides, please see:
- Choose a creative for your intercept.
- Select a target for your intercept.
- Activate your intercept.
- Once all of your intercepts and creatives are complete, it’s time to publish and deploy.
- When you’re finished editing and publishing your Intercept and are ready to deploy the code on your website, see:
Building Website & App Insights Piece by Piece
The pages below provide a very basic overview of how to create a website insights project using standalone creatives and intercepts. This can be a great place to start to familiarize yourself with all of the moving parts.