
Survey Flow (EX)
What's on this page
Attention: Many links on this page link back to pages regarding standard Qualtrics surveys, not just Employee Engagement or Lifecycle surveys. Detailed below are the differences you will need to be aware of on each page. While some content may look slightly different when creating your Employee Engagement or Lifecycle survey, feature functionality remains the same.
Qtip: This page describes functionality available to Engagement, Lifecycle, Pulse, and Ad Hoc Employee Research projects. For more details on each, see Types of Employee Experience Projects.
About the Survey Flow
The survey flow is a block-level view of your survey. From here, you can customize where participants go in your survey and what they see. You can perform simple tasks like rearranging blocks, or you can add elements like branch logic that direct and personalize your participants’ survey experience. Participants will start at the top of the flow and work their way through until they reach an end point and finish the survey.
Survey flow is mostly the same in Employee Experience projects as in survey proejcts, except for three key differences:
With these differences in mind, visit the Survey Platform’s survey flow overview support page for an introduction to the survey flow.
Elements of the Survey Flow
Elements are the building blocks of the survey flow. They let you do everything from creating personalized paths for respondents, to setting up new key variables, to randomizing blocks of questions.
The following is a list of the different survey flow elements available in EX projects, in order of how commonly they are used. Click the corresponding link to learn more about each element.
- Show Blocks: Show a block of questions. Qtip: See Question Blocks for information on using blocks in the survey flow. See Block Options for information on how to create and edit blocks.

- Branches: Display blocks and other elements based on the conditions that survey respondents meet. You can use branch logic to branch participants to different survey flow elements based on variables like question responses or embedded data.
- Embedded Data: Add any extra information you want to include in the survey data beyond the question responses, such as contact data or other variables you assign by branching. For Employee Experience, there is no need to use embedded data to pull in information from a contact list since contact lists are not used for Employee Experience. Instead, participants are uploaded into the project with their personal information, which will be automatically recorded if you are not using an anonymous link. Qtip: Metadata and embedded data are not the same; metadata is exclusive to Employee Experience. For more information, visit our metadata support page section.
- Randomizer: Randomly present question blocks and other elements.
- End of Survey: Terminate respondents at various locations with custom experiences.
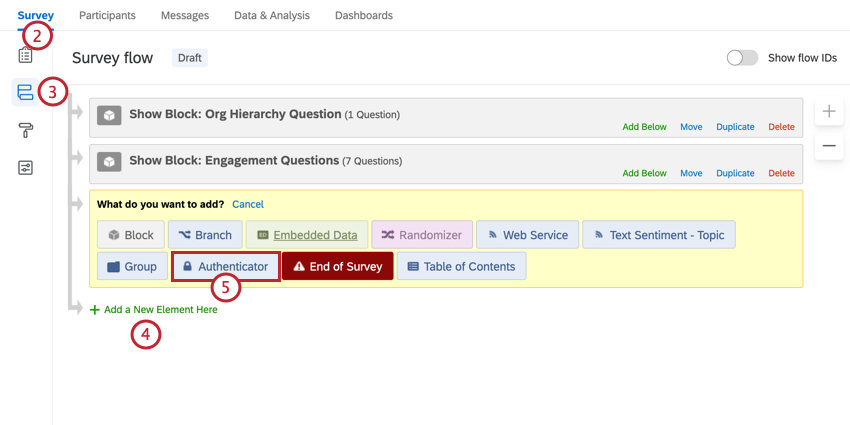
- Authenticator: Verify respondents’ identities before they take the survey. Authenticator setup is unique in EX projects, so make sure to read the below section on how to use them.
- Groups: Group different survey flow elements together.
- Table of Contents: Allow respondents to self-navigate question blocks.
- Text Sentiment – Topic: As respondents fill out open-ended feedback in your survey, assess the sentiment of the response, topics used in the response, and the sentiment of those particular topics. Then branch based on the text analysis results.
- Web Service: Integrate API calls and web services into your survey.
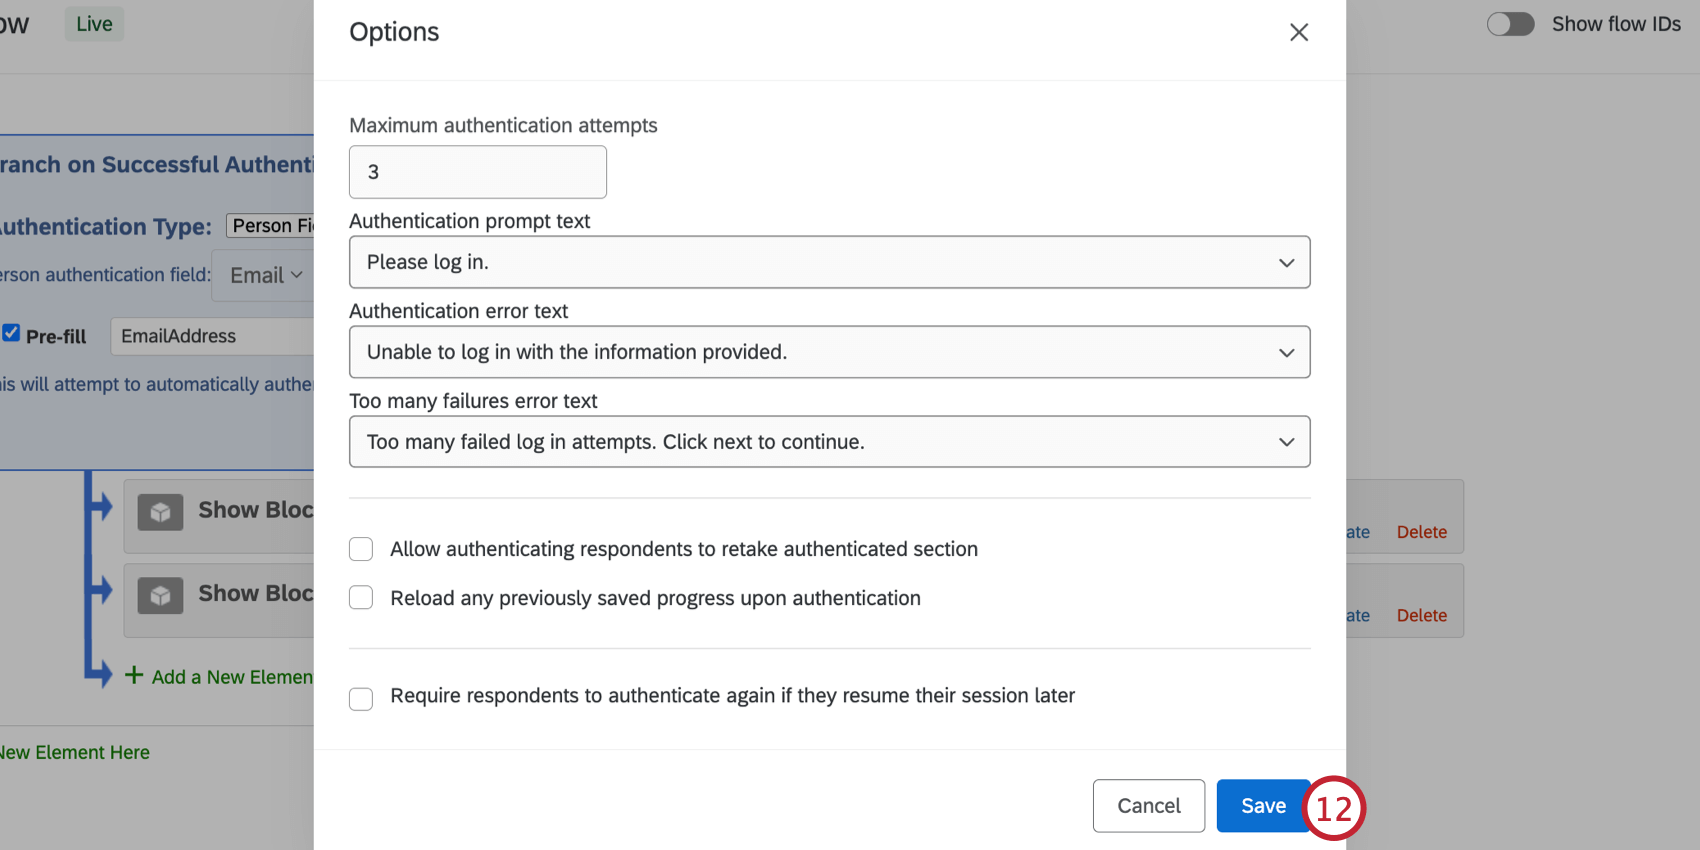
Authenticator
Sometimes you need all the benefits of a unique survey link without actually creating or sending out a unique link. Authenticators allow you to do just this, letting you collect responses that are connected to your participant list without generating unique links. Authenticators make this possible by having participants “log in” to take a survey. This means that you can copy the anonymous link to a website or into an email and still track who has responded. Only people who are listed in your participant list can take the survey, so you won’t collect unwanted responses even when using the anonymous link.
Qtip: To test your authenticator, upload dummy participants to your project and authenticate as them by using the anonymous link. Before launching your survey, make sure to delete the tests from your dataset. The authenticator will not work in the survey preview. For more tips on testing your authenticator, read the testing with an authenticator Survey Platform page.
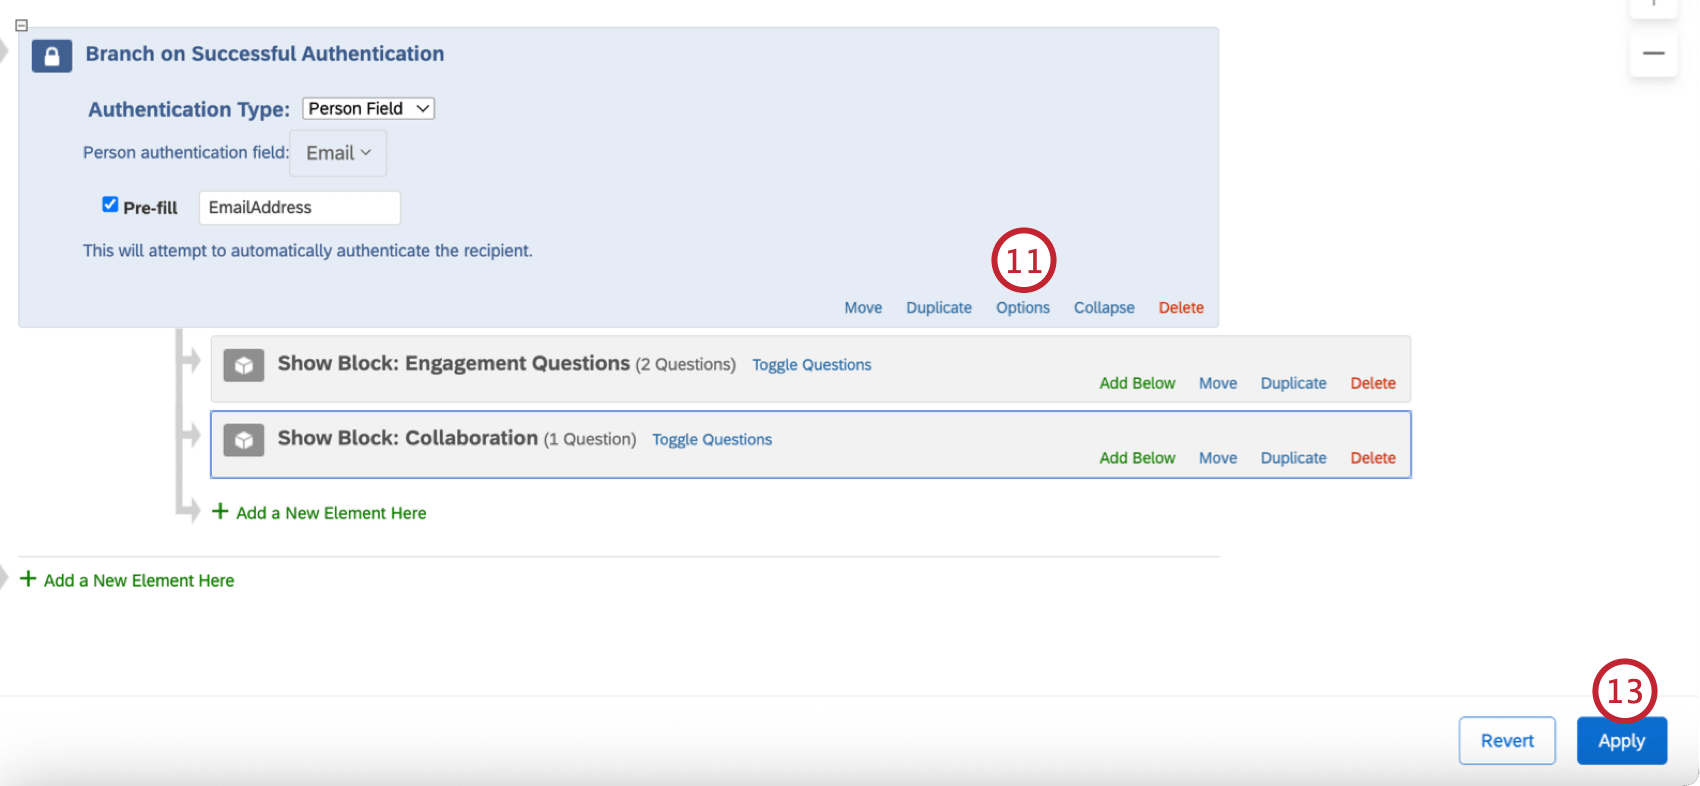
Authenticators always save participants’ progress in the survey; it does not matter whether you have Reload any previously saved progress upon authentication enabled. Otherwise, the authenticator options are the same in Employee Experience as in survey projects. You also remove your authenticator in the same way.
However, authenticators in Employee Experience projects are set up differently. You have two different authenticator types: the standard authenticator and the SSO authenticator. Each behaves a bit differently and requires a specific setup. Please note the following interactions between participant invite links and authenticators:
- If your survey uses the standard authenticator and the respondent accesses the survey via a participant invite link, then they will be automatically authenticated.
- If your survey uses the SSO authenticator, respondents must manually authenticate, even if they have an invite link.
Standard Authenticator
The set up for standard authenticators is different for Employee Experience projects than for survey projects.
First, you’ll need to make sure you’ve uploaded your participants and their metadata into the project. Next, when setting up your authenticator, you will need to specify a Person authentication field.
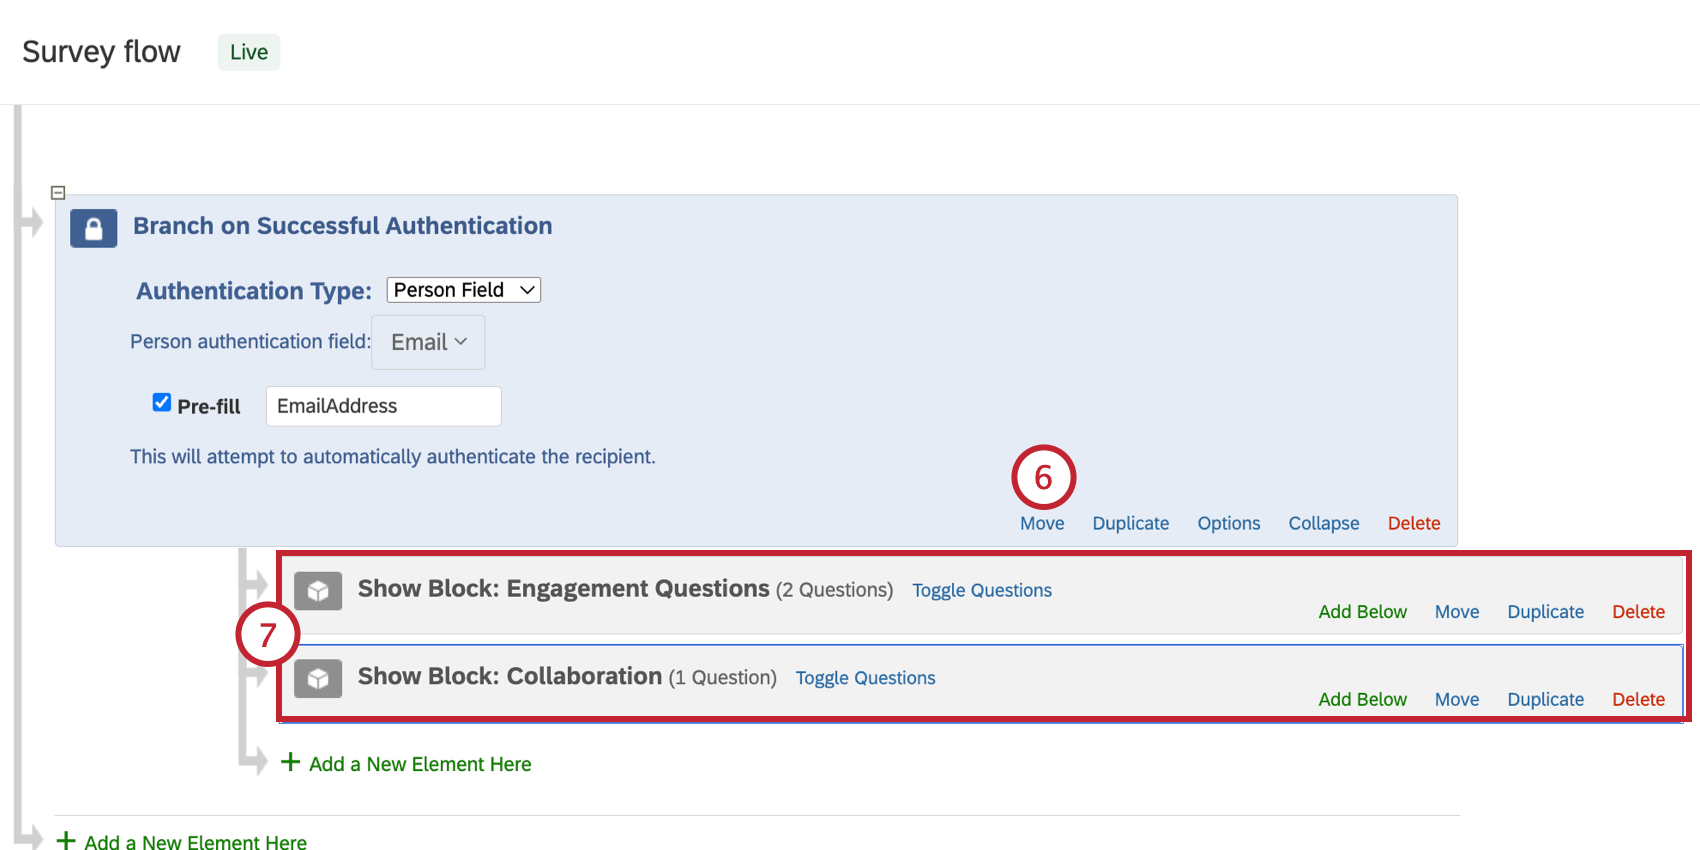
Qtip: Make sure all blocks that you want authenticated are nested under the authenticator element. This means they are not on the same outside tier as the authenticator in the survey flow, but are indented or nested under the authenticator.
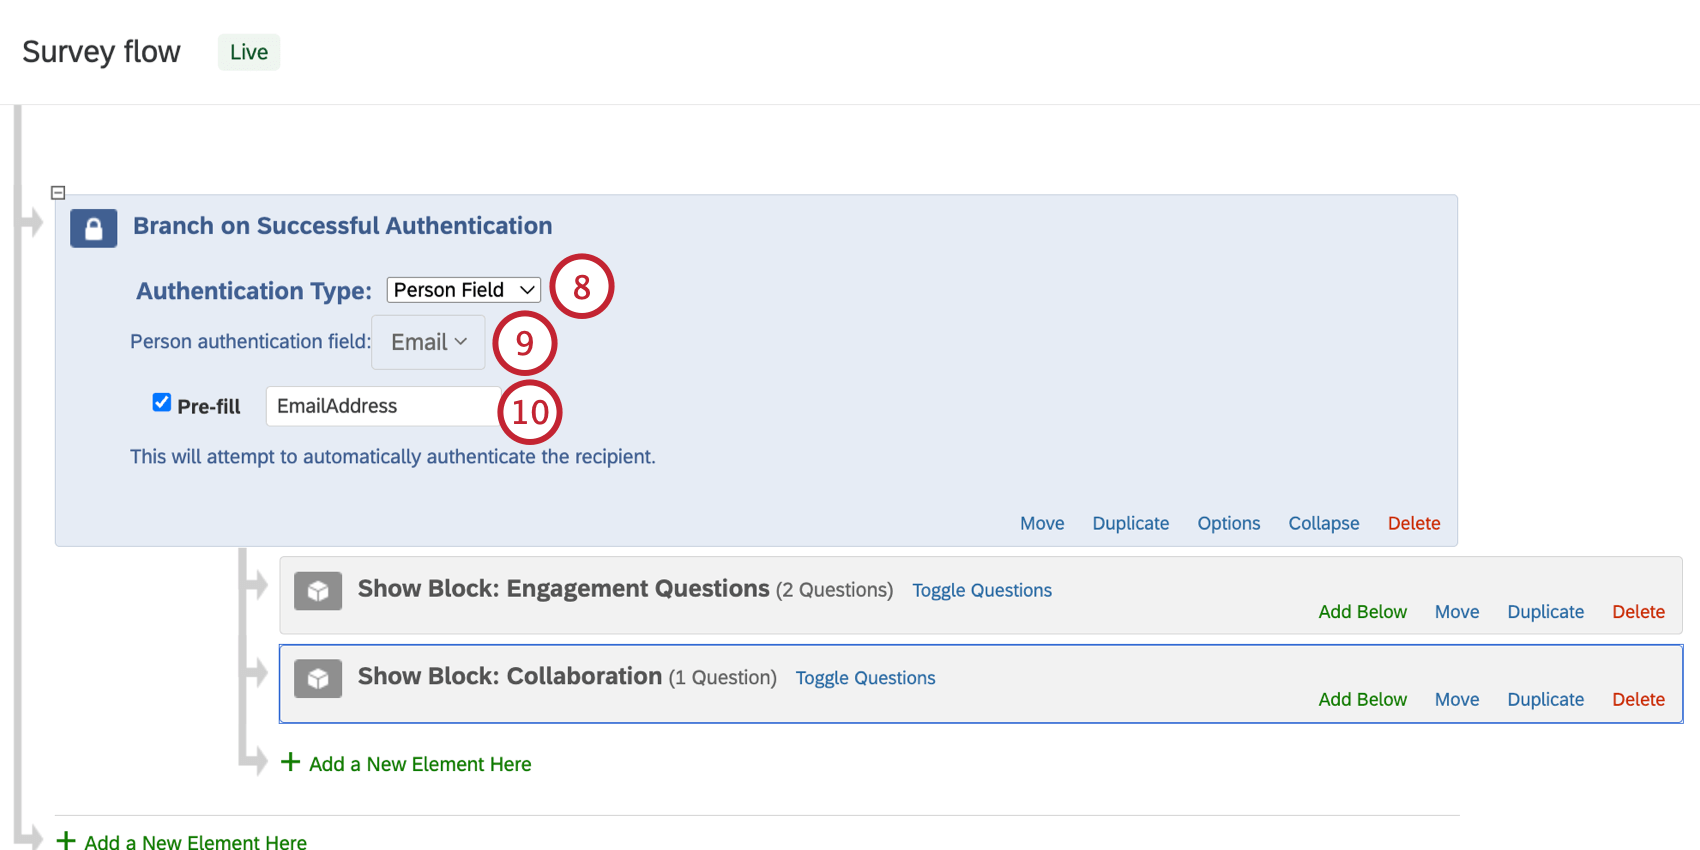
Qtip: The person field used for authentication needs to contain unique values for each participant, such as an employee ID number. If you authenticate based off of a common value, like department, the contacts with duplicate values will not be able to authenticate.
Qtip: The linked page discusses contact lists, which are not available in EX. The project’s participants are used instead of a contact list. Otherwise, prefill authentication works the same way as described on the linked page.
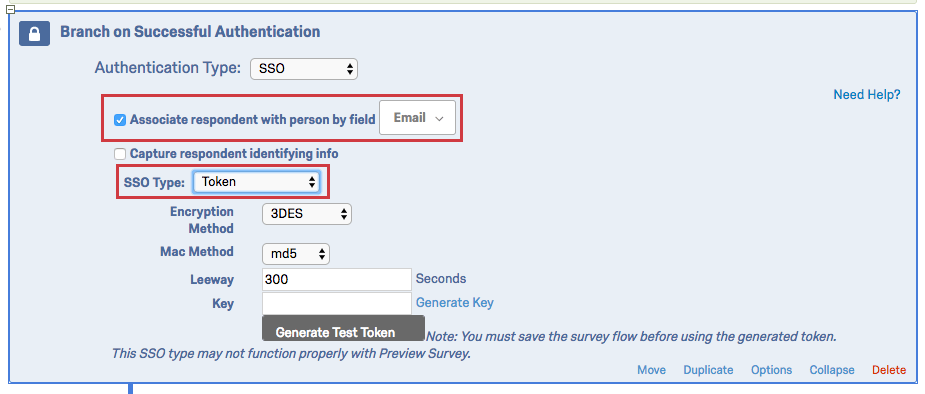
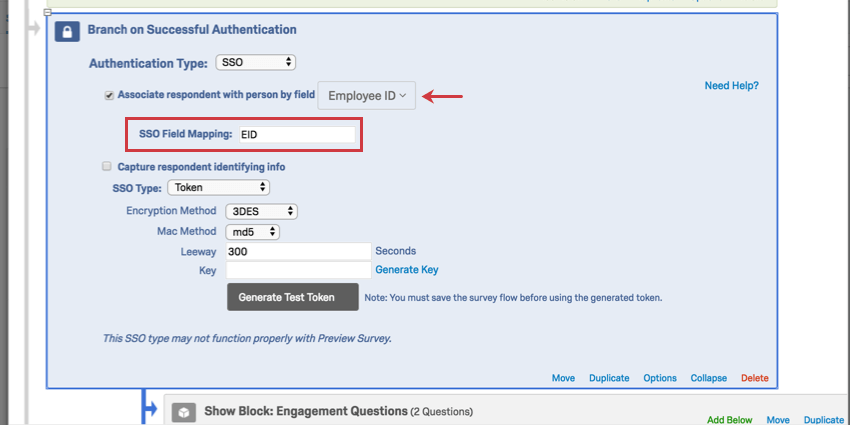
SSO Authenticator
The SSO authenticator works in Employee Experience projects almost the exact same way as it does in standard Qualtrics surveys, except that instead of Associate Respondent With Panel, you have the option to Associate respondent with person by field. This option forces respondents to be a member of your survey’s participant list in order to take the survey. The identifying field in the participant list must match the username attribute from the SSO setup. For example, if the SSO is passing employee IDs as usernames, you will need to include employee IDs as metadata in your participants list.
When the field you’ve chosen to identify participants by isn’t Email, you will be asked to specify a corresponding SSO field in the SSO Field Mapping text box that appears.

Qtip: If the field you select does not match any of the attributes sent to Qualtrics by your SSO, the authenticator will default back to email.
When you select “Email” as the identifier for the participant list in an SSO authenticator in an EE survey, the SSO field that is actually used to pair the participant to the Email in the participant list is different for each SSO type. The SSO field that is referenced for each SSO type is outlined below:
| Shibboleth | Value passed within the attribute assigned to the “Email Field” of the brand’s SSO settings |
| CAS | Value passed as the CAS username |
| LDAP | Value passed within the attribute assigned to the “Email Field” of the authenticator settings |
| Google OAuth | Value passed within the “UserName” attribute |
| Token | Value passed within the “email” parameter of the encrypted SSO token |
| Value passed within the “email” attribute |
For more information, visit the Survey Platform’s SSO authenticator support page.
End of Survey Element
Even though you can easily change the default end-of-survey message in the survey builder, you sometimes may want a different end-of survey experience for different participants. With the end of survey element in the survey flow, you can create custom ending points, each with their own unique behavior.
The standard Qualtrics survey options to Send additional thank you email from the library, Do not increment quota counts, Do NOT record any personal information and remove panel association (not recommended), Flag response as, and Screen-out Response are only available for use with standard Qualtrics surveys. Only the below options are available in Employee Experience projects:
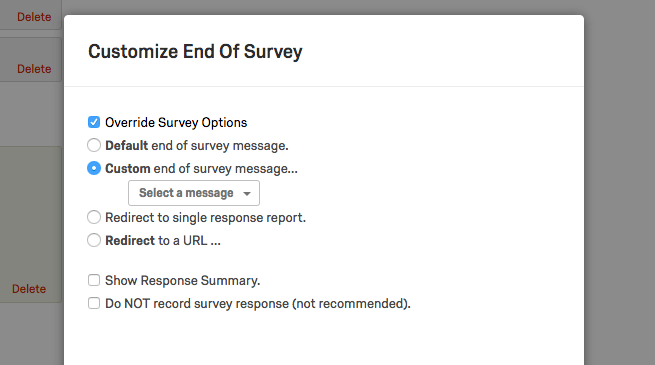
- Override Survey Options
- Default end of survey message
- Custom end of survey message
- Redirect to single response report
- Redirect to a URL
- Show Response Summary
- Do NOT record survey response
Besides the features listed above, end of survey elements work the exact same way in Employee Experience projects as they do in the survey proejcts. For more information, visit the Survey Platform’s end of survey element support page.
That's great! Thank you for your feedback!
Thank you for your feedback!