-

Qualtrics Platform -

Customer Journey Optimizer -

XM Discover -

Qualtrics Social Connect
Update Ticket Task
About the Update Ticket Task
You can set up a workflow that will automatically update a ticket in Qualtrics, so long as you have a ticket key to identify the specific ticket you want to change.
This feature is only available for use by Brand Administrators, CX Administrators, or those with Qualtrics Ticket Admin permission enabled.
Qtip: The ticket key is an ID that is usually found at the top of every ticket. It is formatted T-1234.

Example: You have a survey support reps can fill out to escalate tickets to another specialist. Once this survey is completed, the ticket in question is reassigned to an Escalation status and re-assigned to a new specialist from the next level of support.
Example: You have a survey support reps can fill out to update certain fields on their tickets, such as the name, score, summary, or various ticket data. You can also use this function to tag a ticket with additional ticket data.
Example: You want to update tickets based on an external API or changes to Salesforce data.
Creating an Update Ticket Task
Ticket data changes are recorded in the ticket’s activity.
- Go to the Workflows tab.
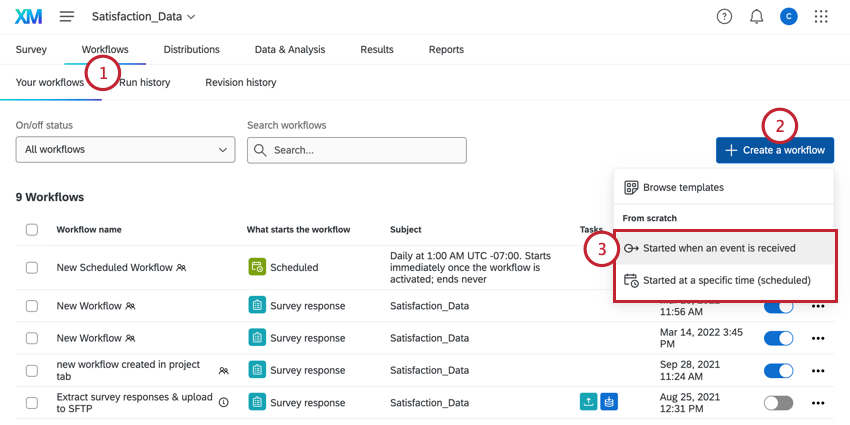
- Click Create a workflow.
- Determine whether the workflow should be scheduled or based on an event. This will be the cause of your workflow.
Qtip: Choosing an event-based workflow and then choosing a survey response creation event is the most common, although you are free to select another choice.
- Set up the event or set the schedule for your workflow.
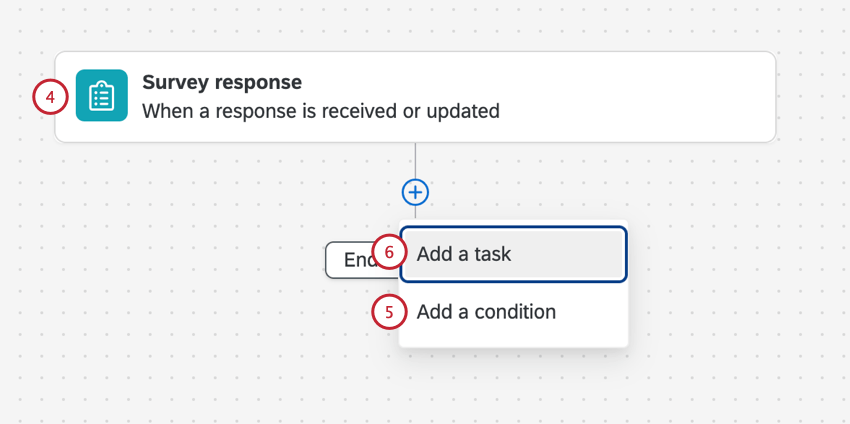
- If desired, click the plus sign ( + ) and then Add a condition to set the conditions under which the workflow is triggered.
Example: You can only update a ticket if you have a ticket key. We store this in a field in the survey called Ticket Key. We set up a condition that says the workflow should only fire if the Ticket Key isn’t empty.
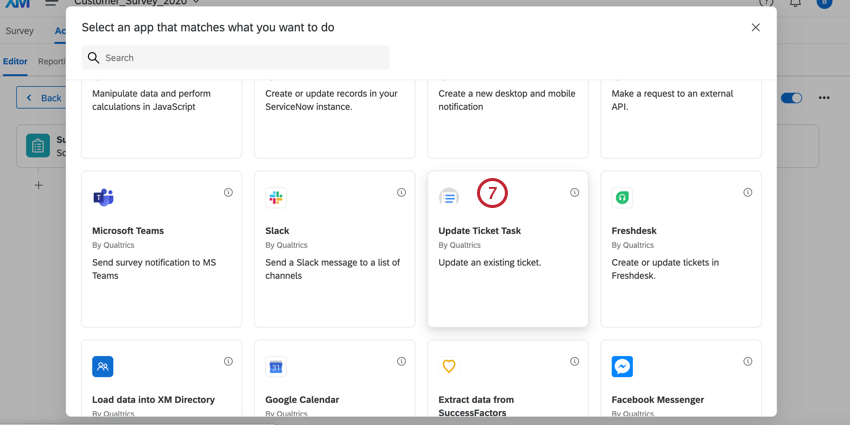
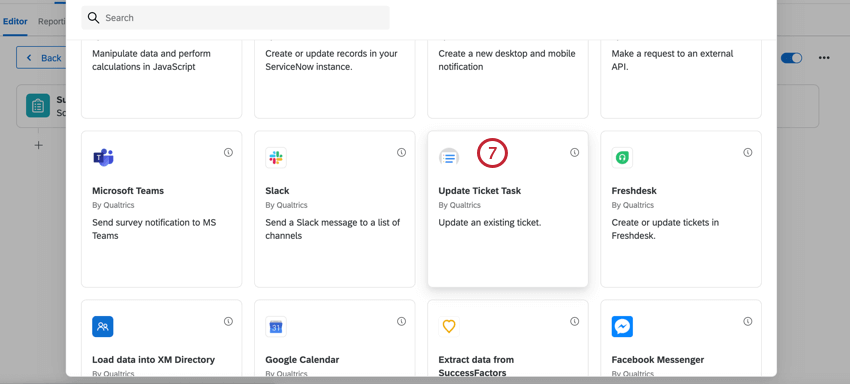
- Click the plus sign ( + ) and then Add a task.
- Select Update Ticket Task.
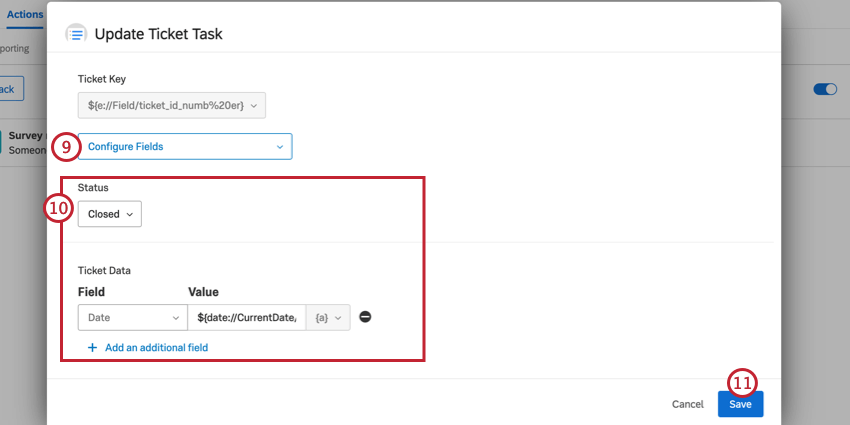
- Click {a} to specify where the ticket key is being stored. A ticket key must be piped in to indicate which ticket needs to be updated.
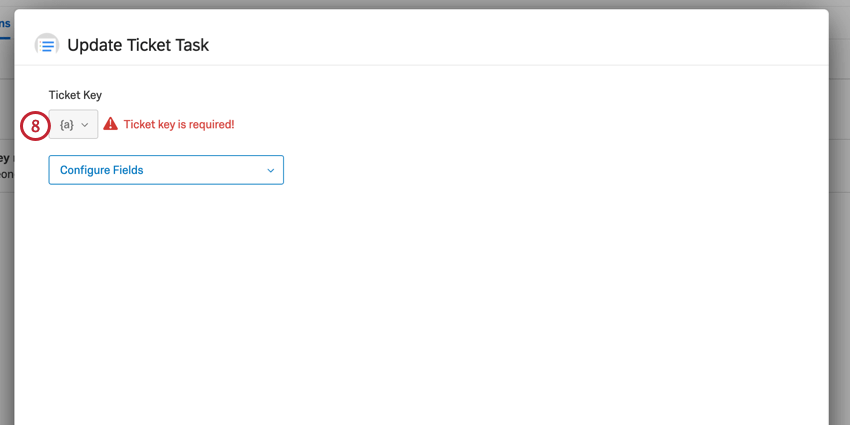 Example: You might be pulling this from embedded data saved in a customer contact list, or a question in your survey that specifically asks for the ticket key.
 - Choose the fields you want to update. You must update at least one. You may choose multiple fields.
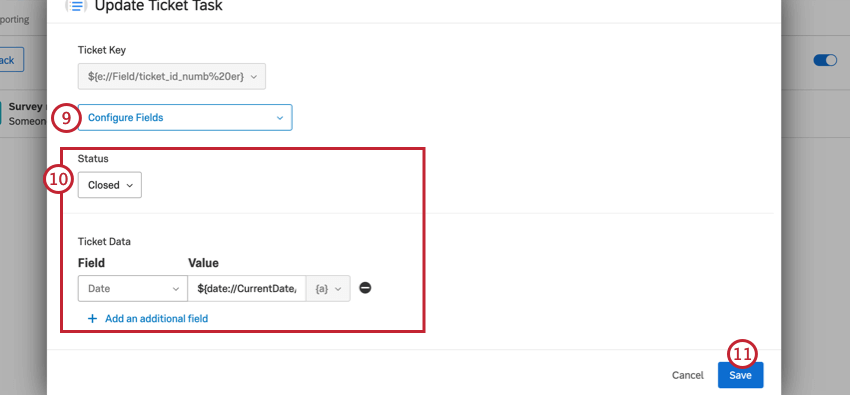
- Specify what the field should be updated to. We’ll list what each field is and its update options below:
- Priority: The ticket priority. You can select low, medium, or high.
- Ticket Name: The ticket’s name. You can type in static text, or add piped text ( {a} ) as needed to include other details.
- Owner: The ticket’s owner. You can search a user or team by name or username. If you are piping in a value ( {a} ), you must use the user ID (UR_8VHEIFNV), not the username or name. If you use the wrong format, the workflow will fail.
Qtip: If you reassign the ticket, the new owner will receive an email telling them the ticket key, the ticket name, the priority, the previous owner, and the time the ticket was reassigned. (Based on the time zone of the new owner’s account.)
- Status: The ticket’s status. What’s available here depends on what your administrator set, but the default options are Open, In Progress, and Closed.
- Ticket Summary Score: The “Score” field in the “Ticket Summary” section of a ticket. This is not a required field. You can either type a static value, or add piped text ( {a} ) to pull a score from elsewhere. If this field is left blank (either because you entered no value or there was no value to pipe in), the Score will be updated to be blank.
- Ticket Summary Comments: The “Comments” field in the “Ticket Summary” section of a ticket. This is not a required field. You can either type a static comment, or add piped text ( {a} ) to pull a comment from elsewhere, such as an open feedback response in a survey. If this field is left blank (either because you entered no value or there was no value to pipe in), the Comments will be updated to be blank.
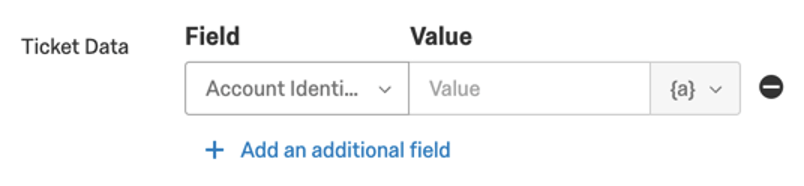
- Ticket Data: Additional fields you want to include in tickets for reporting or visibility purposes. See Ticket Data. When you select this option, you can click Add an additional field to specify as many ticket data as you want. You will be able to choose from existing ticket data, but you will not be able to create new fields. Values can be static or pulled from piped text ( {a} ) as needed. If the value is left blank (either because you entered no value or there was no value to pipe in), the Ticket Data will be updated to be blank.
 Qtip: You cannot create new fields in the update ticket task. To add new fields, go back to the original Ticket Task and add the fields manually.
- When you’re finished, click Save.