-

Qualtrics Platform -

Customer Journey Optimizer -

XM Discover -

Qualtrics Social Connect
Ticket Follow-Up Page
About the Ticket Follow-Up Page
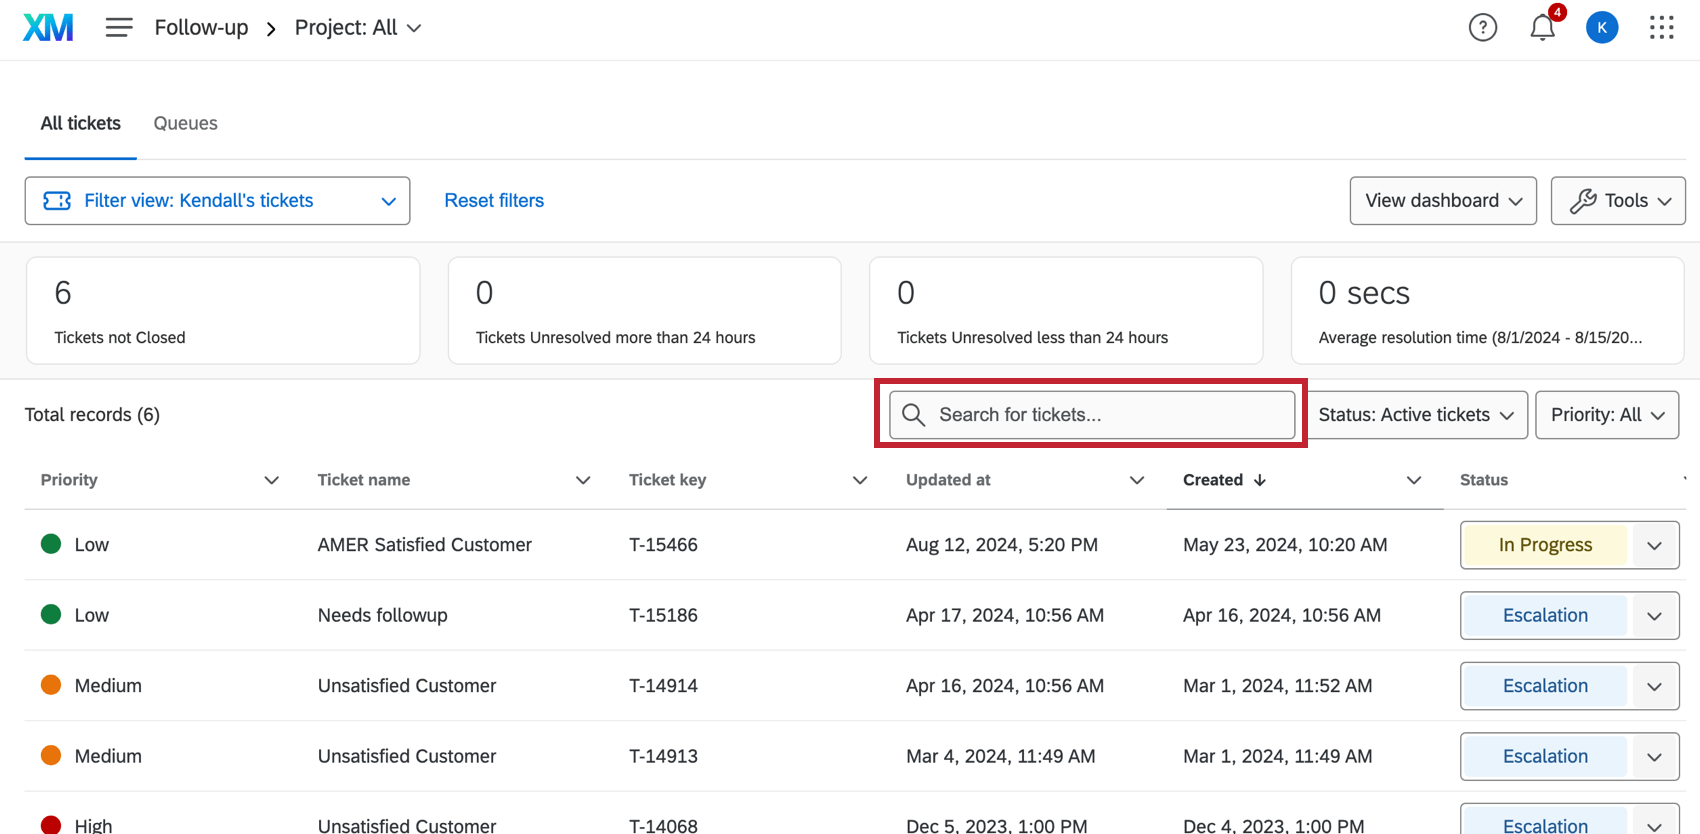
After ticket programs are all set up and new tickets are being created, it’s time to follow up with your respondents! The follow-up page provides a table of your tickets including ticket details, metrics, and the ability to search and filter. All ticket actions begin on the follow-up page.
Navigating to the Follow-Up Page
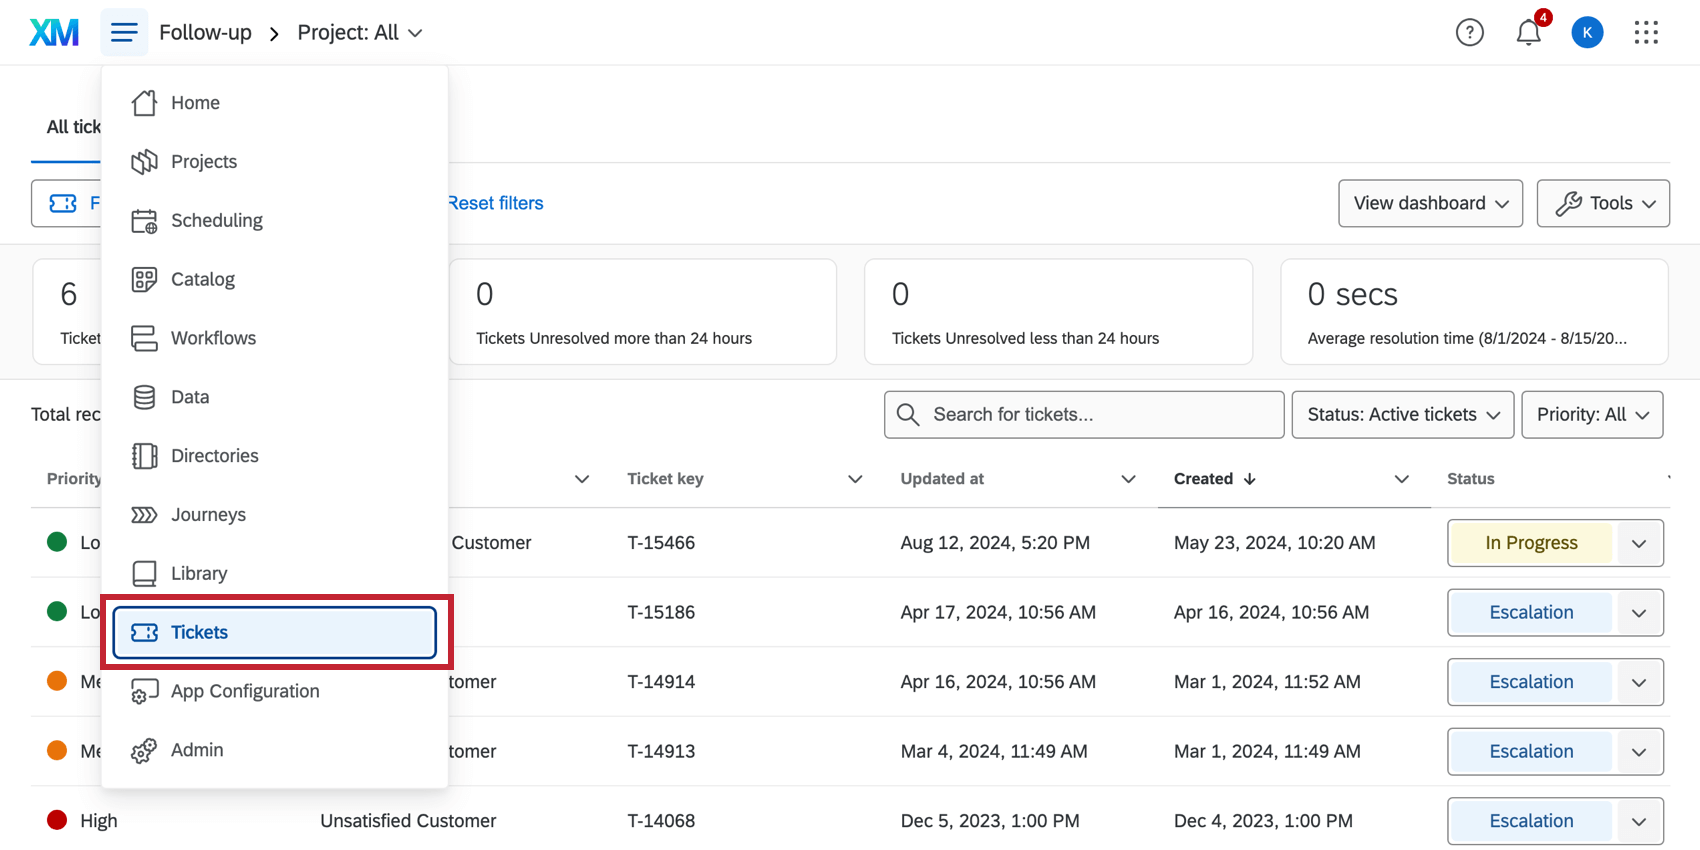
To visit the follow-up page, select Tickets from the navigation menu.
Ticket Metrics
On the top of the follow-up page, you will see a header with a series of metrics.
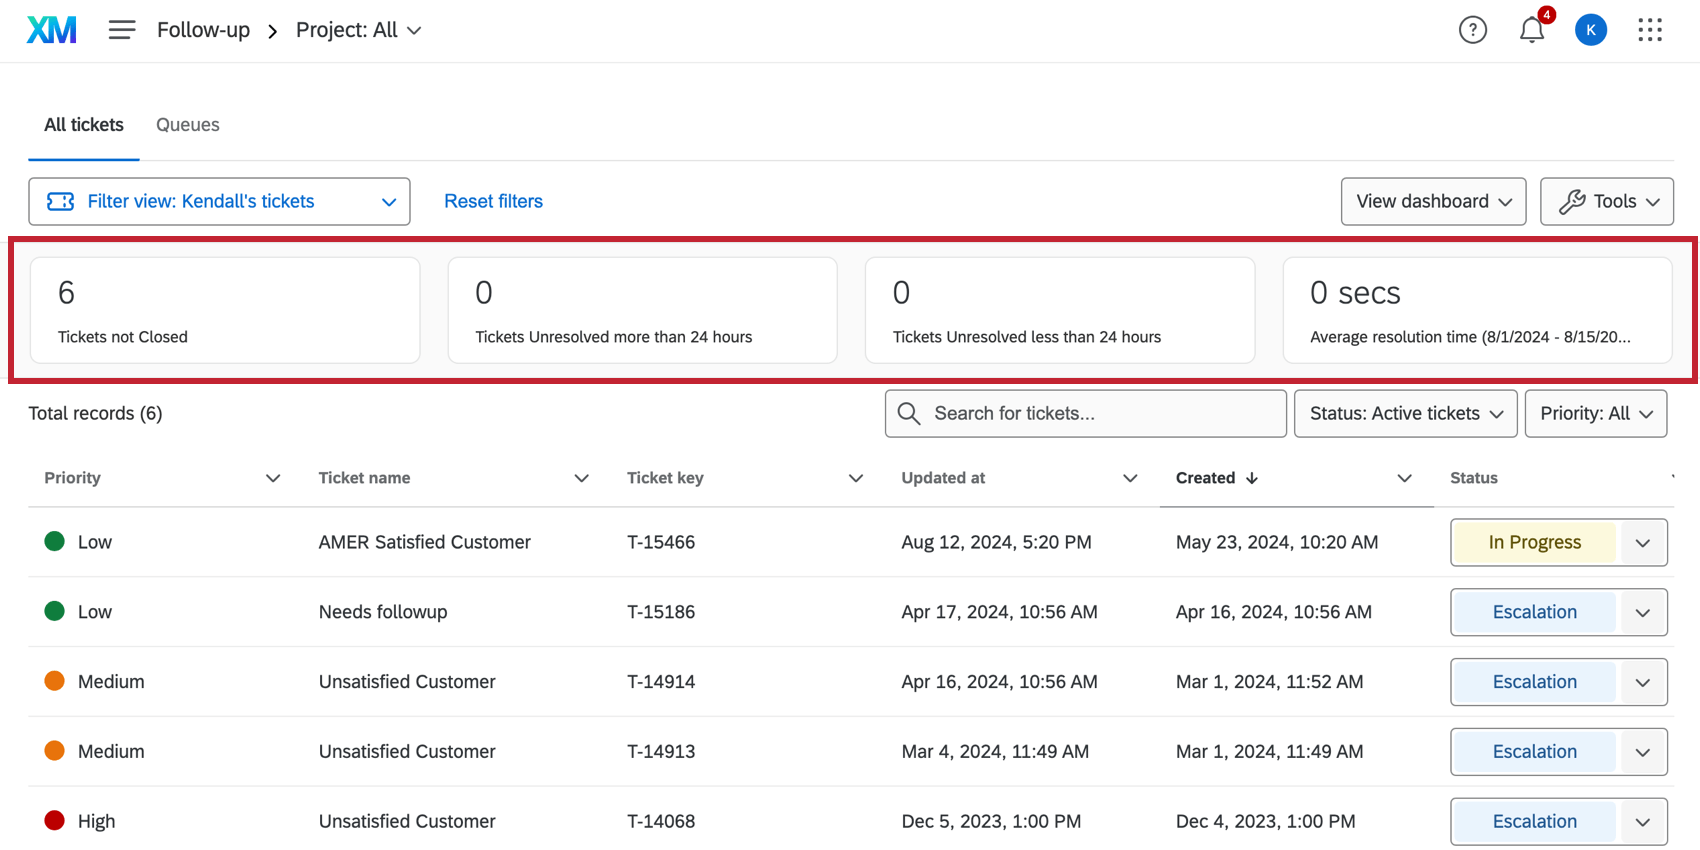
- Tickets not Closed: Tickets that have been marked as a status other than “Closed”.
- Tickets Open more than 24 hours: Tickets that have been marked as a status other than “Closed” for more than 24 hours.
- Tickets Open less than 24 hours: Tickets that have been marked as a status other than “Closed” for less than 24 hours.
- Average resolution time: The average time it takes to resolve a ticket.
Qtip: Average resolution time only takes into account tickets closed within the past two weeks, not all closed tickets.
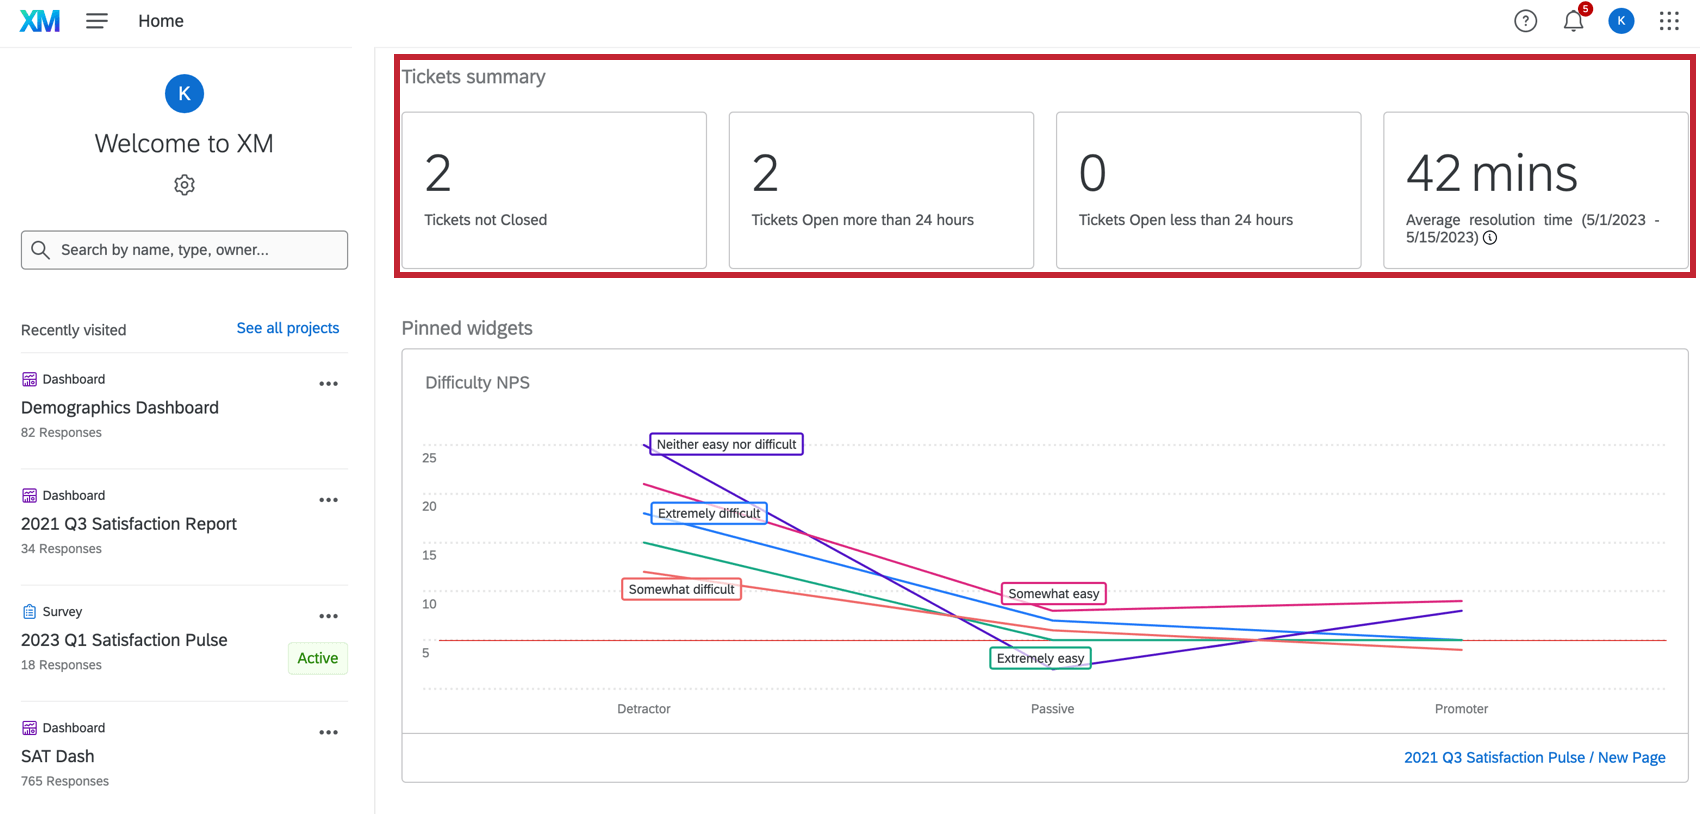
HOMEPAGE METRICS
To add ticket metrics to the homepage, see the Homepage Basic Overview page.
Filtering the Follow-Up Page
On the follow-up page, there are several ways to filter tickets. These filters indicate which metrics and tickets are displayed in your dashboard.
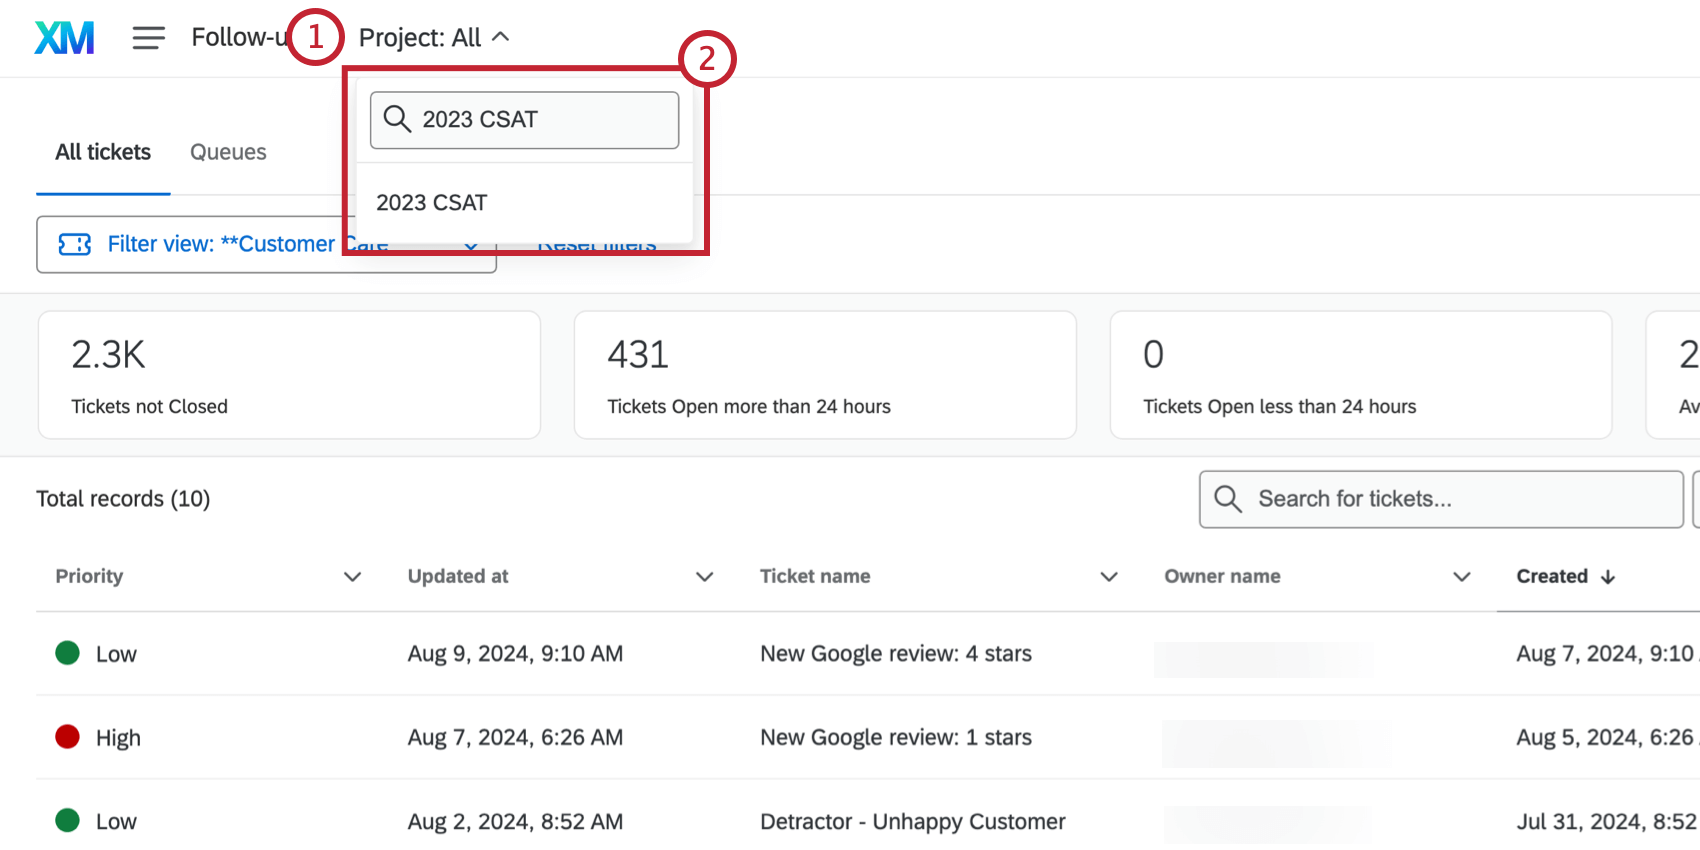
PROJECT
This field displays the projects that have tickets assigned to you or your team/group. To filter the follow-up page by project, select another project from the dropdown.
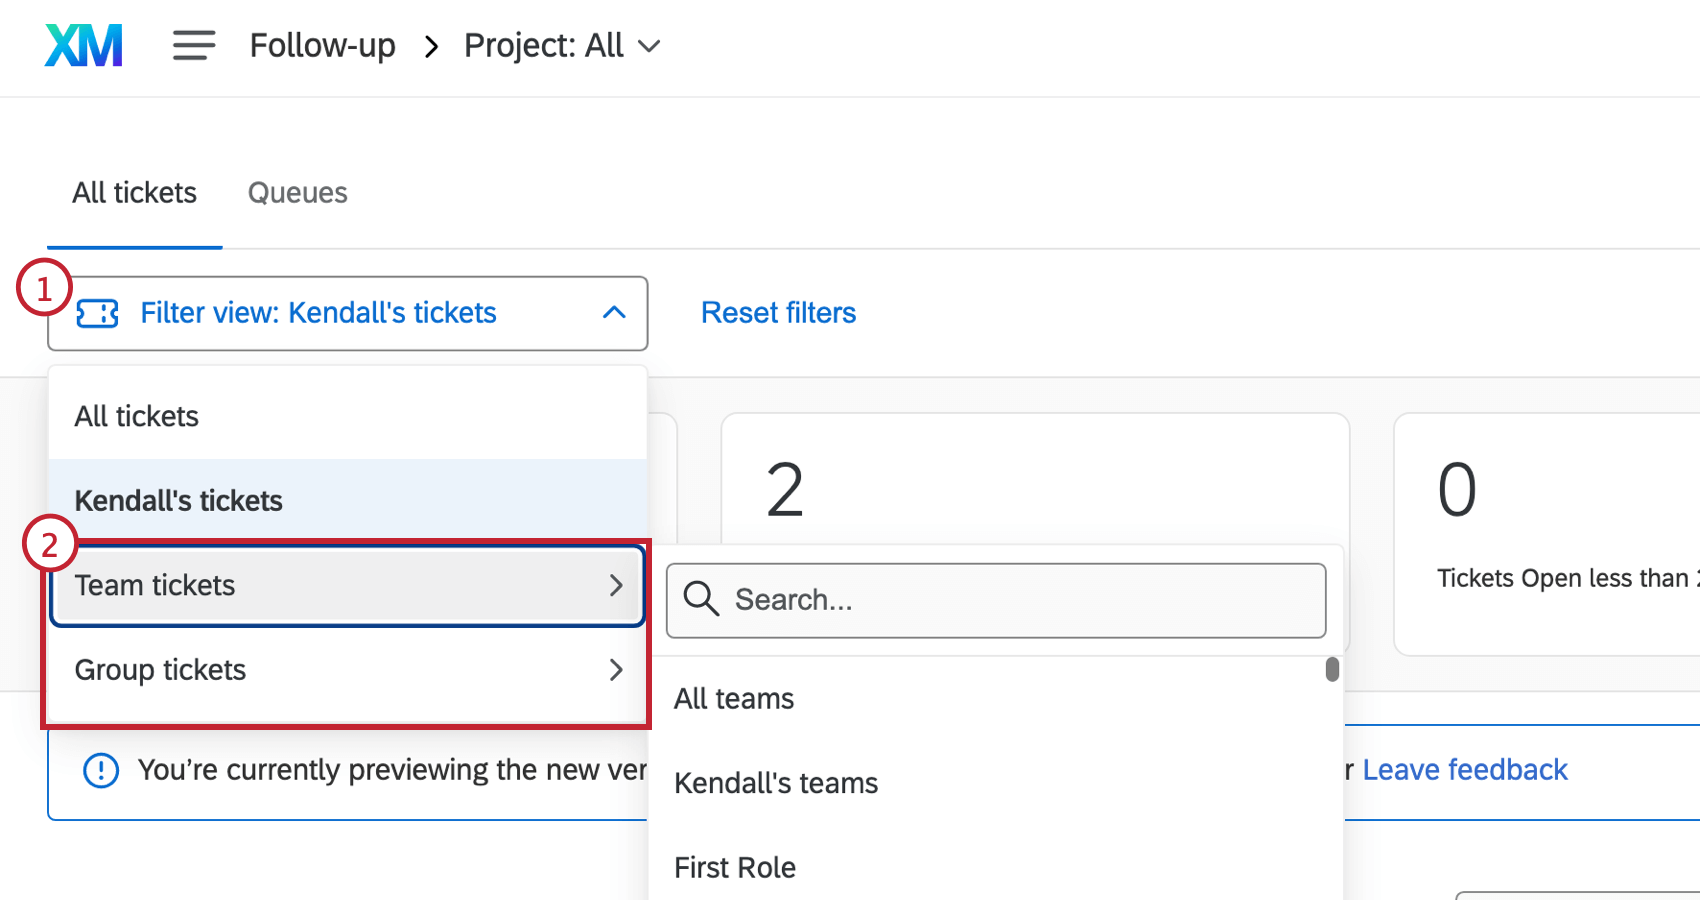
TEAMS AND GROUPS
You will see any ticket groups or ticket teams that have been created by your administrator, as well as the default values All Teams and All Groups. These fields only appear if ticket groups and/or ticket teams have been set up for your organization.
METRICS
The metrics banner displays summary metrics for the owner selected in the Teams and Groups filter. Click on one of the cards in this area to filter the dashboard by one of these metrics.
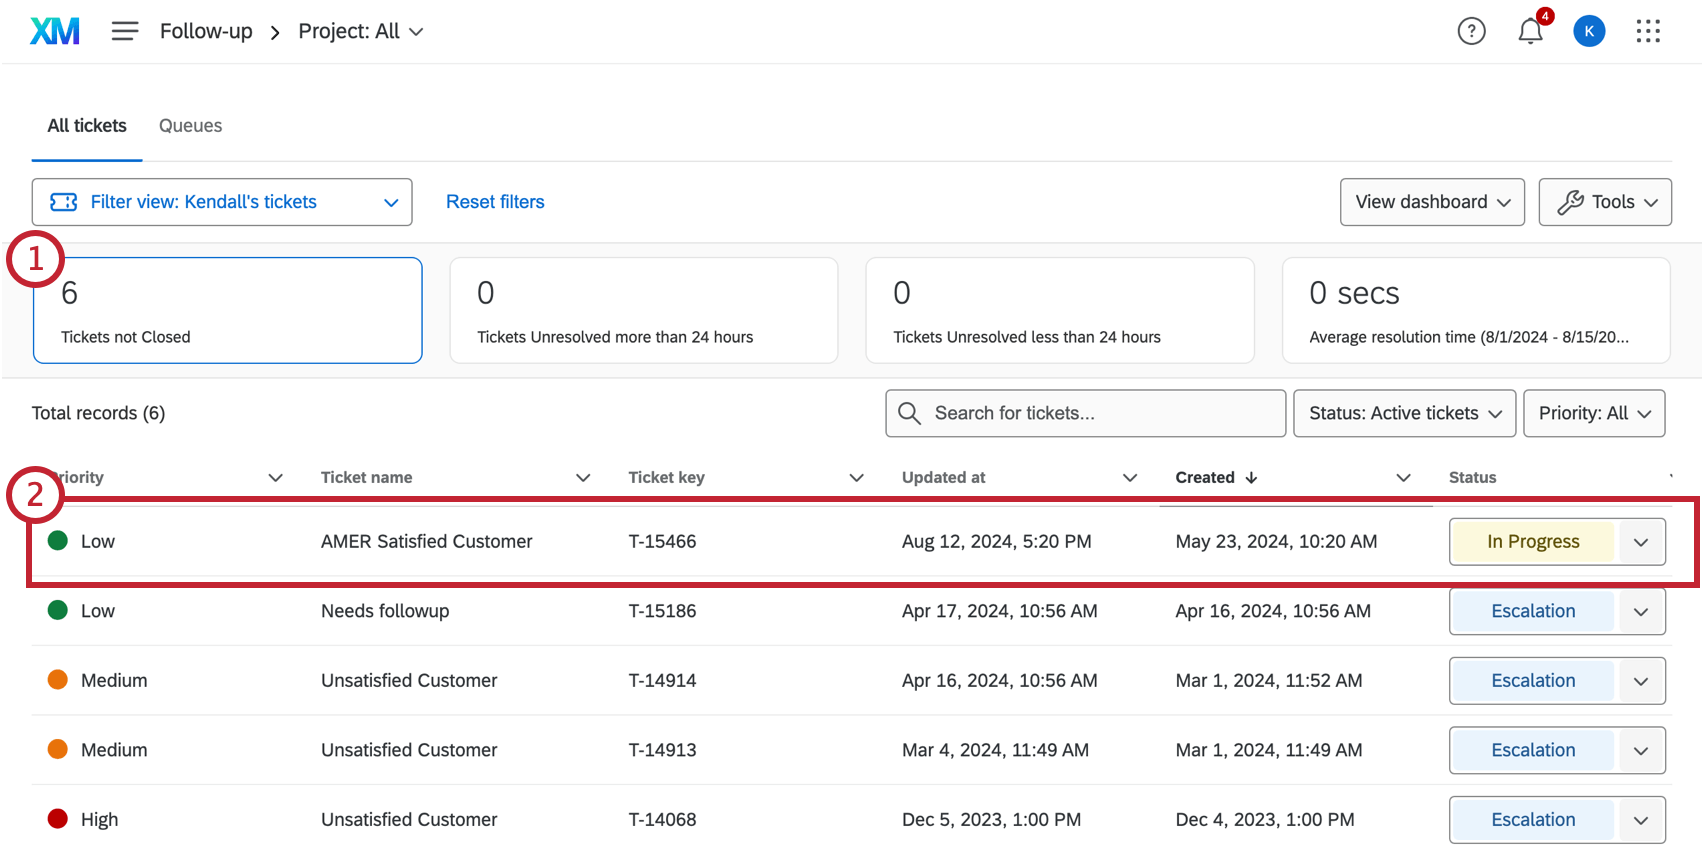
STATUS AND PRIORITY
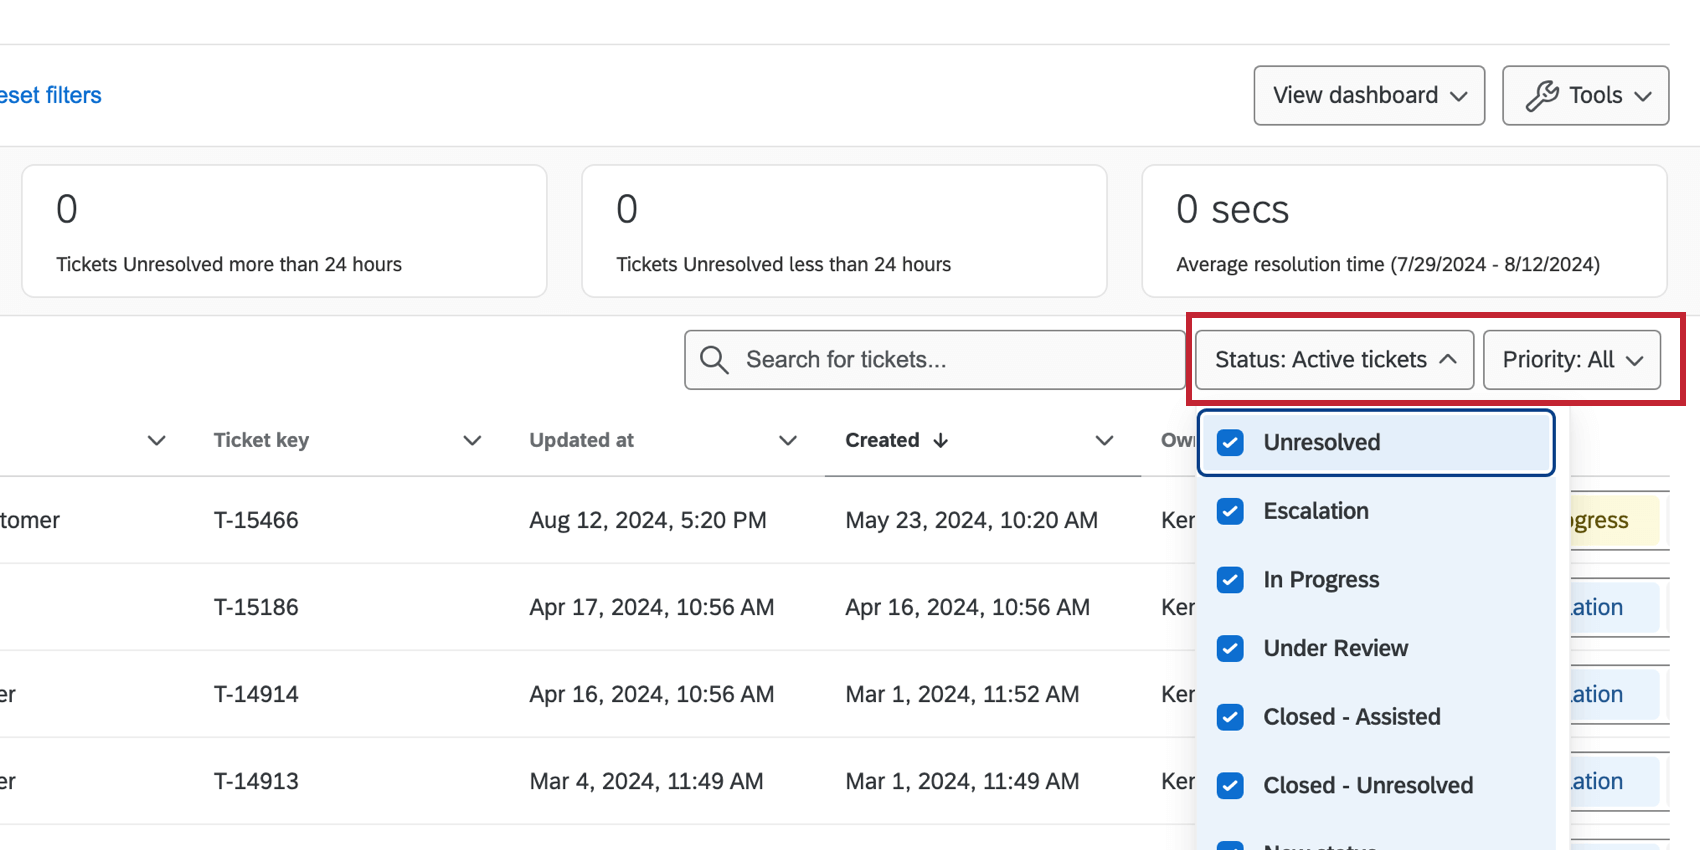
- Status: These will vary based on the statuses that have been set up for your organization. The default statuses are Active, Open, In Progress, and Closed, but additional statuses can be added in the Custom Ticket Status editor.
- Priority: This field shows the priority options Low, Medium, and High. If none are selected this field will default to All.
Following Up on Tickets
There are many ways you can manage your tickets in the follow-up stage, including contacting the respondent from the ticket, changing the status of the ticket, and more. For more information on using tickets, see Following Up On Tickets.
Searching for Tickets
To search for a certain ticket, type key terms into the search bar. The search bar picks up on all ticket content, meaning you can type anything from the owner’s name to the ticket ID.
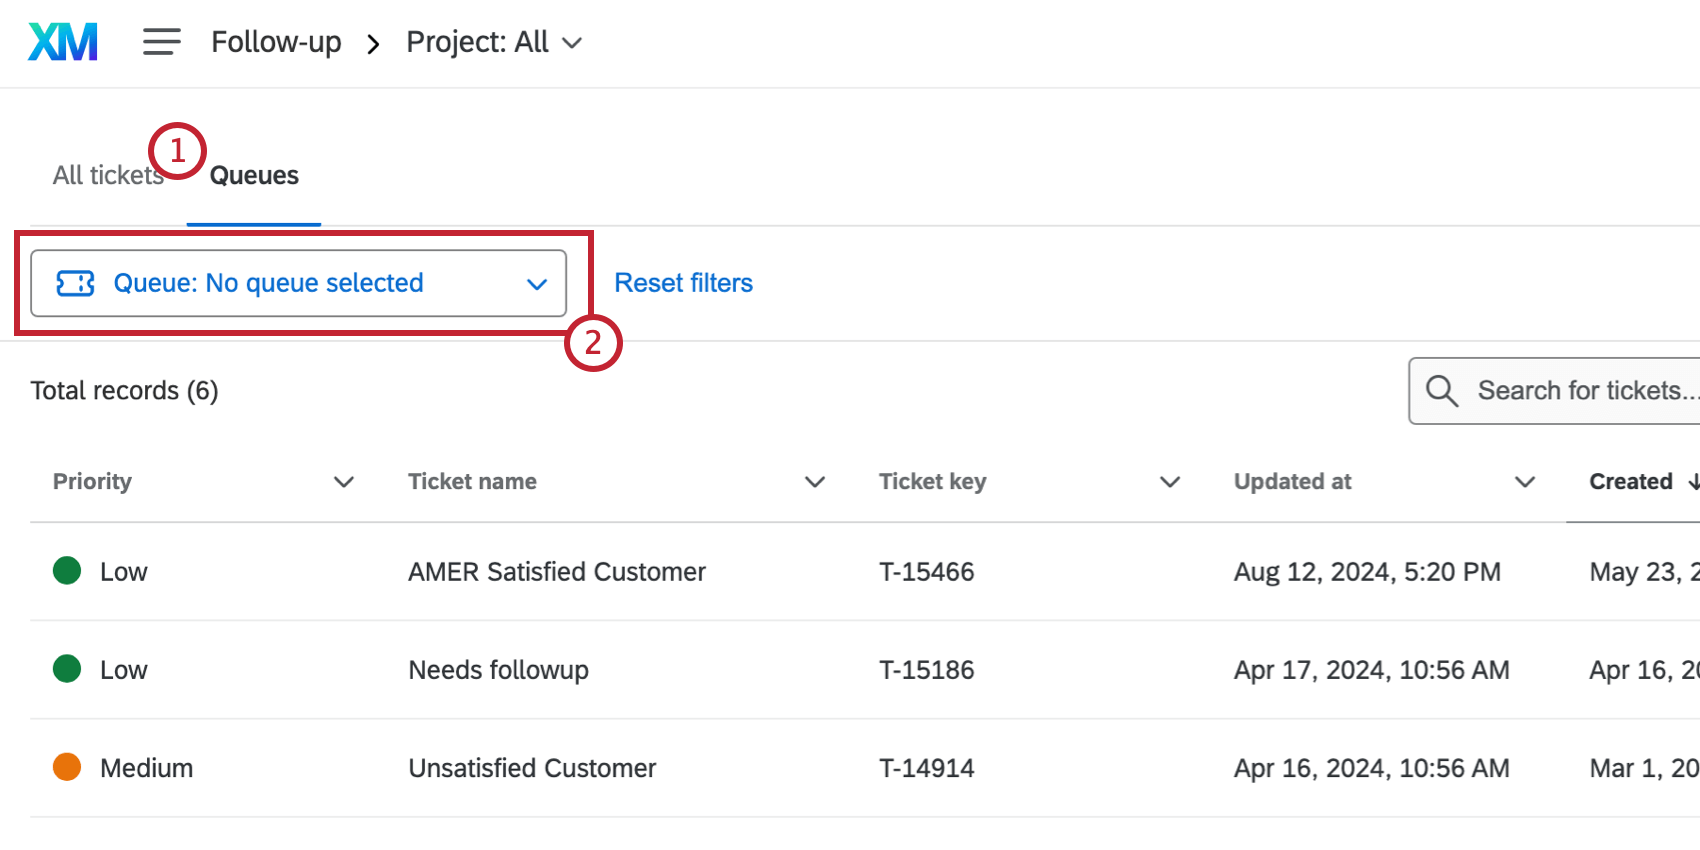
Queues
What’s available in the Queues page will depend on what your administrator set up, but you may see team names, issue types, or however else your organization has chosen to divide ticket queues.