-

Qualtrics Platform -

Customer Journey Optimizer -

XM Discover -

Qualtrics Social Connect
Extract Run History Reports From Workflows Task
About Extracting Run History Reports from Workflows
Qualtrics keeps a run history for each workflow you create. This run history contains information about the workflow’s trigger and tasks. You can export the run history for your chosen workflows using the extract run history reports from workflows task. Then, you can save the exported workflow run history for your own internal record keeping.
Attention: To export run history, your organization must have an SFTP server to save the exported data. Contact your IT team if you need assistance with setting up an SFTP server.
Setting Up an Extract Run History from Workflows Task
Qtip: Check out the Export Workflow run history to SFTP server on a schedule workflow template for a template with the initial setup completed.
- Create an ETL workflow.
- Select Data source (ETL extractor).
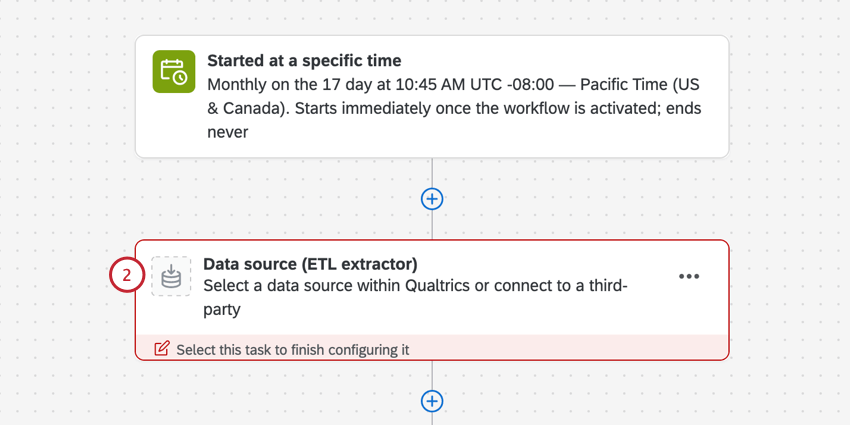
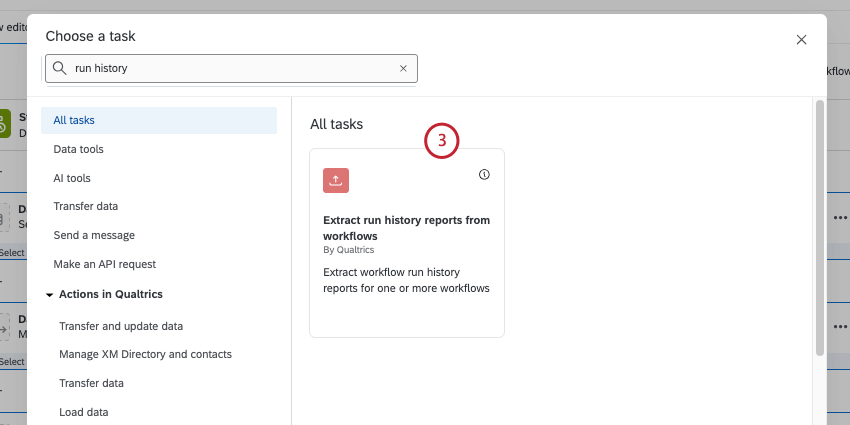
- Choose the Extract run history reports from workflows task.
- Select the workflows you want included in the export:
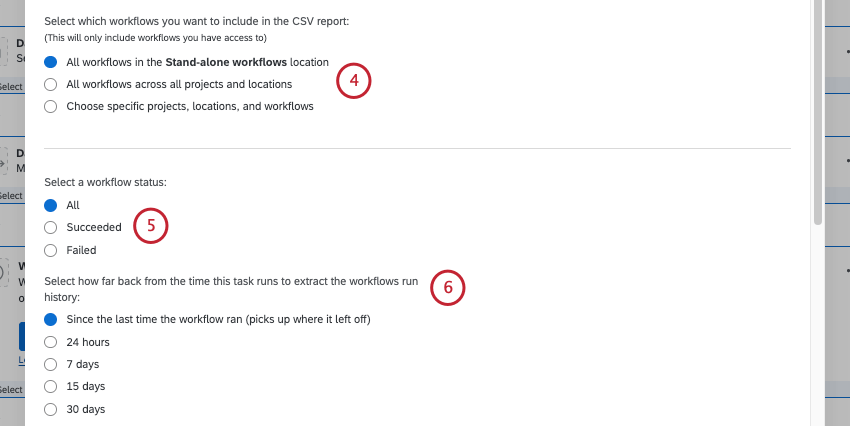
- All workflows in the X location: This option exports all workflows in the location that you’ve created this workflow in (e.g., if you create your workflow in the stand-alone workflows page, then this will say “Allow workflows in the Stand-alone workflows location.” Similarly, if you create this workflow in a project, then this option will list that project instead).
- All workflows across all projects and locations: This option exports all workflows that you have access to.
- Choose specific projects, locations, and workflows: This option allows you to choose what specific workflows you want in your export. See Exporting Specific Workflows for more information.
- Choose which types of workflows you want included in the export. You can choose to select workflow runs that succeeded, workflow runs that failed, or every workflow run.
- Select the time frame for the export: the past 24 hours, 7 days, 15 days, 30 days, or since the last time the workflow ran (which will include all runs that have occurred since the last export).
- Choose how the date and time should be formatted in the export.
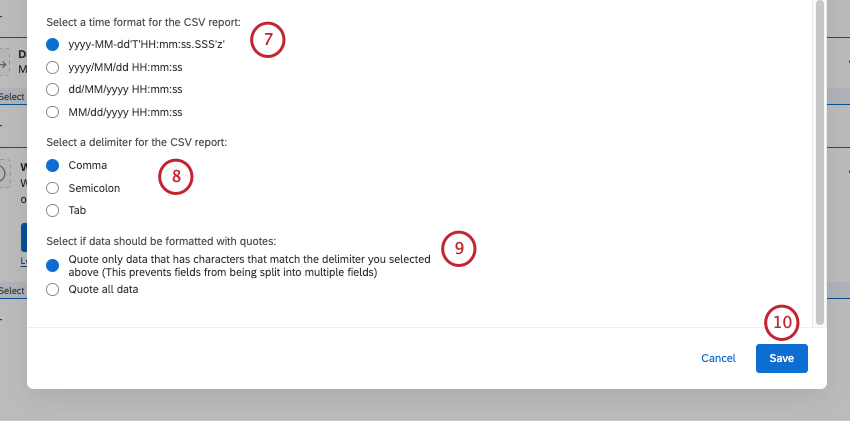
- Select the delimiter for your filter. The delimiter is the character that will separate values in your file.
- Choose if you’d like to include quotes around all of your data, or only around fields that contain characters that match your selected delimiter. This option is to prevent the unintended splitting of fields into multiple fields.
- Click Save.
- Click Add a data destination.
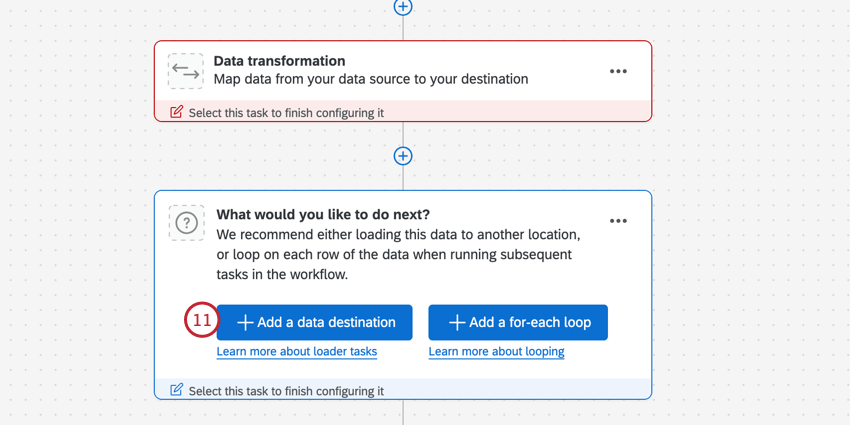
- Add a Load Data into SFTP task to save the exported run history to your SFTP server. Visit the linked page for more information about setting up the task.
Exporting Specific Workflows
This section covers how to choose specific workflows to include in your export.
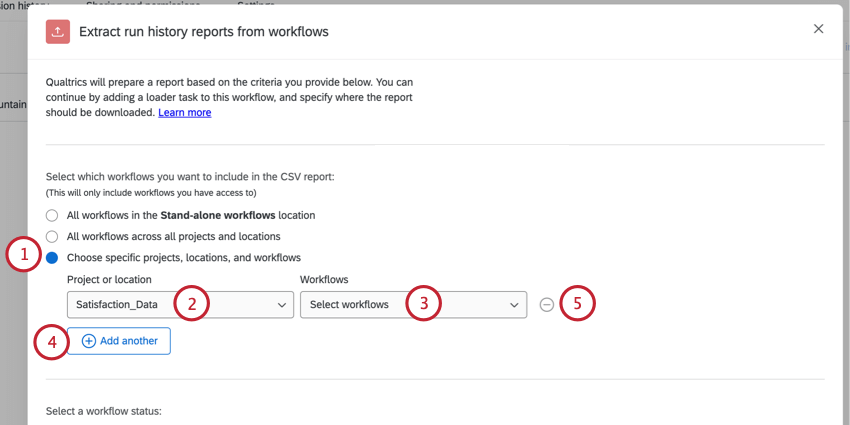
- When setting up your task, select the Choose specific projects, locations, and workflows option.
- Using the Project or location dropdown, choose the project or platform location that contains the workflow(s) you’re interested in. Your options include:
- Project: Choose the project that contains the workflow.
- Stand-alone workflows: The workflows on the stand-alone page (i.e., not in the “Workflows” tab in a survey project).
- Using the Workflows dropdown, choose the workflow(s) you’re interested in. You can select multiple workflows in this menu.
- If you’d like to include workflows from another location, click Add another and repeat steps 2 and 3 until all of your desired workflows are added to the task.
- If you’d like to remove a workflow from your export, click the minus sign (–) to the right of it.
Data Included in Run History Exports
Qtip: If your workflow runs but there is no run history to export, the workflow will produce an empty CSV file that only contains headers.
This section covers the data fields you’ll find in a workflow run history export. When your run history exports, each event and task in a given workflow run will have its own row.
Example: Let’s say I have a workflow with a survey response event, a ticket task, and an email task. When I export the run history for this task, each workflow run will have 3 rows – one for each component.
- Completed Timestamp: The date and time that the workflow finished running. The date and time format is customizable when setting up the task.
- Component Execution Status: Indicates the workflow trigger or task status. Values include SUCCEEDED or FAILED.
- Component ID: The unique ID for your trigger or task.
- Component Input: The input values passed into the task (piped text, field mappings, etc). Triggers do not have inputs. Some tasks do not yet have this information available.
- Component Key: A unique key based on the component name (e.g., email task).
- Component Name: The localized name of the workflow trigger or task (e.g., email task).
- Component Output: The output values passed from the task (returned fields, etc). Triggers do not have outputs. Some tasks do not yet have this information available.
- Component Type: Describes the workflow component, either a trigger or a task.
- Retry: Indicates if the workflow was retried. Values include TRUE or FALSE.
- Run Immediately: Indicates if the workflow was triggered via the Run Immediately button. Values include TRUE or FALSE.
- Started Timestamp: The date and time that the workflow component started processing. The date and time format is customizable when setting up the task.
- Trigger ID: The ID of the trigger that started the workflow. The Trigger ID will be the same for all components within a specific workflow run.
- User ID: The Qualtrics User ID of the user who created the workflow.
- Workflow Execution ID: The Qualtrics-assigned ID number for this specific workflow run. All components of the same workflow run will have the same Workflow Execution ID.
- Workflow Execution Status: Indicates the workflow’s status. Values include SUCCEEDED or FAILED.
- Workflow Name: The workflow’s name as it appears in the workflow editor.
- Workspace ID: The ID of the workspace that contains the workflow.
- Workspace Name: The name of the workspace that contains the workflow. This will either be the name of the project that contains the workflow, or “global” if within the stand-alone workflows page.
Qtip: Not all tasks and triggers will have data for the fields above.