
Adding, Importing, & Exporting Users (CX)
What's on this page
About Adding, Importing, & Exporting Users (CX)
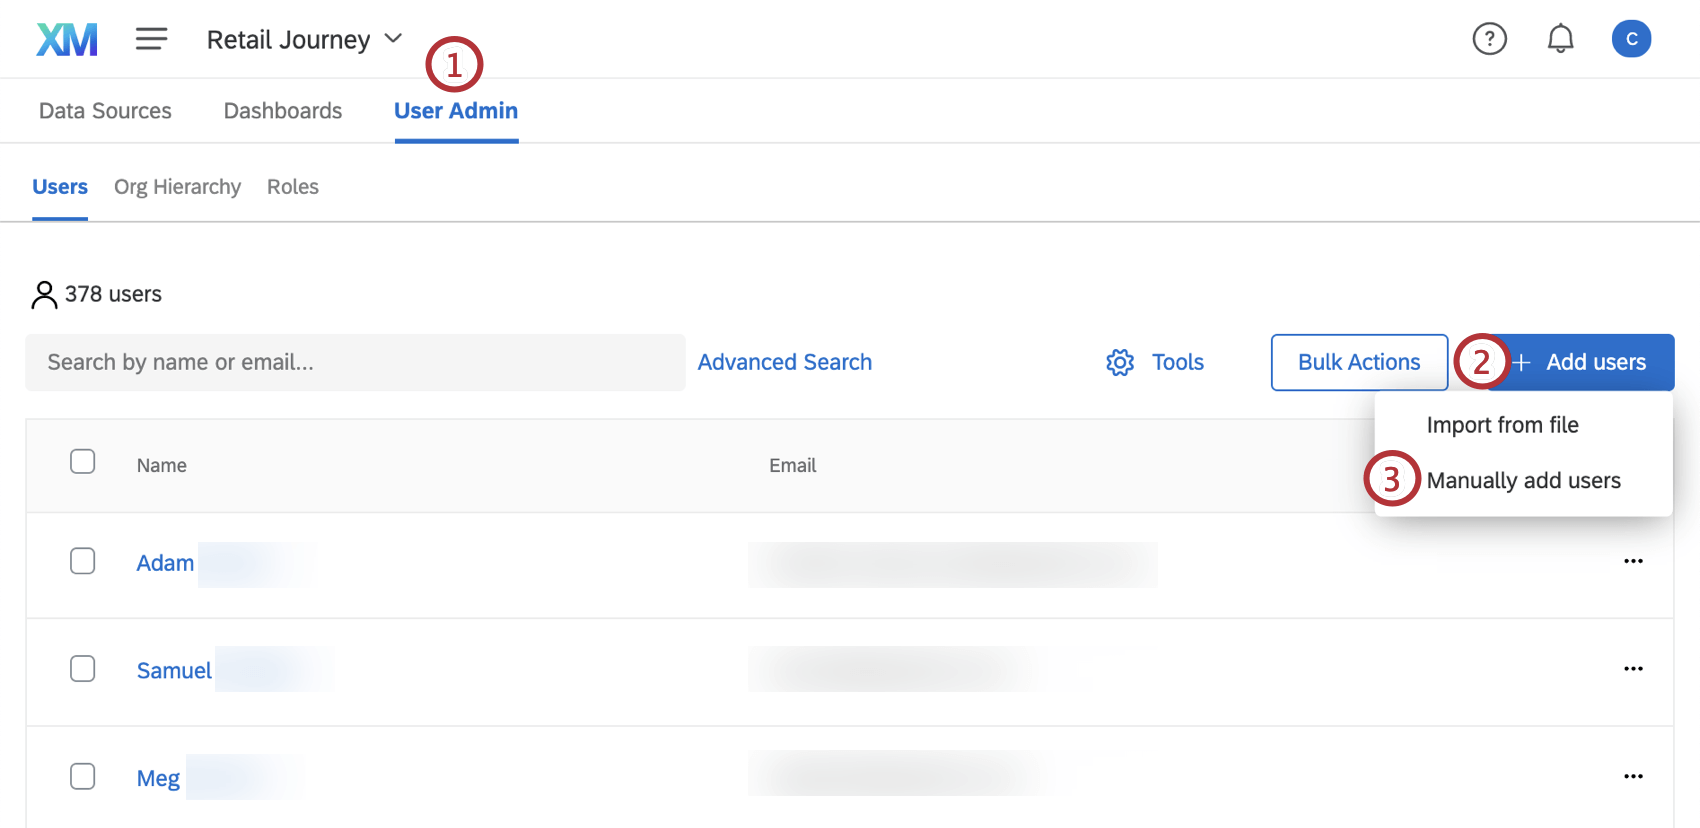
In the Users section of the User Admin tab, you can either upload users in bulk using a file or by manually typing their information into a form. You can also export a list of your users for use in another dashboard or for use in external records you may keep.
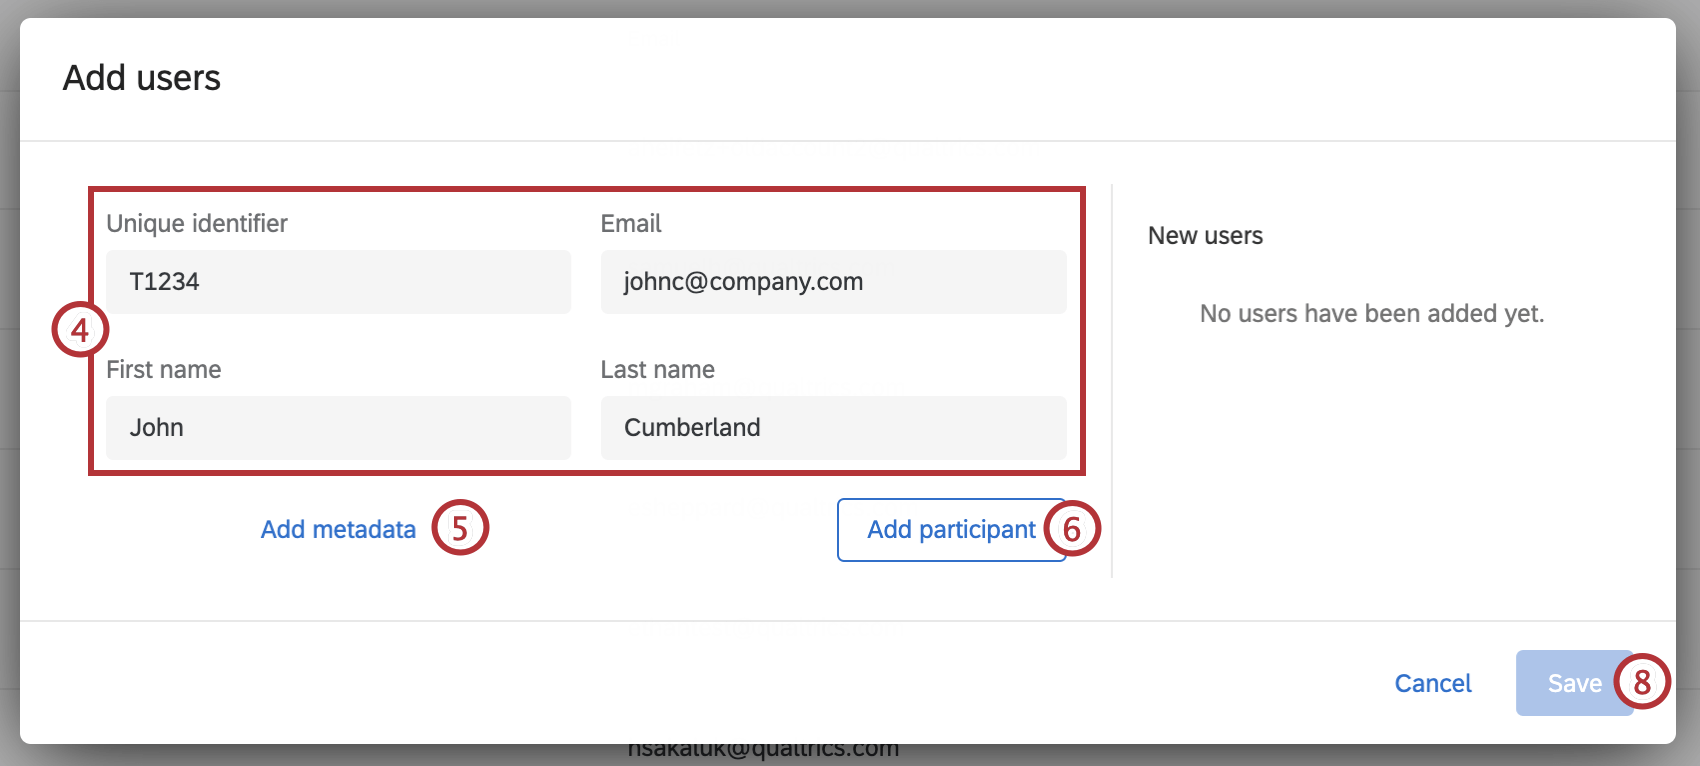
When adding or uploading users, you must include the following fields: email, first name, and last name.
Attention: Only users with certain permissions have access to User Admin. See Getting Access to the User Admin for more details.
Qtip: Uploading blank values in a Metadata column will delete existing attribute values.
Qtip: This page refers to managing users in CX Dashboard projects only.
Add Users Manually
You can add users by typing their information into fields, or by pasting it.
Attention: See Maximum and Supported Characters for guidelines and restrictions around user and metadata fields.
Qtip: The email address will become the user’s username to log in to Qualtrics. All uppercase characters will be automatically converted to lowercase.
Qtip: Metadata serves as any additional information you want to include aside from the basic fields provided. You can name the column whatever you want.
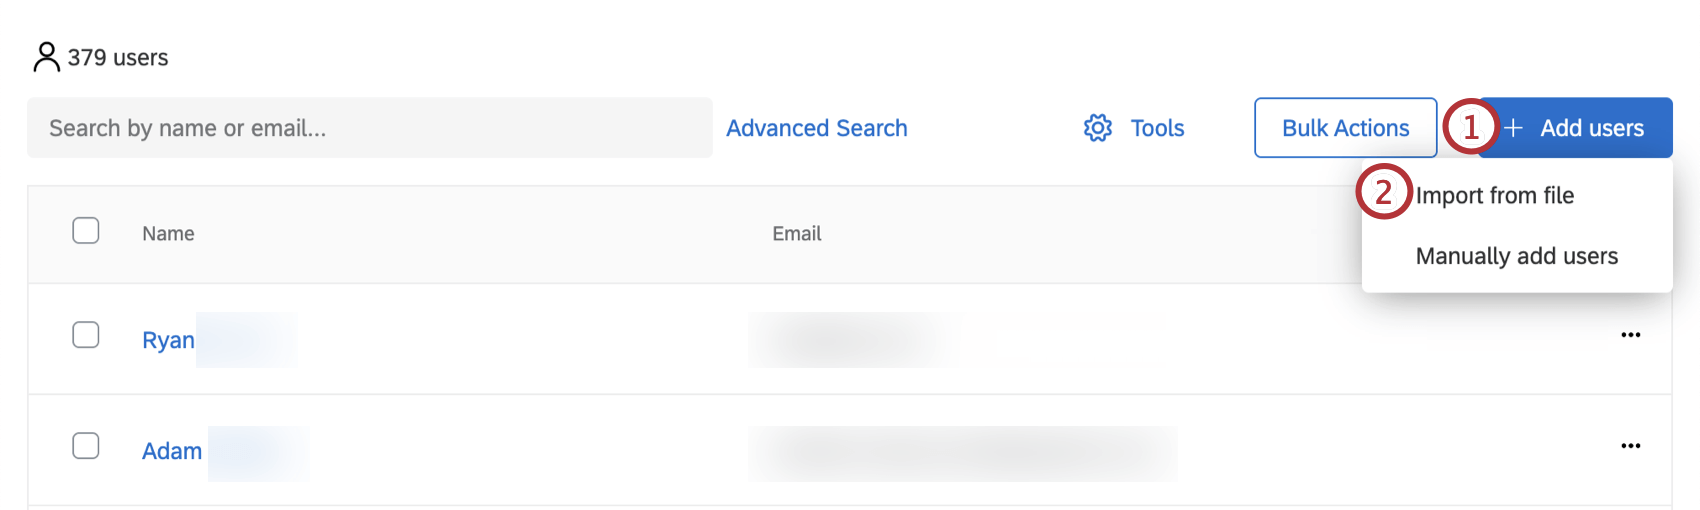
Importing a File
It can be much easier to upload many users at once using a file made in Excel. This also saves you from having to manually add metadata columns or type values one-by-one.
Formatting Your Document for Import
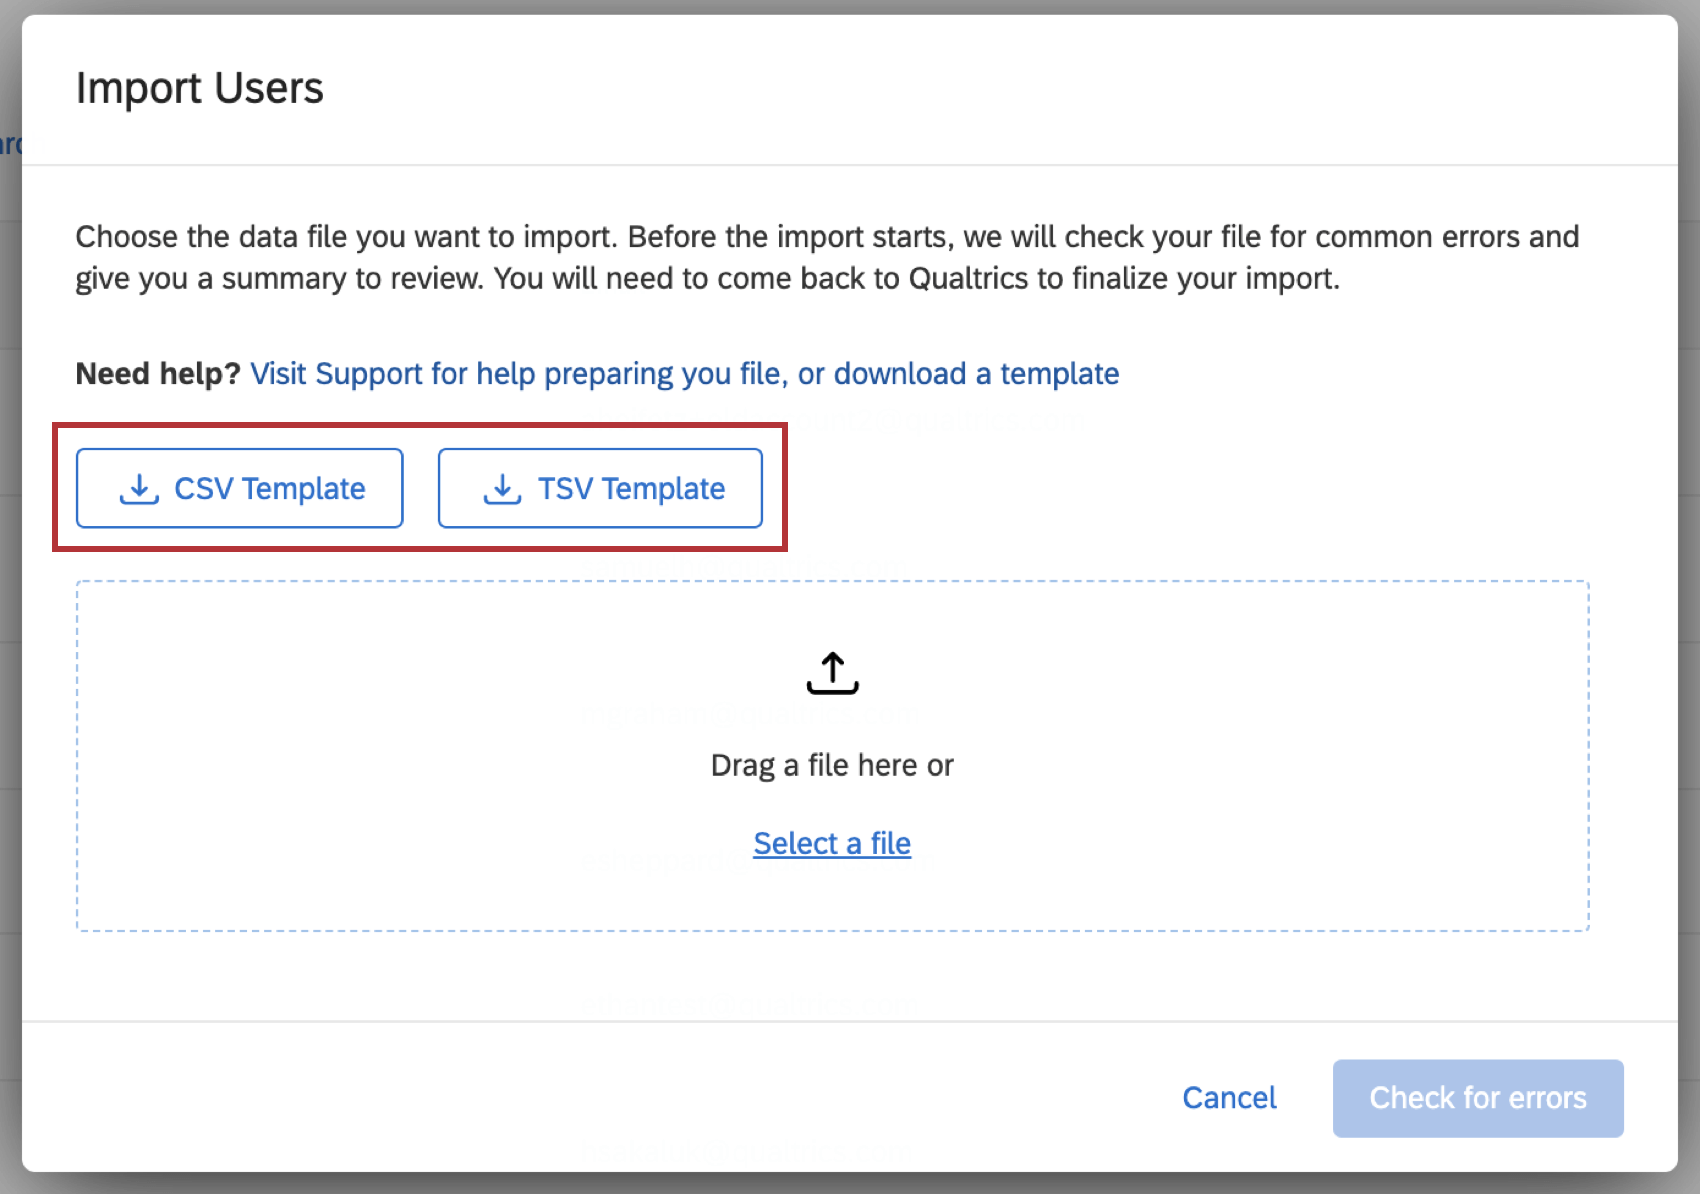
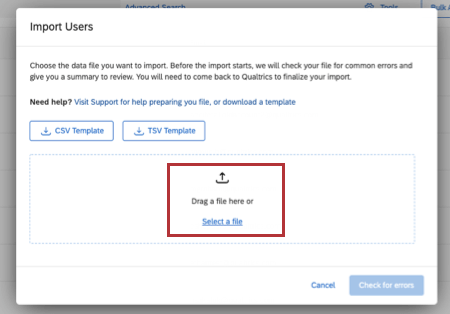
When you are on the upload window, click CSV Template or TSV Template to download an example file for the format you should follow.

Here is a list of requirement this file must meet:
- You must include FirstName, LastName, UniqueIdentifier, and Email for all users. Qtip: If your organization uses SSO, you must include a Username column! The Username column needs to be filled in with the values from your Active Directory that you are passing us for the username attribute. The #brandID will be appended to the username automatically upon upload of the file.
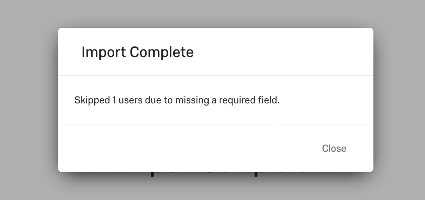
 Qtip: If the import fails, you may get the message “Skipped X users due to missing a required field.”

This likely happened because you forgot to add an email address, first name, or last name for one or more of the users you were importing. - The file must be saved as a CSV or TSV. Qtip: See our CSV/TSV Upload Issues page for help troubleshooting upload issues.
- The spelling and capitalization of certain headers (FirstName, Email, LastName) are vital to this information uploading correctly. The only column headers you can change are the Metadata columns, which can have any header name you want, be as many columns as you want, or be deleted entirely.
- If you are including a Language column, make sure Language is capitalized, and the value for each user is in language code format.
Attention: See Maximum and Supported Characters for guidelines and restrictions around user and metadata fields.
Importing the File
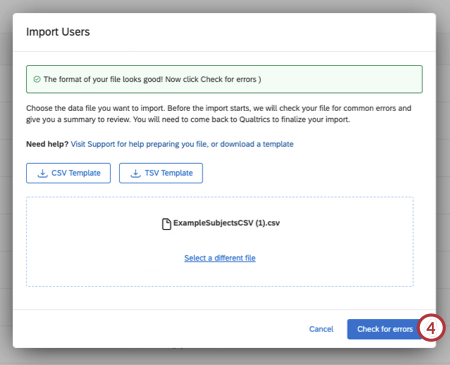
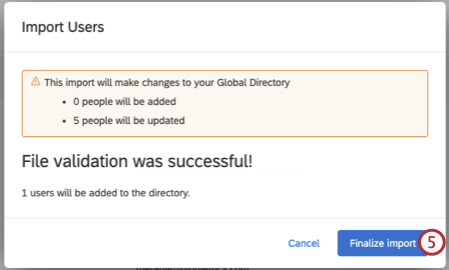
When your file is configured for import, you can upload users within the Users tab.
Qtip: Do you want to upload users automatically on a regular basis? Check out the Load Users into CX Directory task.
Exporting Users
You can also export a list of your users to a CSV or TSV. This file contains every column of information, including FirstName, LastName, Email, UniqueID, and all metadata.
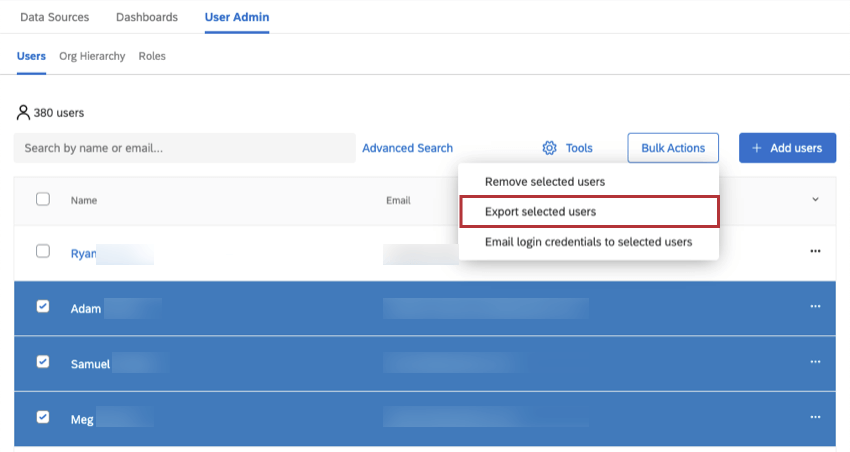
Exporting Selected Users
Once you select users using the checkboxes to the left, go to Bulk Actions and select Export selected users.
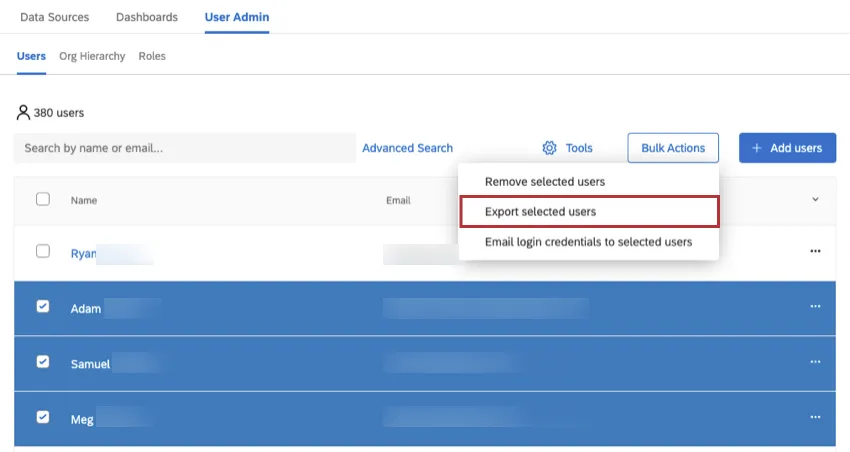
The only metadata that appears in this export is metadata that at least one of the users has a value for. Blank data is excluded if none of the users selected has a value for that metadata.
Qtip: Users have to be selected to be exported. Adding a filter or search terms won’t affect which users are included in your file, you also have to select the users. The Select All option will only select those that meet the search and filter requirements.
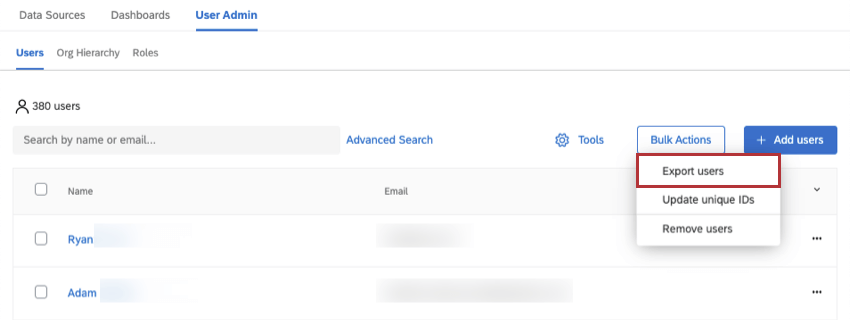
Exporting All Users
To export all the users in your brand, click Bulk Actions and select Export users.
Removing Users
You can use a file to remove users from the admin in bulk, or you can choose to remove only selected users.
Warning: Be careful before deleting users. Deleting a user from CX User Admin may delete them from your entire user organization. (See: Admin users.) If you want to adjust this setting, to either enable or disable it, please reach out to Qualtrics Technical Support.
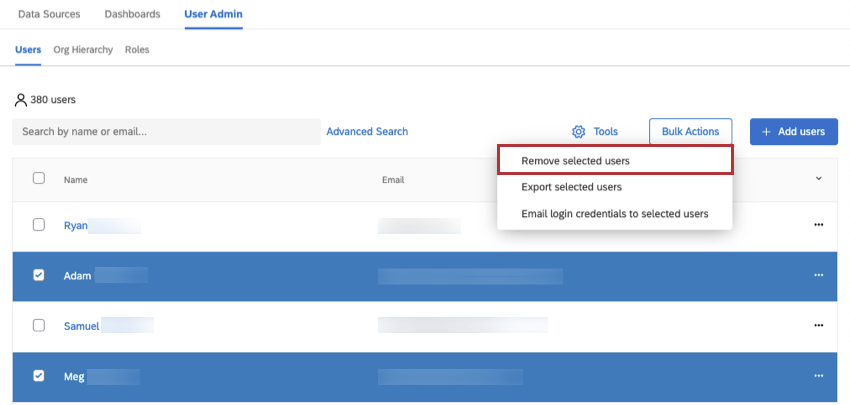
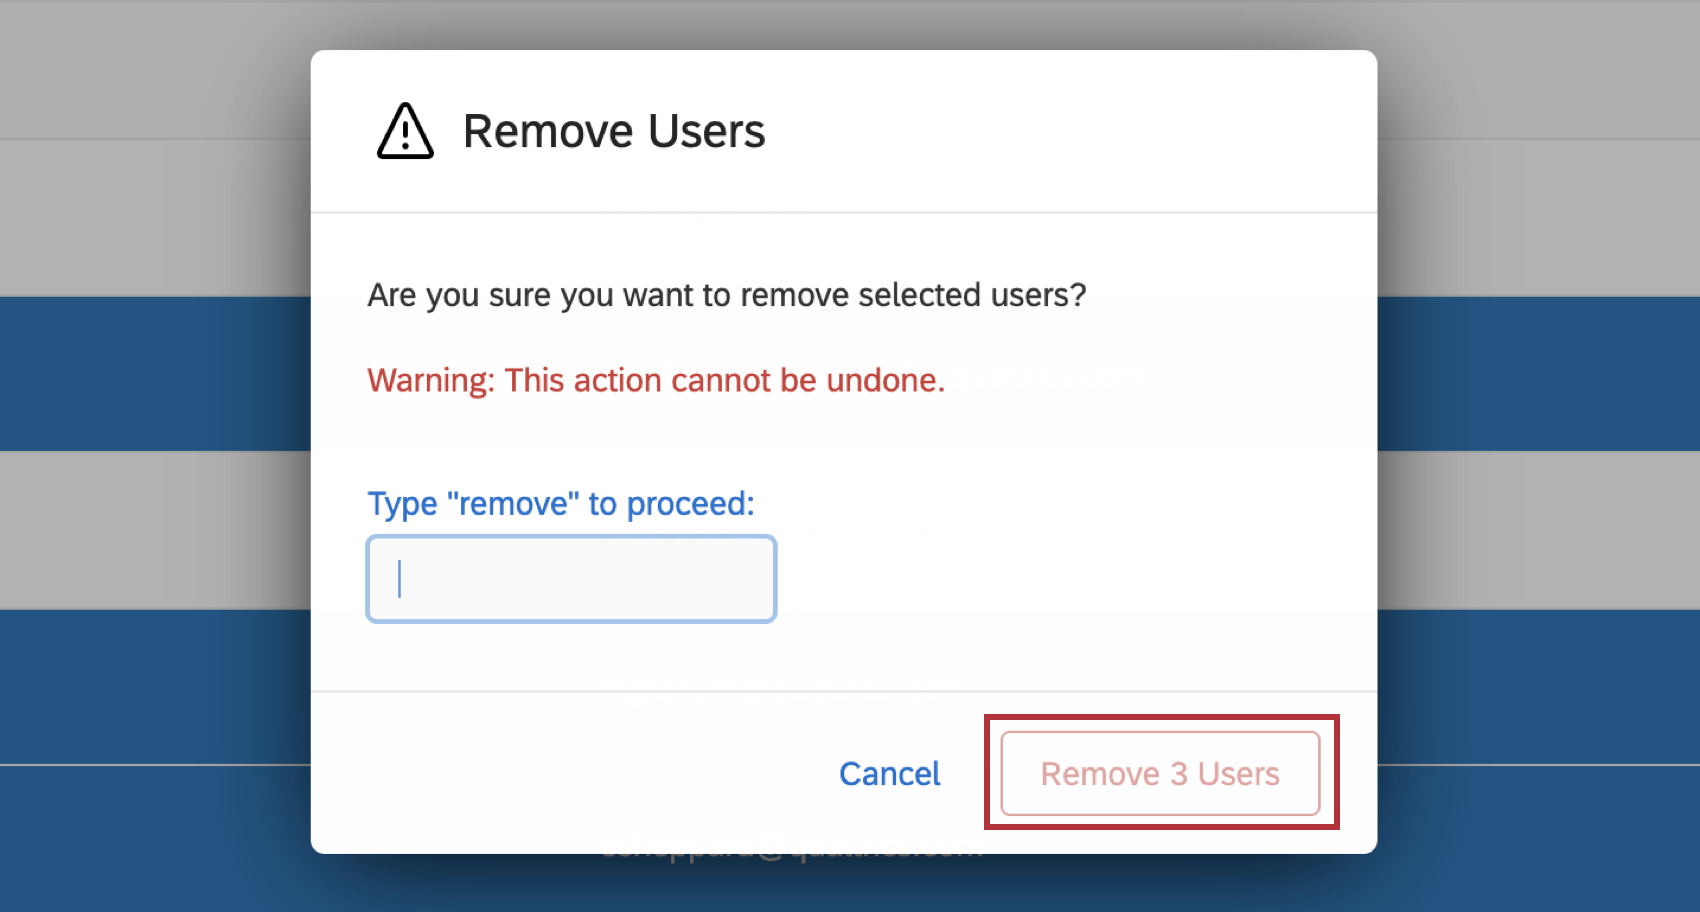
Removing Selected Users
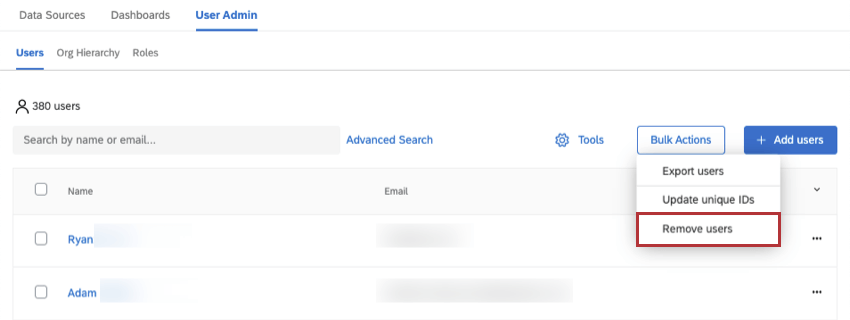
Removing Users with a File
You can use a file to remove users from the admin. This file only needs to contain the users you would like to remove. Users will only be removed from the Users tab within User Admin and will remain in the Qualtrics global directory.
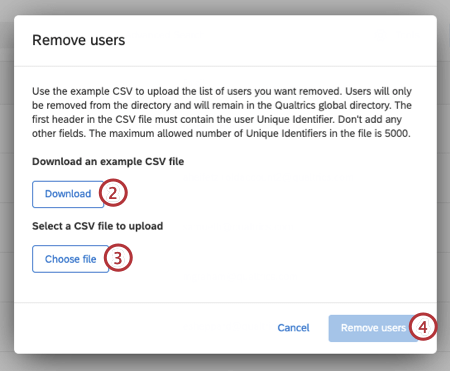
Qtip: The first header in the CSV file must contain the user’s unique identifier. Don’t add any other fields. The maximum number of unique identifiers allowed in the file is 5000.
Updating Users
You can also use a file to update your users as a group. See the Updating Multiple Users’ Metadata Values page for further instruction.
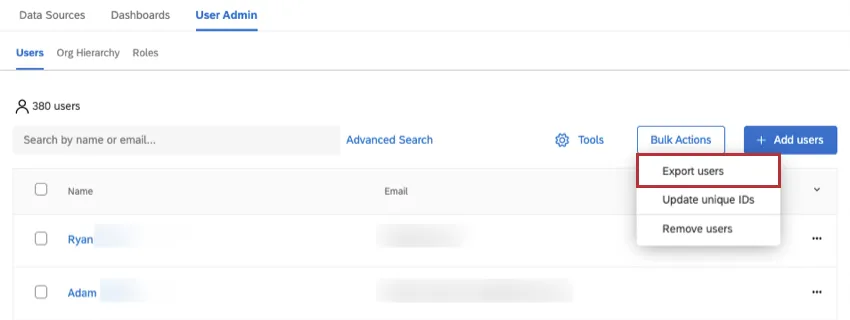
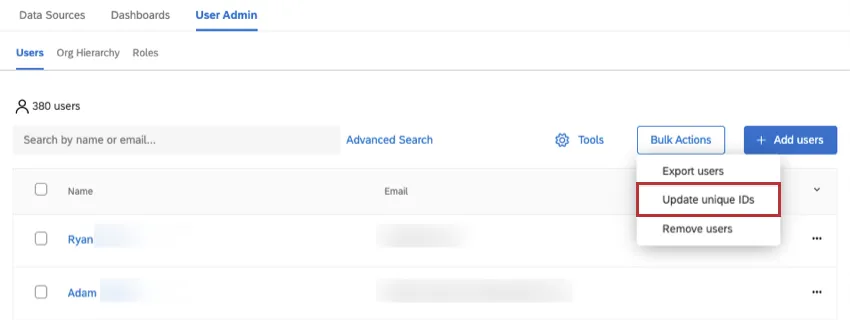
Updating Unique IDs
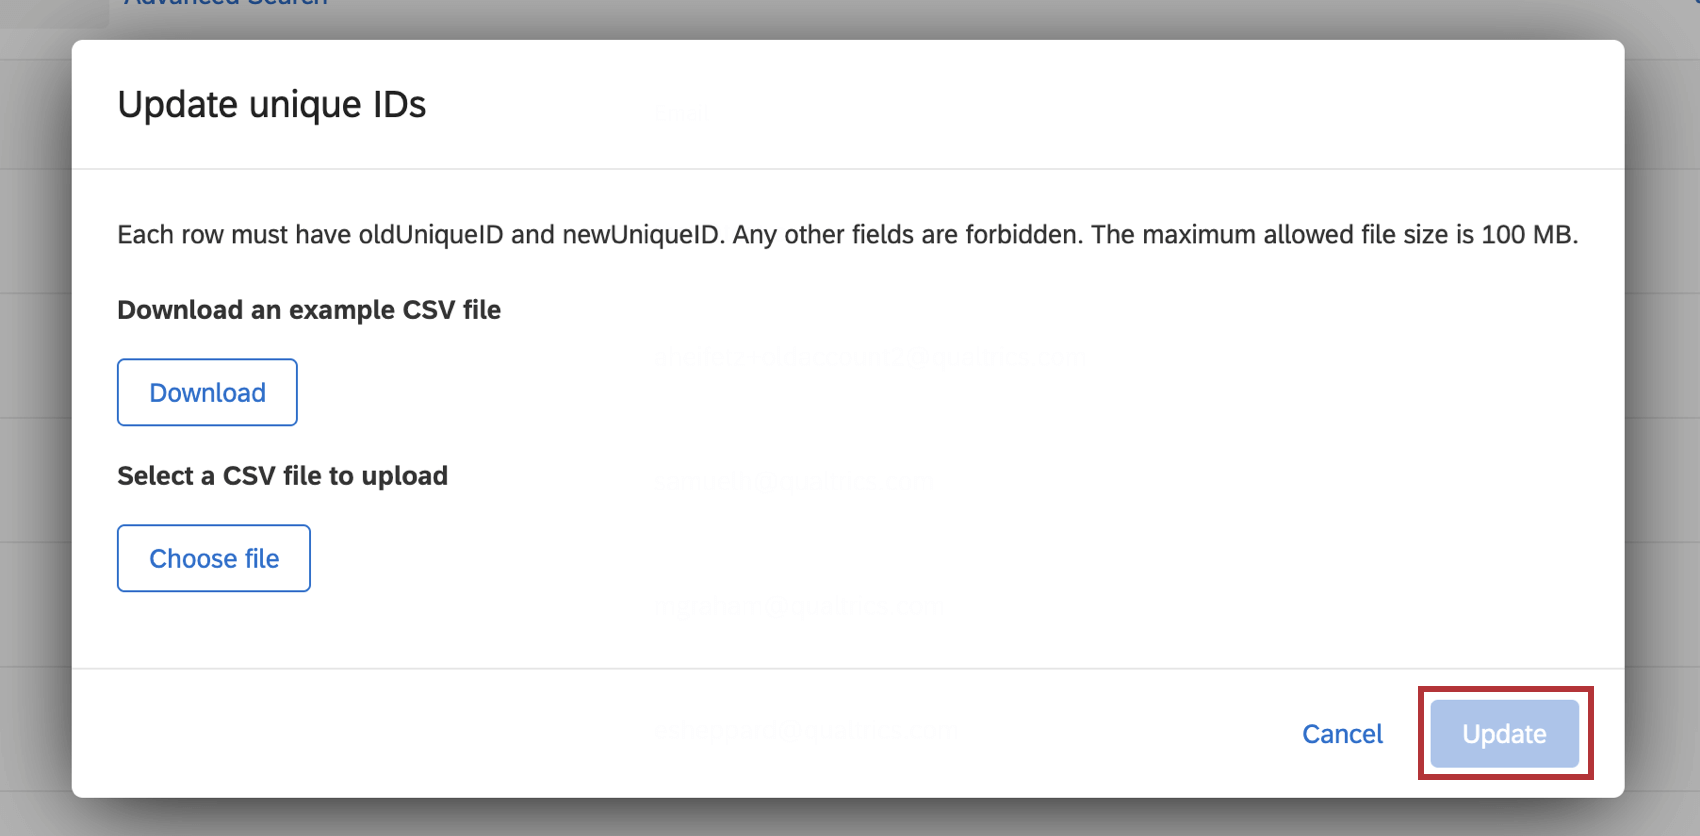
Select Bulk Actions and click Update unique IDs. Upload a CSV file with the users you want to update. Each row must have oldUniqueID and newUniqueID. Any other fields are forbidden.
Qtip: The maximum allowed file size is 100 MB.
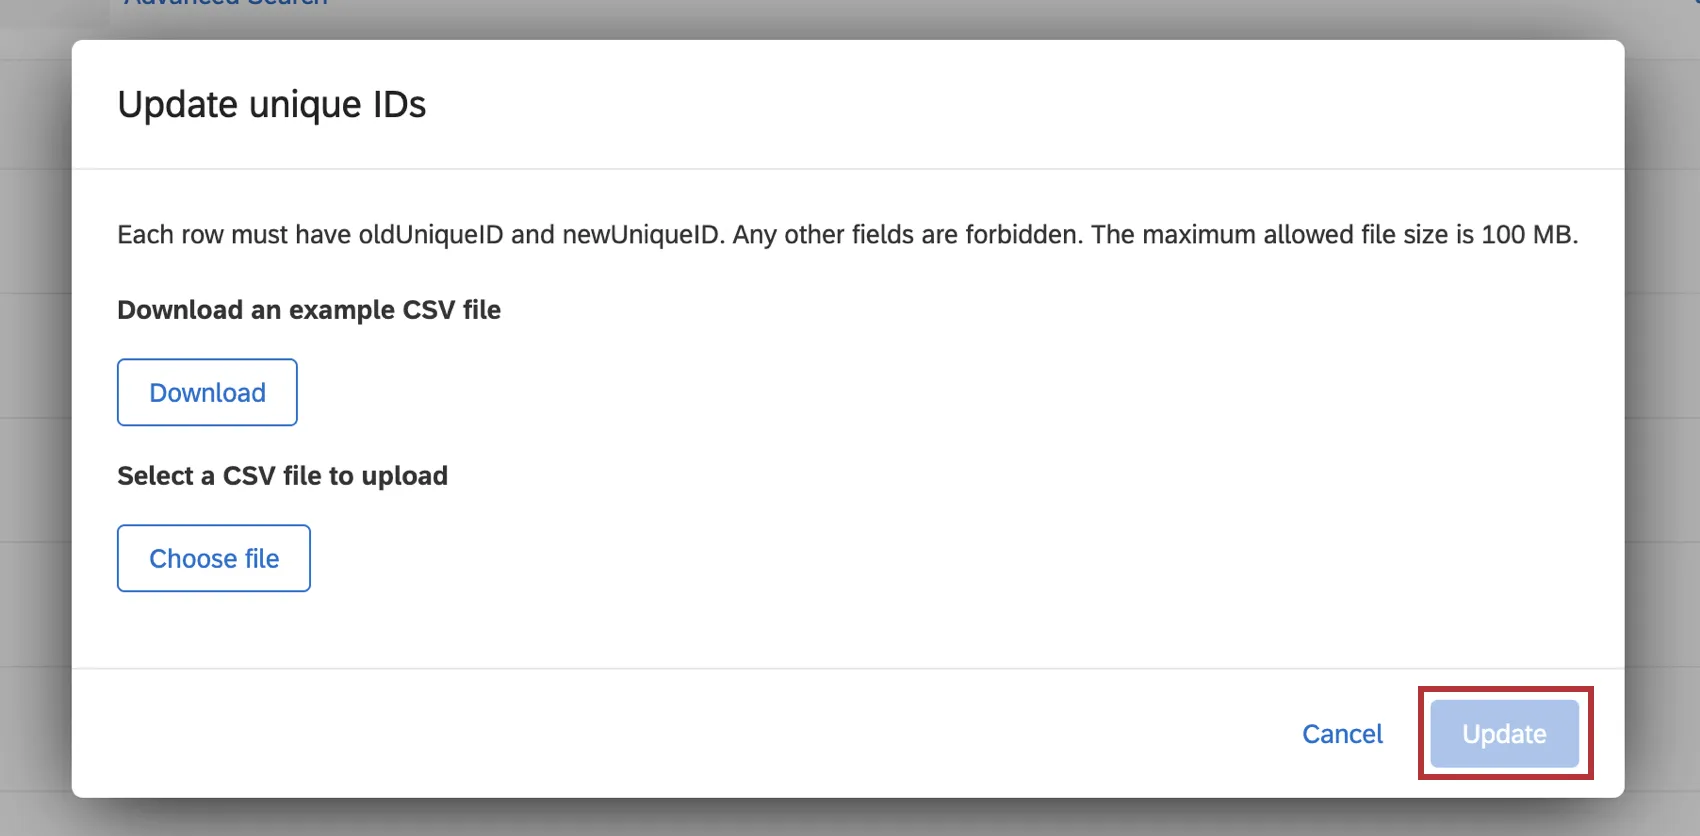
Once your file is uploaded click Update.
Automatically Uploading Users
You can automatically upload users to your CX directory on a regular schedule using workflows. Here are some resources we recommend checking out:
- Scheduled workflows
- Load Users into CX Directory task Qtip: This step also allows you to automatically update your hierarchy.
- Automatic role assignment
FAQs
Can I add just one user at a time to the User Admin tab?
Can I add just one user at a time to the User Admin tab?
How do I set the password for new dashboard users?
How do I set the password for new dashboard users?
When you upload users in bulk, are they automatically added to a role based on the criteria they meet?
When you upload users in bulk, are they automatically added to a role based on the criteria they meet?
If I uploaded a Qualtrics user in the Admin page first, will they be automatically added to my CX directory?
If I uploaded a Qualtrics user in the Admin page first, will they be automatically added to my CX directory?
In contrast, if you create a user through the User Admin page of a dashboard project, that user will be automatically added to your Admin page, too.
I uploaded Qualtrics users in the Admin page first. How do I link these users to CX dashboards?
I uploaded Qualtrics users in the Admin page first. How do I link these users to CX dashboards?
Can I automate changes to my CX org hierarchy?
Can I automate changes to my CX org hierarchy?
That's great! Thank you for your feedback!
Thank you for your feedback!