
Action Planning (CX)
What's on this page
About Action Planning
Action plans can be thought of as initiatives that must be completed in order for a company to reach its goals. They allow you to assign tasks and plan resolutions to some of your company’s biggest issues with customer experience. For example, if customers disagreed that your product met their needs, a larger-scale action plan could be to redesign that product.
There are several steps to action planning, most of which must be completed by a project administrator before launch:
- Configure which users have access to action planning.
- Enable action planning on a dashboard.
- Add custom fields for action planning.
- Create an action planning page in the dashboard, for reporting results.
Once action planning is enabled in the dashboard, dashboard users across the company can create action plans and mark their progress.
This page primarily focuses on the new and improved action planning. For a guide on the older v1 behavior, see the V1 Action Planning section.
Qtip: This page is referring to action planning in CX Dashboard projects only.
Qtip: Action planning is not available to all CX Dashboard users. If you are interested in this feature, talk to your Account Executive about whether or not you qualify.
Action Plan Users
This section discusses how to configure user permissions so that dashboard users have access to create and edit action plans.
Qtip: Action plan owners will always be able to edit the action plans for which they are the owner, even if they do not have action plan editing permissions.
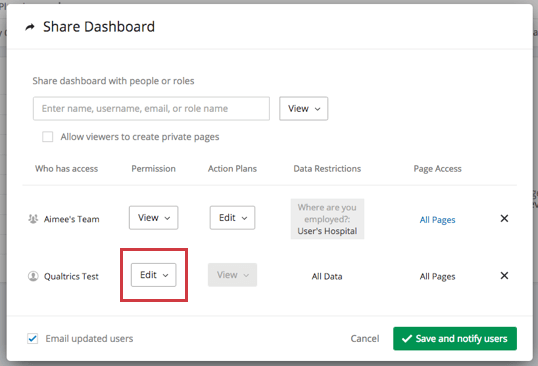
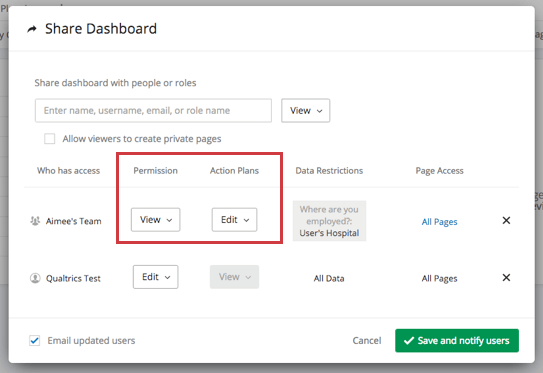
Allowing Users to Edit Action Plan Settings and the dashboard
This option allows a dashboard user to create and edit action plan settings, as well as the rest of the dashboard.

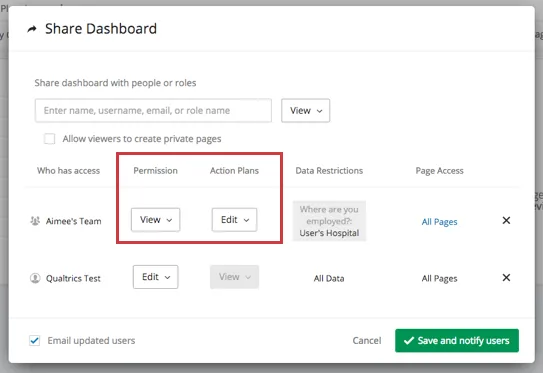
Allowing Users to Edit action plan settings, but no other dashboard content
This option allows a user who cannot edit the dashboard to edit the action plan settings.
Restricting the Data Included in Action Plan Pages
Before giving dashboard users access to create action plans, you may want to make sure your users are configured to only see action plan data that is relevant to them and their user permissions. This is controlled by the same means that you restrict access to other data in the dashboard. For example, if an employee is only required to see data that matches the metadata of the region they work in, they will see only regular dashboard data and action planning data for their particular region.
See the Dashboard Role Data Restrictions support page for more on how to set these restrictions up.
Qtip: When setting the data restrictions for users / roles, you will have the option to select from survey data fields and action planning fields. In some cases, survey data fields and action planning fields may have the same name and may need to be added twice, once for the survey and once for action plans.
Hiding All or Certain Pages of Action Plans from Dashboard Viewers
This option hides action plan reporting from people with only view or export access to the dashboard. If a user can edit the dashboard, you cannot restrict their page access.
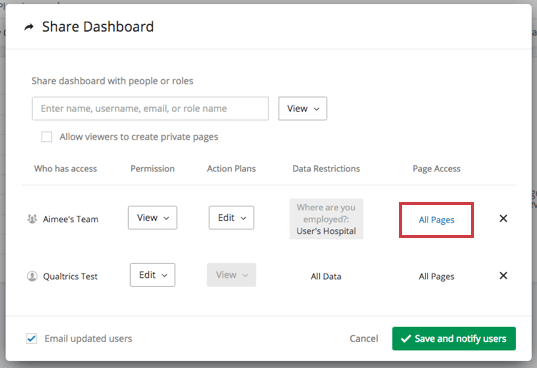
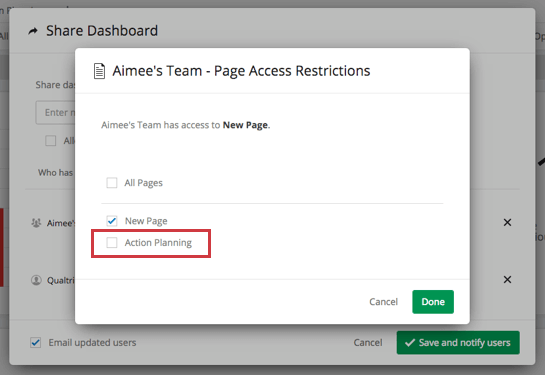
Qtip: If page level attribute data restrictions are in place, all action plans that do not have matching data will not be shown. Action plans must therefore be populated by the users with all data that is required to be filtered on.
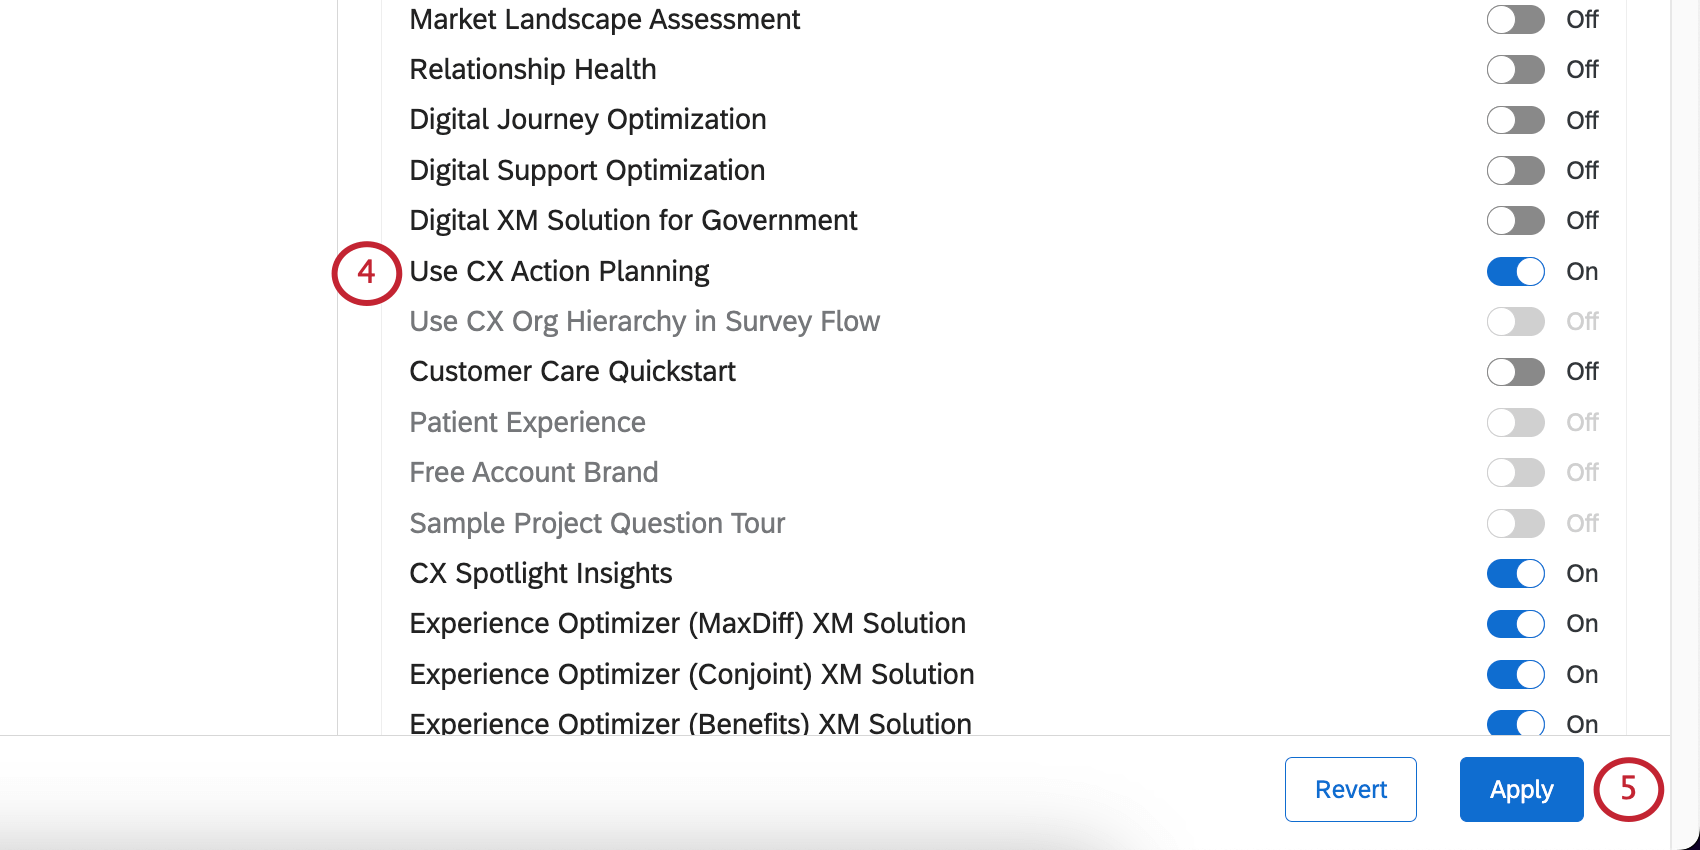
Division Permissions
Divisions can be created and edited by Brand Administrators, and are a way to control account permissions for many users at once. If you use divisions, then you need to enable the Use CX Action Planning division permission. Then you use the role or dashboard user-specific configurations described above to determine what level of access the user should have to action planning.
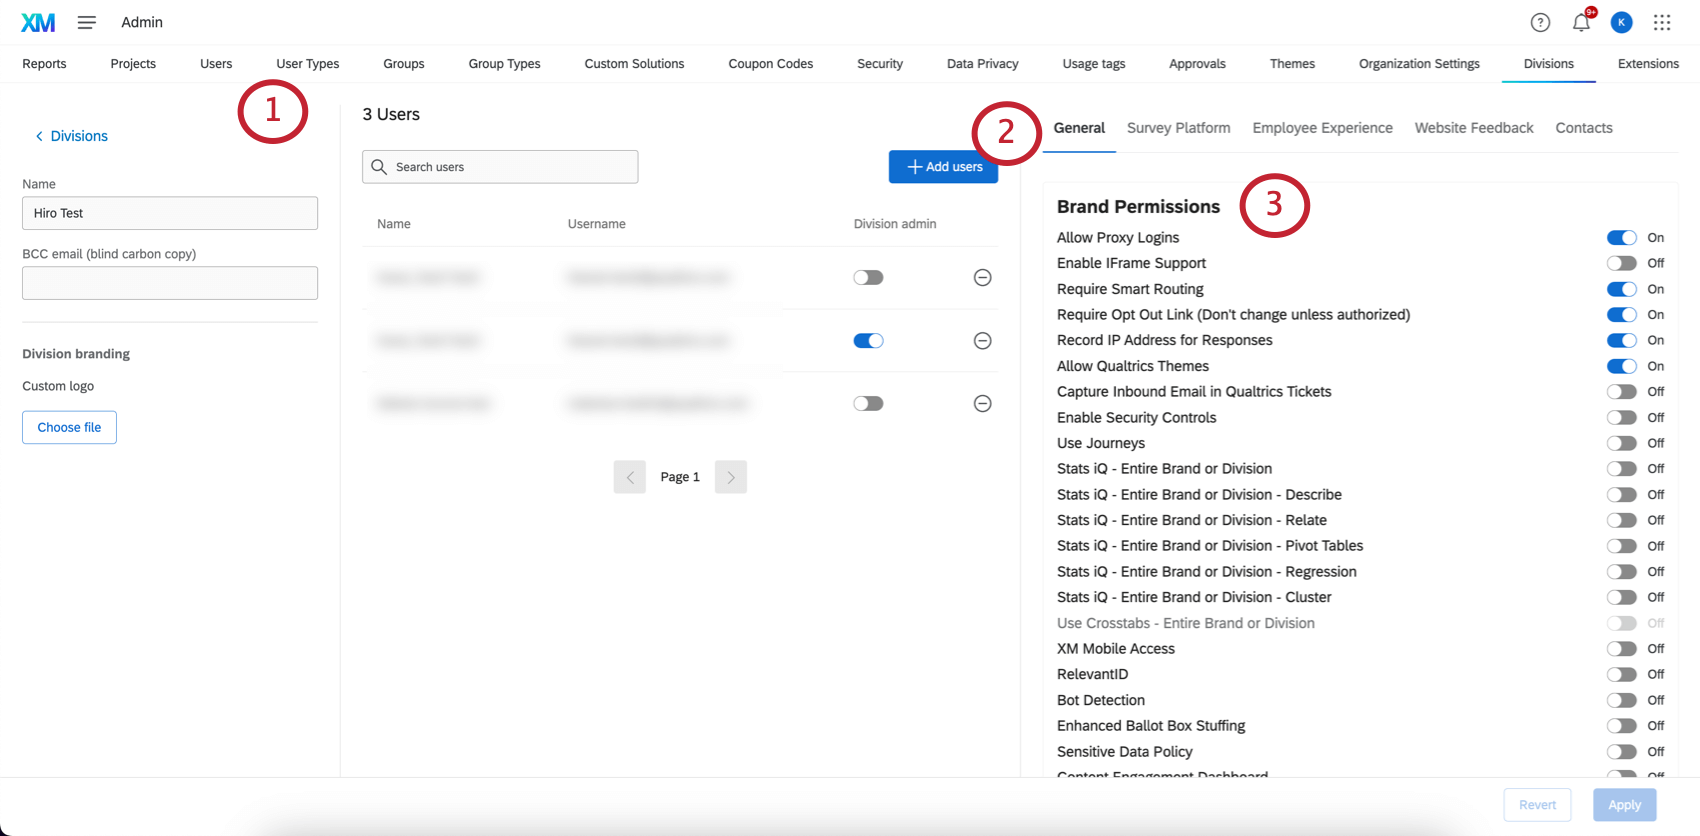
Qtip: There is no equivalent division permission for EX action planning.
Enabling Action Planning and Setting Custom Fields
Before you can start using action planning in your dashboard, you need to enable it. You can also configure additional fields that will appear when your users go to create action plans.
See the Action Plan Dashboard Settings page for more on how to enable action planning and customize these fields.
Creating Action Plans
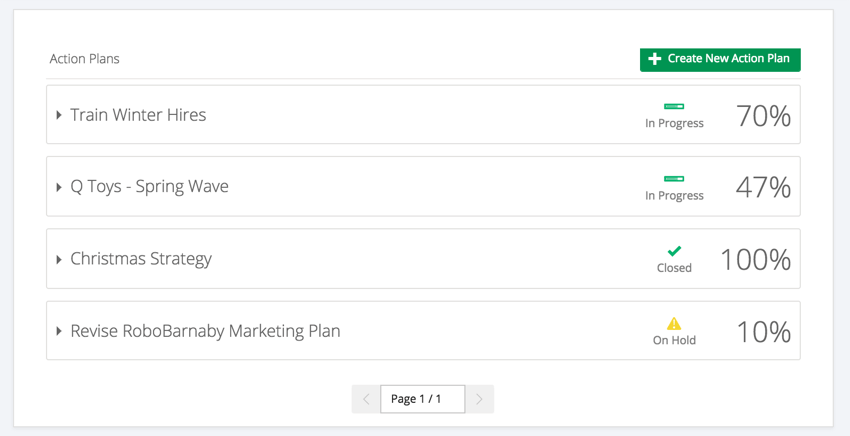
There are a few ways to create action plans, from both the action planning page itself and in focus area widgets. You can also add actions within a larger plan.
For more details, see the Creating Action Plans page.
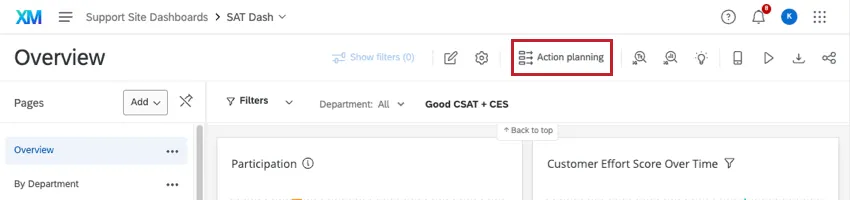
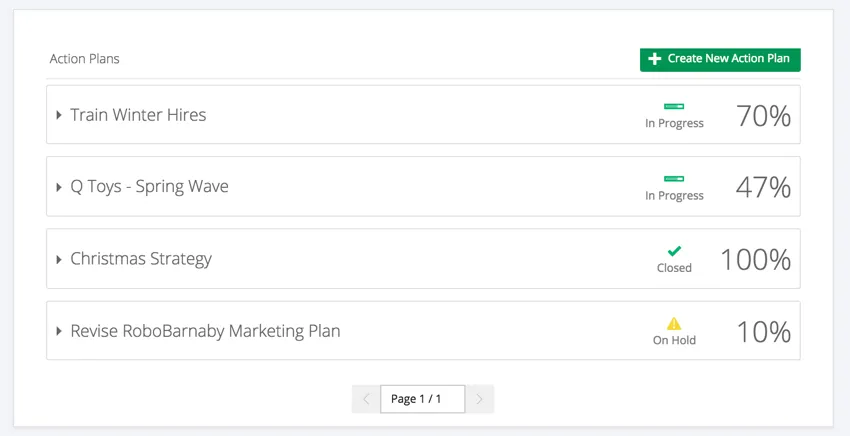
Viewing and Navigating Actions Plans
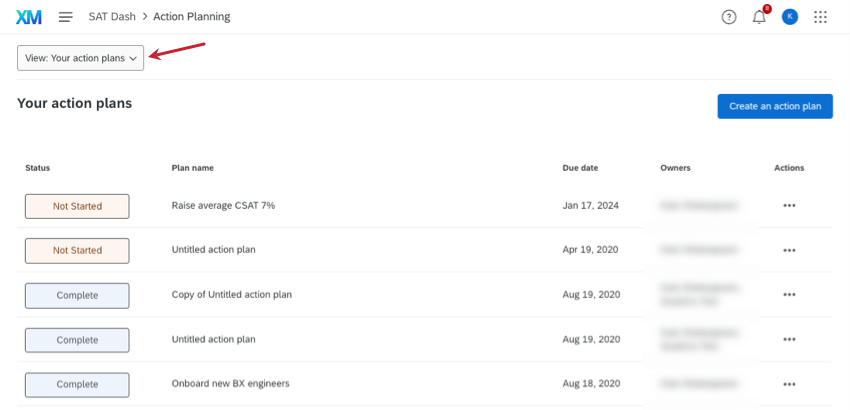
You can find your action plans by clicking the Action planning button.
Switch the View between all action plans you have access to and just the plans assigned to you by using the dropdown.

Filtering Action Plans
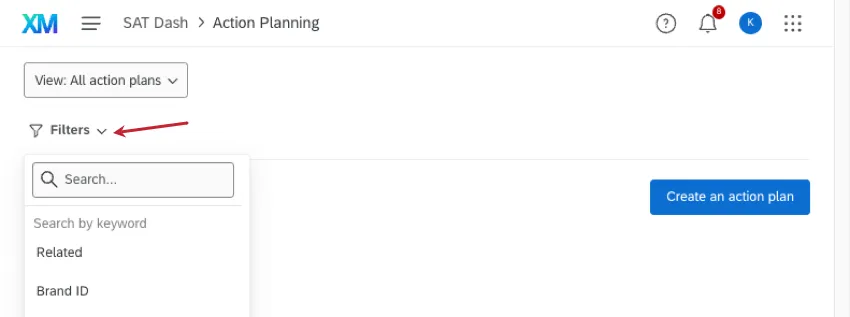
If you’re viewing all action plans, you can narrow down what’s displayed using a Filter. When filters are enabled, data restrictions set up on the dashboard are respected, and you can add additional filters using the fields we described below. When filters are disabled, data restrictions are not applied, and so you will just see all the action plans you’re the owner or creator of.
If you select a filter and cannot select criteria, that means there’s no values or only one value. For example, if you try to filter by status and cannot select a status, that may mean all action plans are “in progress” and thus there’s no other status you can narrow down by.
There is a limit of 10 filters at once. Filters cannot be locked or saved.
Qtip: Brand Administrators see all action plans in the dashboard, regardless of whether they are the owner or creator.
You can filter by a list of fields, including:
- The title of the action plan
- Due date
- Creation date
- Date last modified
- The action plan creator’s metadata
- The action plan owner’s metadata
- Comments
- The status of the action plan
- The percentage progress of the action plan
- Any additional fields included on every action plan
There are also filtering options for brand ID, which will be the same for all action plans, and for creator ID and fieldset ID, which are internal Qualtrics IDs.
All filters are multi-select. You cannot search using phrases or terms, and can only filter by selecting relevant values.
Exiting Action Plans
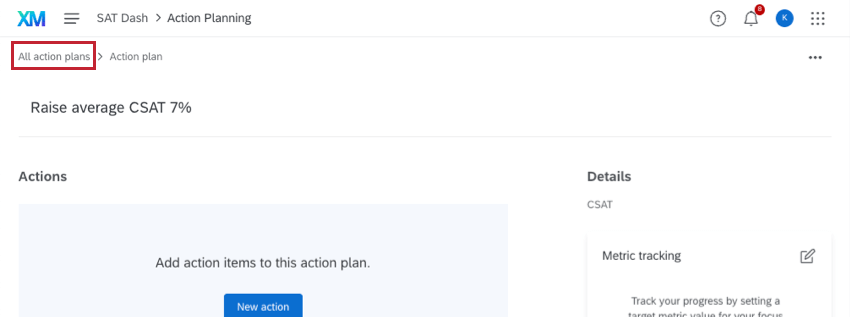
To exit an action plan, click All action plans in the upper-left.

To exit action planning, click the name in the global navigation to return to the dashboard.

Reporting on Action Plans
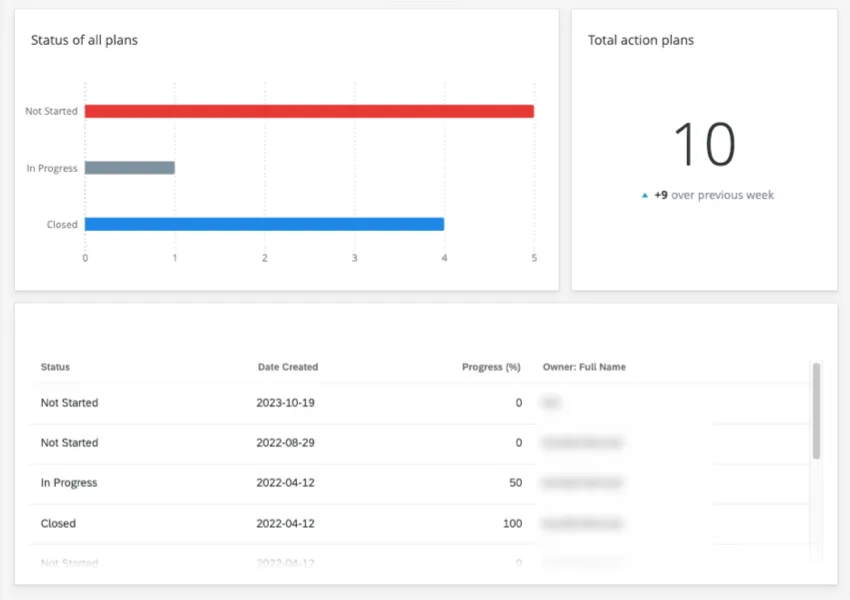
Once you and your dashboard users have created action plans, you can start reporting on their progress. For example, you can create a chart that breaks out according to the roles of people assigned action plans, or a table that shows the statuses of all action plans.
Qtip: Action planning data is required in advance of building widgets to report on. Test action plans can be created to do this and then deleted once the reporting widgets have been built.
Creating an Action Planning Page
Qtip: Action planning pages do not have access to other page features such as sharing, exporting, viewing data in Text iQ or Stats iQ, and accessing tickets. For access to these features, navigate to a non-action planning page.
Before you can start reporting the progress of your action plans, you will need to make an action planning page on your dashboard. See Creating CX Dashboard Pages, and make sure to select Action planning page.
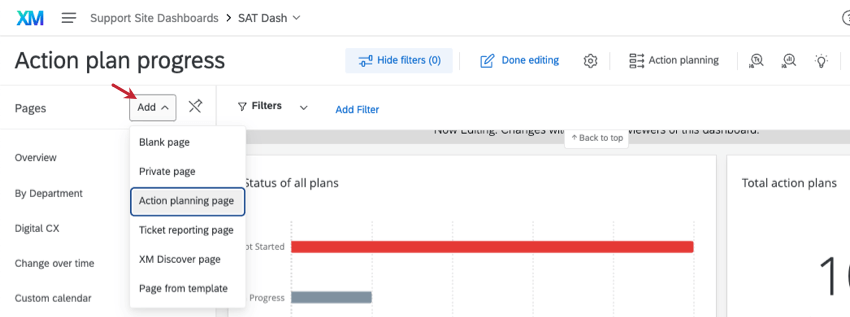

Once this page is created, you can start adding widgets and reporting out on your action plans! All the same widgets available on regular dashboard pages will be available on an action planning page. The only difference are the fields you’ll add to those widgets.
Action Planning Fields
When you start to customize widgets on your action planning page, you will notice that action plan-specific fields will appear in the list instead of the contents of your dashboard data.
Since action planning fields are not included in your dashboard data, they are automatically assigned field types for optimum reporting. Below, each field is listed by its type. For more on what field types mean and the widgets they are compatible with, see the Field Types support page.
Open Text:
- Comments: This field displays comments left on action plans.
Text Set / Multi-Answer Text Set:
- Owner IDs: Owner IDs are internal Qualtrics IDs assigned to the owners of action plans.
- Status: The status of the action plan. Statuses include Not Started, On Hold, In Progress, Closed, and Canceled.
Number Set:
- Progress: This is the exact percentage that the action plan is completed.
Date:
- Creation Date: The date the action plan was created.
- Due Date: This is the due date given the action plan.
- Last Modified: The date someone last edited the action plan. This includes status and percentage changes, but not the addition of comments.
Misc. Field Types:
- Action Plan Owner User Attributes: You will be able to select from a list of metadata for the people the action plans have been assigned to. For example, let’s say the metadata you uploaded with your users is Department, Start Date, and Office Location. You would see the options Action Plan Owner: Department, Action Plan Owner: Start Date, and Action Plan Owner: Office Location.
- Action Plan Creator User Attributes: You will be able to select from a list of metadata for the creator of the action plan. For example, let’s say the metadata you uploaded with your users is Department, Start Date, and Office Location. You would see the options Action Plan Creator: Department, Action Plan Creator: Start Date, and Action Plan Creator: Office Location.
- Field type of the metadata depends on how the original is mapped in the Project Mapper. Example: If Department is mapped as a Multi-Answer Text Set, then Action Plan Owner: Department and Action Plan Creator: Department will also be Multi-Answer Text Sets.

- Field type of the metadata depends on how the original is mapped in the Project Mapper.
- Action Plan Fields: The fields you set in your Action Plan Settings will also be available for reporting. For example, let’s say you create a field called “Responsible Departments” referring to departments who will need to be involved to resolve this action plan. You’d be able to report on this data by selecting “Responsible Departments” from the list of fields.
- Text fields are Open Text
- Dropdowns are Text Set, unless set to Multi-Answer Text Set
- Checkboxes are Text, unless set to Multi-Answer Text Set
- Dates are Date
Action Planning v1
This guide is only for users who do not have v2 action planning enabled. V1 action planning leans on the use of the old Action Planning Editor widget. It also does not allow you to create actions within plans.
Configuring Action Planning Users
This works the same as it does in v2. See Action Plan Users.
Configuring Action Plan Fields
There are some custom field types, such as drill down and data definition, that are only available in v1. For a guide to all other field types, see Adding Custom Fields to Action Plans.
Creating and Editing Action Plans
In order to create action plans, you first need to create an action planning page in the dashboard.

Then you need to add an Action Planning Editor widget to your action planning page. This widget allows dashboard users to create action plans based on survey results. This widget is required to create and edit action plans. The data captured in action plans can then be reported on in a separate action planning page. You can even use this widget to assign issues to members of the team best suited to the task.
Reporting on v1 Action Plans
Reporting on v1 is the same as reporting on new action plans. First you make an action planning page, and then you can report on your results.
That's great! Thank you for your feedback!
Thank you for your feedback!