
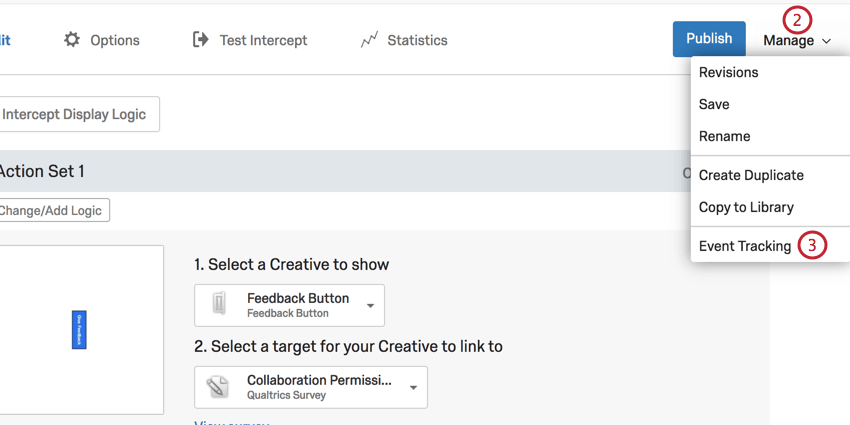
Adding Event Tracking & Triggering
What's on this page
Qtip: If you don’t have access to any of the features described on this page, reach out to your Account Executive. For more information about the differences between Digital Feedback and CustomerXM for Digital, see Digital Feedback vs. CustomerXM for Digital.
About Event Tracking & Triggering
With event tracking, your intercept will detect specific events on your website. Events might include visitor actions like downloading a monthly statement on a banking website, clicking to chat with a live agent on a commerce site, and more. Once captured, a record of these events is saved in a cookie on the participant’s browser so that this information can be used for Intercept logic or sent to your target website as embedded data.
In addition to this, when a visitor qualifies for your intercept, you can trigger events like editing, adding, or removing a cookie or Google Analytics event. You can set these events to happen when the creative loads, or when a visitor interacts with your creative in a specific way. This is known as event triggering.
Qtip: This page shows how to set up event tracking in a standalone intercept, but it can also be added to projects that use the guided setup.
Basic Event Tracking
If the elements on your website you’d like to track have HTML IDs, and if you are tracking clicks (as opposed to other events, such as hovering), you can quickly set up event tracking with no website modifications needed.
Example: On this website, we’d like to track visitors who click on the checkout button. Because the checkout button contains an HTML ID, Qualtrics can track this with no site modifications needed.

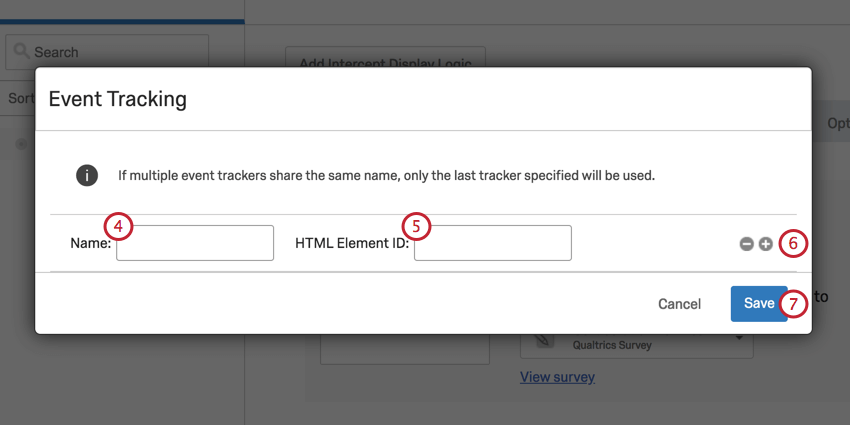
To set up basic event tracking
Qtip: If you’re using the project deployment code, events tracked by one Intercept can be accessed by another. There is no need to add the same event tracking to multiple intercepts.
Advanced Event Tracking
If you would like to track events on your website that do not involve a visitor clicking (e.g., hovering over an item), or if you would like to track interaction with elements that don’t have an HTML ID, you can manually add the event tracking code to these elements on your website. These added codes will allow Qualtrics to know when the event has taken place.
Attention: Advanced event tracking requires a basic knowledge of HTML and JavaScript, as well as access to modify your website’s source code. Unfortunately, Qualtrics Support cannot advise you on custom coding. You can always try asking our community of dedicated users instead.
To track an event on your website
<span>Chat with an agent.</span> <span onclick=”...”>Chat with an agent.</span> window._qsie = window._qsie || [];window._qsie.push('eventName'); <span onclick=”window._qsie = window._qsie || [];
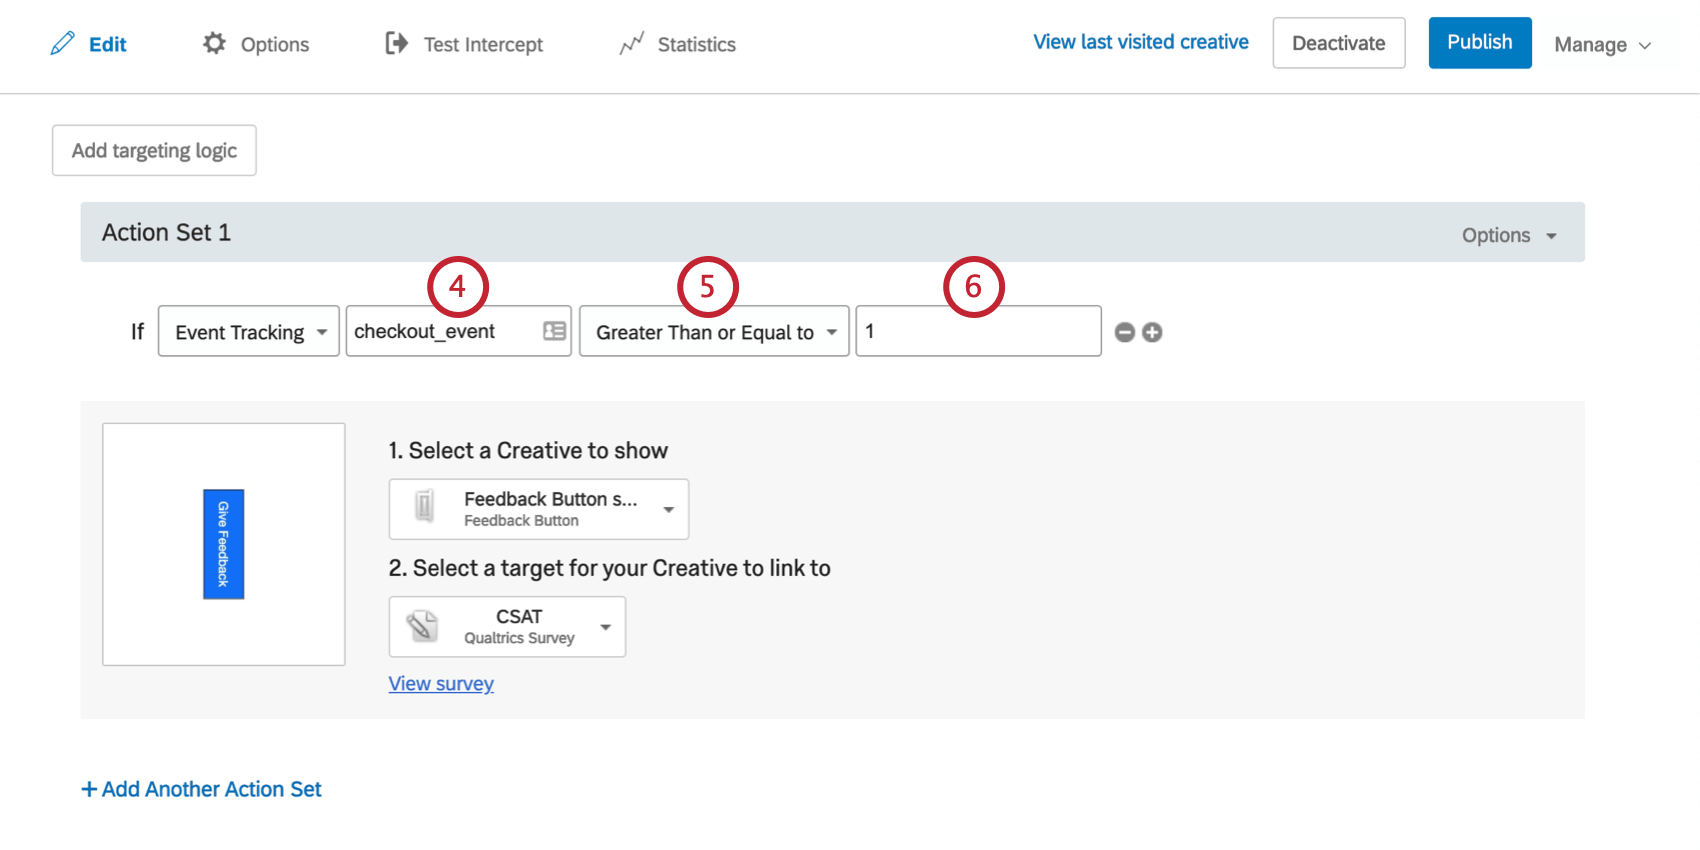
window._qsie.push('InitiatedChat');”>Chat with an agent.</span> Example: In the image above, the event is a chat being initiated on the website. The name of the event, as defined in step 4, is InitiatedChat. 1 is the value that indicates this act is not yet initiated, whereas anything above that indicates an action has taken place. So the condition reads, “If Event Tracking InitiatedChat is Greater Than 1,” the creative will display.
Using Tracked Events
Once you have set up event tracking, you can use these events in your targeting logic. You can also send event tracking information over to your target website or survey using Embedded Data.
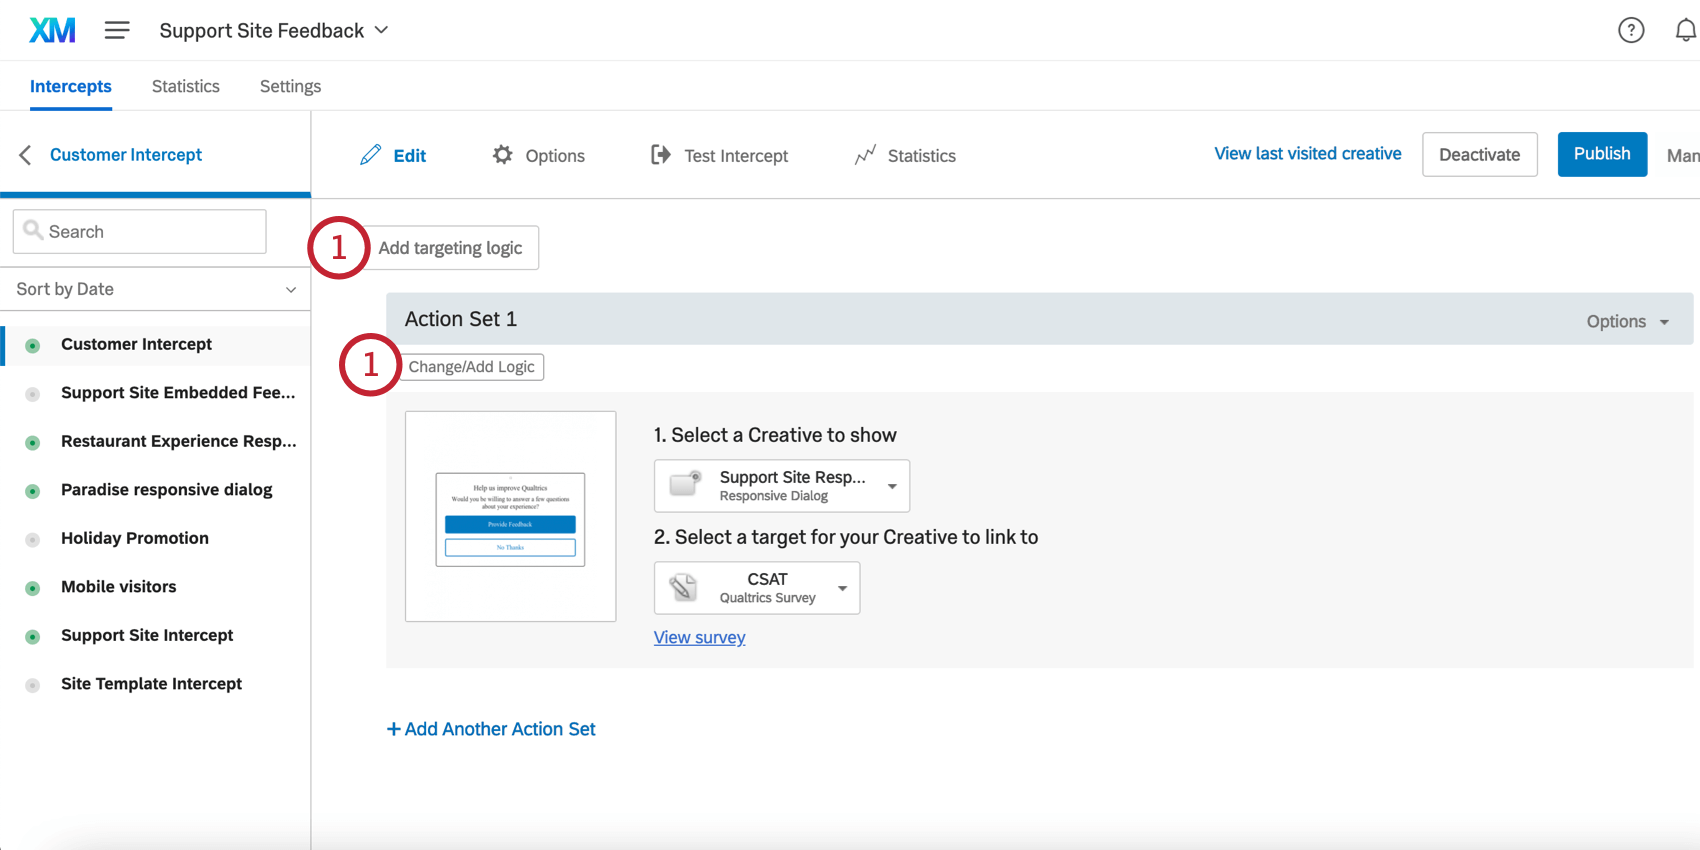
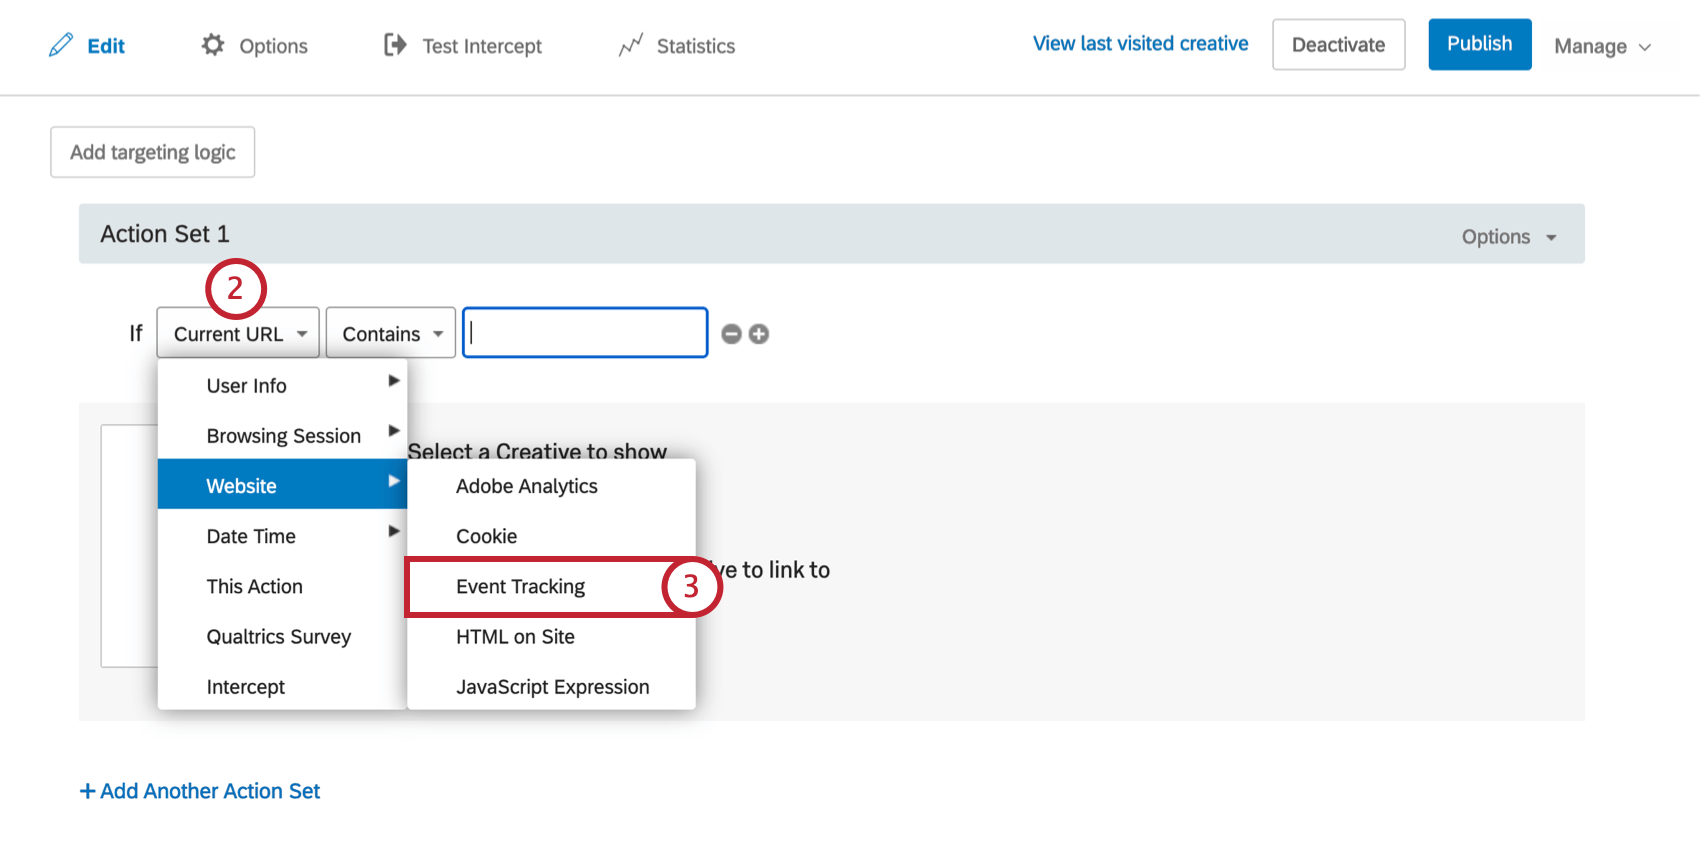
To add logic based off of an event
To save event information as Embedded Data
Event data can also be saved as embedded data, as described on the Embedded Data in Website Feedback page.
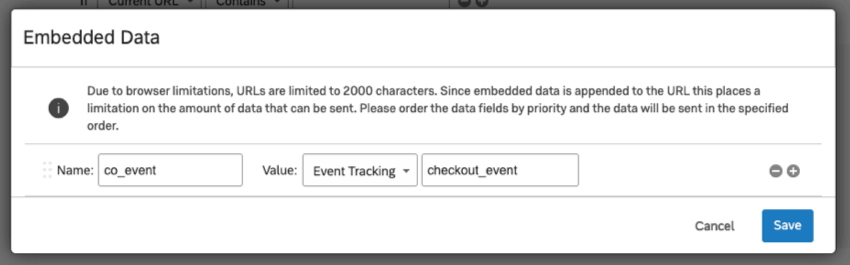
In the Name field on the left, you’ll enter the name of the embedded data field, which can be anything you like. You’ll then set the value to Event Tracking and enter the event name as it’s saved on your website.
The final embedded data value sent over to your target website will be the number of times the event occurred for that particular visitor.
Triggering an Event
There are two ways to trigger an event. The first is to trigger an event as soon as your creative is displayed to a website visitor. The second is to trigger an event as soon as a website visitor interacts with a specific element in your creative. The following sections outline how to accomplish both triggers.
To trigger events on creative display
Qtip: Learn more about these options in the Defining an Event section below
To trigger an event when a visitor interacts with a creative
Qtip: You may want to add the event to the target element to track individuals who click the target (see below), or to the Close button to track those who choose not to participate.
- On Click: The event will occur if the visitor clicks on this element of the Creative.
- Mouse Out: The event will occur if the visitor hovers their mouse over this element of the Creative and then moves their mouse away.
- Mouse In: This event will occur if the visitor hovers their mouse over this element of the Creative.
Defining an Event
Once you’ve selected how your event is triggered, you can choose exactly what the event will be. There are three types of events available: Remove Cookie, Add/Modify Cookie, or trigger a Google Analytics Event.
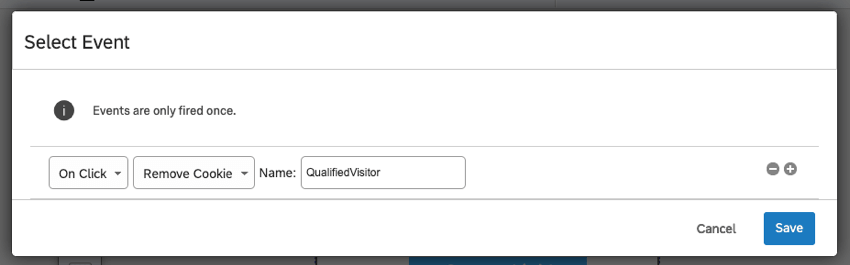
Remove Cookie
With the Remove Cookie event, the Name should be the name of the cookie being removed, as defined on your site. If the visitor qualifies for this event and if the cookie exists in the browser, then the cookie will be removed.
Example: Once a visitor has clicked to redeem a coupon, you could remove the cookie that indicates they are eligible for promotions.
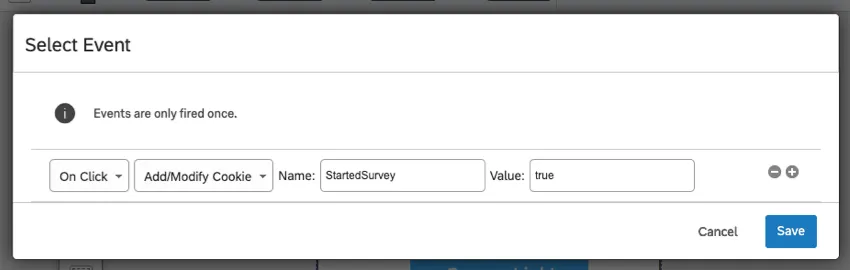
Add/Modify Cookie
With the Add/Modify event, a cookie will be added to the visitor’s browser. If the cookie already exists, then it will be modified. For this event, specify the name of the cookie you’d like to add/modify, and then specify the new value for that cookie.
Example: Once a visitor has clicked to take a survey, you could add a cookie flagging this visitor as someone ineligible for other campaigns.
Qtip: The cookie saved in this event is a browsing session cookie. These are temporary cookie files, which are erased when you close your browser.
Google Analytics Event
With a Google Analytics Event, Intercept interactions can be recorded and reported within Google Analytics. For this event, specify the account number for your Google Analytics Account, as well as a Category and Action name for this event. Refer to Google’s Event Tracking page for more information.

FAQs
Can I capture information from my website visitors in my intercept's survey? How?
Can I capture information from my website visitors in my intercept's survey? How?
Aside from simply setting a static value that you want carried into the survey, the embedded data menu also comes pre-built with other options that can be carried into the survey. For example, you will be able to automatically capture the ID of both the intercept and creative shown, the URL of the page that displayed the intercept, the person‘s site history, or even how much time was spent on the site. You will even be able to capture information from a cookie that appears on that person‘s web browser or you can write a JavaScript expression that captures a particular variable that you are interested in.
If you are running a survey in Qualtrics, then you can also add the embedded data in the Survey Flow to save this information to the survey response.
How are tracked events stored?
How are tracked events stored?
That's great! Thank you for your feedback!
Thank you for your feedback!