
Website / App Insights for Employee Experience
What's on this page
About Website / App Insights for Employee Experience
Website Insights projects allow you to deploy intercepts on your internal company sites so you can gather targeted Employee Experience data. Depending on your preference, employees can provide feedback anonymously or not. Central dashboards can provide you with an overview of ratings over time and open-text comment analysis.
To run a digital employee feedback program, you’ll need to complete a few steps:
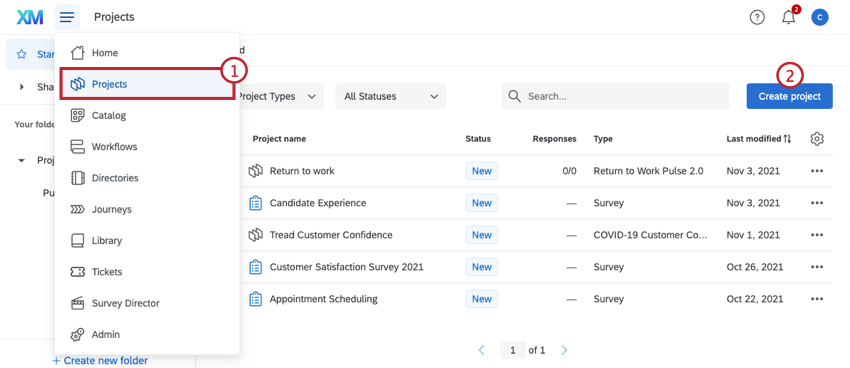
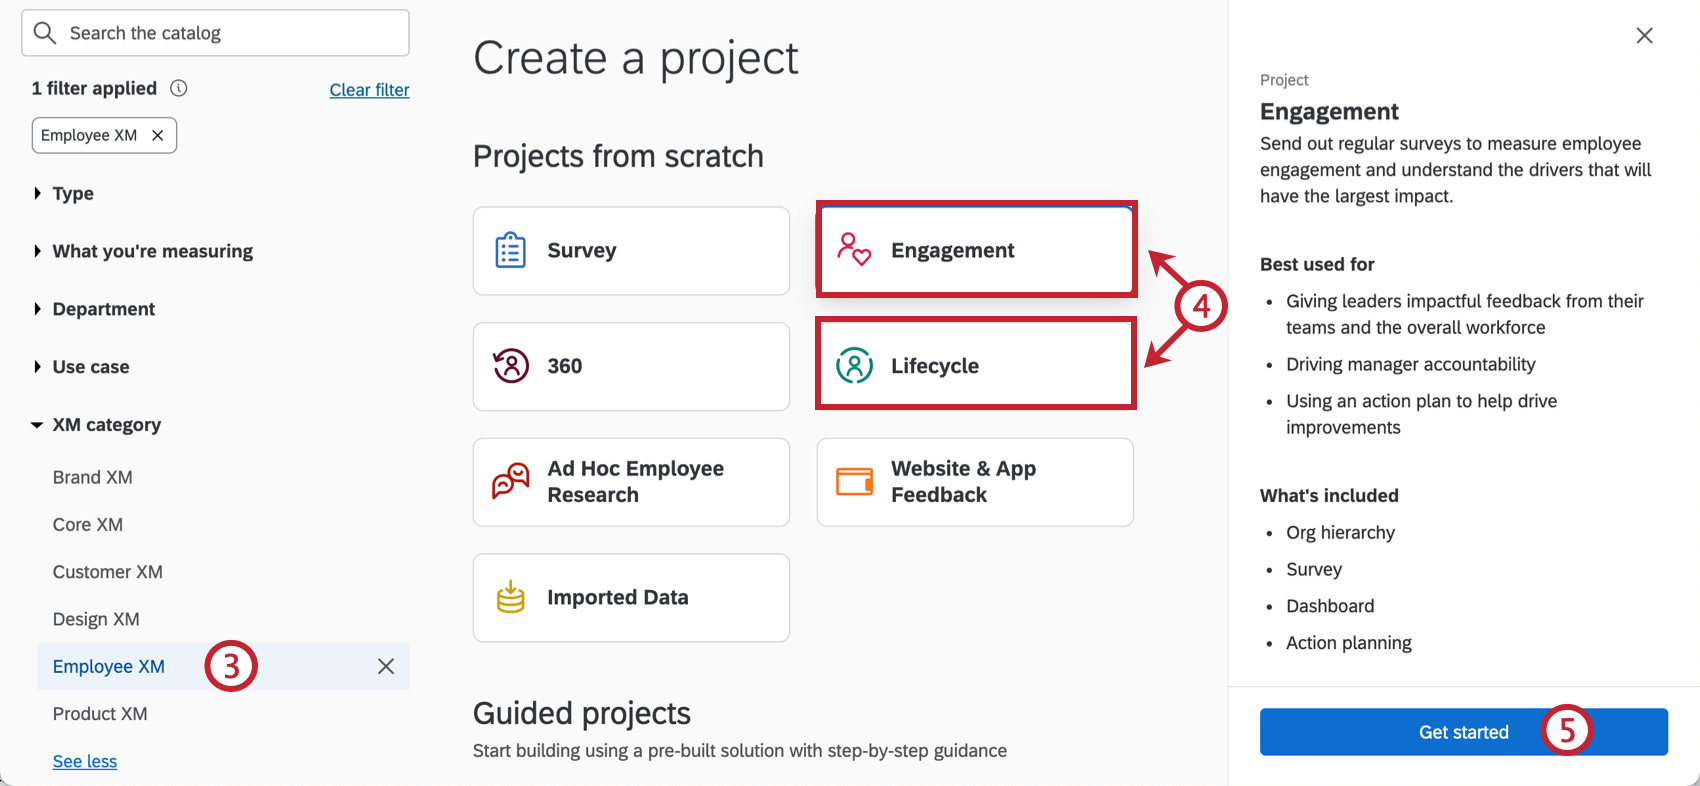
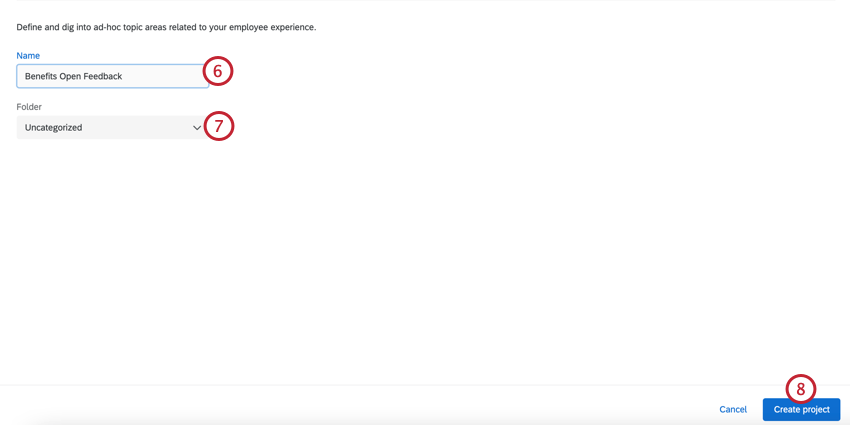
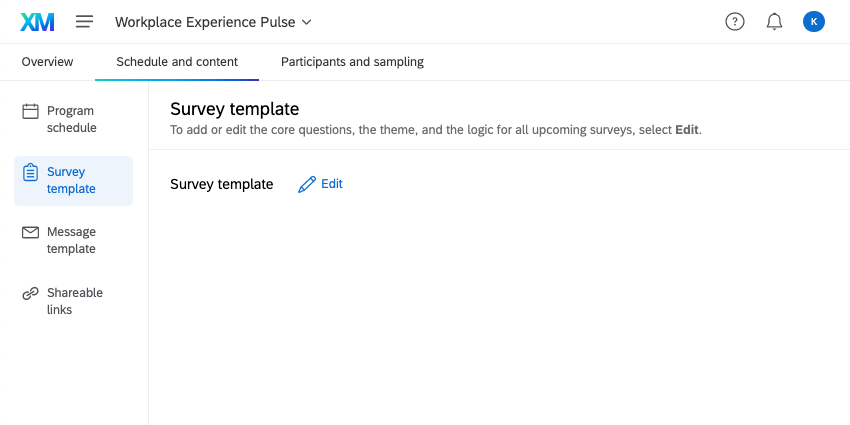
Setting Up the Feedback Survey
The first step to getting started is to create a feedback survey for your use case. You will use this survey to collect the employee data on your internal site. For Website / App Insights for Employee Experience, we recommend using either Engagement, Lifecycle, or Candidate Experience surveys depending on your specific needs. However, you can use any employee experience project type that you’d like.
Qtip: Pulse programs are compatible with Website Insights, but require unique setup steps. See Using Pulse Programs with Website Insights.
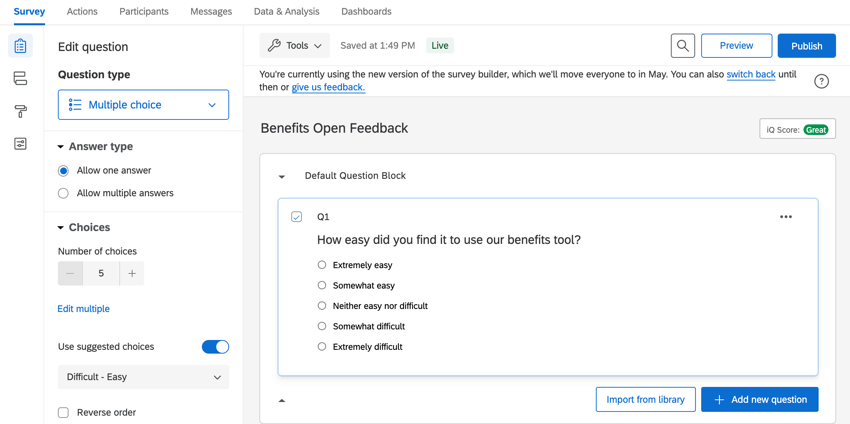
Generally, there should be fewer questions in this survey than you would include in a regular employee survey. We recommend sticking to scaled Multiple Choice or Text Entry questions.
Qtip: For question-building guides, see Creating Questions, Formatting Questions, and Formatting Answer Choices.
Getting a Survey Link and Setting Up Participants
Qtip: Some project types do not have hierarchies. See Types of Employee Experience Projects for more information.
Unlike most employee surveys, this survey will not be distributed through email, but through links and creatives on a website. As a result, we recommend you configure the survey as described in the following sections.
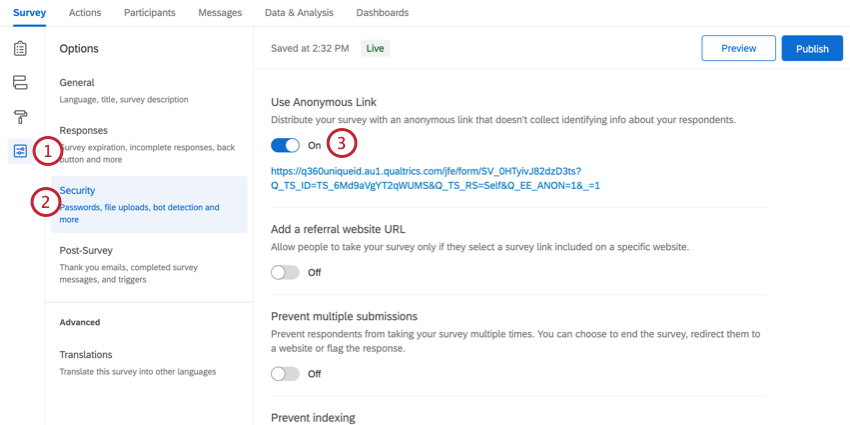
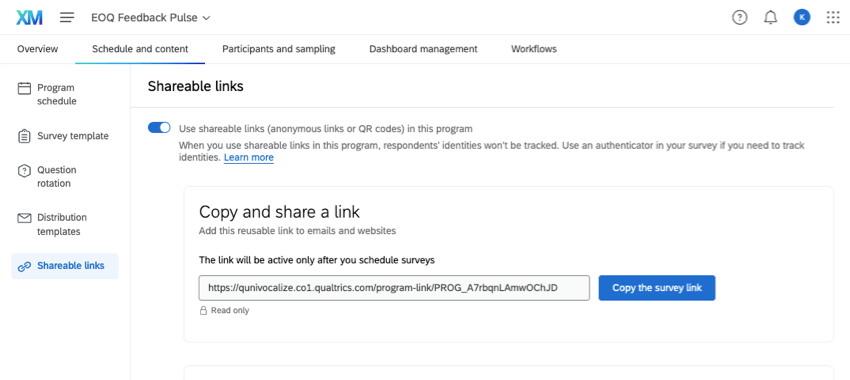
Anonymous Link Distribution
Distribute using the anonymous link. This is useful in cases where you explicitly want an anonymous listening post for employee feedback on your intranet portals.
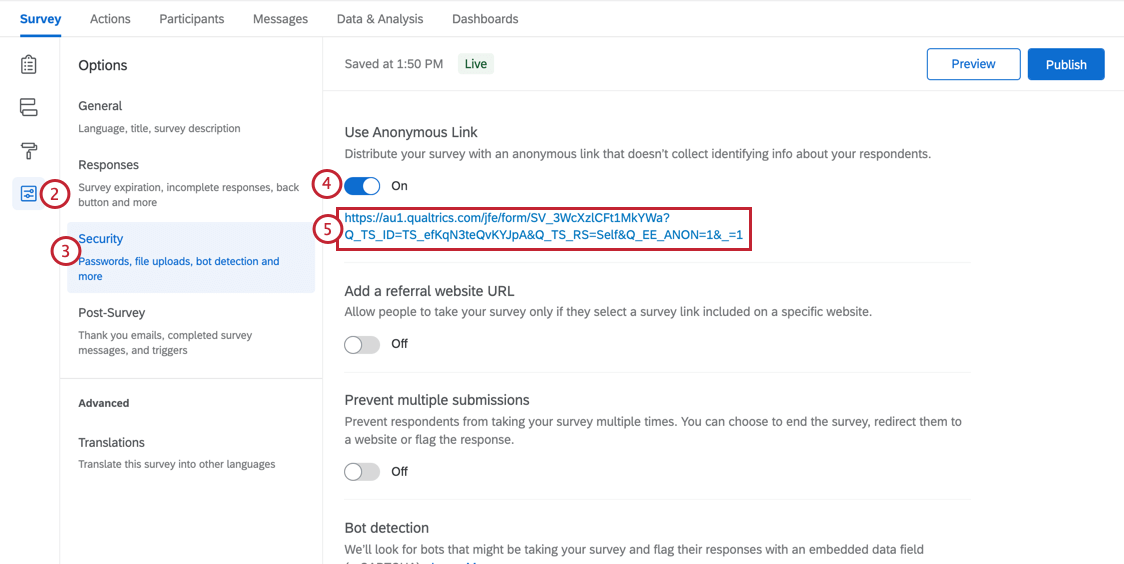
Qtip: You can capture embedded data that may be available from your employee portal such as user’s location etc. See Embedded Data in Website Feedback for more.
Qtip: Respondents can respond more than once using anonymous links, unless you add an authenticator.
Associating Responses with Employees
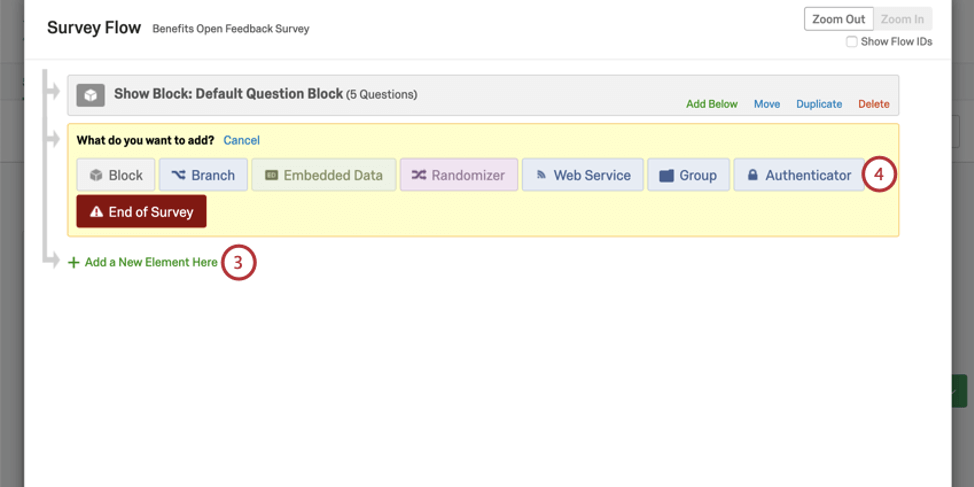
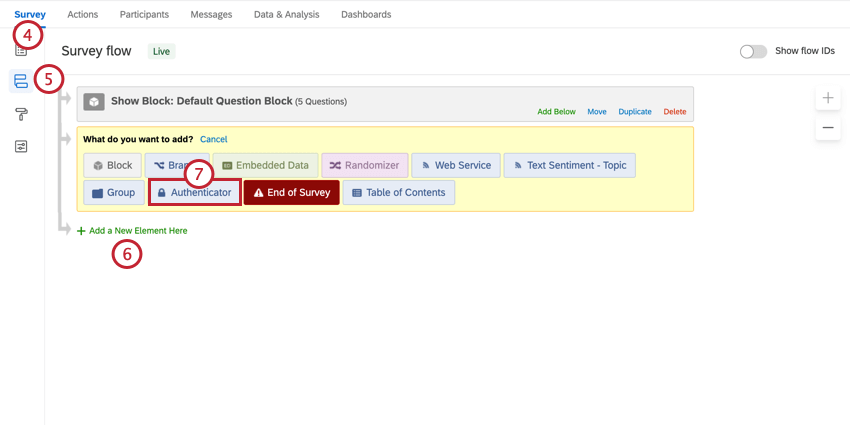
Just because you are distributing with the “anonymous link” doesn’t mean your data has to be anonymous. If you use an authenticator, you can link each response to a specific employee.
Authenticators require end-users to confirm their identity before they can take the survey. With this, you can capture employee information that is associated with their participant record within the project.
Qtip: When a survey has an authenticator, employees can only respond once.
Authenticators for Brands with SSO
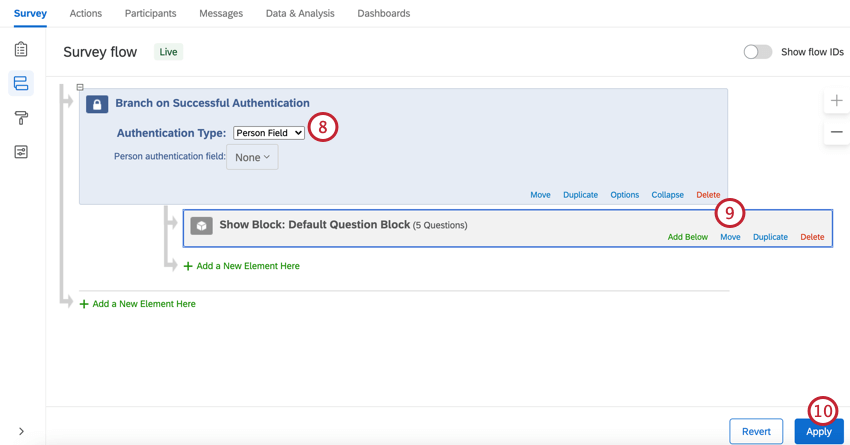
If your brand has SSO, all you need to do is add an authenticator to your project’s survey flow, and make sure it’s configured for SSO.

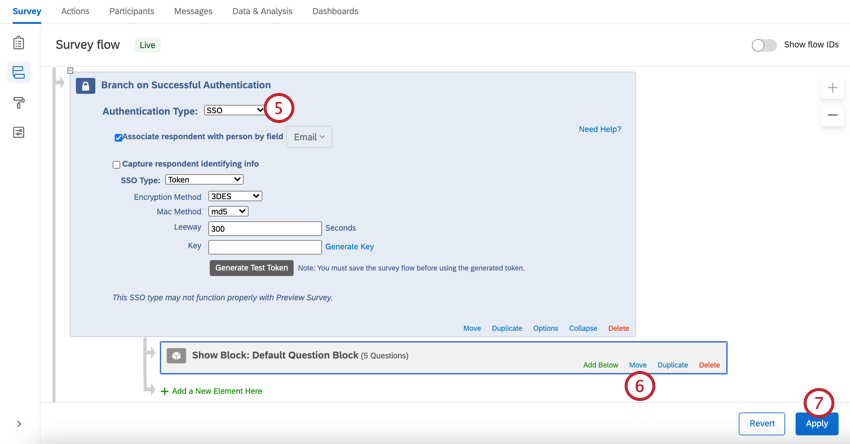
Attention: Your SSO provider might not support its authentication protocol being iframed.
Authenticators for Brands without SSO
If you are using an authenticator in a brand without SSO enabled, you’ll need to upload participants before configuring your authenticator.
Qtip: Only pay attention to the fields described in the first section of this page, and any additional employee information (metadata) that would benefit you in this research. Do not worry about hierarchy fields, such as Manager ID or Level, unless this information would benefit this research.
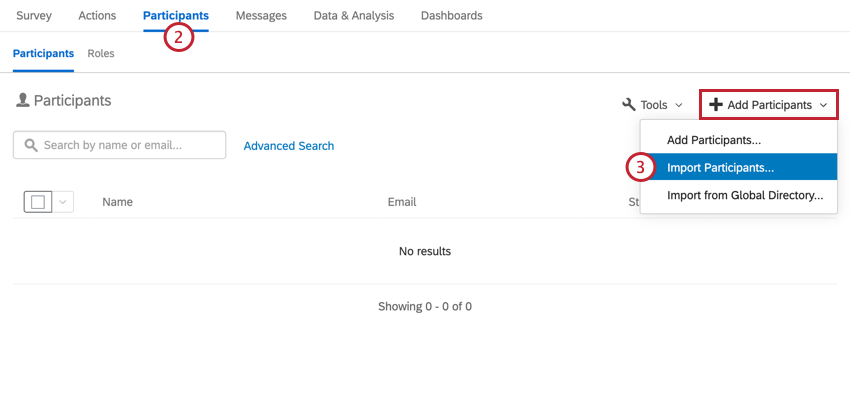
Qtip: Are all your participants already uploaded to the employee directory in Qualtrics? Instead of preparing and uploading a file, try importing participants from the global employee directory.
Configuring Dashboards
When you’re ready, you can configure dashboards that report on this employee feedback. See Reporting on your Employee Engagement Project Results and Dashboards Basic Overview for an introduction. We also have pages that dive deeper into widgets, filtering, field mapping, and more.
Deciding How Visitors are Prompted for Feedback
“Creatives” are the many ways a Website Feedback project can appear to the website visitor. This includes buttons, tabs, pop-ups, iframes that slide out from the side of a page, and more. There are a few Creatives that are especially suited to digital employee experience programs:
Example: A feedback button on an Employee Benefits site can constantly collect employee feedback on benefits.
Example: A feedback tab on the home-page of the employee portal can serve as an employee suggestion box or feedback post.
Configuring the Website Feedback Project
The Website Feedback project is where you configure the intercept that will go on your site.
Qtip: Depending on the website information you plan to capture from employees, don’t forget to add Embedded Data to the Survey Flow of your project.
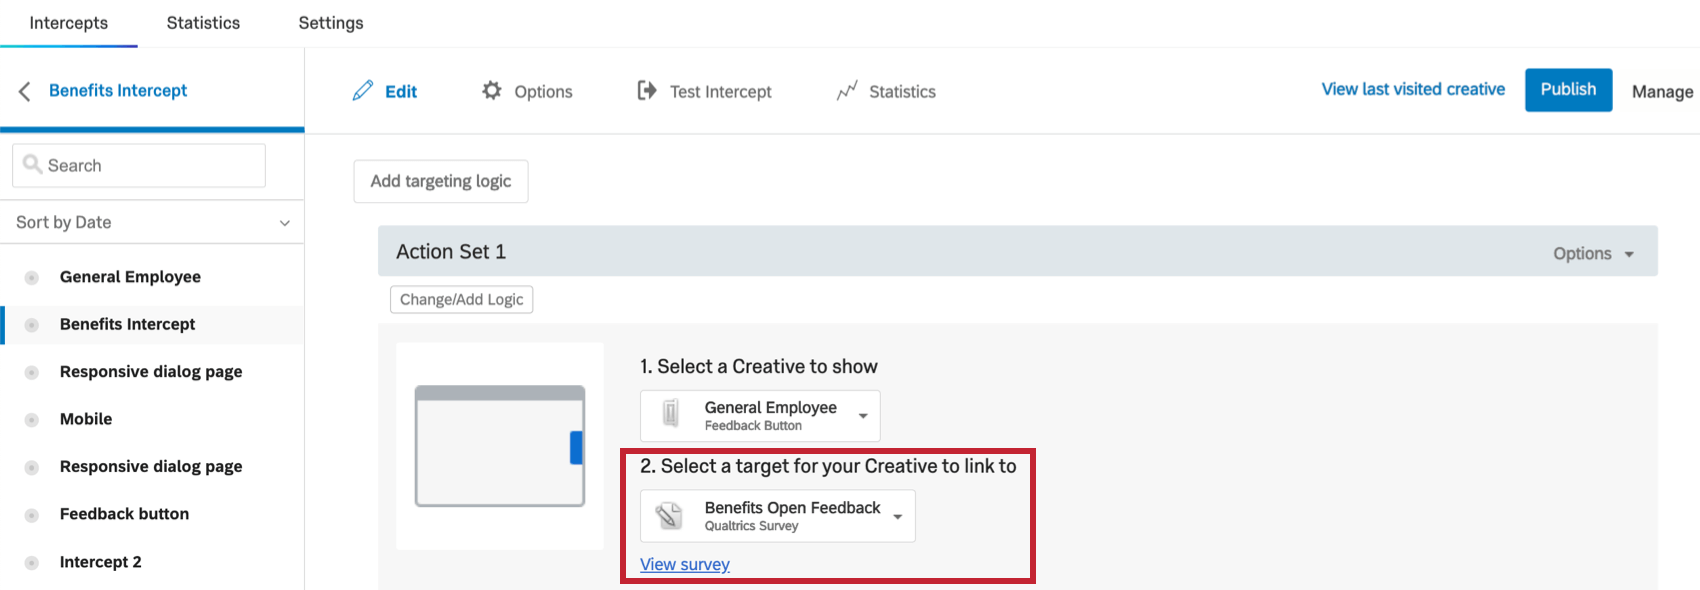
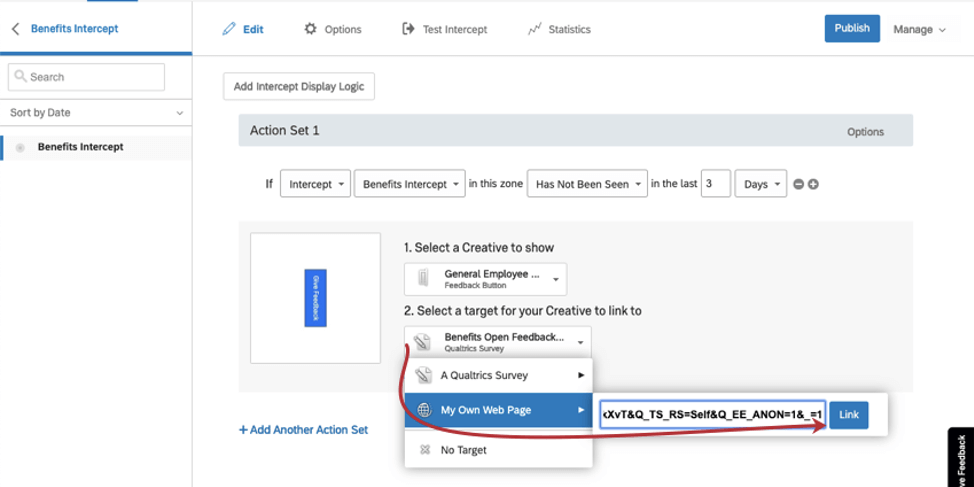
Surveys with authenticators
If your survey has an authenticator on it, then the steps to add a target to your Website Feedback Intercept will be a little different.
Qtip: If you’re using an authenticator, this option should already be enabled and saved!
Testing and Deploying Intercepts to your Employee Web Portals
Once you have created and configured your intercepts, you will need to test them. See Testing Intercepts. Make sure your intercepts look and behave exactly as you want them to.
When you are ready, your intercepts can be deployed to your Employee Intranet web sites. See Activating, Publishing, and Managing Intercepts for what you need to do on your end, and see Deployment and Technical Documentation for what your web development or IT team will need.
Attention: You will need to engage with the teams (typically IT or web development) that can deploy JavaScript code snippets to your employee intranet pages.
Using Pulse Programs with Website Insights
Pulse programs can be used with Website Insights. However, there are some important setup steps to consider that are unique to pulses.
That's great! Thank you for your feedback!
Thank you for your feedback!