
Merge Task
What's on this page
About the Merge Task
Qtip: You must have access to Imported Data Projects to use this feature.
With the merge task, you can combine data from multiple datasets into a single merged dataset. This allows you to view data from multiple sources in 1 convenient place, and gives you the ability to build dashboards and analyze results across data sources.
Data can be merged from up to 3 sources at the same time. The merging of data is referred to as a join. When setting up a merge task, refer to the task limits for information on the limitations that apply to your datasets.
Qtip: For information on general limits that apply to ETL workflows, see Workflow Limits. For any task-specific limits, refer to the information on this page.
Attention: This task can not be run more than 1 time per day. Test runs with less than 200 rows can be run up to 25 times per day.
Attention: For privacy reasons, EX Surveys cannot be used in the merge task.
Available Joining Methods
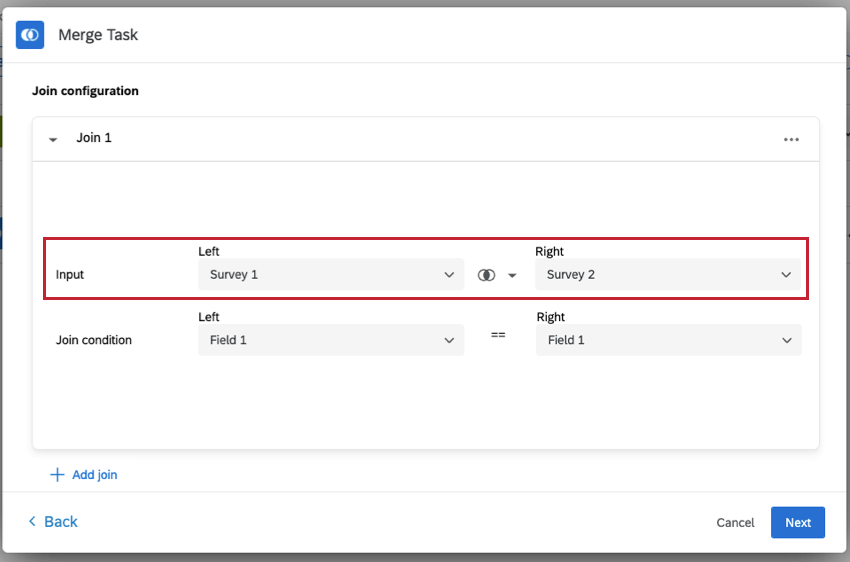
Before selecting a join method, decide which survey will be the “left input” and which survey will be the “right input”. This will be important when you decide which join operation to use.
Attention: This example shows how to join data from 2 different surveys.
Qtip: If you are using an “inner” join it does not matter which survey is the left input and which is the right input.

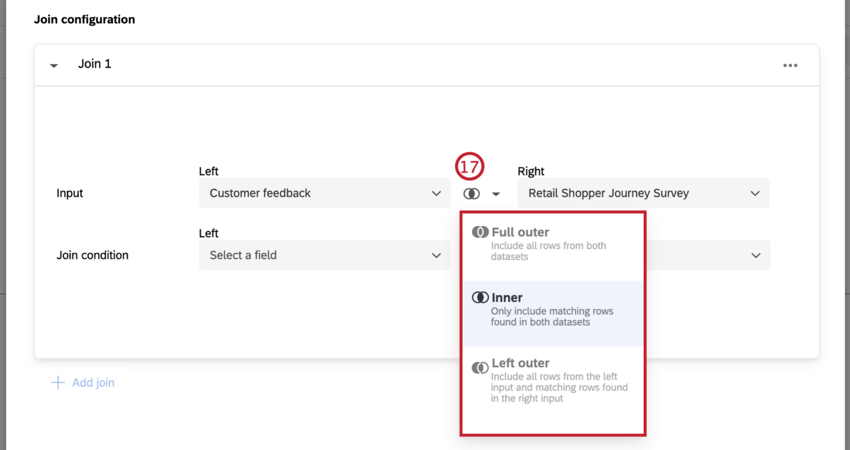
Once you have set your left and right inputs, there are 3 join options to create the merged dataset:
- Inner: The merged dataset will only include matching rows found in both datasets.
- Left outer: The merged dataset will include all rows from the left input and matching rows found in the right input.
- Right outer: The merged dataset will include all rows from the right input and matching rows found in the left input.
Attention: Only the above join types are currently available. Reach out to Account Services if you are interested in using a full outer join.
Qtip: All joins happen simultaneously. If you are joining 3 surveys, they will all be merged at the same time, instead of joining 2 surveys and then joining the resulting dataset with the third survey.
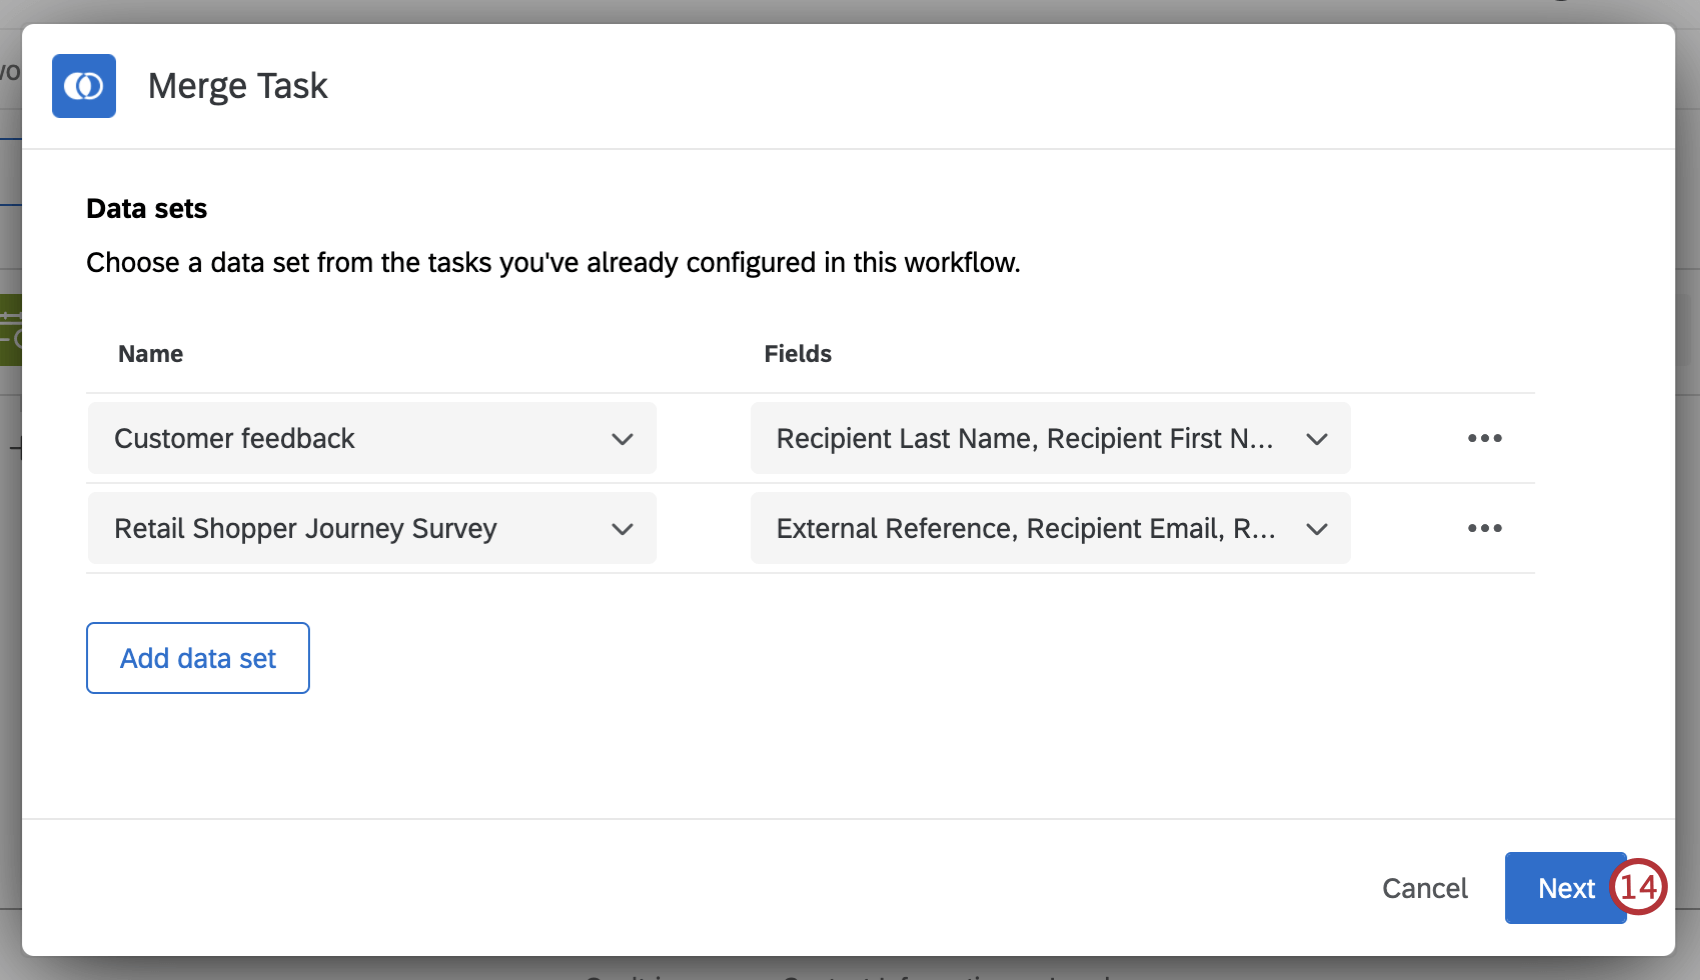
Setting Up a Merge Task
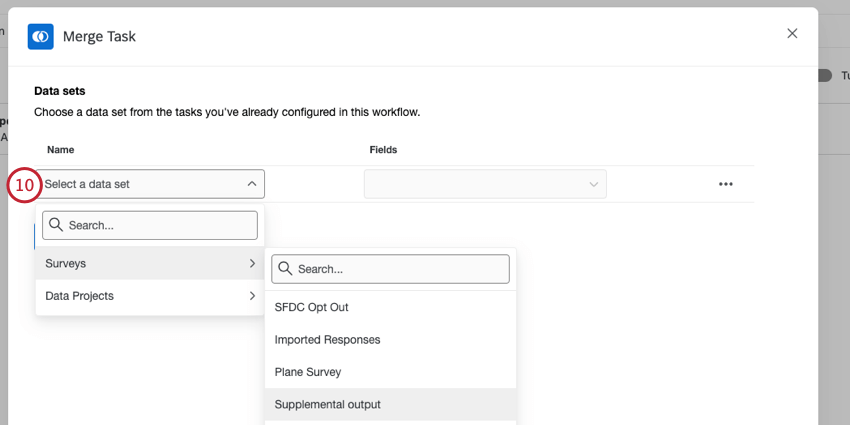
Once you have at least 2 datasets you want to merge, you can begin setting up your merge task.
Qtip: Edited responses cannot be used in the merge task. Any edited responses in your datasets will not show up within the task.

Qtip: To remove a dataset from the merge task, click the 3 horizontal dots to the right of the dataset.
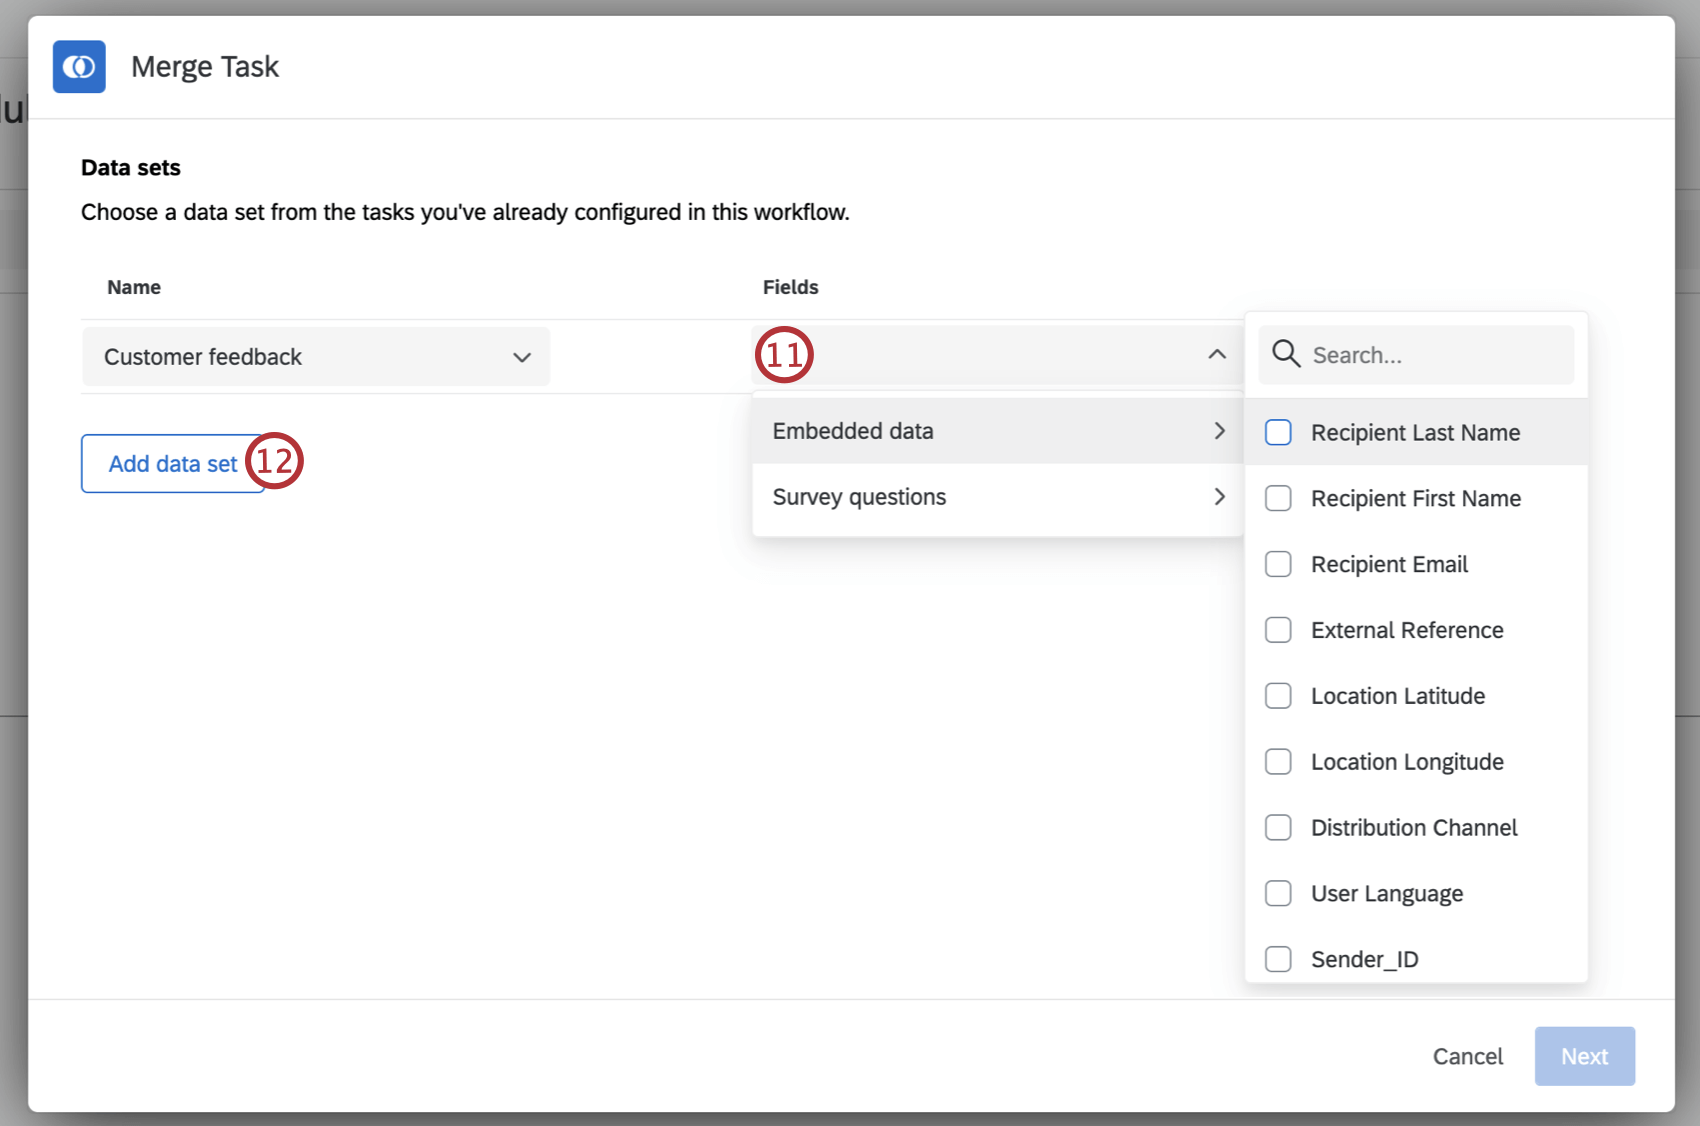
Qtip: The maximum number of fields in the resulting dataset is 500. If your combined sources have more than 500 fields, only the first 500 will be selected.
Attention: Fields that start with an underscore (_) will not be available for selection.
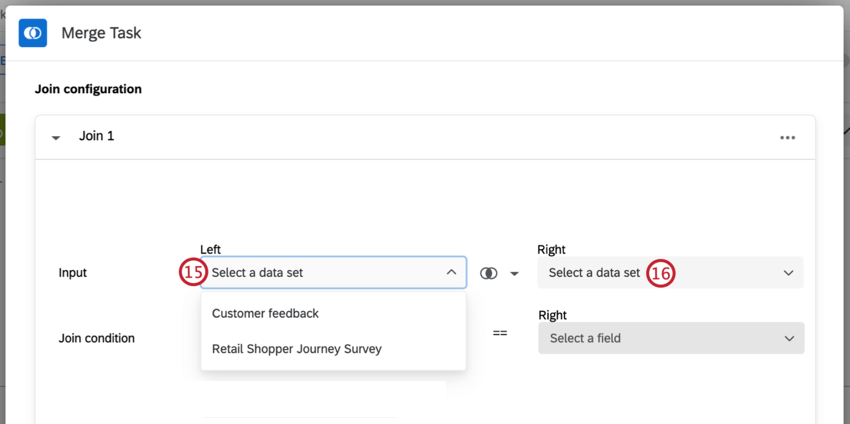

Qtip: When you join multiple datasets, you can only join them on 1 field.
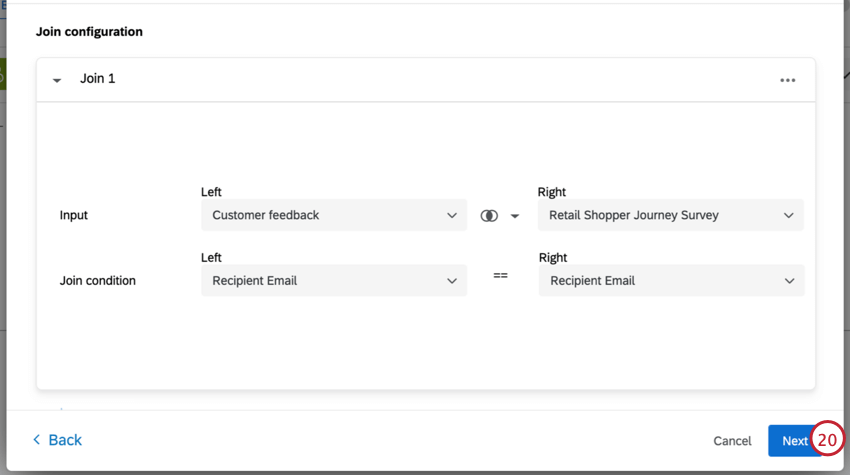
Attention: If you are merging 3 datasets, you will need to click Add join and repeat steps 15-19, selecting Join 1 as the left dataset and your third dataset on the right.
Qtip: To delete a join, click the 3 horizontal dots and select Delete.
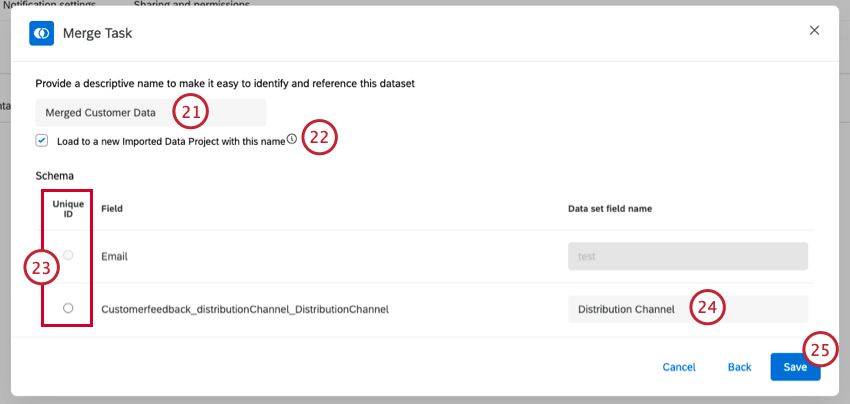
Attention: If you leave the box unchecked, you will need to create a load into a data project task in your workflow. Within this task, you can select an existing imported data project to be the destination for your merged dataset.
Attention: Unique IDs must be a string. Non-string fields cannot be selected.
Qtip: Survey choices cannot be used as a Unique ID because they are not unique.
Attention: Fields cannot start with an underscore (_). Any field that starts with an underscore will be filtered out of your merged dataset.
Execution Results
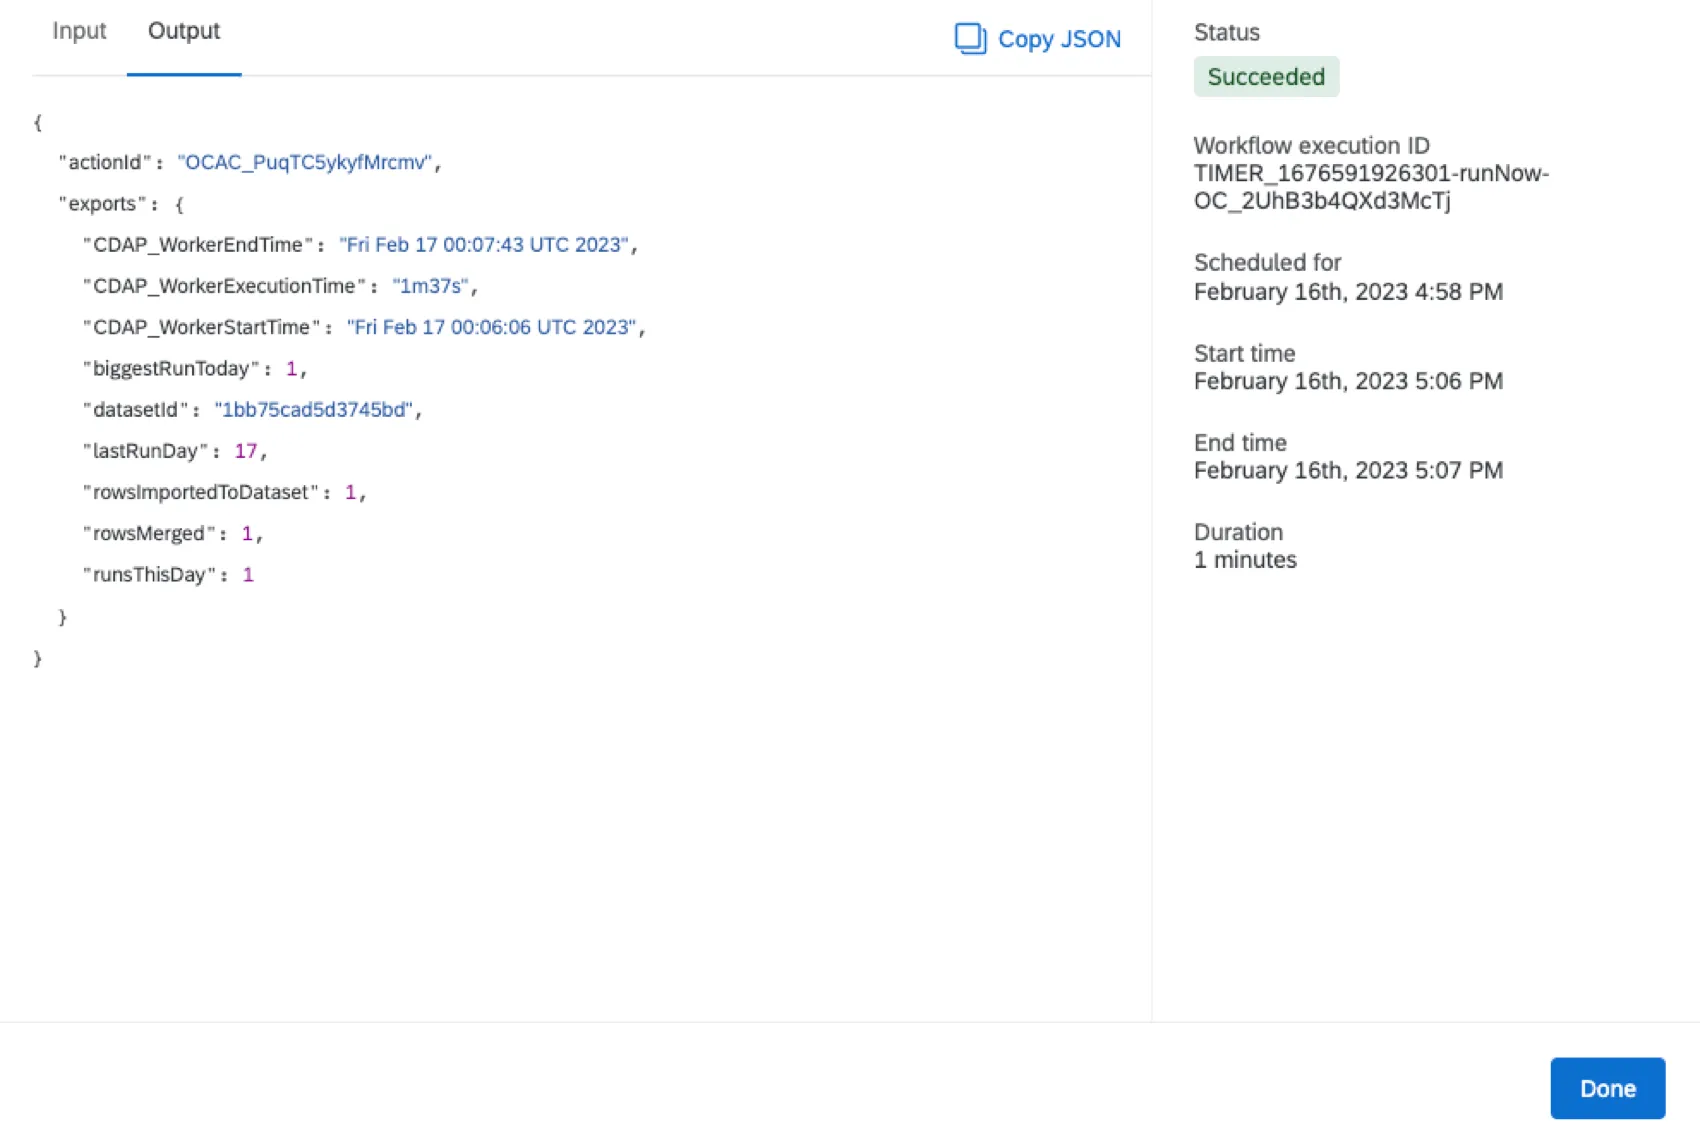
Once your merge task has run, you can view the task execution results. If your join does not produce any rows for the resulting dataset on the first run, a merged dataset will not be created.
Qtip: If you are joining survey data, it may take up to 24 hours before recorded responses appear in the join result.
Qtip: If a task execution does not produce any results (after the first time it is run) the execution will show up as successful, with 0 rows merged.
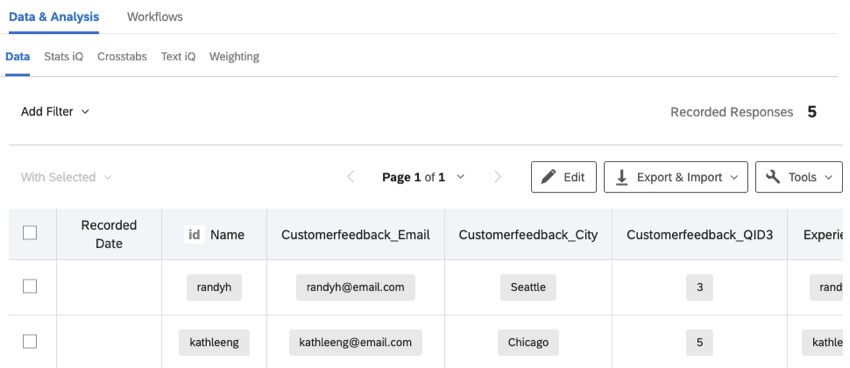
Viewing Your Merged Dataset
After your merge task runs successfully, you will be able to view your combined dataset.
Attention: Each merge task can only be run once per day, per workflow.

Qtip: If you decided to create a new imported data project within your merge task, your Unique ID column will be denoted by “id” in front of the column name.
Qtip: The tabs you see here will depend on your individual user permissions.
Once your data is imported into Qualtrics, you can use Stats iQ, Text iQ, crosstabs, and response weighting to analyze your data. You can also use your project as a data source in CX dashboards.
Attention: While you can add new fields once your merge task has been set up, this requires your data to be re-loaded. This may result in the next run being skipped while loading is completed.
Limits
Merge tasks have the following limits. If you exceed these limits when setting up your merge task, it will not execute successfully.
Source Dataset Limits:
| Number of fields within each source dataset | 500 fields |
|---|---|
| Number of records within source dataset | 1 million records |
| Row size | 100 KB |
| Number of fields selected for merged dataset | 500 fields |
Qtip: A source can only be used in a join 8 times, regardless of dataset. Joins in a CX dataset count towards this limit.
Merged Dataset Limits:
| Number of records within joined dataset | 1 million records |
|---|---|
| Size of joined dataset | 1 GB |
Task Limits:
| Number of datasets within a join | 3 datasets |
|---|---|
| Merge task execution frequency | 1 time every 24 hours |
Inner Join
The following limits are specific to inner joins.
| Number of fields within source dataset | 500 fields |
|---|---|
| Number of records within source dataset | 1 million records |
| Size of merged dataset | 1 million records |
Left Join
The following limits are specific to left outer joins.
| Number of fields within source dataset | 250 fields |
|---|---|
| Number of rows within each source dataset | 50,000 rows |
Troubleshooting
There are a few issues that may arise when setting up and running a merge task:
- The merge task will not run because of an ambiguous field name. This is caused by 2 fields on step 25 of the task setup being given the same name. Change the name of 1 of the fields to proceed.
- The merge task will not run because datasets are currently building. This is caused by the task being run with an older survey as one of the source datasets. Run the task again in 24 hours to proceed.
- The merge task will not run when a new survey is selected as a source dataset. This is caused by new surveys not being available for processing, even though they can be selected while configuring the task. Wait up to 24 hours before re-running the task.
- The merge task will not run when there were recent modifications to a source survey dataset. This is caused by modifications not being available for processing, even though they are visible while configuring the task. Wait a few hours before re-running the task.
- New survey responses are not available when setting up the merge task or within the merged dataset. Wait a few hours for these responses to be available within your task.
- The merge task only processes and merges new information added since its last run. If you want to reprocess information or process your entire project after the workflow has run a few times, you. need to delete your merge task, then recreate it from scratch. Copying a workflow or task will not work; you must recreate it from scratch.
- When merging data from surveys, the merged dataset uses the source recode values, not the question choice text (e.g., if merging data for a satisfaction question with a scale of “Very dissatisfied” to “Very satisfied,” this recodes to a scale of 1 to 5).
- If you run into the maximum number of joins for a data source, you may need to either remove an existing workflow task or CX dataset. To remove or edit a CX dataset, see the Data page. See also more on Editing CX Joins.
- Only the workflow owner has permission to use the datasets created from the Load into a Data Set task as a the data source.
That's great! Thank you for your feedback!
Thank you for your feedback!