-

Qualtrics Platform -

Customer Journey Optimizer -

XM Discover -

Qualtrics Social Connect
Managing Mailing Lists & Samples
About Managing Mailing Lists and Samples
Once you’ve created mailing lists and samples, you can manage them on the Segments & lists tab in the Lists section. This page covers how to do the following with lists and samples:
- Search
- Sort
- Organize lists and samples into folders
- Share with colleagues
- Copy
- Delete
Searching Mailing Lists
Once you are in the Segments & lists tab, you can determine what type of list you want to find using the navigation on the left. Here, you can pick between segments, lists, and samples (listed in order of icon appearance).
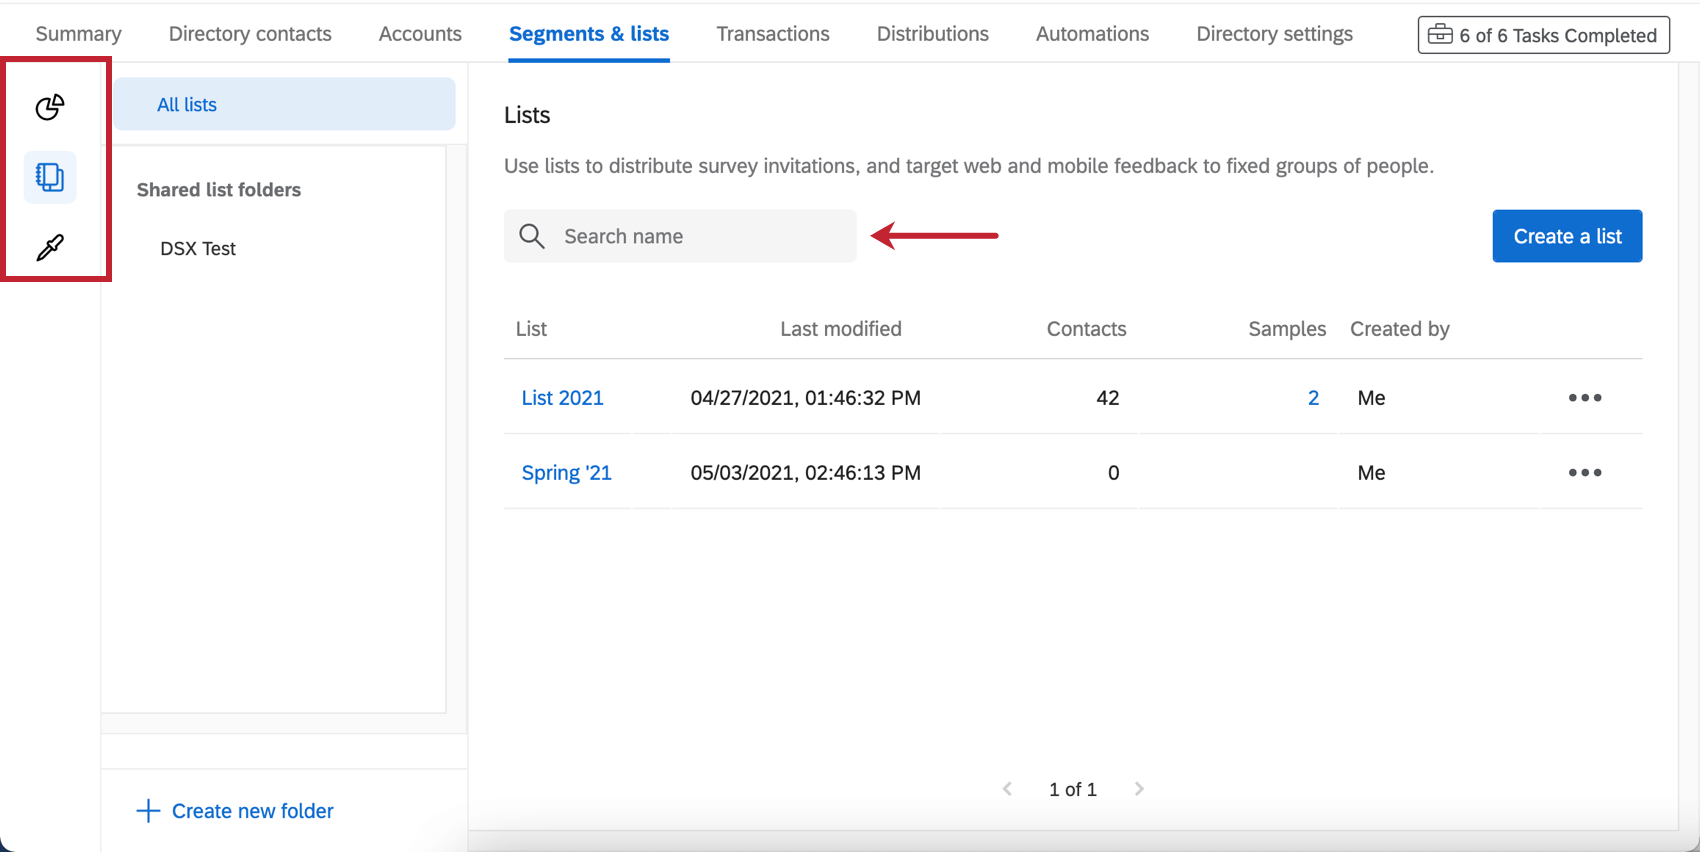
Once inside a given section, you can use the search bar on the right to search a list by name. Features from different sections will not appear when searched, e.g., you cannot find a sample by searching for it in the Segments section.
Sorting Mailing Lists
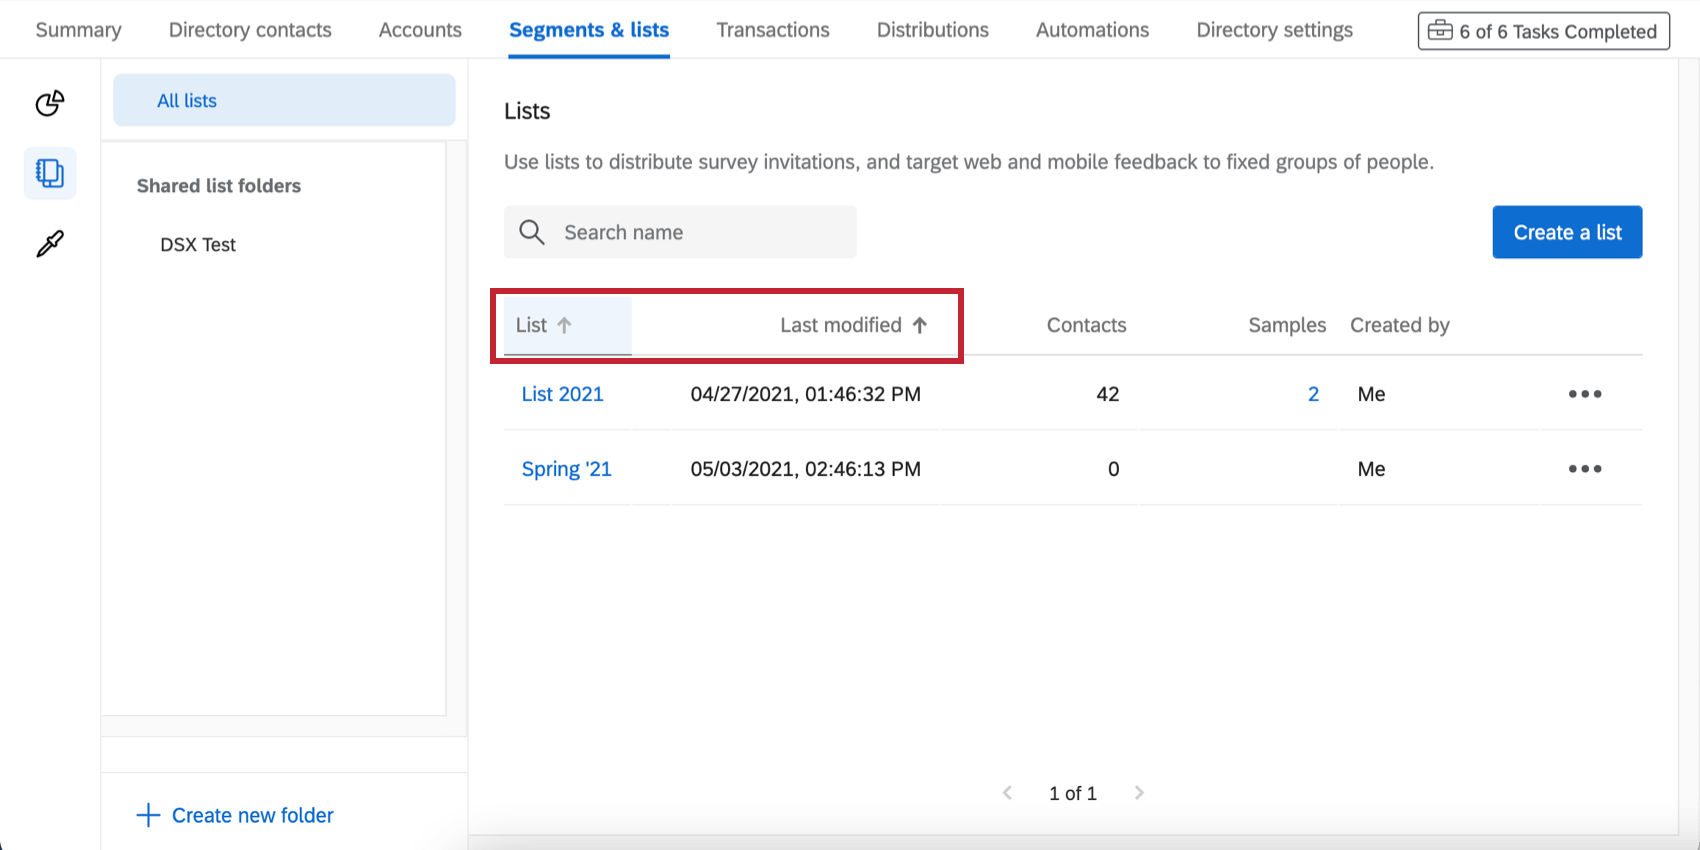
You can sort your mailing lists to make them easier to find. You can sort by the name of a list (alphabetical order), or by the date the list was last modified. To do so, click the header of the column you want to use to sort. For information on sorting contacts within a specific list, see Sorting Contacts.
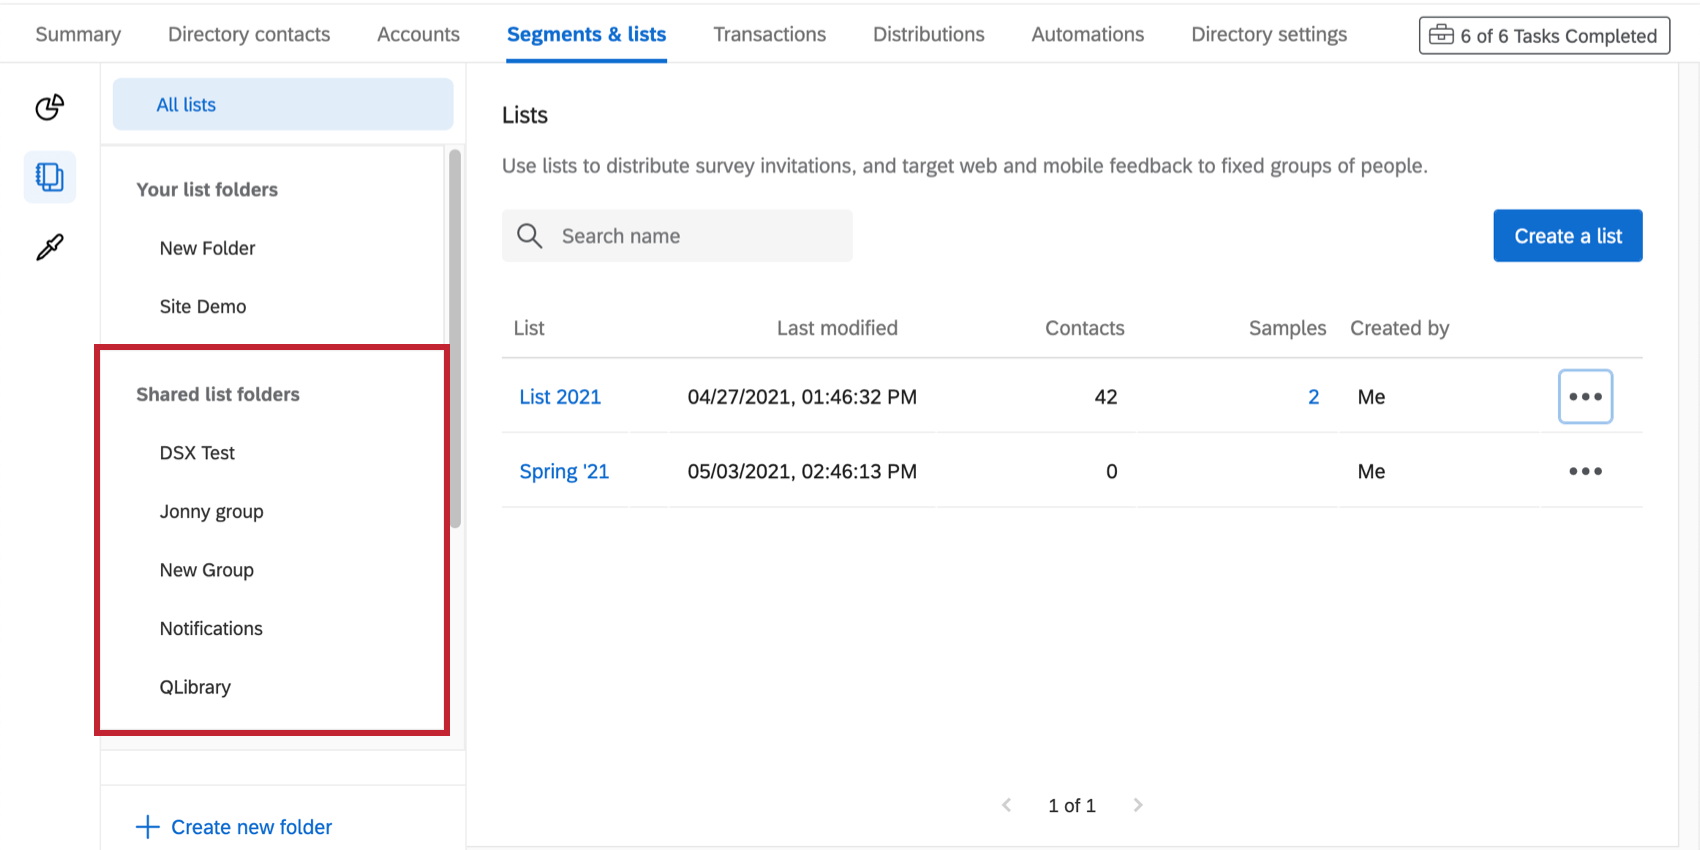
Folders
If you want to organize your lists, you can create a series of folders. Both samples and mailing lists can be added to folders.
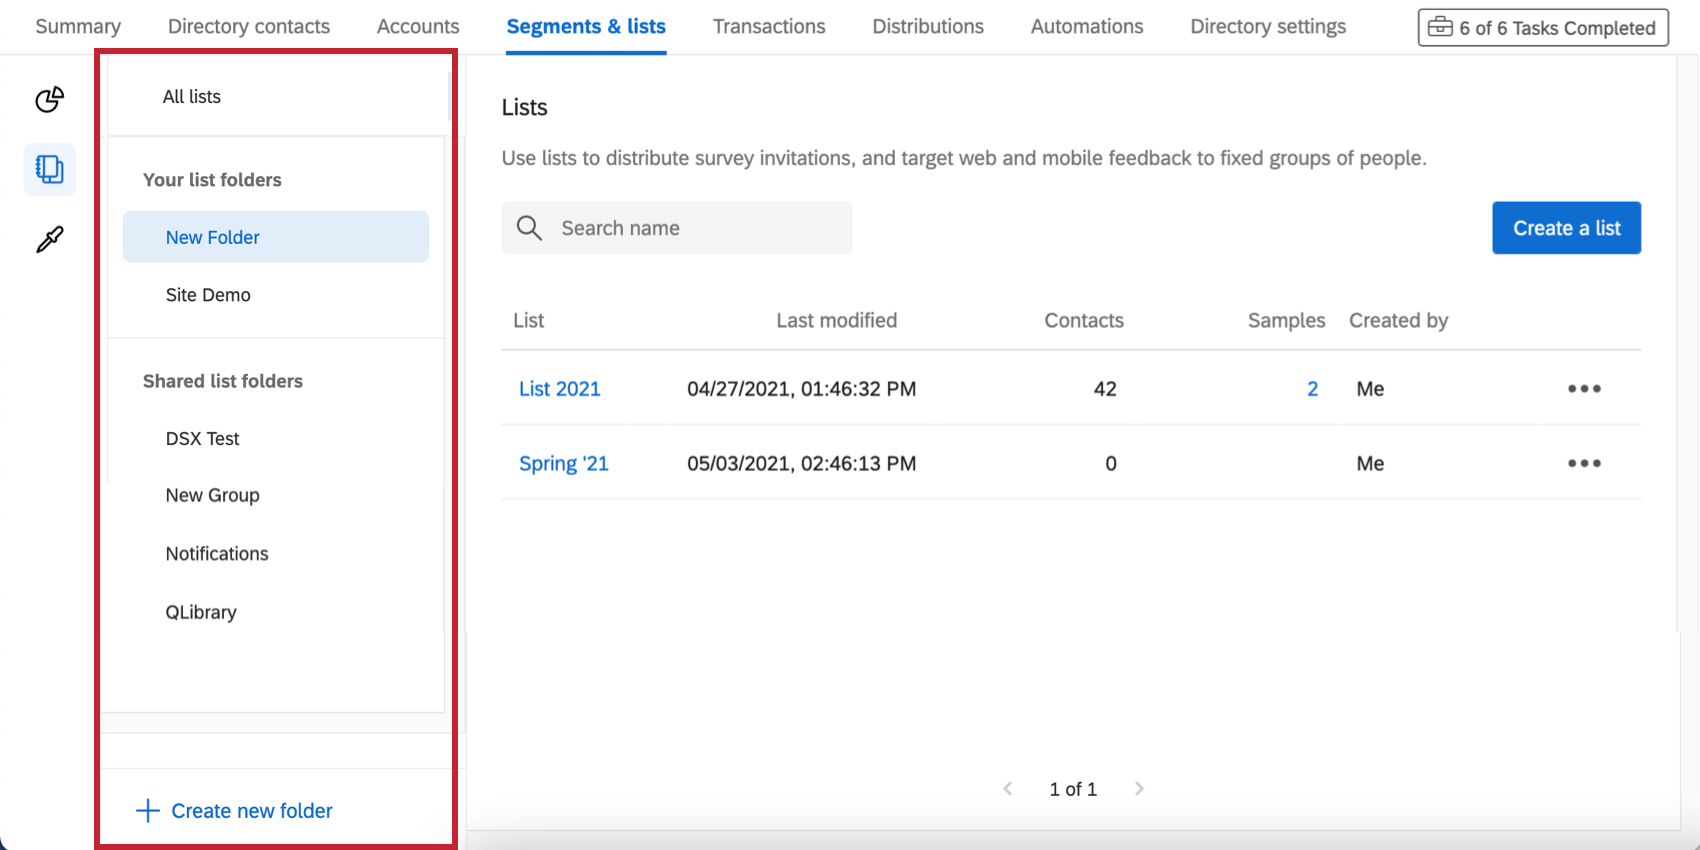
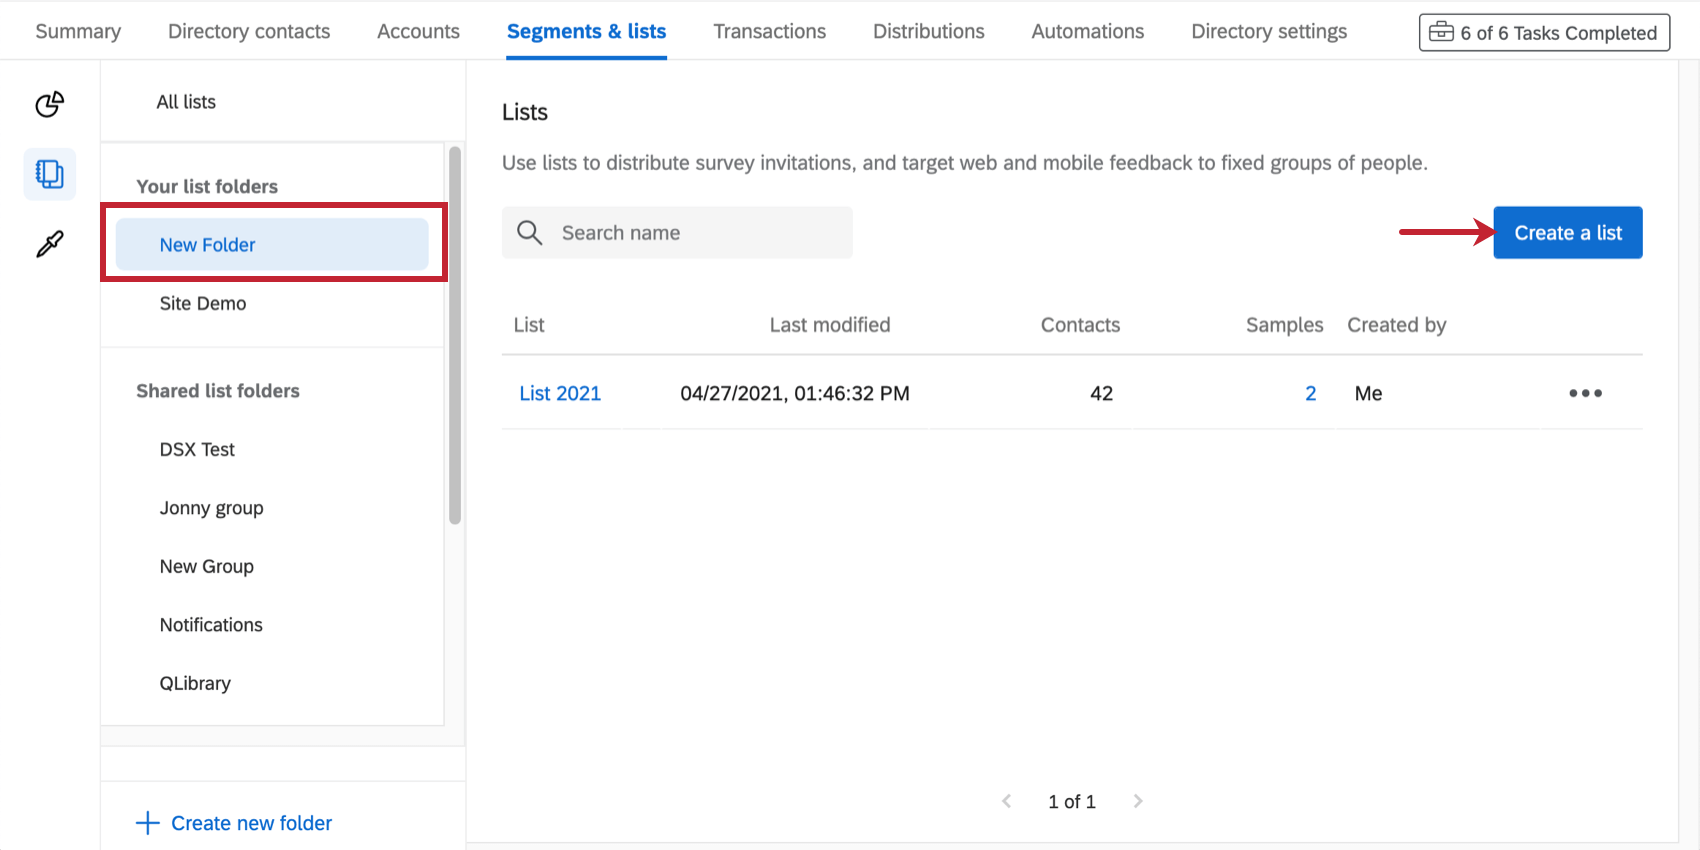
If you want to view a folder’s contents, select it on the menu on the left. All Lists contains the contents of all folders.
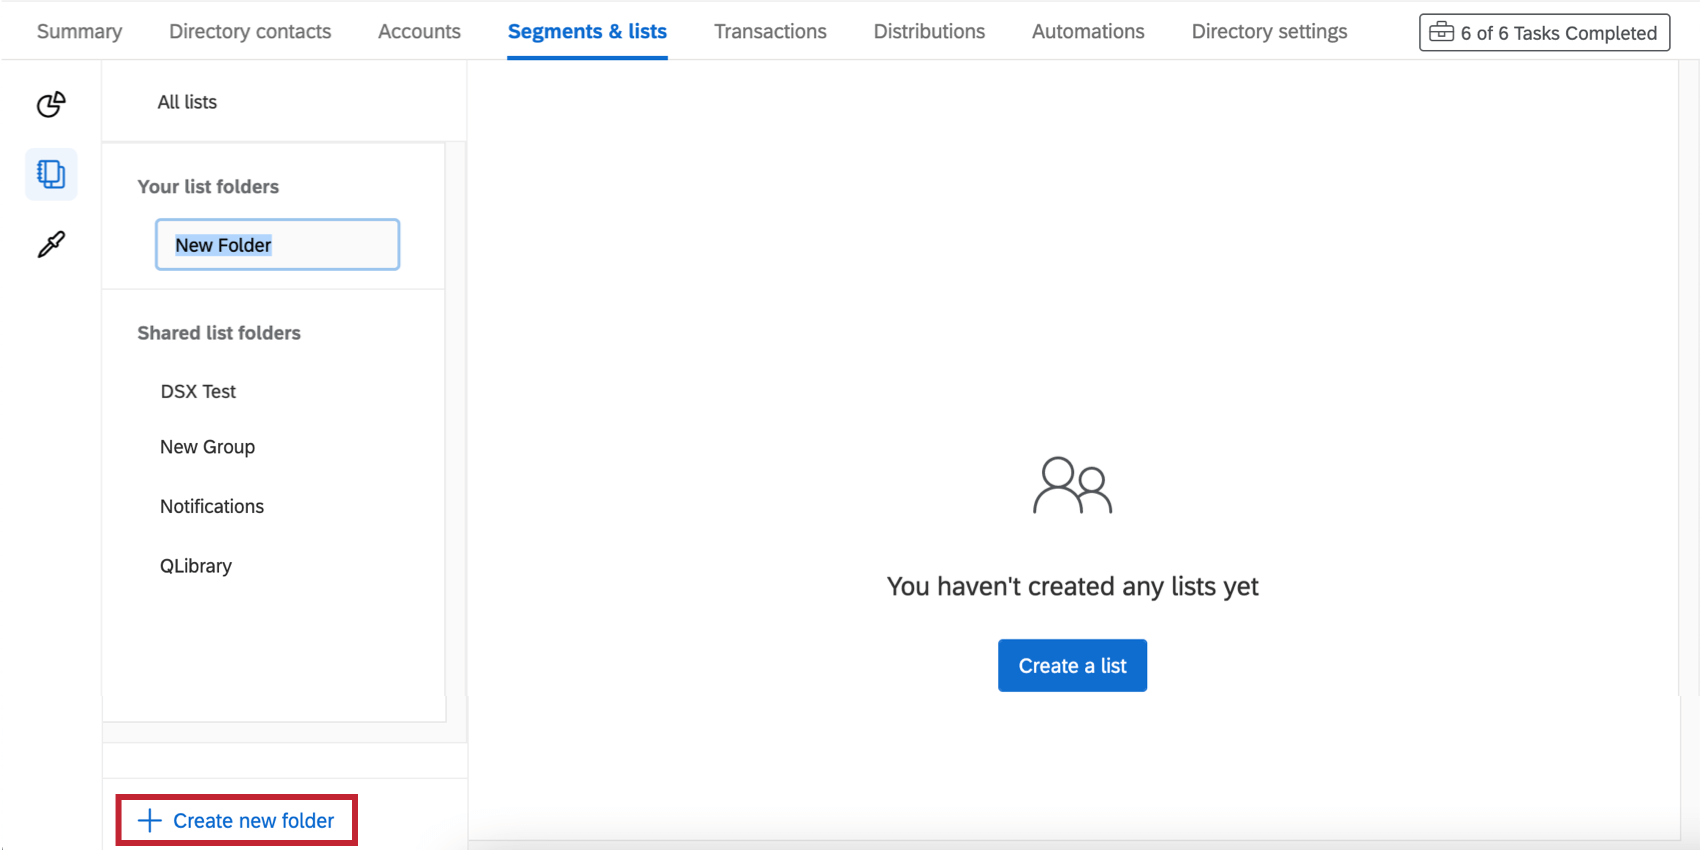
Creating and Managing Folders
Click Create new folder at the bottom of the menu to create a new folder. Then type the name where it says Untitled Folder.
Click a folder and expand the dropdown menu to rename the folder, create another subfolder within it, or to delete the folder.
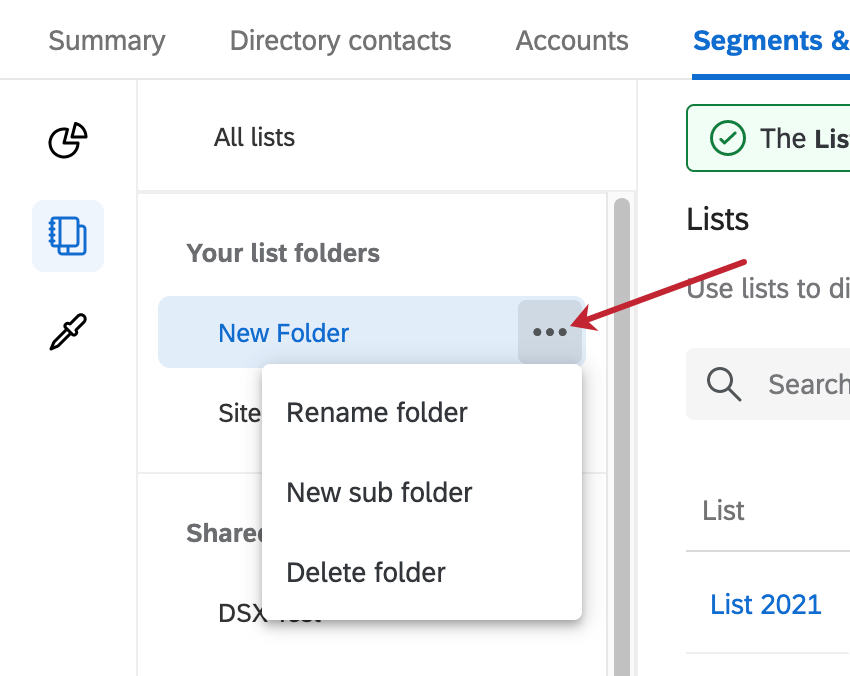
The same folders will appear on both the samples and lists section of the page.
Sorting into Folders
There are two ways to get a list into a folder:
Select the folder, then create the list while inside it.
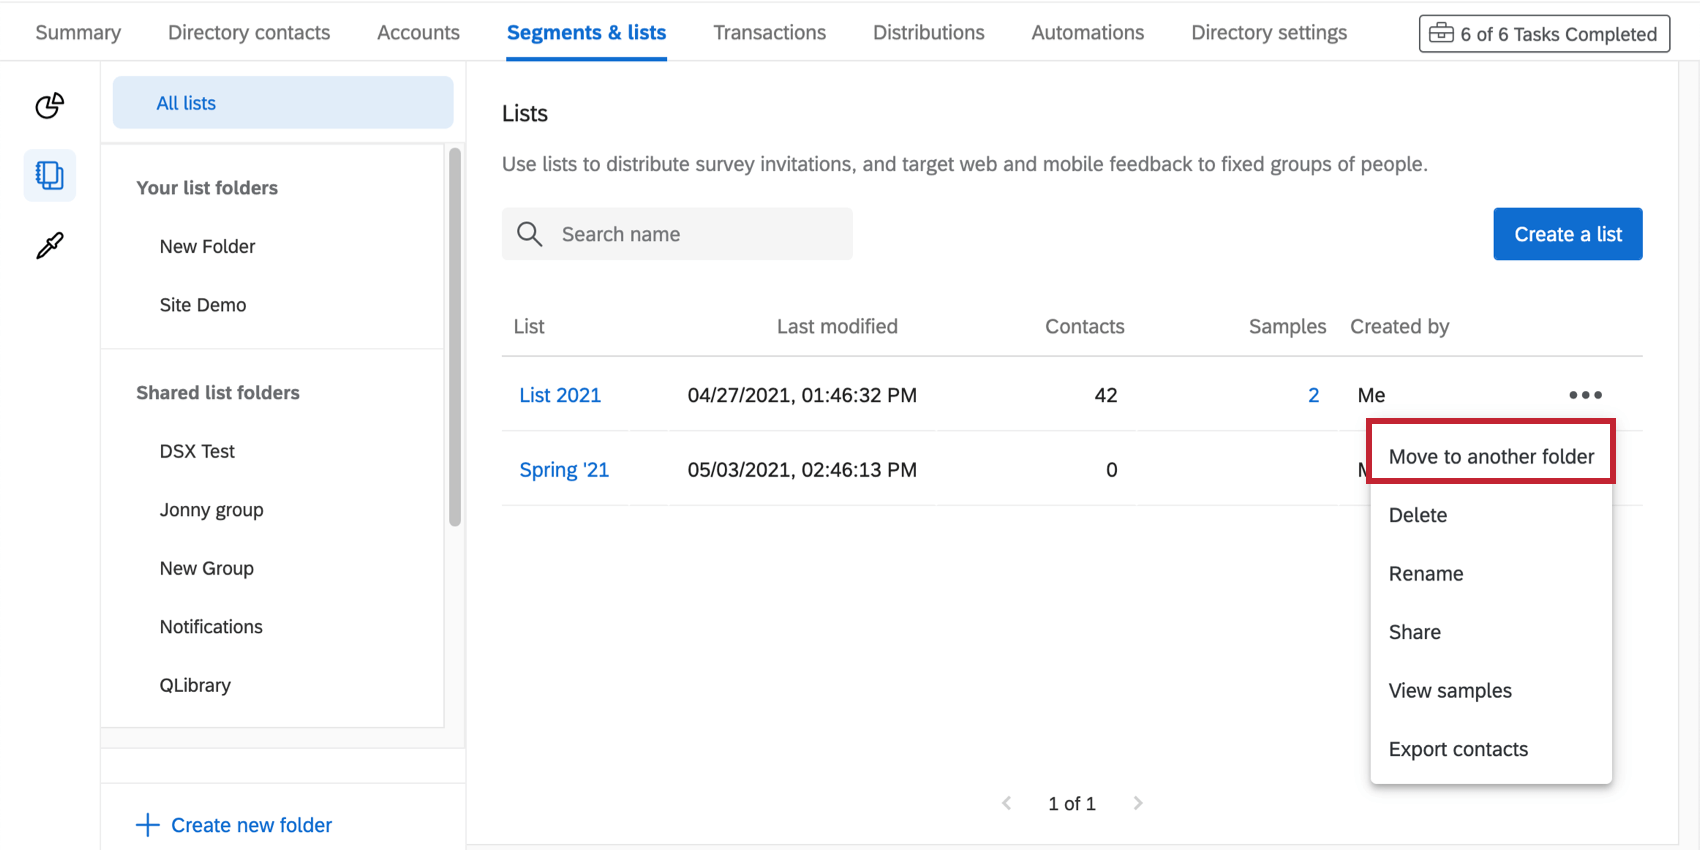
While viewing all lists, click the dropdown, then select Move to another folder.
You cannot drag and drop content into folders.
Sharing Lists
You can share mailing lists with users in your brand. Sharing lists makes it easy to collaborate on surveys together and to make sure that you use the same sample of respondents on future surveys.
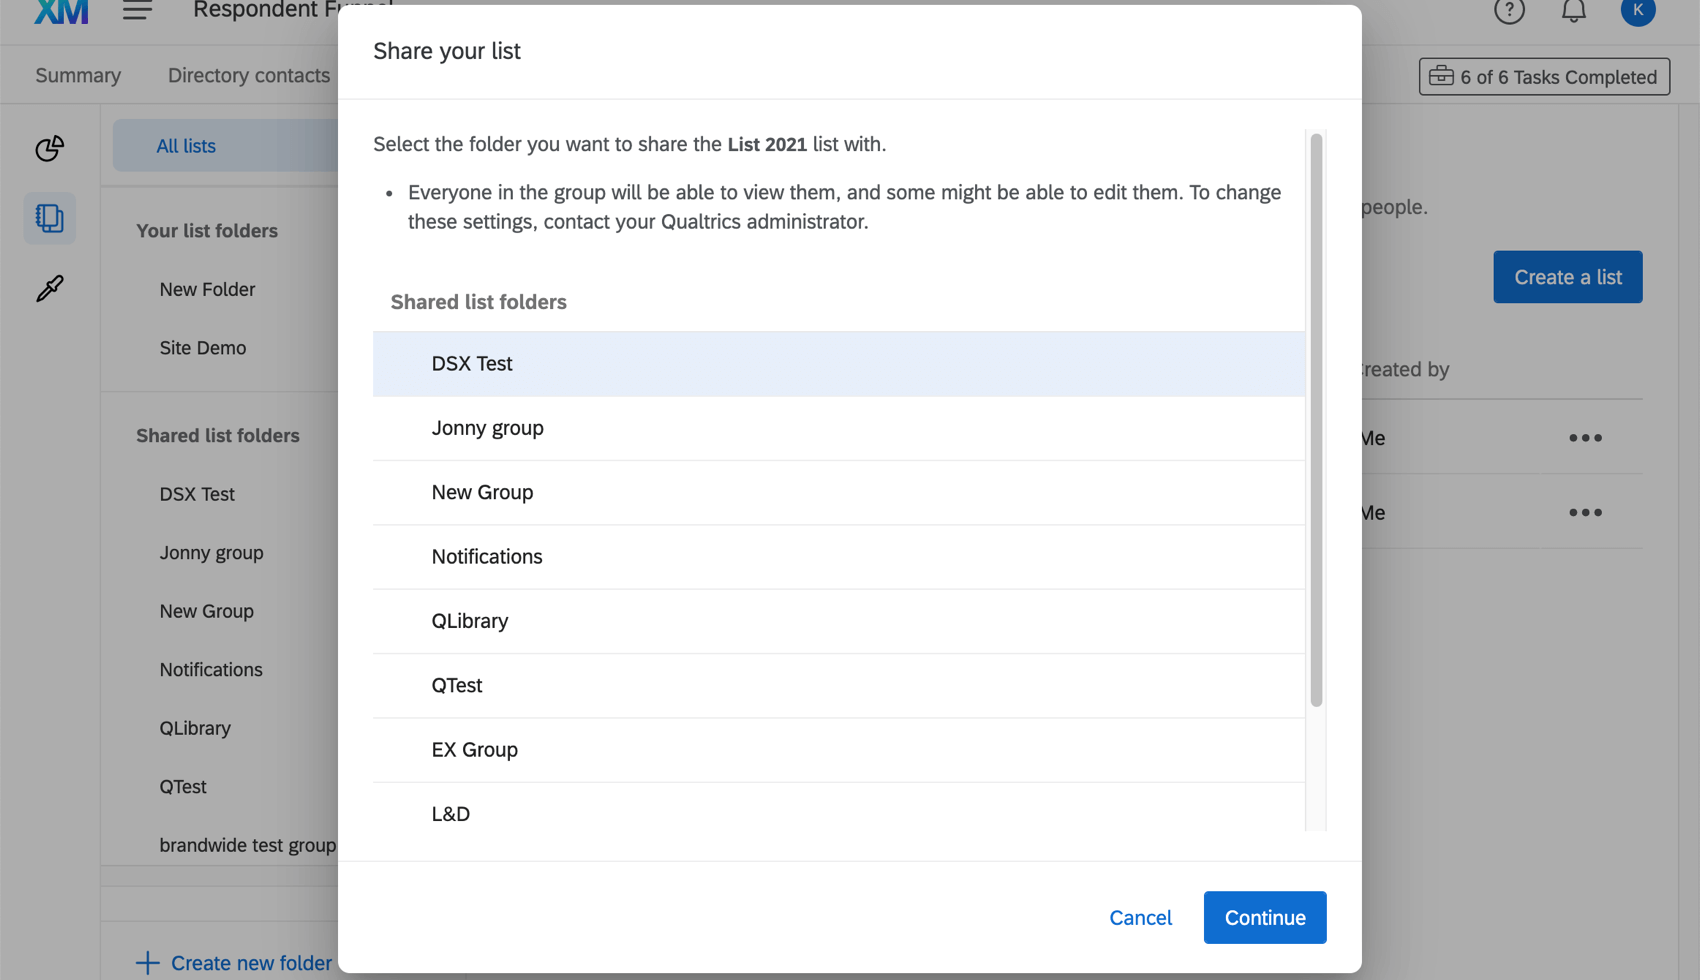
To share a contact list, you and the user you want to share with must be in a group together. You can see what groups you belong to by looking under Shared list folders.
If there are no groups listed here, or if you don’t know who belongs to this group, contact your Brand Administrator to get a group created. For Brand Administrators, the guide to group creation can be found on the User Groups page.
Sharing Lists
Share contact lists by clicking the dropdown and selecting Share.
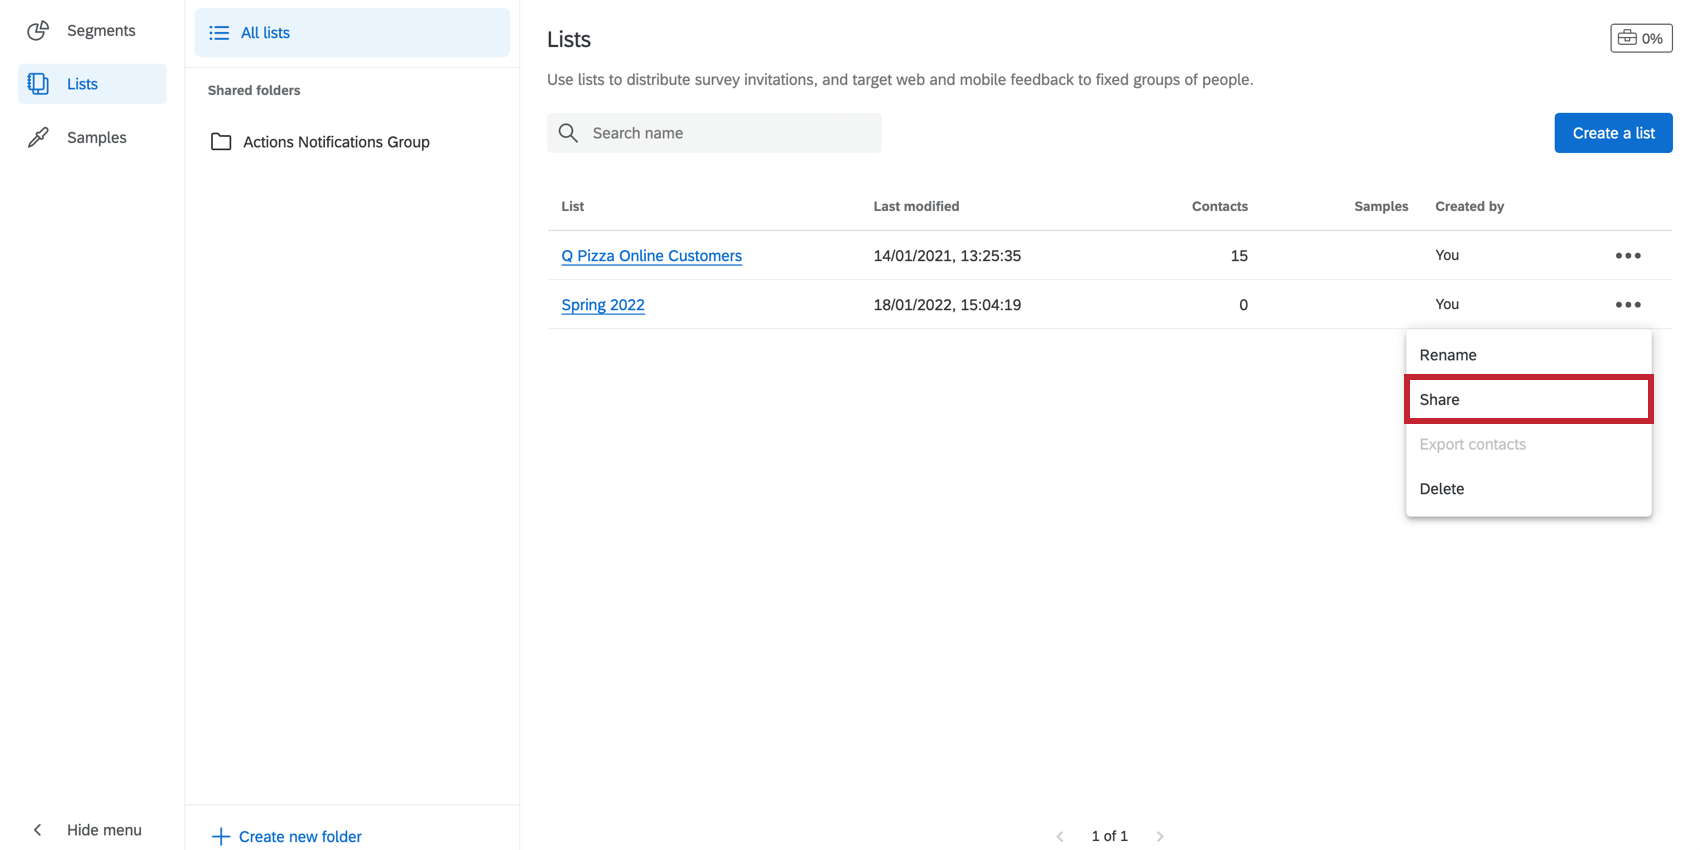
Select the group you’d like to share with. You can only pick one at a time.
You cannot share a sample unless the mailing list the sample is taking from has also been shared.
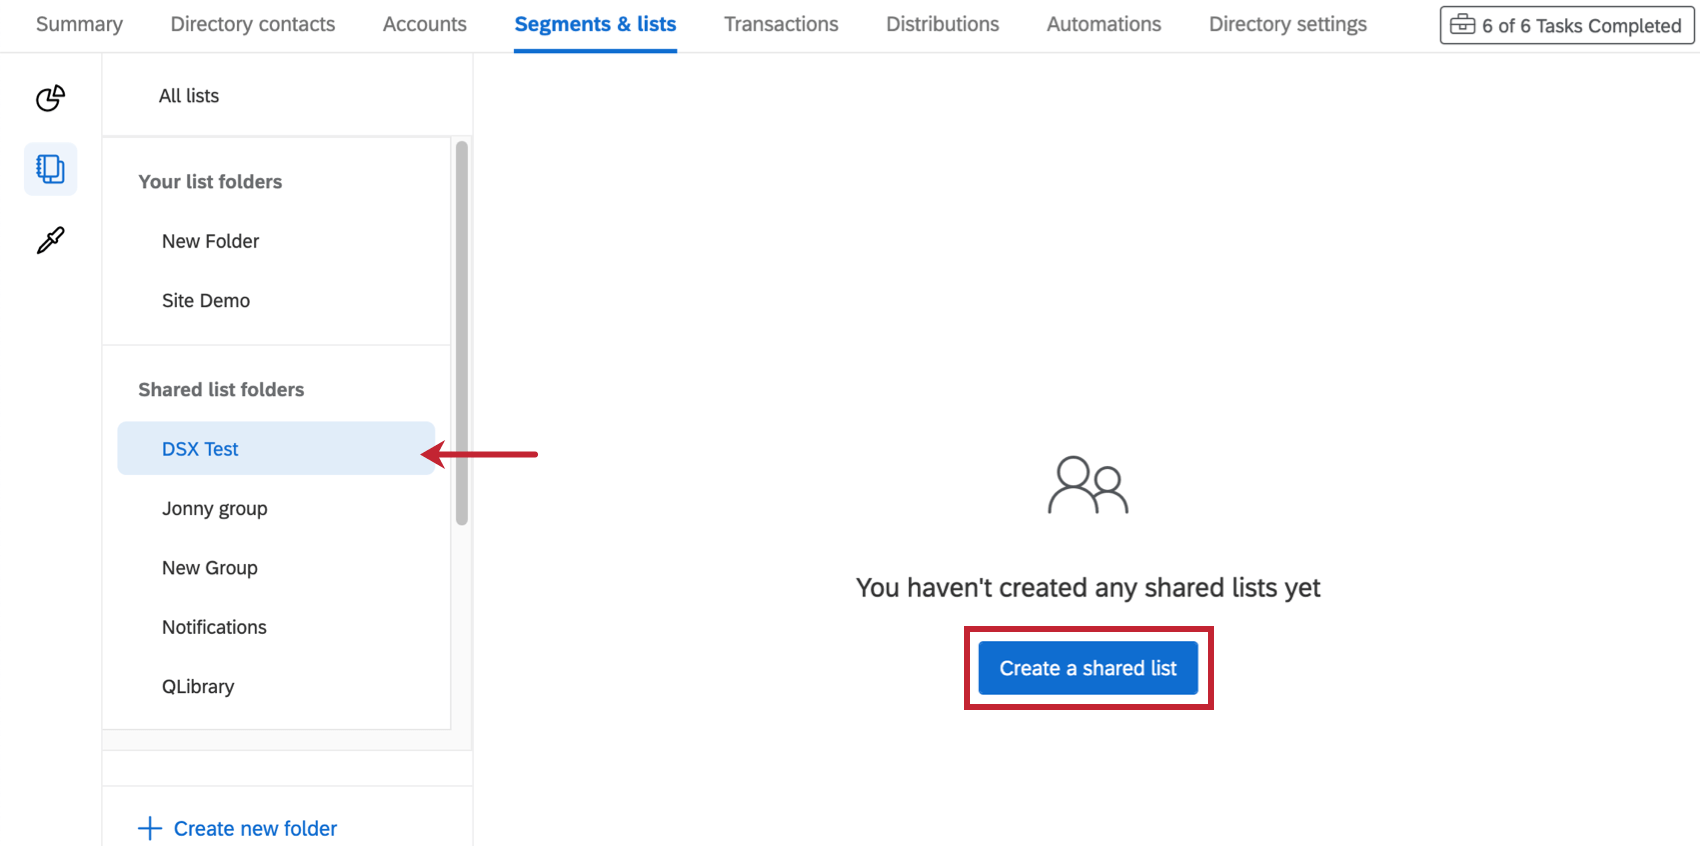
Creating New Shared Lists
Navigate to the folder of the group you wish to share with. Then click Create a shared List. From there, you can create the mailing list and then create samples of it the same way you would if it were created in a different folder.
Actions for Shared Lists
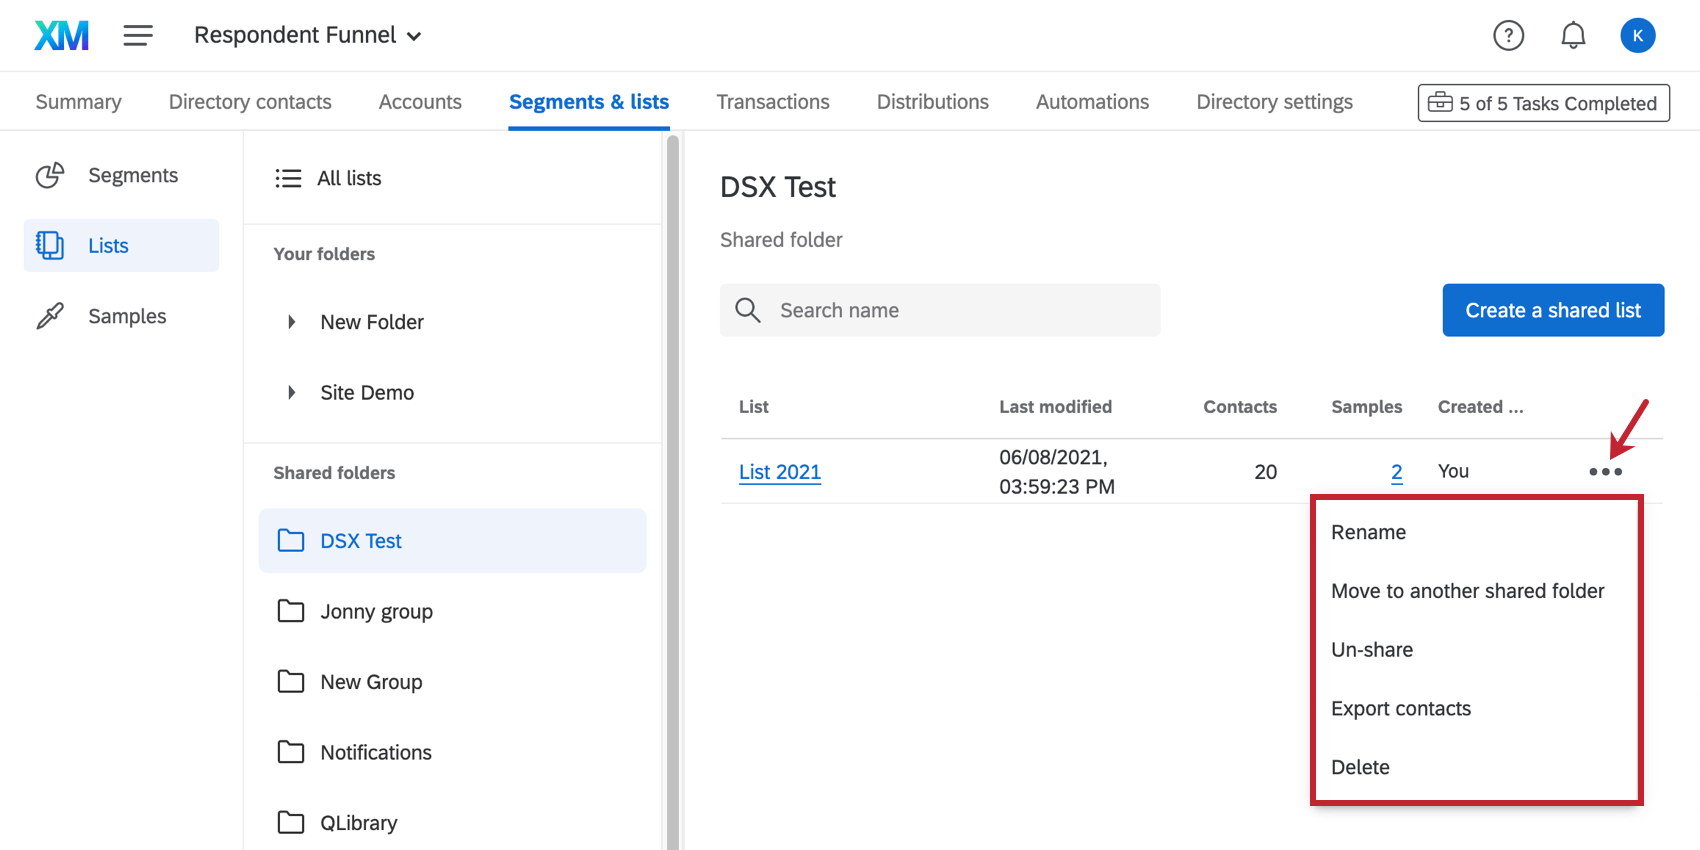
Once a mailing list has been shared to the group, you can click the dropdown to choose from a series of actions:
- Move to another shared folder: Move the list to another group folder. This option only appears if you created the list.
Attention: Changing who has access to a list can disrupt distributions in progress that other users are sending to that list. Only move the list if you are sure that is what you want to do.
- Un-share: Remove the list from the shared folder so that only you can access it. This option only appears if you created the list.
Attention: Un-sharing a list can disrupt distributions in progress that other users are sending to that list. Only un-share the list if you are sure that is what you want to do.
Samples cannot be moved to another shared folder or un-shared – you must perform those actions on the mailing list they originate from.
List Actions
When you click the dropdown next to a list or a sample, you will have several actions to choose from. These are very similar to the options found under List Options.
Mailing List Actions
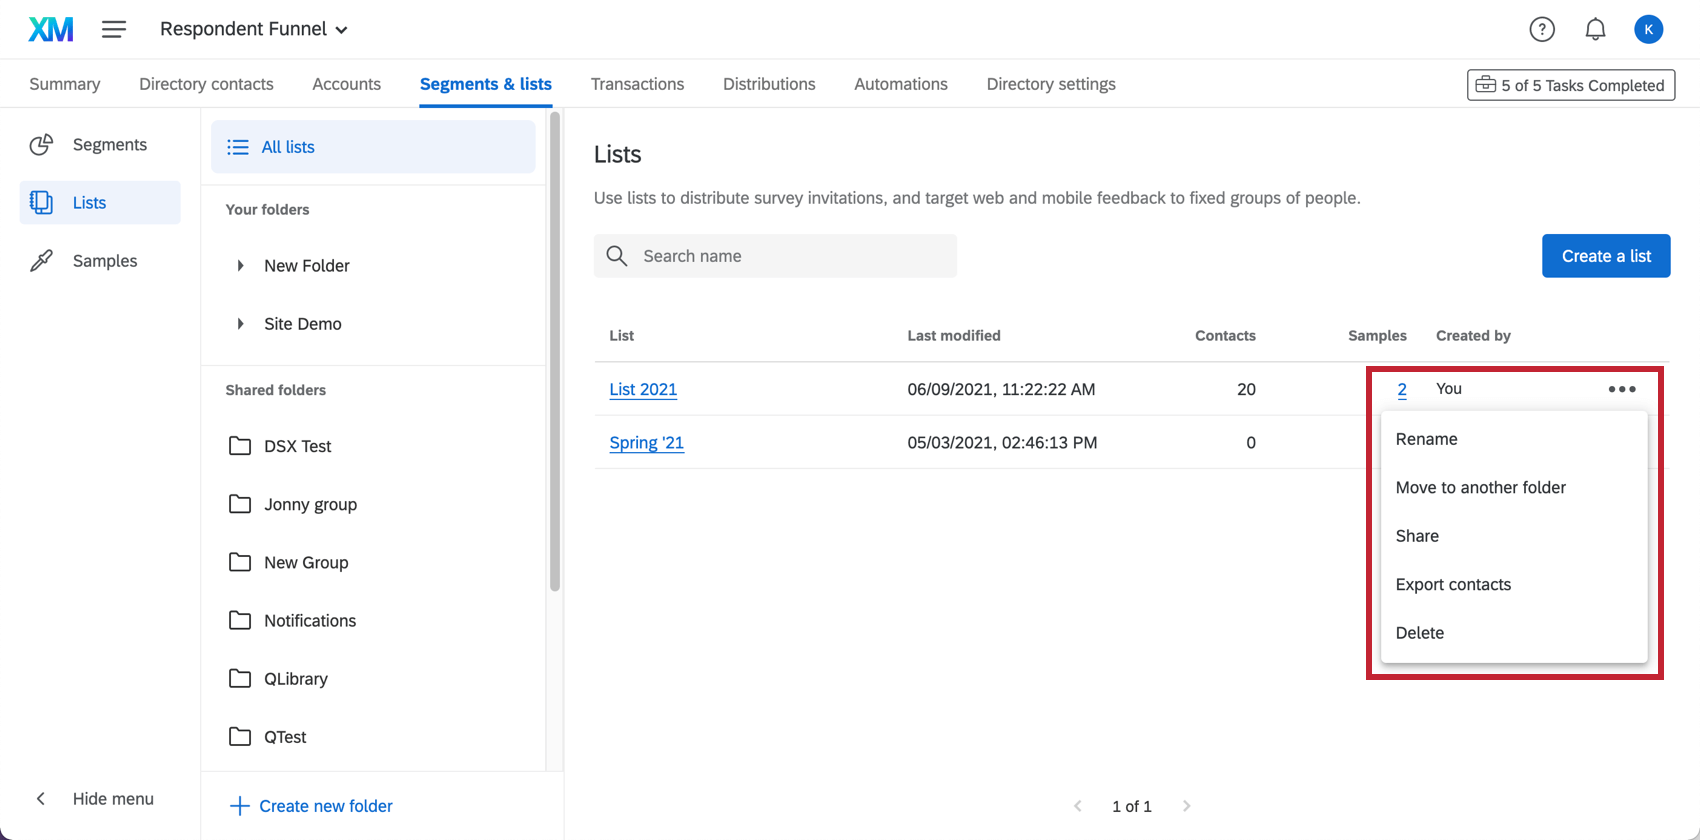
- Rename: Rename the list.
- Move to another folder: Move the list to a folder.
- Share: Move the list into a shared folder, which will allow everyone in that group to access and edit it.
- Export contacts: Export your mailing list.
- Delete: Delete the mailing list.
Sample Actions

- Edit: Change the name, sample size, and sampling criteria. Once you click Re-sample, the sample will be taken again according to the conditions.
- Make a copy: Create a new sample with similar criteria. When you click this option, a window will open with a copied sample and all the same sampling criteria; you can adjust the name of the list, the sampling criteria, and the mailing list being sampled before creating the copy. This is a great way to quickly make multiple similar samples with slight adjustments.
- Move to another folder: Move the list to a folder.
- Share: This option is disabled, since samples are only shared if the mailing list they’re linked to are also shared.
- Export contacts: Export your sample.
- Delete: Delete the sample.
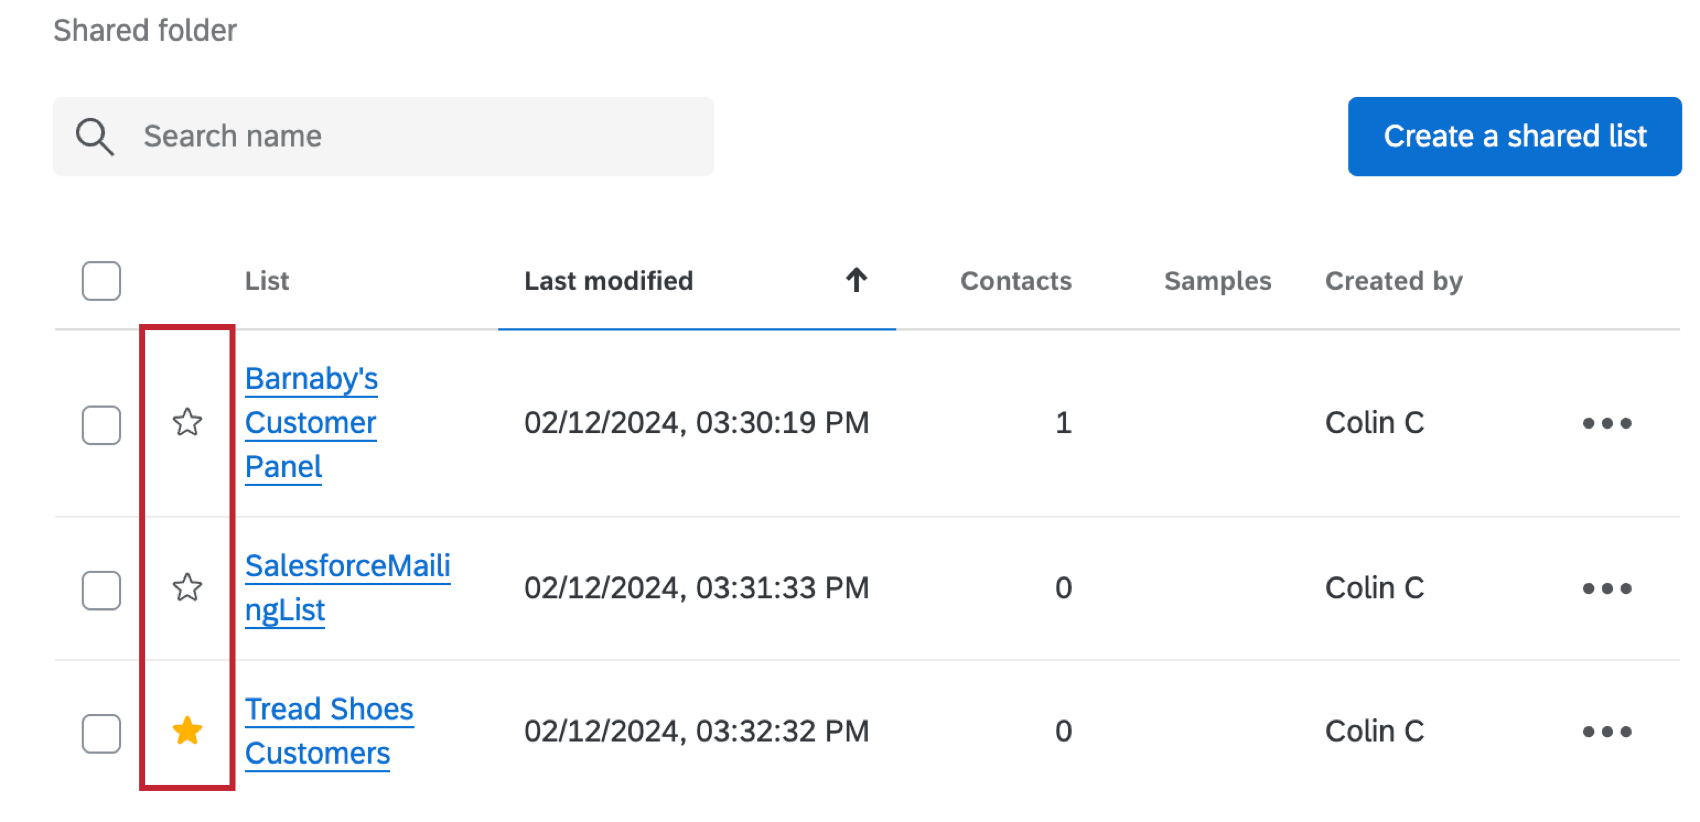
Marking Lists as Favorites
Clicking the star icon to the left of a list or sample will mark it as a favorite. This will display the list within the Favorites section of the Summary tab. For more information, see Favorites.
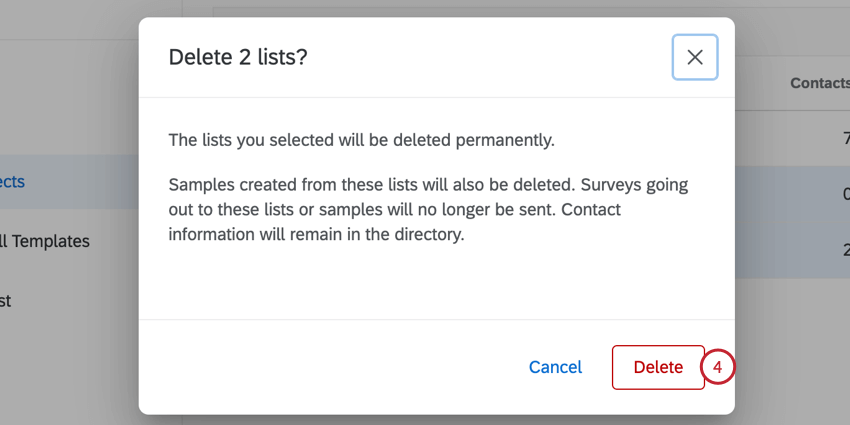
Deleting Mailing Lists and Samples in Bulk
You can delete multiple mailing lists and samples in 1 action by following the steps below.
- Navigate to the folder that contains the lists you want to delete. This can be either a personal folder you’ve created, or any “shared” folder you have access to.
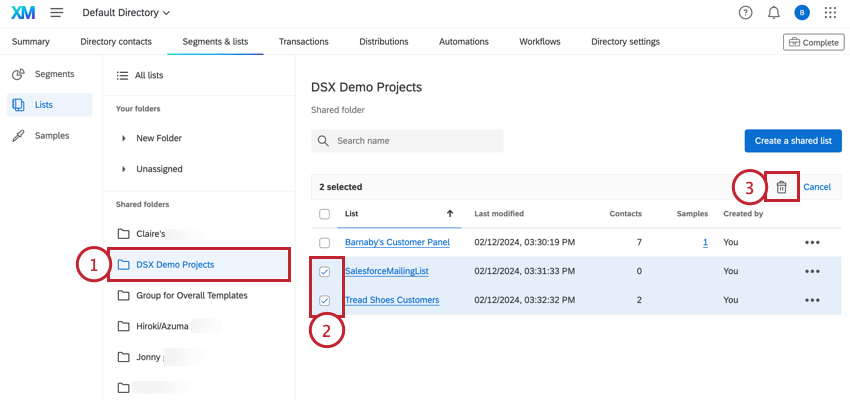 Qtip: You can only delete lists in bulk from a folder. You cannot delete lists in bulk from the “All lists” view.
 - Select the boxes next to each mailing list you’d like to delete.
- Click the trash can icon.
- Click Delete.