
Responses Section of Survey Options
What's on this page
About the Responses Section of Survey Options
These survey options affect how responses are recorded and how respondents experience the survey-taking process. Here, you’ll find settings related to how respondents can change their answers during a survey session, survey error messages, what to do with incomplete responses, and more.
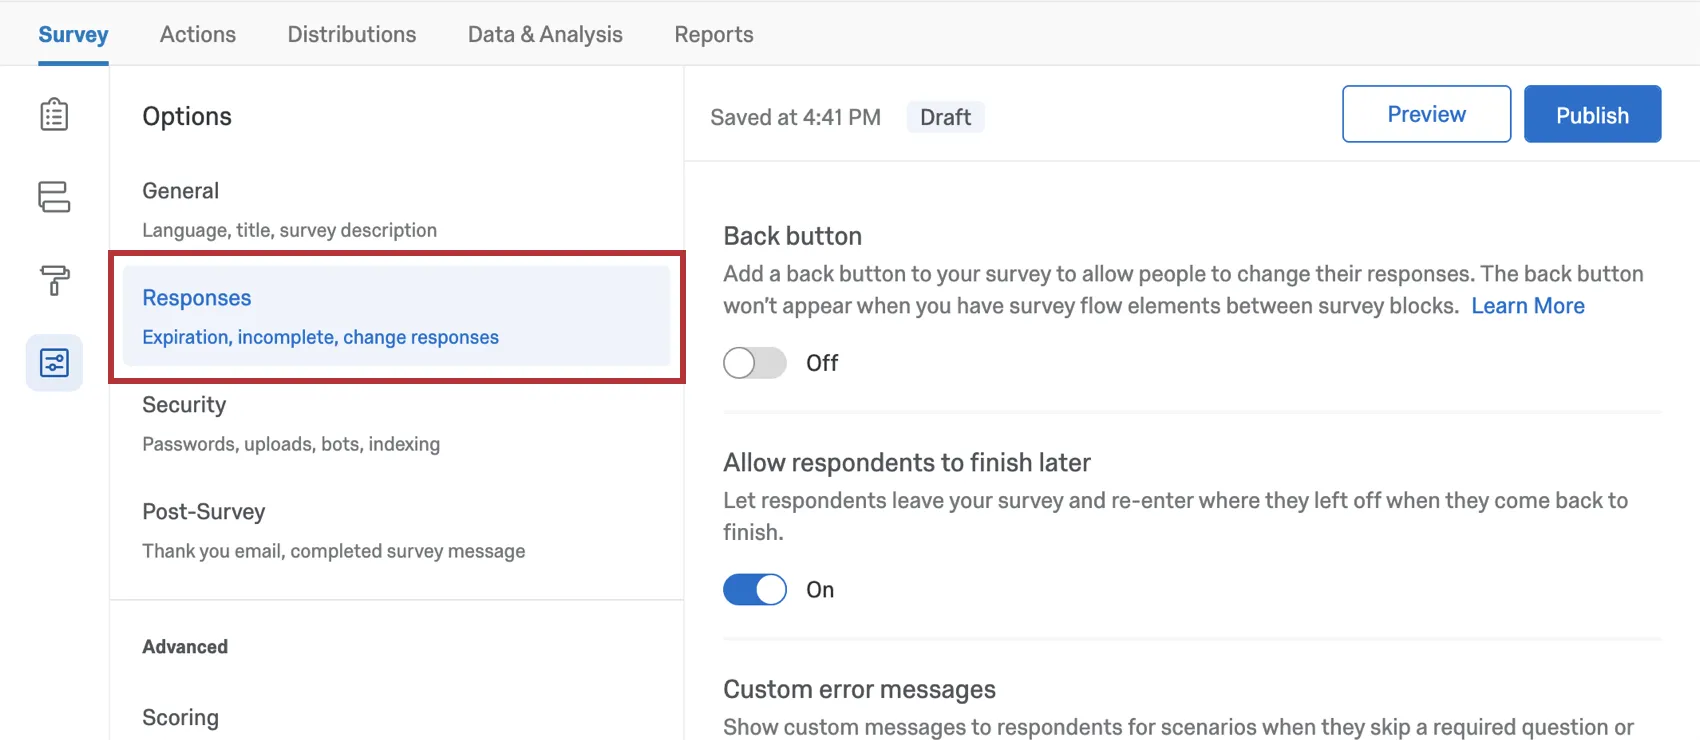
Back Button
With a back button, respondents can return to pages they have already visited in your survey and update their responses.

Warning: In some cases, a back button won’t show on a page of the survey even if you have the setting enabled in your survey options. This is caused by having elements between blocks in your survey flow. Any element (branch logic, embedded data, randomizer, web service, etc.) will disable the back button on the first page of the block that follows it.
Allow Respondents to Finish Later
Qtip: This setting used to be called Save and Continue and was in the Survey Experience section of the old survey options.
This setting allows respondents to leave the survey and resume their progress later, so long as they return on the same browser where they started the survey.

This feature is turned on by default and works by placing a cookie on the respondent’s browser that keeps track of the survey progress. If you are distributing your survey using individual links, progress is tracked automatically, so this survey option isn’t needed.
By default, respondents have 1 week to return to the survey and finish their response. After a week, their response will be recorded as-is. This time period can be changed using the Incomplete Survey Responses setting in survey options.
Qtip: Because “Allow respondents to finish later” uses cookies to save a respondent’s progress, it will only work as long as your respondent returns to the survey on the same internet browser on the same computer to finish the survey.
Attention: If your Employee Engagement, Employee Lifecycle, or survey project has an authenticator, the Allow respondents to finish later option won’t work.
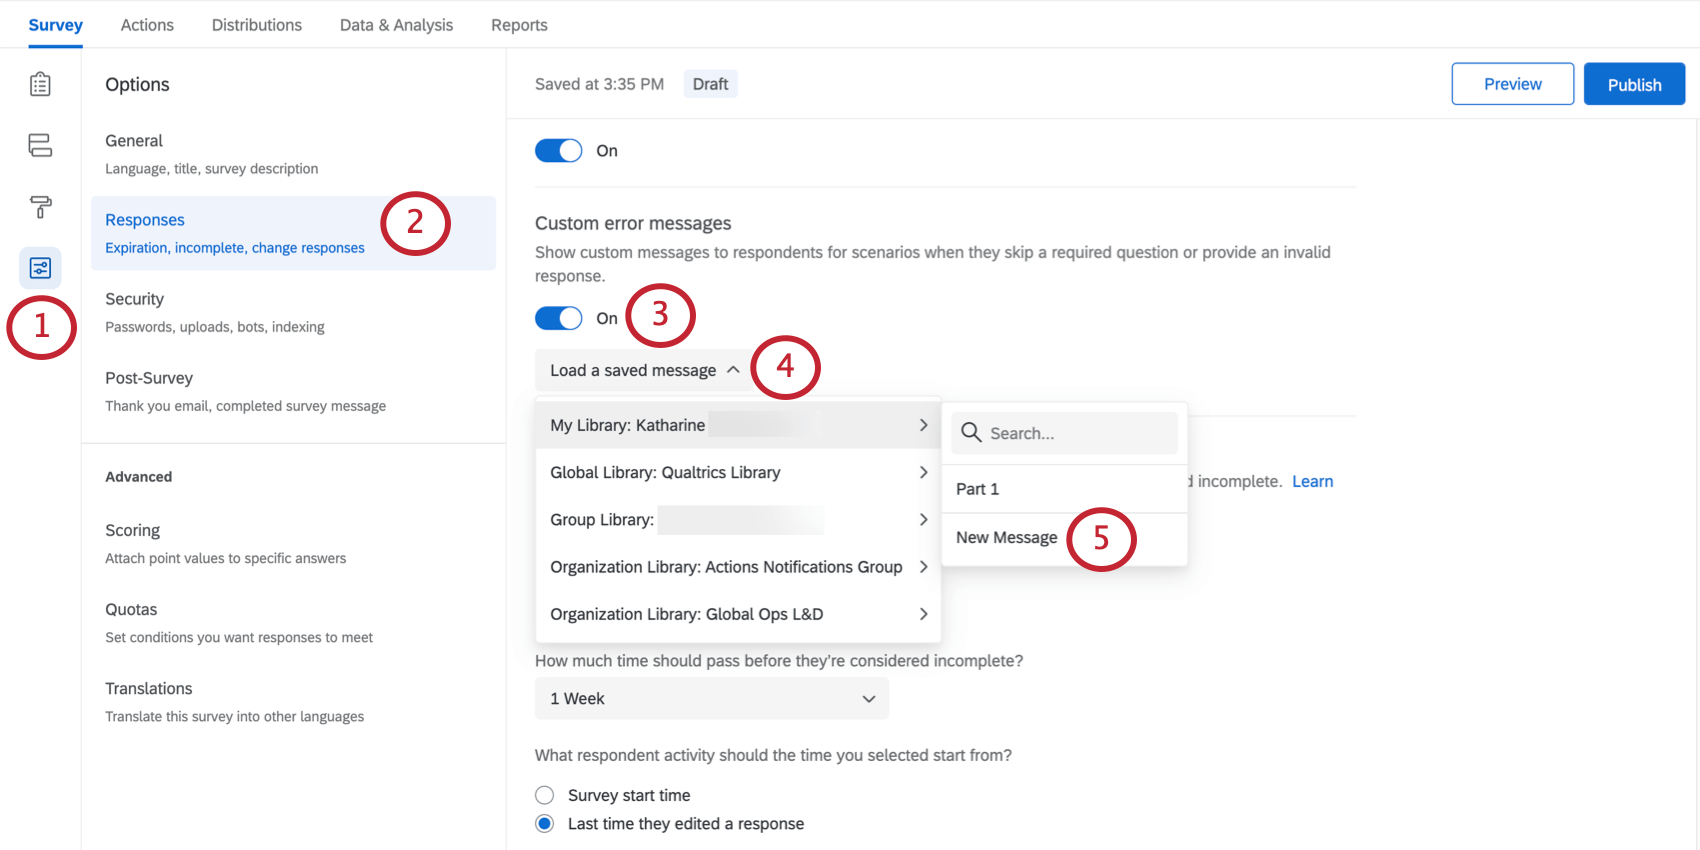
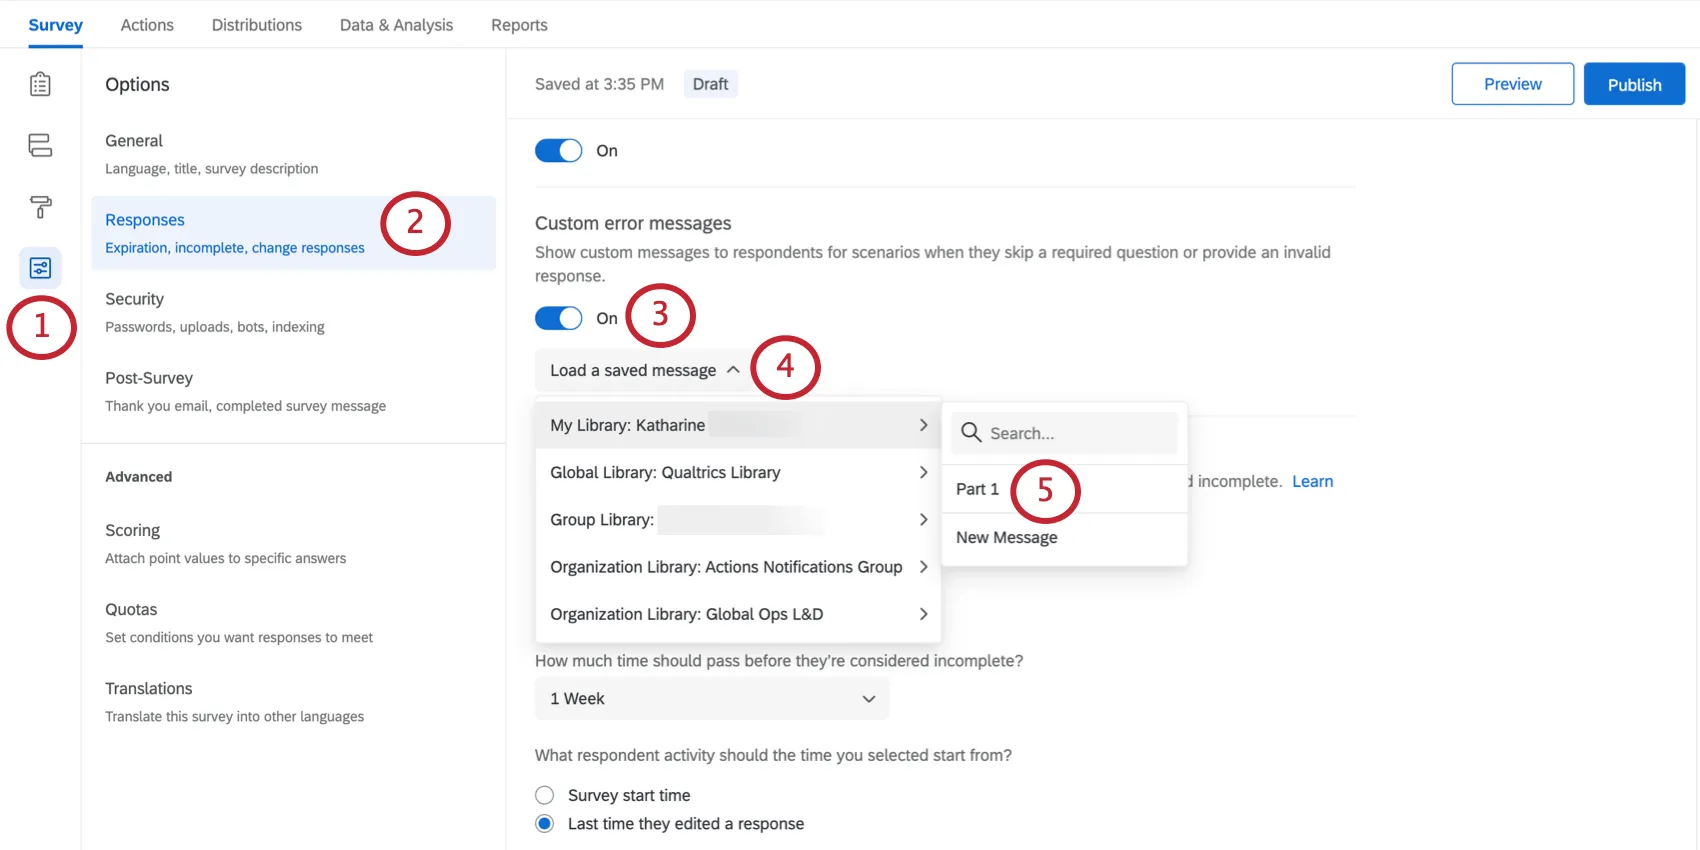
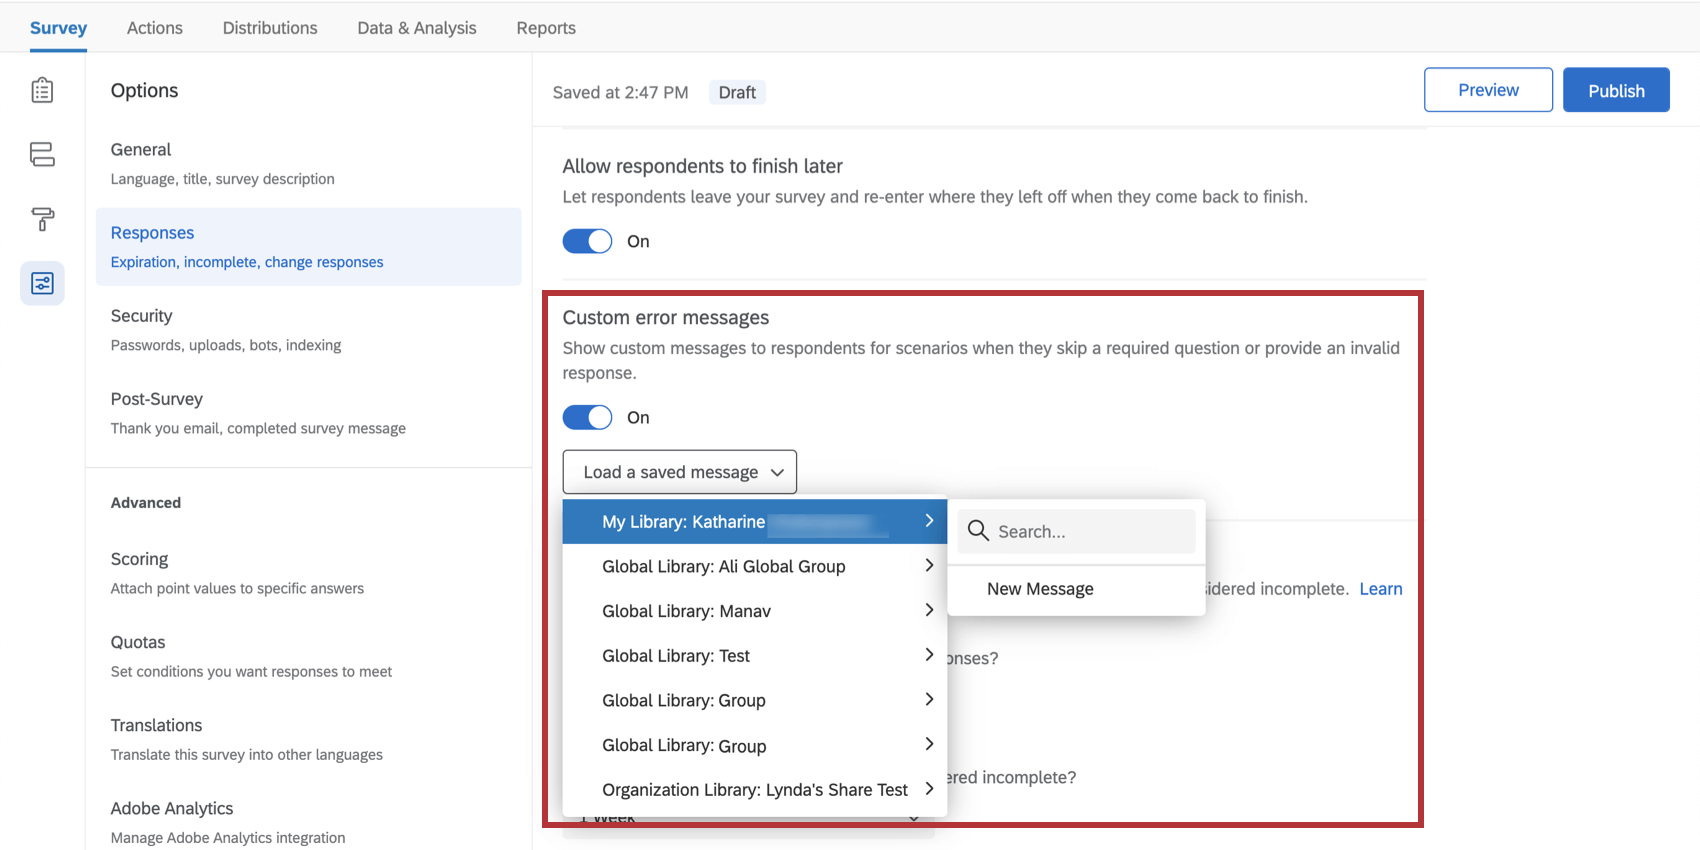
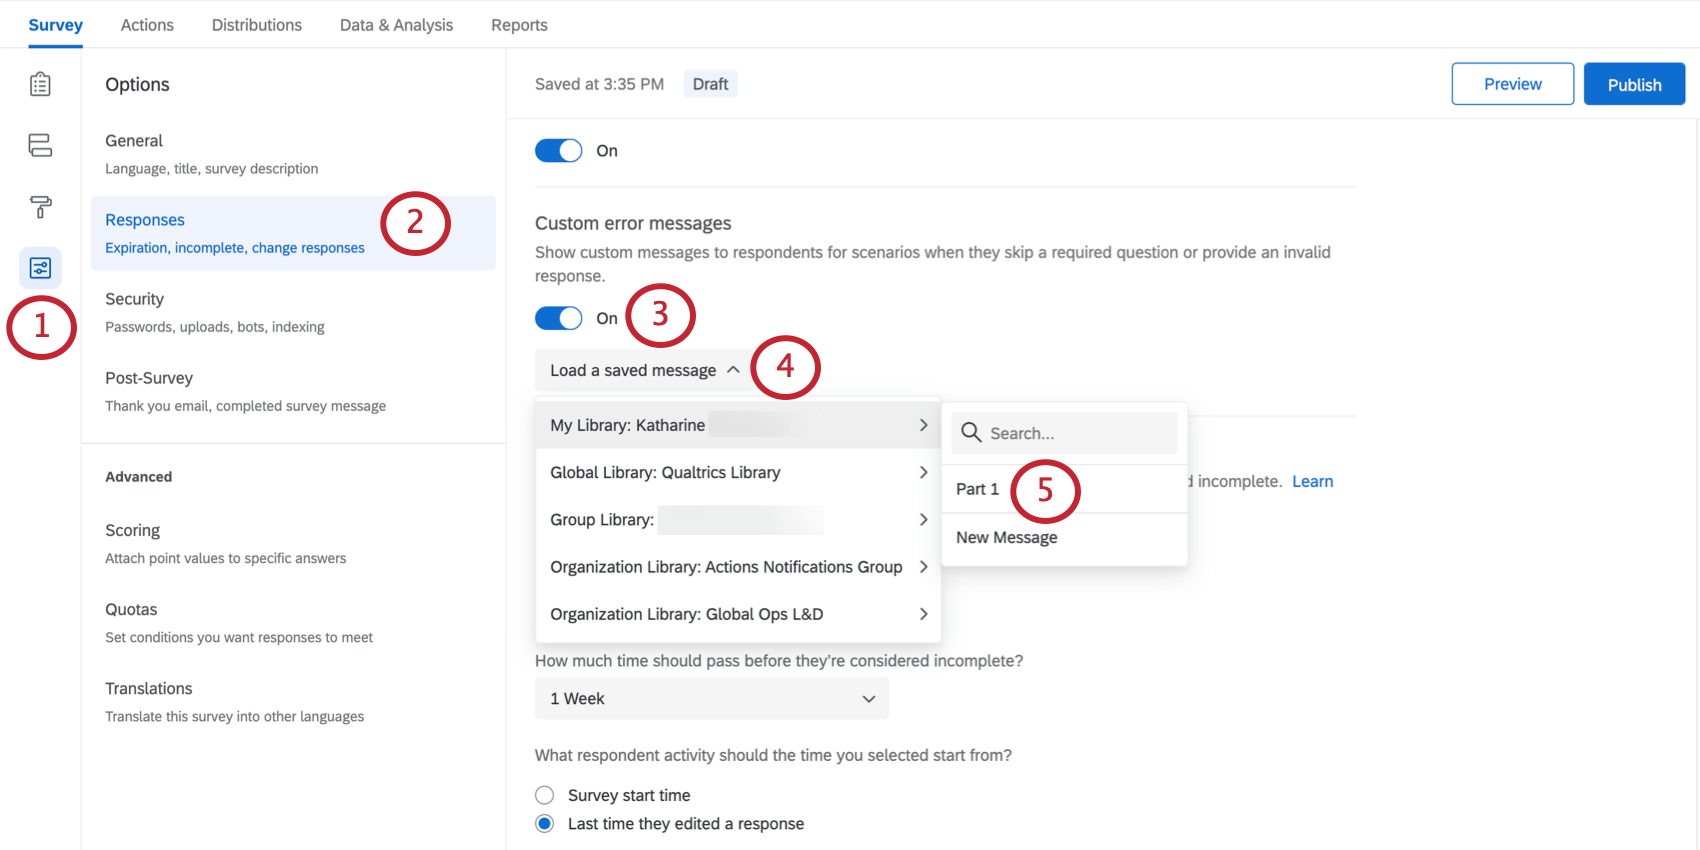
Custom Error Messages
Qtip: This setting used to be called “custom survey validation message” and was in the Survey Experience section of the old survey options.
When building your survey, you have the option of forcing respondents to answer certain questions. If a respondent doesn’t answer the question, they’re shown the error message, “Please answer this question.” In survey options, you can also customize a new standard error message to display in this situation.
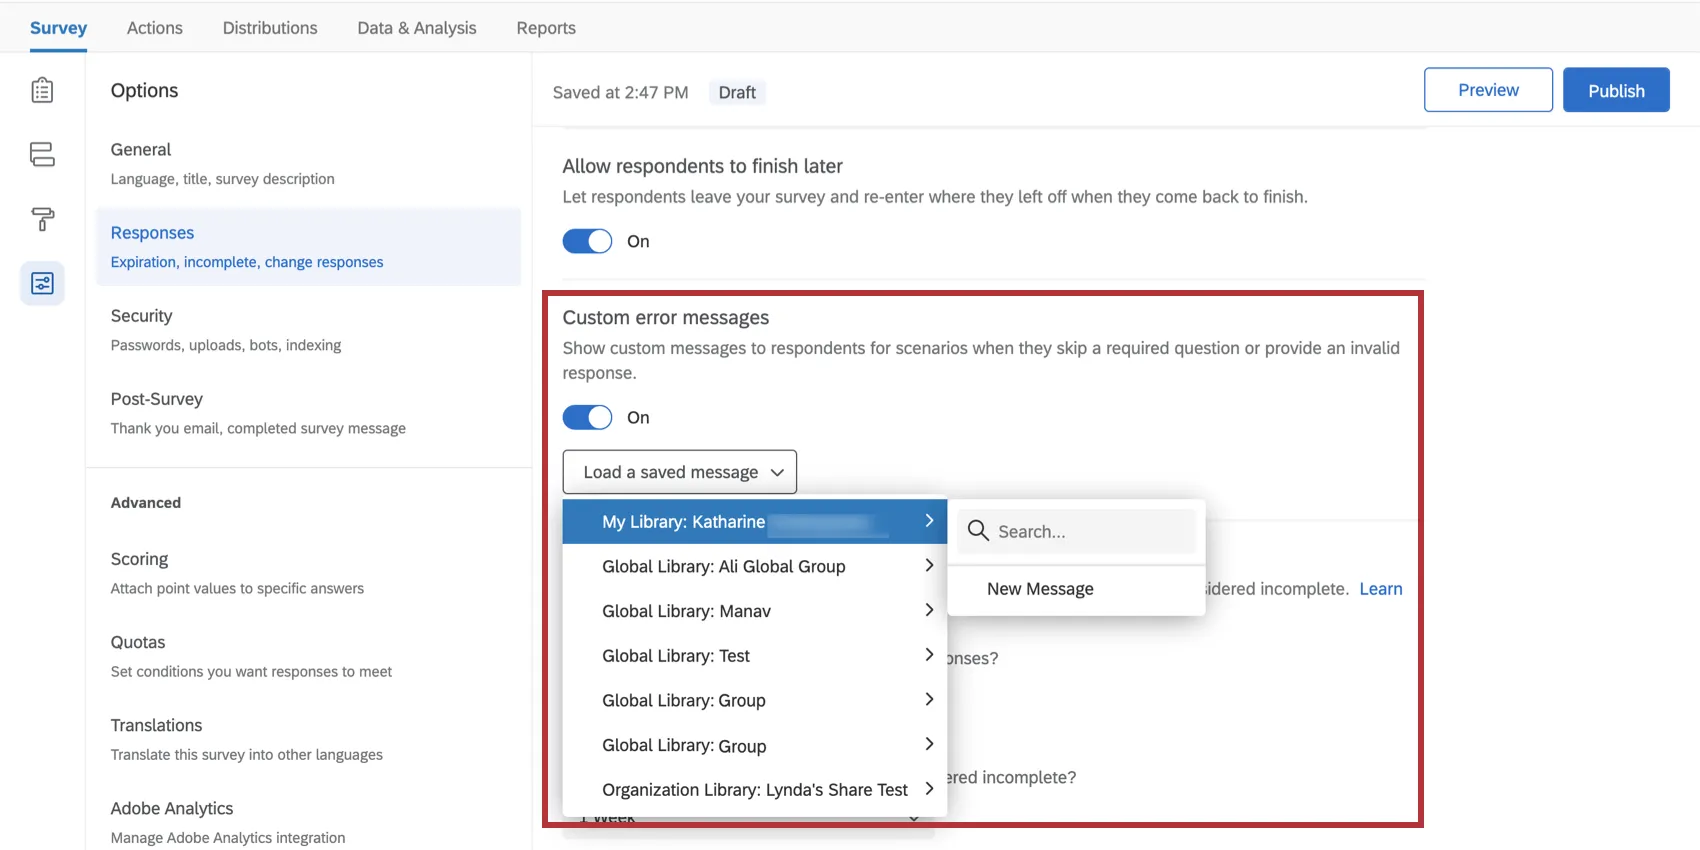
Qtip: You can also create and edit custom error messages in the library.
Creating a new Validation message
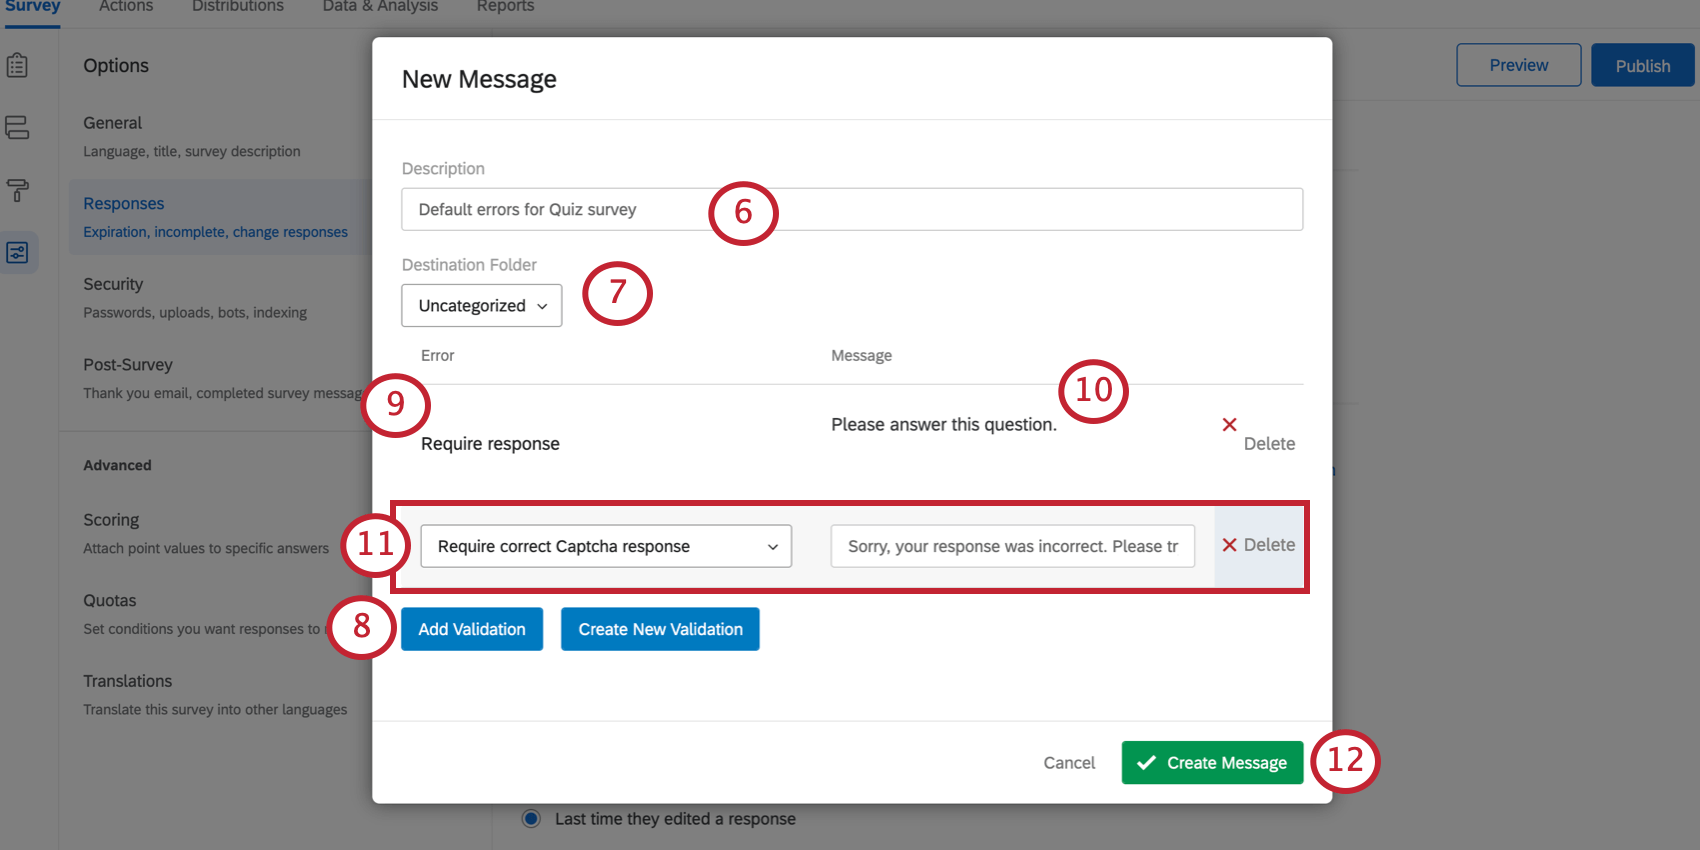
Qtip: To add a system error category to the defaults list, select Create New Validation. This would be appropriate if you want to create a new error type to be used in custom validation.
Qtip: Custom error messages can also be created and edited in the message library.
Selecting an existing Custom Validation message
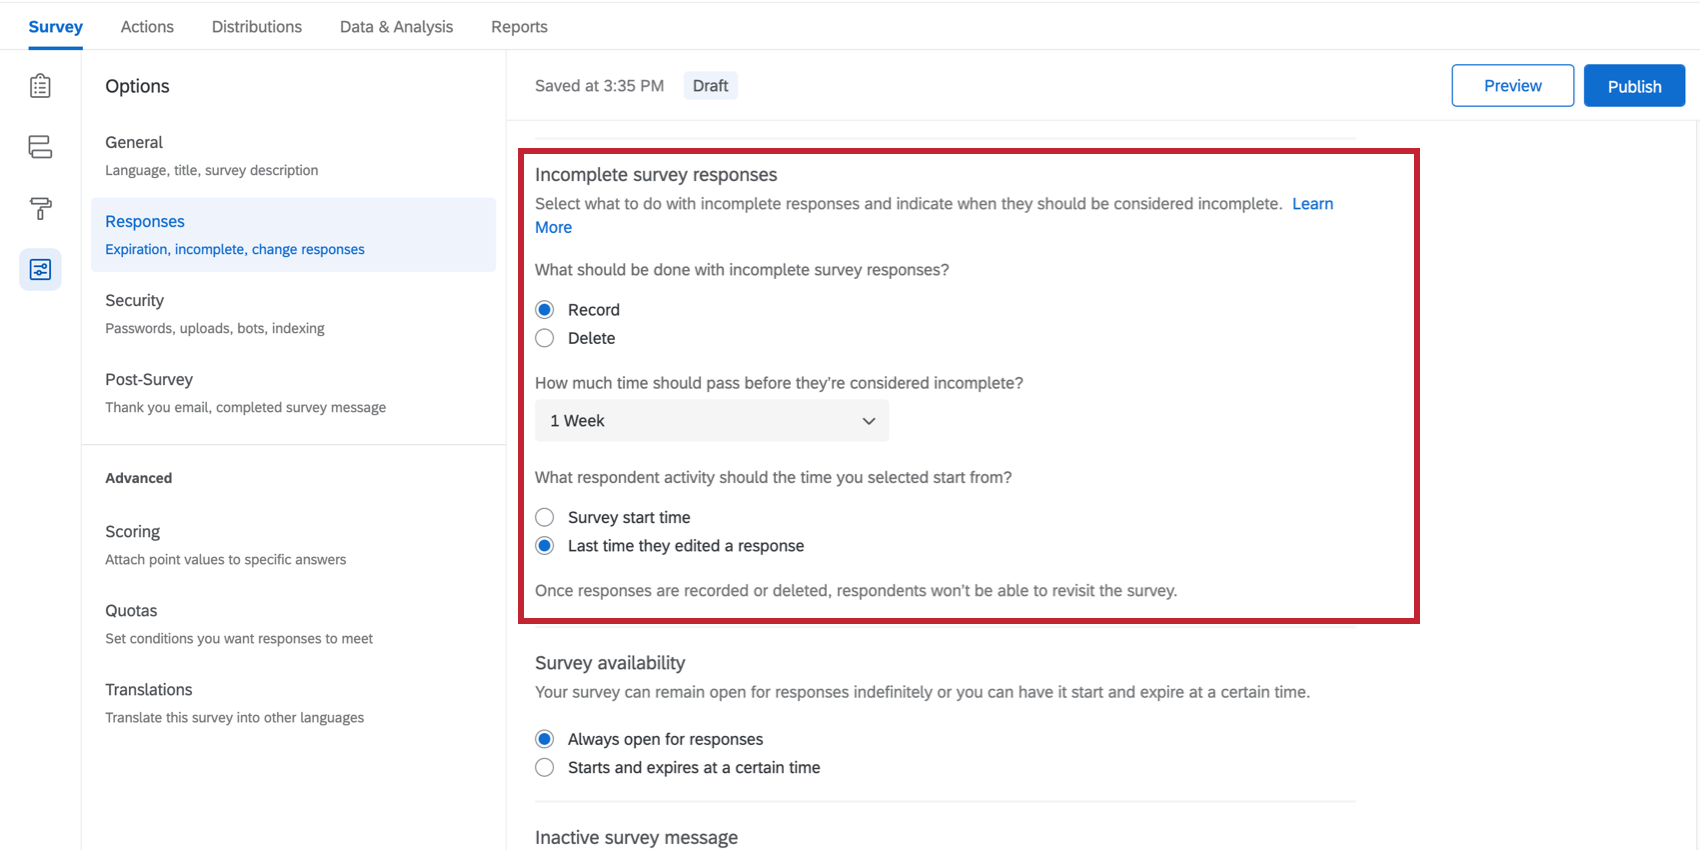
Incomplete Survey Responses
Sometimes, respondents will get partway through a survey before they quit. The Incomplete survey responses settings allow you to determine whether to record or delete incomplete responses, and after how long. See the Incomplete Survey Responses support page for more details.

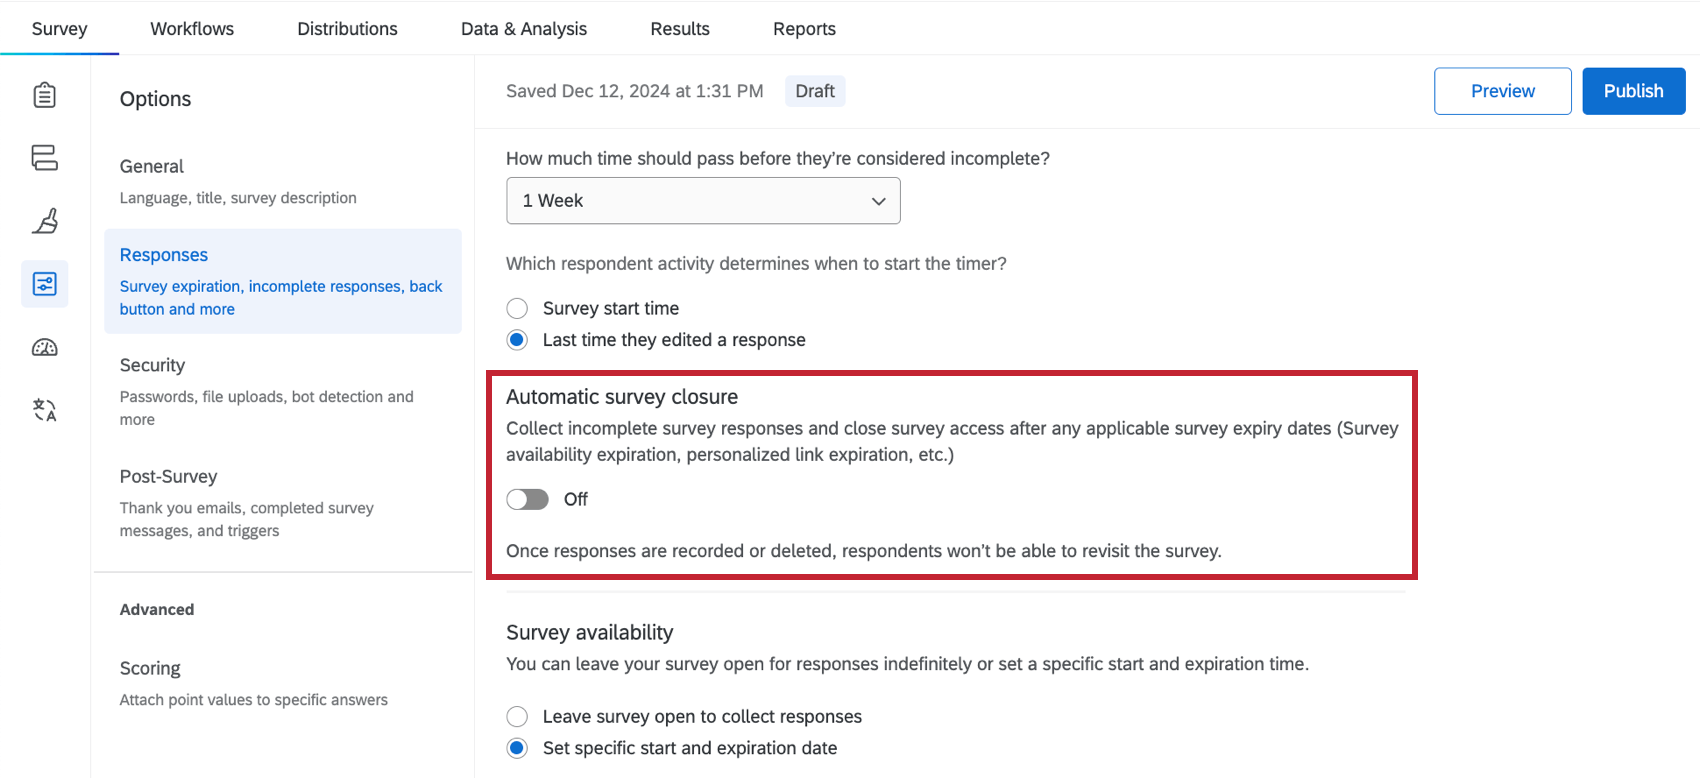
Automatic Survey Closure
The Automatic survey closure setting allows you to automatically close access to the survey after any survey expiration dates are reached. Once responses are recorded or deleted, respondents won’t be able to revisit the survey. In-progress survey sessions will be closed based on the first occurring expiration setting, which can include:
Example: Let’s say our survey availability is set to end on Aug 15, personal link is set to expire on Aug 14, and the survey is set to record incomplete responses after 1 week. If a respondent starts and abandons the survey on Aug 1, their partial response is submitted on Aug 8 due to the 1 week incomplete response setting. If a respondent starts and abandons the survey on Aug 10, their partial response is submitted on Aug 14 when the personal link expiration date is reached.

Example: You are doing market research and need to ensure no data is collected after a specific deadline due to contract obligations. Enabling Automatic survey closure and choosing to delete incomplete survey responses ensures compliance with contract obligations.
Qtip: This setting is turned off by default.
Attention: There is no way to extend the availability window for a response once it has been started. For example, if you make the availability expiration June 20, then Barnaby starts his survey, then you extend the expiration to June 21, this change will not affect Barnaby or give him more time to complete the survey. His due date is still June 20. The Automatic Survey Closure settings cannot change this.
Survey Availability
Qtip: This feature used to be called “survey expiration” and was in the Survey Protection section of the old survey options.
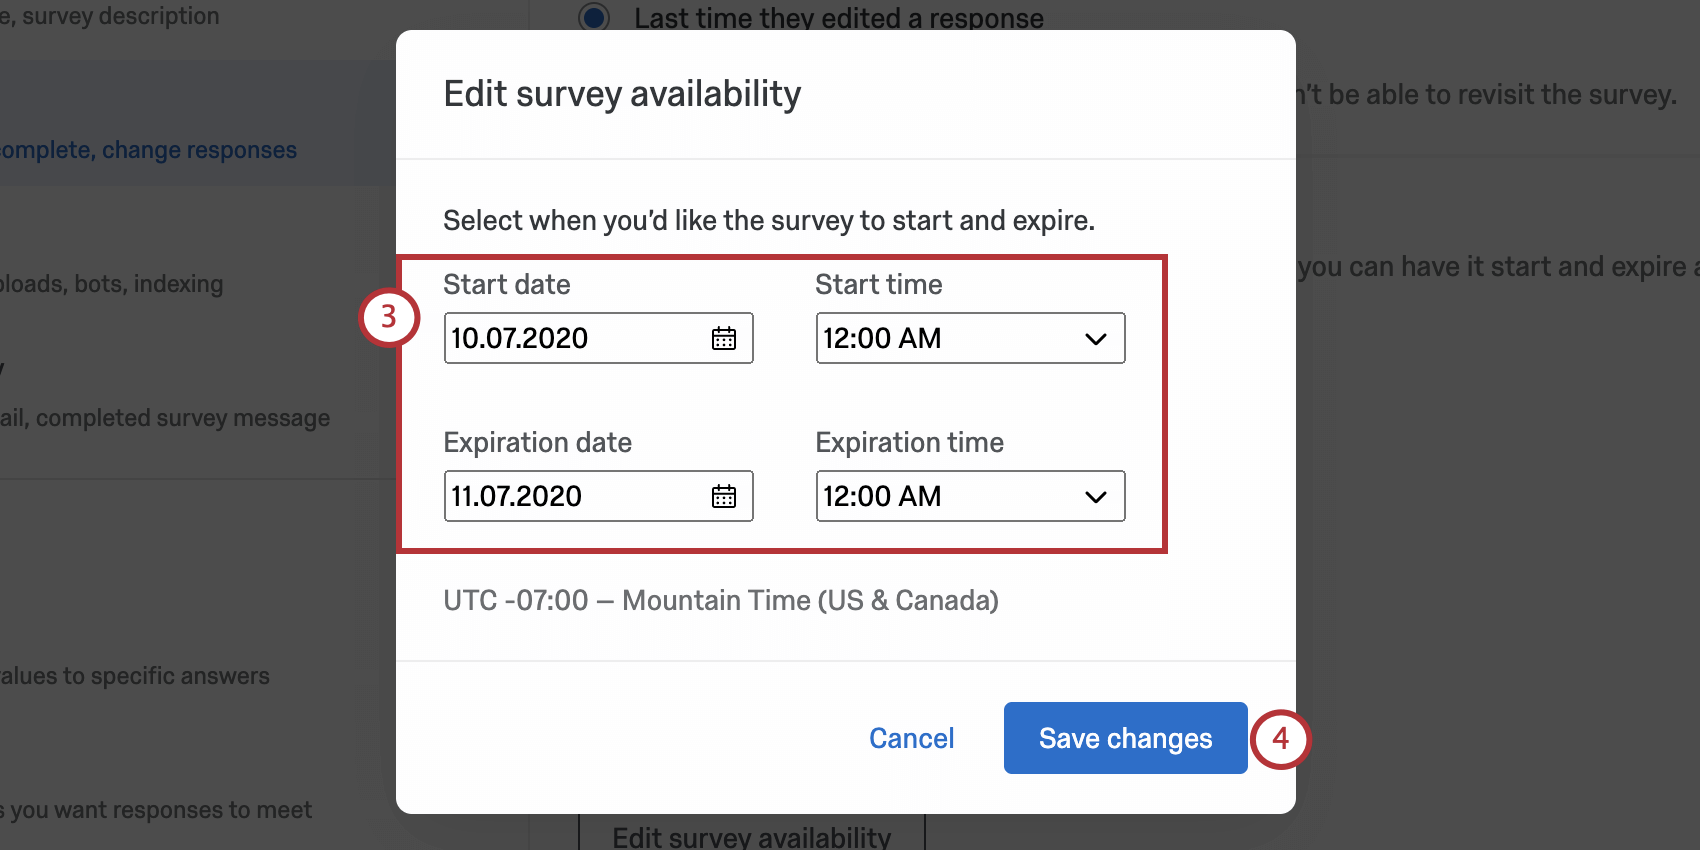
With the survey availability setting, you can make your survey available as long as its status is active, or set an expiration date when the survey will be closed to new respondents.
Example: If you only want to collect responses that started before the new year, you could set New Years Day as the expiration date so that you can enjoy the holiday festivities without needing to remember to deactivate your survey.
Respondents trying to access your survey before or after the specified range will see a simple message explaining that the survey is currently unavailable. The expiration date specifically affects participants’ ability to start the survey. Participants in the middle of a response will be allowed to continue taking their survey and can finish after the expiration date.
Qtip: The start and end times are based off the time zone of your account, which can be changed in your account settings.
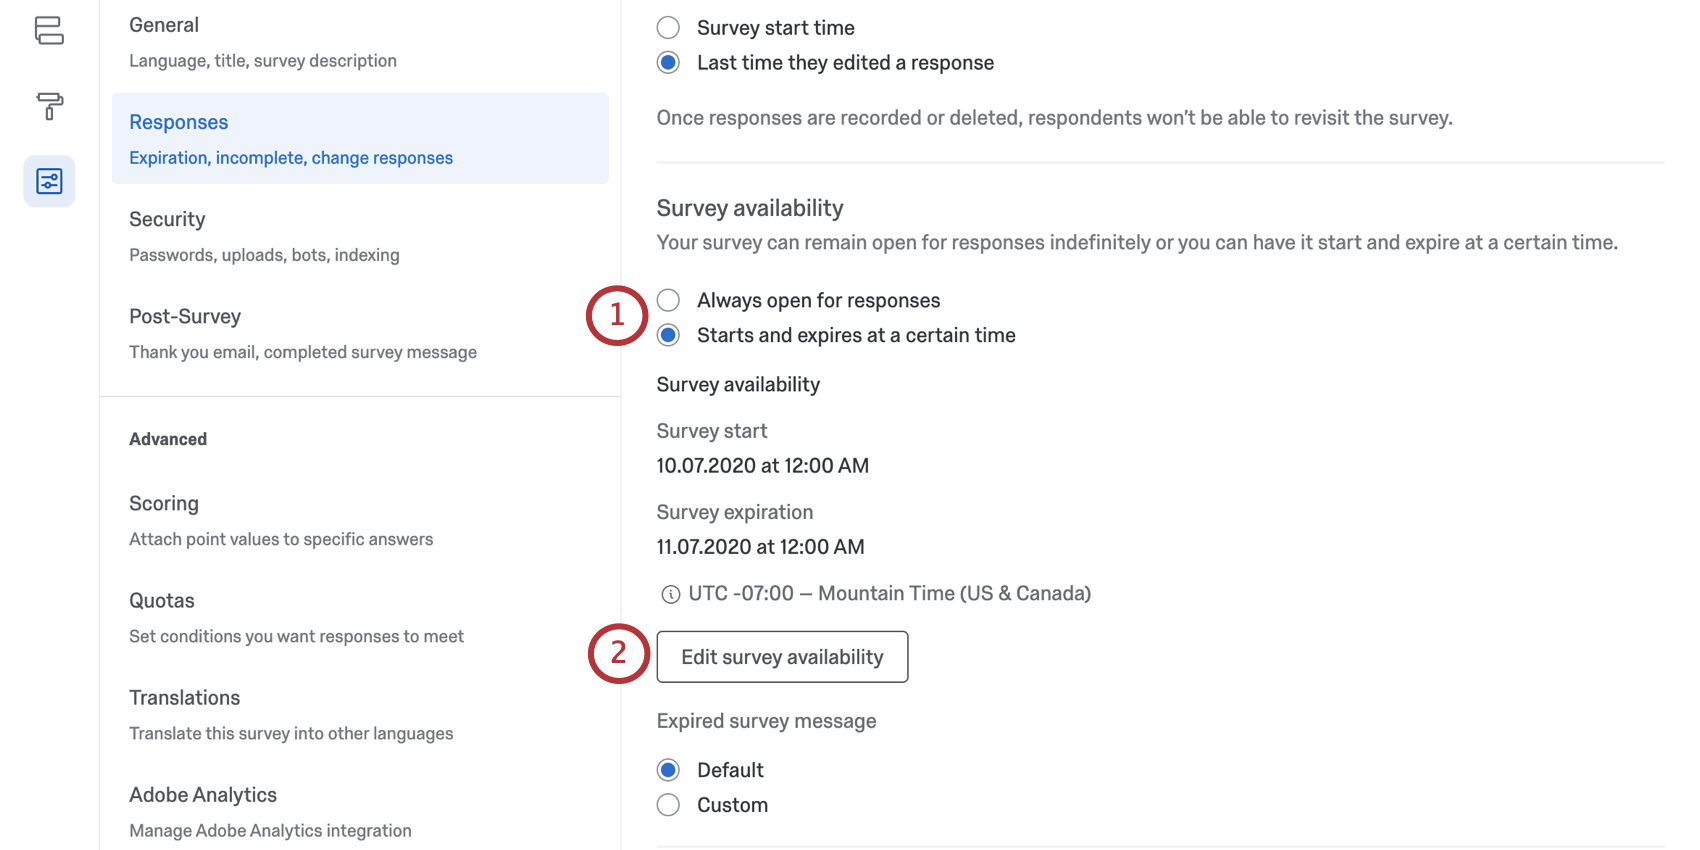
- Always open for responses: This is selected by default. The survey will be able to collect responses so long as the status is active.
- Starts and expires at a certain time: Set a specific start and end date for your survey.
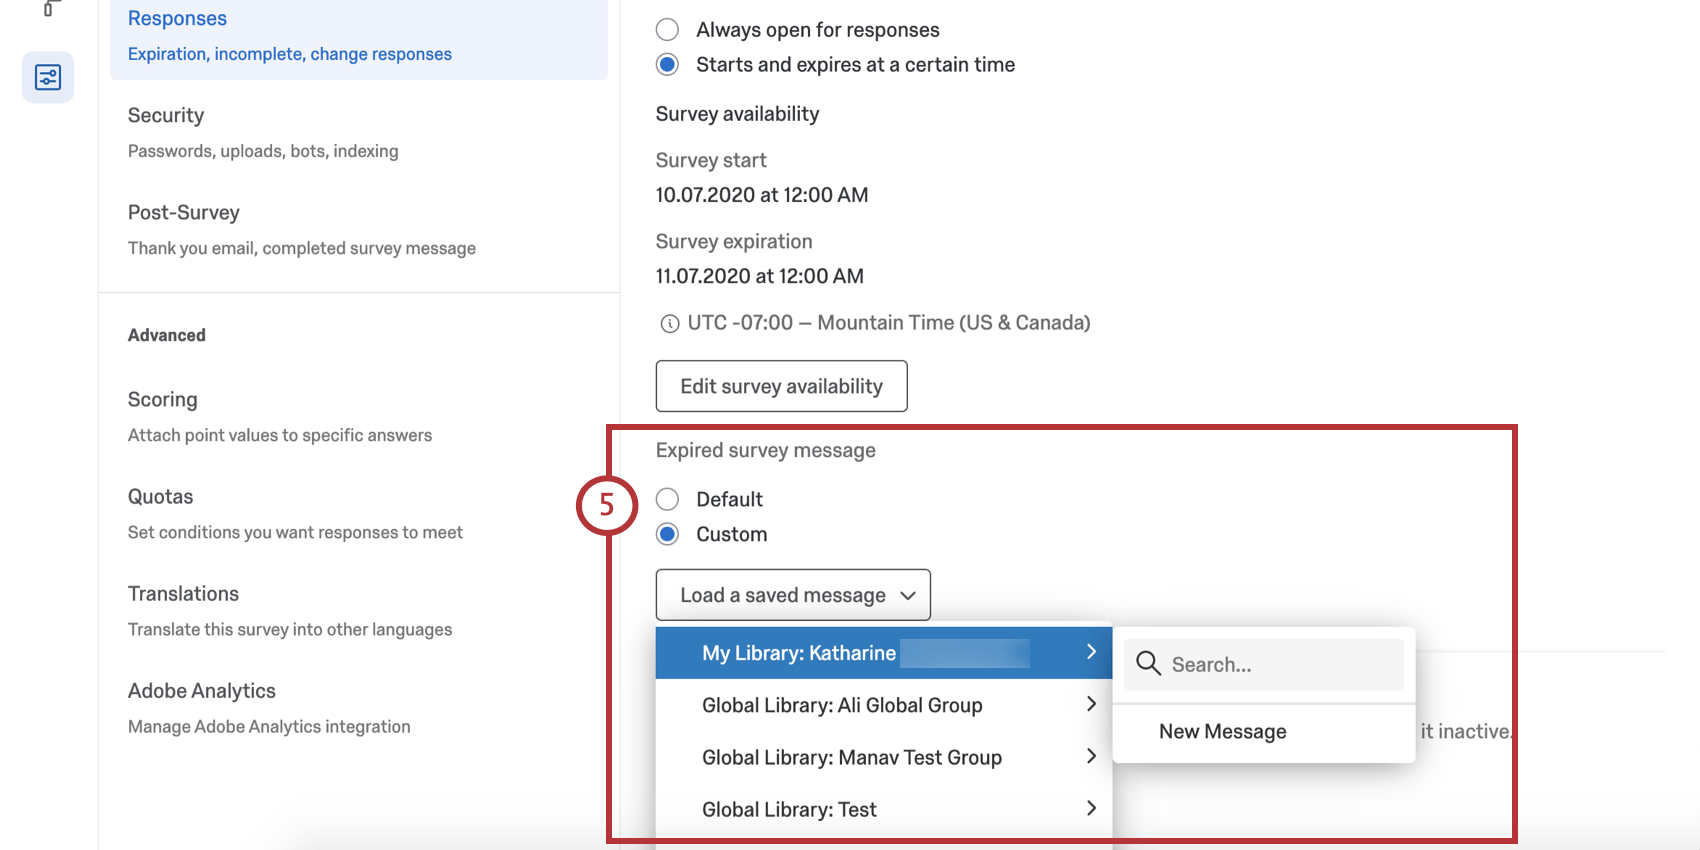
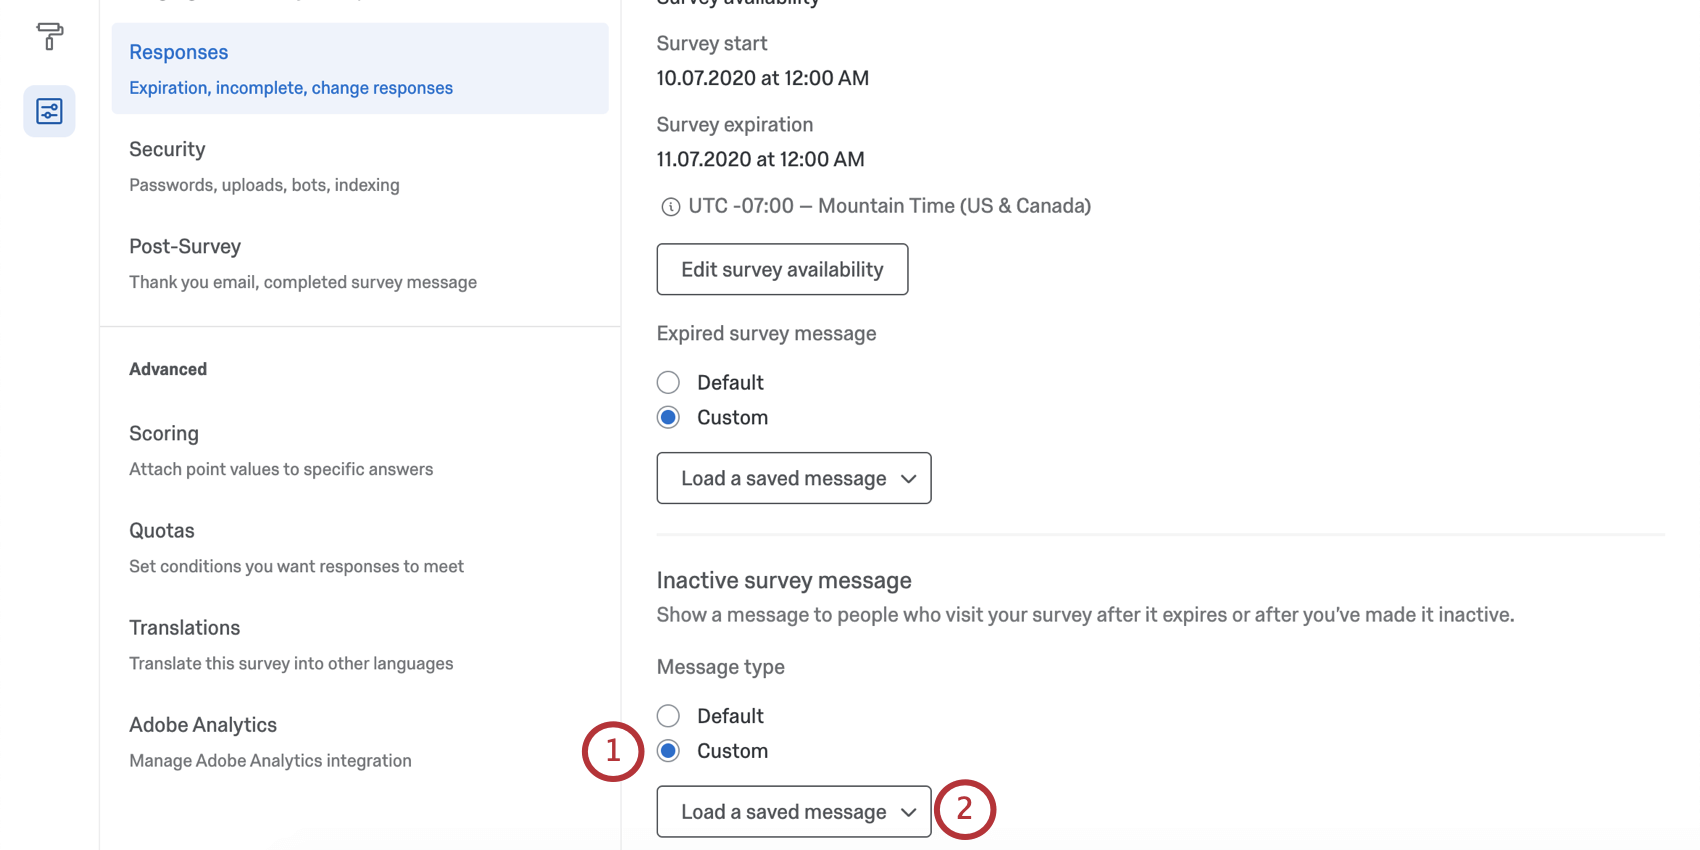
Inactive Survey Message
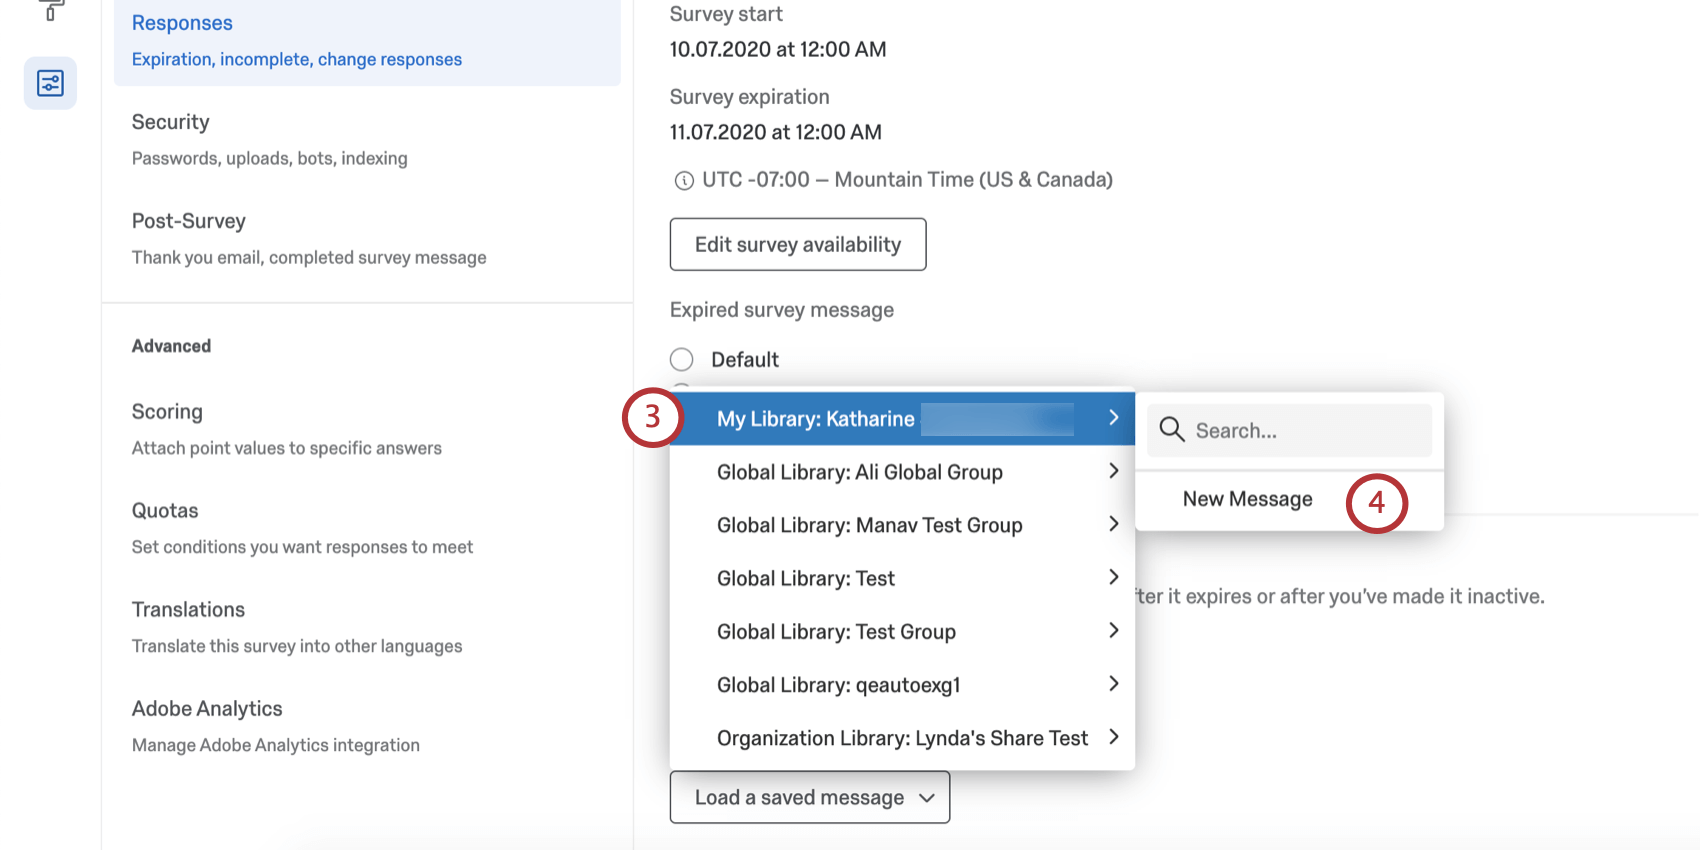
When someone attempts to take a survey that has been deactivated (e.g., when your survey is no longer collecting responses), the following default message is displayed: “Sorry, this survey is not currently active.” You can change this message to a custom message by doing the following:
Qtip: Alternatively, select an existing message for use.
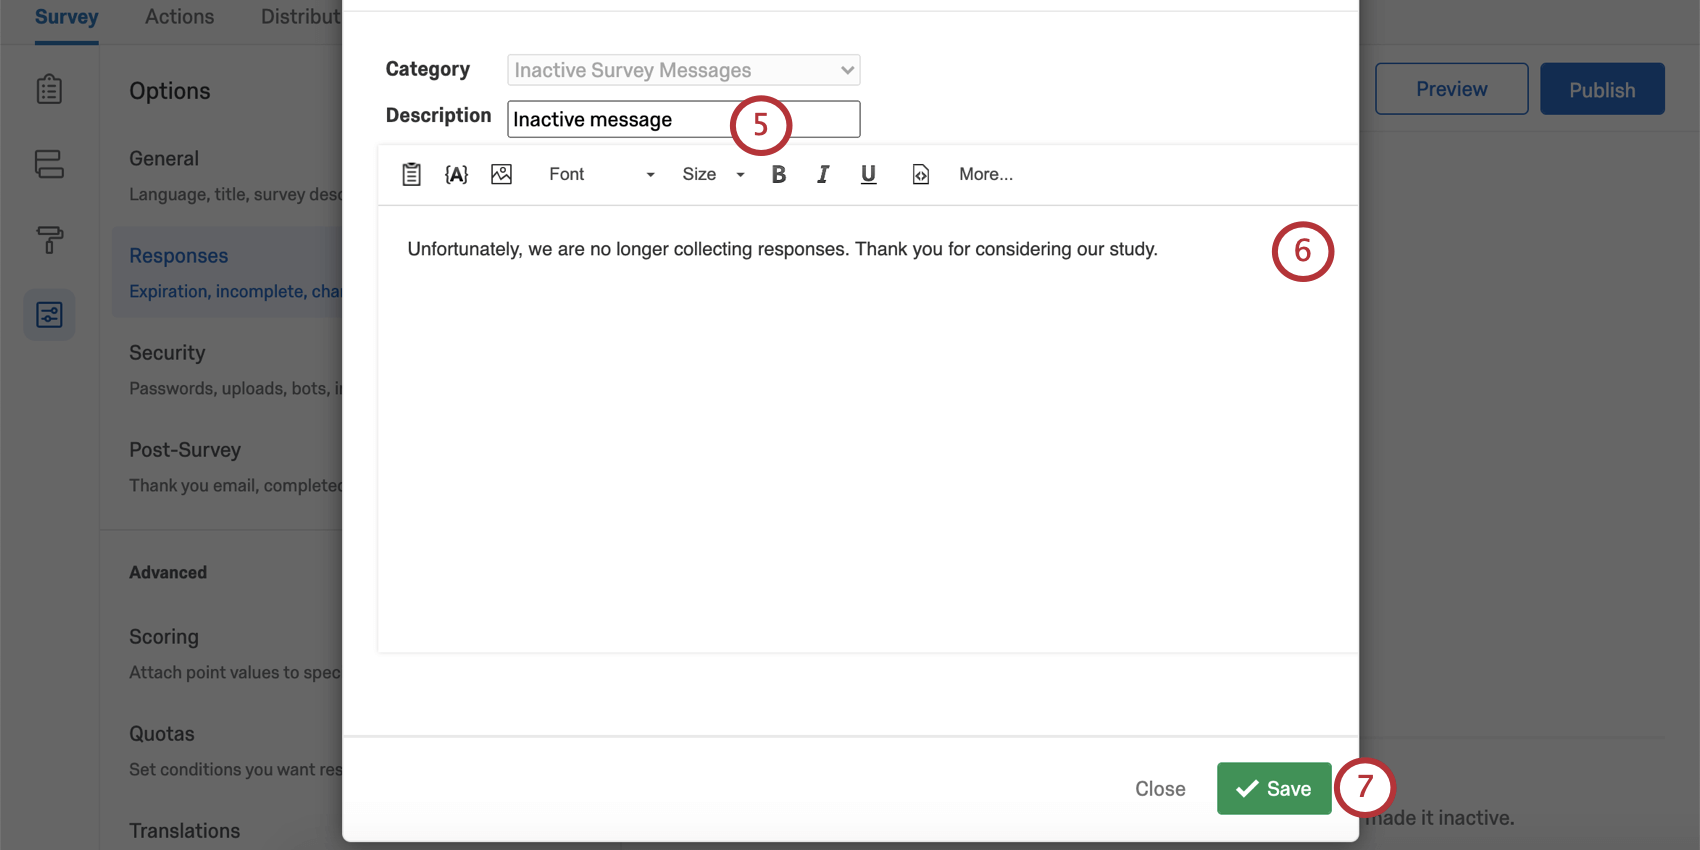
Qtip: The inactive survey message will display to respondents once the survey has been deactivated. To deactivate an active survey, you must pause response collection. See the linked support page for details on how to pause responses.
Survey Options in Different Project Types
Survey options are available in many different types of projects. The options described on this page are available in:
There are a few other projects that have access to survey options, but with unique functionality to keep in mind.
- For Engagement, Lifecycle, or Ad Hoc Employee Research projects, please see Survey Options (EX).
- For Pulse, see the section on survey options in Features Available in Pulse Surveys.
- For 360 projects, see Survey Options (360).
- For Conjoint and MaxDiff, see Survey Options.
FAQs
My participants are telling me that their survey link is not working. What could be causing this?
My participants are telling me that their survey link is not working. What could be causing this?
- Prevent Multiple Submissions: The participant may be attempting to take a survey on the same computer and browser with the Prevent Multiple Submissions feature enabled in the Survey Options. Prevent Multiple Submissions places a cookie on the participants browser that will prevent another survey session from being started from that device. The participant will need to clear their browser cache.
- Used Individual Links: The participant may be trying to access the survey through a used or expired Individual Link. Individual Links are created automatically for every person in your contact list when you send the survey out through the Qualtrics mailer or create Personal Links. This kind of survey link can be used only once and then becomes invalid. We recommend not forwarding any Individual Link to avoid this situation. In addition, if your respondent clicks onto the link, decides not to fill anything out, and leaves the survey for a long time (one week by default), this can also cause the link to close, because the incomplete survey response timeframe has passed. In both of these scenarios, the participant will need to receive another survey link (either through a new email distribution, Personal Link, or the Anonymous Link) in order to access the survey.
- Expiration: The participant may be trying to access a survey that is expired. In the Survey Options, there is an option to set an Expiration Date (after which participants can no longer start new surveys). Turn off the expiration to allow them access to the survey. (Please note that copying a project will copy over all survey settings, including the Expiration Date.)
How can I make sure the participant only takes the survey once?
How can I make sure the participant only takes the survey once?
If you are distributing your survey through the Anonymous Link, there are 2 options to prevent participants from retaking the survey:
- Prevent Multiple Submissions: You can enable Prevent Multiple Submissions in your Survey Options. This option will place a cookie in the participant’s browser that will restrict them from retaking the survey on that browser. However, the participant could still clear their cookie cache, use a different browser, or use a different computer in order to take the survey again.
- Authentication: You can use the Authenticator element in the Survey Flow. This option will require the participant to be a member of a contact list you have previously set up within your account. The Authenticator options will allow you to prevent contacts from retaking the survey by using the contact list as an authentication database.
I set a survey expiration date, but some responses are still coming in. What is happening?
I set a survey expiration date, but some responses are still coming in. What is happening?
When the survey expiration date arrives, respondents who have already started their surveys will be able to complete their responses for a limited period of time. How long they have is determined by the Incomplete Survey Response setting (also found in Survey Options).
For example, let's say Survey Availability is set to 60 days and Incomplete Survey Response completion is set to 2 weeks. You receive your survey link and wait 55 days before clicking on it. As soon as you move past the first page (i.e., click the first "next" button), the Incomplete Survey Response setting takes over. You now have 2 weeks to finish taking the survey (even though the survey expires in 5 days). In this situation, participants can submit survey responses after a survey has expired or been deactivated.
If you want to avoid this scenario, you can pause response collection and choose to close all incomplete responses. This will close all surveys regardless of Incomplete Survey Response status and stop anyone from submitting after that point. All the partial data will be added to the Recorded Responses page with all the other survey data.
How do I change the link expiration when I email my survey using the Qualtrics Mailer?
How do I change the link expiration when I email my survey using the Qualtrics Mailer?
If you would like to change the expiration for your entire survey and not just a few links, see Survey Availability. This availability can be changed at any time.
Why do the options for Anonymous and Multiple Completes links not show up when I try to change the Link Type in my email I am sending?
Why do the options for Anonymous and Multiple Completes links not show up when I try to change the Link Type in my email I am sending?
Navigate to the Survey tab and select Survey Options. In the Survey Protection section you can change your survey to be Open Access which will allow you to choose Anonymous or Multiple Completes links when sending your survey.
Does a survey expire? Under what circumstances?
Does a survey expire? Under what circumstances?
- Incomplete Survey Responses: After someone begins a survey session, they will have 7 days to complete the survey before it closes (meaning the data is recorded and they can no longer edit their response). You can adjust this setting in the Survey Options in the Survey tab. Once changed, the change only applies to new respondents going forward.
- Link Expiration: When you send an email distribution or create personal links, your respondents will have 60 days to open the survey link before it expires. After they begin the survey, they will be subject to the Incomplete Survey Responses rule mentioned above. Once this expiration is set, it can’t be edited.
- Survey Expiration Date: You can set this in the Survey Options for a specified date and time. Any respondent that attempts to start the survey after the set expiration date will not be able to enter. However, those respondents who have already started a survey will still be able to access it. You can turn this expiration on or off at any time.
I want to offer the opportunity to enter a raffle following the end of my survey for my participants. I want participants to submit their email address, but keep it separate from their response so it remain anonymous. Is this possible?
I want to offer the opportunity to enter a raffle following the end of my survey for my participants. I want participants to submit their email address, but keep it separate from their response so it remain anonymous. Is this possible?
Does Qualtrics set the value of the "Referer" field?
Does Qualtrics set the value of the "Referer" field?
As of August 25, 2020, Chrome has changed the default behavior around the referrer field. Previously Chrome defaulted to no-referrer-when-downgrade as the value for Referrer-Policy. Now the default value is strict-origin-when-cross-origin. What that means is that if the customer hasn't specified their own policy on their page, it will default to this policy. This policy affects requests that are cross origin, meaning the parent page is on a different domain that the link (i.e., my webpage is example.com and my survey is on the base URL test.qualtrics.com). In a cross origin request, only the origin will be passed. That means that if my page is actually at the URL qualtrics.com/support-center, the Referer is going to be qualtrics.com. Changing this behavior has to be done by the owner of the parent page.
That's great! Thank you for your feedback!
Thank you for your feedback!