-

Qualtrics Platform -

Customer Journey Optimizer -

XM Discover -

Qualtrics Social Connect
Web Service
About Web Services
Sometimes you may want to include more complex features in your survey. Maybe you want to pull in the top 10 headlines from a news website into your survey, or you want to automate a second survey distribution to be emailed to the respondents of a first survey exactly 2 hours later. A Web Service would allow you to do just that by making requests to a designated URL.
Adding a Web Service
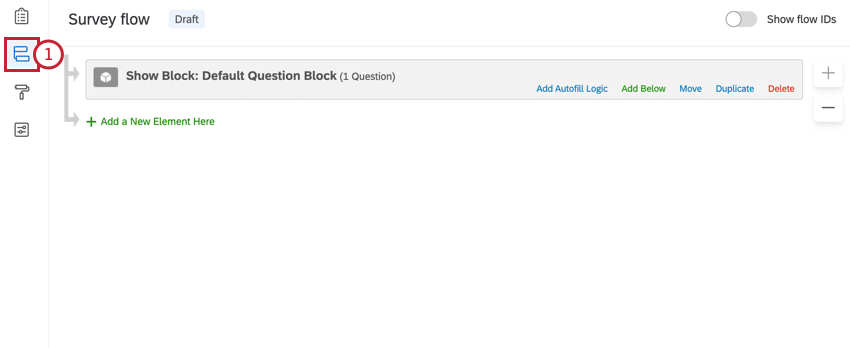
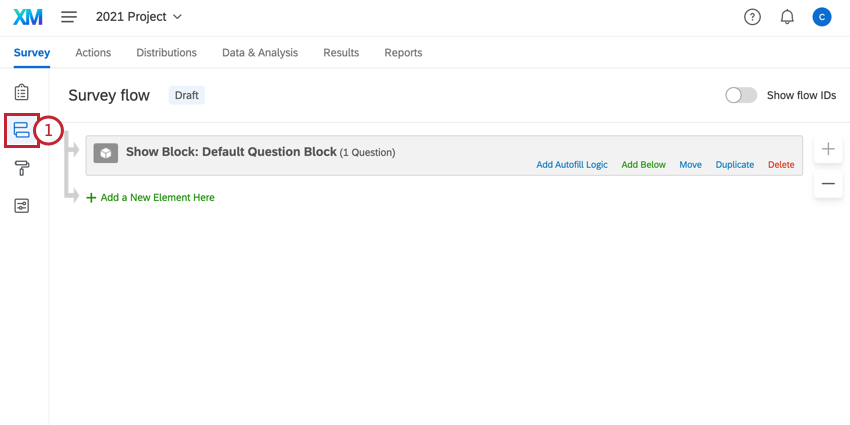
- While editing your survey, click the Survey flow icon in the left navigation bar.
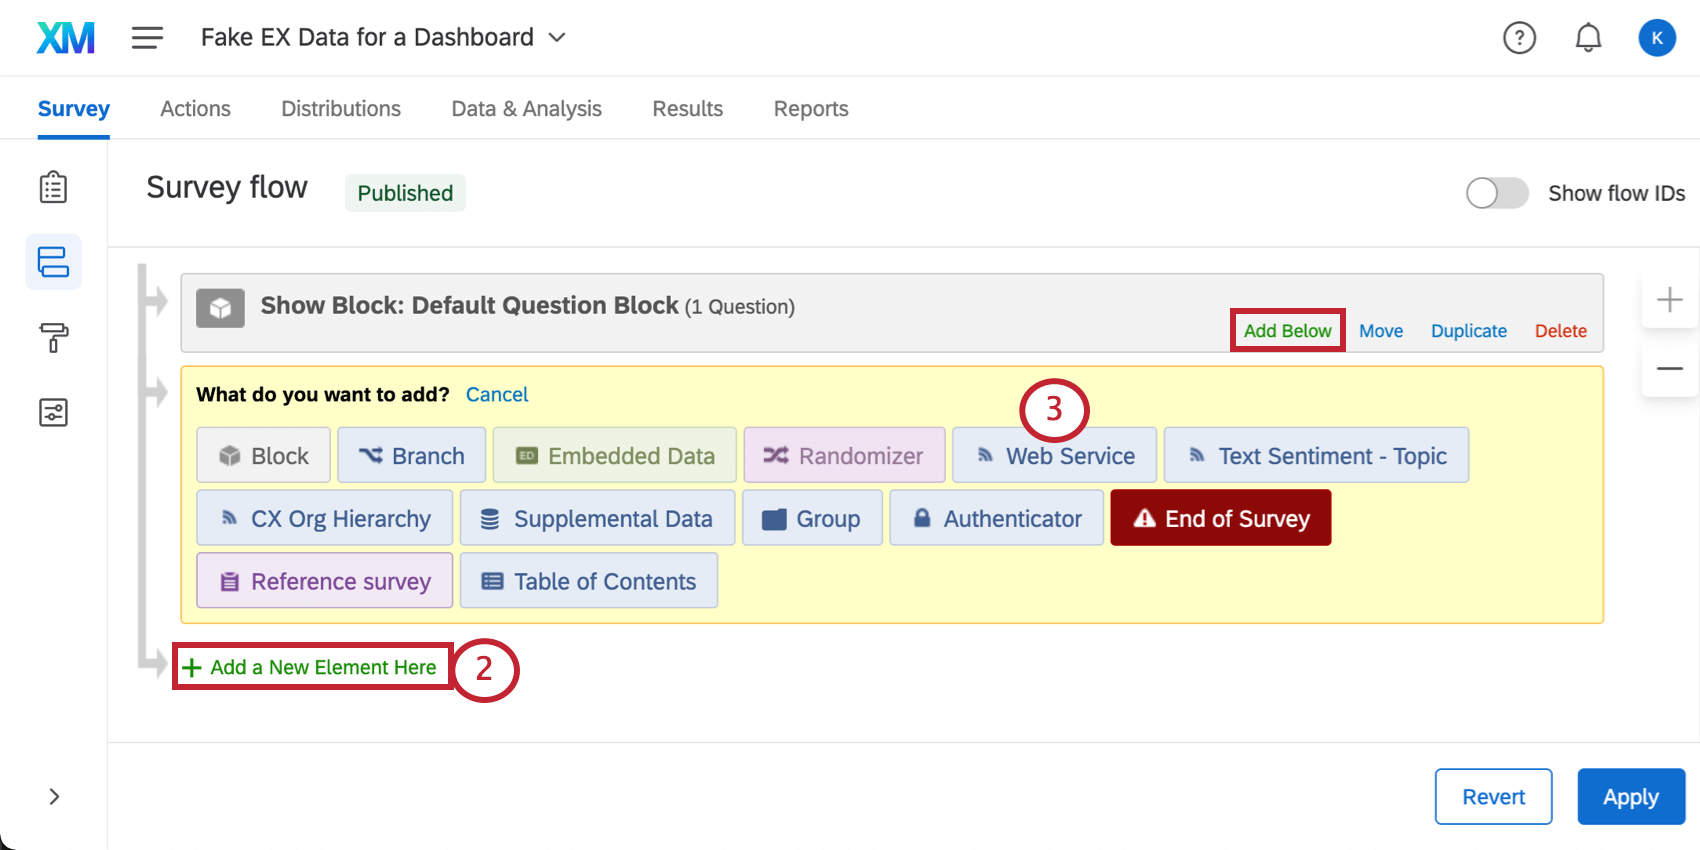
- Click Add Below or Add a New Element Here.
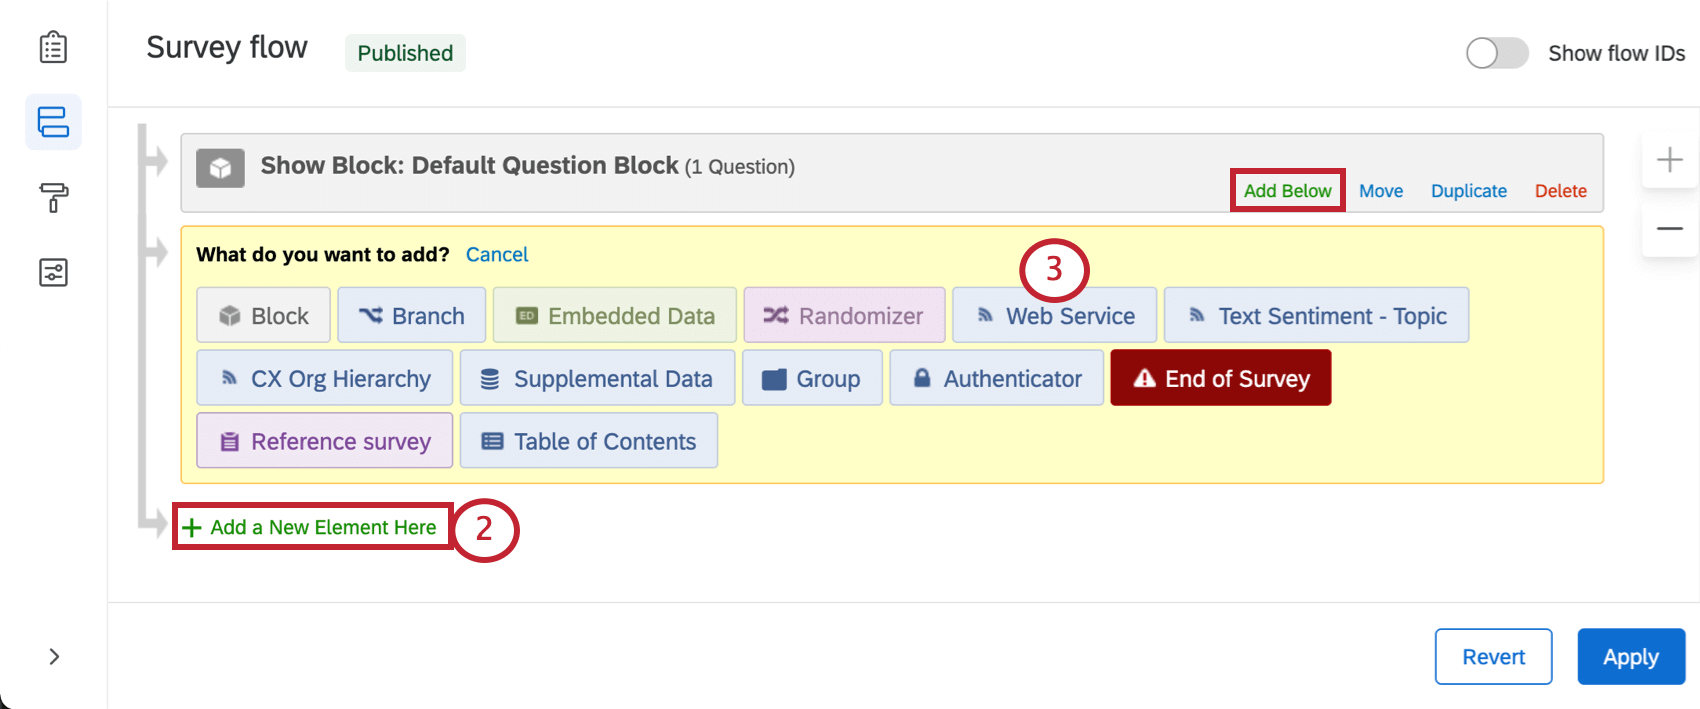
- Select Web Service.
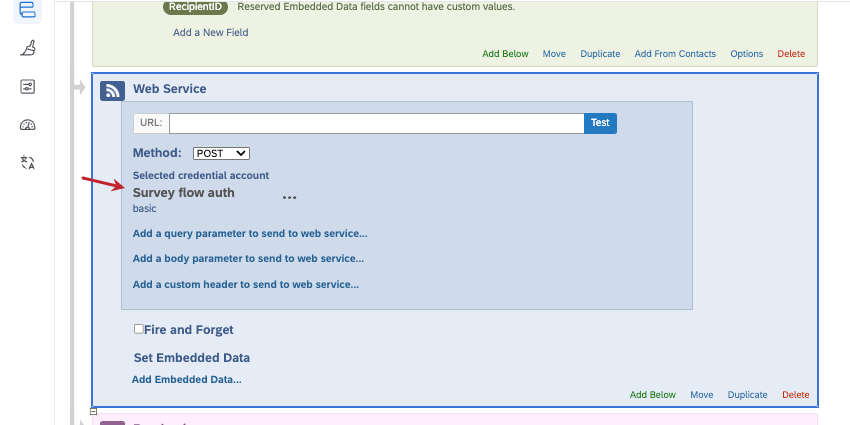
- In the URL field, paste the URL of your external Web Service.
 Qtip: You can use piped text to pass survey information into your endpoint URL via query strings.
 - Select a Method for your web service. We will explain more about the different methods in the section below.
Methods
Our web service feature allows you to choose from a series of Methods to request information from your specified URL.
| Method Type | Action | Example |
| GET | The web service goes to the URL and retrieves information. | Retrieve information about a member of your contact list. See the Get Contact API call for more details. |
| POST | Go to the URL and save information there. | Create a library message. |
| PUT | Update or replace existing information. | Change a username. This is 1 of the things you can do with the Update User call. |
| PATCH | Update or replace existing information. Very similar to PUT. While our web Service offers this method, our API does not use PATCH calls. | Modify data saved on your server. |
| DELETE | Remove information. | Delete a graphic from your library. |
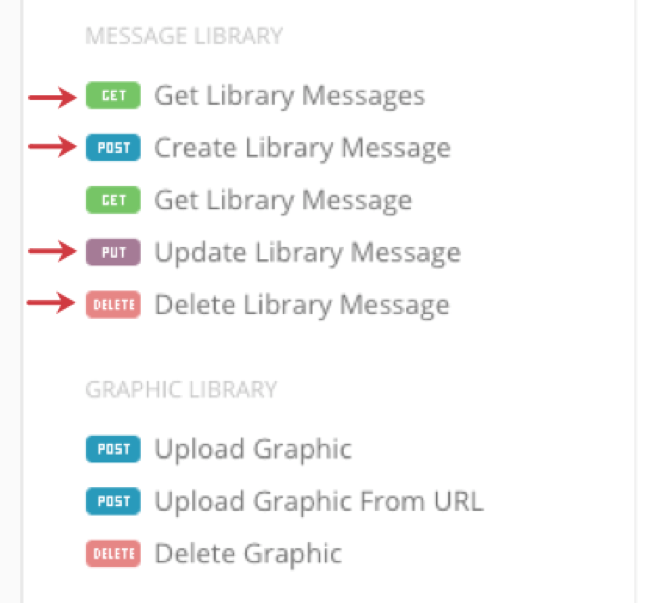
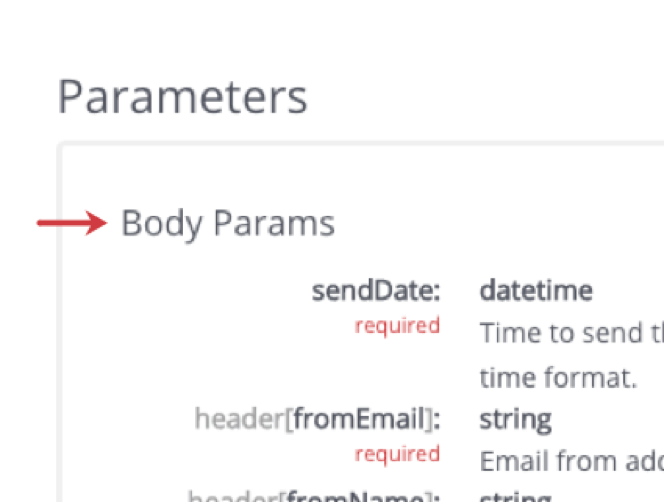
If you are using our API calls, the documentation will tell you which method to use, as indicated in the screenshot below.
Adding Credentials to a Web Service
As an optional step, you can add authorization credentials to your survey flow’s web service. Survey flow web services are compatible with basic, API key, and OAuth 2.0 methods, and can share credentials with web services in workflows.
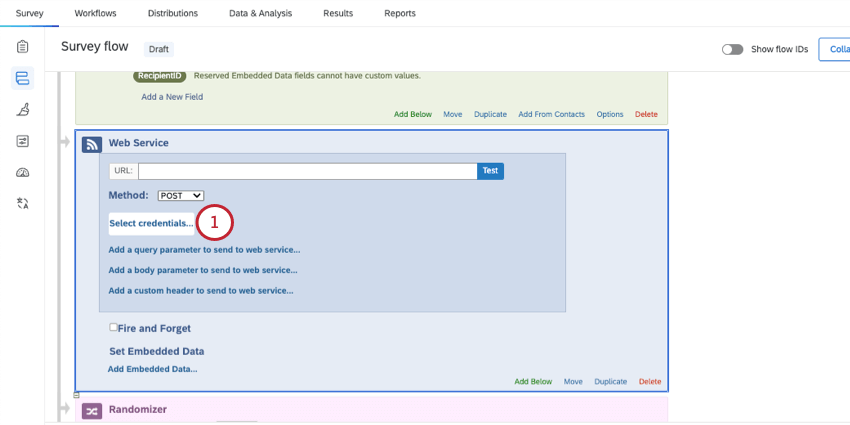
Setting Credentials
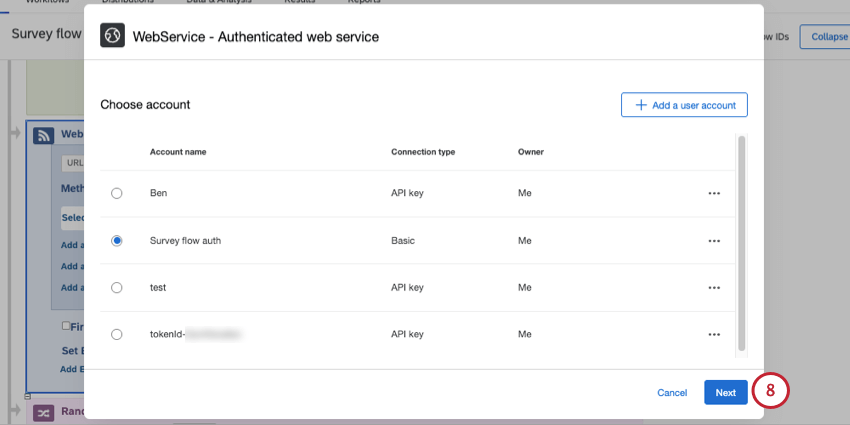
- Click Select credentials.
- You can choose from an existing set of credentials, or you can click Add a user account.
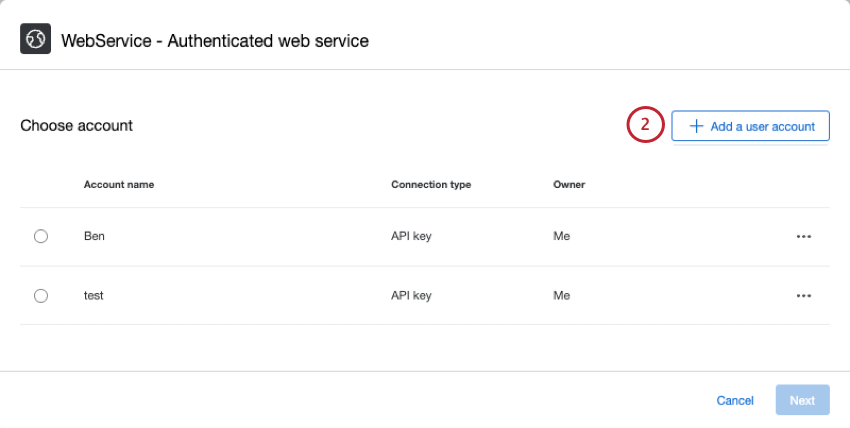 Qtip: The accounts you see in this window may include ones created for web services in workflows, or made by Brand Administrators for use by the entire organization.
 - Give a name to identify your credentials with later.
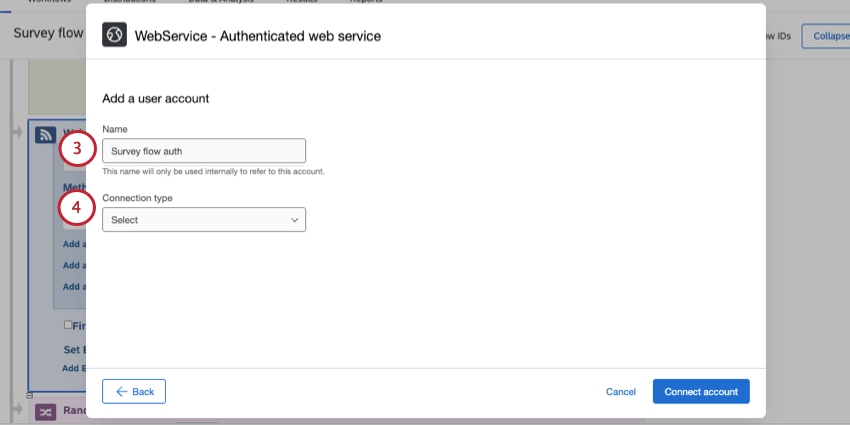
- Select the connection type:
- Basic: Provide a username and password.
- API key: Use a unique identifier to authenticate to an API.
- OAuth: Authorize third-party access to your server resources without sharing your credentials.
- Set up your chosen credential following the steps on this linked page.
- Decide whether to use mTLS. Learn more at the linked page.
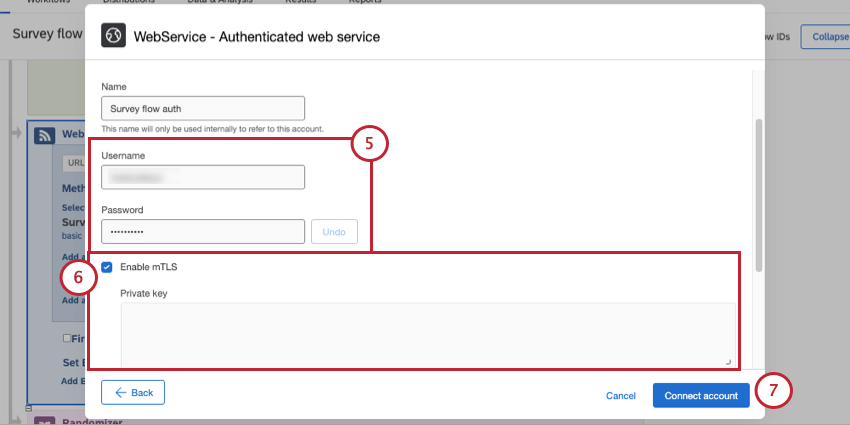
- Click Connect account.
- Click Next.
- Your credentials will appear on your web service.
Configuring Credential Parameters
You can adjust where your credentials are added in the request, in addition to name and template parameters.
- Click the 3 dots next to the credentials.
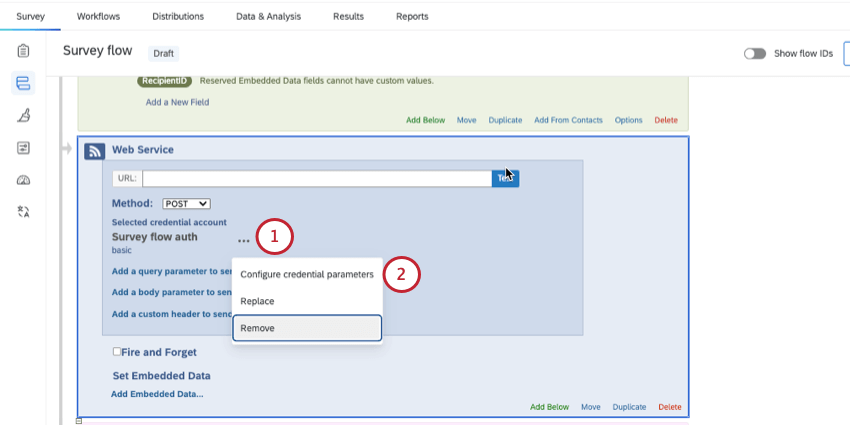
- Select Configure credential parameters.
- Under Parameter format, choose where in the request the credentials should be passed:
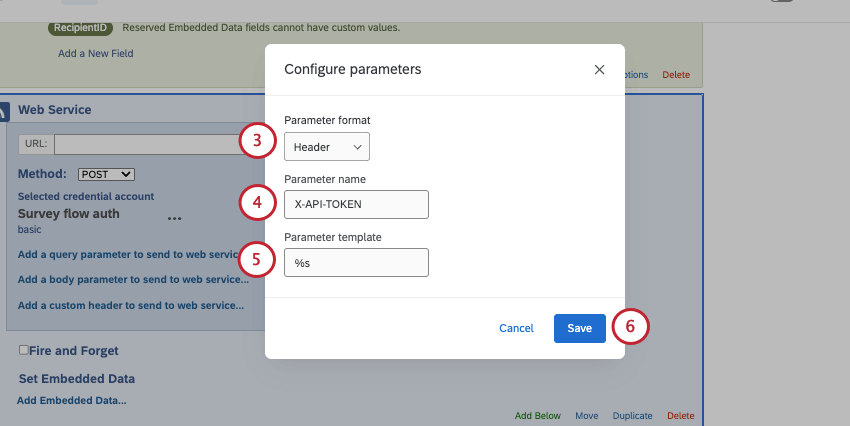
- Header
- Query
- Body
- Give the Parameter name.
- Enter the Parameter template.
- Click Save.
Replacing and Removing Credentials
Click the 3 dots next to your credentials for the following options:
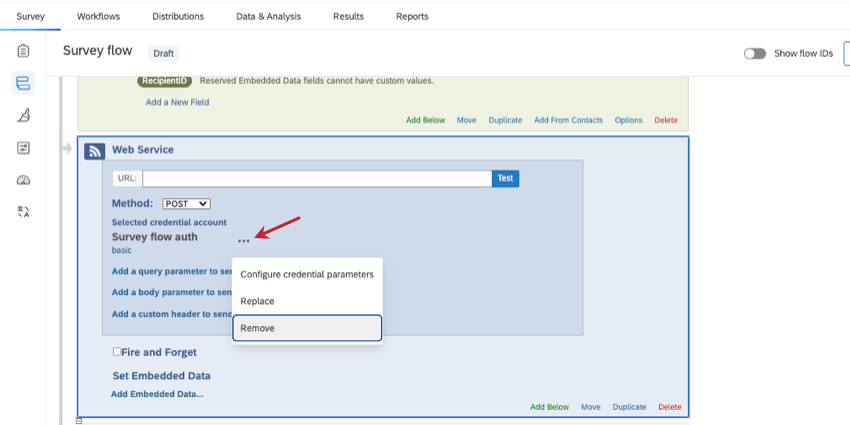
- Configure credential parameters: Described above.
- Replace: Choose or add a different set of saved credentials to the web service.
- Remove: Delete the credentials from the web service. This is how you’d switch the web service from authorized to non-authorized.
Managing Accounts
In the credentials window, you can manage accounts (individual credentials) by clicking the 3 dots. Your options include:
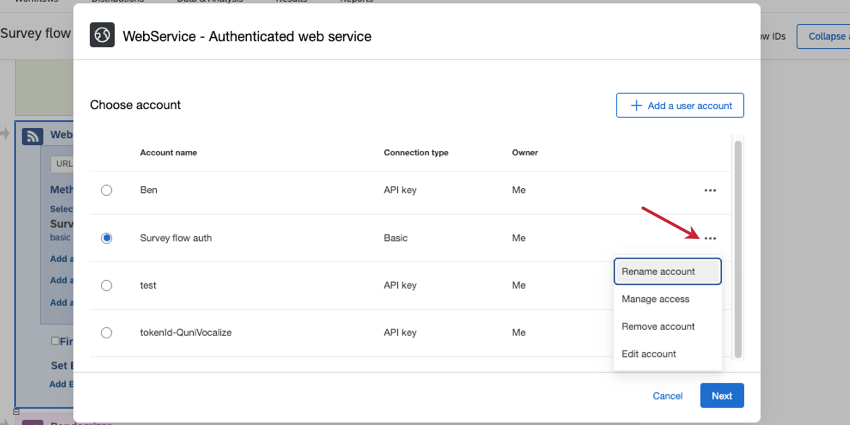
- Rename account
- Manage access
- Remove account
- Edit account (change how the credentials are set up, such as authorization type)
Some options may be unavailable. For example, if you didn’t make an account, you may not be able to delete it. If you aren’t a Brand Administrator, you won’t be able to manage user access to accounts.
Managing Credentials as an Administrator
Brand Administrators can create web service credentials and control which users throughout the organization are allowed to use them.
To learn more, see Extensions Administration. The extension is called WebService, with no spaces.
Parameters
There are currently 3 types of Parameters you can append to your request.
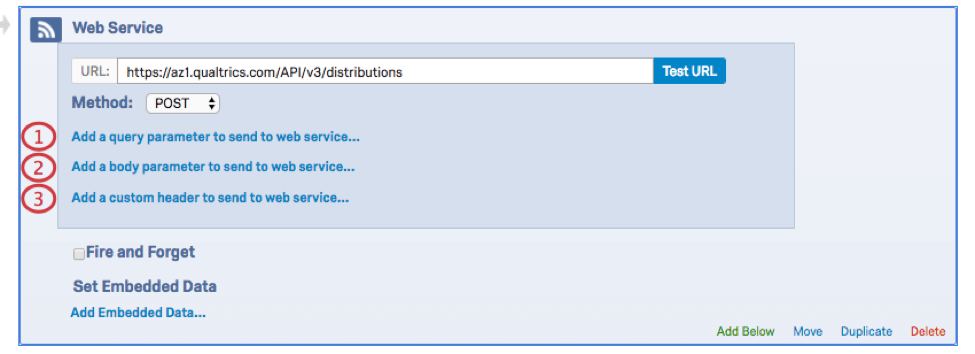
- Query parameter: Instead of adding a query string to the end of your Web Service URL, place your query parameters here.
- Body parameter: This parameter is not available for GET or DELETE requests. It comes with 2 formatting options:
- application/x-www-form-urlencoded: Rather than entering your body parameters into the specified area of the Web Service, add them as a query string at the end of your specified URL.
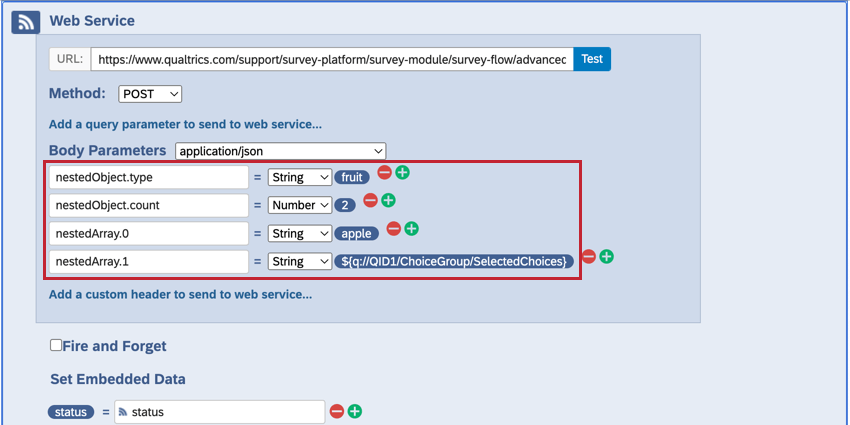
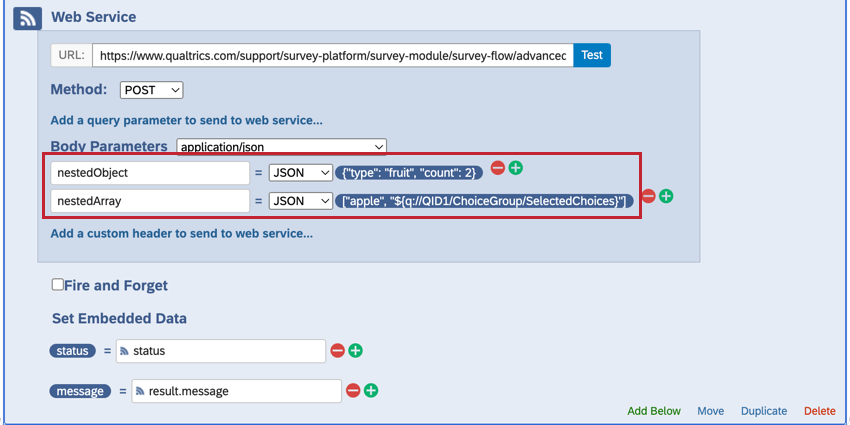
- application/json: Enter each of your request body’s parameters, being sure to specify the type and value. For nested parameters, such as arrays and objects, you can either enter your keys using Dot Notation or enter the values directly as raw JSON:
- This image shows body parameters using Dot Notation.
- This image shows the same body parameters but as raw JSON instead.
 Attention: Every key and value in a JSON object, as well as every element in a JSON array (including piped text), must have double quotes around it.
- This image shows body parameters using Dot Notation.
- Custom header: Insert URL headers here.
Qtip: Authentication URLs should be added into the custom header.
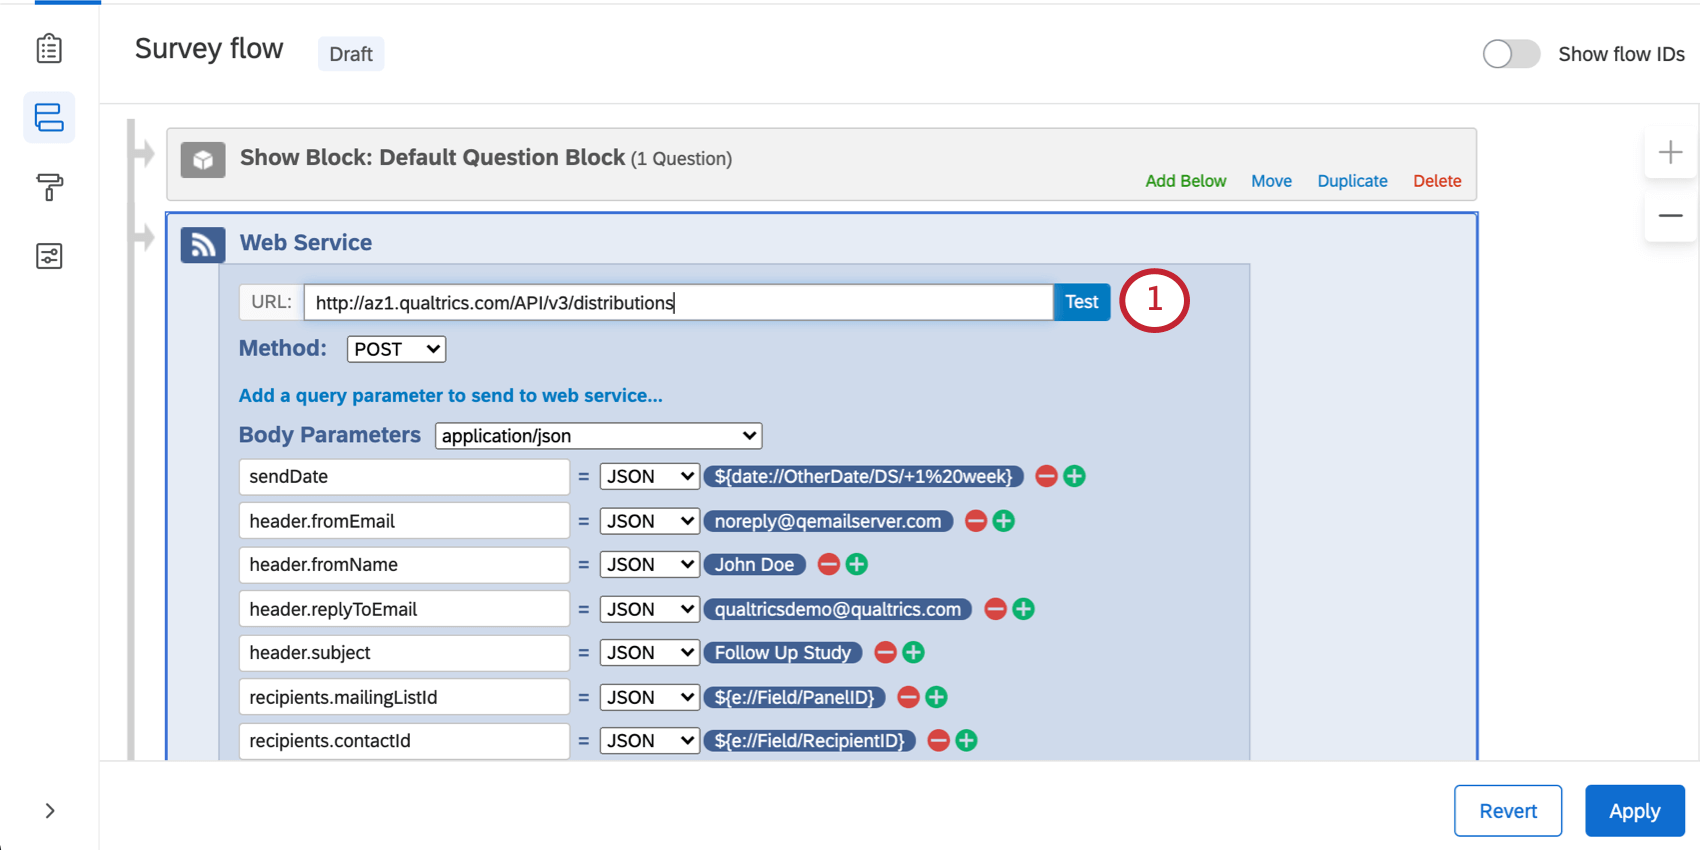
If you’re using our API calls, the documentation will tell you what kind of parameters to include. The example below provides Body parameters to set.
Adding Parameters to Your Web Service
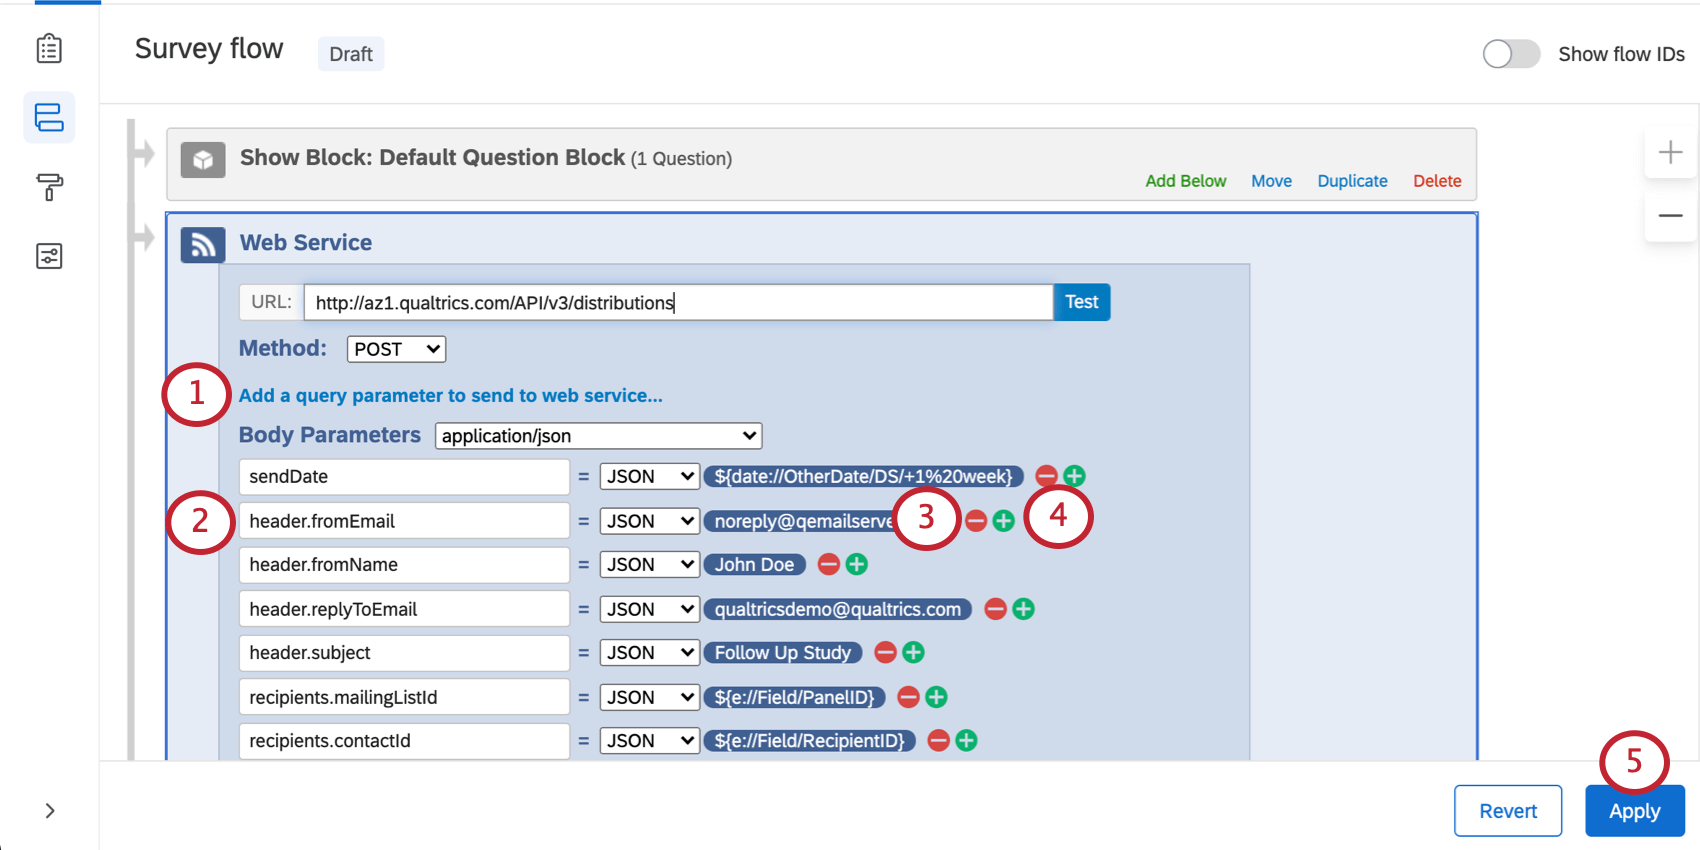
- Select any of the 3 Add a parameter to send to web service options indicated in the previous section. In the above example, we are indicating the Query Parameters.
- Type in the name of the parameter in the Parameter to Web Service box on the left.
- Type the corresponding value of the parameter in the Value box on the right.
- Click the plus (+) sign to the right of the parameter to add another.
- Click Apply when finished.
Testing Your Parameters
Once you have pasted in your URL and set up your parameters, you can test your URL to see what Fields you can pull in.
- Click Test URL to see which information you can pull from the external Web Service.
- Select any fields that you want to use or record in your survey. The Field Name appears on the left and a corresponding Example Value appears on the right.
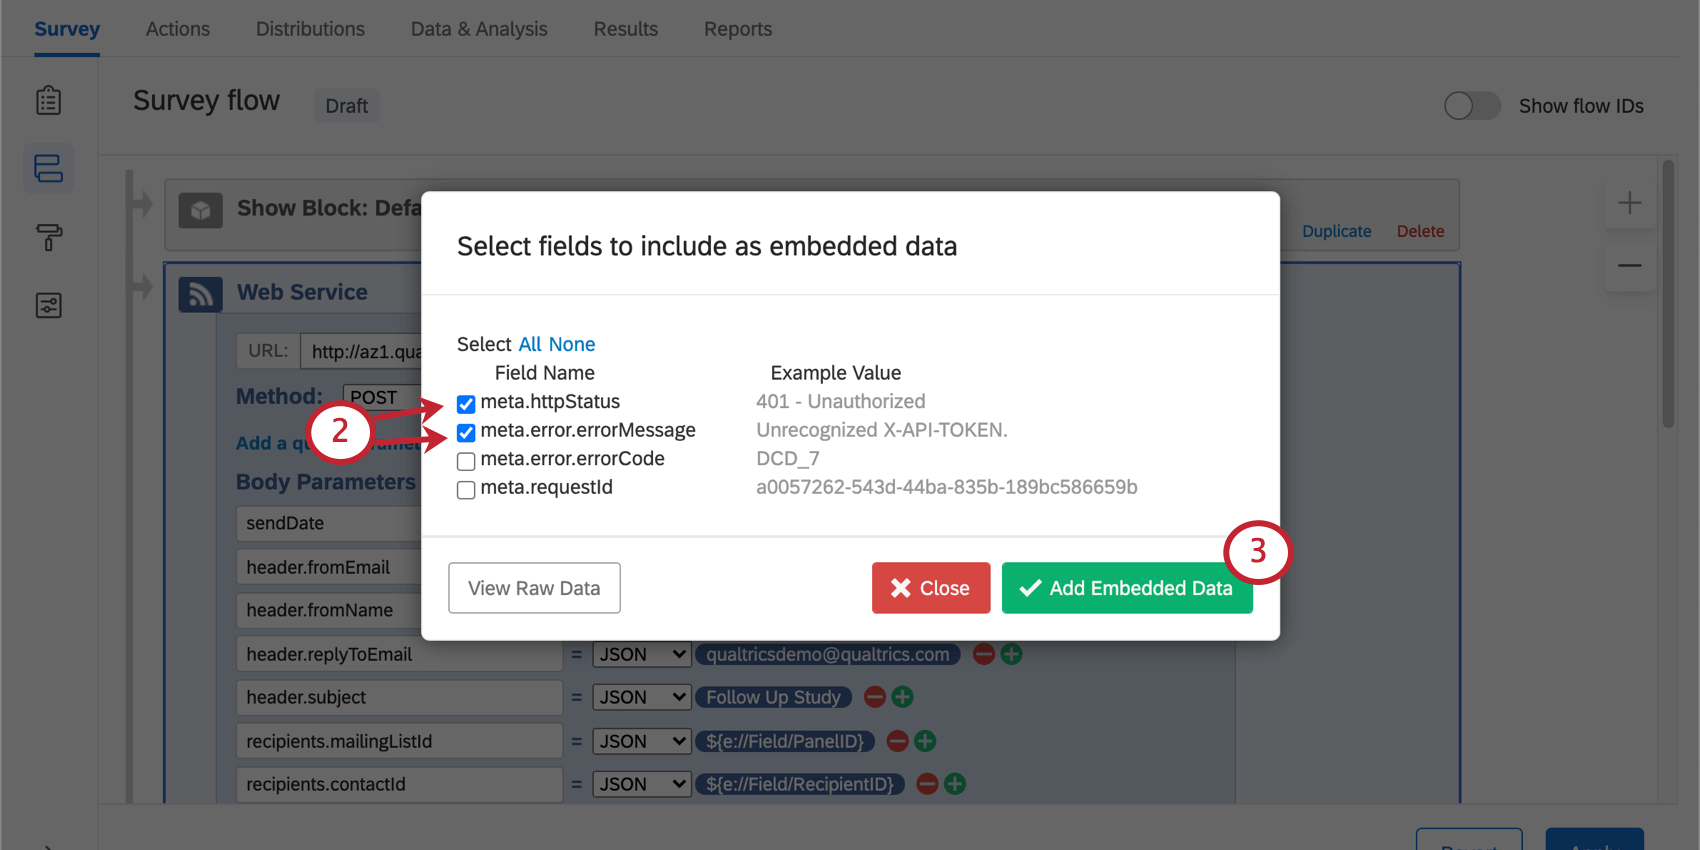
- Click Add Embedded Data to add selected fields to your data.
Qtip: Embedded data set in a web service is recorded as a “text set” variable type.Qtip: You can change the embedded data names associated with the fields of your web service under the Set Embedded Data column. The embedded data names are to the left of the equals (=) sign, indicated by a green ED icon. The right side should not be altered. The names you set on the left will be the names of the fields as they appear in your data.
- If you select Fire and Forget, you will not save any of the data returned from the web service call. This feature is useful when you do not need to save the returned data.
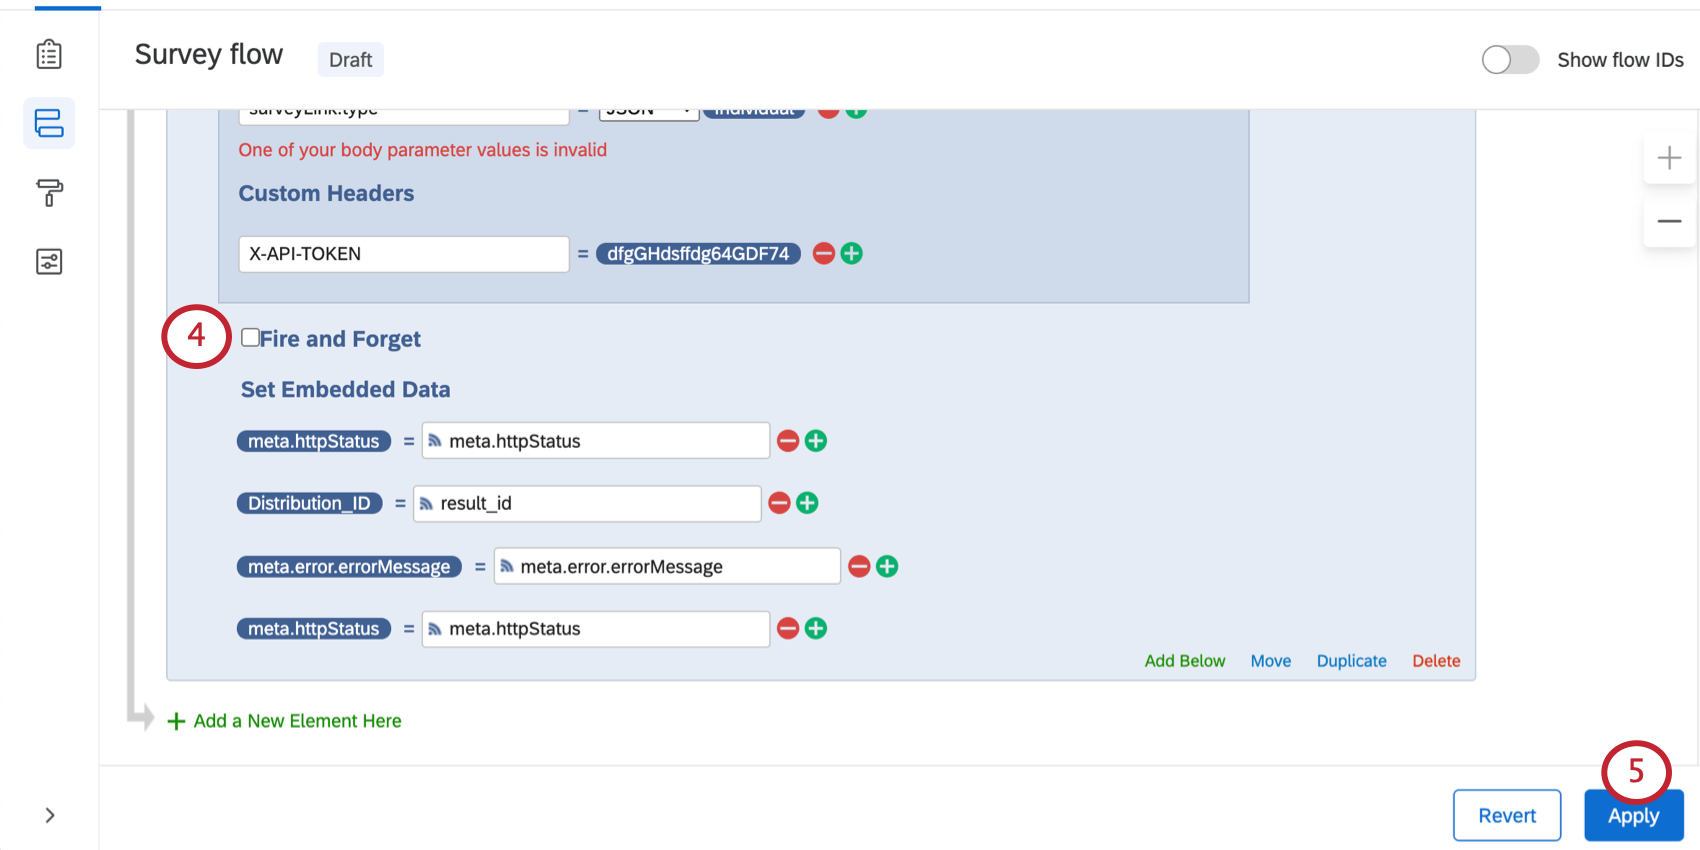 Qtip: Fire and Forget allows your survey to make a request to a web service without waiting for a response. This means that your respondents will be able to complete the full survey without any delay due to the web service. You may want to use this option if you have a web service request that takes a while to process, but we would recommend that you only use this feature during testing, since it will prevent embedded data from saving.
 - When you’re done, click Apply.
Correcting TLS Errors
As of September 1, 2021, web service requests with Transport-Layer Security (TLS) errors will fail. TLS is what makes web requests over HTTPS (as opposed to plain HTTP) secure, preventing the request data from being visible to third parties and ensuring that the request is sent to the correct destination. Ignoring TLS errors effectively eliminates these security benefits; this change is an important step in our continual efforts to improve the security of the Qualtrics platform.
In order to resolve each TLS error, you need to do 1 of the following:
- Fix the TLS error. Due to the nature of TLS errors, our support team cannot provide specific guidance on how to do so, but your network administrator will know how to fix the error.
- Change the flow element web service request to be made over HTTP, not HTTPS. For example, you could change the URL “https://example.com” to “http://example.com”. If you choose to take this approach, you should also ensure that the HTTP URL doesn’t redirect to the HTTPS URL.
Attention: Please note that this approach will cause the web service request data to be transmitted unencrypted.
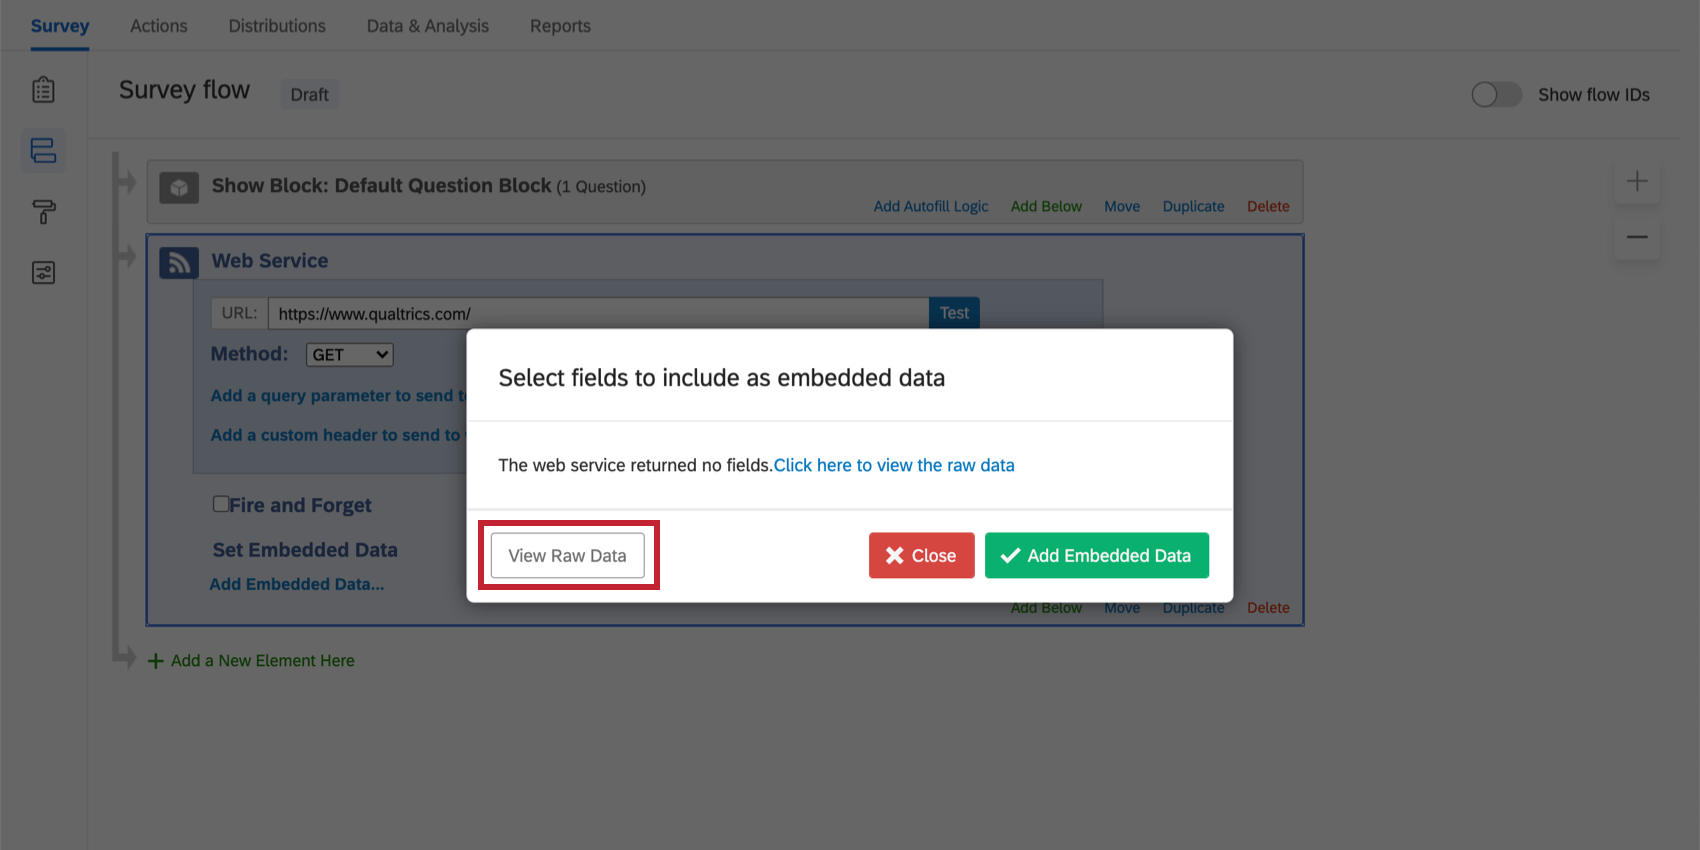
You can verify that your web service element is ready for this change by using the test button next to the URL field in the flow element. Viewing the raw data in the resulting window, also shown below, should not show an error.
Types of Projects this Feature Is Available In
So long as you have access to Web Services as part of your license, you can add a web service to any type of project’s survey flow. This includes: