Bucketing Fields
About Bucketing Fields
You can “bucket” answers to questions into new groups. As soon as a bucketed field is created, it’s applied to existing data, and applied to all new responses going forward. Creating a bucketed field can be a great way to split out your data in different ways for reports and filters without having to make edits to an active survey.
This support page covers how to create a bucketed field. If you’d like to edit an existing bucket field, see Editing Custom Fields.
Creating a Bucketing Field
- Go to the Data & Analysis tab.

- Select Field Editor.
- Click Create Field.
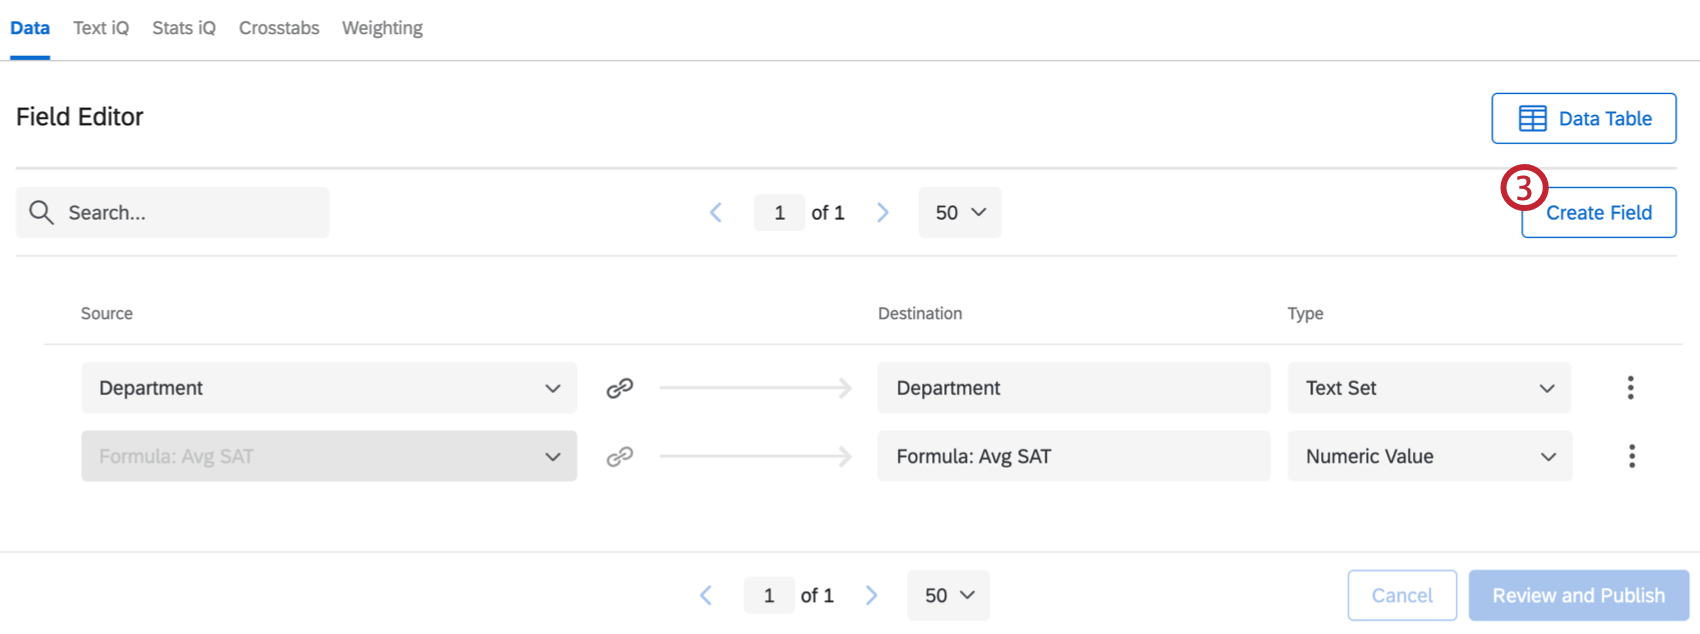
- Select Bucketing at the top.
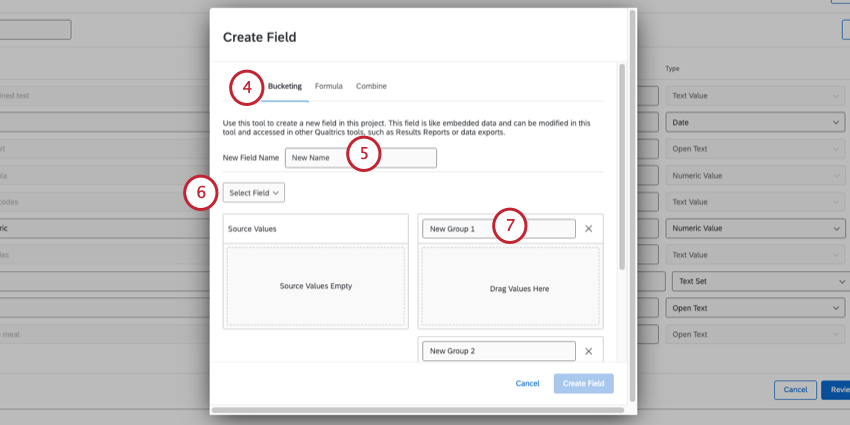
- Name your field.
- Click Select Field to choose the data to bucket. You can choose from all available survey questions, survey metadata, contact fields, or embedded data.
Qtip: You can bucket any multiple choice or numeric data. You cannot bucket other custom fields or open text data (like a standard text entry).Qtip: The selected field must have 200 or fewer unique values. (I.e., questions cannot have 200+ answer choices.) If the field exceeds this amount, you’ll see the message “Too Many Source Values” in the Source Values box.
- Name the groups your values will be sorted into.
- You can add more groups by clicking Add Group.
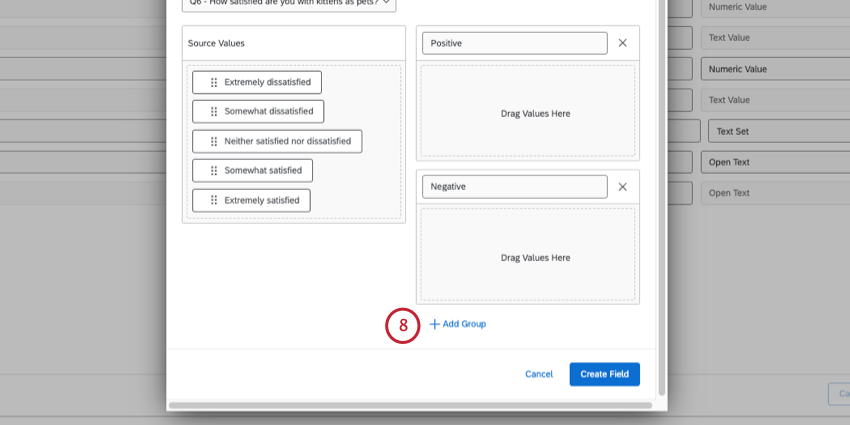
- Drag fields from the Source Values box to the groups on the right.
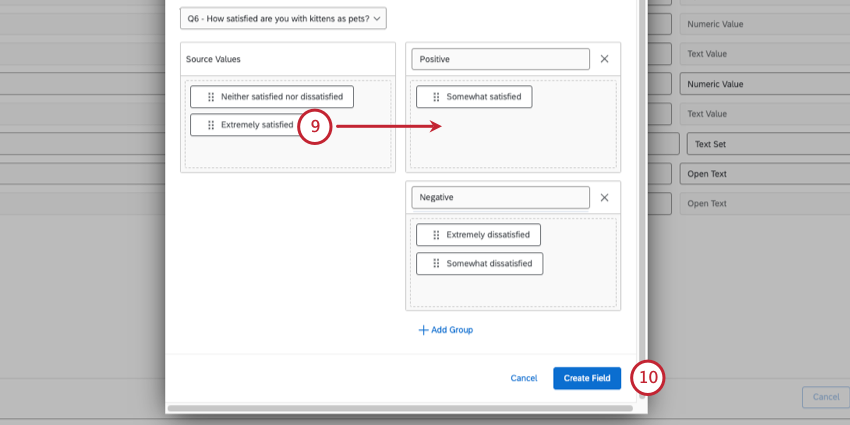 Qtip: Note that you don’t need to have every field sorted into a group. Whenever a value isn’t sorted into a group, it’s marked Uncategorized within your new bucketed field.
 - Click Create Field.
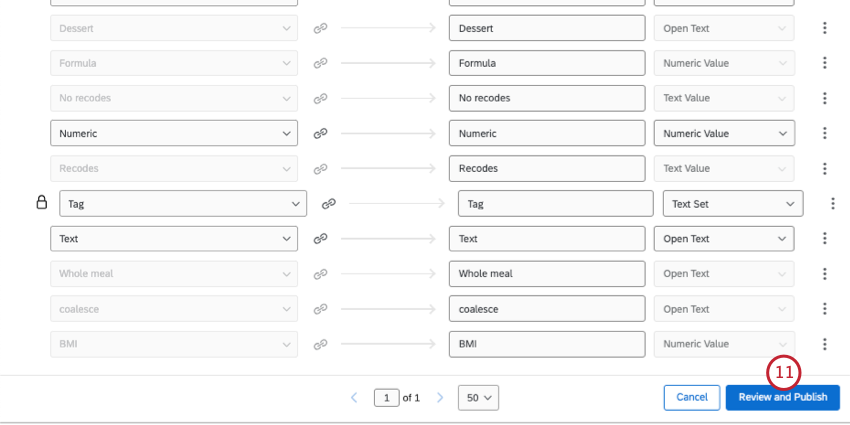
- Select Review and Publish to save your changes.
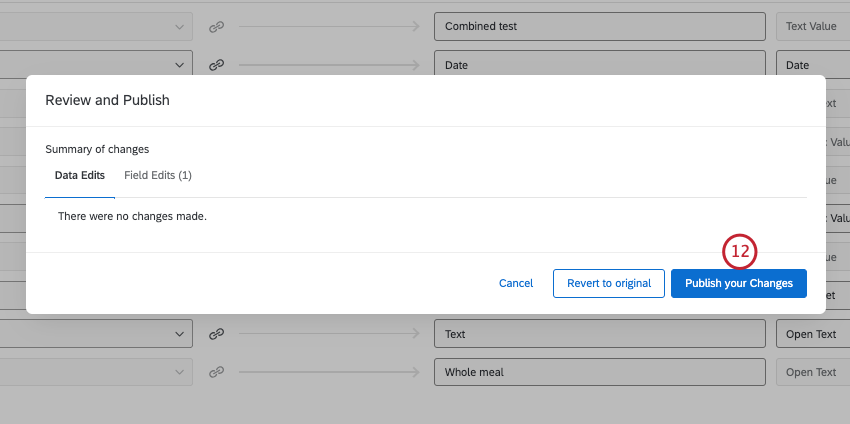
- Click Publish your Changes.
Bucketing Numeric Ranges
When the field you’re trying to bucket is numeric in format, you divide your buckets into numeric ranges instead of the categorical groups described in the previous section.
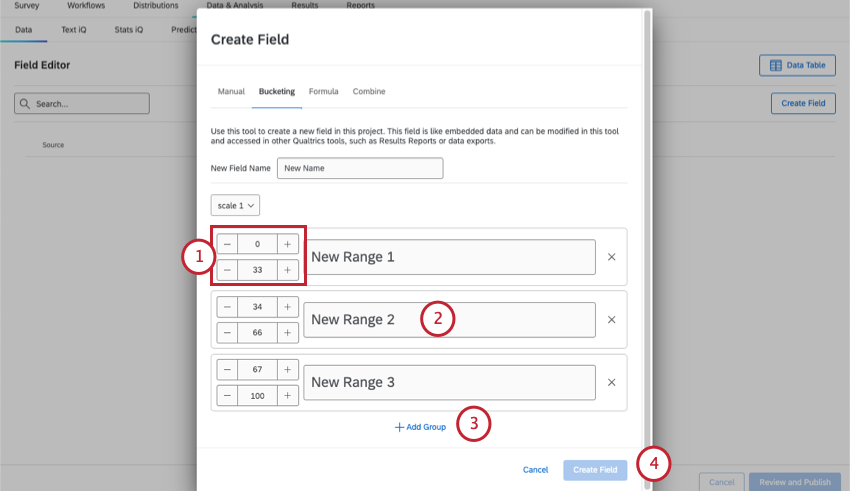
- Set the minimum and maximum numerical value for each bucket.
- The names of your bucket will adjust to match the numerical ranges, but you can also enter whatever name you’d like here. These names will appear as the answers to the new bucket field once it’s created.
- Add the desired number of buckets by clicking Add group. Buckets can be removed by clicking the “x” on the right side of the bucket.
- When you’re finished, click Create Field.
Projects Where You Can Bucket Fields
Depending on your license, you may have access to several different types of projects that have a Data & Analysis tab. The options described on this page are available in:
- Survey projects
- XM Solutions
- Imported data projects
- 360 projects
Qtip: See Creating New Fields (360) for more details.
- Conjoint / MaxDiff
Qtip: While you can bucket Conjoint and MaxDiff-specific fields, the data may not make sense and cannot be recoded. We recommend only bucketing survey fields.
- CX Dashboards
While the functionality is technically available, we do not recommend using these custom fields with other types of Employee Experience projects. See Creating New Fields (EX) for more details.

