-

Qualtrics Platform -

Customer Journey Optimizer -

XM Discover -

Qualtrics Social Connect
End of Survey Element
About End of Survey Elements
The end of survey element is a great tool for customizing different survey paths for respondents, by giving them different endings. For example, you may want to give different messages to respondents after they submit their survey, based on how they scored, or based on whether they opted out of the study altogether. Other times, we need to set up special redirects for respondents we set up with our panel company, or screen out certain demographics altogether based on our study’s needs. The end of survey element is perfect for all these use cases, and more. You can add multiple end of survey elements to your survey.
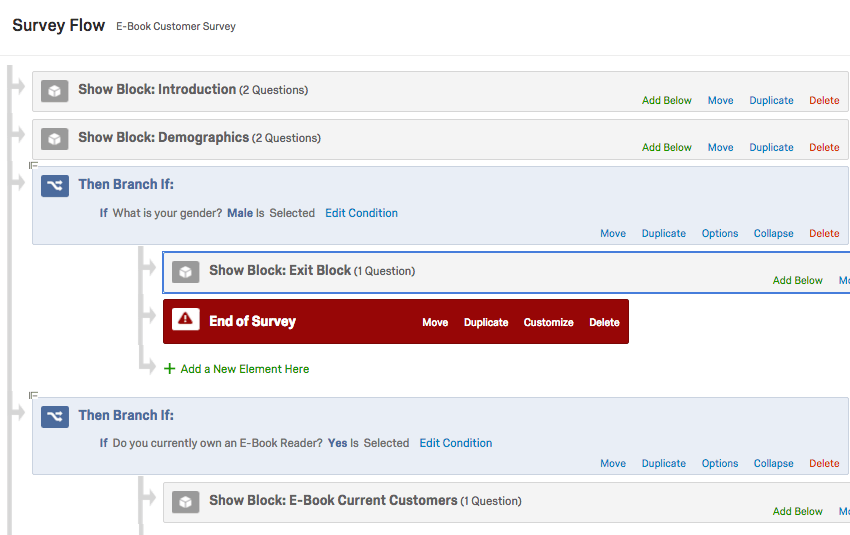
Example: We want to screen out all male respondents. We set up a branch for respondents who indicated their gender was male, and send it to an end of survey element. Respondents who don’t meet this branch will skip right over it, to the next branch or set of questions that they qualify for.
Tips for Using the End of Survey Element
Here are some things to keep in mind before you use this feature:
- If all your respondents should end the survey the exact same way, you might not need an end of survey element. Instead, check out Editing the (Default) End of the Survey, back in the survey builder. There are many options for customizing how all respondents should end a survey, including custom messages, displaying response summaries, redirecting to a URL, and more.
- When you use the end of survey element, it should almost always be paired with branch logic. Whether you want to screen out certain respondents or just customize the messages certain people see when they finish the survey, the first step is getting your branch logic set up. The branch is how we assign different endings to respondents.
- The end of survey element isn’t just for custom messages and screen-outs. See the full list of customization options.
Creating an End of Survey Element
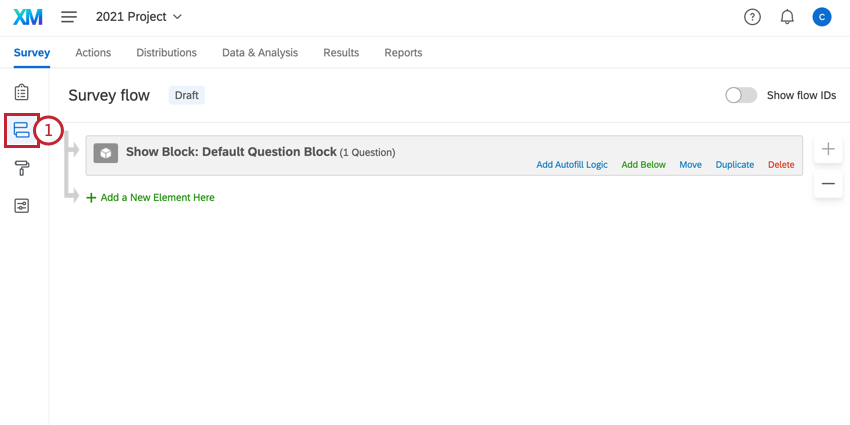
- While editing your survey, click the Survey flow icon in the left hand side navigation bar.
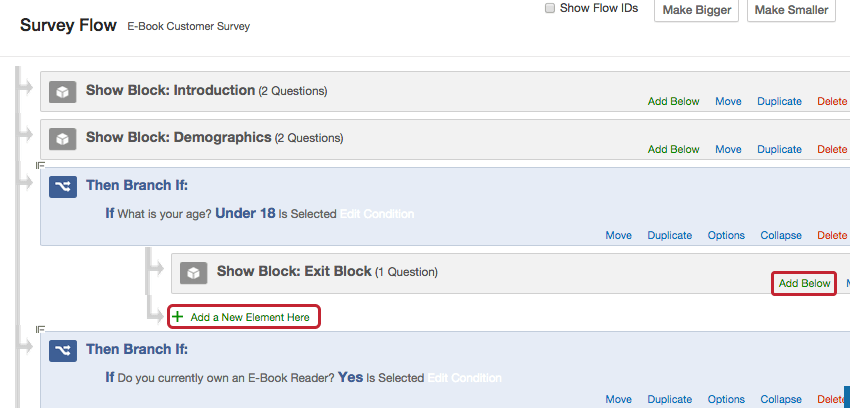
- Find or create the branch where your custom ending should be added.
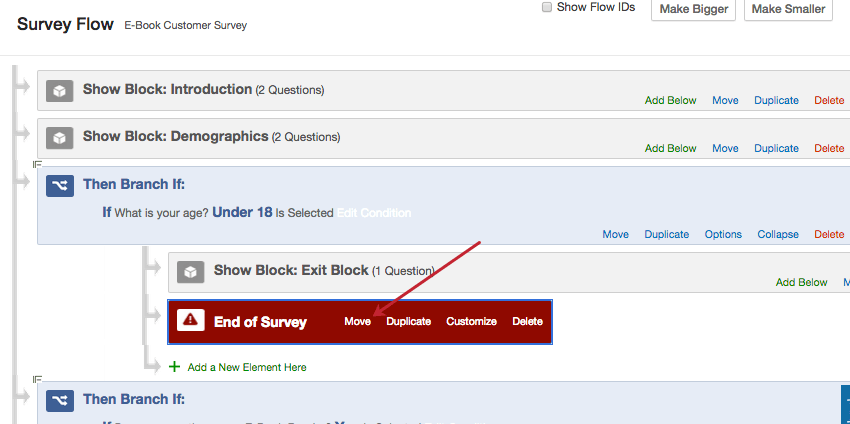
- Indented under the branch, click Add a New Element Here, or look to the last element nested under the branch and select Add Below.
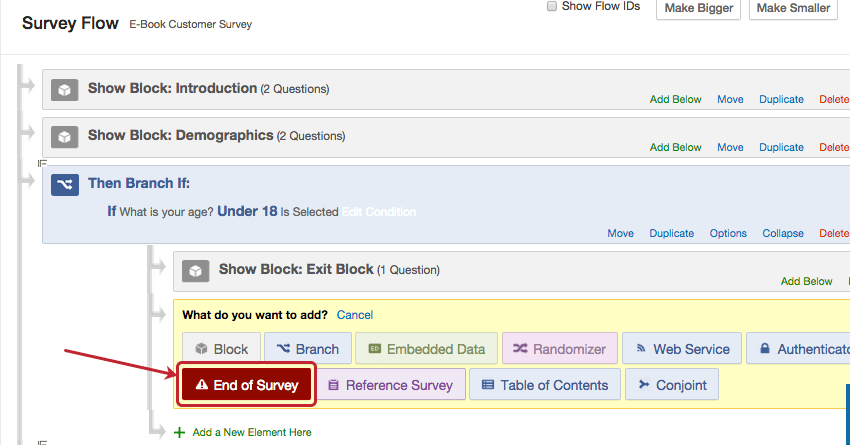
- Select End of Survey.
- If the element is not in the correct location, click the Move option and drag the element to your desired location.
 Warning: If the branch where you’ve added your end of survey element has other elements – such as blocks, embedded data, and so on – make sure the end of survey element is last under the branch. Otherwise, respondents will end their survey before they encounter these other elements, meaning they will not see the question block or record the appropriate embedded data.
 - Save your survey flow.
Customization Options
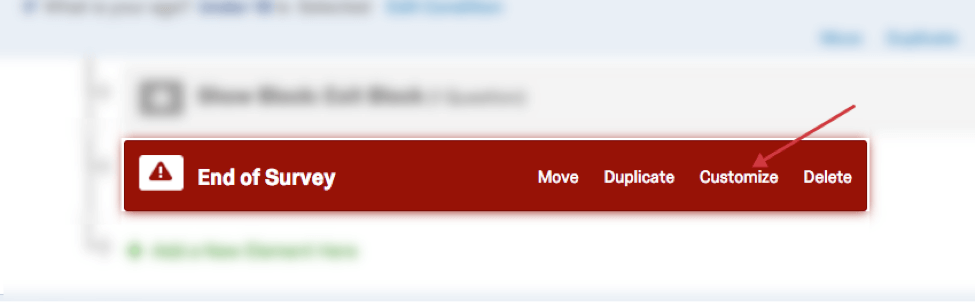
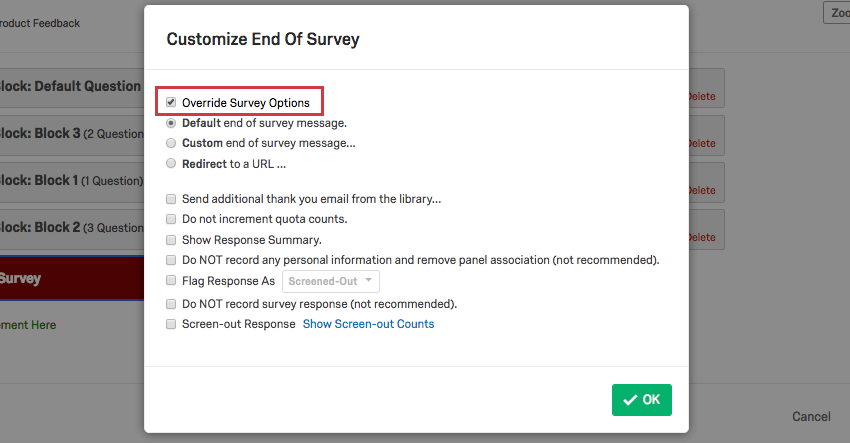
By default, end of survey elements will use whatever settings you have set up in your survey builder. However, if you want to customize your survey endings, just click Customize on your end of survey element and click the Override Survey Options checkbox. From here, you can access additional options for changing the experience for respondents who leave the survey at this point.
Messages vs. Redirects
If you’ve decided to override your survey options, you must choose from one of the following:
- Default end of survey message: Display the generic thank you message (“We thank you for your time spent taking this survey. Your response has been recorded.”) to respondents when they finish the survey.
- Custom end of survey message: Display a custom message to respondents when they finish the survey.
Qtip: This works similarly to adding a custom message in survey options, where you can create a new message for your survey that will also be saved to your library, without leaving the survey flow.
- Redirect to a URL: Automatically send the respondent to another website upon completion of the survey.
Qtip: This feature is not available for free accounts.Example: When working with a third-party sample provider, they often will have you redirect respondents back to their website at the end of the survey.
Additional Customization Options
You can select multiple of the following options:
- Send additional thank you email from the library: If you distributed your survey to a contact list, create or choose a custom thank you email to automatically be sent to them at the end of the survey.
Qtip: If you did not distribute your survey through the Qualtrics mailer, but are collecting respondent email addresses and want to send a thank you email, try the email task instead.
- Do not increment quota counts: Ignore these responses when tallying quotas.
Example: If a respondent is screened out of your survey for being too young, they won’t be counted toward any quotas they might have otherwise met conditions for.
- Show Response Summary: Upon full survey completion, show the respondents a survey overview with their answers selected. This gives respondents the option to download the individual response as a PDF.
- When this option is enabled, you can also enable Show Response Summary before completing the survey, which allows a respondent to see their answers before submitting them and then go back to change them if the back button is enabled. This option also allows you to choose an end of survey message from your library to display to respondents.
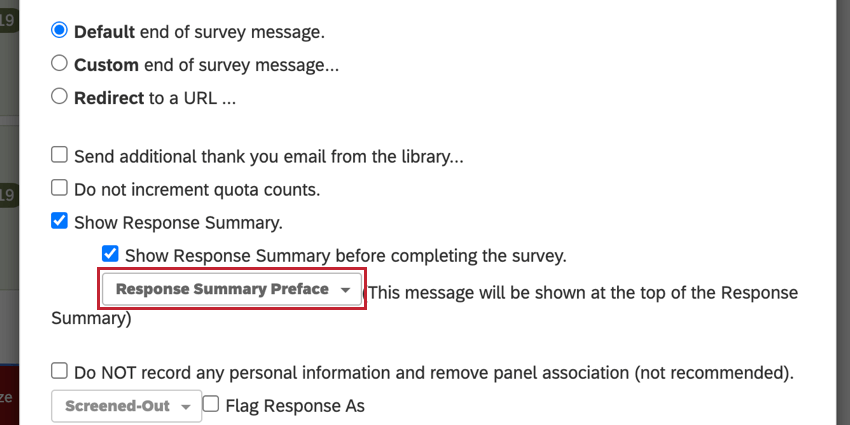
This message will be shown at the top of the response summary.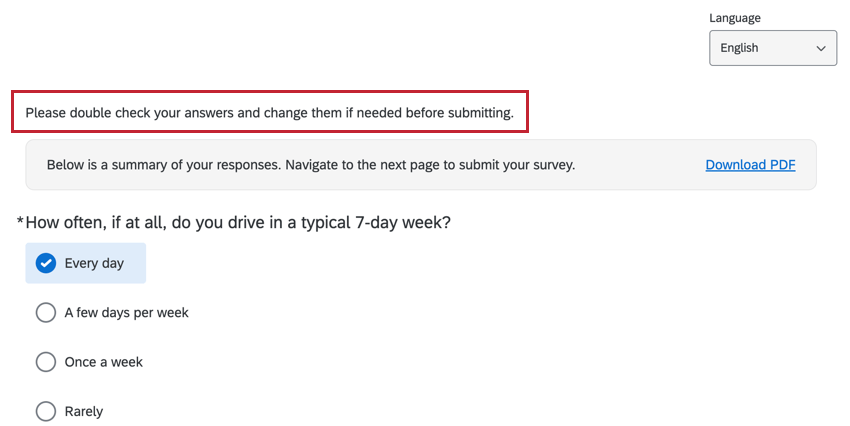
Attention: Summaries with more than 10 MB of HTML data may cause the PDF download to fail. For very large surveys, we do not recommend enabling this option.Qtip: If you’re using a redirect to a URL, we recommend that you enable Show Response Summary before completing the survey. Otherwise, respondents can only view the response summary very briefly before being automatically redirected. - When this option is enabled, you can also enable Show Response Summary before completing the survey, which allows a respondent to see their answers before submitting them and then go back to change them if the back button is enabled. This option also allows you to choose an end of survey message from your library to display to respondents.
- Do NOT record any personal information and remove panel association (not recommended): Permanently scrub the response of identifying information (such as IP address or any associated contact list information) before saving it in the results. This option is helpful if you need to send your survey to a contact list so that you know who is participating, but you also need to keep individual responses anonymous.
Warning: Once identifying information is removed, it cannot be restored.
- Flag Response As: Flag responses as “screened out,” “poor quality,” “complete,” or “quota met.” You must add the Embedded Data field ‘Q_TerminateFlag’ to your Survey Flow for this column to appear in your downloaded dataset or report. See using the flag response option for a detailed step-by-step.
- Do NOT record survey response (not recommended): Do not save responses from respondents who exit the survey at this point. This option also automatically enables Do not increment quota counts, Do NOT record any personal information and remove panel association, and Flag Response As Screened-Out. This is useful if you are screening the respondent out of the survey and don’t want to collect a response.
Warning: Responses that are not saved cannot be retrieved later. Use this method with caution.Warning: For responses that are not saved, any associated Workflows will not send.
- Screen-out Response: Label and tally responses exiting the survey at this point without having to collect those responses. You can see the number of screened out individuals in your end of survey element by clicking “Show Screen-out Counts” or, if you distributed your survey through the Qualtrics mailer, you’ll be able to see who was screened out and why in the Status column of the distribution history.
Qtip: This feature is not available for all users. Please check with your Qualtrics Account Executive if you are interested in this feature.
Using the Flag Response Option
When you select Flag Response As under customization options, you can use a special embedded data element to track why a response was terminated or to evaluate the response’s quality. For example, the respondent could have been screened-out, a quota could be full, or you could flag a response as poor quality or successfully complete.
- Set up your screening or quota branch(es).

- Click Add a New Element and select Embedded Data.
- Name it Q_TerminateFlag.
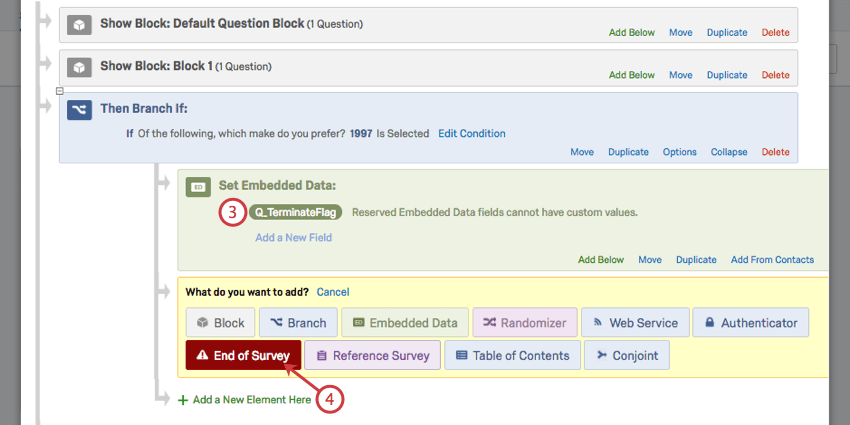
- Click Add a New Element and select End of Survey.
- Click Customize.
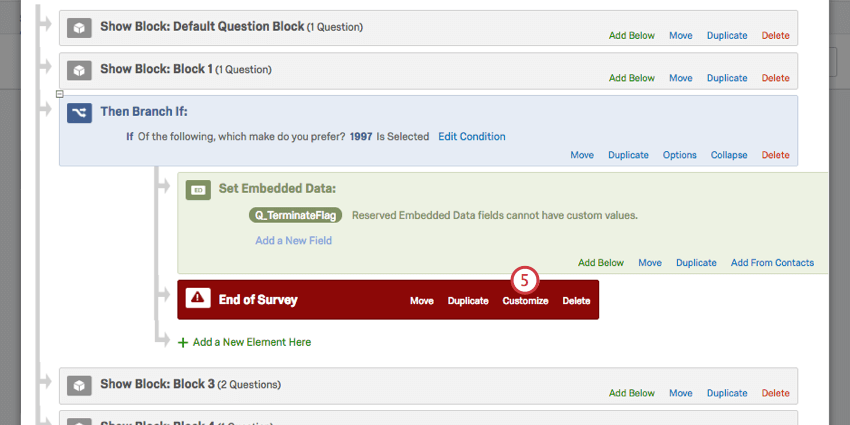
- Select Override Survey Options.

- Select Flag Response As.
- Choose how you’d like responses to be flagged:
- Quotas Has Been Met to indicate the response was terminated because a quota was full. The response will have a value of “QuotaMet.”
- Screened-Out to indicate the response was screened-out. The response will have a value of “Screened.”
- Survey Complete to indicate the response was completed successfully. The response will have a value of “Complete.”
- Poor Survey Quality to indicate the response was completed but is poor quality (for example, the respondent failed an attention check question). The response will have a value of “PoorQuality.”
- Click Save to save the end of survey element.
- Repeat these steps for any additional branches you would like to flag. Make sure to Apply your survey flow edits once you’re done.
When you export your data or choose columns while previewing data, you will be able to find this information under the column named Q_TerminateFlag. If the column is empty, the respondent did not meet the selected screen-out or quota.
Examples of How to Use the End of Survey Element
One of the easiest ways to learn how to use the end of survey element is to see how other users commonly set it up. Below, we’ll link some pages that describe surveys where the end of survey element is crucial to the setup.
- Screen-Out Management: Are you looking to limit what kinds of respondents can fill out your survey, based on demographic or other information? Check out this guide.
- Panel Company Integration: If you are using a panel company to distribute your survey to specific respondents, you’ll need to set up your survey to track respondents properly. This page outlines a step-by-step process for your panel company integration.
- Displaying Messages Based on Scoring: On this page, we discuss how to display different messages to respondents based on how they scored on a survey.
- Creating an Anonymized Raffle: We often want to reward our respondents for helping us with our research, while keeping responses anonymous. Here, the end of survey element helps determine different outcomes for respondents who took the survey vs. those who opted out.
- Building a Consent Form for an Advanced Survey: Many studies require that we get consent from respondents before they participate. If your survey already has a complex survey flow, the end of survey element is important for creating different endings for respondents who took the survey vs. those who opted out.
Types of Projects this Feature Is Available In
This support page describes how end of survey elements work in the following project types: