Loading...
Skip to article
  • Qualtrics Platform
    Qualtrics Platform
  • Customer Journey Optimizer
    Customer Journey Optimizer
  • XM Discover
    XM Discover
  • Qualtrics Social Connect
    Qualtrics Social Connect

AI-Assisted Text Analytics in XM Discover


Was this helpful?


This site is protected by reCAPTCHA and the Google Privacy Policy and Terms of Service apply.

The feedback you submit here is used only to help improve this page.

That’s great! Thank you for your feedback!

Thank you for your feedback!


Qtip: This page describes functionality that we intend to release starting July 16, 2025. Qualtrics may, in its sole discretion and without liability, change the timing of any product feature rollout, change the functionality for any in preview or in development product feature, or choose not to release a product feature or functionality for any reason or for no reason.

About AI-Assisted Text Analytics in XM Discover

Artificial Intelligence (AI) assisted text analytics in XM Discover enables you to jumpstart text topic model creation. Using a diverse set of inputs including your unstructured customer data, topic use case, persona, industry, and additional context information, you can leverage AI to build a topic hierarchy, enabling you to identify the themes most important for your business use case.

Required Permissions

To use AI-assisted text analytics in XM Discover, your Qualtrics account must meet the following requirements:

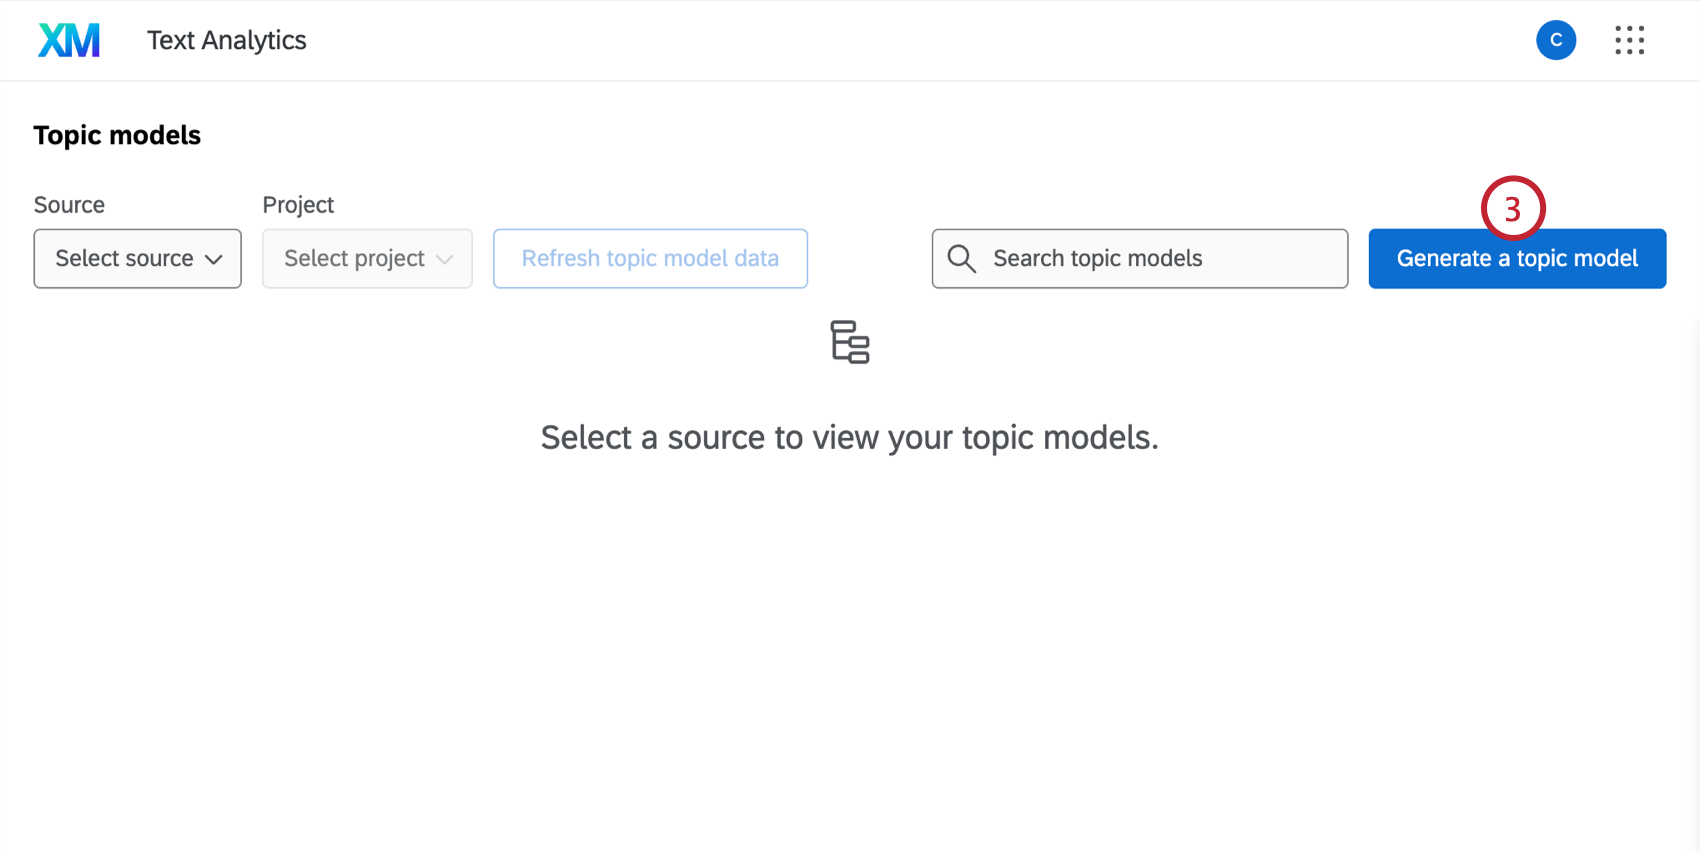
Using Generative AI to Build a Topic Hierarchy

  1. In XM Discover, select Text Analytics in the Studio sidebar.clicking "text analytics" in discover
  2. The text hierarchy builder will open for you to generate a hierarchy.
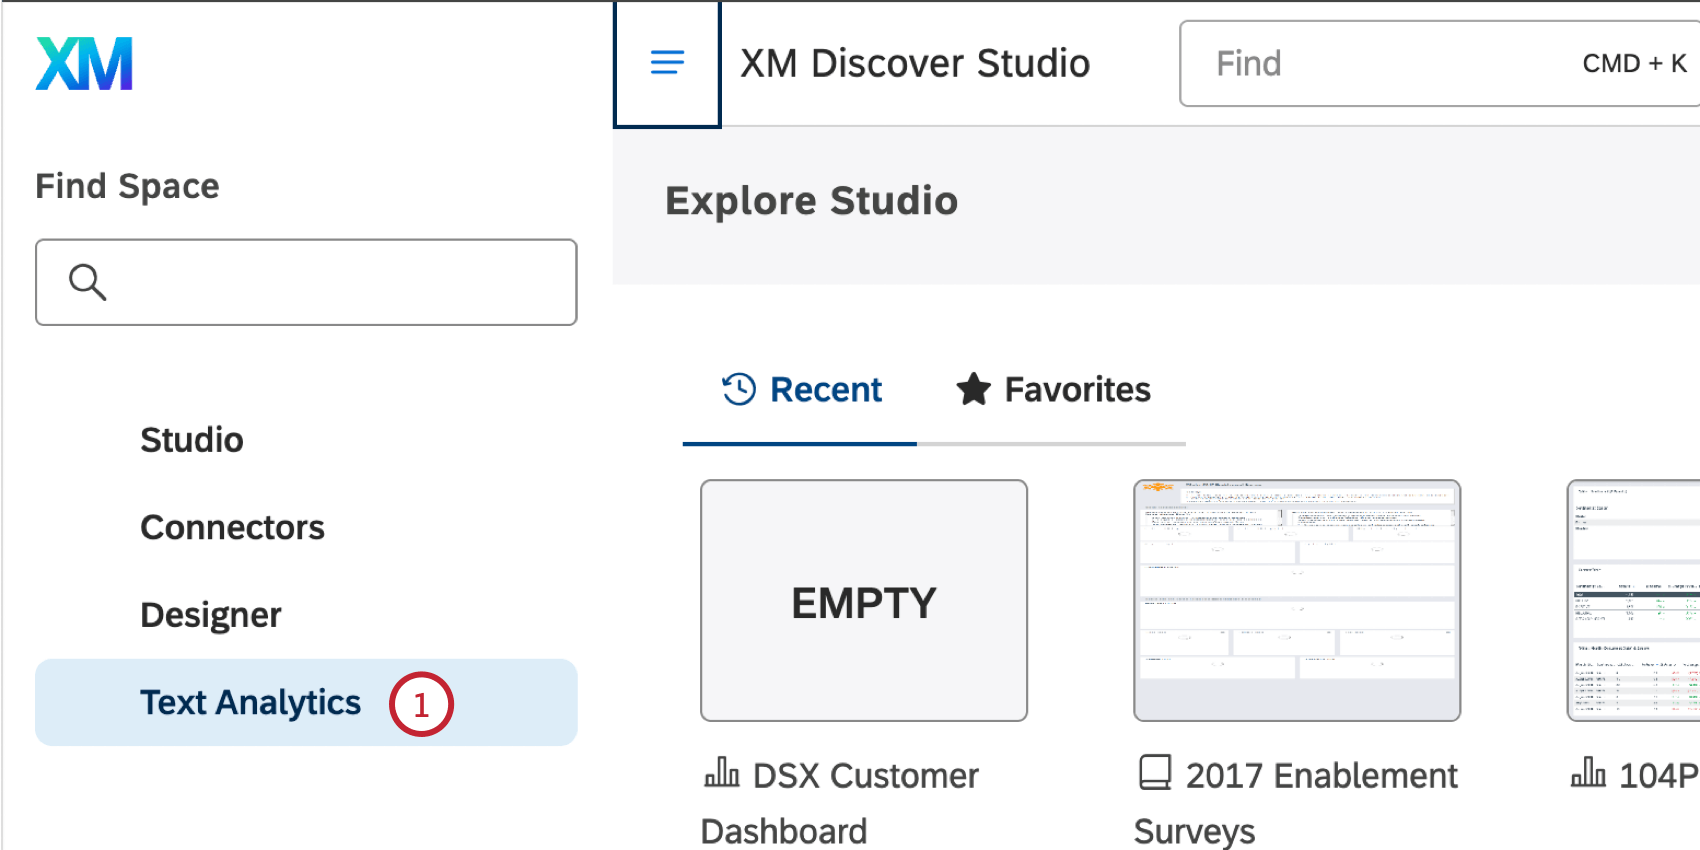
    Qtip: If you receive a login error, manually log into your Qualtrics Platform account in a new tab, and then try again.
  3. Click Generate a topic model.clicking "generate a topic model"
  4. Give your model a name so you can identify it later.naming the model and choosing where to save it in discover
  5. Select Discover for the source.
  6. If you have access to multiple workspaces, choose the workspace
  7. Choose the Discover project to save the topic model.
  8. Click Create.
  9. Choose what you’d like Qualtrics to generate:
    choosing the type of model you'd like to generate

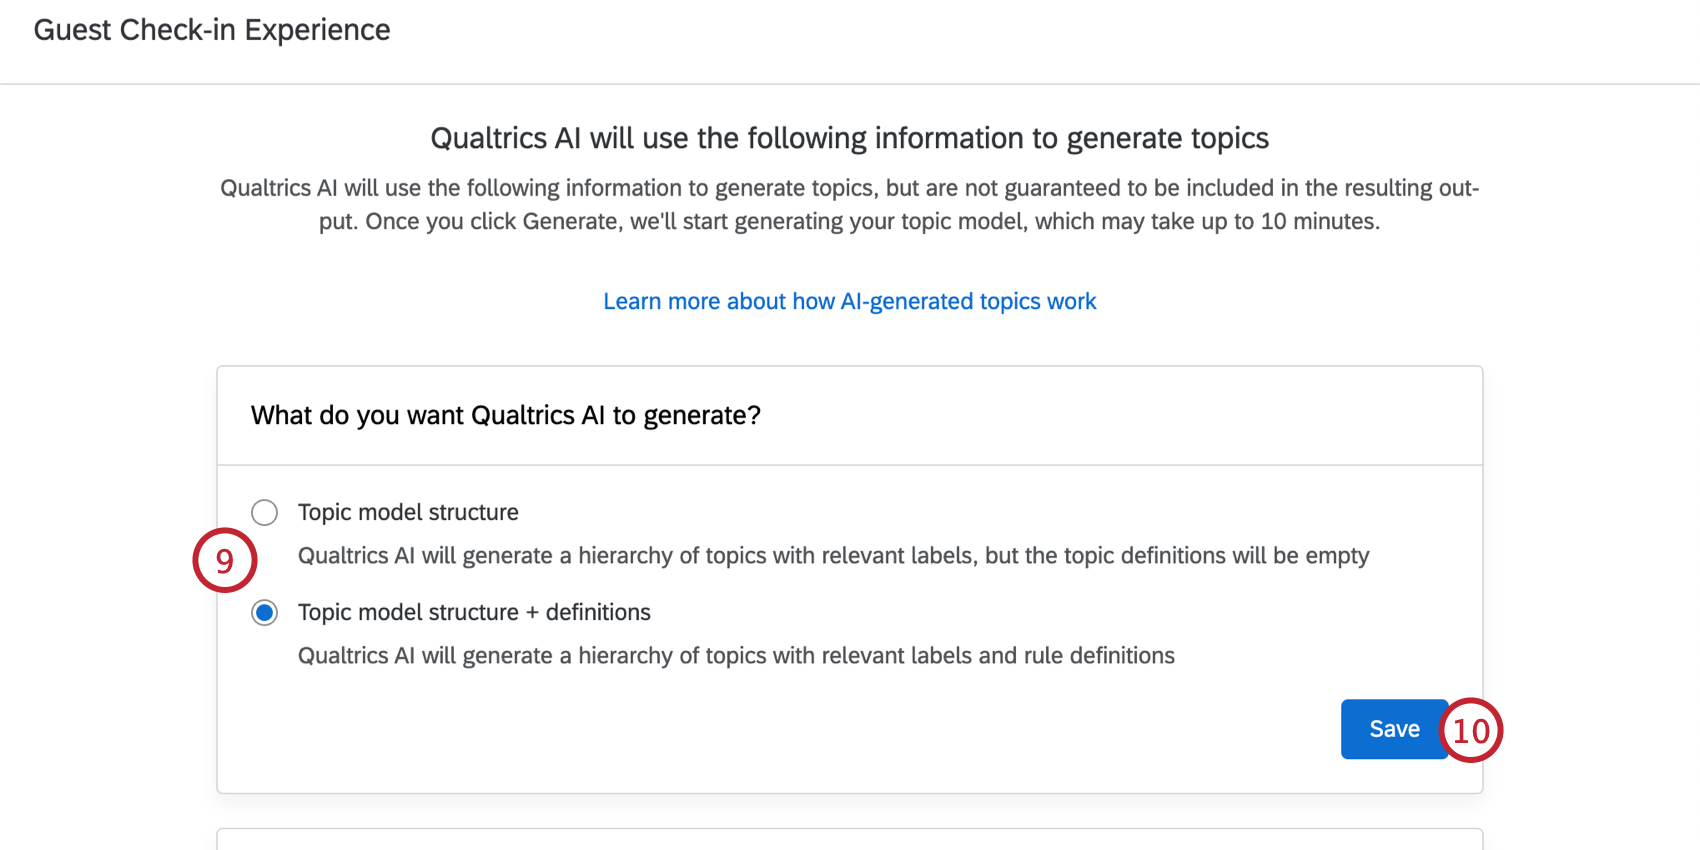
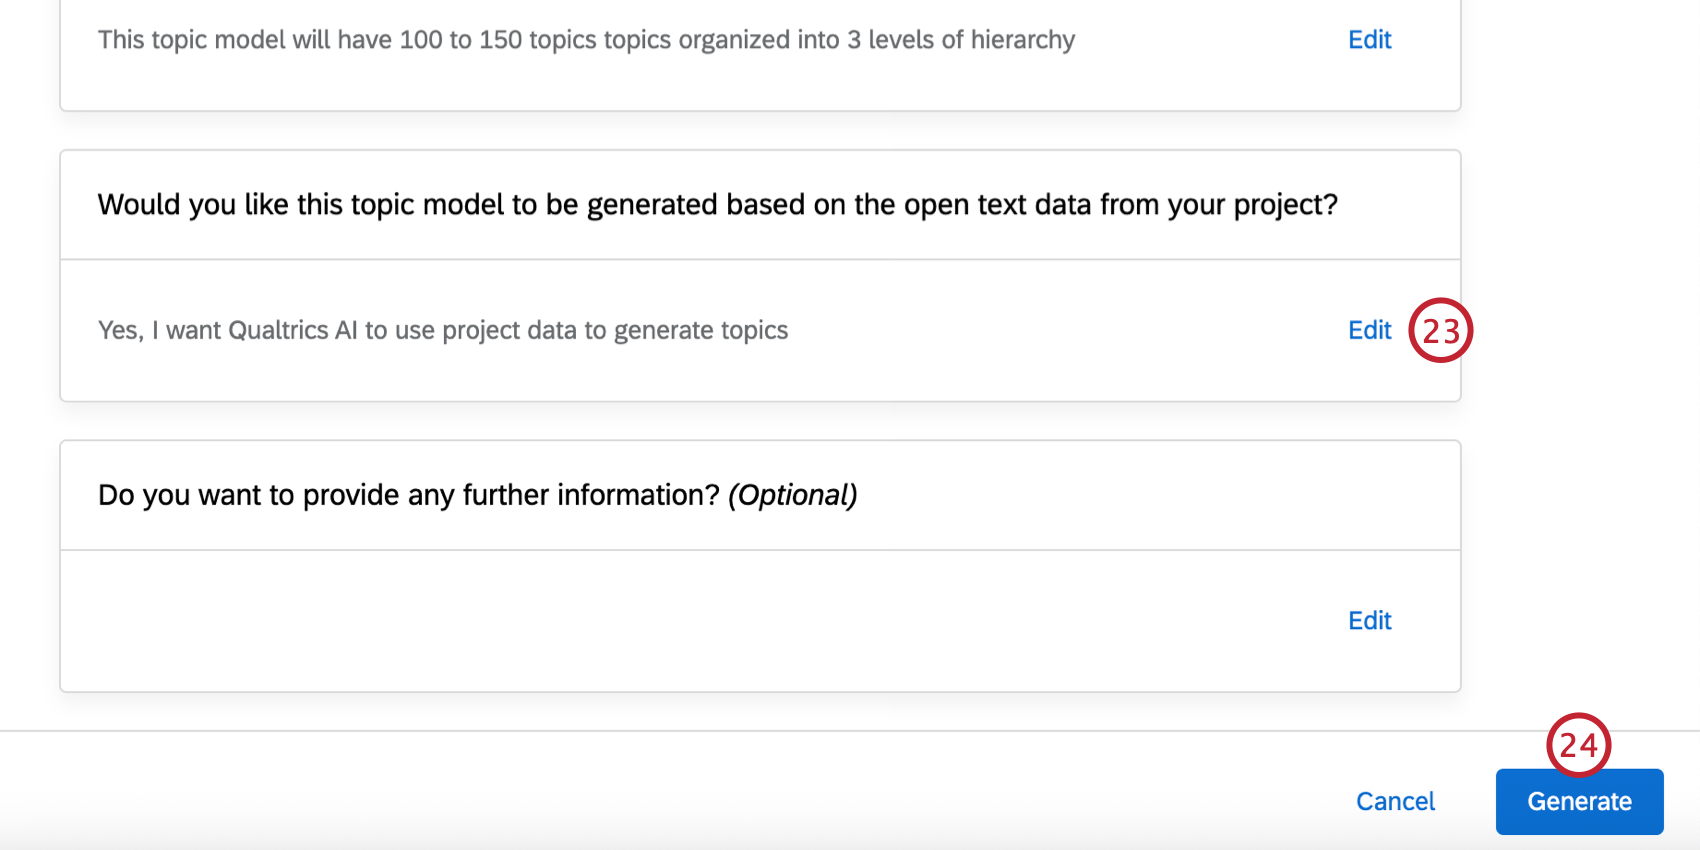
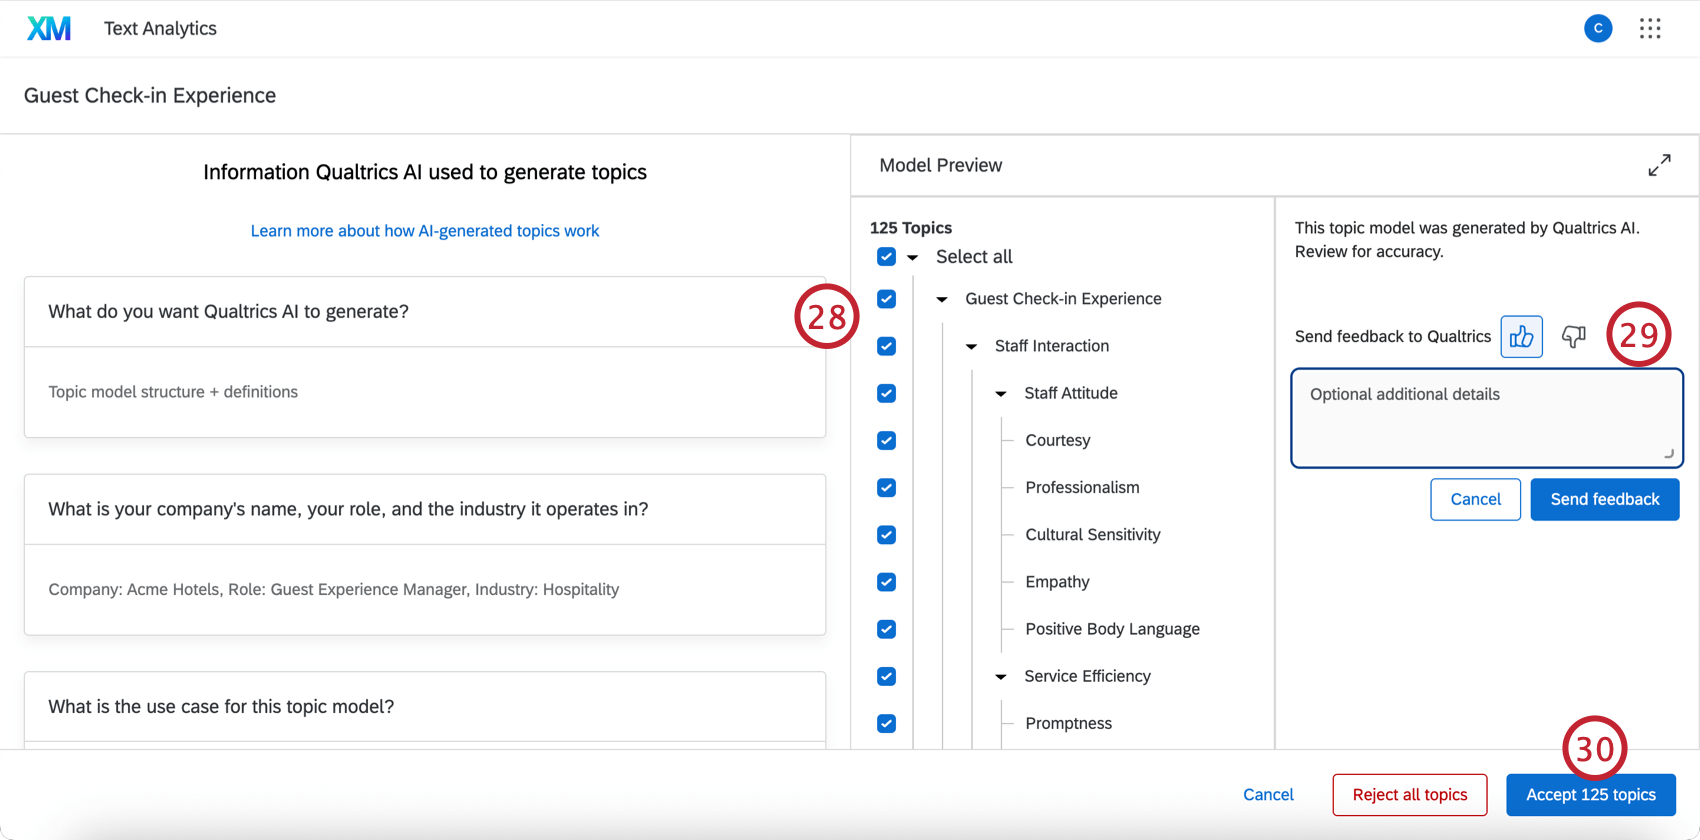
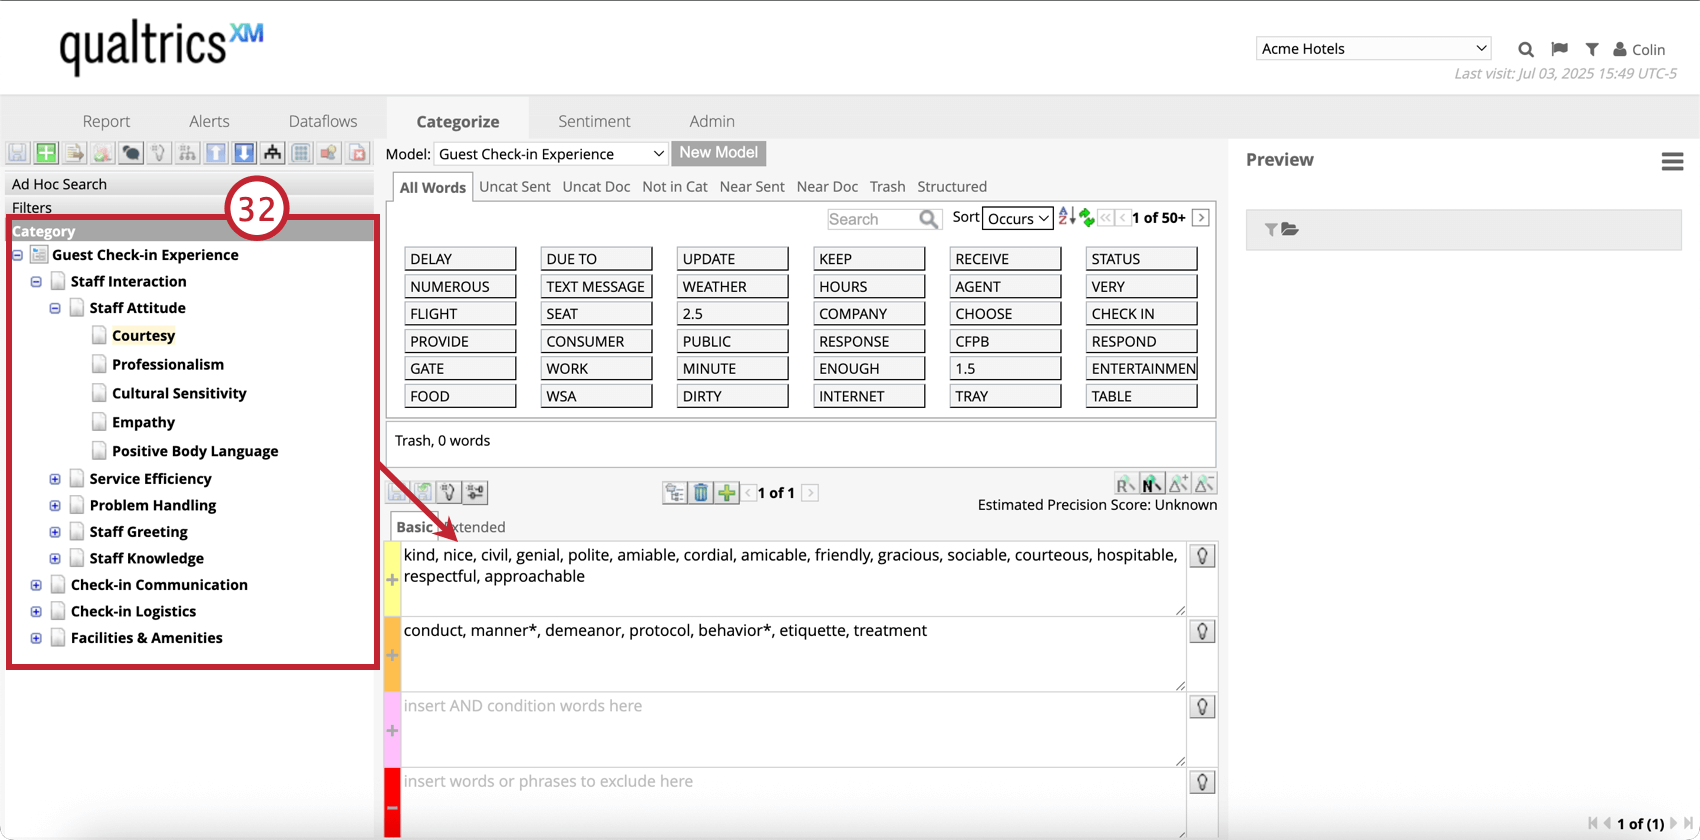
    • Topic model structure: Generate a topic hierarchy with labels, but no rules for any topics.
    • Topic model structure + definitions: Generate a topic hierarchy with labels and rule definitions for all topics.
      Qtip: The generated models are a starting point and can be further customized once saved to your project.
  10. Click Save.
  11. Enter your company name.entering the industry, role name, and company for the model
  12. Enter the role in the company of the user persona who will use the topic analysis output (e.g., Employee Experience Manager, In-store Manager).
  13. Select your industry.
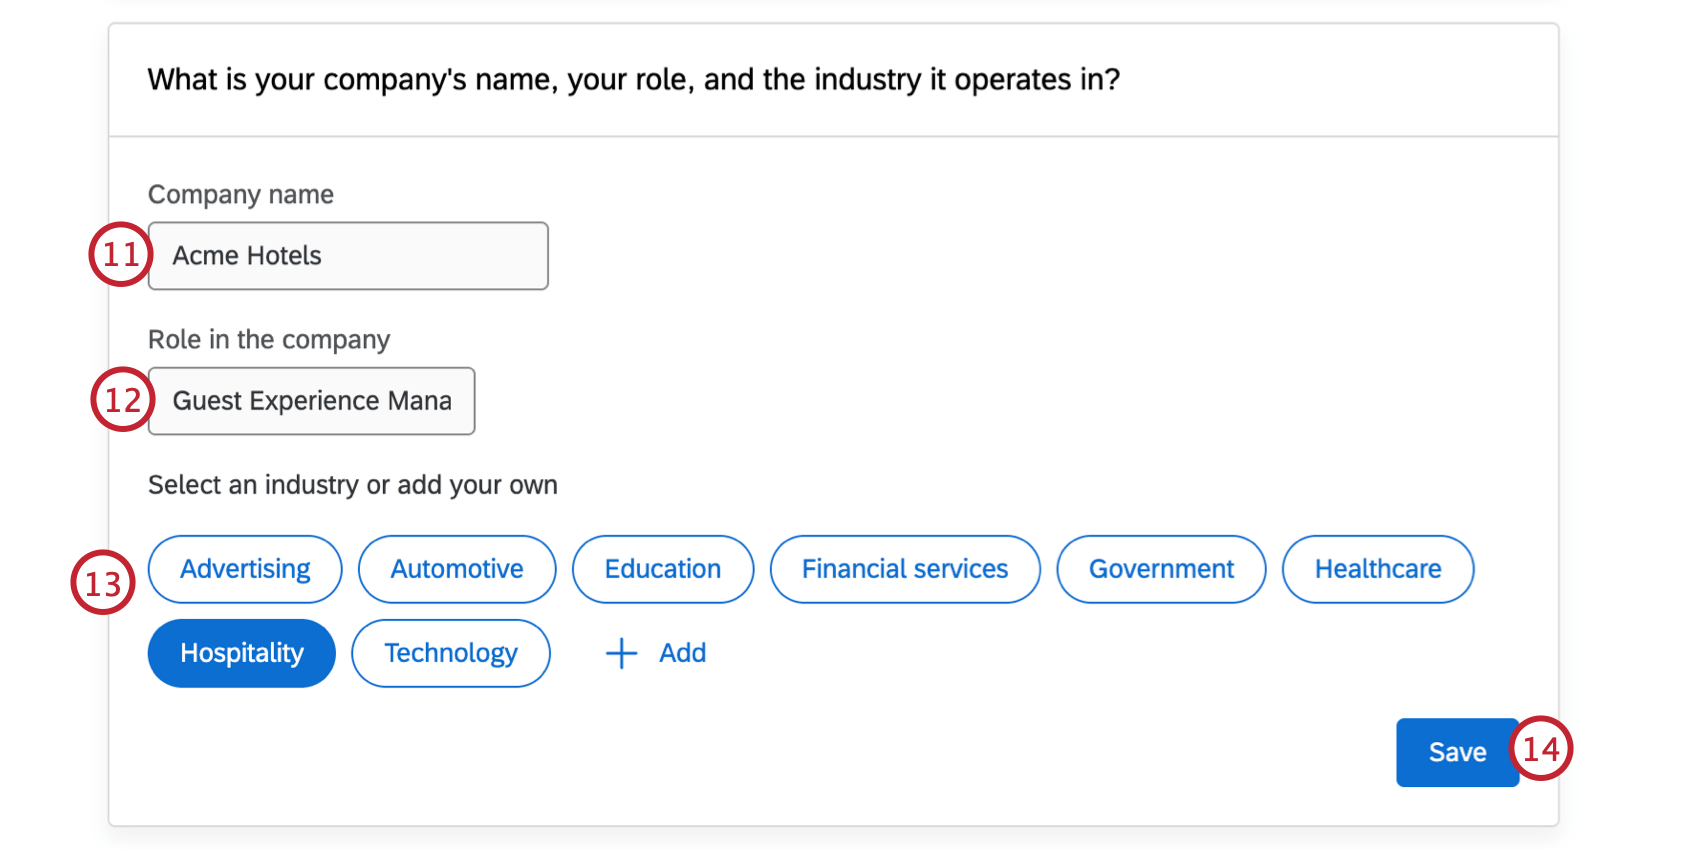
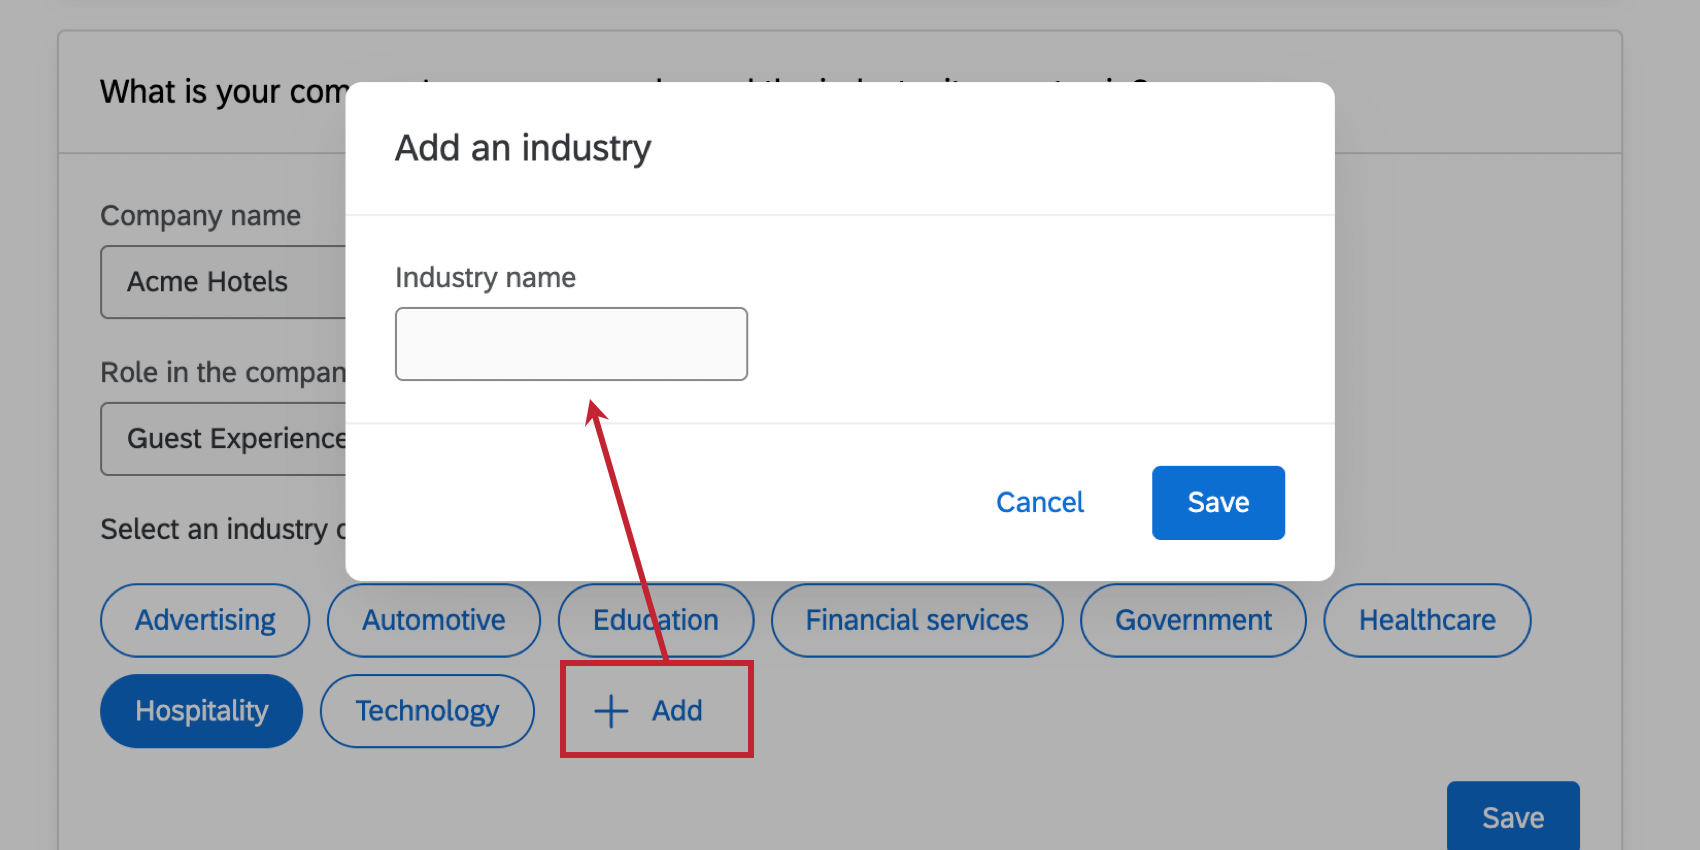
    Qtip: If your industry isn’t listed here, you can click Add and then specify your industry in the text box.adding a custom industry
  14. Click Save.
  15. Enter a use case for the hierarchy. Use the example use cases as a starting point.entering a use case prompt
  16. Click Save.
  17. Choose the number of levels in your hierarchy. You can have between 1 to 5 levels; generally we recommend 3-5 levels for an in-depth analysis.choosing the number of levels in the hierarchy
  18. Click Save.
  19. Choose if you’d like the text model to generate topics based on the open text data from your selected Discover project. You can then select the individual data sources you’d like to include.choosing the discover projects to use as a data source for the topic model
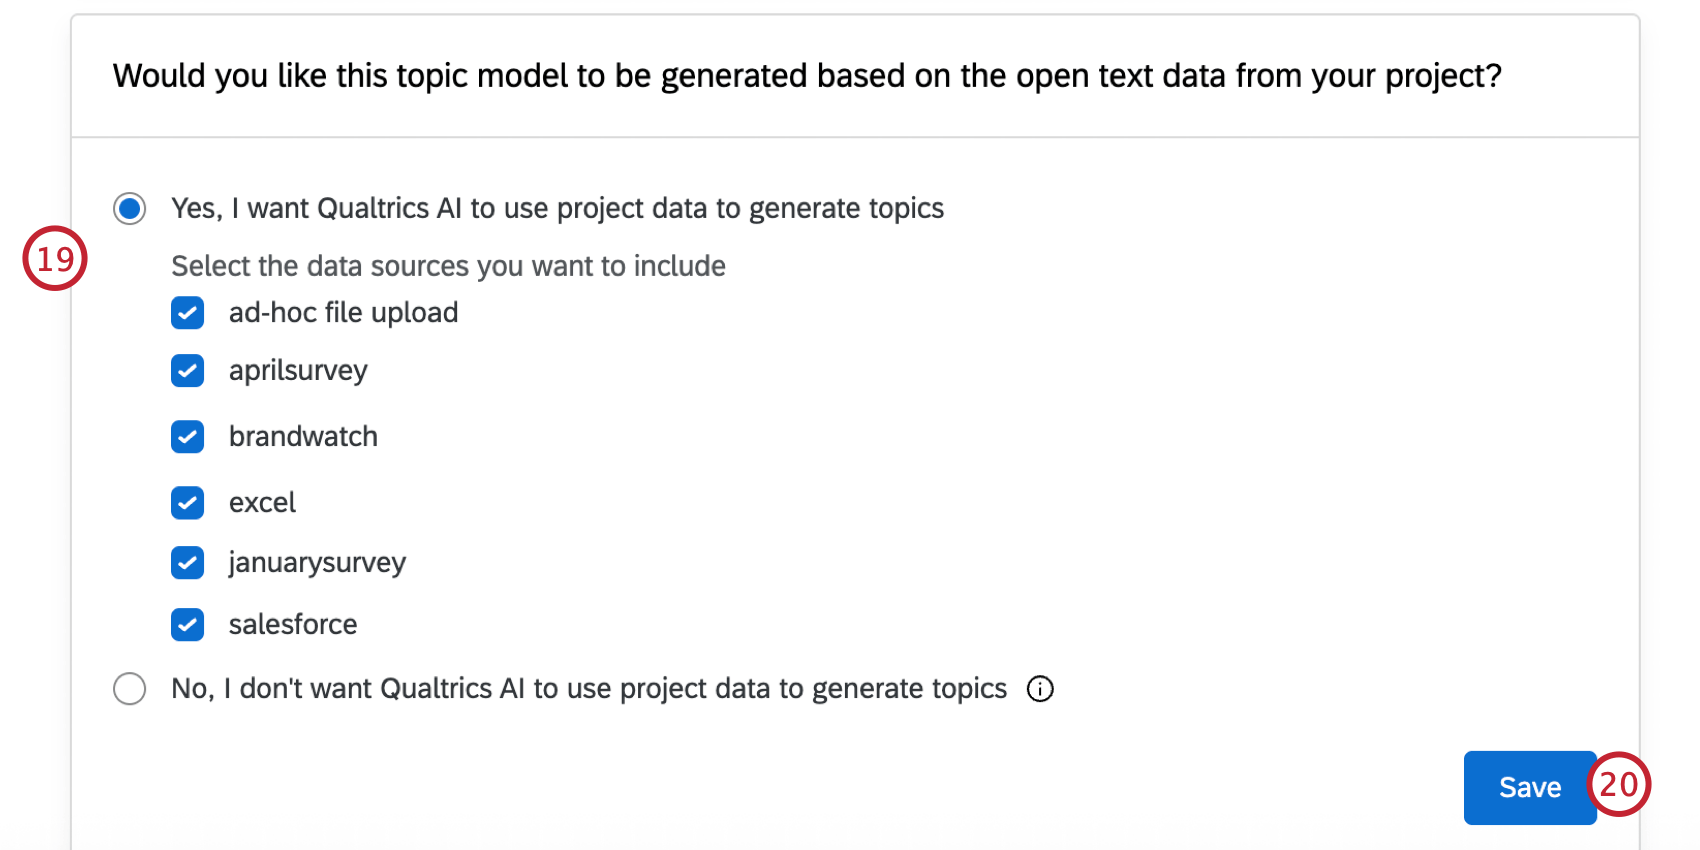
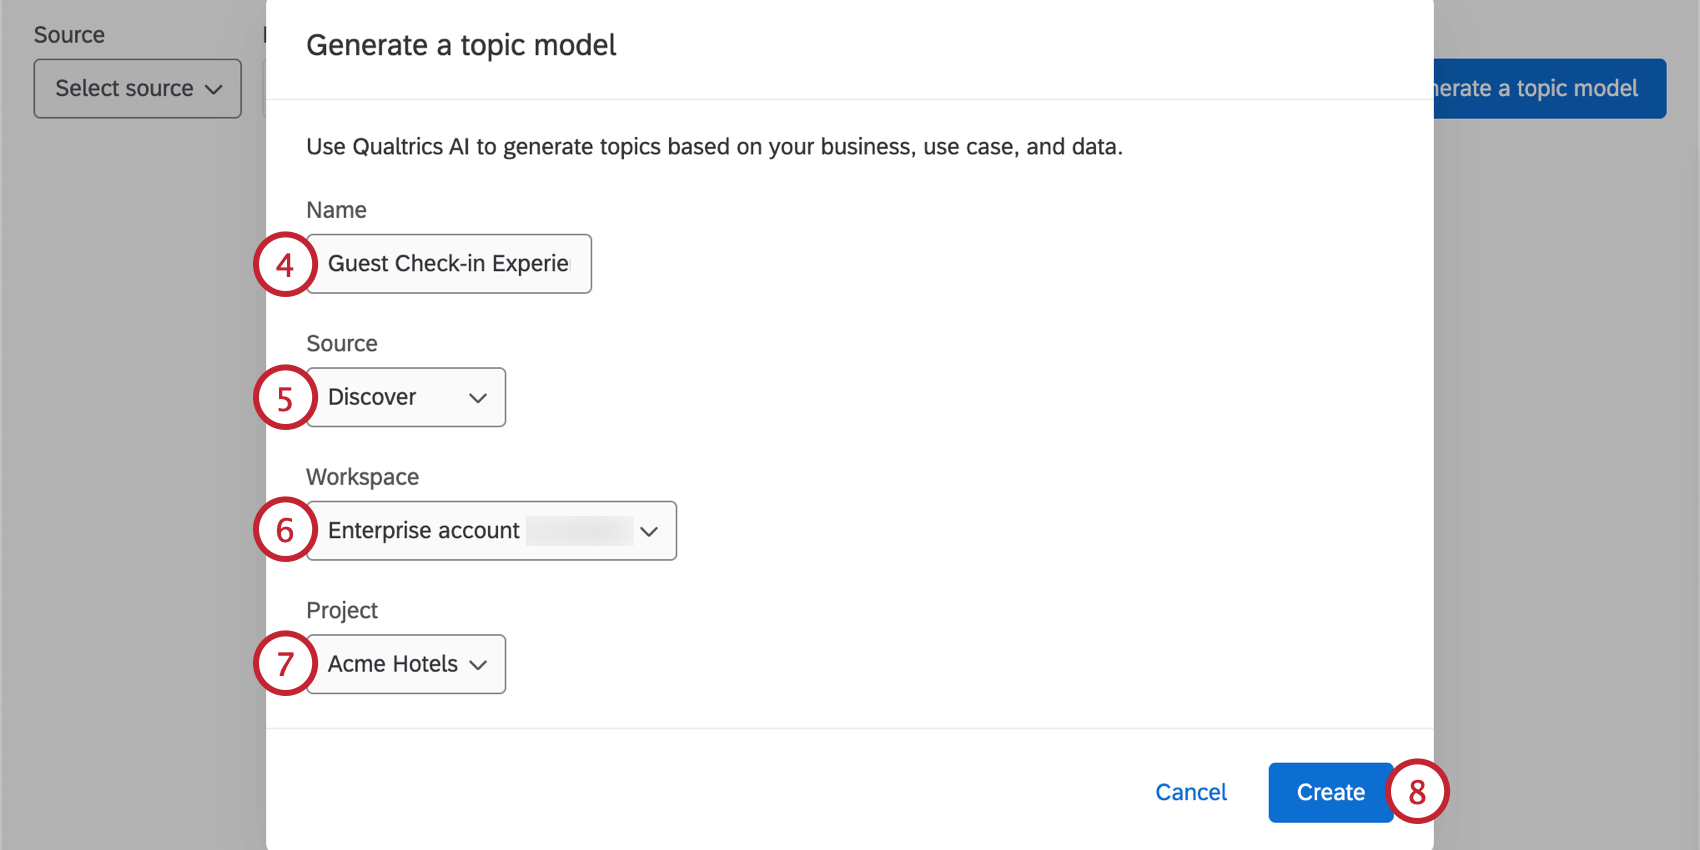
    Qtip: Generally we recommend using your project data so the generated model is the most tailored to you.
  20. Click Save.
  21. If desired, you can enter any extra information about your company, industry, products, and services to help further customize the model.entering additional context information for the prompt
  22. Click Save.
  23. If needed, you can click Edit to change any part of the model parameters before generating the text hierarchy.if needed, editing the model setup before generating it
  24. Click Generate. It will take a few minutes for your model to be ready.
  25. To view your model, use the menus at the top to choose your Discover workspace and project.refreshing the displayed data to check on the generated model's status
  26. If your model isn’t ready yet, you can click Refresh topic model data to update the status and check if generation is complete.
  27. Once your model is “Ready for review,” click on it and select Review topic model.reviewing the model after it's finished generating
  28. Review the generated topics. Deselect any topics you don’t want to keep in your model.choosing the topics to include in the model and providing feedback
  29. You can rate the generated model and provide additional feedback in the text box on the righthand side of the page.
  30. Click Accept topics to accept the selected topics and load the topic model into Designer.
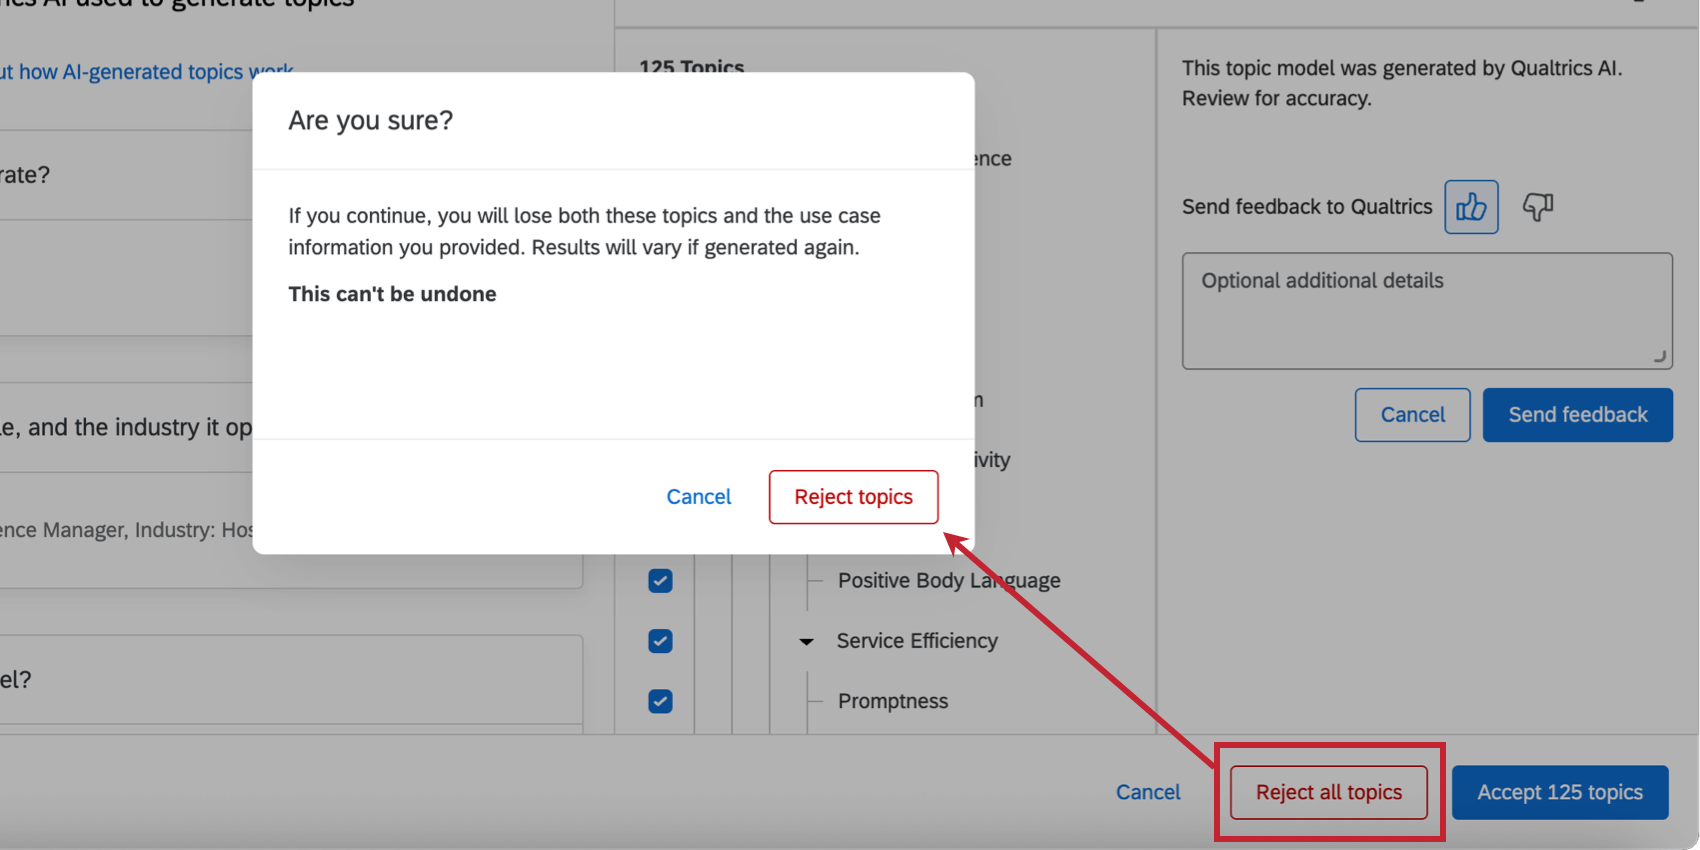
    Qtip: If you do not want to save the model, click Reject all topics instead.clicking "reject topics" to reject the model instead
  31. Once your model is saved, you can edit it further in Designer. Click the Edit in Designer button to open the model.clicking "edit in designer"
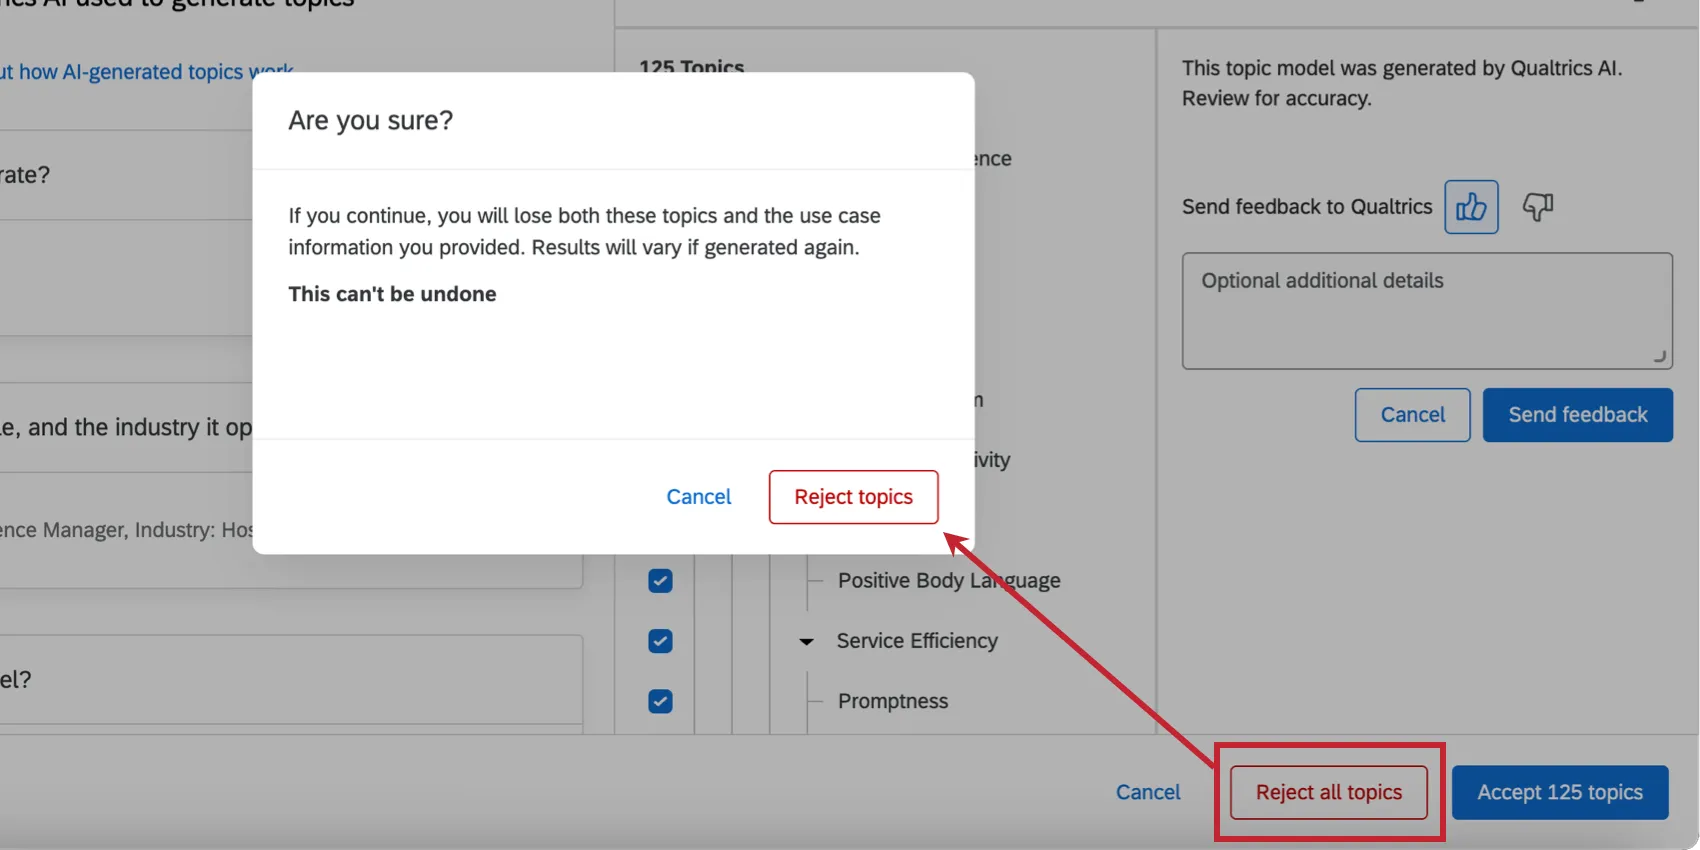
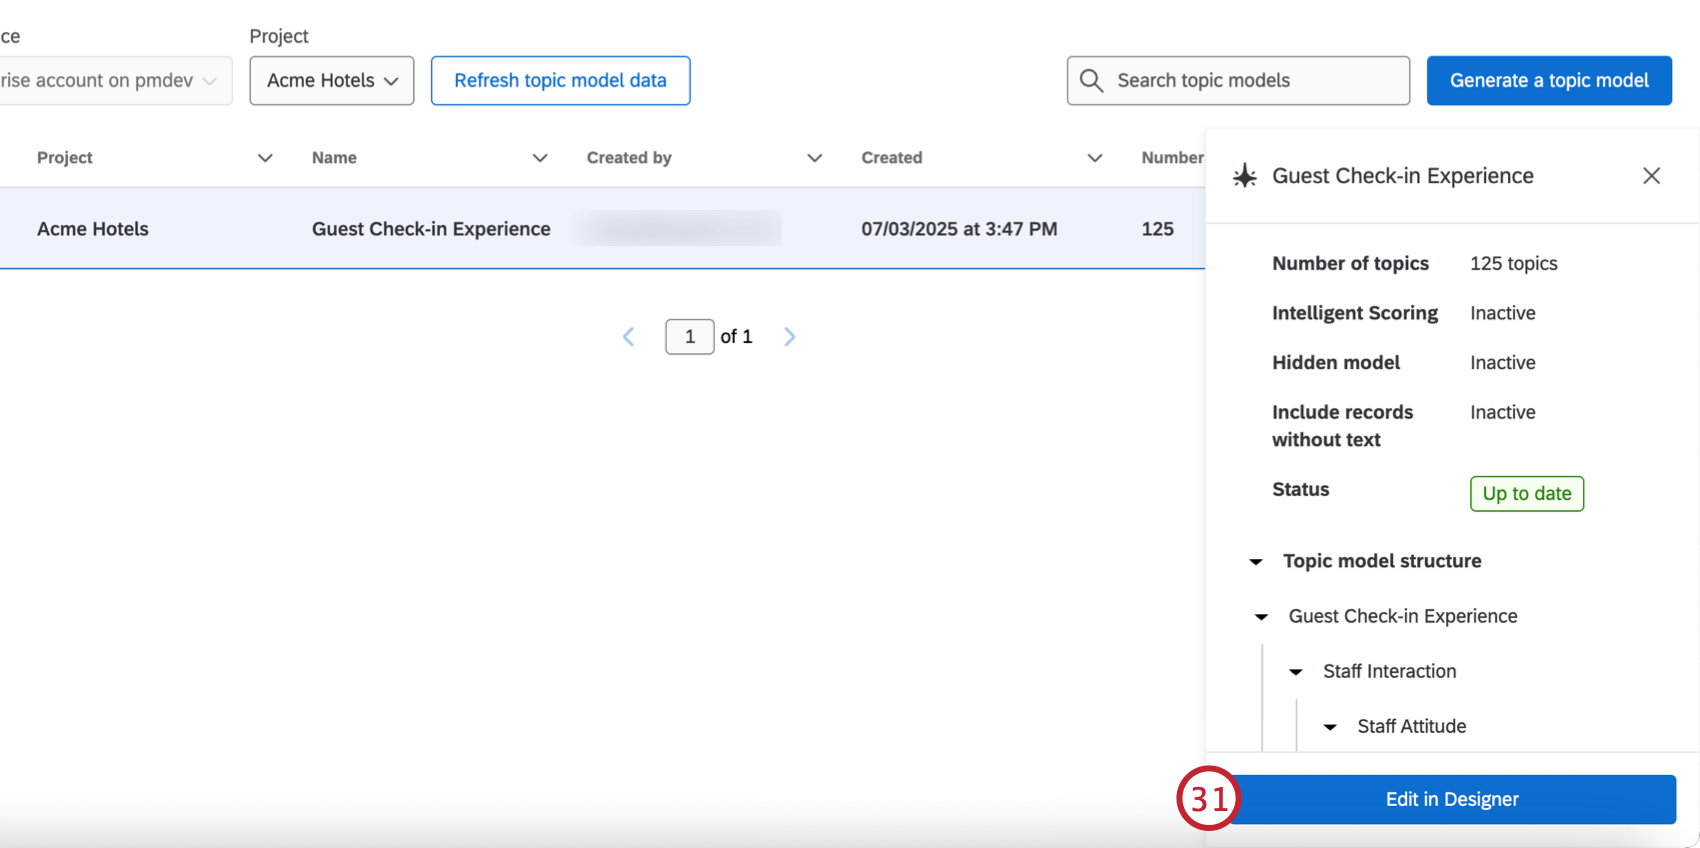
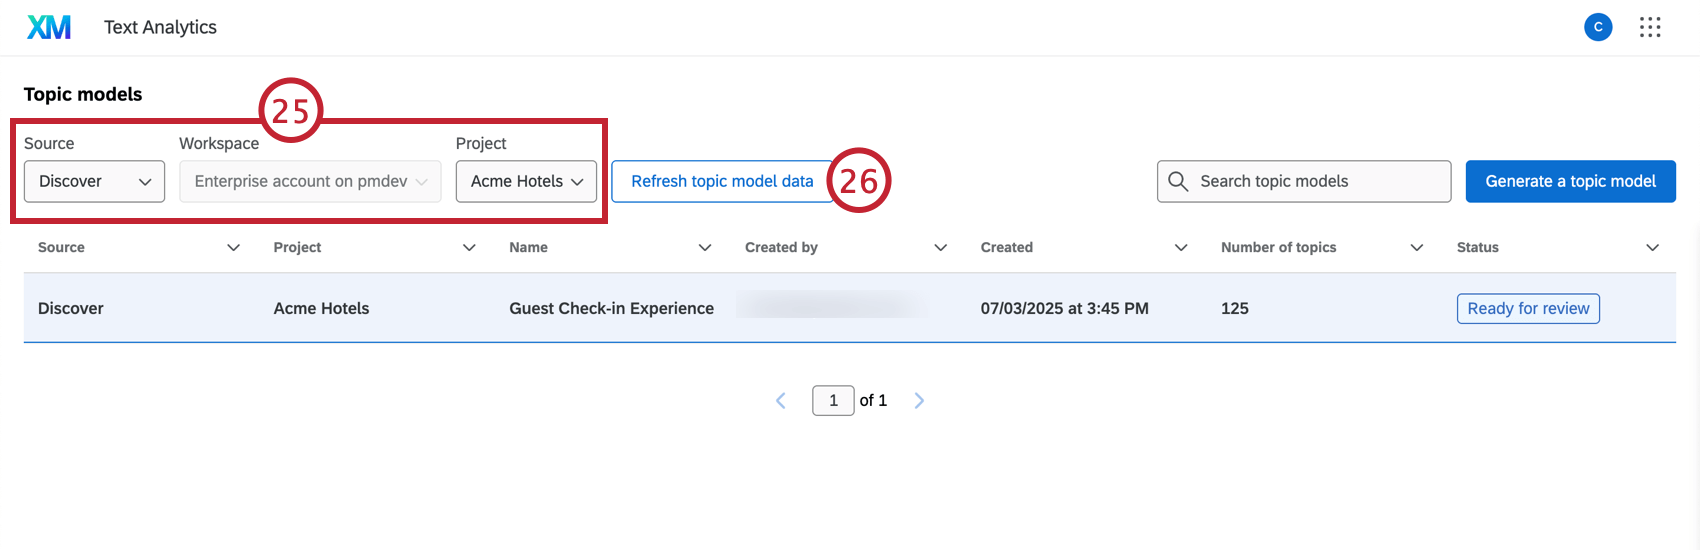
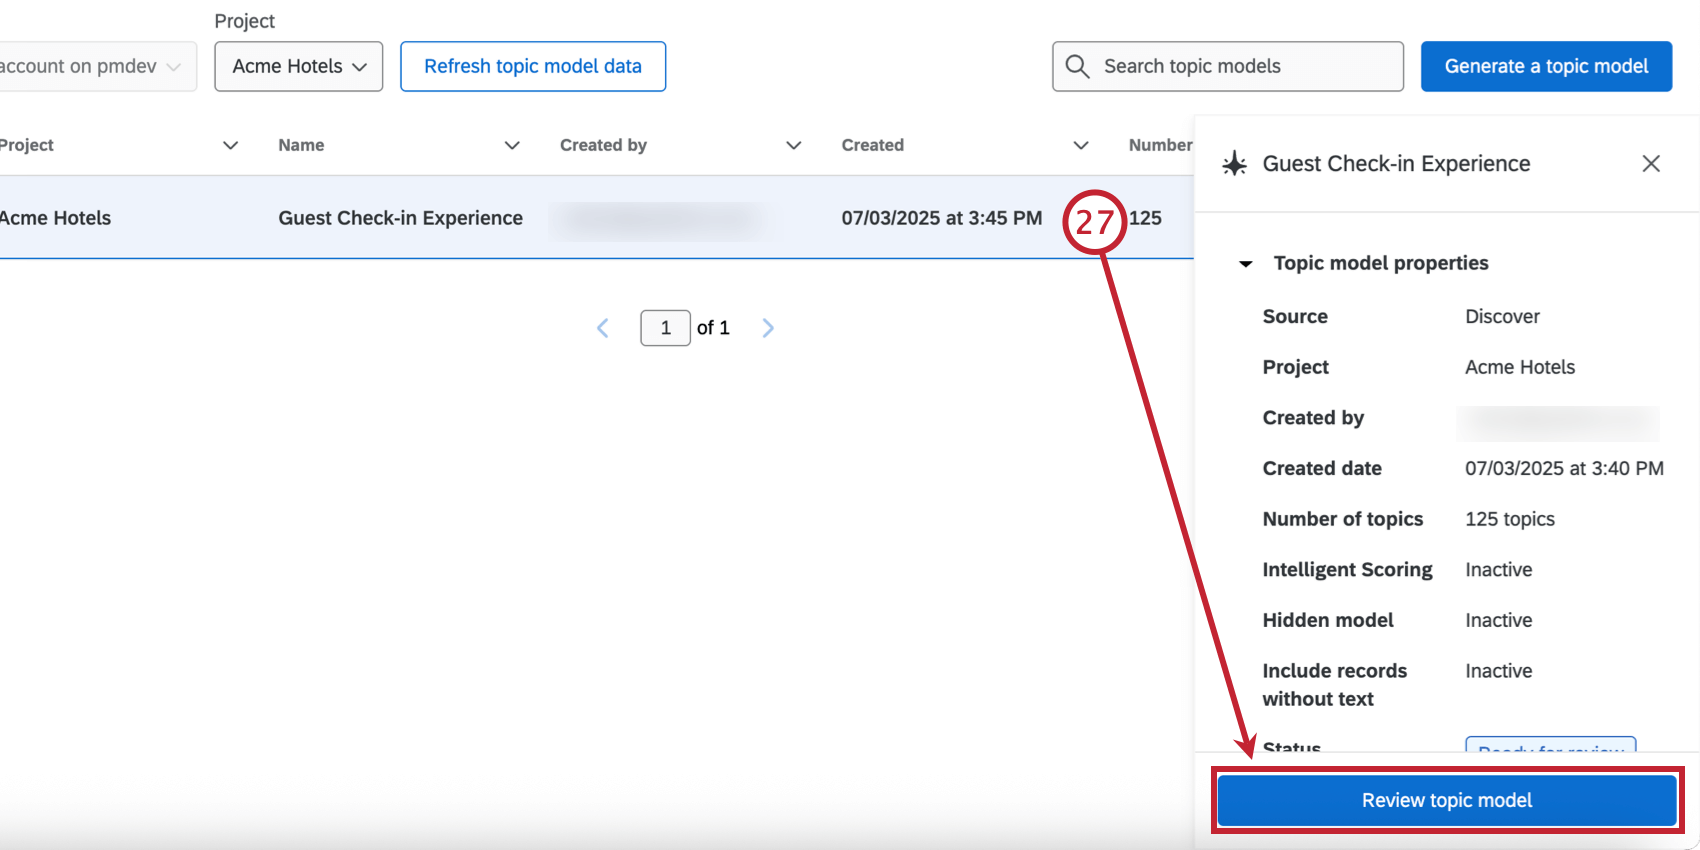
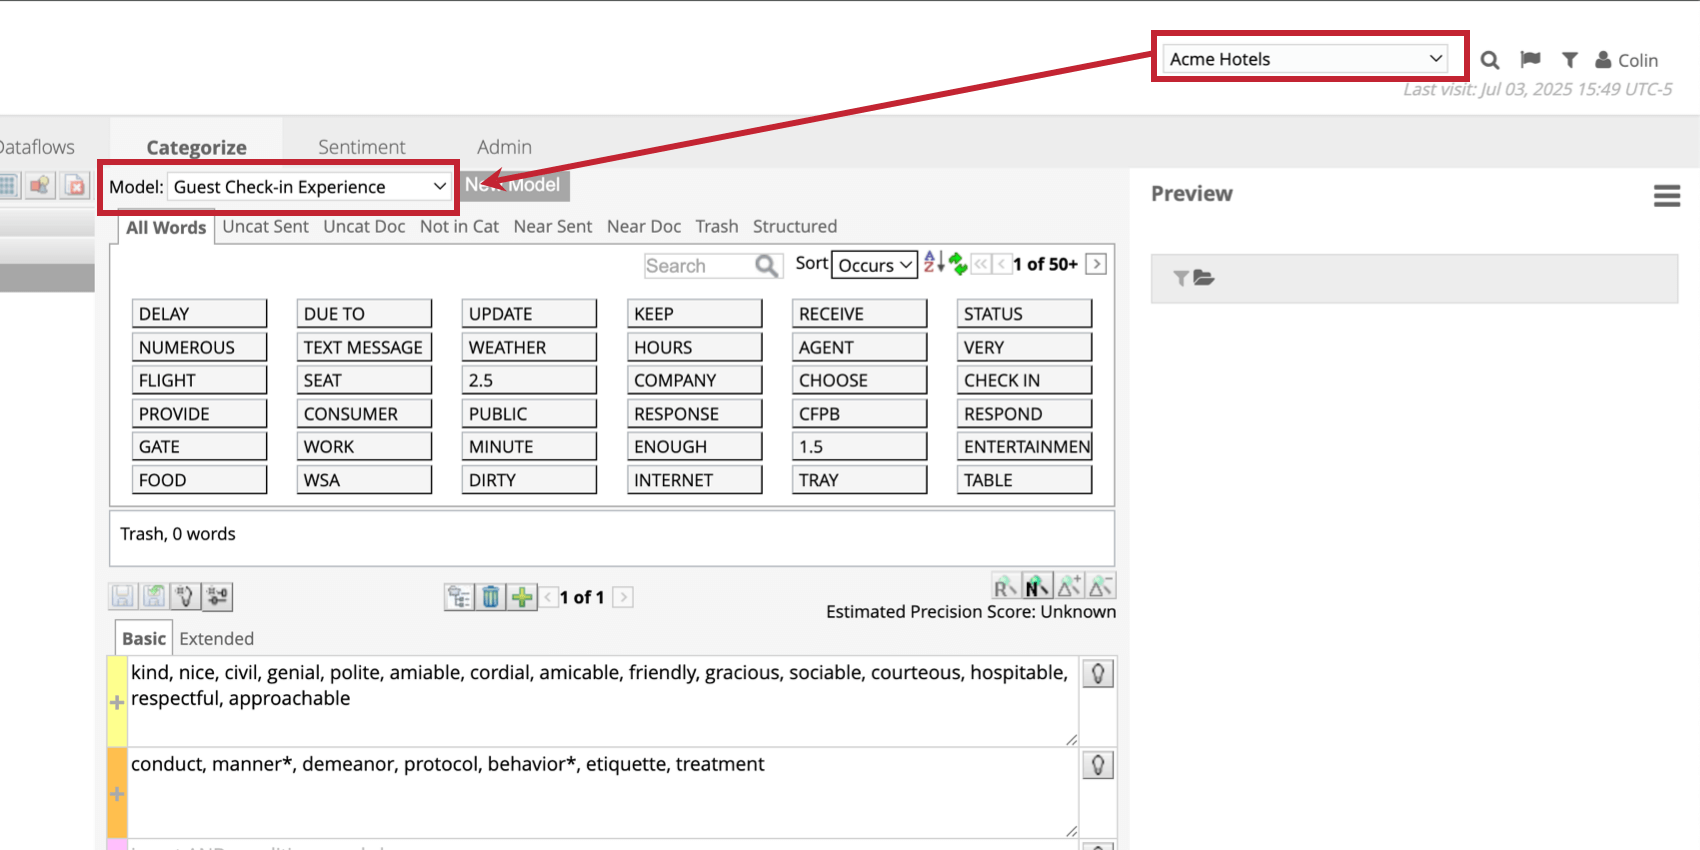
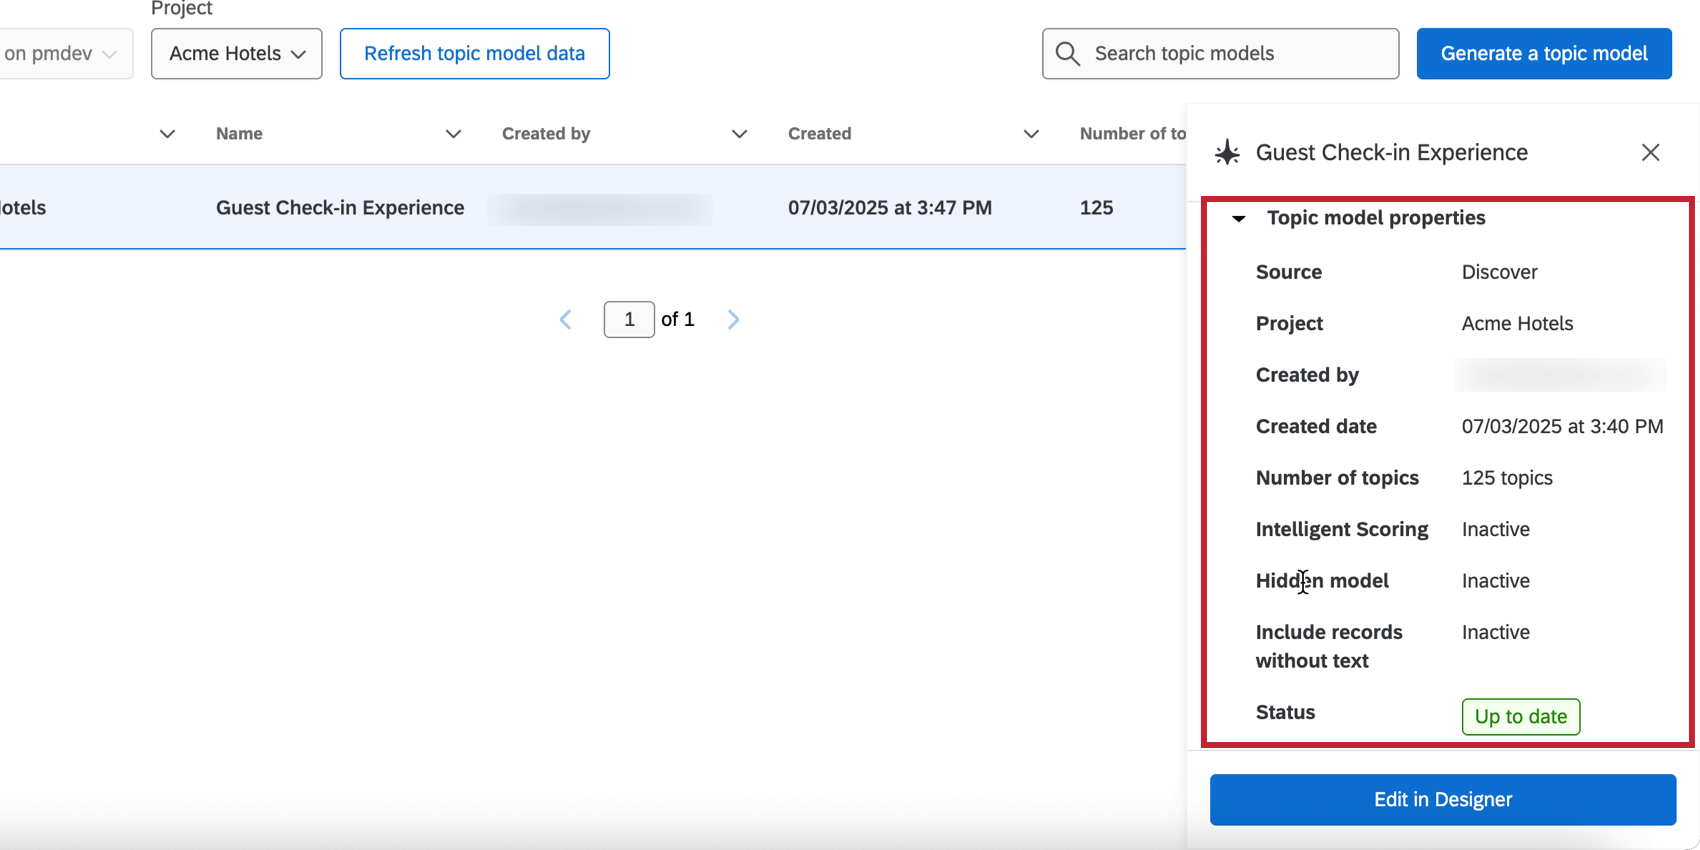
    Qtip: If you’re having trouble finding the model in Designer, make sure the right project is selected, and then double check the topic model.selecting the newly generated model in Designer
  32. You can then edit the model in Designer like any other topic model.editing the model in designer
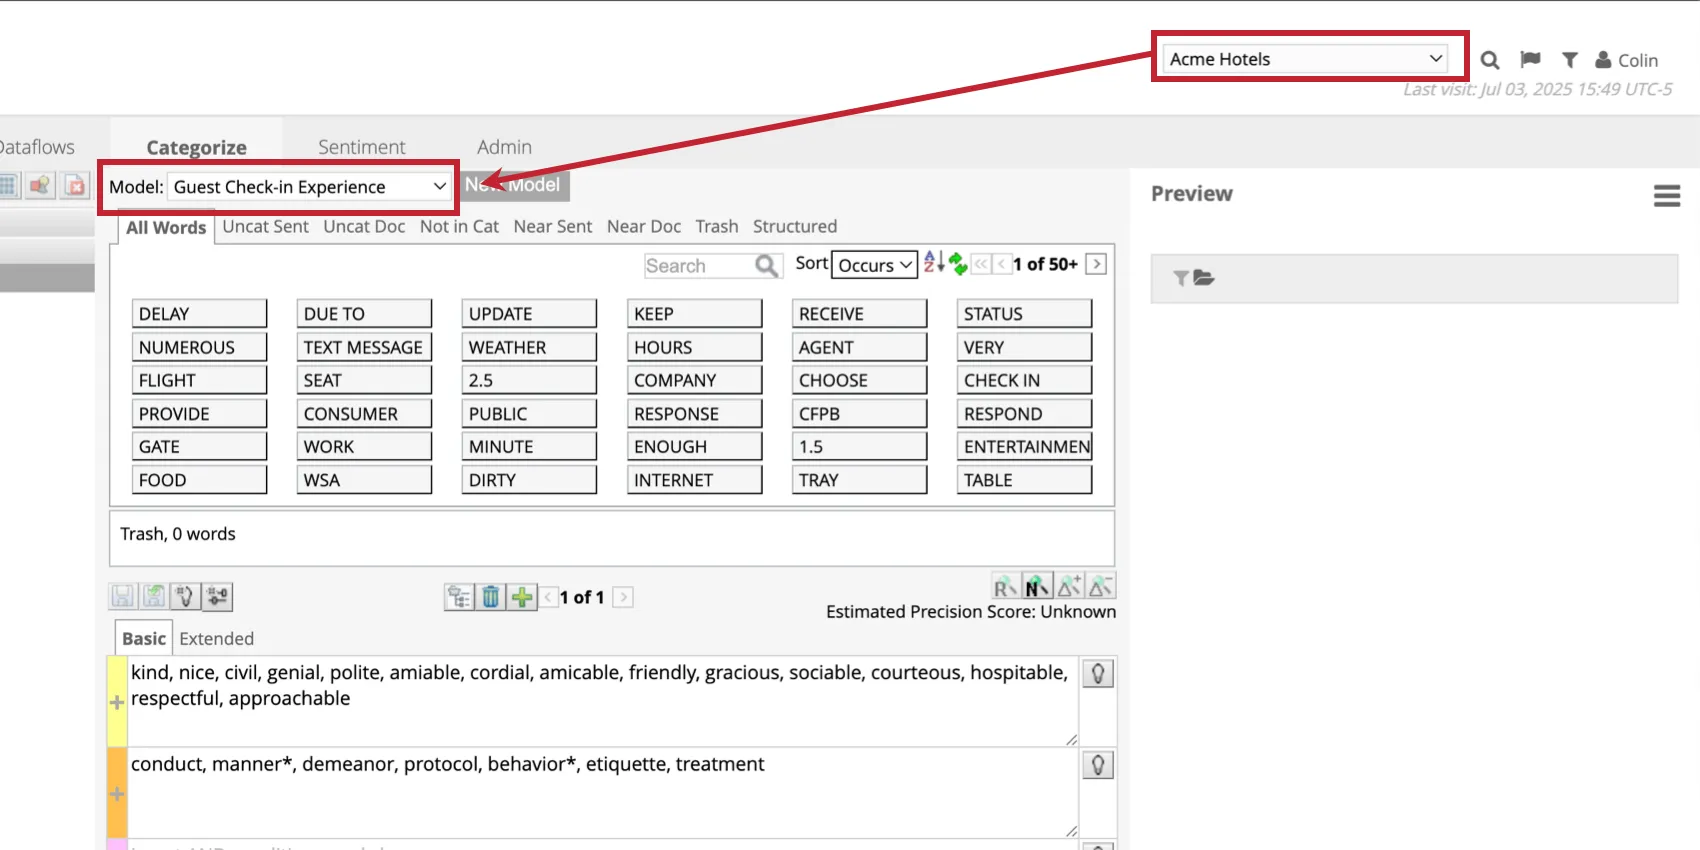
    Qtip: The model information in the Text Analytics screen will stay up-to-date with any changes you make to the model.
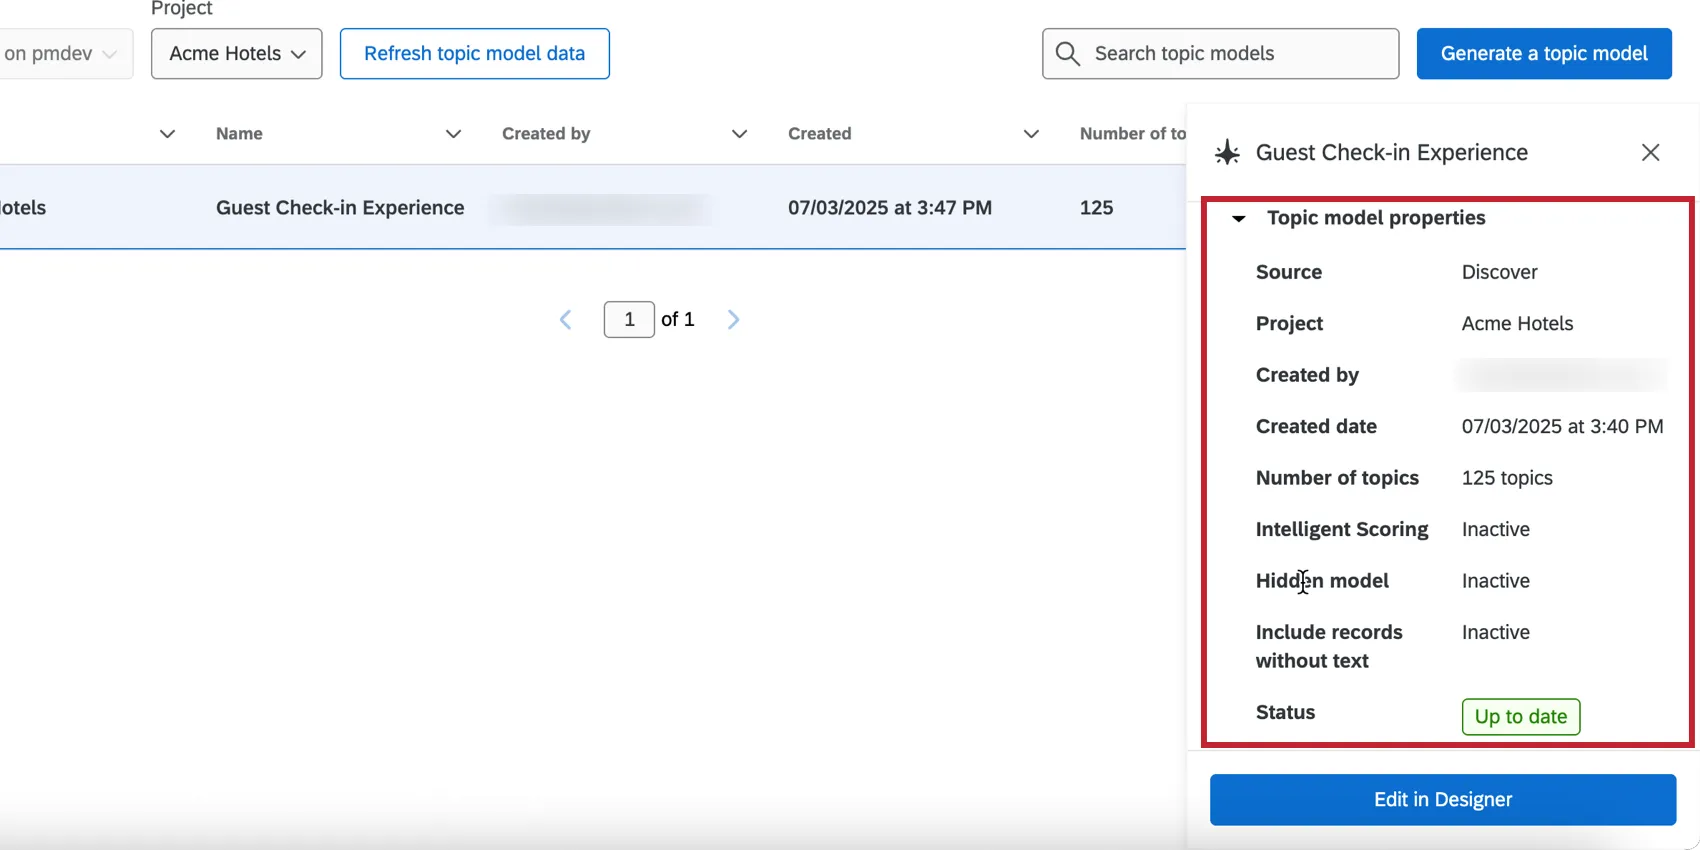
viewing the model's properties on the Text Analytics page