
Directory Options
What's on this page
About Directory Options
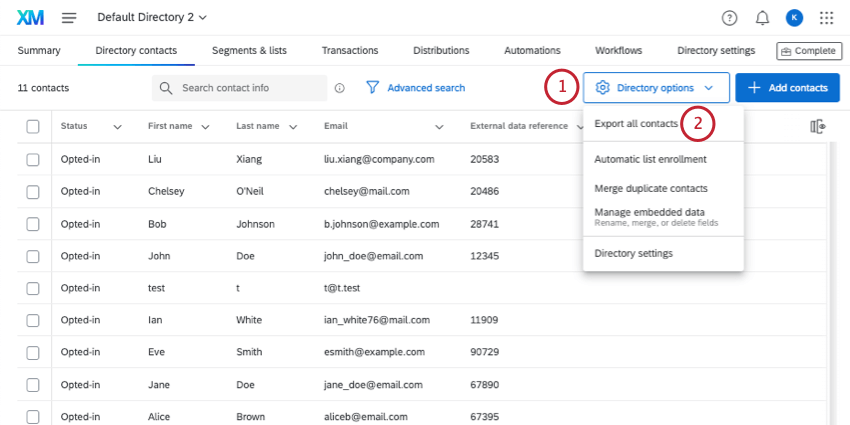
Directory options is a dropdown menu that can be found in the upper-right corner of the Directory Contacts tab. It contains many important means of managing your directory contacts, such as the ability to export them, to set up automatic rules for list enrollment, merge duplicates, and manage embedded data.
Qtip: This support page describes directory options for XM Directory, only.
Exporting All Contacts from the Directory
You can export all of your directory’s contacts in a file format of your choosing.
Qtip: It doesn’t matter which contacts are selected. All contacts will be included in the export unless you use follow the exact steps linked here. Filters and searches also do not narrow down the contacts included in the following export. Remember you can also export a mailing list instead of the entire directory.

- Contact statistics: This includes the invite count, email count, average response time, response rate, last invite date, last response date, and response count. Response count includes incomplete but closed responses. Average response time is in milliseconds.
- Contact ID: Each XM Directory contact has a randomly generated, unique ID. This ID cannot be changed and is used as a unique identifier in API calls.
Qtip: Click Select all embedded data fields to include all embedded data in the directory. Keep in mind that depending on how many fields are in your directory, this can drastically increase the file’s size. See our guide on cleaning directory embedded data.
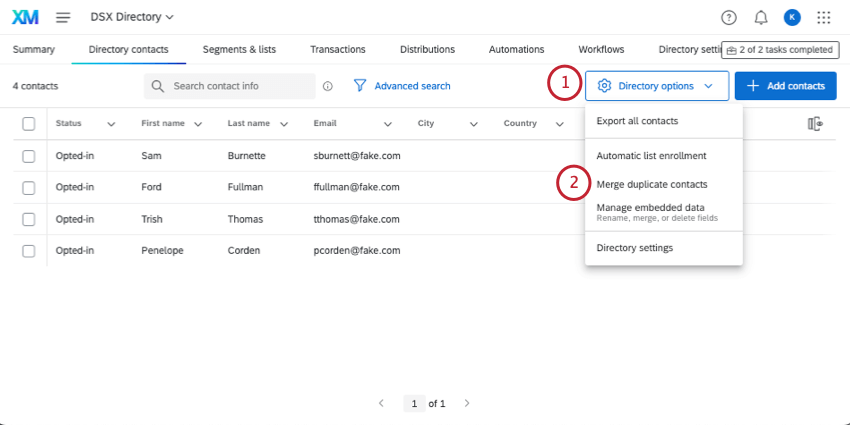
Merge Duplicates
At times, you may upload multiple copies of the same contact to your directory without knowing. You can combine these duplicate contacts into one contact by using Merge duplicates in the directory options.
Qtip: You can use the directory options to consolidate duplicates after the contacts are uploaded. However, if you want duplicates to be consolidated as they’re uploaded so that you don’t have to go back and fix them later, you should adjust your directory settings. Check out Merging Duplicate Contacts in XM Directory for more details.
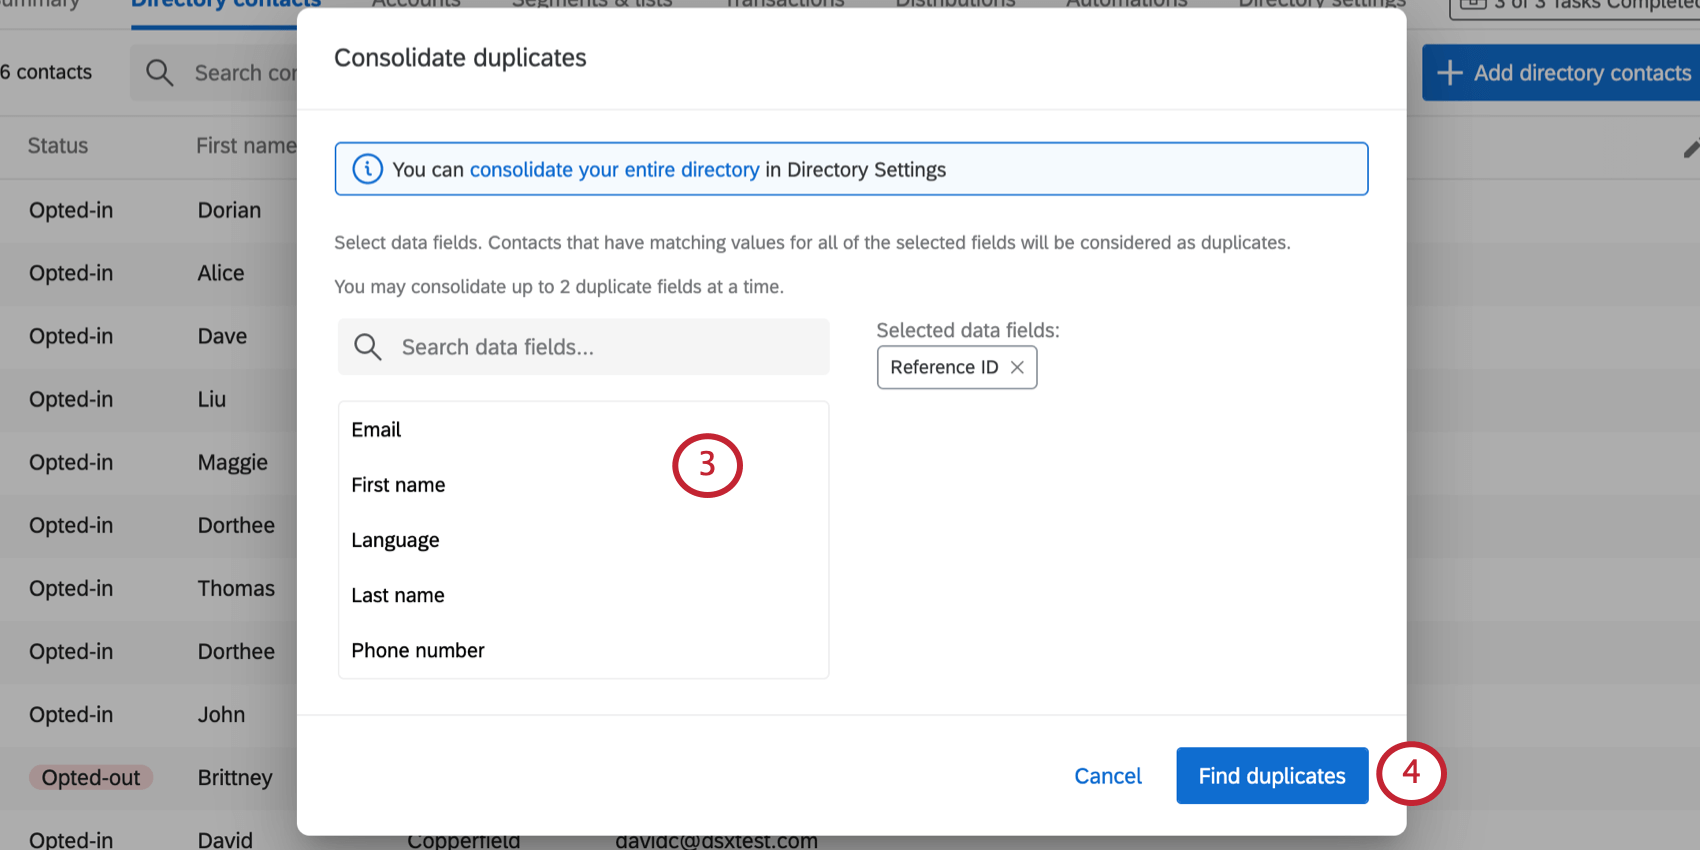
Example: If we select first and last name, contacts with the same first name won’t be considered duplicates. Only if both names match will they be considered duplicates of each other.

Qtip: You can only consolidate 100,000 sets of duplicates at a time. In the above image, 2 sets of duplicates were present. If your directory has more than 100,000 sets of duplicates, you will need to consolidate duplicates multiple times. You can also merge duplicate contacts in the Directory Settings tab. See Merging Existing Contacts for more information.
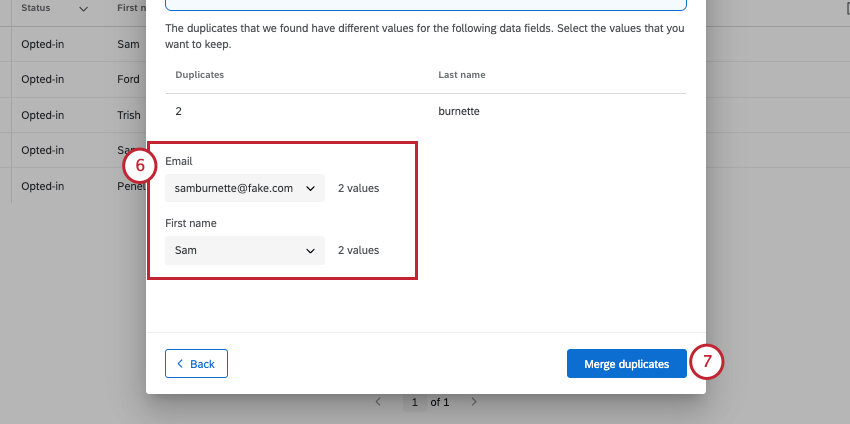
Qtip: For all contacts, you can specify the values for contact information (name, email, phone, and language). For embedded data, it depends on the contacts that are being consolidated. If each duplicate contact has different values for an embedded data field, then you will be given the option to choose which embedded data value to keep. If one contact has a value for an embedded data field but the other contact does not have a value for that field, then whichever version of the contact that is selected will determine which non-duplicated field is kept.
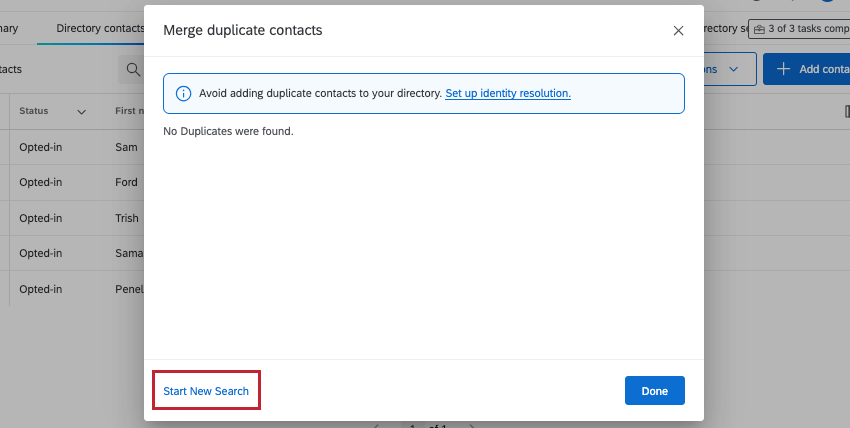
Consolidating Additional Duplicates
If you’re finished your search, click Start New Search on the bottom-left to choose different fields for identifying duplicates.

Manage Embedded Data
Warning: Edits made here will affect all the embedded data in the directory, not just for individual contacts.
In order to easily analyze your data or compile it into reports, it’s important to keep your data clean. That means making sure everything has the correct name, removing unnecessary data, and merging duplicates, where possible.
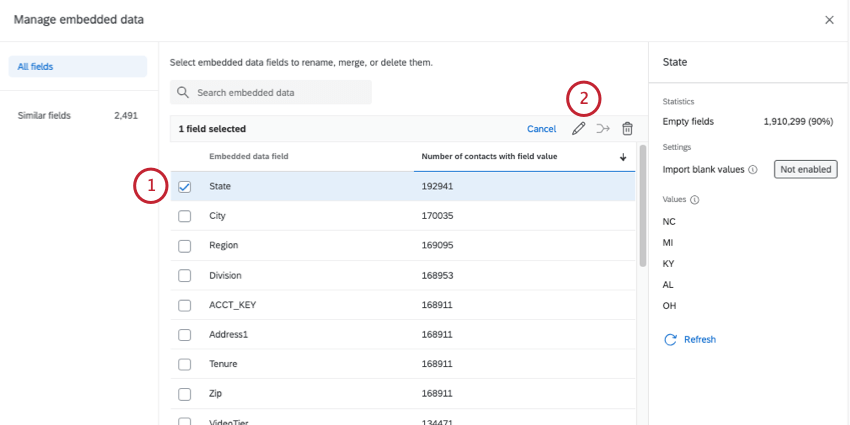
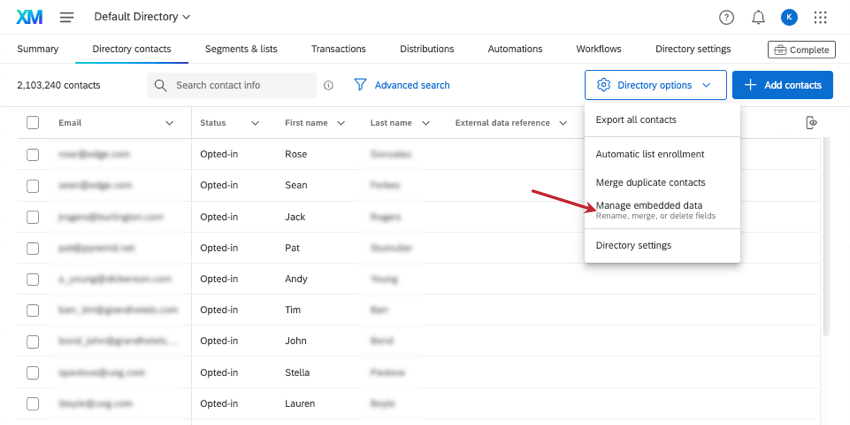
When you open Directory Options, then select Manage embedded data, you can delete embedded data, rename fields, and merge similar fields. This tool will even give you recommendations of which fields to merge.

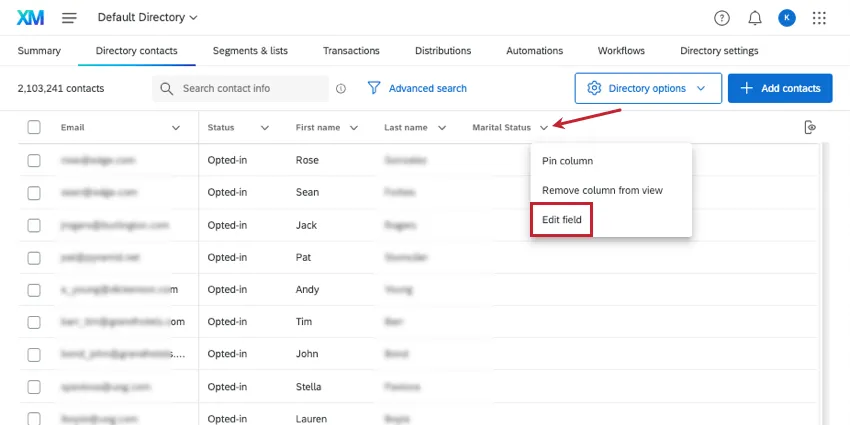
Qtip: You can also open the manage embedded data window from another spot. If you’re displaying embedded data as a header in your directory, you can click the arrow next to it and select Edit field.

Qtip: Interested in learning how you can use this tool in your directory? Check out our XM Directory Best Practices for data cleanup.
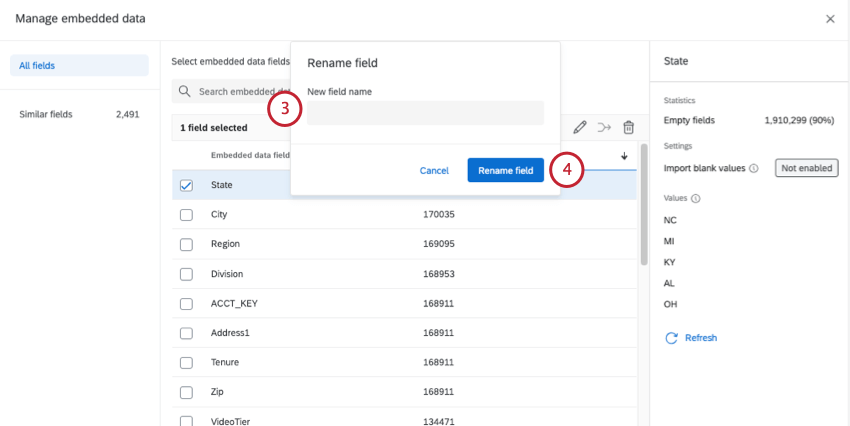
Renaming a field
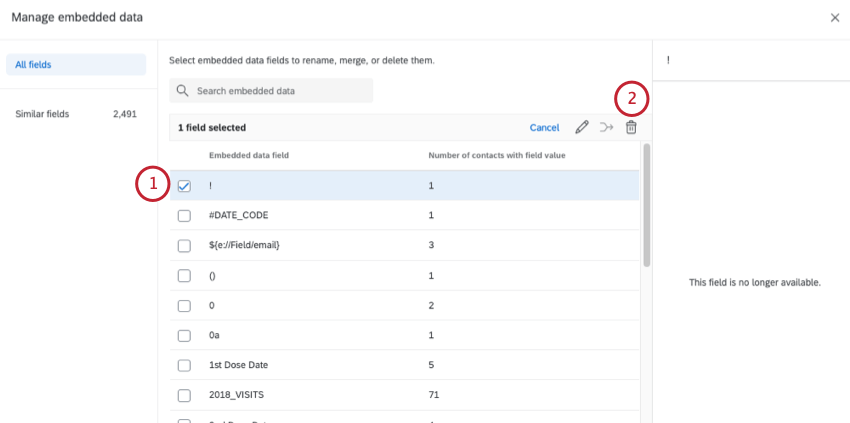
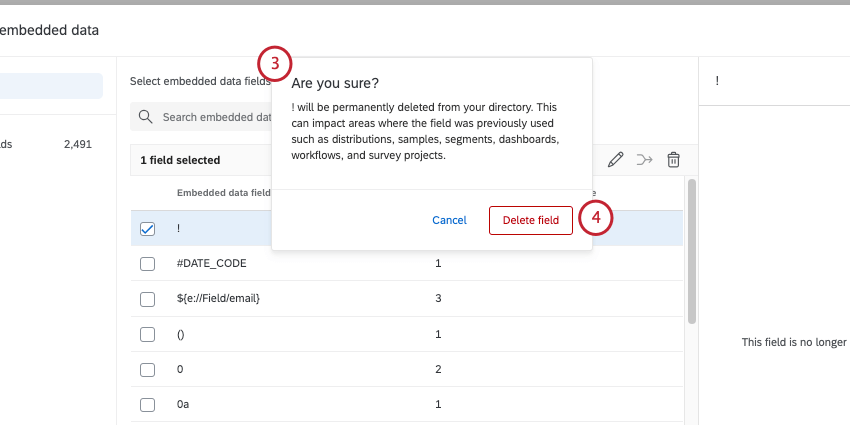
Deleting a field
Warning: Once you delete a field, this information will be permanently deleted from all contacts in your directory. Only delete a field if you are absolutely sure.
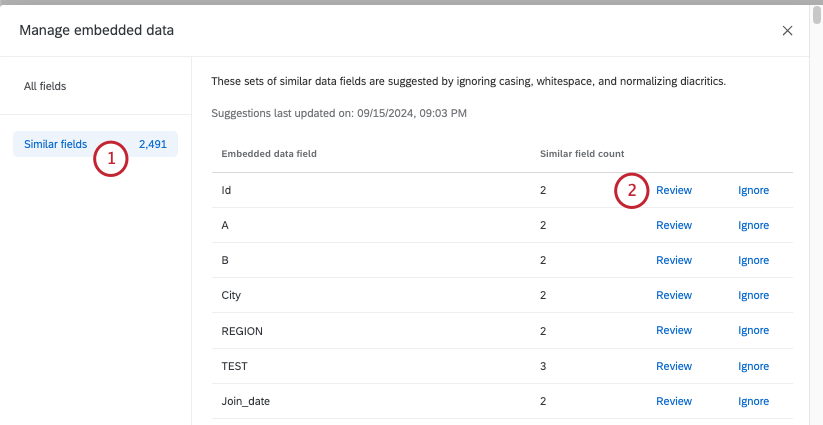
Merging similar fields
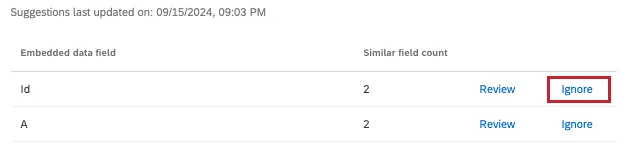
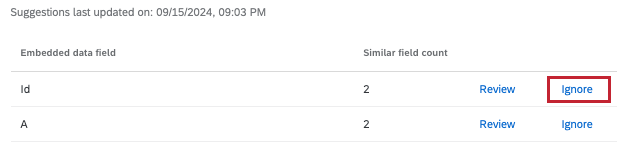
Qualtrics will generate recommendations of fields to merge based on how similar their names are. Names are assessed by ignoring casing, whitespace, and diacritics (i.e., accents on letters).
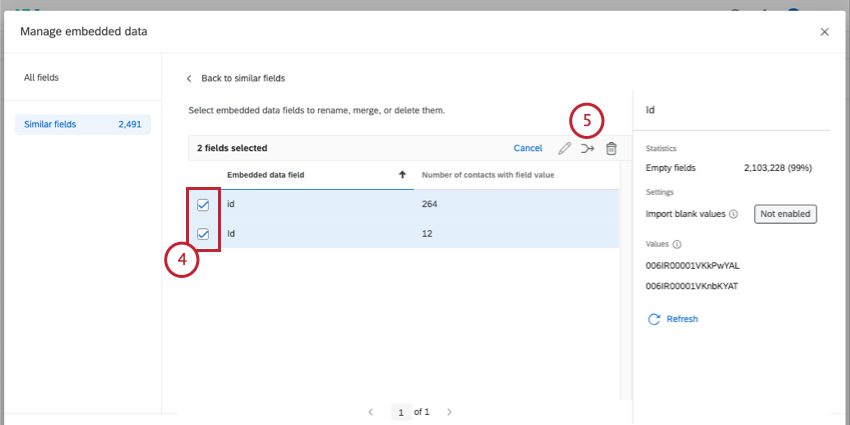
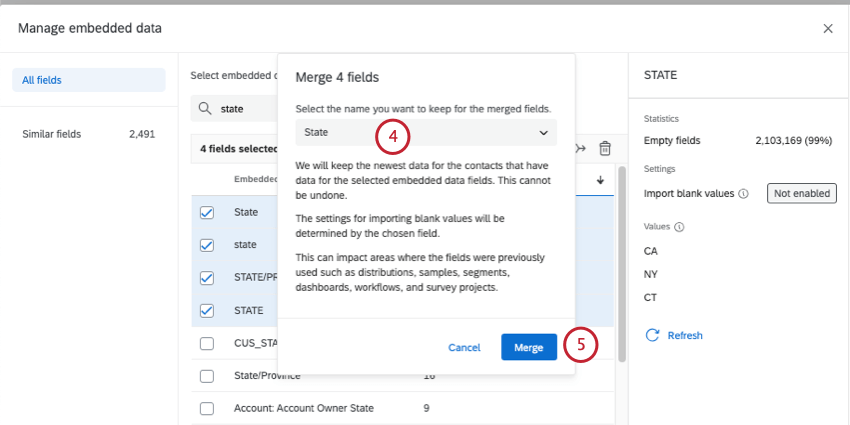
Qtip: If a contact has a value for each of the fields being merged, only the newest data will be saved after fields are merged.
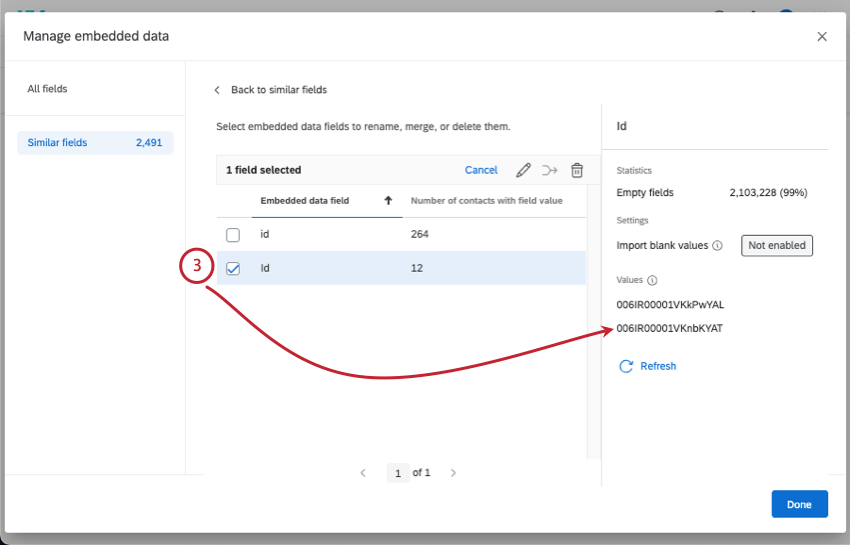
- Empty fields: The number of contacts who have no information for this field. Qtip: You can click the arrow next to a header to sort by the field’s name or number of contacts.

- Values: A sample of up to 10 values for this field. E.g., if the field is Country, the values can be Japan, Spain, France, and so on. This does not show every value for the field.
- Refresh: Refresh your view to see different sample values. Qtip: The pane on the right will show whichever field you selected last. You can also deselect fields as needed.

Qtip: If you don’t want to merge fields, you can click Ignore next to the suggestion.
Manually merging fields
You don’t have to wait for fields to be flagged to clean your data. You can select any number of fields at any time and merge them.
Qtip: If a contact has a value for each of the fields being merged, only the newest data will be saved after fields are merged.
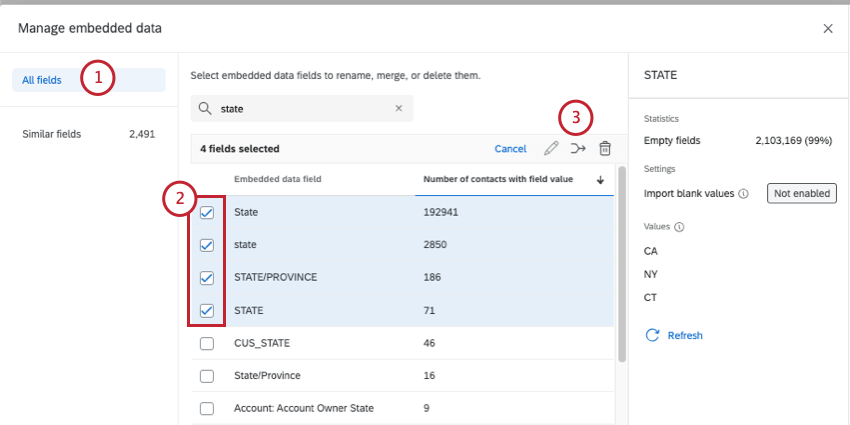
Qtip: Try the search function to narrow down the fields you want to merge.
Directory Settings
The Directory settings option will redirect you to the Directory Settings tab. See the following pages for more on the options you can find there:
FAQs
What do most XM Directory users choose to deduplicate by?
What do most XM Directory users choose to deduplicate by?
Why would I choose to deduplicate by External Data Reference in XM Directory?
Why would I choose to deduplicate by External Data Reference in XM Directory?
I don't think the count at the top of my Mailing List/Directory is correct in XM Directory. How can I be sure?
I don't think the count at the top of my Mailing List/Directory is correct in XM Directory. How can I be sure?
Some of my contacts have been deleted or changed in XM Directory, but I didn’t do anything. What happened?
Some of my contacts have been deleted or changed in XM Directory, but I didn’t do anything. What happened?
What’s XM Directory? / Where’s Target Audience?
What’s XM Directory? / Where’s Target Audience?
That's great! Thank you for your feedback!
Thank you for your feedback!