
Salesforce Outbound Message Event
What's on this page
Attention: You are reading about a feature that is not currently available for all clients. If you’d like more information or to purchase access, talk to your Account Executive.
About the Salesforce Outbound Message Event
Qtip: This feature used to be named the Salesforce Workflow Rule Event. Older workflows may still use this legacy event, but they will be automatically migrated to the updated event without any action required on your end.
In the Workflows tab, you can set up an event so that you automatically trigger a Qualtrics workflow when Flow conditions are met in Salesforce. The Flow conditions might be an event such as a case being closed, or an opportunity that is won.
Attention: Salesforce is deprecating Workflow Rules in favor of the Flow Builder. See this Salesforce blog post for more information about this change. This event can only be used with Salesforce Flows.
Installing the Salesforce Outbound Message Event
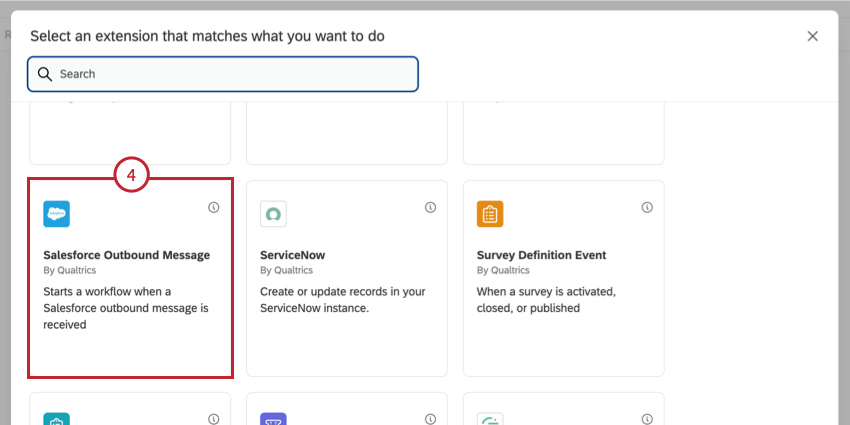
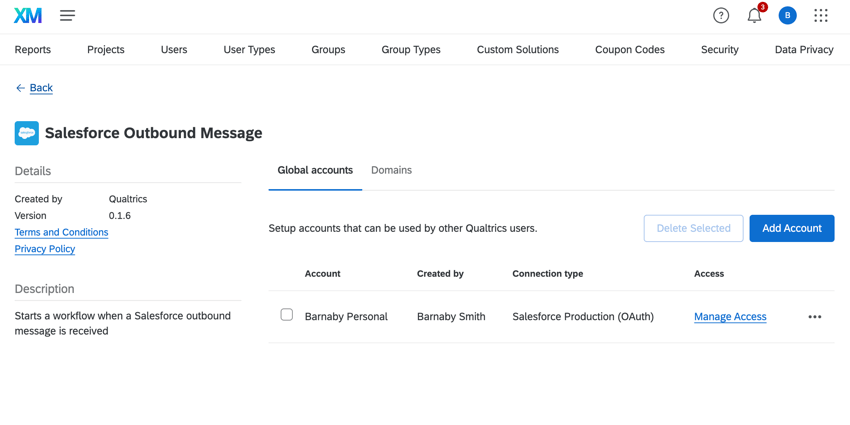
To use the Salesforce workflow rule event, a Brand Administrator must add the Salesforce Outbound Message extension to your brand.
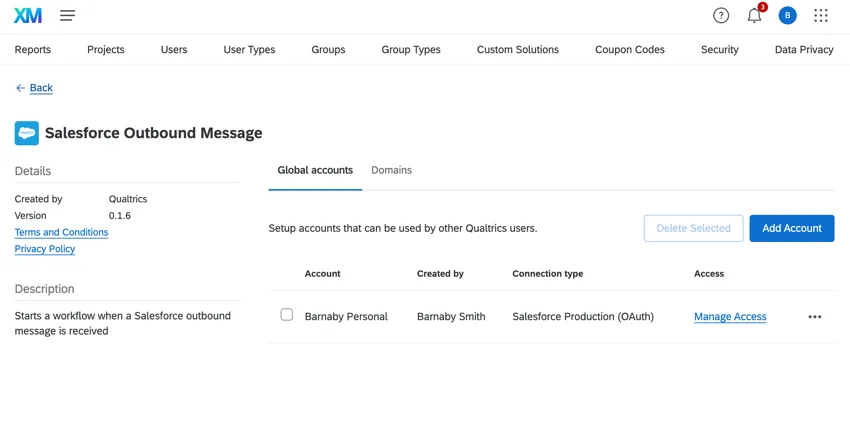
See Installing Third Party Extensions for step by step instructions on downloading an extension.
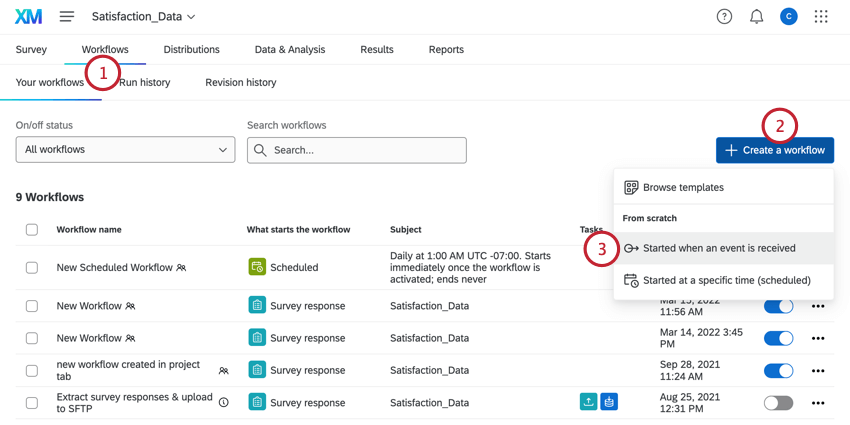
Setting up a Salesforce Outbound Message Event
Follow the instructions in this section to set up a Salesforce outbound message event.
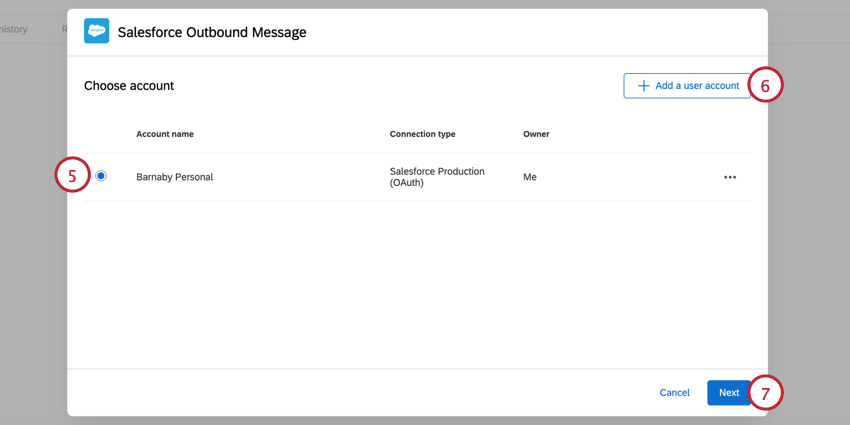
Qtip: When adding a new account, you’ll choose the account type (either production or sandbox) and give the account a name so you can identify it. Then, you’ll be prompted to log in to Salesforce. See Linking Qualtrics & Salesforce for more information on connecting a Salesforce account.
Attention: After you configure this workflow task for the first time, you cannot switch environments (e.g., from sandbox to production) by changing the connected Salesforce account. Instead, you must rebuild your workflow from scratch using the other environment credentials.
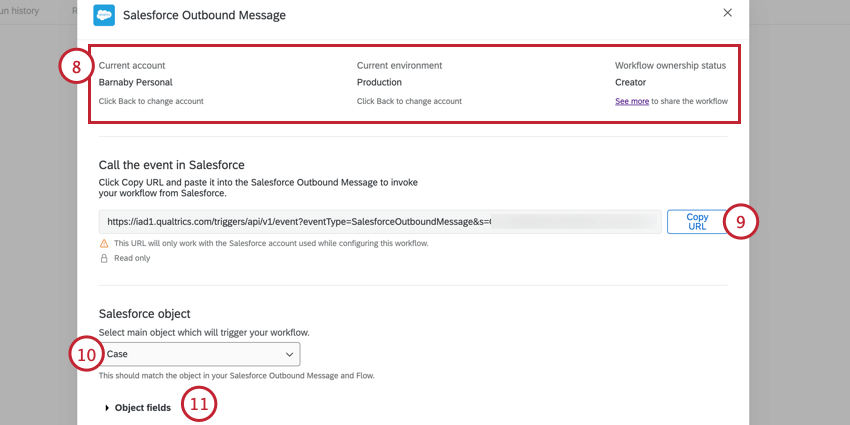
Attention: When making edits to your Salesforce workflow, it’s important that the user who initially set up the workflow is the only user who edits the workflow. If a user who did not set up the workflow tries to edit it, the Salesforce integration will stop working. If you are not the Salesforce workflow owner but need to edit the workflow, then copy the workflow and make edits to the copy.
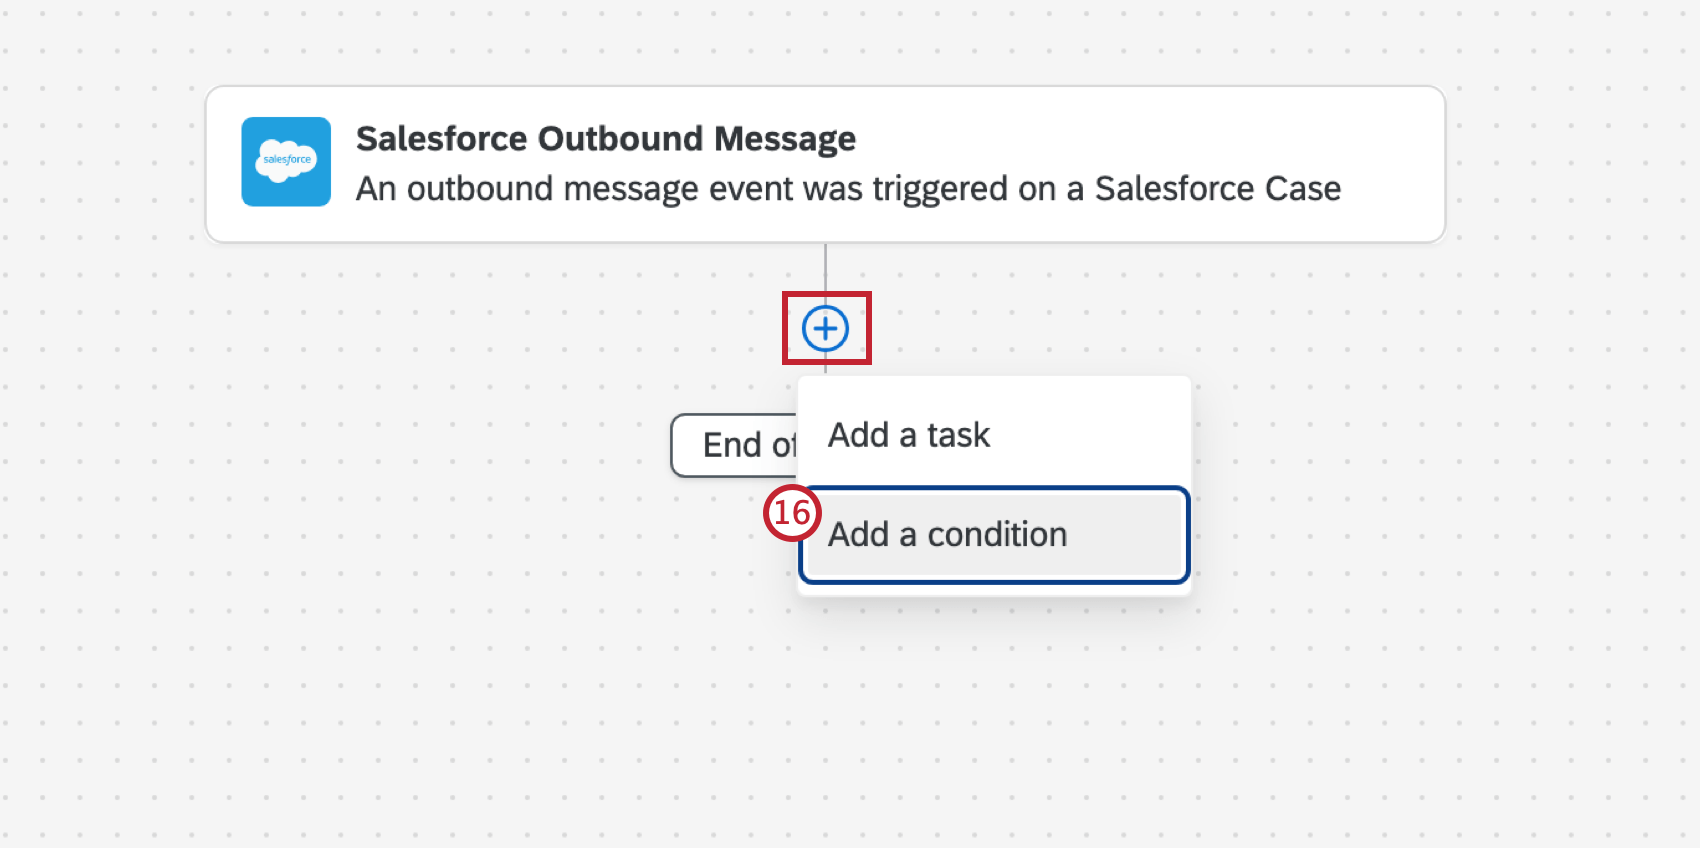
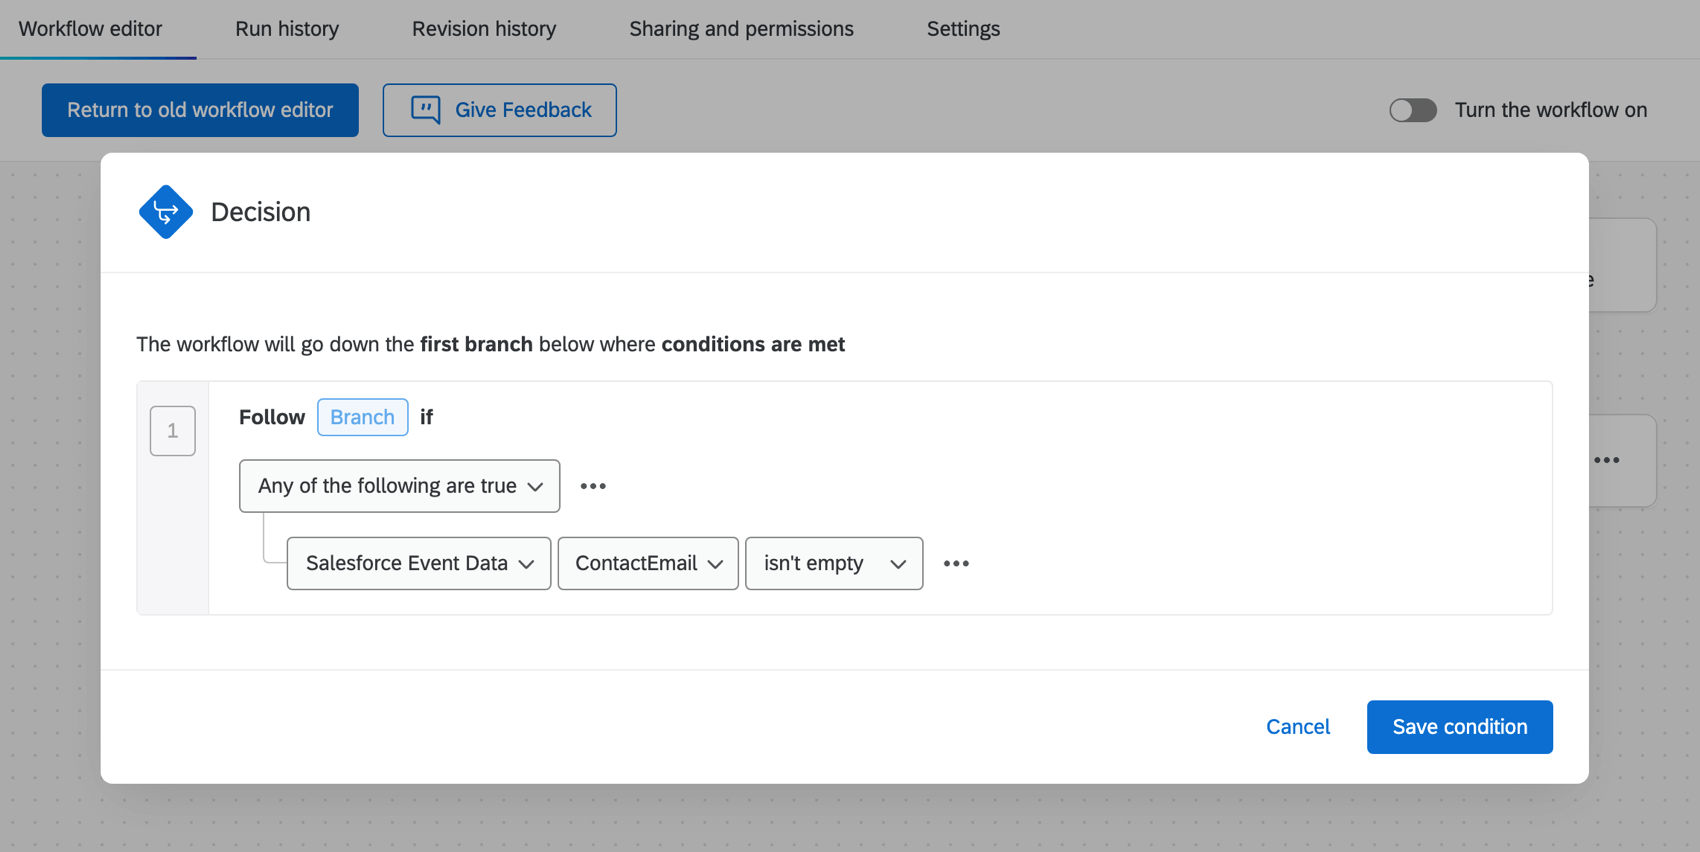
Example: In the below example, the event will only trigger when the Salesforce field ContactEmail is not empty.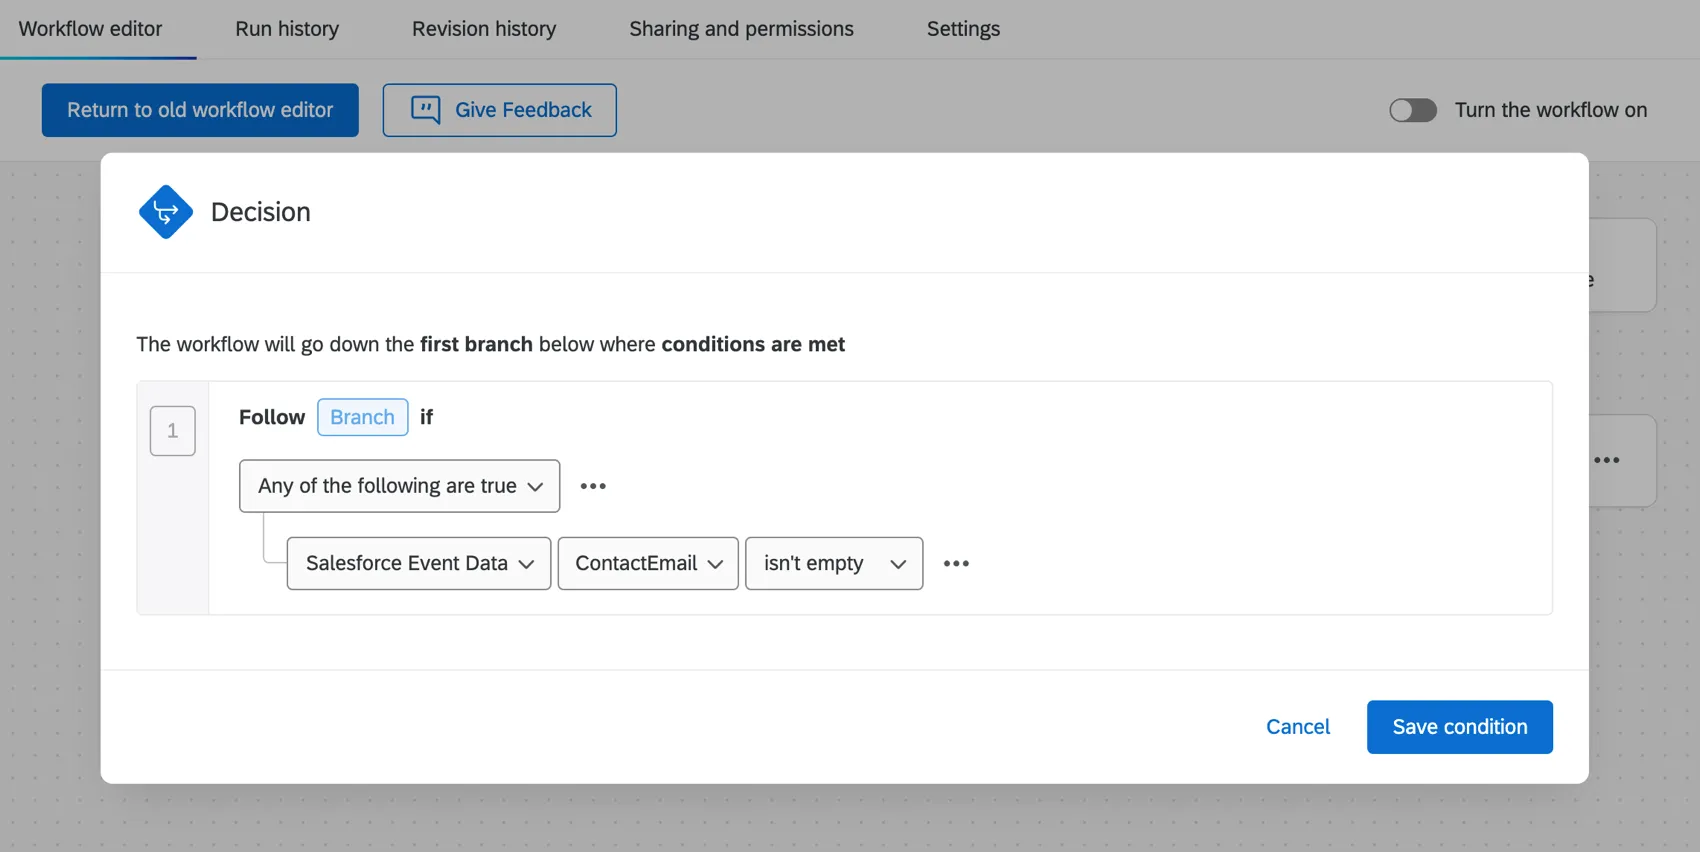
After setting up the event with conditions, you’ll need to choose the task that completes the workflow. Usually, this is either the Send Survey via Email Task to send a survey, or the email task to send a follow-up email. See the linked pages for more information about each task.
You will also need to create an outbound message and add it to a flow in Salesforce. When setting up your outbound message, make sure it meets the following requirements:
- The object selected in the outbound message should be the same object you selected in step 10.
- Paste the URL you copied in step 9 into the Endpoint URL in your outbound message.
Qtip: Check out the Triggering & Emailing Surveys in Salesforce or Updating Contacts in Qualtrics page for step by step instructions on setting up this integration for the supported use cases.
FAQs
My Salesforce action says "Account Token Expired." What does that mean?
My Salesforce action says "Account Token Expired." What does that mean?
Do I have access to all extensions available through the Workflows templates?
Do I have access to all extensions available through the Workflows templates?
Is there a link to all Workflows events and tasks?
Is there a link to all Workflows events and tasks?
What are Workflows templates?
What are Workflows templates?
What are workflows? / Where are actions?
What are workflows? / Where are actions?
There are no changes to workflow functionality as part of this update.
That's great! Thank you for your feedback!
Thank you for your feedback!