-

Qualtrics Platform -

Customer Journey Optimizer -

XM Discover -

Qualtrics Social Connect
Retention Policies
About Retention Policies
Organization rules or privacy laws such as GDPR may require you to delete or anonymize collected survey data after a certain period of time. Retention policies are organization-wide policies that determine how long Qualtrics stores survey response or contact data. Each time the policy runs (every 24 hours), Qualtrics deletes responses or contacts older than the configured threshold. For response deletion policies, you can also set exceptions allowing for individual surveys to have a different retention period.
You can also set an anonymization policy. With this option, you can decide how long after responses are submitted that you want specific identifying information removed from them.
Setting up a Default Response Deletion Policy
You can only have 1 default deletion policy per brand. However, you may create exceptions for specific surveys. All Brand Administrators can access and edit the same retention policy.
- Go to the Admin page.
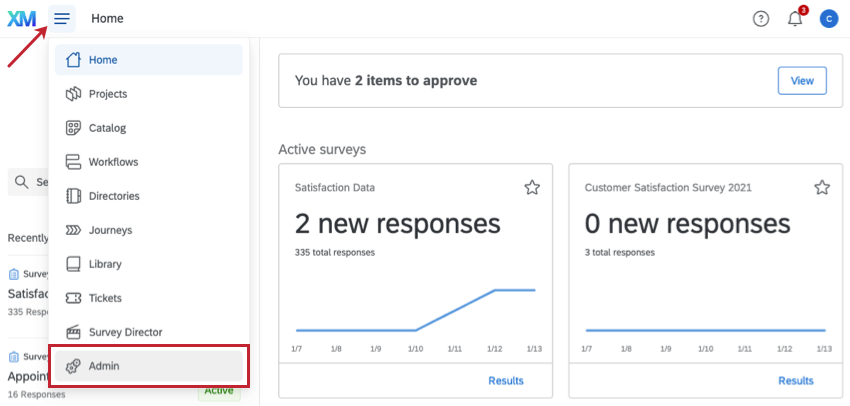
- Select the Data Privacy tab.
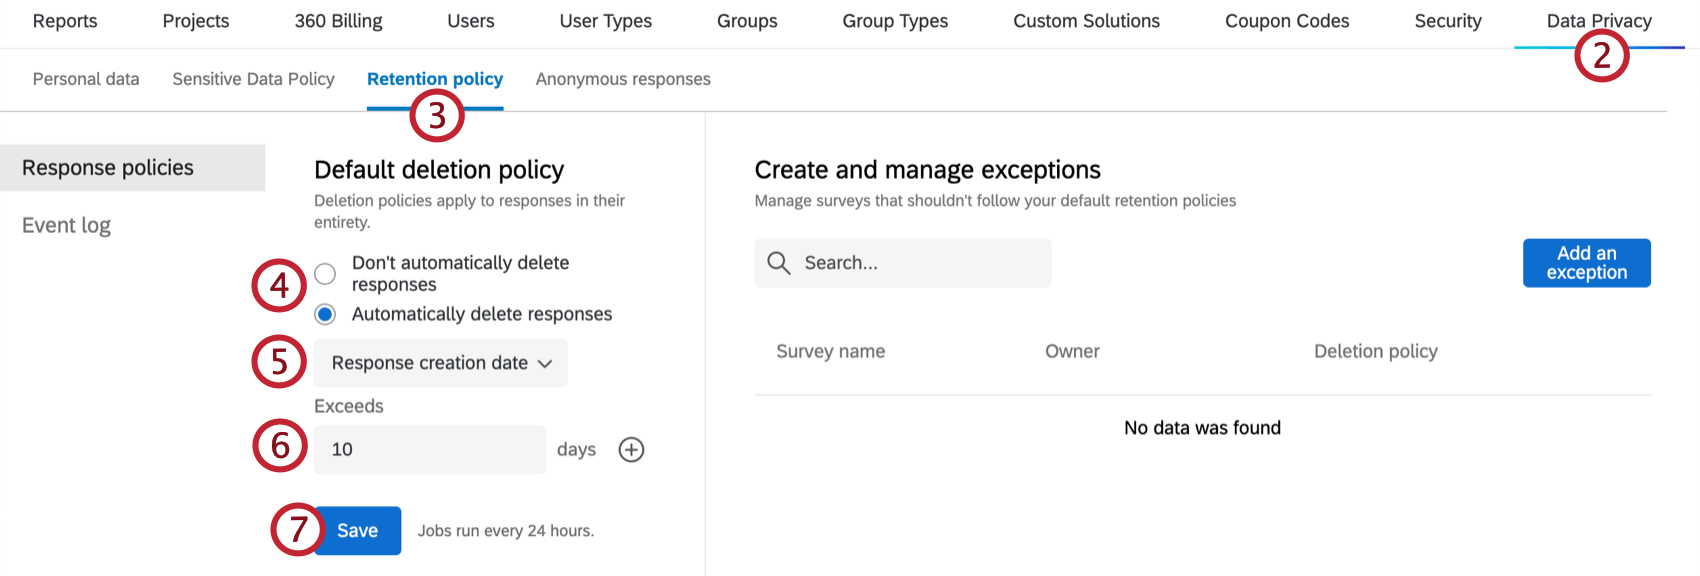
- Go to the Retention Policy section.
- Decide if you want to Automatically delete responses or Don’t automatically delete responses.
- If you want response data to be automatically deleted, select the criteria for deleting responses. You have 2 options:
- Response creation date: Responses will be automatically deleted a certain number of days after they are recorded.
- Latest response in survey: Responses will be automatically deleted a certain number of days after the latest response in the survey was recorded.
Qtip: You can also combine the 2 criteria in your retention policy.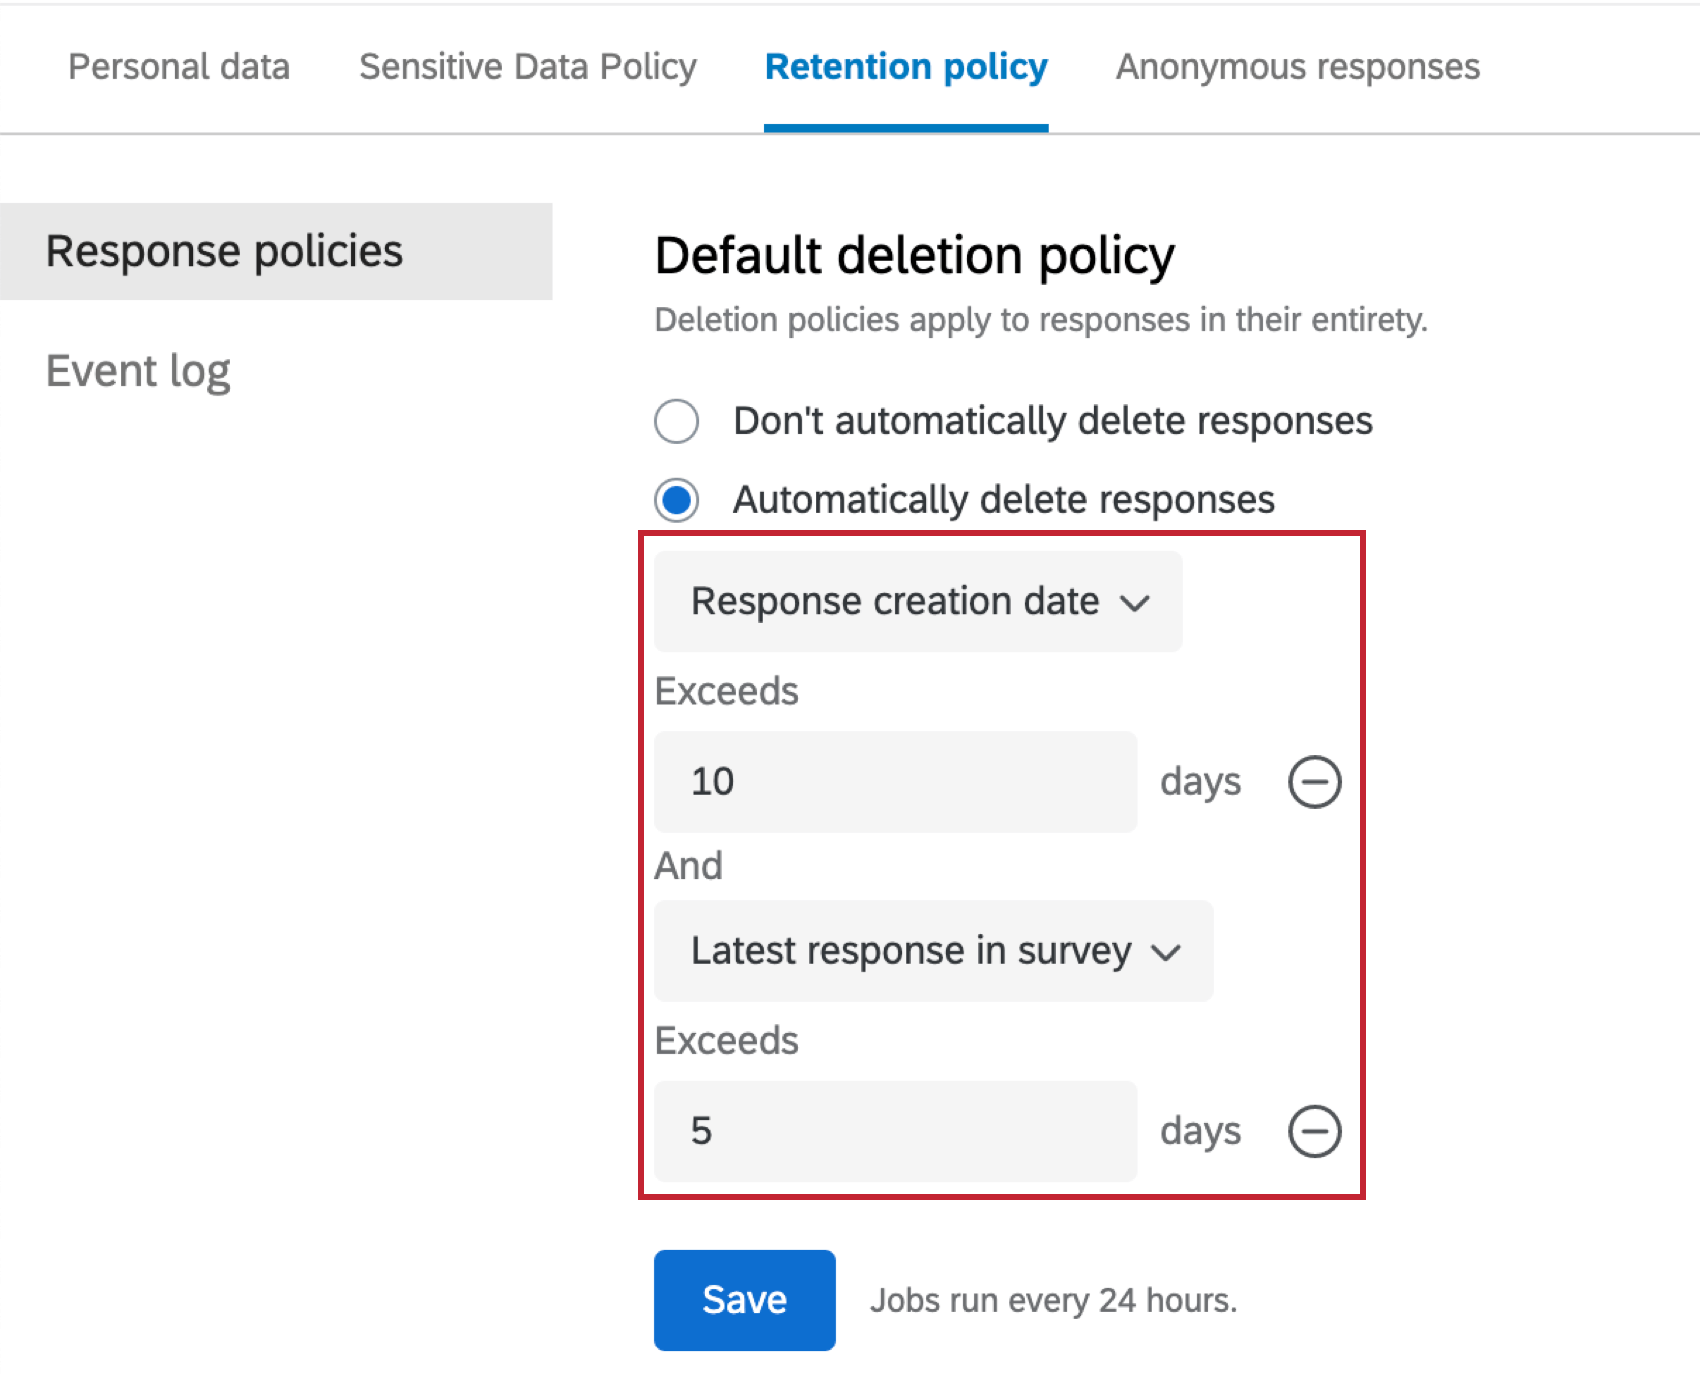
- Type in the number of days after which responses will be deleted.
Qtip: The value must be greater than or equal to 1.
- Click Save.
Setting Up a Default Anonymization Policy
You can only have one anonymization policy per brand. However, you may create exceptions for specific surveys. All Brand Administrators can access and edit the same anonymization policy.
- Go to the Admin page.
- Select the Data Privacy tab.
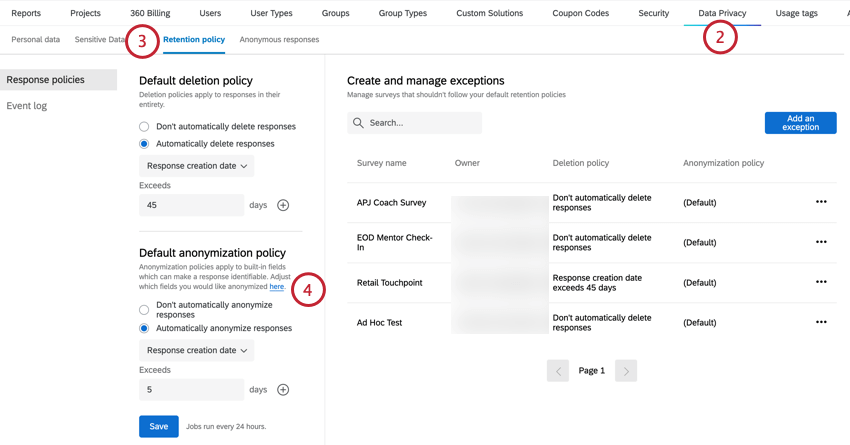
- Go to the Retention Policy section.
- To choose the fields to anonymize, click the hyperlinked here .
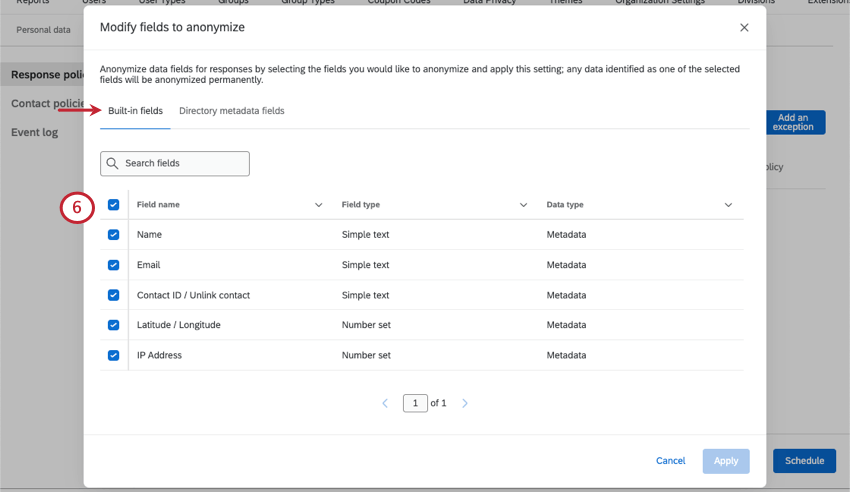
- In the Built-in fields tab, select the preexisting fields you want to anonymize by. These fields will be removed from your survey responses. Your options include:
- Name: The respondent’s first and last name.
- Email: The respondent’s email address.
- Contact ID/ Unlink contact: The contact ID associated with the response. Choosing this option will also unlink the response from the contact in your XM Directory.
- Latitude / Longitude: The respondent’s latitude and longitude.
- IP Address: The respondent’s IP address.
- In the Directory metadata fields tab, you can select embedded data that currently exists in your directory. These embedded data fields will be removed from your survey responses.
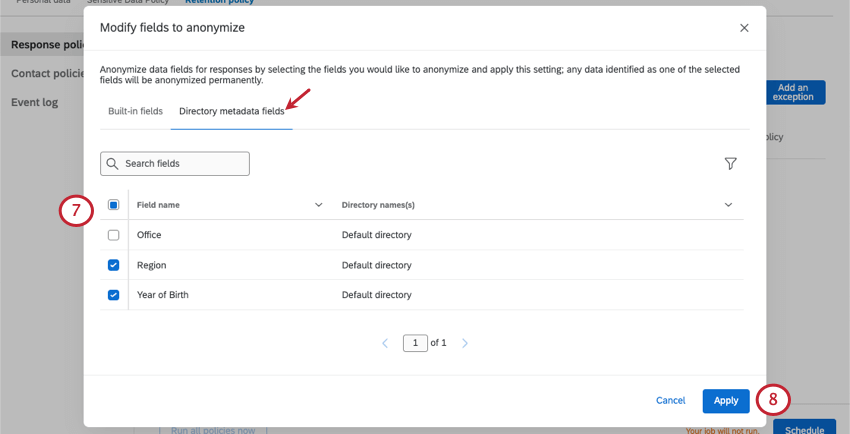 Qtip: Click the filter icon to view only selected fields or unselected fields. If you have multiple directories, you can also use the filter to view specific directories’ embedded data.

- Click Apply.
- To anonymize responses, select Automatically anonymize responses.

- Choose if you want responses to be anonymized based on the Response creation date or after the Last response in survey.
Qtip: You can combine the 2 criteria in your policy.
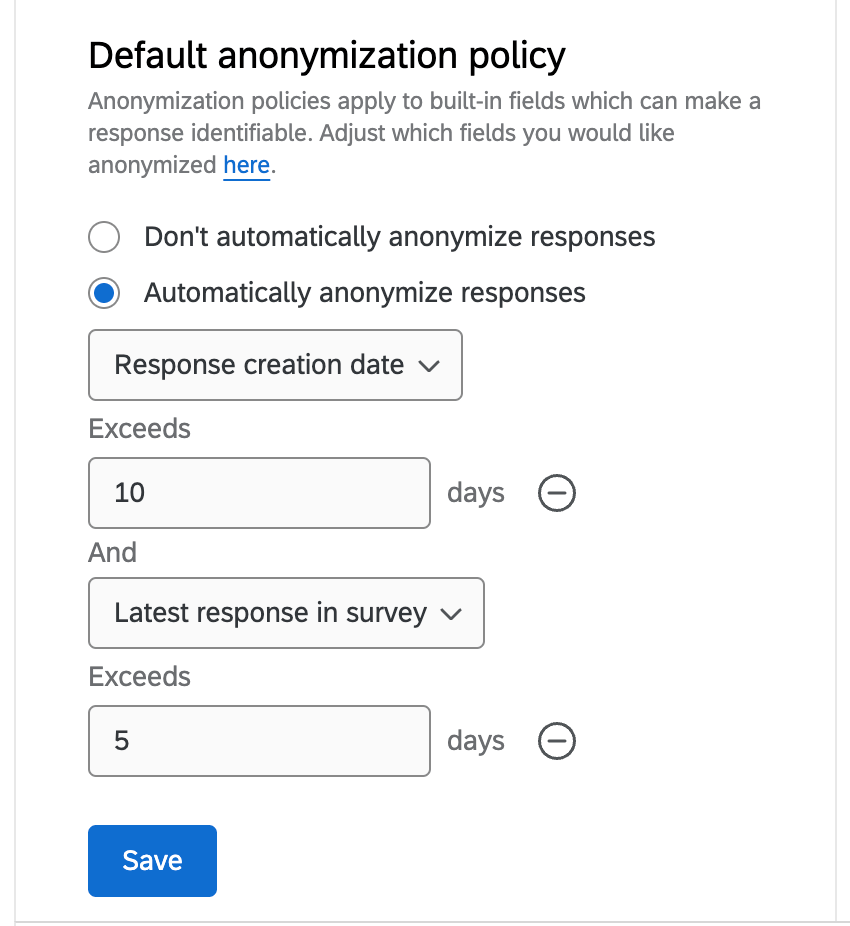
- Enter the number of days after which responses will be anonymized.
- Click Save.
Setting Up a Default Contact Deletion Policy
Contact deletion policies automatically delete contacts from your directory based on conditions you set. You can only have 1 default deletion policy per brand. You cannot create exceptions for contact deletion policies. All Brand Administrators can access and edit the same retention policy.
- Go to the Admin page.
- Select the Data Privacy tab.
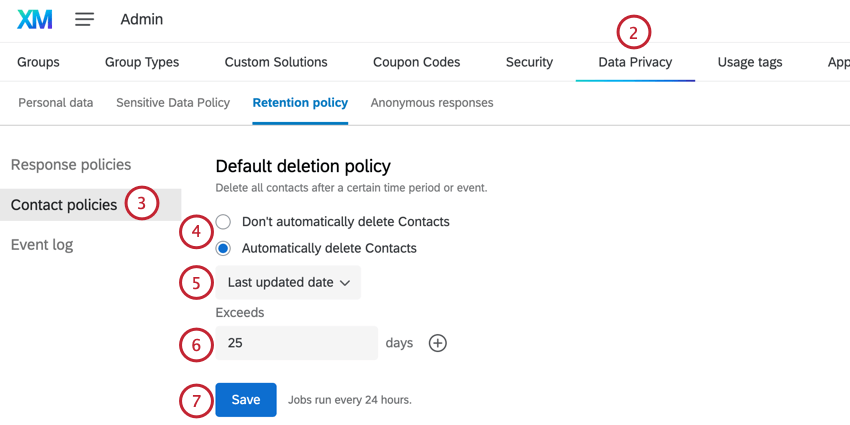
- Go to the Contacts Policies section.
- Decide if you want to Automatically delete contacts or Don’t automatically delete contacts.
- If you want contacts to be automatically deleted, select the criteria for deleting contacts. You have 4 options:
- Last updated date: Contacts will be automatically deleted a certain number of days after they were last updated.
- Contact creation date: Contacts will be automatically deleted a certain number of days after they are created.
- Last response date: Contacts will be automatically deleted if their last survey response exceeds the specified number of days.
- Last participation invite: Contacts will be automatically deleted if their last participation invite exceeds the specified number of days.
Qtip: You can also combine multiple criteria in your retention policy.
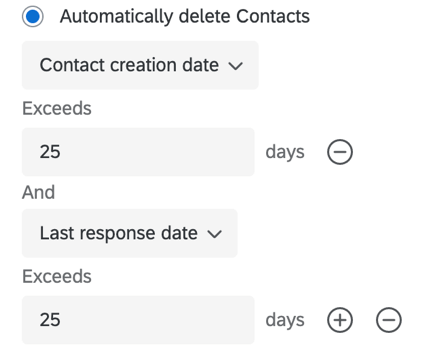
- Type in the number of days after which contacts will be deleted.
Qtip: The value must be greater than or equal to 1.
- Click Save.
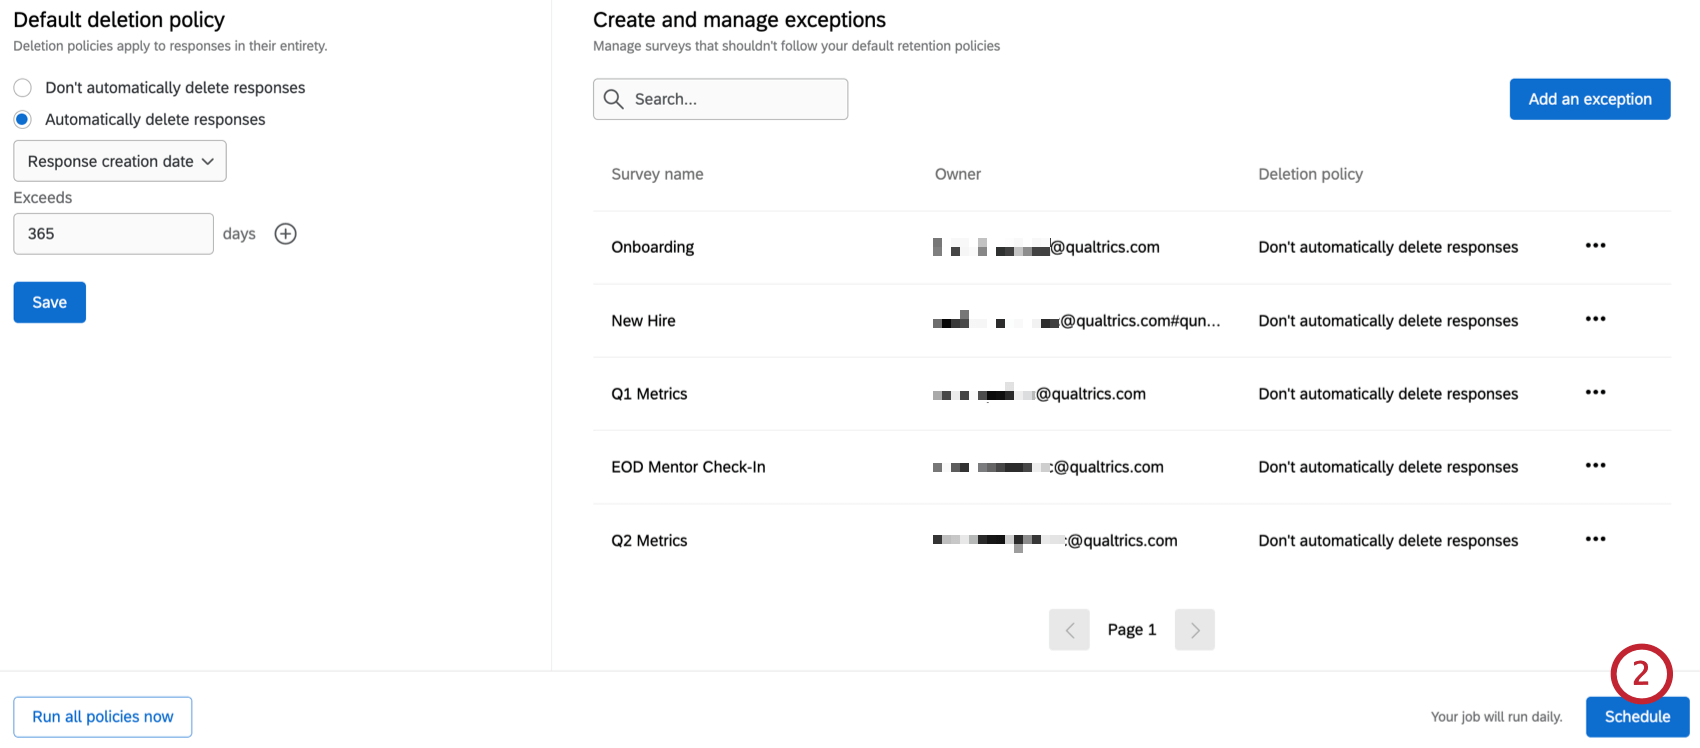
Scheduling Retention Policies
Retention policies are scheduled to run every day by default. If you want your survey responses or contacts to be deleted at a different frequency, you can schedule them to run weekly, monthly, quarterly or yearly.
- Set up your response deletion or contact deletion policy.
- Click Schedule.
- Select how frequently you want your deletion policy to run.
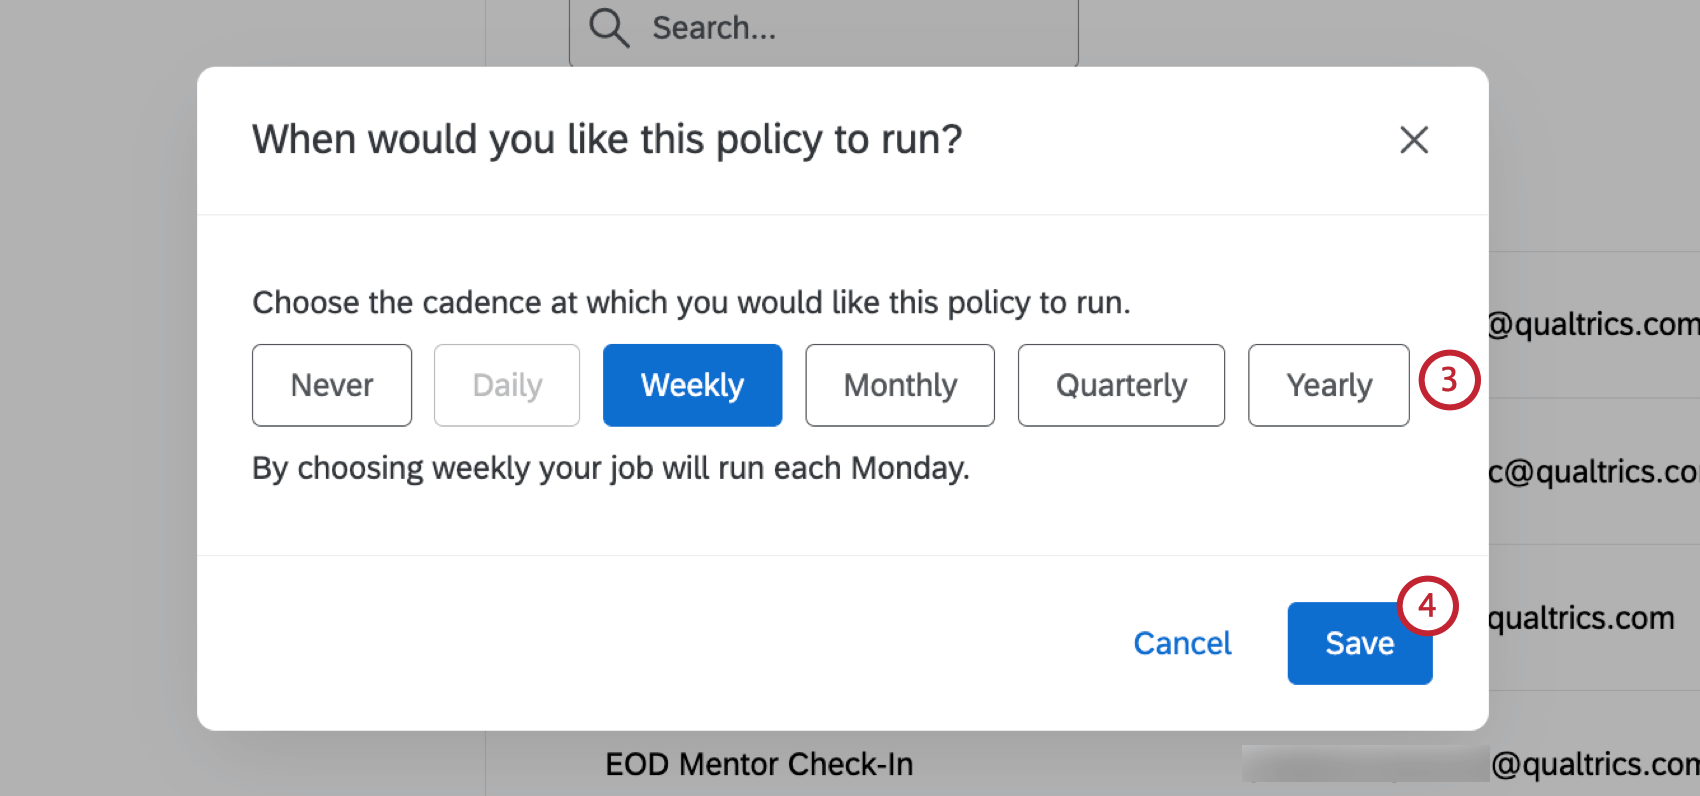
- Daily: Your job will run every morning.
- Weekly: Your job will run every Monday.
- Monthly: Your job will run the first of the month every month.
- Quarterly: Your job will run the first of the quarter every quarter.
- Yearly: Your job will run the first of the year every year.
- Never: Your job will not run.
- Click Save.
Run All Policies Now
Once you’ve scheduled your retention policies, you can choose to run them all immediately regardless of their scheduled cadence.
- Click Run all policies now.
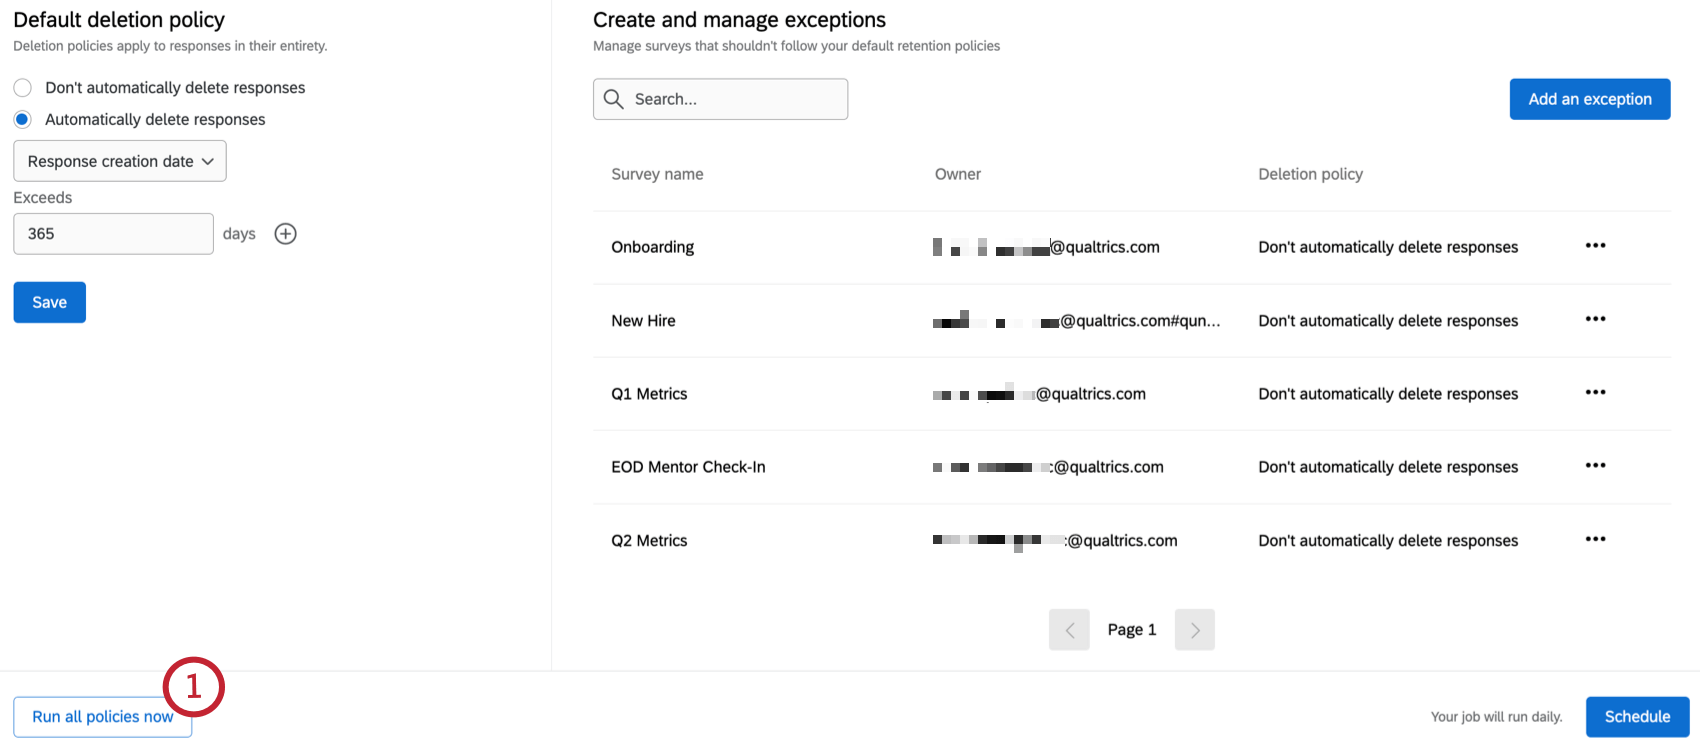
- Type I UNDERSTAND.
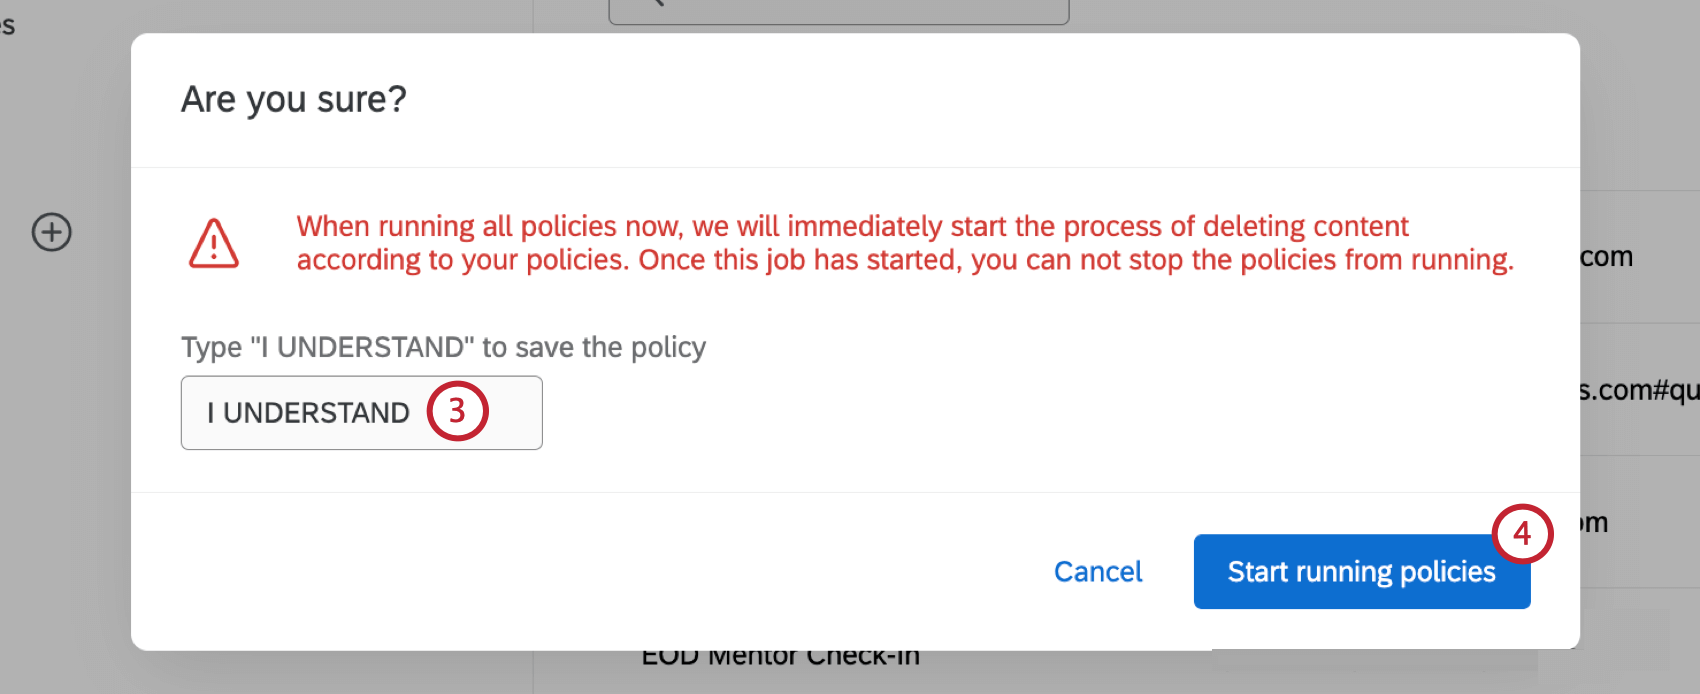
- Select Start running policies.
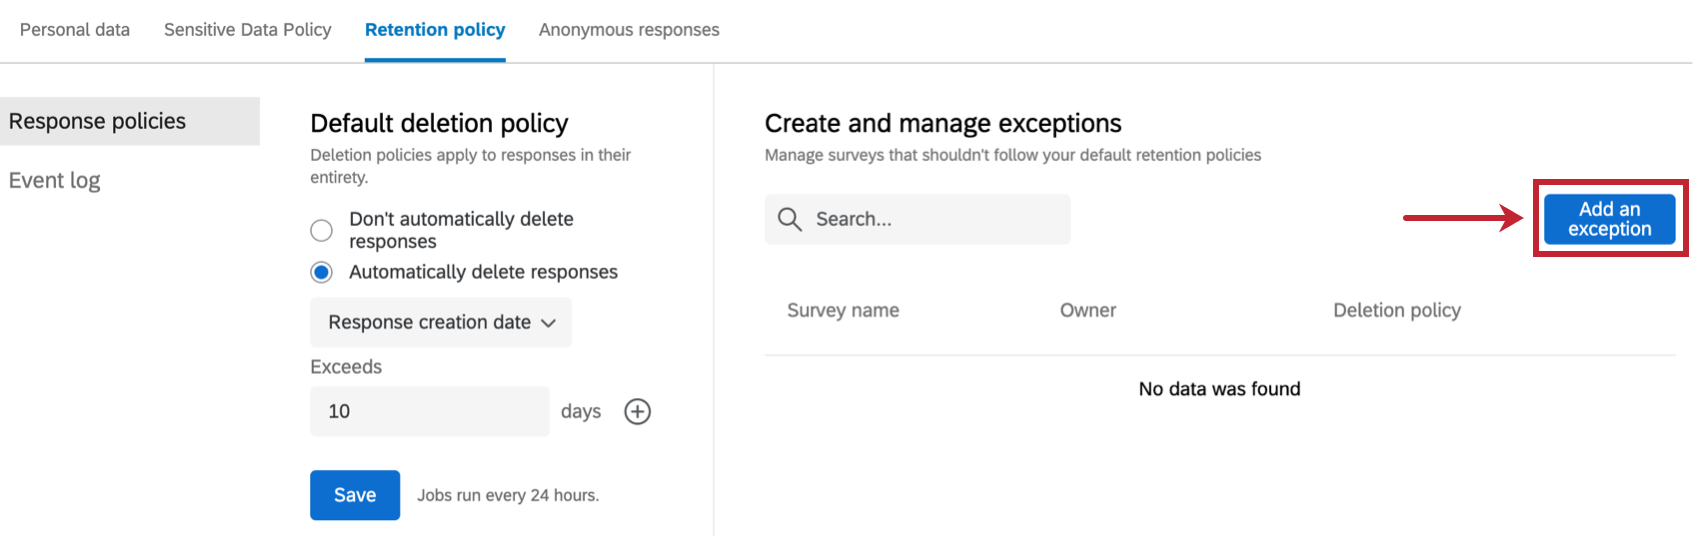
Creating an Exception
If there are specific surveys that should have a different retention policy than the rest of the brand, you can set up an exception.
- While on the Retention Policy tab, click Add an exception.
- Search for the survey you would like to set an exception for by typing a keyword or survey name into the search bar.
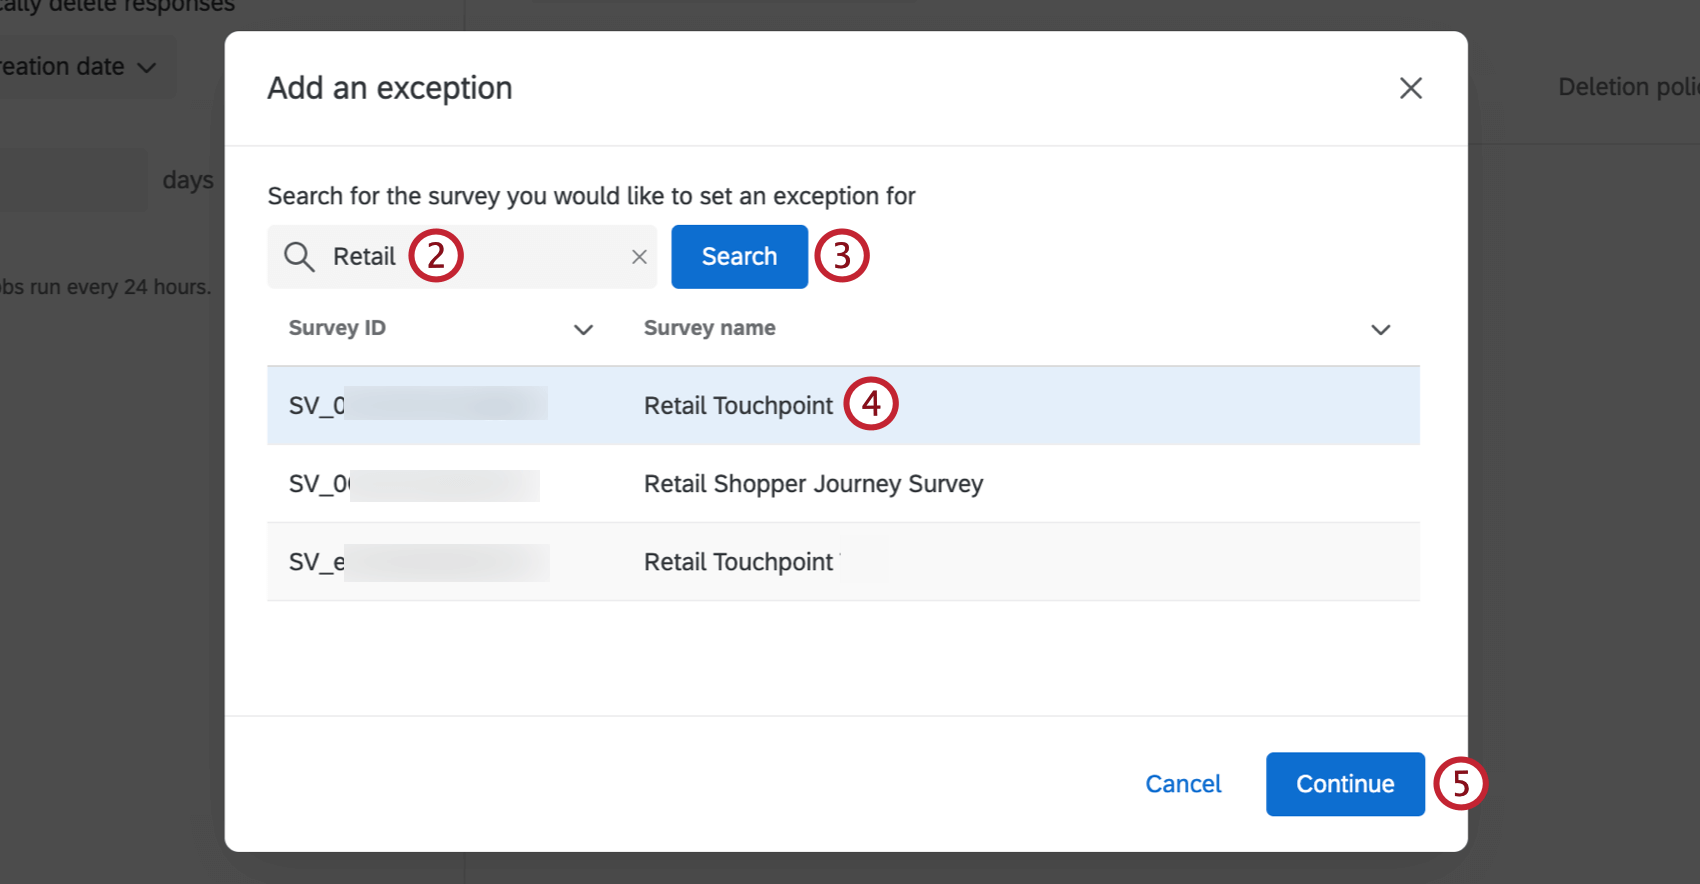
- Click Search.
- Select the survey you want to set an exception for in the list of returned results.
- Click Continue.
- You can set an exception for the deletion policy for the survey you selected. You have 3 options:
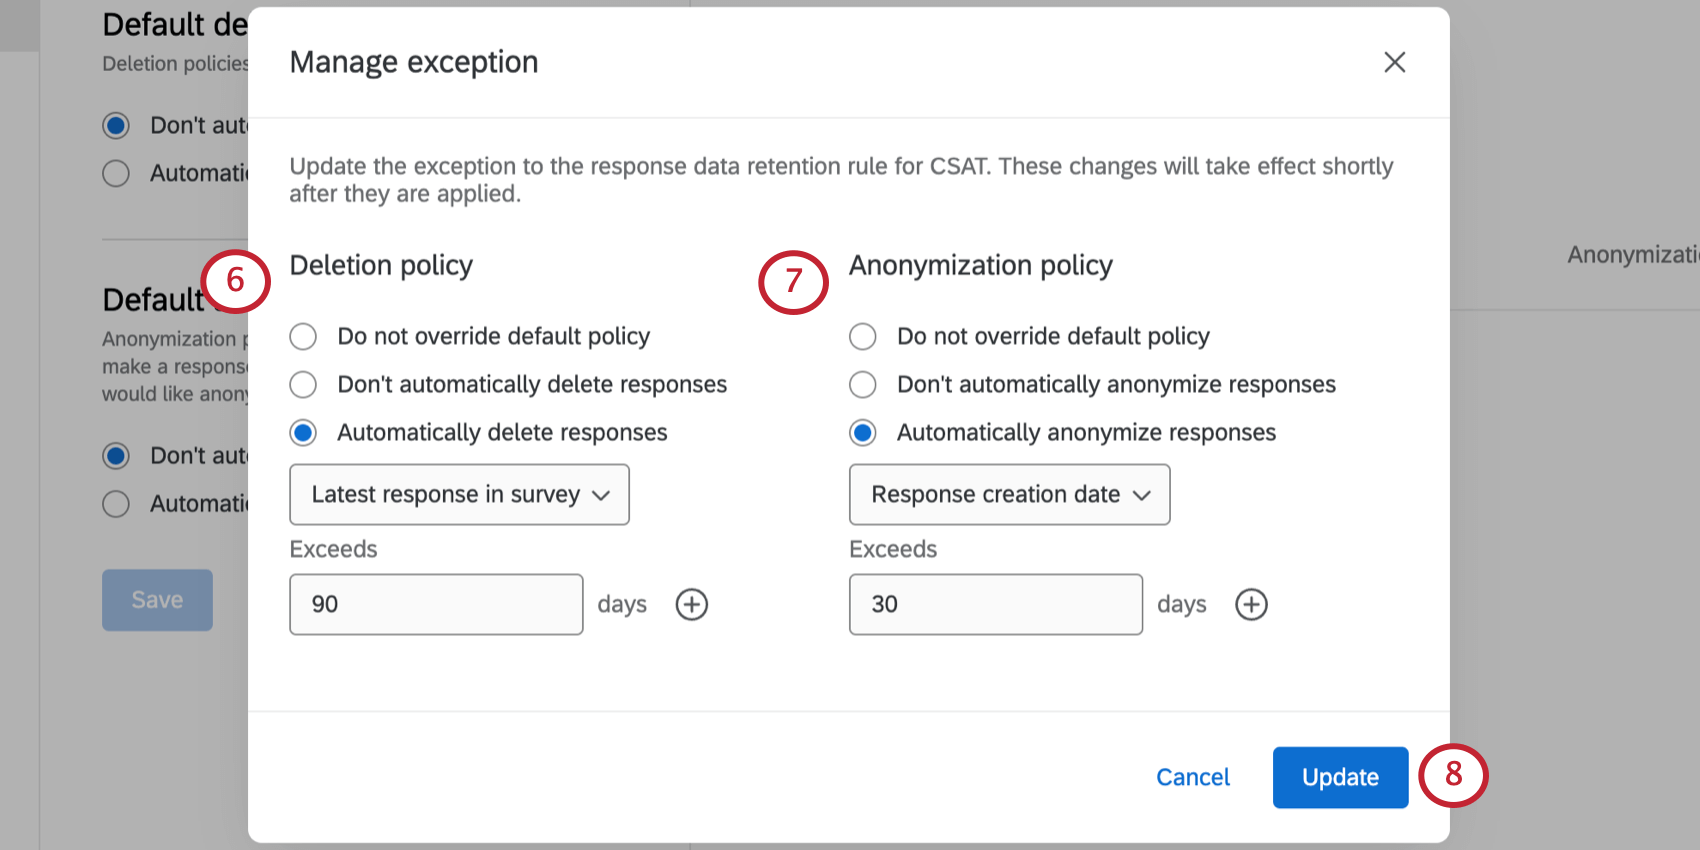
- Do not override default policy: The survey will follow the default deletion policy.
- Don’t automatically delete responses: Responses for this survey will not be automatically deleted, regardless of the default deletion policy.
- Automatically delete responses: Responses for this survey will be automatically deleted, regardless of the default deletion policy. If you are opting to automatically delete responses, enter the deletion criteria. For more information on these criteria see steps 5-6 in the Setting up a Default Deletion Policy section.
- You can set an exception for the anonymization policy for the survey you selected. You have 3 options:
- Do not override default policy: The survey will follow the default anonymization policy.
- Don’t automatically anonymize responses: Responses for this survey will not be automatically anonymized, regardless of the default anonymization policy.
- Automatically anonymize responses: Responses for this survey will be automatically anonymized, regardless of the default anonymization policy. If you are opting to automatically anonymize responses, enter the anonymization criteria. For more information on these criteria see steps 8-9 in the Setting up a Default Anonymization Policy section.
- Click Update.
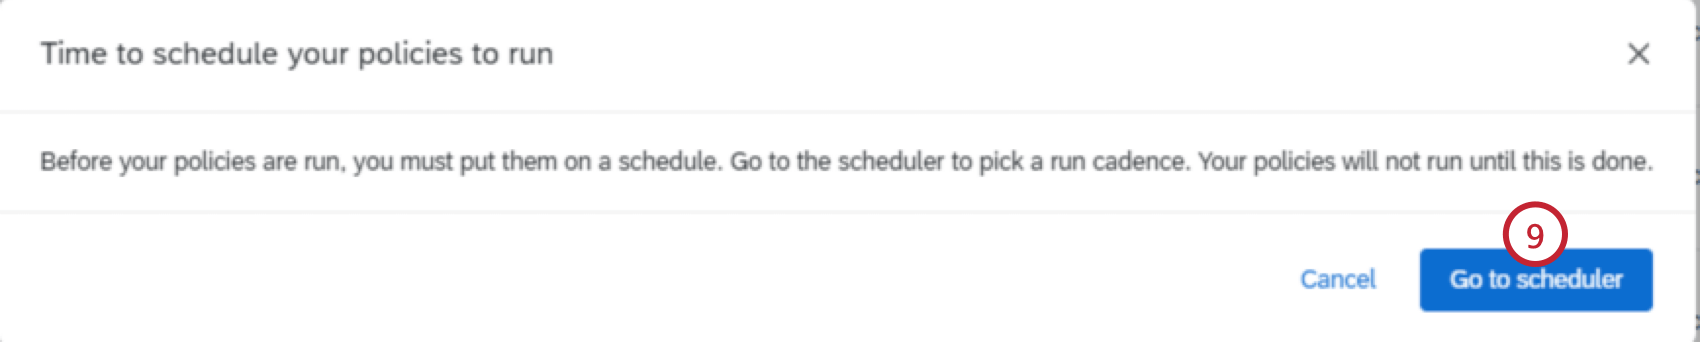
- If you haven’t set a schedule yet, a window will appear prompting you to set one. Click Go to scheduler to set a schedule.
Managing Exceptions
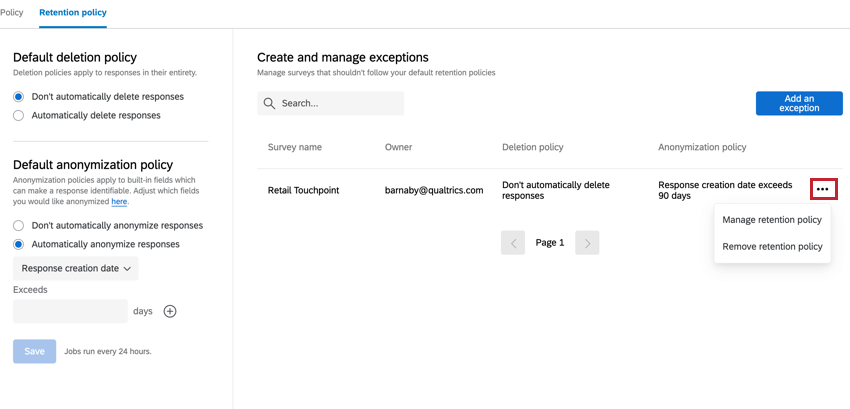
All exceptions for the brand can be viewed in the Create and manage exceptions table. Type a survey name or keyword into the search bar to search for existing exceptions. In this table you can see the following information:
- Survey name: Name of the survey the exemption was created for.
- Owner: The username of the survey owner.
- Deletion policy: The deletion policy that will apply to this survey.
- Anonymization policy: The anonymization policy that will apply to this survey.
Clicking on the three horizontal dots next to an exception allows you to edit the retention policy or remove the retention policy.
Viewing the Event Log
The event log shows both retention events and policy changes.
Retention Events
When Retention is selected in the dropdown, this table displays data deletions and anonymizations that occurred as a result of retention rules and exceptions. You can use the search bar to search for specific retention events. Clicking Last 12 months allows you to filter the table to a specific time frame.

The table contains the following information:
- Timestamp: Date and time the retention event occurred.
- Event type: The type of retention event that occurred.
- Record type: The type of record that was affected.
- Affected records: The number of records that were affected.
- Job ID: The ID of the retention event.
Changes in Retention Policies
When Policy changes is selected in the dropdown, this table displays changes to retention rules and exceptions. You can use the search bar to search for specific policy changes. Clicking Last 12 months allows you to filter the table to a specific time frame.
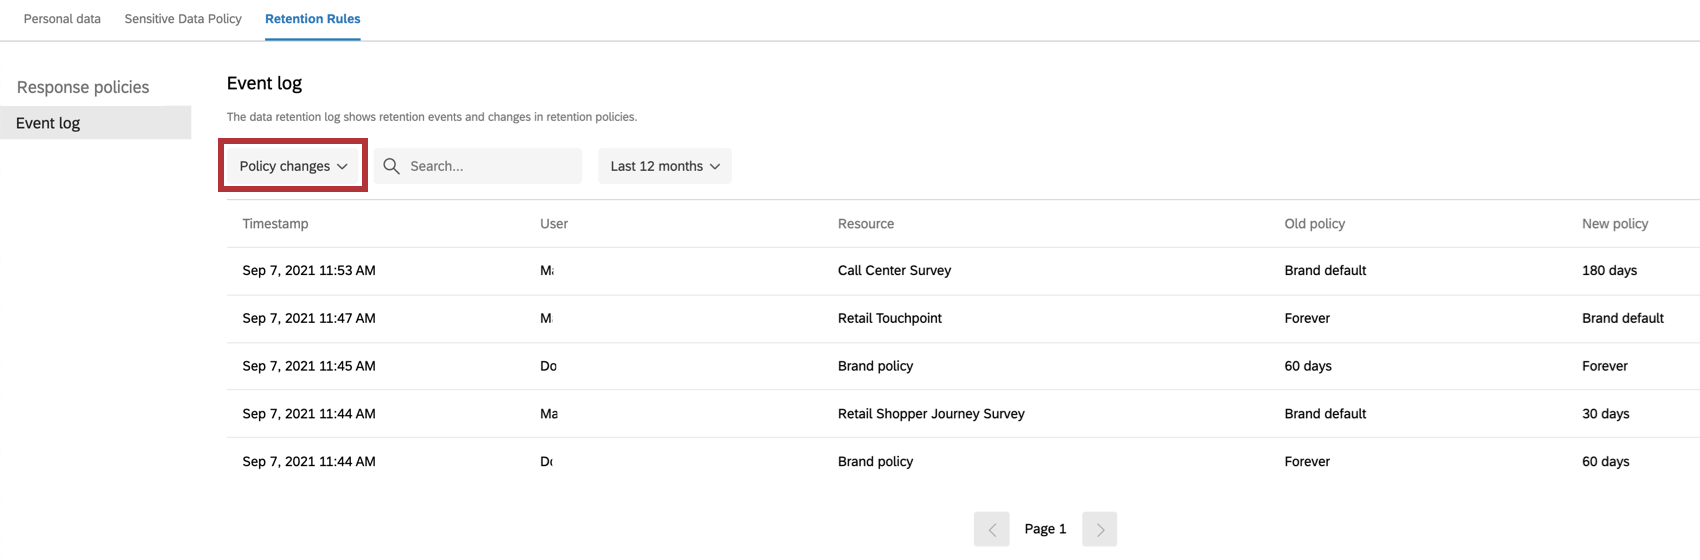
The table contains the following information:
- Timestamp: The time the policy change was made.
- User: The user that made the policy change.
- Resource: The name of the specific survey an exception was changed for, or the brand policy if the brand-wide retention rule was changed.
- Old policy: The previous policy or exception.
- New policy: The new policy or exception.
Qtip: A value of “Brand default” means a new exception was created and the survey previously followed the brand-wide retention rule.
EX Pseudonymization Policies
The EX Pseudonymization tab allows you to enable a default pseudonymization policy for the entire brand. A pseudonymization policy allows you to obfuscate personal identifying data from EX responses in real time, such that survey responses can no longer be attributed to a specific employee within the platform. For more information, see Pseudonymization Policy (EX).