-

Qualtrics Platform -

Customer Journey Optimizer -

XM Discover -

Qualtrics Social Connect
Drivers (Studio)
About Drivers
Drivers are used to find out which aspects of your data are the best predictors of a particular outcome.
Here are common situations when using drivers is a good idea:
- You have a lot of data, an outcome you need to know more about, and are unsure where to start your data investigation for actionable XM insights.
- You simplified a survey and need a new way to pinpoint key problem areas without explicitly asking customers.
- You want to cut down on exploration time.
For information about managing drivers, see Managing Drivers.
How Drivers Work
This section focuses on the steps to follow to analyze the drivers behind your data.
Step 1: Define the Outcome
The first step is to define the outcome, the causes of which you wish to investigate. An outcome is an attribute value or a topic you want to know more about. For example, if you want to know what’s driving detractor ratings, set the detractor value of a corresponding attribute as the outcome of your investigation.
Here are some best practices for defining the outcome:
- Your outcome must occur in your XM Discover data.
- Binary outcomes work best. For example: true or false.
- Avoid extremely rare or common outcomes. For example, if your outcome occurs for only 10 people out of 100,000, or 99,990 times out of 100,000.
You can define the outcome of the investigation when you create a driver.
Step 2: Define the Scope
Define the scope of the investigation.
The most common way to define the scope is using date filters, but you can also apply other filters, such as a specific product or location.
Consider questions such as:
- “Should we find drivers of your outcome for the past 3 months?”
- “Should we find records from certain sources only?”
Here are some best practices when defining the scope of the investigation:
- Filter out feedback with empty values for your outcome.
- Recent data is most useful.
- More data is better. Ideally, the investigation should cover 50,000 records or more. Generally, you shouldn’t run drivers if the scope includes fewer than several thousand records.
You can define the scope of the investigation when you create a driver.
Step 3: Select Relevant Data
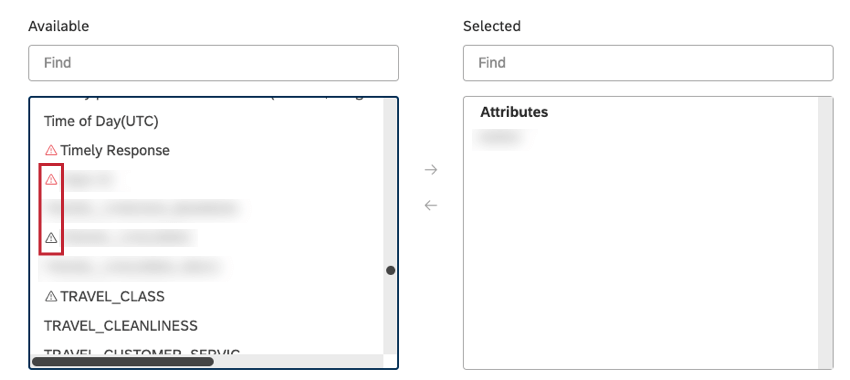
Define the attributes and topics to be evaluated as potential drivers that led to the outcome in your data. Attributes and topics that have a scarce number of values within the selected scope are marked with a gray warning icon. These items are not likely to be useful in the investigation. Attributes and topics that have no values within the selected scope are marked with a red warning icon. These items will not be used in the investigation.
Here are some best practices for selecting attributes and topics:
- Use your business knowledge to decide if a driver derived from an attribute or topic would be both actionable and a new insight to you.
- In general, the more topics and attributes you include, the better. Forcing drivers to work with a very small number of attributes or topics reduces opportunities to find previously unknown correlations and fresh insights.
- Avoid attributes and topics if they are:
- Empty
- All have the same value
- Unique for every record, such as IDs
- Obviously irrelevant to your outcome or no action on them is possible
- You can group similar attribute values into 1 “bucket” using category-derived attributes in Designer.
- It’s critical that your model topics are well-defined and thought out. Topics that are overly broad or too specific will result in non-actionable answers.
You can select relevant data when you create a driver.
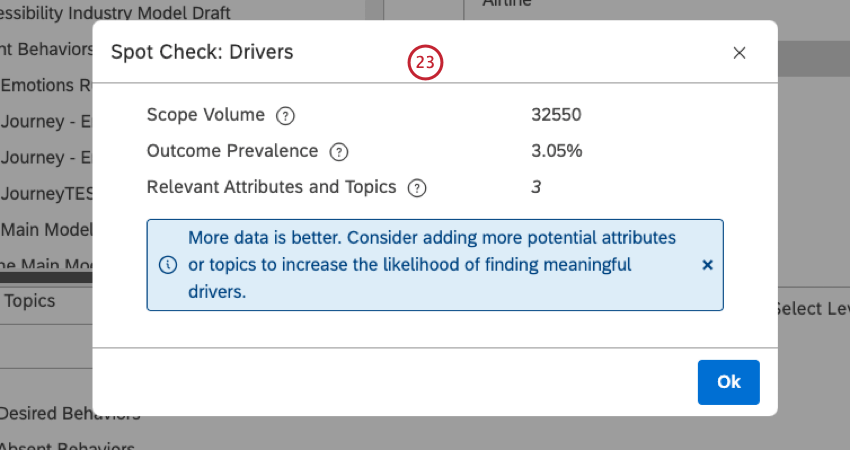
Step 4: Spot Check the Driver
Run a spot check to get a quick overview of the data and check it for potential issues. Doing this will help you answer questions like these:
- “Is there significant volume?”
- “How often does the outcome actually occur in your selected scope?”
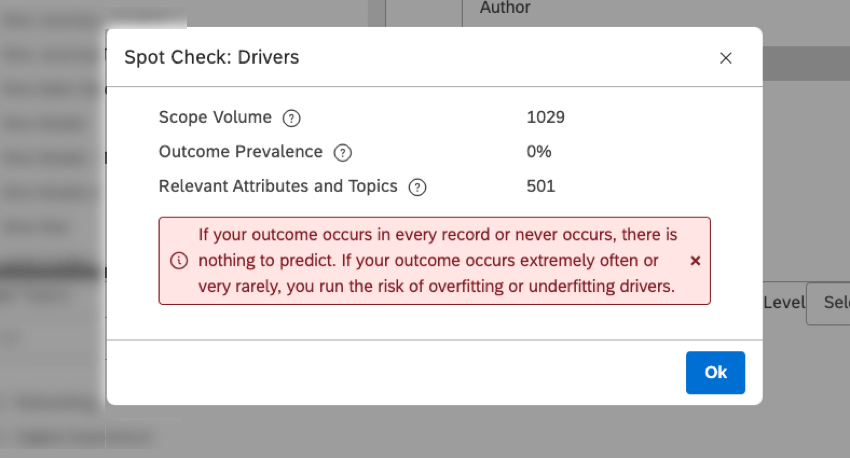
When running the spot check, you may see 2 message types:
- Blue suggestions: These indicate issues that you can choose to fix or ignore.
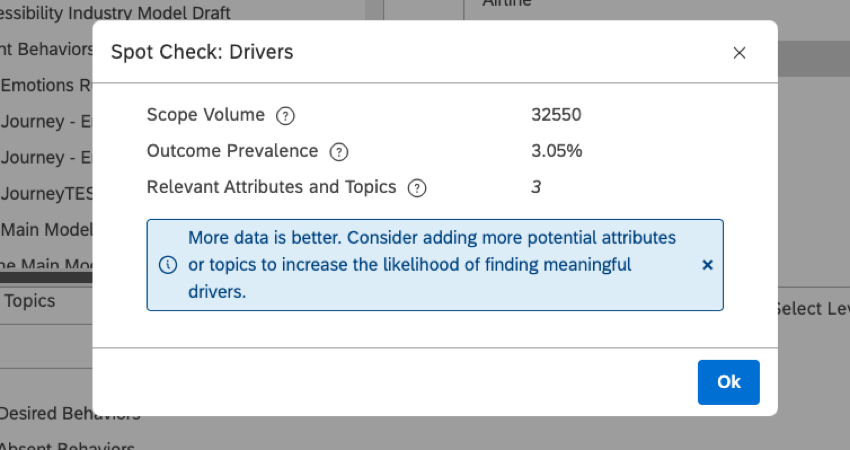
- Red warnings: These indicate issues that you must fix before you can use these drivers.
You can spot check your data when you create or edit a driver.
Step 5: Find Drivers
After you create a driver, you need to run the driver for XM Discover to find the actual drivers in your data. For more information, see Finding Driver Results.
Step 6: Analyze Drivers
Once you find the drivers in your data, you can view them and use them in scatter widget reports.
When data is grouped by drivers, you can rank them by the Impact score, allowing you to further investigate the root cause of the issue. For more information, see Reporting on Drivers.
Drivers Page Overview
This section provides an overview of the Drivers page.
You can manage drivers created in Studio on the Drivers page. To access the Drivers page, click the Spaces menu and select Drivers.

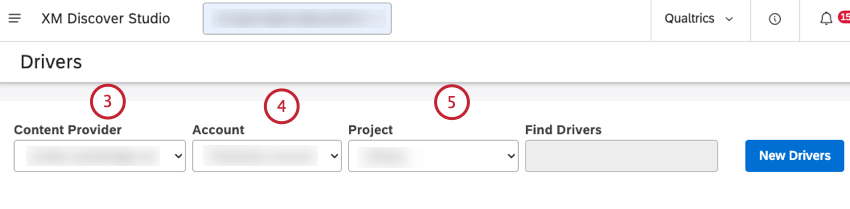
On the Drivers page, you can do the following:
- Select the Content Provider’s project to view its drivers.
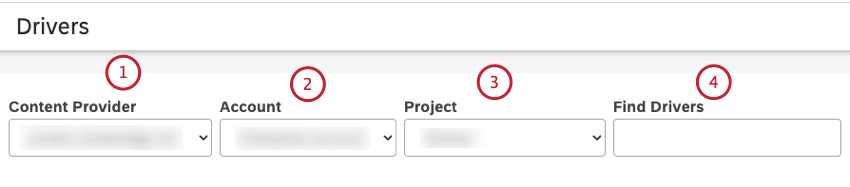
- Select the relevant account if you have more than 1 account.
- Select the relevant project if you have more than 1 project.
- Search for drivers by name.
- Create drivers.
- Create folders to organize your drivers.
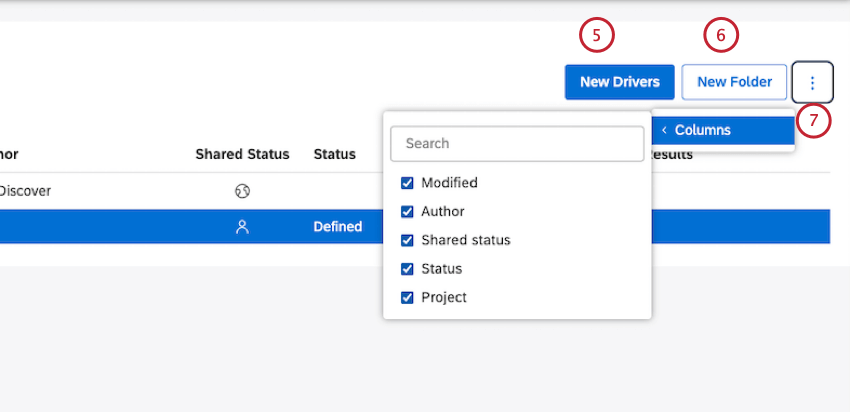
- Select which of the optional columns should be displayed in the table.
Qtip This setting is user-specific.
- Depending on the current selection, you can select the topmost checkbox to select all items or deselect the topmost checkbox to deselect all items or deselect the topmost checkbox to deselect currently selected items. Selections do not apply to items that are hidden and invisible or filtered out by a search query.
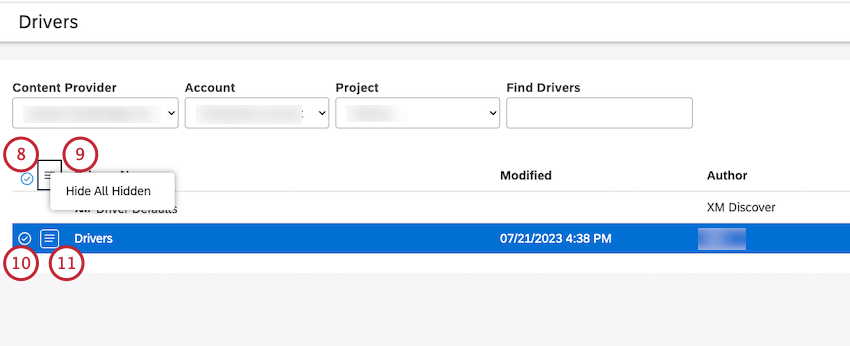
- Switch the visibility of hidden drivers on this page on and off.
- Select the checkbox next to each driver to select multiple items and perform bulk actions. Multiple selections share the same actions menu.
Qtip: Use Shift to select multiple items at once.
- Use the actions menu to manage drivers.
Qtip: Multiple selections share the same actions menu.
- Define default settings for drivers.
- Find drivers or view driver results.
Drivers Table Overview
The table on the Drivers page provides the following information:
- Driver’s Name: The name of the driver.
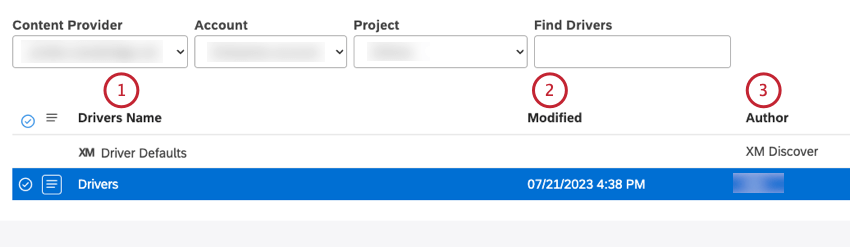
Qtip: The XM icon denotes all system objects across Studio pages.
- Modified: The time this driver was created or last modified according to the current user’s time zone.
- Author: The user who created the driver.
- Shared Status: Shows the following driver sharing statuses:
- Private: a private driver can only be used by the user who created it (when you create a driver in Studio, it is private by default),
- Shared: a shared driver can be used by the users with whom it is shared.
- Public: a public driver can be used by all users of your master account.
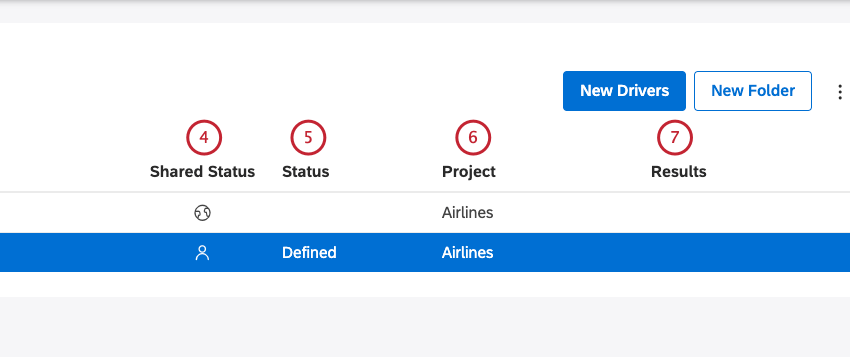
- Status: Shows the following driver reporting statuses:
- Defined: the driver definition is configured, but the search for drivers was not initiated,
- Pending: the driver generation is underway, processing a request, or the request is waiting in a queue,
- Preparing: the driver generation is underway, and the dataset is under construction,
- Calculating: the driver generation is underway, and drivers are being calculated,
- Reportable: the driver generation is complete. The results are ready to be viewed and reported on or
- Check Dataset: the driver generation is complete and no results were found. This may be a natural result if no strong drivers are found, or may be due to anomalies in the data. Check the hazard symbol for potential recommendations or explanations.
- Project: The name of the project on which the driver is based.
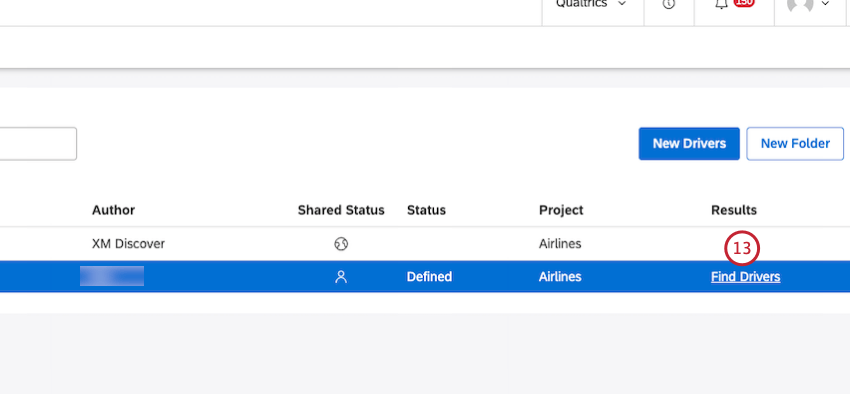
- Results: Depending on the driver reporting status, you can perform these tasks:
- Find Drivers: Run the investigation.
- View Drivers: View investigation results.
Creating Drivers
Creating a driver enables you to set up an investigation that answers the question “Which of the following aspects of my data are the best predictors of a particular outcome in my data?”
- Click the Spaces menu.
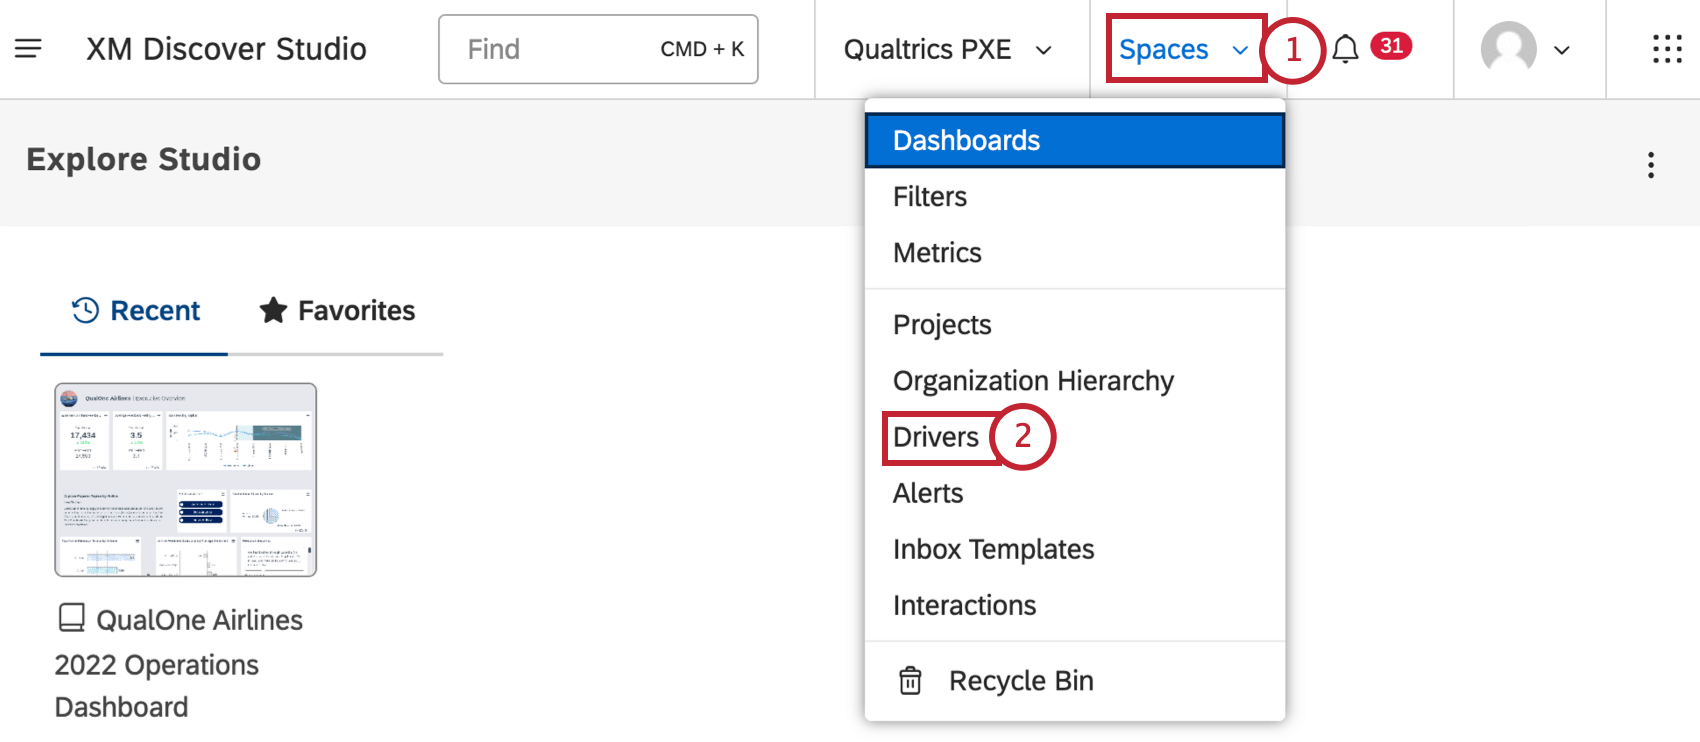
- Click Drivers.
- Select the content provider’s project to use.
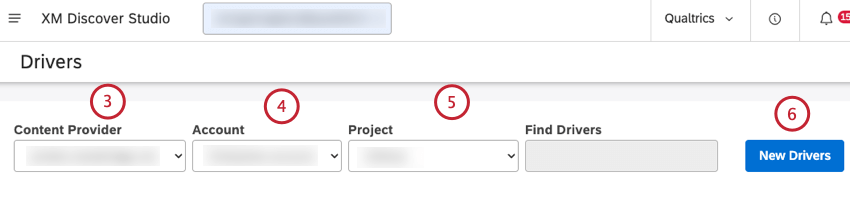
- If you have access to more than 1 account, select the relevant account.
- If you have access to more than 1 project, select the relevant project.
- Click the New Drivers button.
- In the Edit Drivers window (or the Edit Default Drivers window when you are setting driver defaults), you can define the outcome, scope, and relevant data for your investigation. Enter a name for the investigation in the Drivers Name box.
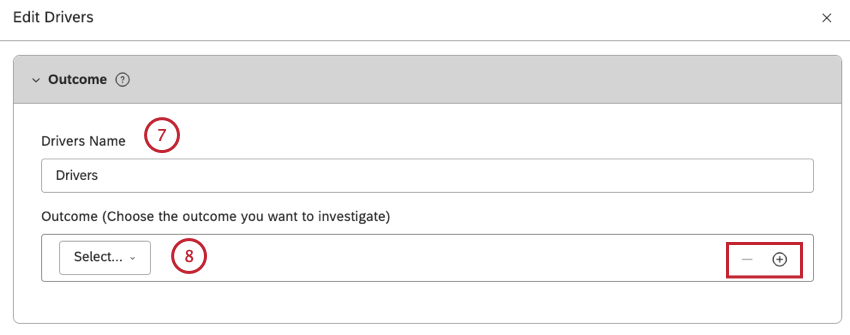
- Select the subset of your data to serve as the outcome in your investigation.
Qtip: Click the plus ( + ) icon to add a data subset. Click the minus icon to remove a data subset.
- In the Scope section, you can limit the scope of the investigation to a given time period, a geographic region, customer demographic, or other criteria. Select from and to dates to define the time period for the investigation.
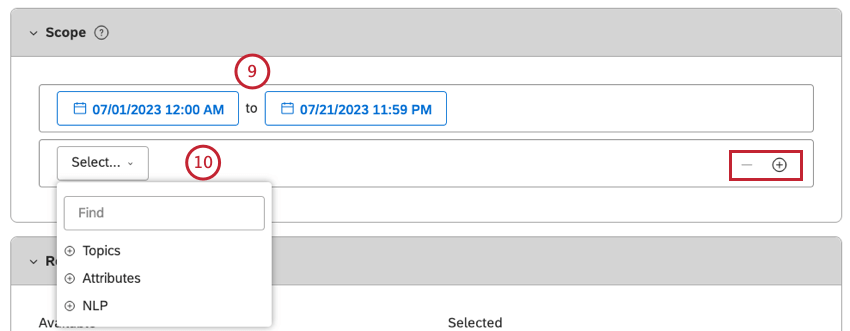
- Select up to 5 additional filters. For more information, see Creating a Filter.
Qtip: Click the plus ( + ) icon to add another filter. Click the minus ( – ) icon to remove a filter.Qtip: As attributes and NLP entities can have a significant number of values, you may need to type enough characters to get a refined list of results.
- If the value you’re looking for is not in the first 20 values, click Load More to show the next 20 values.
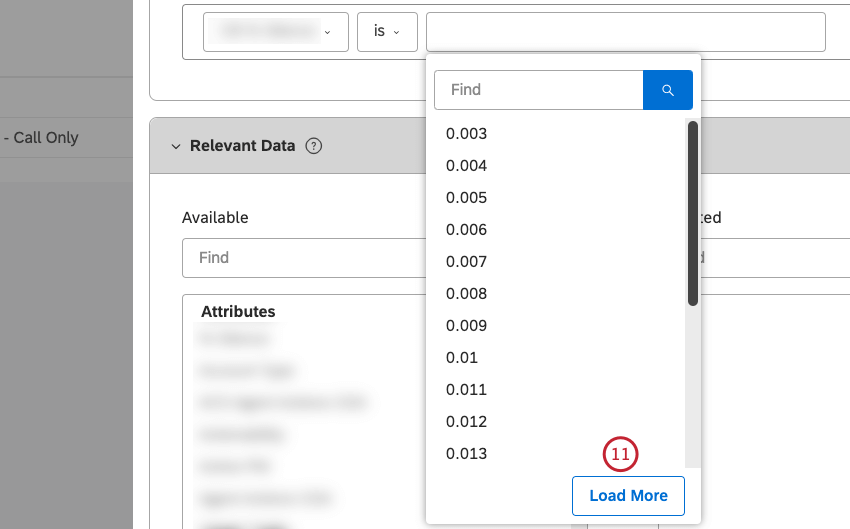 Qtip: You can also use the Load More button to bypass the cached results and get the latest values from the content provider.
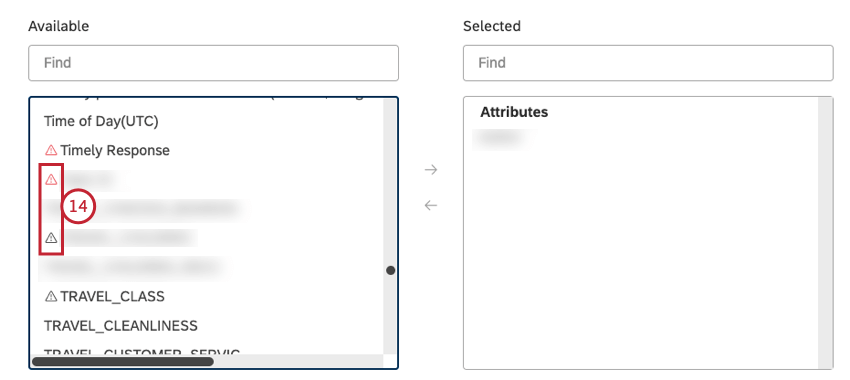
 - In the Relevant Data section, you can select the attributes and topics that should be evaluated as potential drivers that led to the outcome in your data. To select an attribute for evaluation, locate the attribute in the Available column on the left and select it.
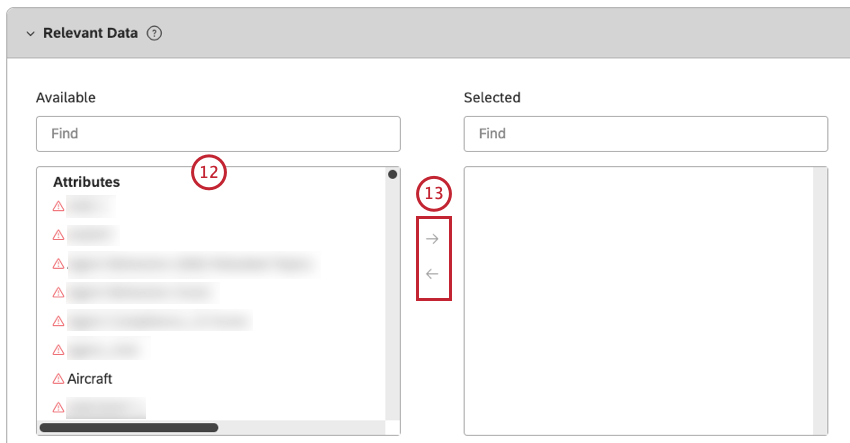
Qtip: Enter the name of the attribute in the search box to find it quickly.
- Click the right-facing arrow to move the attribute to the Selected column on the right.
Qtip: Click the left-facing arrow to remove an attribute from the Selected column.
- Attributes and topics that have a scarce number of values within the selected scope are marked with a gray warning icon. These items are not likely to be useful in the investigation. Attributes and topics that have no values within the selected scope are marked with a red warning icon. These items will not be used in the investigation.
- To select a topic for evaluation, locate a corresponding model in the Available column on the left and select it.
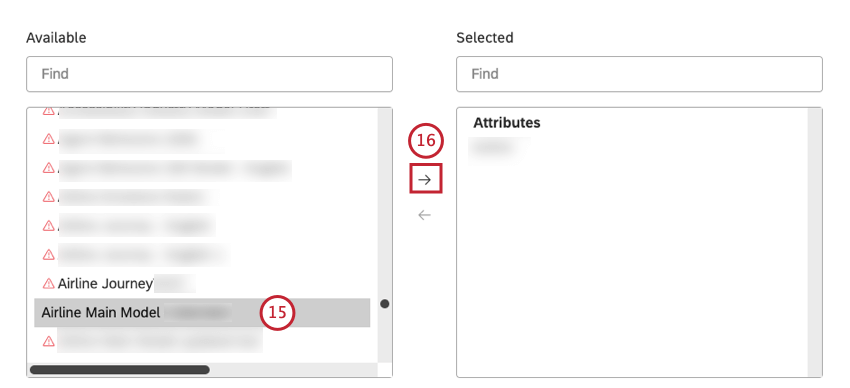
Qtip: Enter the name of the model in the search box to find it quickly.
- Click the right-facing arrow to move the model to the Selected column on the right.
- Select the model in the Selected column.
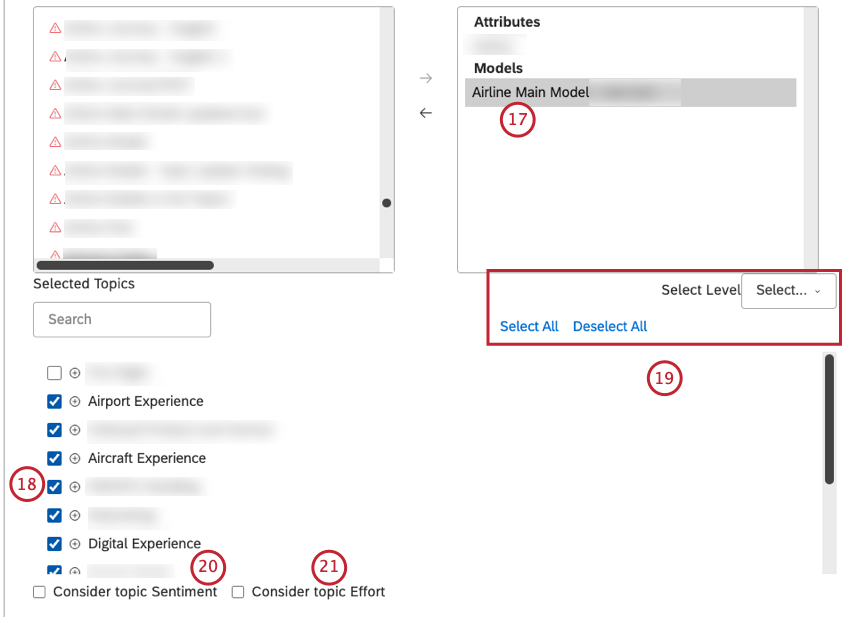
- Select 1 or more relevant topics in the Selected Topics section.
- Click Select All, Deselect All, and Select Level to speed up the process.
Qtip: All selected topics will be included and may be returned as potential drivers. This is different from widgets where only selected topics from a chosen level are displayed.
- Select the Consider topic Sentiment checkbox to include the topic sentiment into relevant data for the investigation. This step is optional.
- Select the Consider topic Effort checkbox to include the topic effort into relevant data for the investigation. This step is optional.
Qtip: You can integrate drivers with rubrics by evaluating topics from a scoring model.
- Click the Spot Check button to get a quick overview of the data and check it for potential issues.
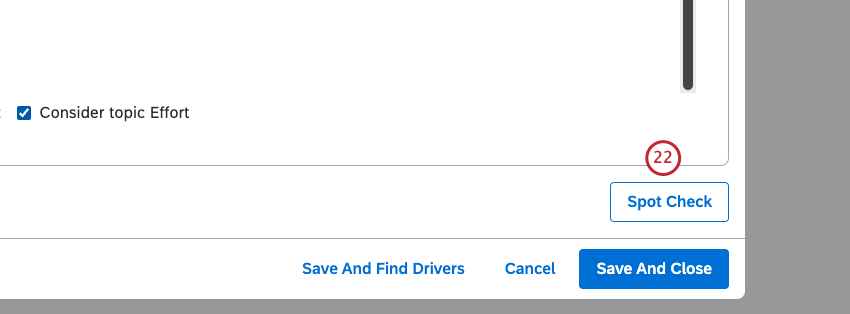
- You may see 1 of the following: Blue suggestions: these indicate issues that you can fix or ignore or Red warnings: these indicate issues that must be fixed before you can use these drivers.
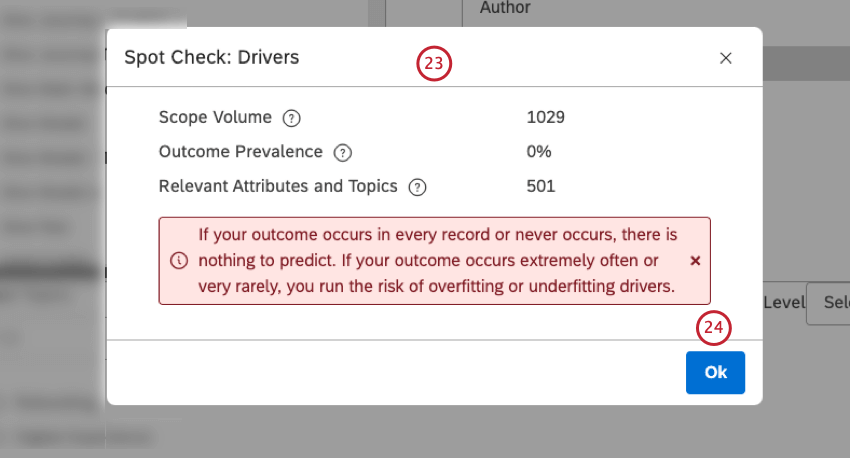
- Click Ok.
- Once the driver is set up, click the Save And Close button.
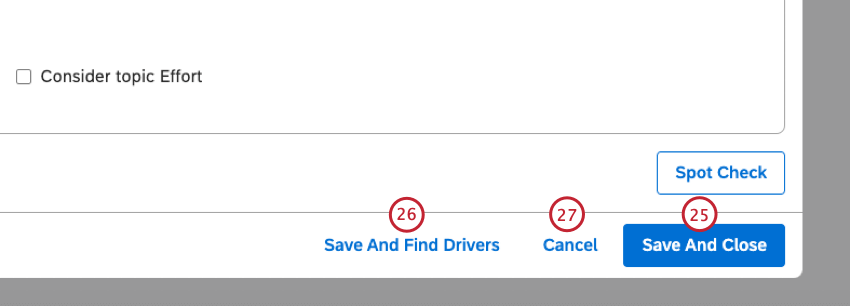
- Click Save And Find Drivers to save the driver and run the investigation.
Qtip: This option is only available if there are no critical issues with the driver.
- Click Cancel to close the Edit Drivers window without saving the driver.
Setting Driver Defaults
When you create a new driver, you can define the scope and relevant data settings to use by default. Default settings are project-specific and shared with all users of your master account.
- Click the Spaces menu.
- Click Drivers.
- Select the content provider’s project to use.
- If you have access to more than 1 account, select the relevant account.
- If you have access to more than 1 project, select the relevant project.
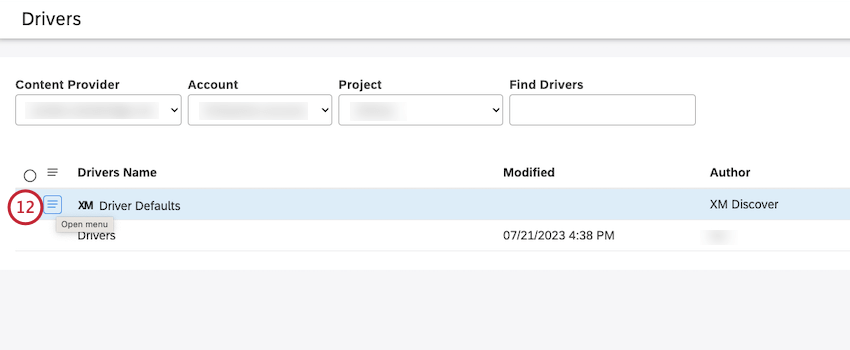
- Locate XM Driver Defaults in the table on the Drivers page in the Drivers Name column.
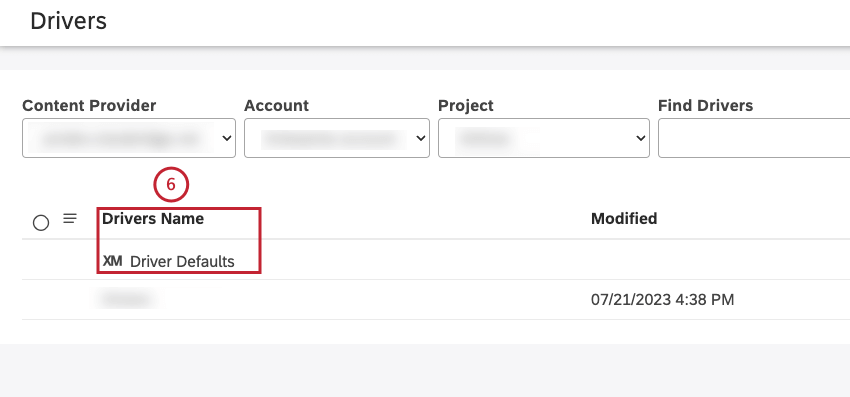
- Click the actions menu next to XM Driver Defaults.
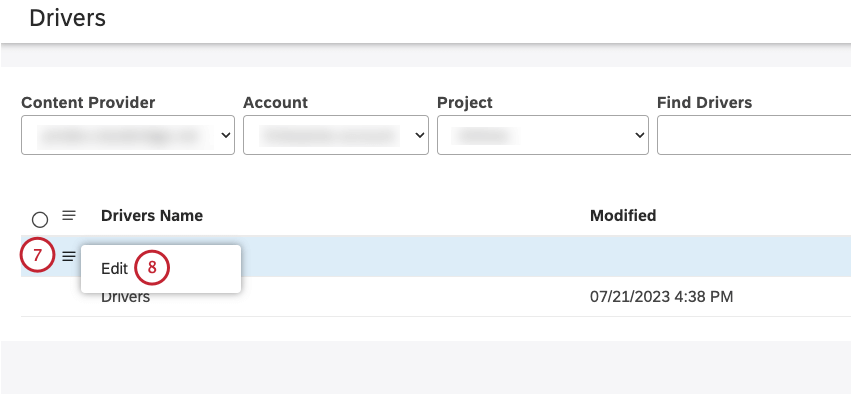
- Select Edit.
- For information about how to define the outcome, scope and relevant data for your investigation, see Creating Drivers in Studio (Steps 9 to 24).
- Click the Save Defaults button at the bottom-right of the Edit Drivers window to save these settings.
- Alternatively, click Cancel to close the Edit Drivers window without saving these settings.