
Sharing Your Dashboard Projects
What's on this page
About Sharing Your Dashboard
Now that your dashboard is built, it’s time to let others see your work. Sharing lets you collaborate your visual data with others in your organization and lets them edit your dashboards, if you choose. Dashboards can be shared with anyone who is in your organization and already has a Survey Platform account with permissions to use CX Dashboards. If an individual does not meet these requirements, you cannot grant them access to your dashboard. In this case, a Brand Administrator would need to create an account for the user in order for the individual to get access to your dashboard.
Note that you can only share dashboards you own or dashboards you have permission to edit.
Qtip: A CX Dashboards user does not need an additional account if they already have a Survey Platform account. The ability to use CX Dashboards is an additional permission of your Survey Platform account that can be granted by a Brand Administrator of your organization. If a Brand Administrator creates a new user within the User Admin tab of CX Dashboards, by default, this user will be initially restricted only to use CX Dashboards. Reach out to your Account Team with any questions about user billing.
Sharing Your Dashboard
Qtip: This page refers to sharing CX Dashboard projects and BX Dashboards only.

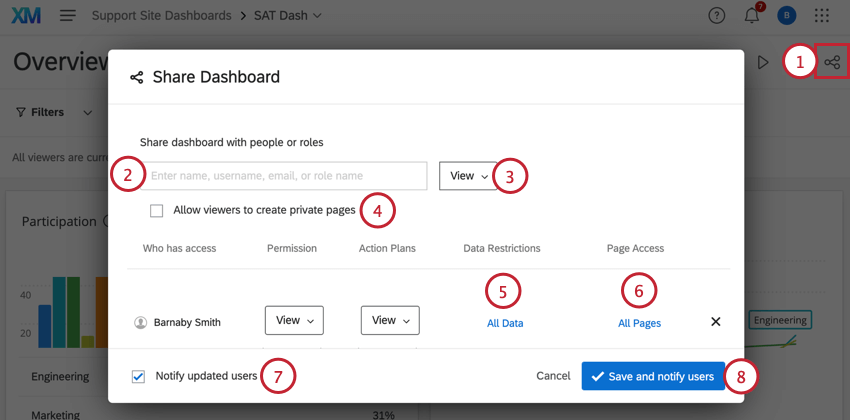
Types of Access
- View: If granting view-only access, you can also grant data permissions based on a number of different factors. These permissions allow you to show only relevant data to the collaborator rather than your entire dataset. The person will still see all the widgets on the Dashboard, but they will only see data for the allowed set. To learn more about restricting access to information, see our page regarding setting data restrictions. Qtip: Be thoughtful about which dashboards you give users access to. If some users need access to sensitive data, we recommend creating a separate dashboard for them, instead of creating a general dashboard with layers of restrictions for other users.

- Export (Images): In addition to view access, users will be able to export widgets and dashboards in PDF and JPG format. To allow users to export the aggregated data in CSV, TSV, and Excel formats, please enable the Dashboard export permission dashboard setting. Additionally, users with export access can also email the dashboard.
- Export (All): Granting export access carries the same permissions as a user with view-only access; however, the user will also be able to export the dashboard and individual widgets to PDF or JPG. This option also allows the user to export the dashboard as a PPTX, DOCX, CSV or TSV file. Additionally, users with export access can also email the dashboard.
- Edit: Collaborators with edit access will be able to edit all aspects of the Dashboard and Dashboard Data (if they have also been shared the respective surveys that have been mapped into the Dashboard), share the Dashboard with additional users, and change user permissions on the Dashboard.
Qtip: Be careful when you invite other users to edit the dashboard. While many users can access the dashboard at once, it’s best practice to only have one person making edits at a time. The more people who are making edits at once, the more likely they are to overwrite each other’s changes. If you need to edit a dashboard, make sure your colleagues are not still making changes to it.
Attention: All users in the brand are able to export ticket reporting data. Changing export permissions for the dashboard will only affect exports of dashboard data and will not affect the ability to export tickets data.
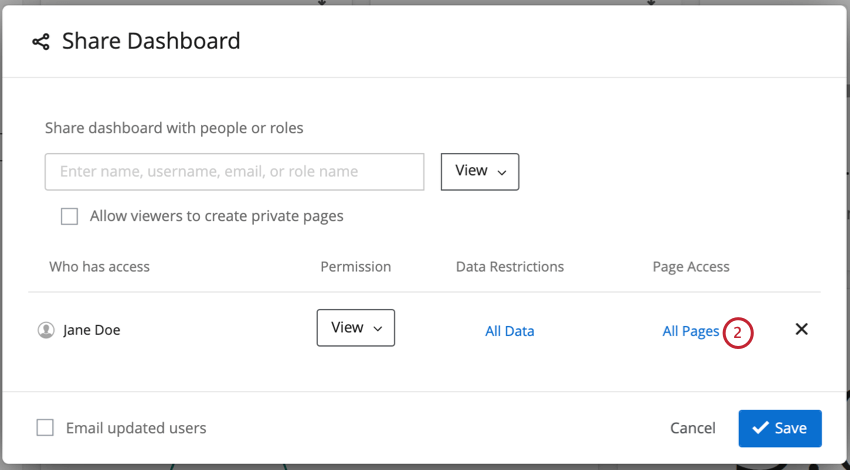
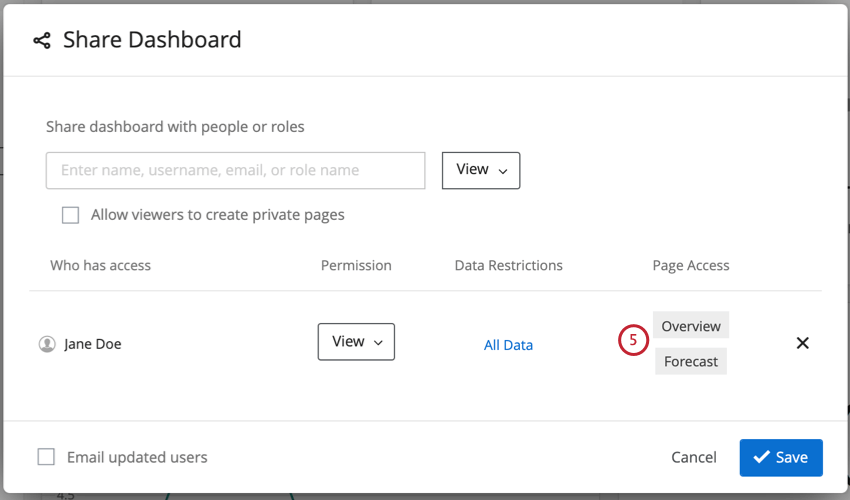
Restricting Access to Pages
You can limit which pages of the dashboard users have access to. For example, if you made pages that are only viewable for managers or people belonging to certain roles, you can hide these pages from everyone else.
Qtip: You can also restrict page access by an entire role. Roles make assigning the same permissions and sharing dashboards to large groups of users faster.
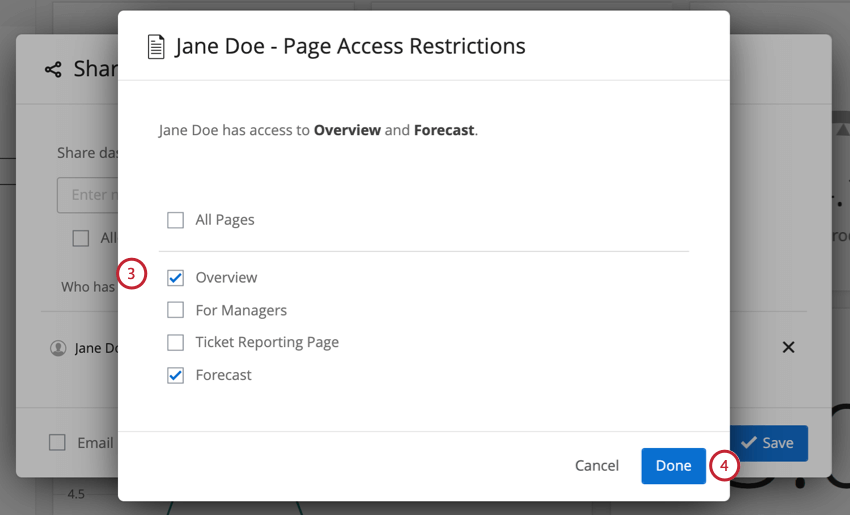
Qtip: If a user is in a role that restricts access to some pages and the user is given individual access to each page manually, then the user will be able to see every page in the dashboard. Note that access to each page needs to be granted individually. You cannot use the All Pages option in this scenario. For more information on role data restrictions, see this page.
Public Dashboards
Attention: This service is only available for State & Local Governments and Academic research products. Standard CX Dashboards, Engagement, Lifecycle, and Ad Hoc Employee research projects do not have this capability.
Attention: Not all features are supported on public dashboards. Some of the features unavailable to public dashboards include Text iQ, custom widgets, action planning pages, ticket reporting pages, certain widget types, and any data marked as sensitive. If unsupported features are used in a public dashboard, viewers will see error messages instead.
A dashboard can be made public so that anyone can access it using a single link. This means people would not need to have an account and log in to view the dashboard. However, before you pursue this route, there are some important considerations to take into account.
Qtip: There is no way to make a “restricted” link that can only be viewed by members of your organization. For similar functionality, you should consider having single sign-on enabled for your organization and configure user dashboard roles accordingly. See Automatic Role Assignment with SSO.
If you would like to make a new or existing dashboard public, please have a Brand Administrator reach out to Qualtrics Support to start this process.
Attention: You must have all required legal rights and consents for any data included in your public dashboards. Your right to use public dashboards will end upon the expiration or termination of your corresponding Qualtrics license.
Qtip: Dashboard export capabilities are not currently available in public dashboards. For workarounds, we recommend looking into automated survey data exports or Qualtrics API paired with a web service task.
FAQs
How do I give my dashboard users the ability to use action planning?
How do I give my dashboard users the ability to use action planning?
That's great! Thank you for your feedback!
Thank you for your feedback!