
Step 2: Preview & Edit Conjoint Survey
What's on this page
Qtip: Conjoint projects are an additional purchase. Please contact your Account Executive if you are interested in learning more about this product.
Once you’ve defined the features and levels you’d like to analyze, it’s time to create your conjoint project! Log into Qualtrics and navigate to the catalog.
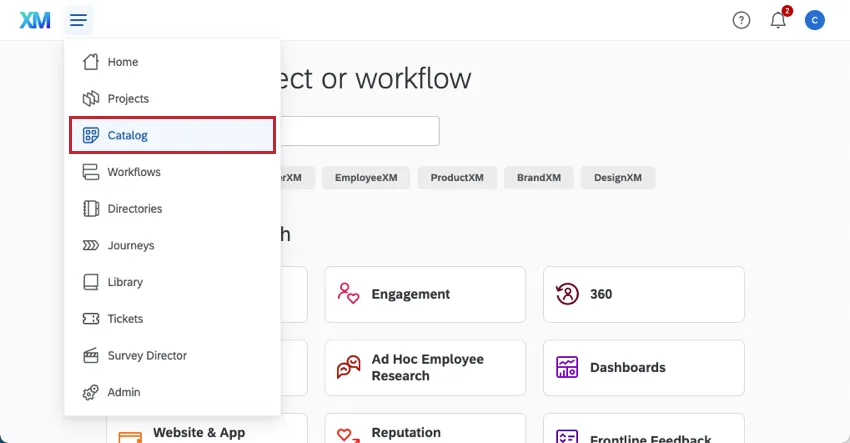
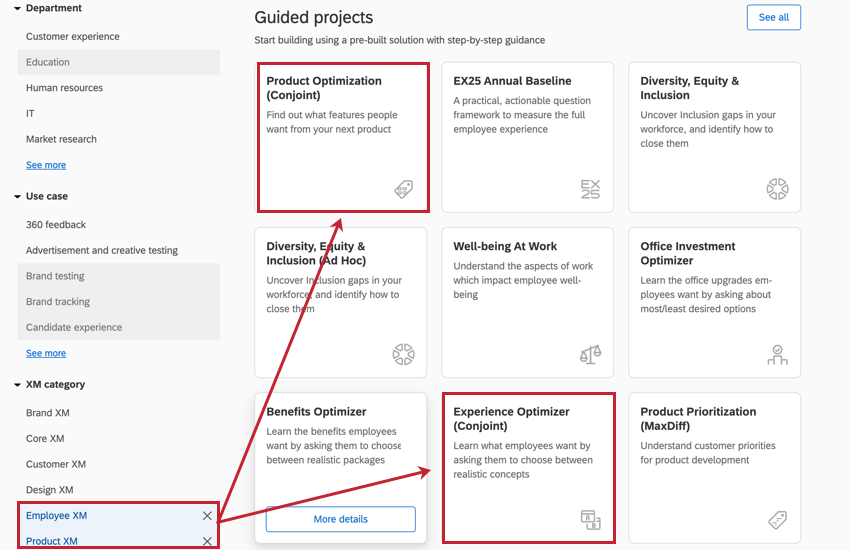
From there, select Product XM or Employee XM and then, under the Guided projects section, select Product Optimization (Conjoint) or Experience Optimizer (Conjoint). The difference between these 2 projects is they have a different focus on what is being optimized – the underlying conjoint functionally is the same in both projects.

Qtip: You may only have access to 1 of these projects depending on your license. Use whichever project you have access to.
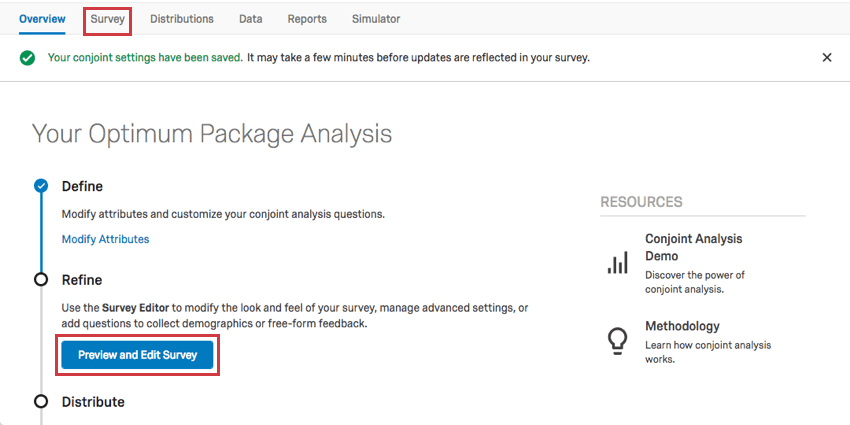
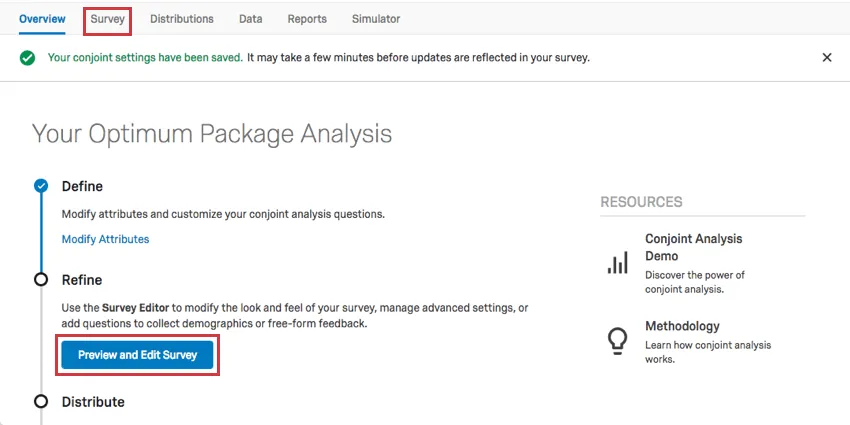
After you name your project, the first tab you will find yourself in is the Overview.
Customizing Your Conjoint
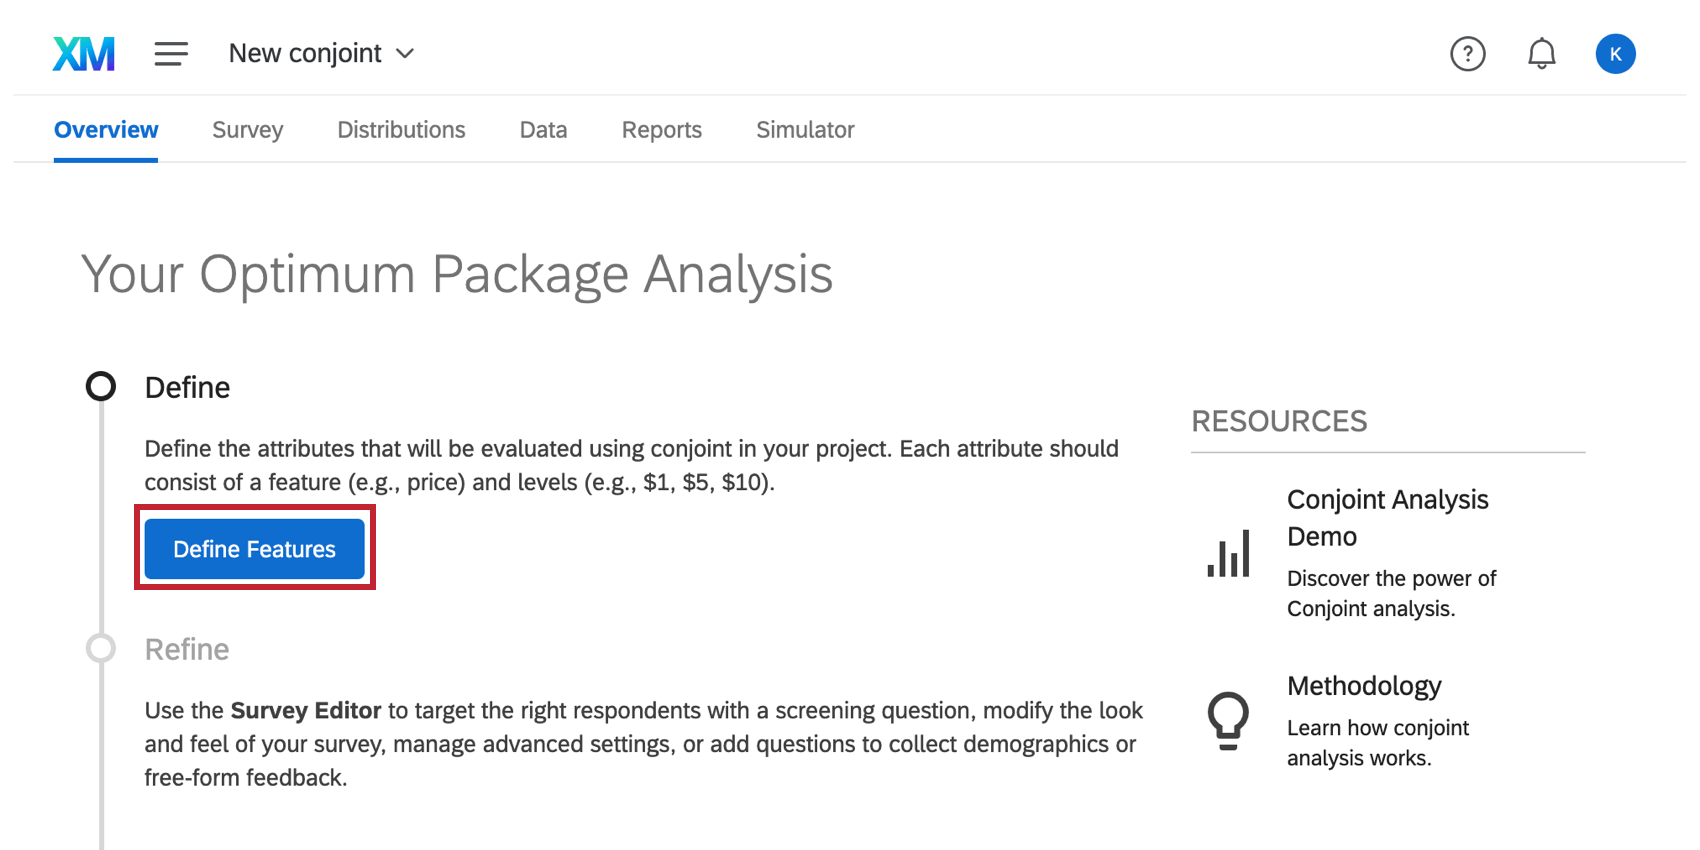
Once you’ve decided on the features and levels you’d like to offer, click Define Attributes on the Overview tab.

You will be brought to a page where you can define your features and their levels. You will also be given access to additional options that affect how your conjoint is presented to respondents.
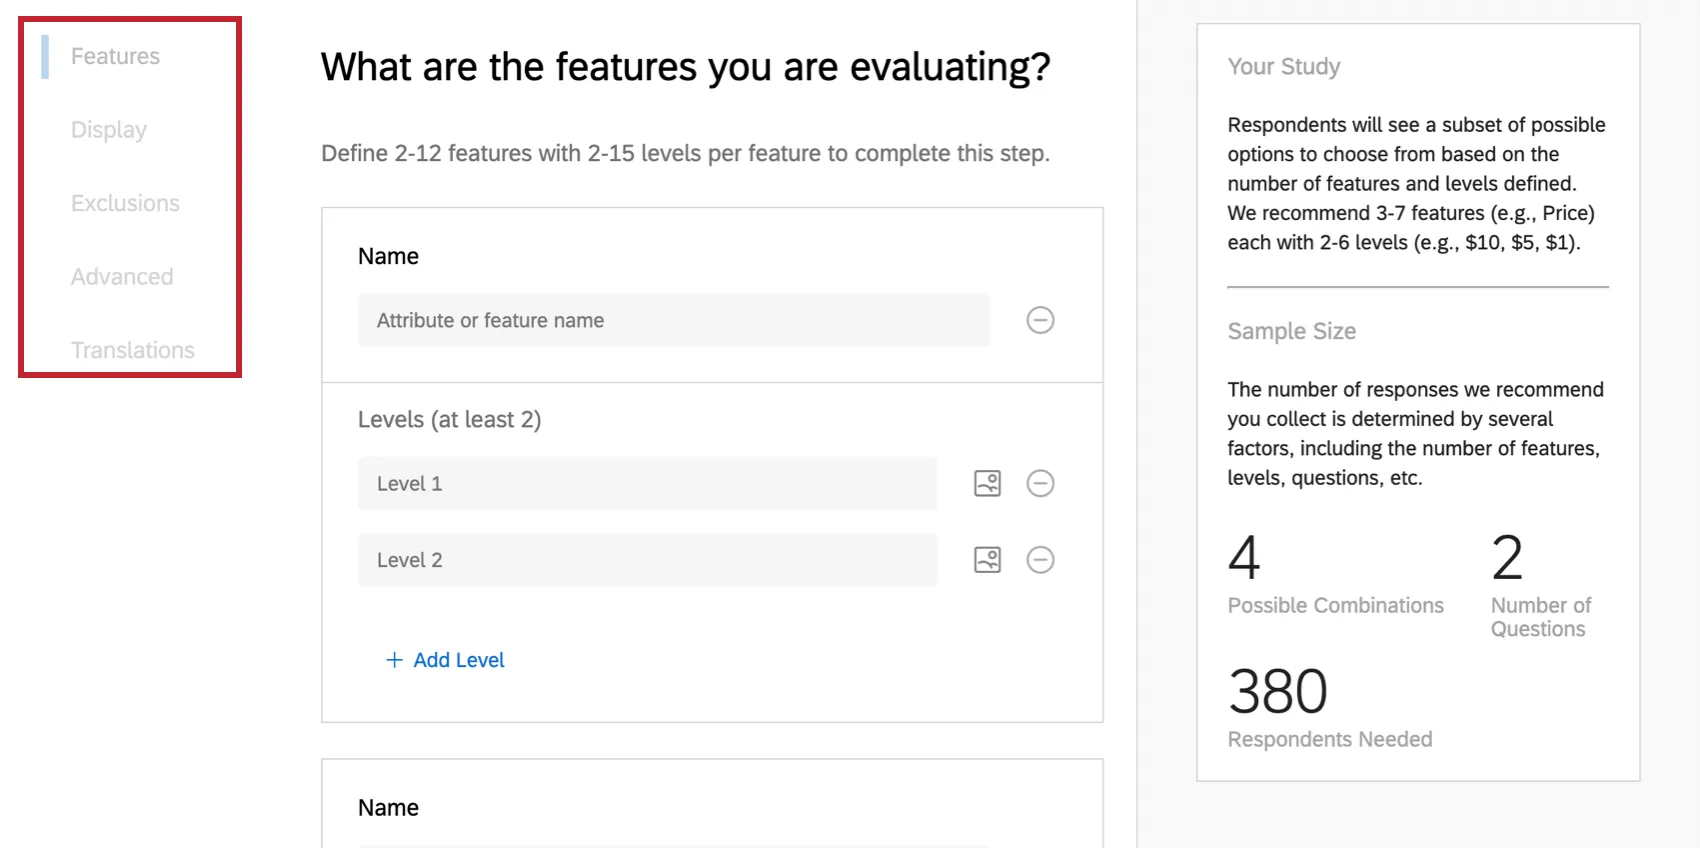
- Attributes: Add features and levels. Qtip: Confused about what to enter here? See Step 1: Defining Conjoint Features & Levels for more details.

- Display: Determine the wording of the conjoint questions in your survey, and the visual format for how the packages are presented.
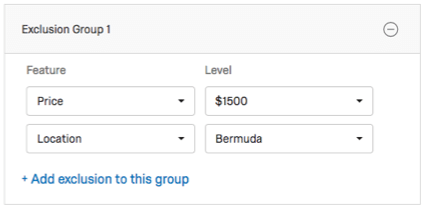
- Exclusions: Determine combinations that cannot be presented as packages. For example, maybe $1500 is a price available for the Bahamas and the Jamaica trip, but is simply too little to afford Bermuda. You could indicate that Price $1500 and Location Bermuda can never occur together as an option.

- Advanced: Decide on the number of packages presented to each respondent, and how many packages (options) should be offered in each question. By default Qualtrics will provide a ‘best-case’ recommendation. You can also decide to add a None option. Additionally, the advanced section lets you set up conditional pricing which associates price with level to determine realistic package prices.
Qtip: Click Save on the lower-right corner to return to the Overview.
Should I include a “None” option?
The best determiner on whether or not you should include a None option in your conjoint analysis project would be based on the primary business objectives you are trying to answer. If the primary goal is research and development on what is the best package we can assemble, then it is best not to include the None option. If the primary objective is product adoption and how different bundles might perform in the market, then is is best to include the None option.
Additional Survey Content
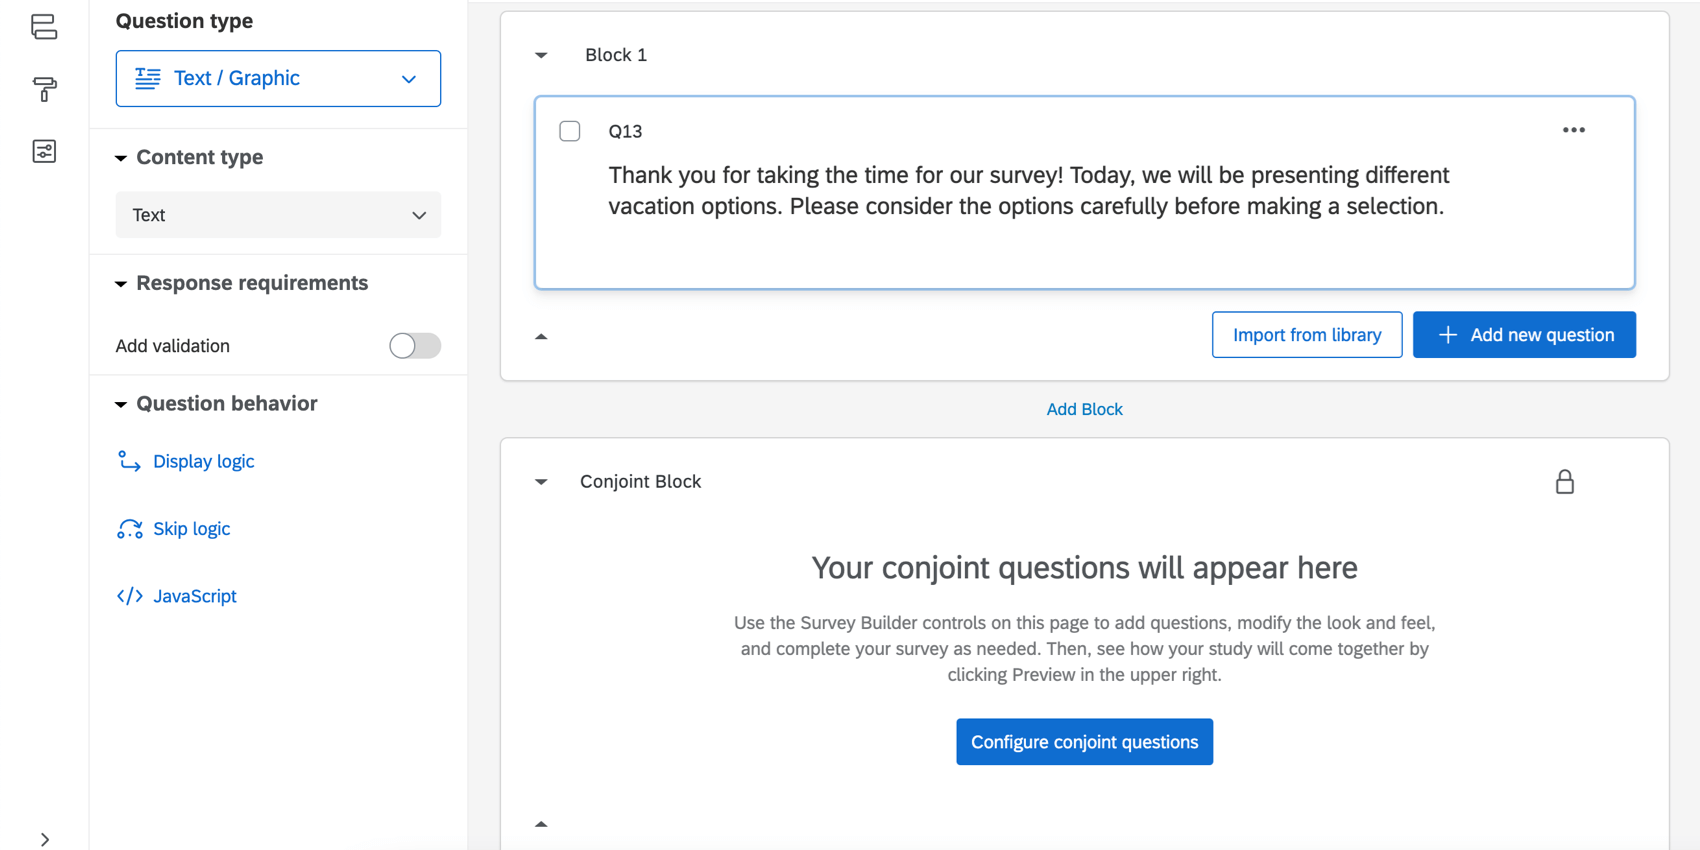
It’s best to keep conjoint surveys simple. Too many questions, blocks, or other customizations can distract from the conjoint analysis and increase respondent fatigue. However, there are times where you may want to collect additional info from your respondents or introduce the purpose of the study.
This content can be added in the Survey tab, or by clicking Preview and Edit Survey in the Overview tab.
Adding an Introduction
You can use a text / graphic to add images and/or text before your conjoint begins.

Adding Additional Questions
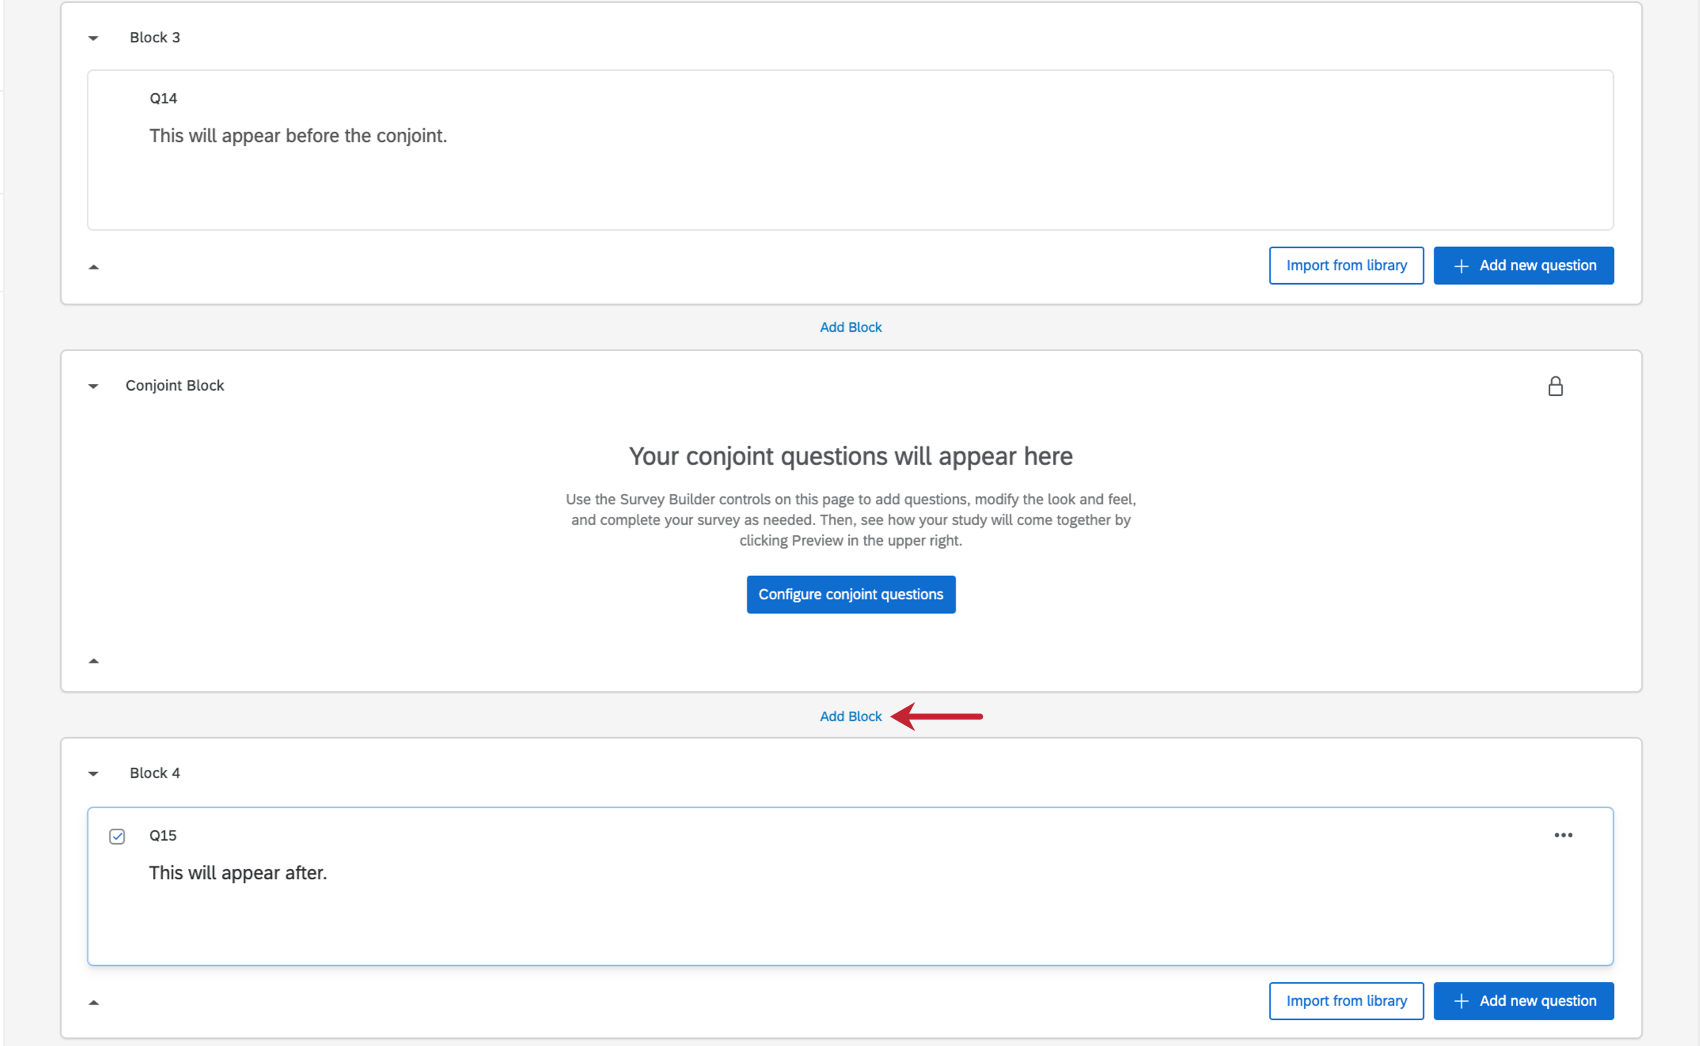
You can also add additional questions to your survey. It’s best to stick to simple demographic or preference questions, and use basic formats, such as multiple choice and text entry.
Qtip: Any questions added to the block above the conjoint will appear before the conjoint. Move the block down, or click Add Block below the conjoint block to add questions that follow the conjoint. You can also delete any block you don’t need.

Other Options
Survey options allow you to define who can access the survey and when. Here you can also add different aesthetic options, like question numbers and custom end of survey messages. Check out the Survey Options page for more details. Note that this link will take you out of the conjoint support pages to the Survey Platform pages, since these features function the same.
Qtip: Back buttons are not compatible with conjoint blocks.
Survey options also allow you to determine how long respondents have to complete the survey response before it’s recorded (or deleted). These are called incomplete survey response settings. It is important to configure these before you distribute the survey.
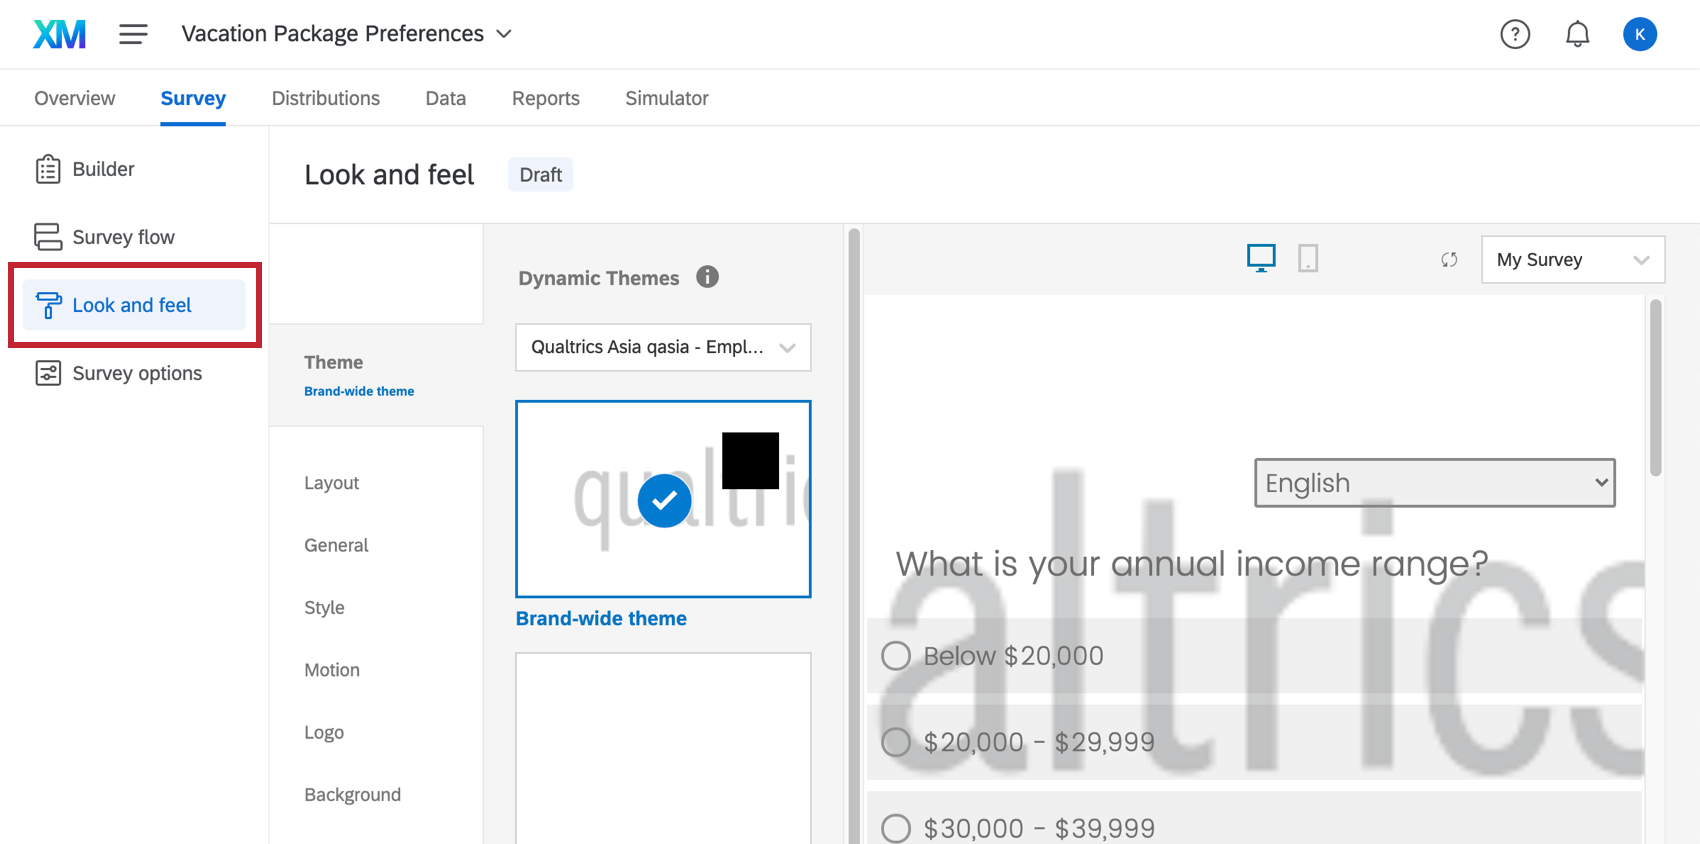
Look & Feel
The Look and feel menu allows you to customize the visual appearance of your conjoint survey, including font colors, font faces, theme, and more.

Make sure you keep themes readable. For example, tiny font and a background color that barely contrasts from the font color make for an unpleasant survey-taking experience.
You can add branding with a custom theme, or, if you are not interested in purchasing themes, by adding a logo in your header. If you are adept with coding, you can also use Custom CSS to design your survey.
Qtip: Although the following links are to the Survey Platform pages, not Conjoint project pages, the customization described is the same for both platforms.
Here are additional resources for customizing your conjoint survey’s Look & Feel:
Previewing & Publishing Your Conjoint
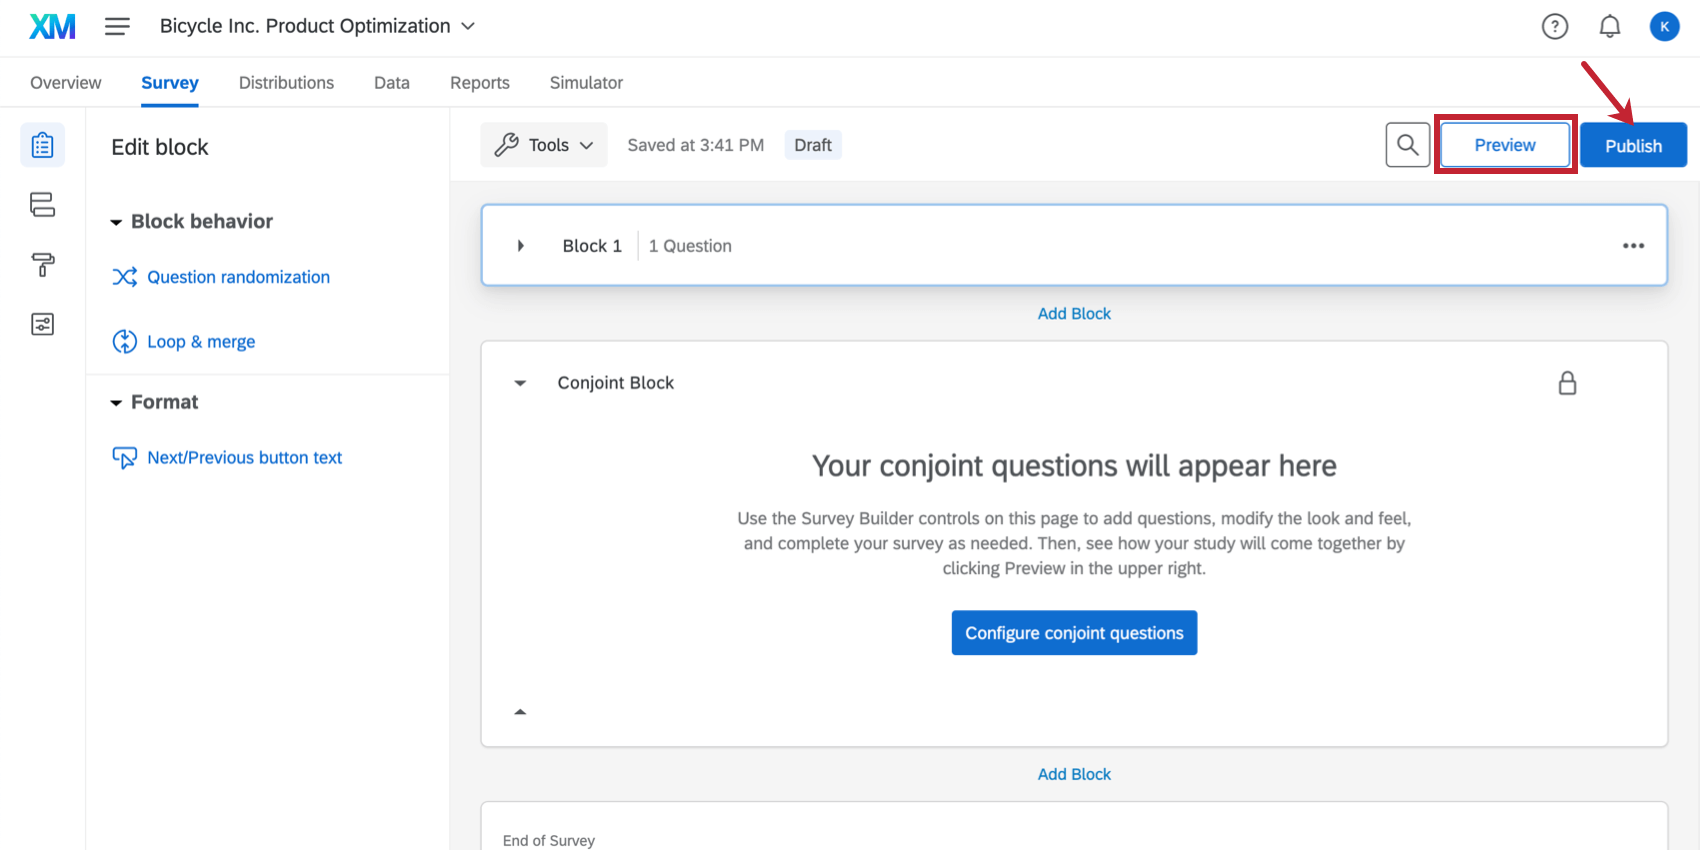
It is incredibly important to test your survey before sending it out. You can preview what your conjoint survey will look like to your respondents by clicking Preview Survey.
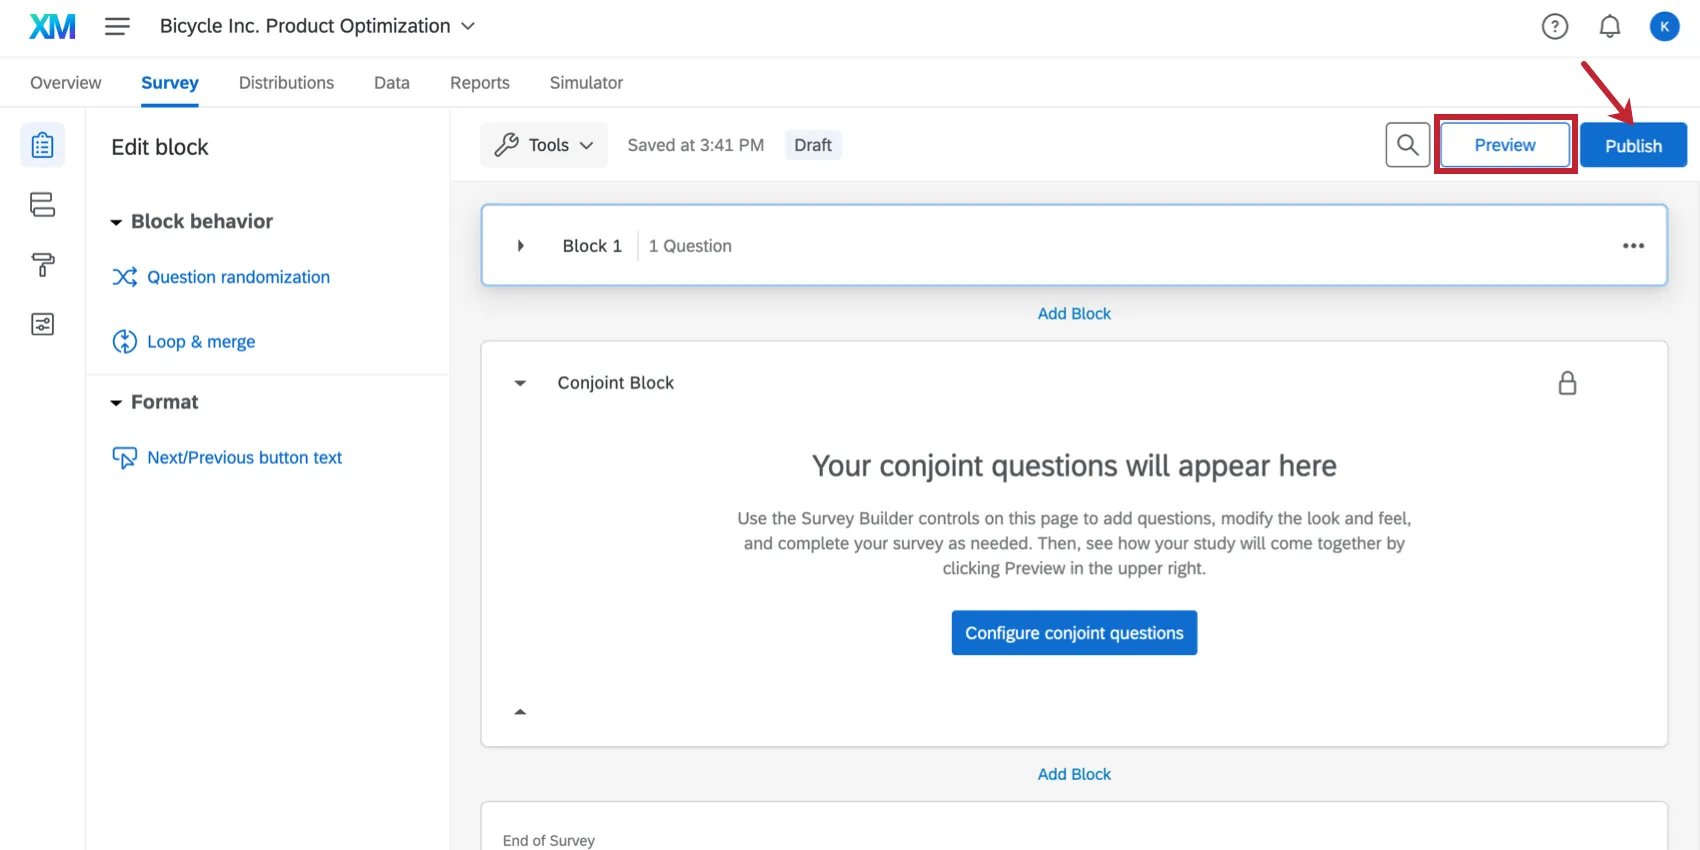
When you have made the desired edits and would like to activate your survey with these settings, click Publish. If you’re not ready to go live yet, Qualtrics will save your progress, so you only have to publish when you’re ready.
Qtip: See Survey Publishing and Versions for more on how publishing works.
FAQs
How can I stay up to date on new Qualtrics features?
How can I stay up to date on new Qualtrics features?
To access these release notes, you need an XM Community account. These accounts are free for any users with a Qualtrics account. This support page contains information for how to register an XM Community account.
Once you're logged into the XM Community, head over to the Weekly Product Updates Introduction Post. This post contains all the information you need to get started with subscribing to product updates!
That's great! Thank you for your feedback!
Thank you for your feedback!