-

Qualtrics Platform -

Customer Journey Optimizer -

XM Discover -

Qualtrics Social Connect
Step 3: Configuring Project Participants & Distributing Your Project
Creating and Uploading Your Participant File
The next step in preparing your Employee Engagement project is to finalize your participant data file and upload the file to the Employee Experience Platform. Once your file is uploaded, the participant list will allow us to distribute unique survey links to each participant and generate the hierarchy we need to report results. For additional information, visit the Preparing Your Participant File for Import and Adding Participants support pages.
Before uploading your participant data file into your Employee Engagement project, be sure that the participant file contains a row for each participant with the participant’s first name, last name, and email address listed. Click here to review hierarchy types.
The file also must contain the metadata that we will use to construct the hierarchy. Metadata are fields that can be used to create our hierarchy or to segment data in our dashboards.
- For a parent-child hierarchy, include two columns in the participant file, one for Employee IDs and one for the manager’s Employee ID.
Qtip: If you have one, your Unique Identifier column can act as the Employee ID.
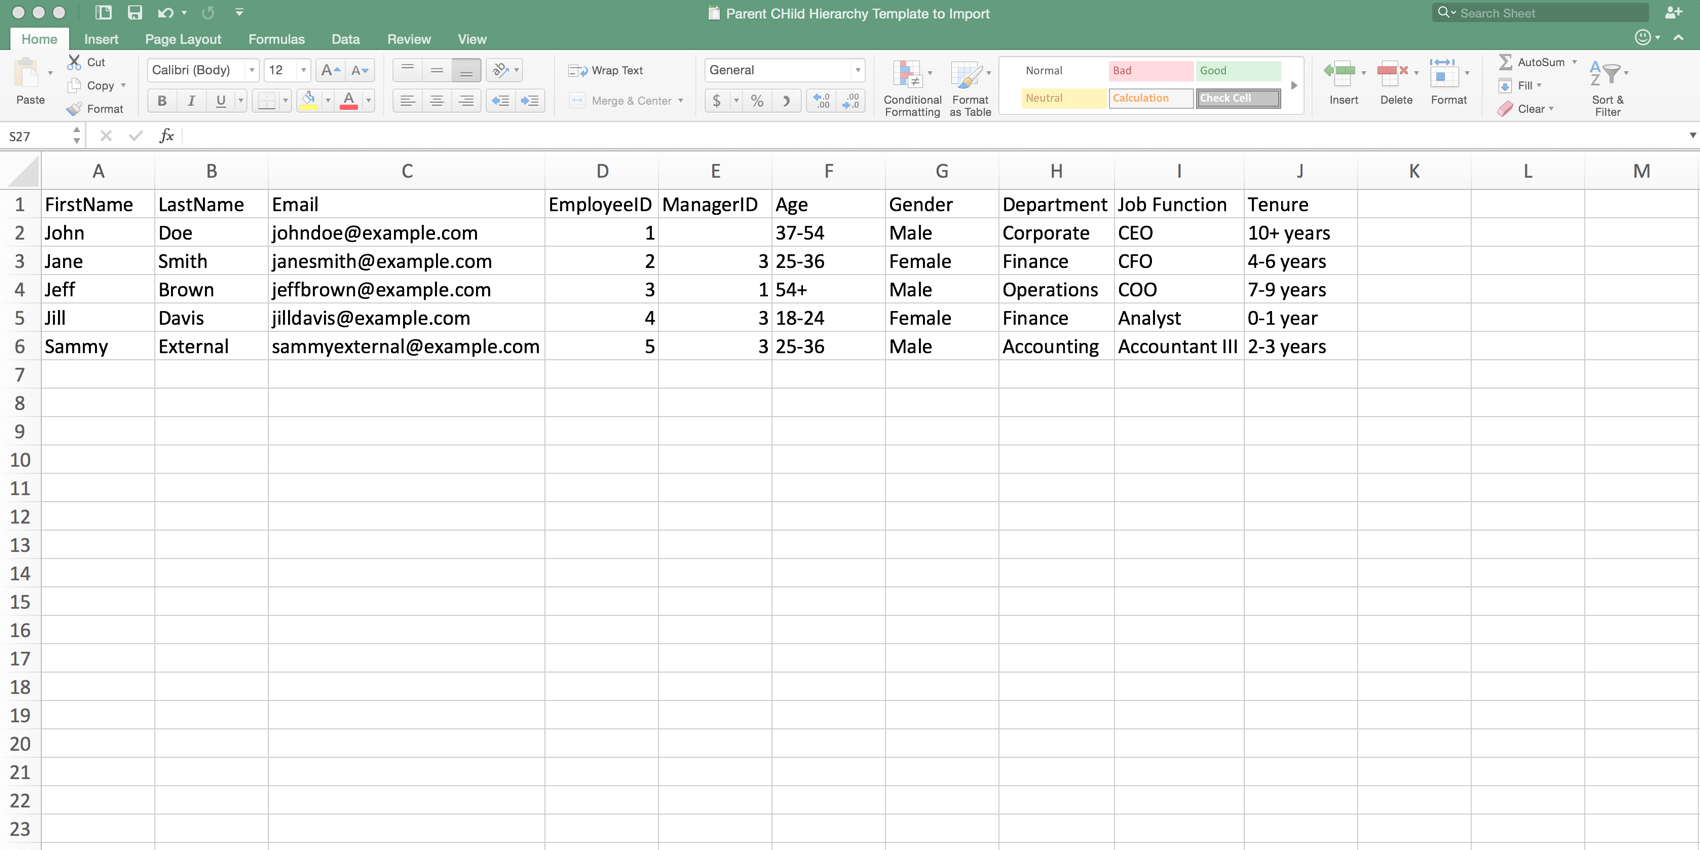
- For a level-based hierarchy, add a column for each level of your organization’s hierarchy and assign each level’s value to that participant. You will also need a column of data that indicates whether each participant is a manager or not. The participant will be assigned as the manager of the lowest level he or she has listed. For example, the screenshot below indicates that Jane Smith will be made a manager of the Finance department, but Jill Davis will simply be a member of the Finance department and not a manager.

In addition to listing the metadata necessary to build your hierarchy, you can add additional columns to your spreadsheet that have demographic information, such as location, gender, tenure, or work group. This data can be used to filter dashboard results or segment data on dashboard widgets.
If you are providing translations for your email messages, include a column of metadata in your participant upload file entitled “Language.” Provide the language code for each participant using the Available Language Codes guide. Note that the participant’s browser language, not the language code, determines the default language of the survey itself.
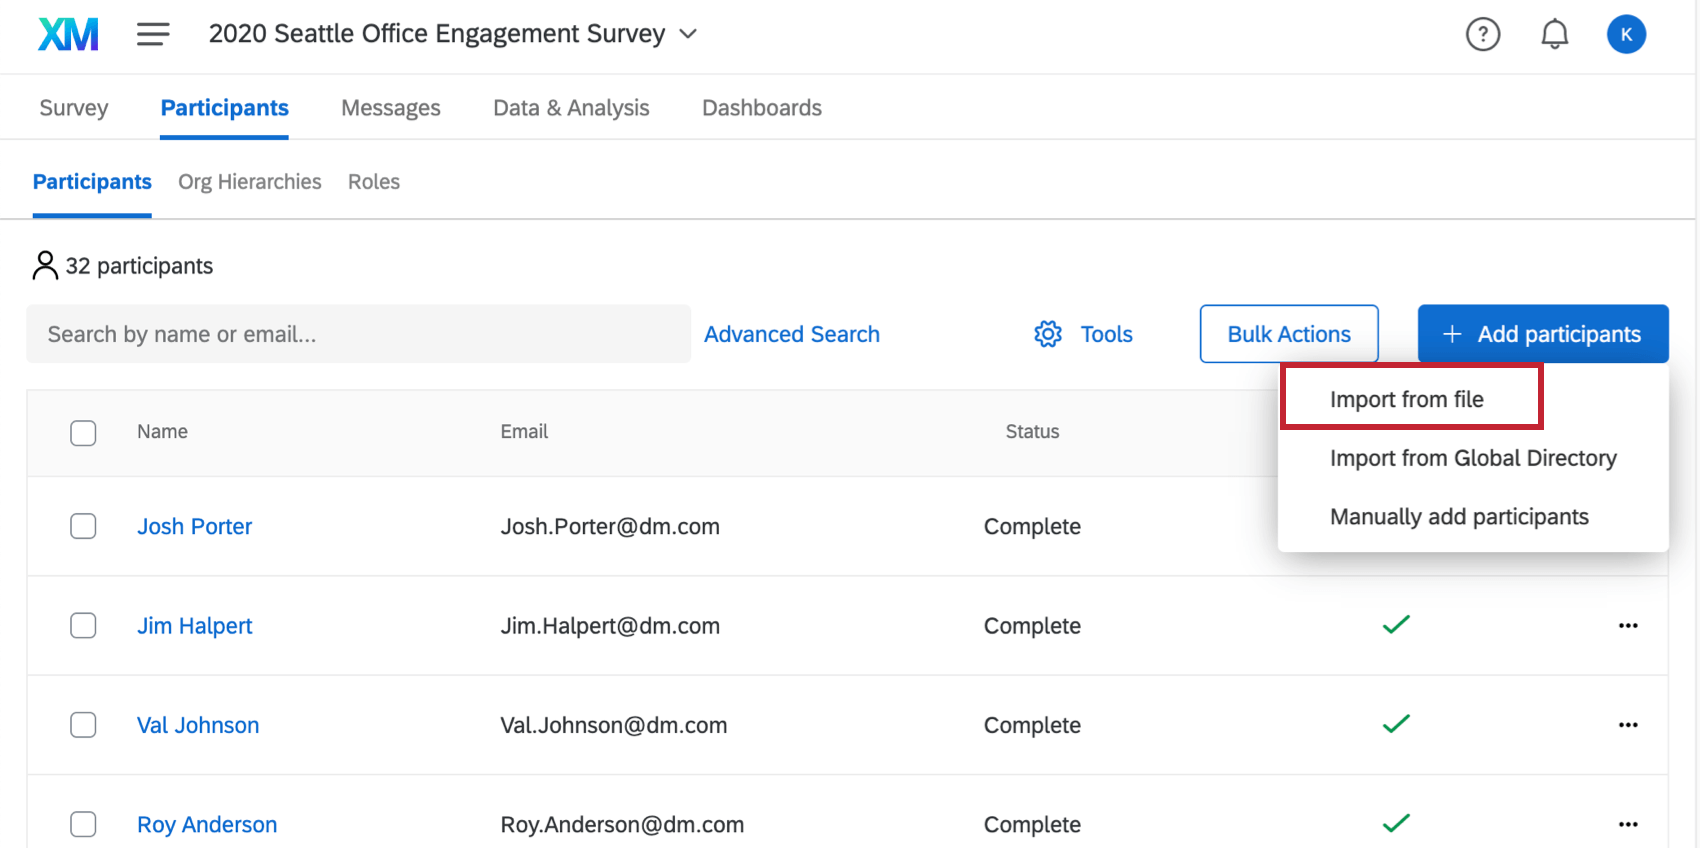
Once you have finished formatting your participants file, save your participant file as a .CSV (UTF-8) or .TSV file and upload the file to your participant list in the Participants tab using the Import from file option pictured below.
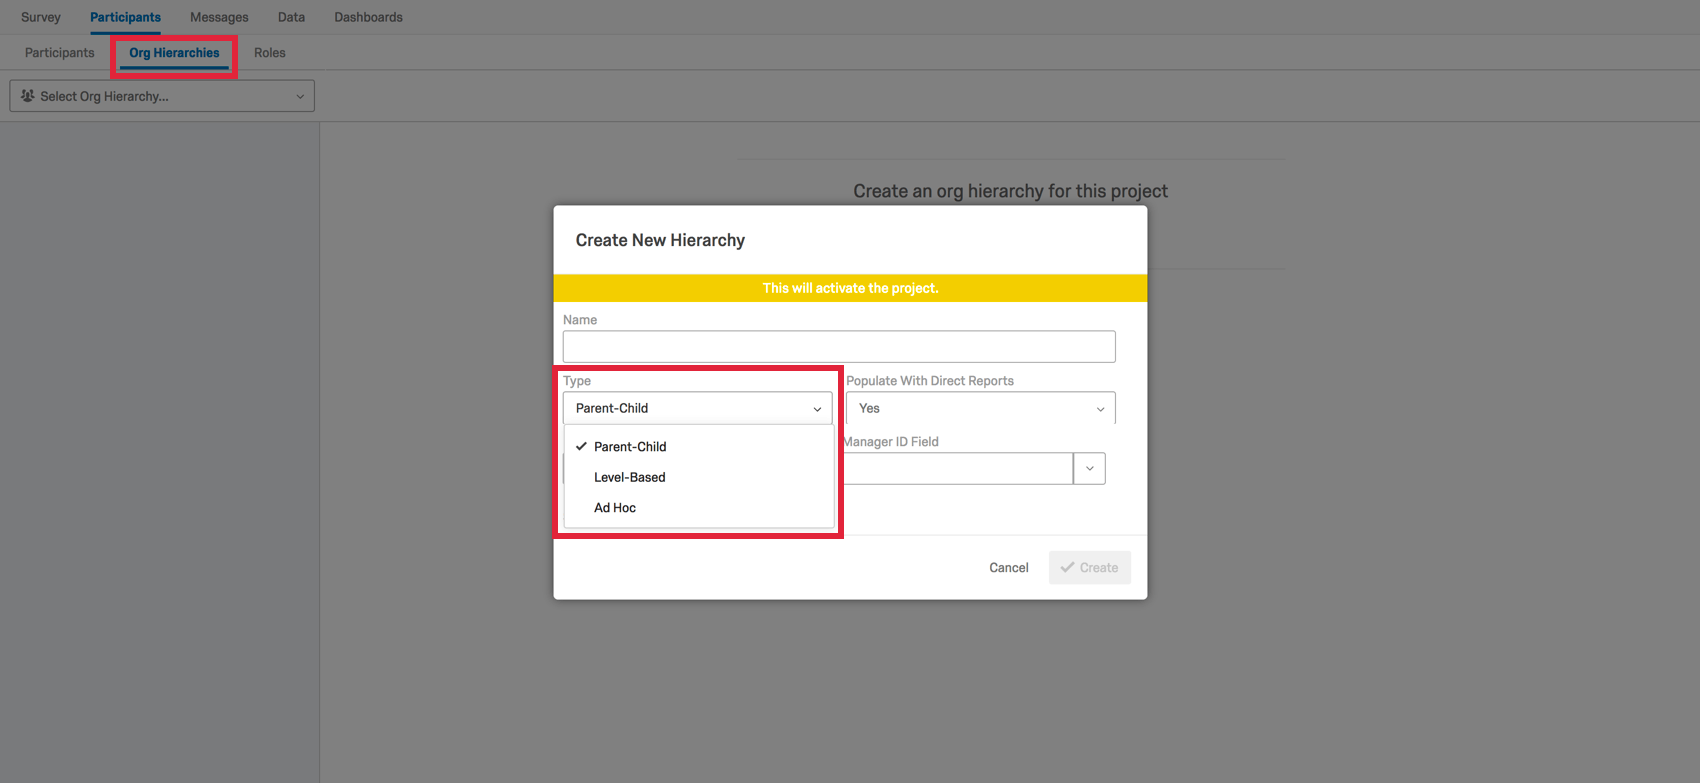
Generating Your Organization’s Hierarchy
Now that you have loaded your project participants into the platform, we can generate a hierarchy based off of the information that we included in our participant file upload. The hierarchy will be used to structure data when we are reporting on our engagement project results.
Learn more about which hierarchy is best for you on the Hierarchies Basic Overview. Once you’ve chosen a hierarchy type that suits your organization best, see the Preparing a Participant File page to learn what information you should upload with your participants. After you’ve prepared your file, you can head over to Generating a Parent-Child Hierarchy or Generating a Level-Based Hierarchy, depending on the hierarchy you chose.
You can review hierarchy types or download template participant upload files here.
Choose Your Survey Distribution Method
The next step in preparing your Employee Engagement project for launch is to determine how you would like to distribute the survey to your employees. Once you have determined this, you will be able to set up your email messaging and launch the project.
The four distribution methods available in Qualtrics are outlined below, along with the recommended hierarchy types for each distribution method.
- Distribute the survey with unique survey links sent to participants’ email addresses.
- Recommended hierarchy type: Parent-Child or Level-Based
- Send all survey participants the same anonymous link to the survey and require participants to authenticate into the survey with their Employee ID.
- Recommended hierarchy type: Parent-Child
- Send all survey participants the same anonymous survey link and ask participants to select their hierarchy unit using a tree-selector survey question.
- Recommended hierarchy type: Level-Based
- Use a combination of distribution methods. Send participants with an email address a unique link to the survey. For those participants without their own email address, give participants access to the anonymous link to the survey and require participants to authenticate into the survey using their Employee ID.
- Recommended hierarchy type: Parent-Child or Level-Based
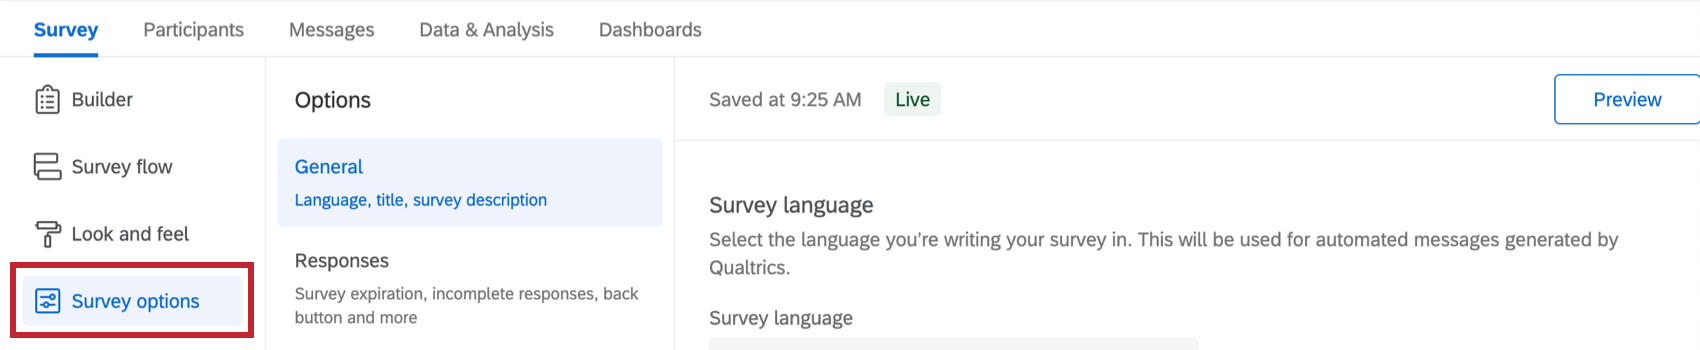
Survey Options
Once you have selected your Employee Engagement project distribution method, you will need to configure your engagement project’s options to meet your distribution requirements. For additional information, visit the Survey Options support page.
- Survey Retakes: Allows respondents to use their unique link to retake the survey. This option is turned on by default, so make sure to deselect this if you don’t want your participants to retake the survey.
- Use Anonymous Link: A single link to your survey that will collect anonymous responses that is not turned on by default.
- It can be used multiple times to complete the survey and is recommended when offering the survey in a kiosk.
- For anonymous responses to be associated with hierarchy units, you must use an authenticator in the survey flow so that participants can identify their hierarchy unit or an org hierarchy question in the survey. Visit our page on building surveys here for more information on either option.
- Prevent Multiple Sessions: Prevents anonymous survey respondents from taking a survey more than once by using their browser cookies. If you are allowing participants to use the anonymous link, and everyone is using the same device / kiosk to take the survey, you should turn this option off.
- If a respondent attempts to take the survey on a different device or browser, this option will not prevent them from responding a second time.
- “Prevent multiple sessions” will not have any affect on unique links distributed to participants or when using an authenticator with the anonymous survey link.
- Add a Referral URL: Allows you to set the URL the participant must come from to take the survey.
- This is not an option commonly enabled for Employee Engagement surveys.
- Prevent Indexing: Prevents search engines from indexing your survey and is enabled by default.
- Survey Availability: Allows you to set a survey expiration date, which will automatically close the survey.
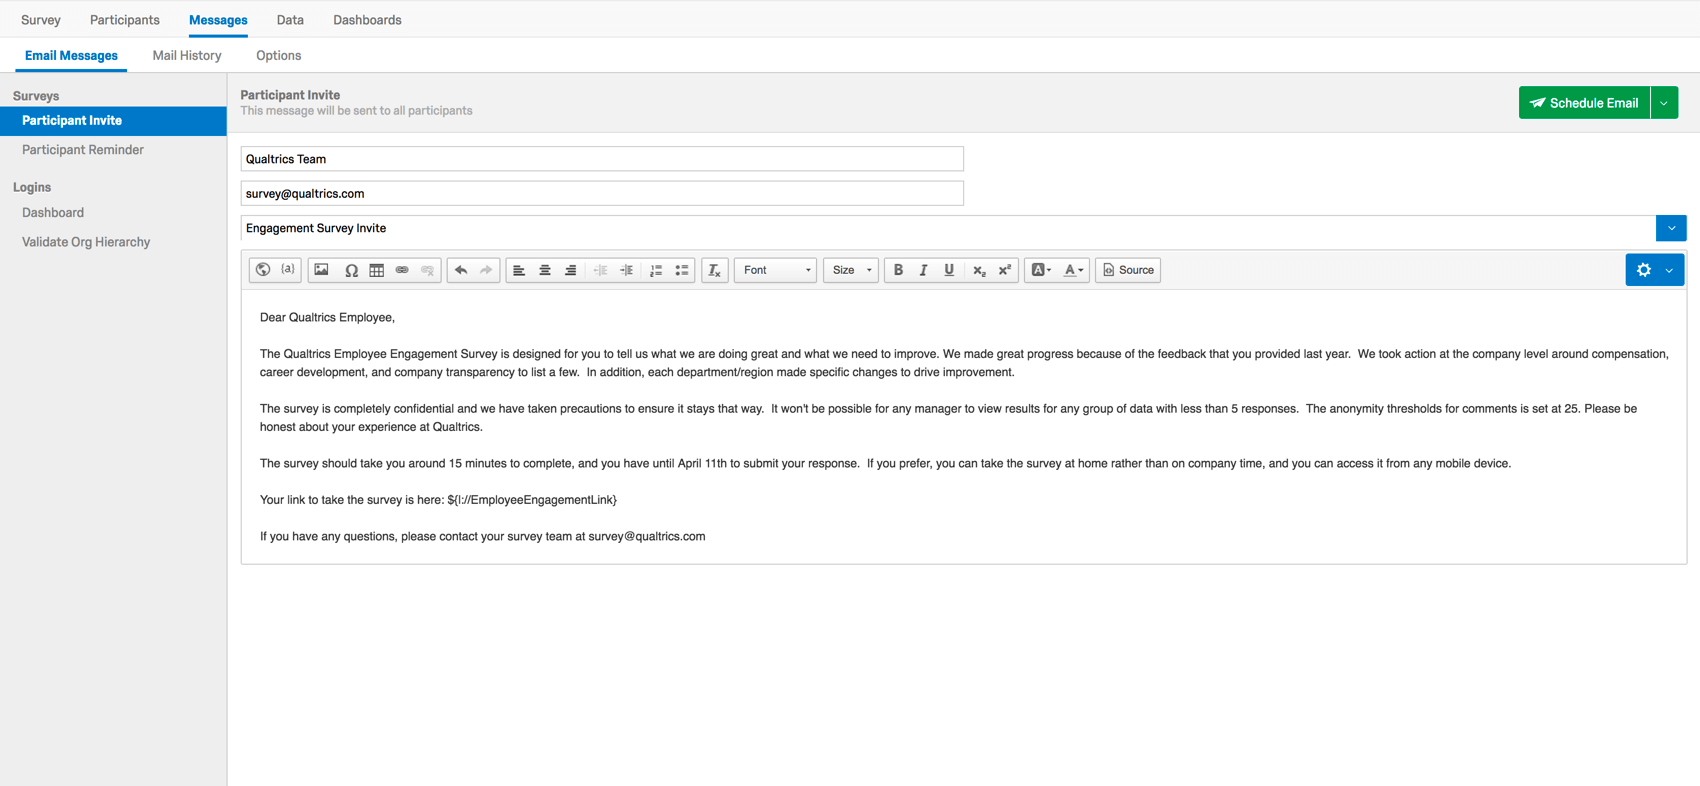
Creating Invitation and Reminder Messages
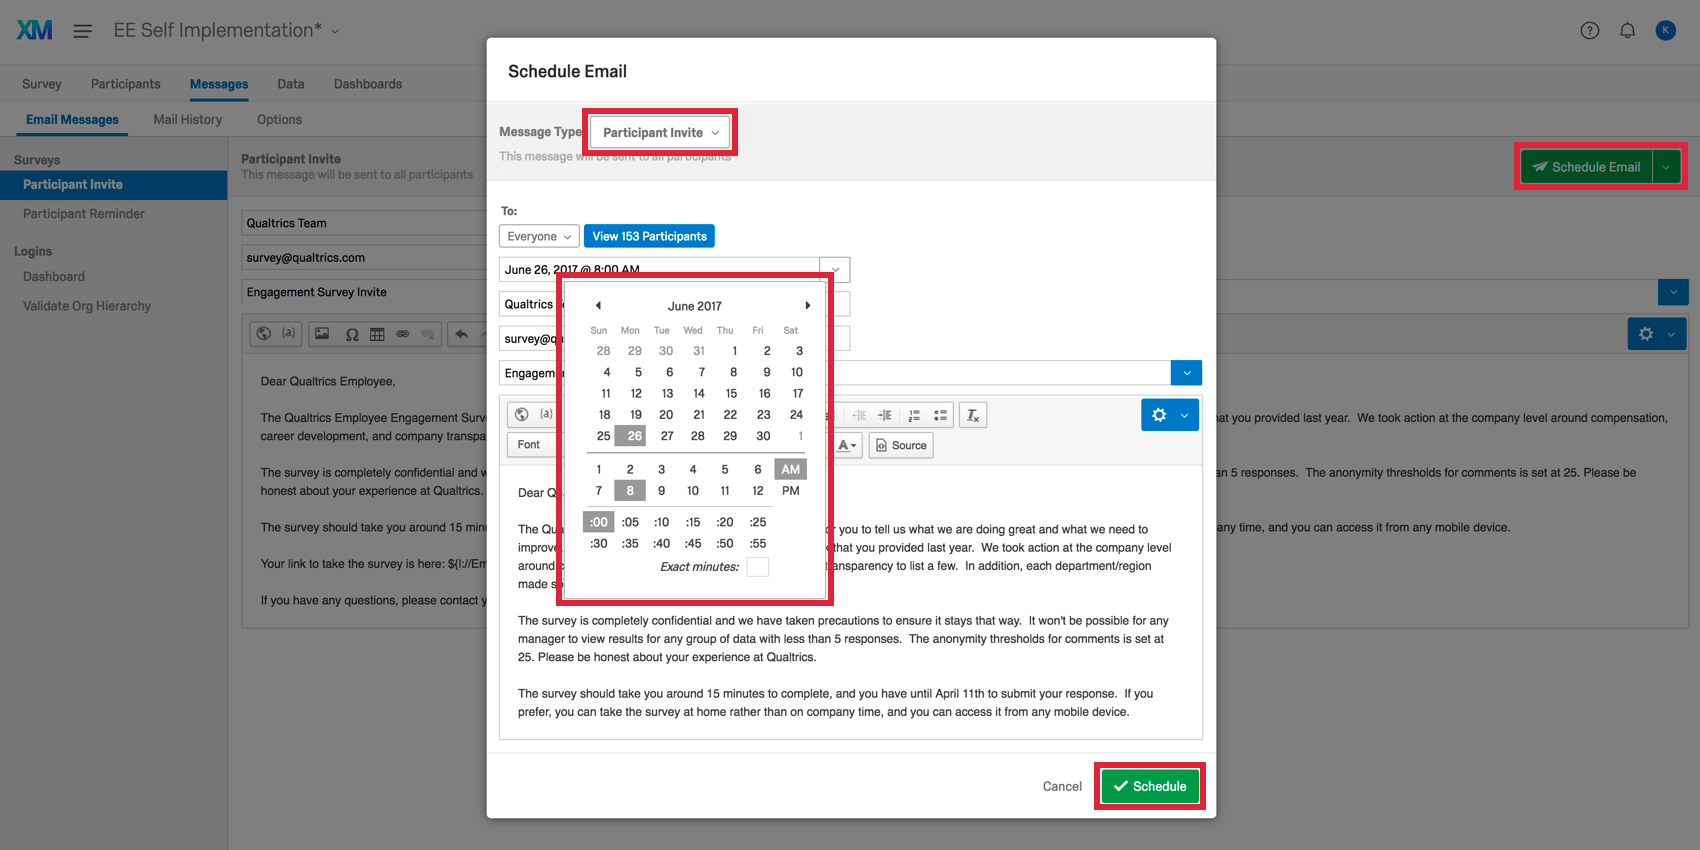
Once you have your workflow set up, it is time to configure the invitation and reminder messages for your Employee Engagement project. Once the messages have been set up in Qualtrics, they can be scheduled for distribution and the project can be launched.
In your engagement project, there are several messages you can customize. Participant invites welcome participants to the survey, and are the first mailings you’ll distribute. Next are participant reminders, which will remind only unfinished respondents that they still have to complete the survey. Once all your data is collected and you have your dashboard customized, dashboard messages invite dashboard users to their dashboards to analyze the data.
For additional information, visit the Email Messages Overview support page.
Once you have set up your project’s invitation and reminder messages, you are ready to launch your Employee Engagement project. The final step is to schedule your invitation and reminder messages.