-

Qualtrics Platform -

Customer Journey Optimizer -

XM Discover -

Qualtrics Social Connect
Ticket Translations
About Ticket Translations
With ticket translations, you can support ticket owners by translating ticket information into many different languages, thus making it easier for your teams to expand globally. You can upload one language at a time or multiple at once, and even turn languages on and off temporarily, if you need to adjust your offerings.
Ticket information can be translated into the languages listed on this page.
Translatable Ticket Information
The ticket translation tool covers the following fields and information that ticket owners see:
- Queues
- Root cause
- Statuses
- Teams
- Ticket data
- Ticket groups
- Ticket workflows
- Legacy follow-up questions
Qtip: We recommend using Ticket Feedback Surveys instead.
The tickets user interface, such as the buttons and text on the Follow Up page, is already translated in many languages, and isn’t included in the translation files. With this, certain default fields, like ticket priorities and dates, are already translated and don’t need to be uploaded.
Adding Ticket Languages
- Go to the Tickets page.
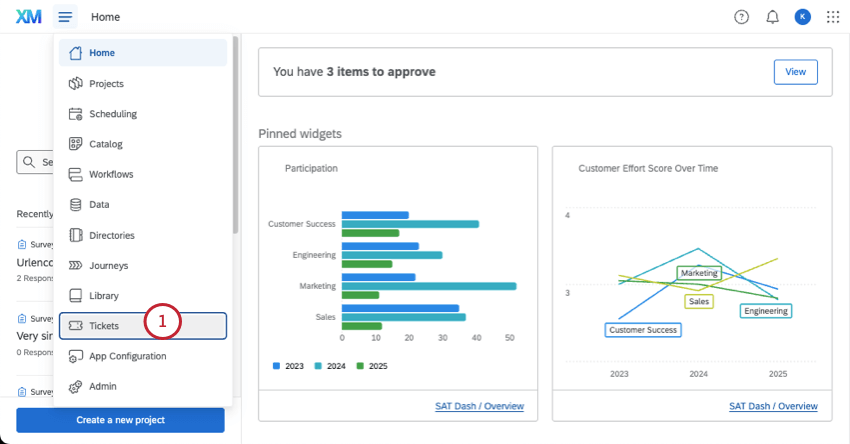
- Click Tools.
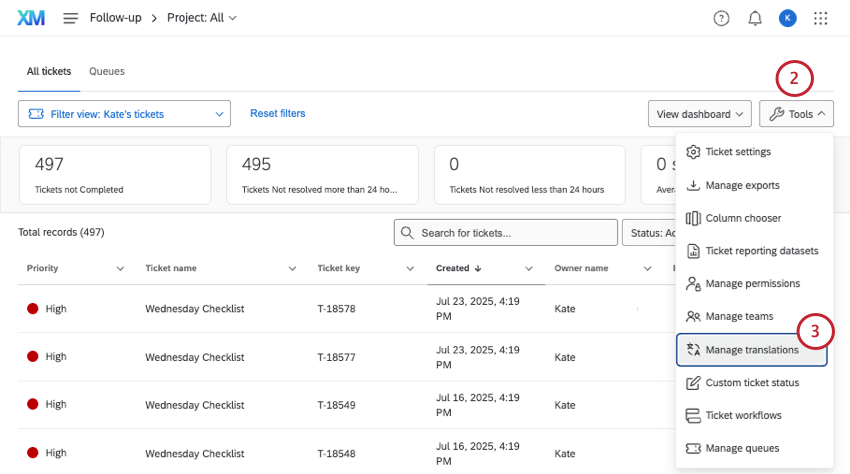
- Select Manage translations.
- Click Add language.

- Select the languages you want to add.
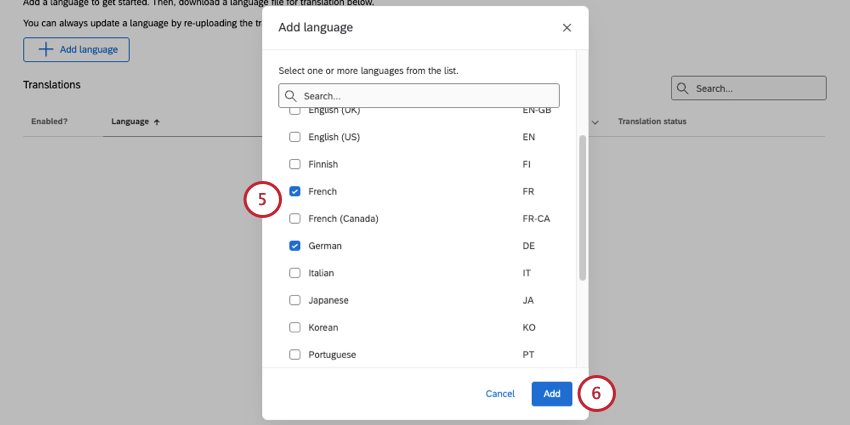
- Click Add.
- You can now prepare translations using a template spreadsheet. See instructions for:

Uploading Multiple Ticket Translations
If your tickets come in multiple languages, and you have owners who speak different languages, you can upload many translations at once.
- Click the download button.
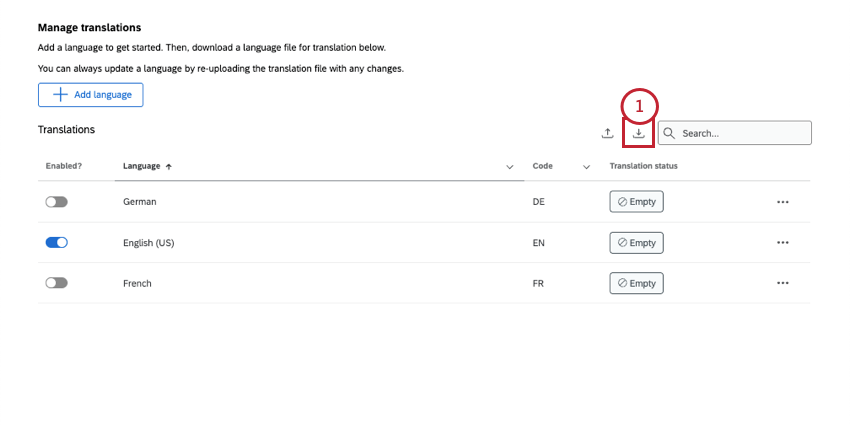
- Select All languages.
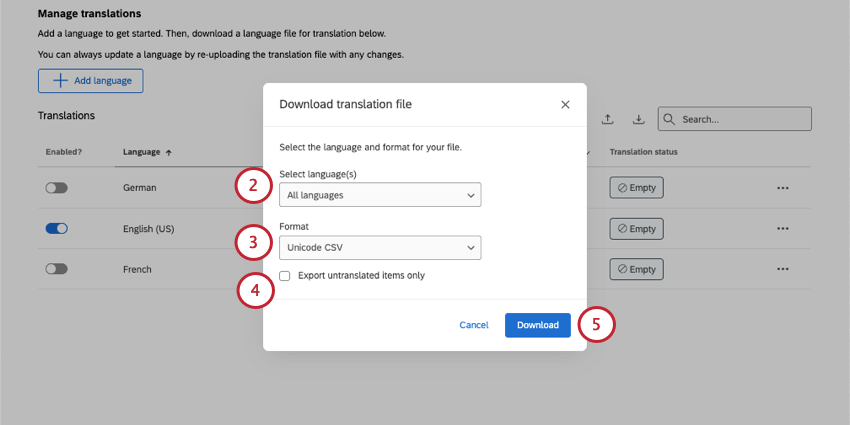
- Under format, choose between CSV and TSV format.
- If you’re updating a translation, select Export untranslated items only. This setting has no effect if you haven’t translated anything yet.
Qtip: As you add ticket data and change your tickets setup, you’ll need to add more translations. The Export untranslated items only setting is the perfect way to focus just on the new material.
- Click Download.
- Fill out your translation file. See all translation file best practices here.
- Click the upload button.
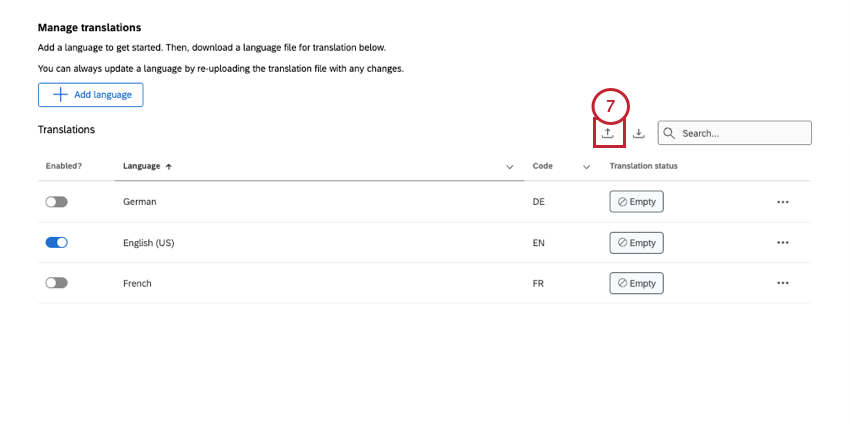
- Drag a file there or click Browse file to select from your computer.

- Click Upload.

Uploading One Ticket Language
- Click the dots next to a language.
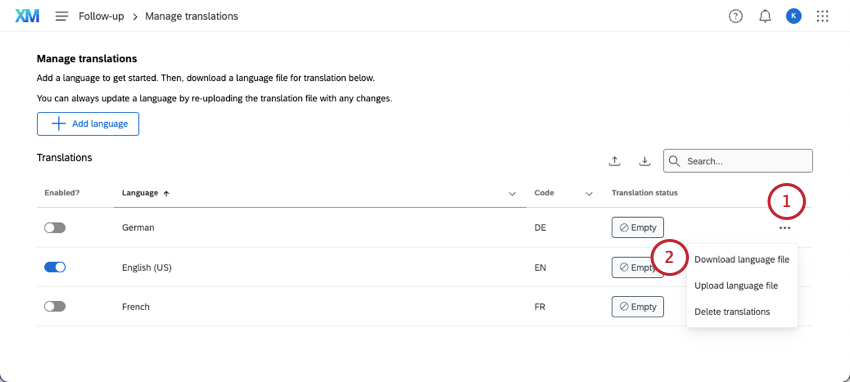
- Click Download language file.
- Leave your specific language selected.
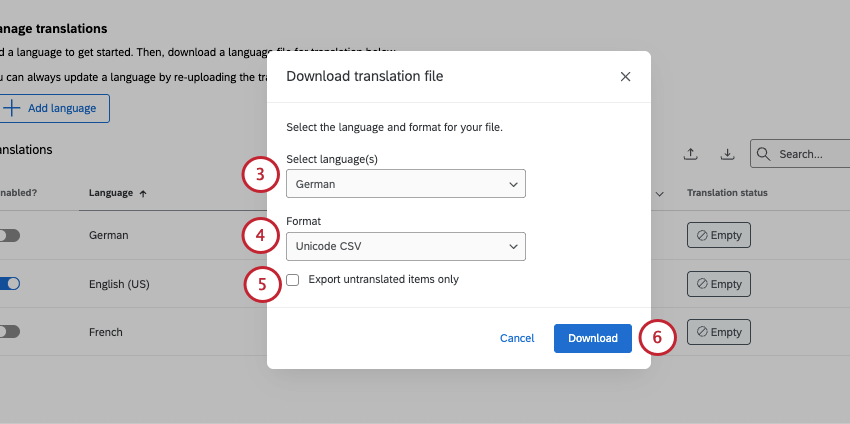
- Under format, choose between CSV and TSV format.
- If you’re updating a translation, select Export untranslated items only. This setting has no effect if you haven’t translated anything yet.
Qtip: As you add ticket data and change your tickets setup, you’ll need to add more translations. The Export untranslated items only setting is the perfect way to focus just on the new material.
- Click Download.
- Fill out your translation file. See all translation file best practices here.
- Click the dots next to a language.
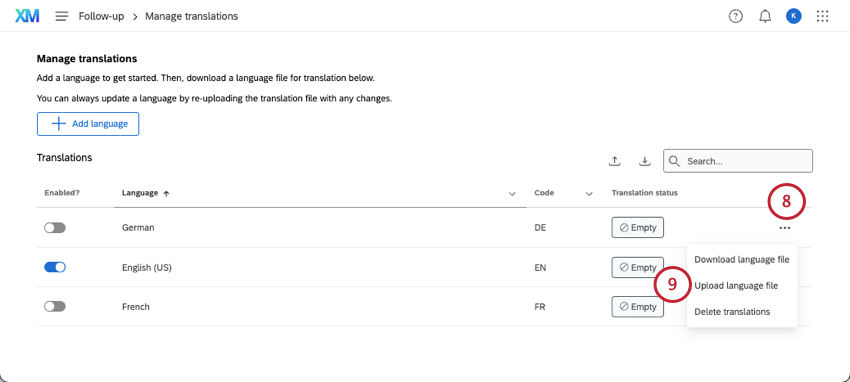
- Click Upload language file.
- Drag a file there or click Browse file to select from your computer.
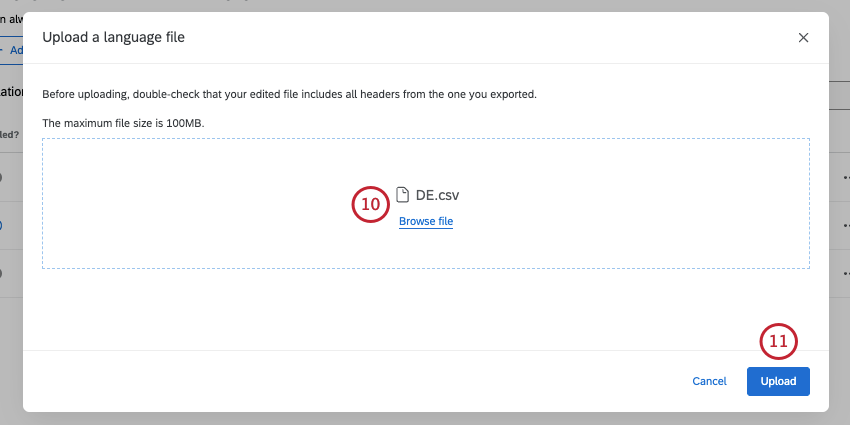
- Click Upload.
Formatting a Ticket Translation File
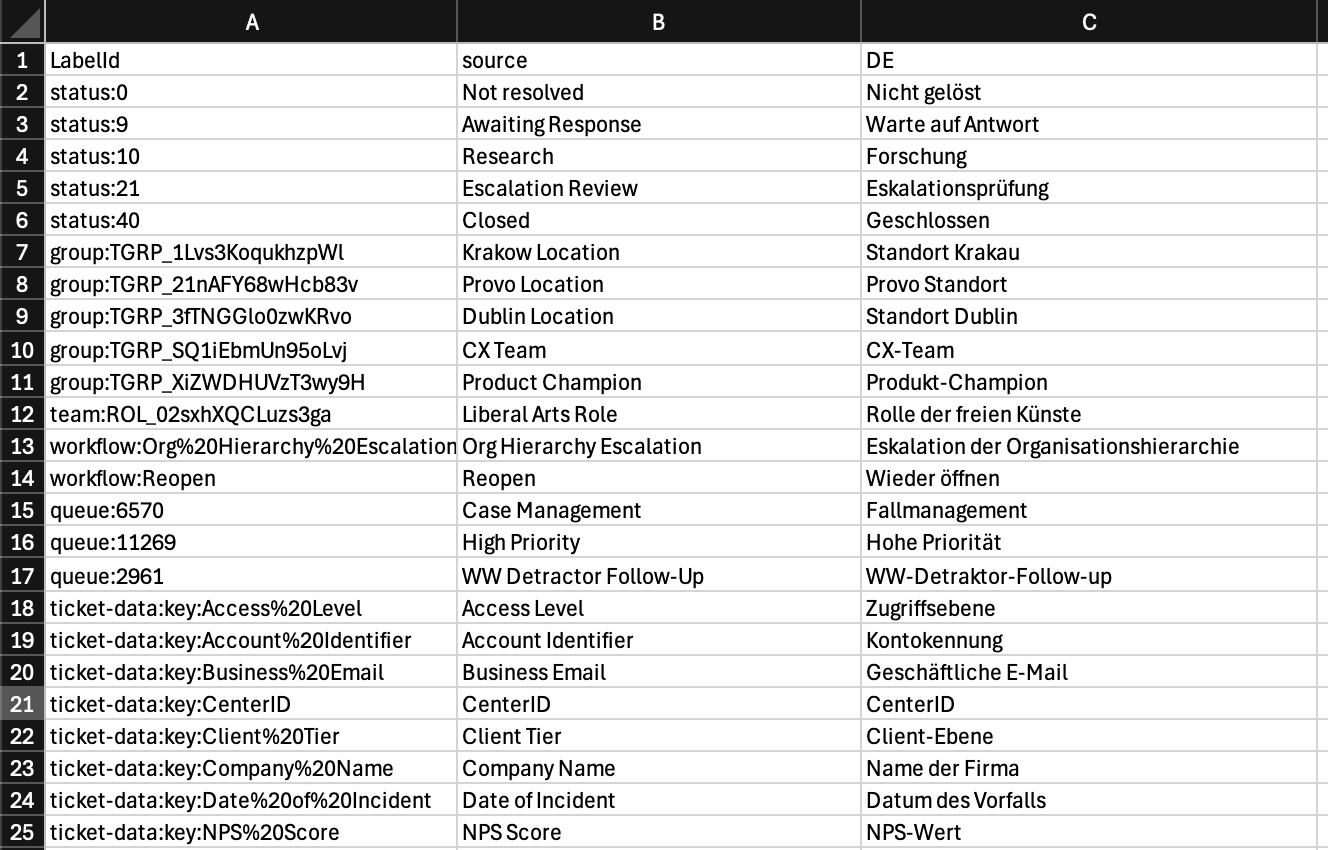
Translation files have 1 row of headers. There’s a column for internal LabelId, a column for the source language, and then columns for the languages you selected. Each row represents a different field.
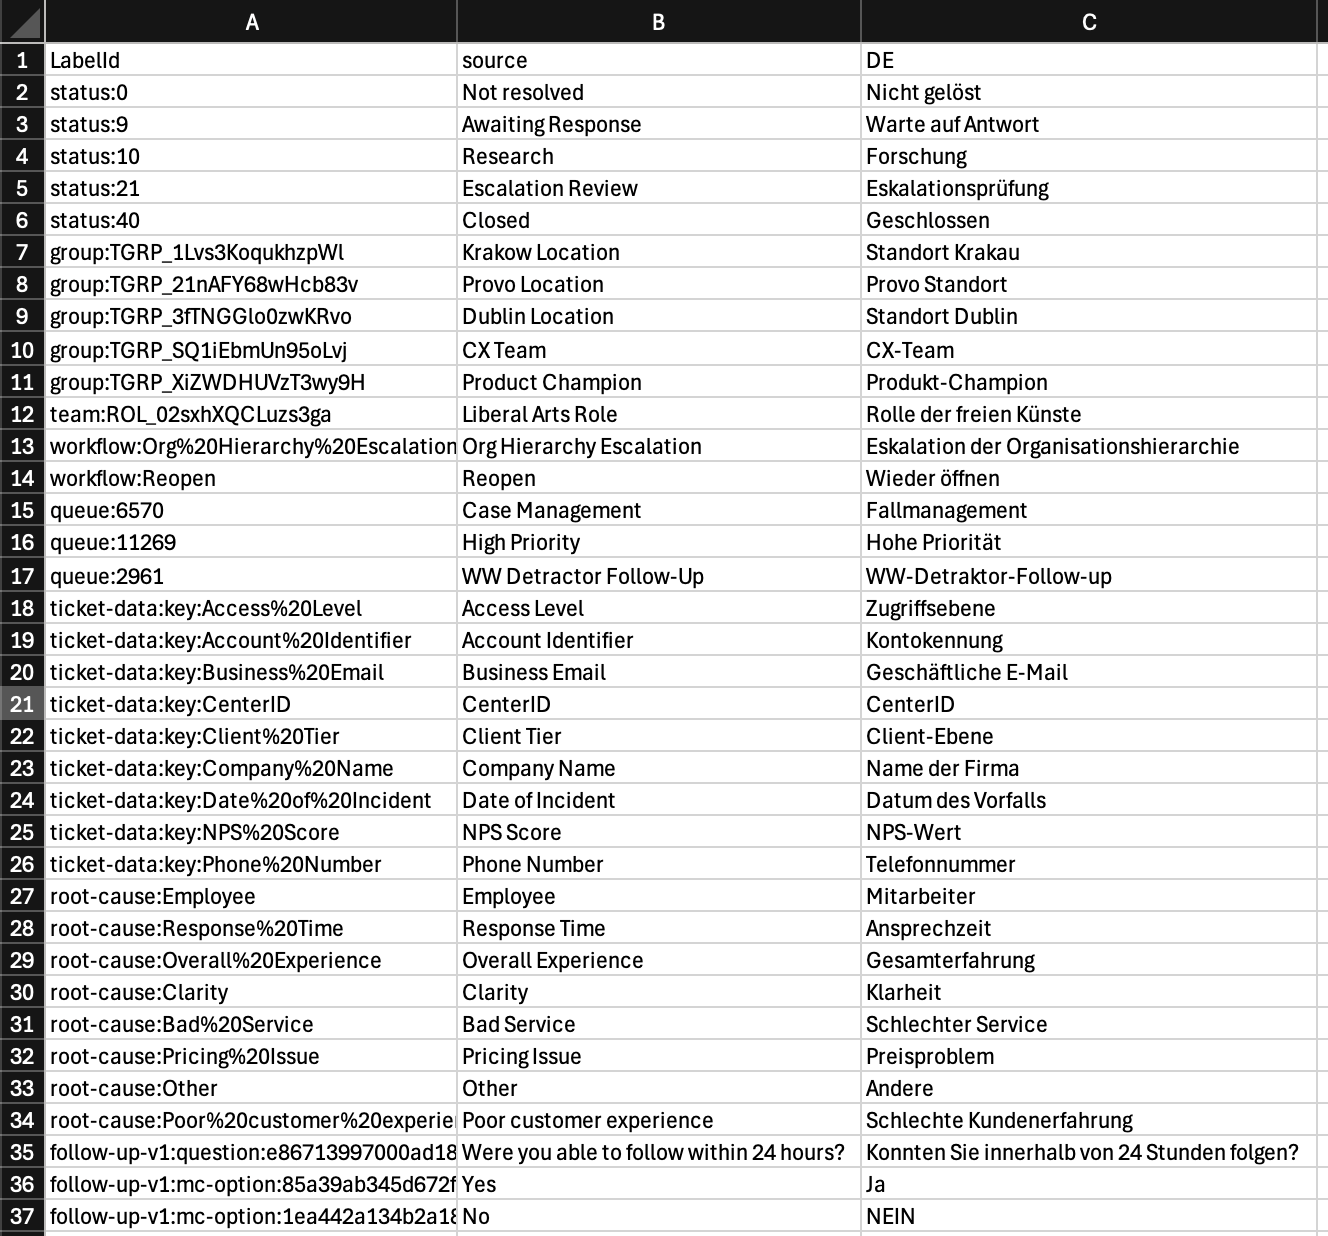
In the screenshot above, you’ll notice IDs often start with helpful identifiers, like “Status,” “group,” or “queue,” to identify the type of field.
- File encoding: Files must be CSV UTF-8 encoded or TSV.
- File size: The maximum file size you can upload is 10MB.
- Required headers / columns: Do not remove the LabelId or source headers, and do not erase any information in those columns.
- Language codes: Each language in your file must have the language code as its header. For example, if the columns are DE, FR, and IT, those columns represent German, French, and Italian, respectively. You can see this language code next to the translation progress.
- Incomplete translations: You can upload partial translations. However, you have to format them in a specific way.
- Columns must be completely filled out for every field you include.
- If you’re not translating a field, you must delete its entire row. If a field isn’t translated, it will just show the source (original version).
- You can remove entire columns if you’d like to just translate one language at a time. See more on individual language uploads.
- CSV / TSV formatting: For general file upload troubleshooting and common formatting solutions, see CSV & TSV Upload Issues.
Viewing Tickets in Another Language
What language tickets appear in depends on the user account language set. If you want to test different languages, try changing your user account language and viewing the Tickets page.
If tickets aren’t available in a language, they’ll default to the original, untranslated version.
Removing Ticket Languages
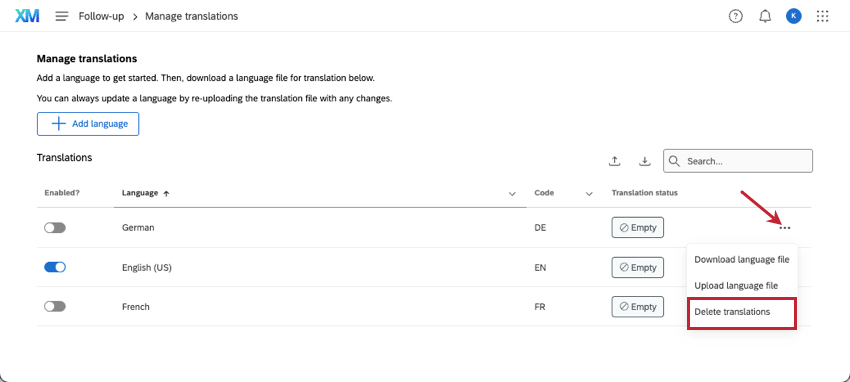
To remove a ticket language, we recommend disabling it. This way you can reverse your decision later if needed by reenabling the language.
However, you can also permanently remove a language from your tickets by clicking the 3 dots next to it and selecting Delete translations.
Translation Progress
As translations upload, you’ll see a Translation status change on the screen.
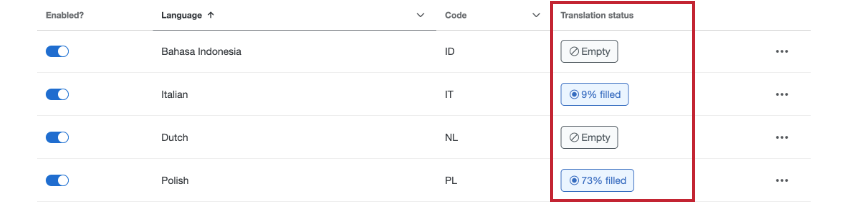
This field also changes as new fields are added to tickets. For example, if your tickets are completely translated in Italian, but someone brings over new ticket data or adds a custom status, the Italian translation may suddenly become 97%. This can be a good way to check for updates, especially if there are multiple admins running the tickets program.