
Redact and Substitute Data Task
Suite
Customer Experience
Employee Experience
Strategy & Research
Product
Qualtrics
What's on this page
About the Redact and Substitute Data Task
The Redact and Substitute data task is a transformation task that can be added to an ETL workflow. The task will redact or substitute data from an extractor task using your redaction or substitution rules. You can choose to redact or substitute specific fields within your data source, or all fields. This can be useful if your loader task is bringing sensitive data into your workflow that you’d like to protect, like customer contact or payment information.
Qtip: Voice data cannot be used with the Redact and Substitute Data task.
Warning: This task does not automatically recognize and redact PII. If you set up a task to redact or substitute a field containing PII, keep in mind you must manually account for all potential forms of PII in this field when setting up your task configuration. Any PII that does not match the criteria set up in your redaction or substitution rule will still be visible.
Setting Up a Redact and Substitute Data Task
Click the navigation menu in the top-left corner.
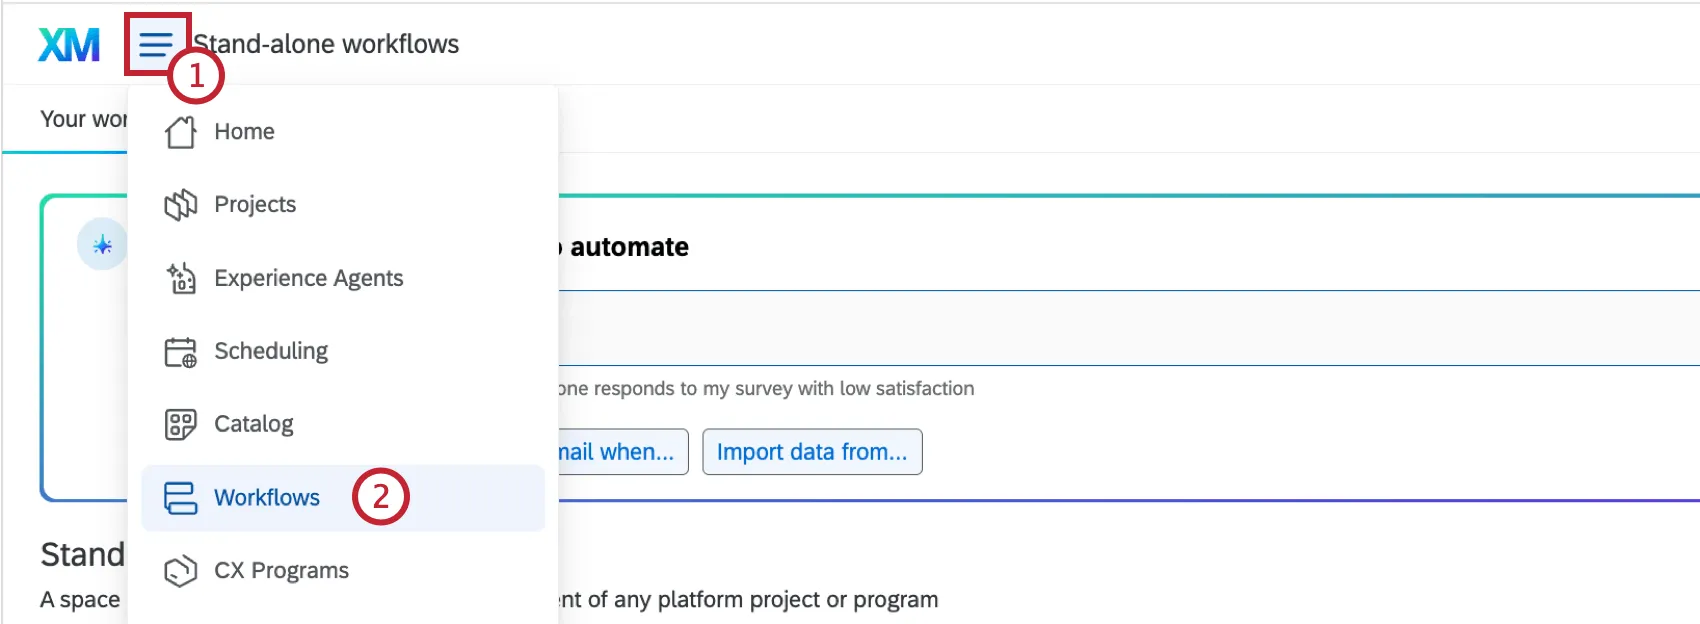
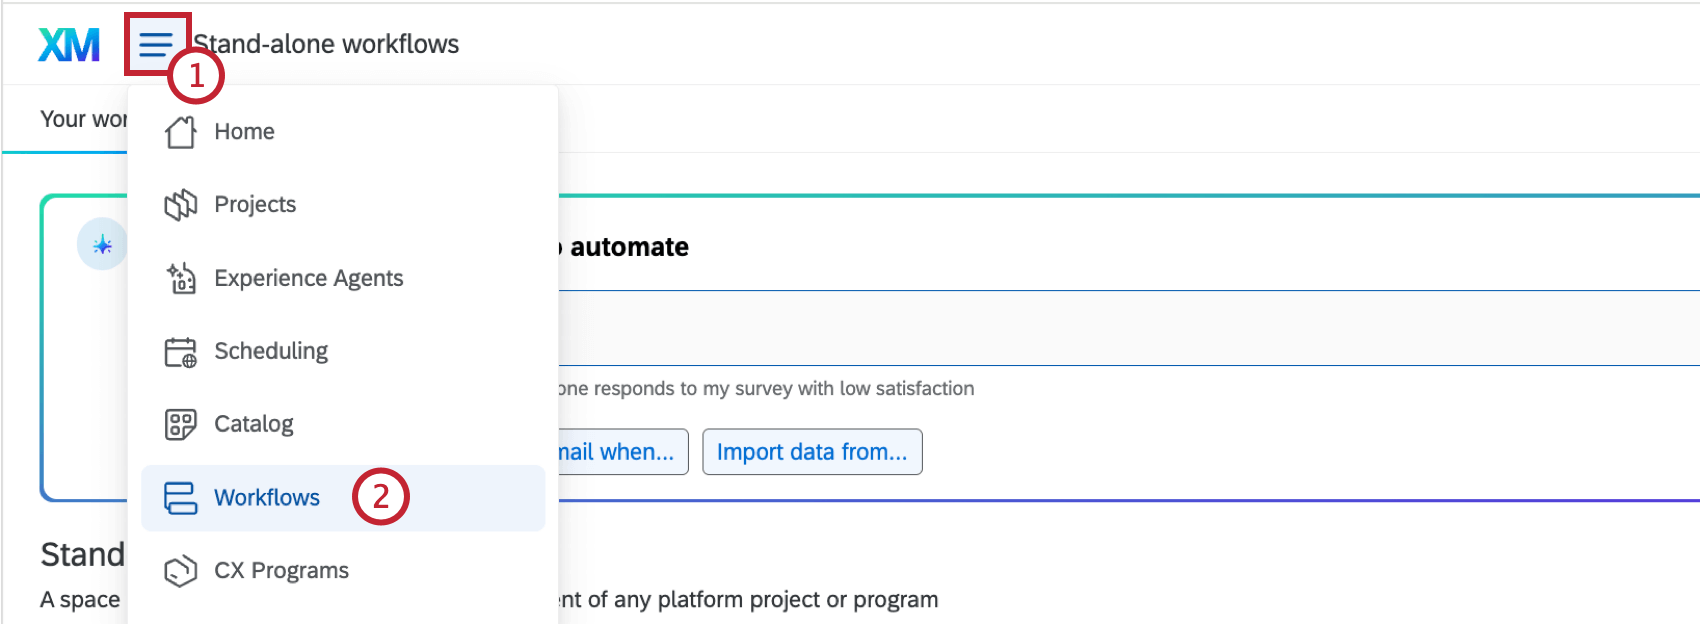
Choose Workflows.
Navigate to an existing ETL workflow, or create an ETL workflow with an extractor task and a loader task.
Click the plus sign (+) underneath your extractor task.
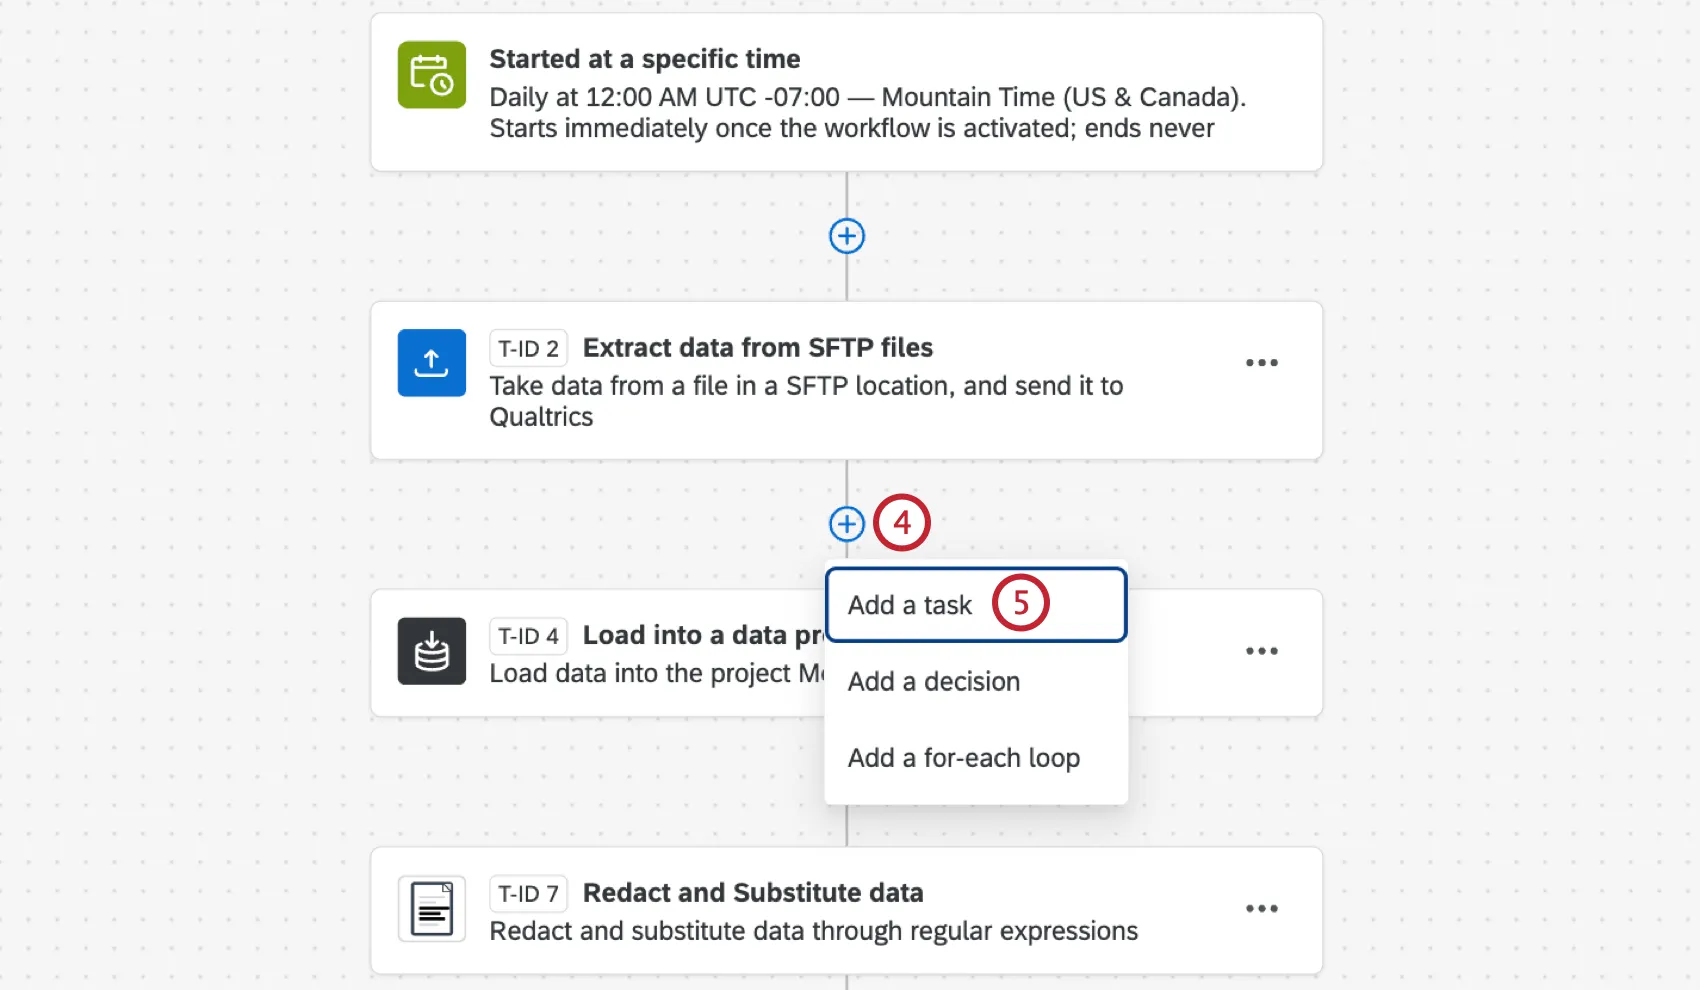
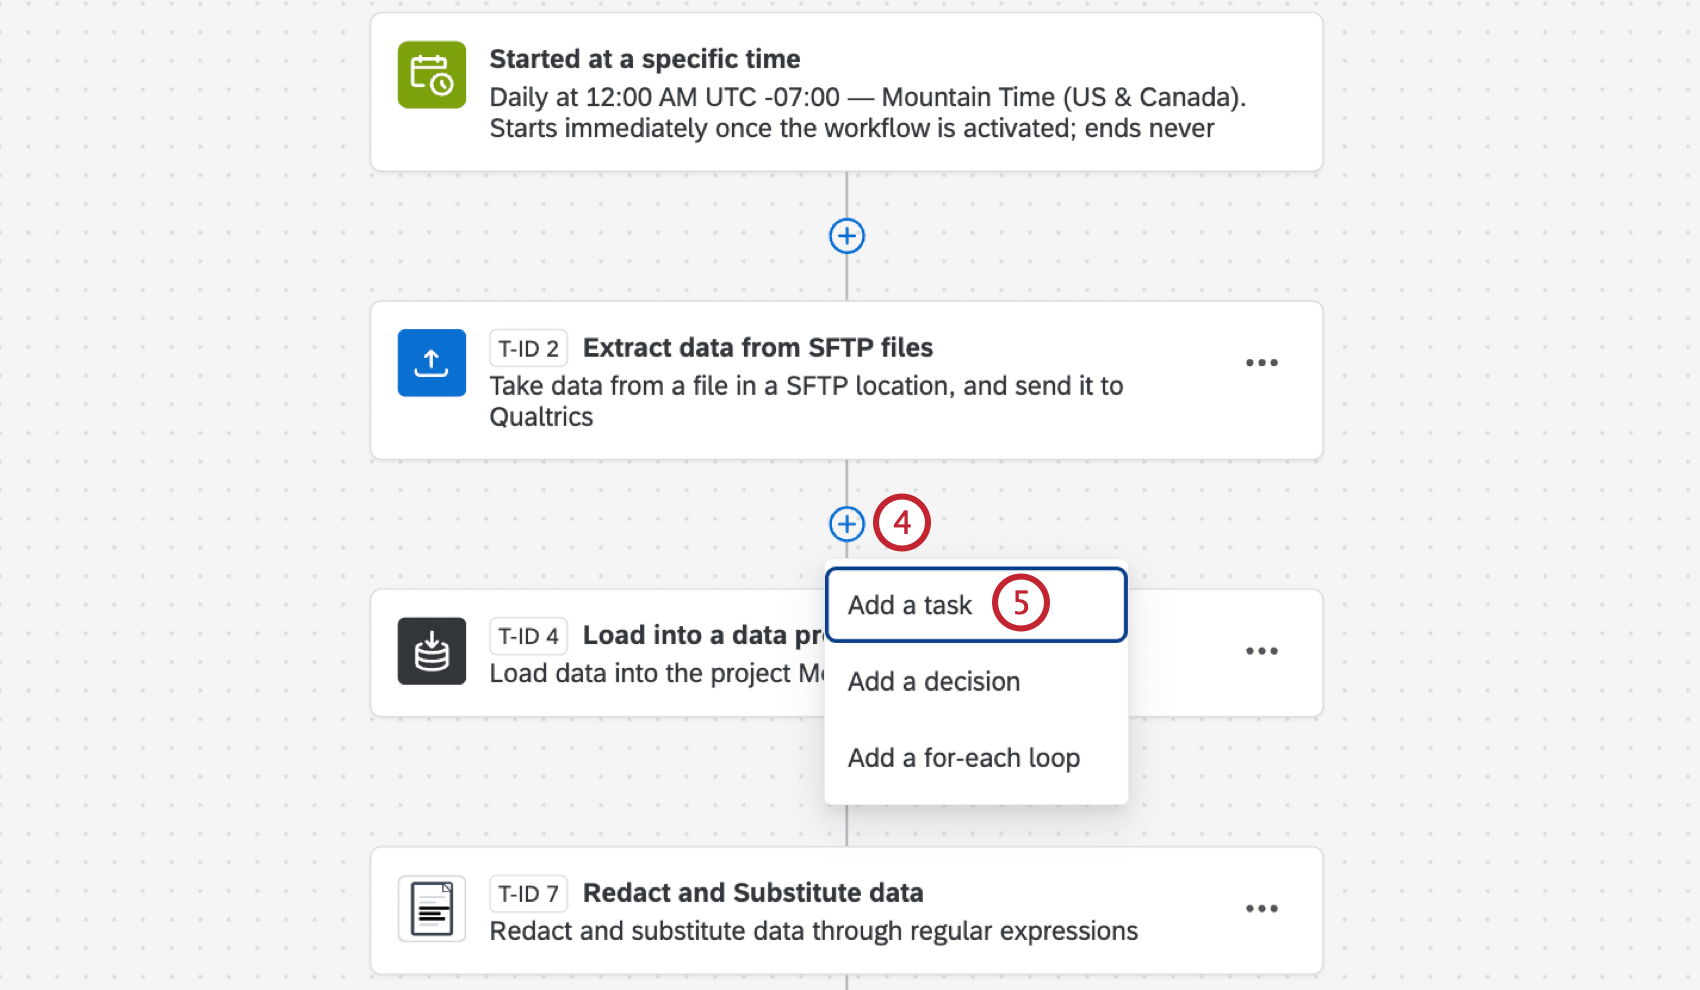
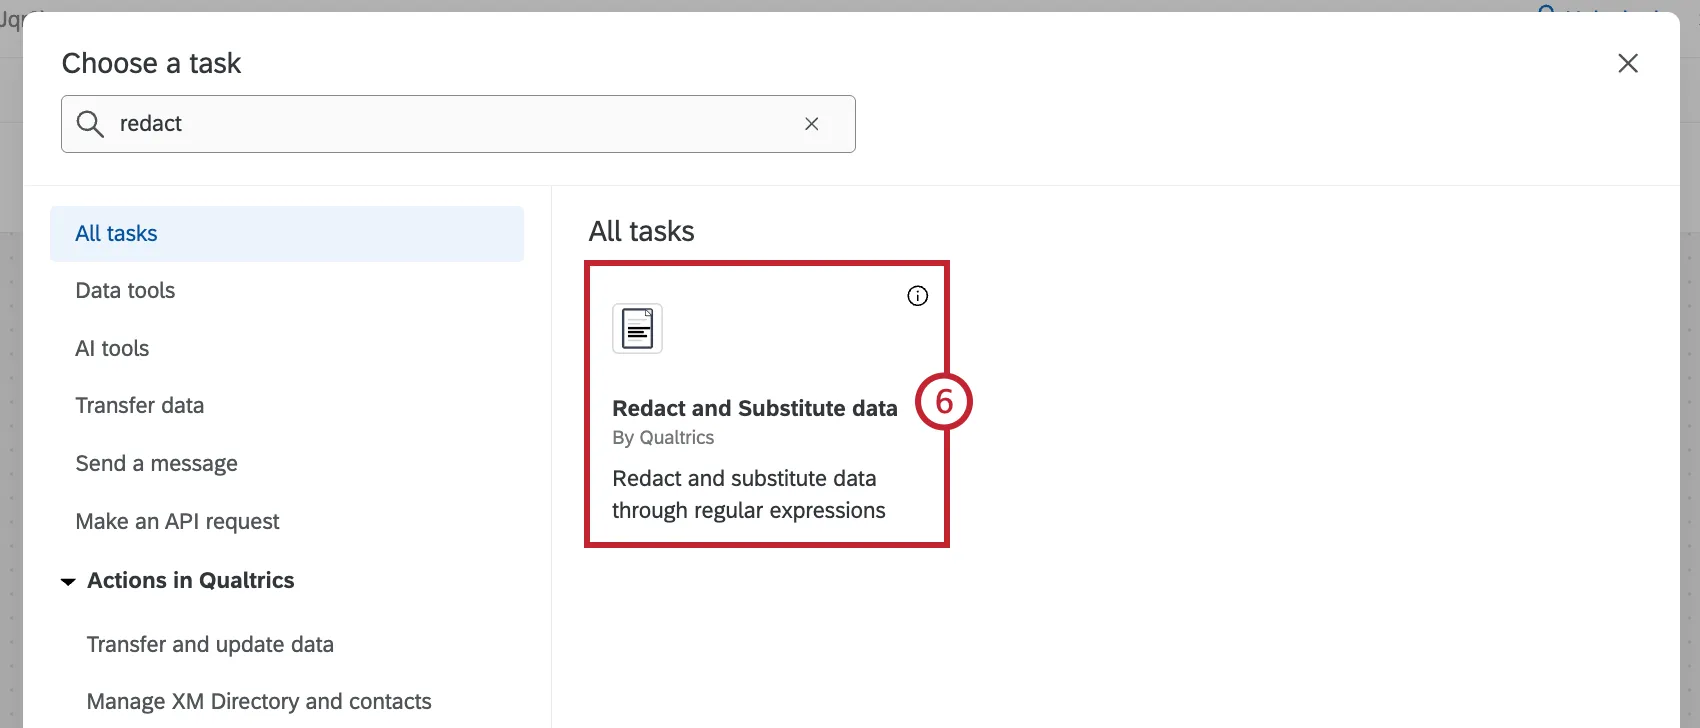
Select Add a task.
Select Redact and Substitute data.
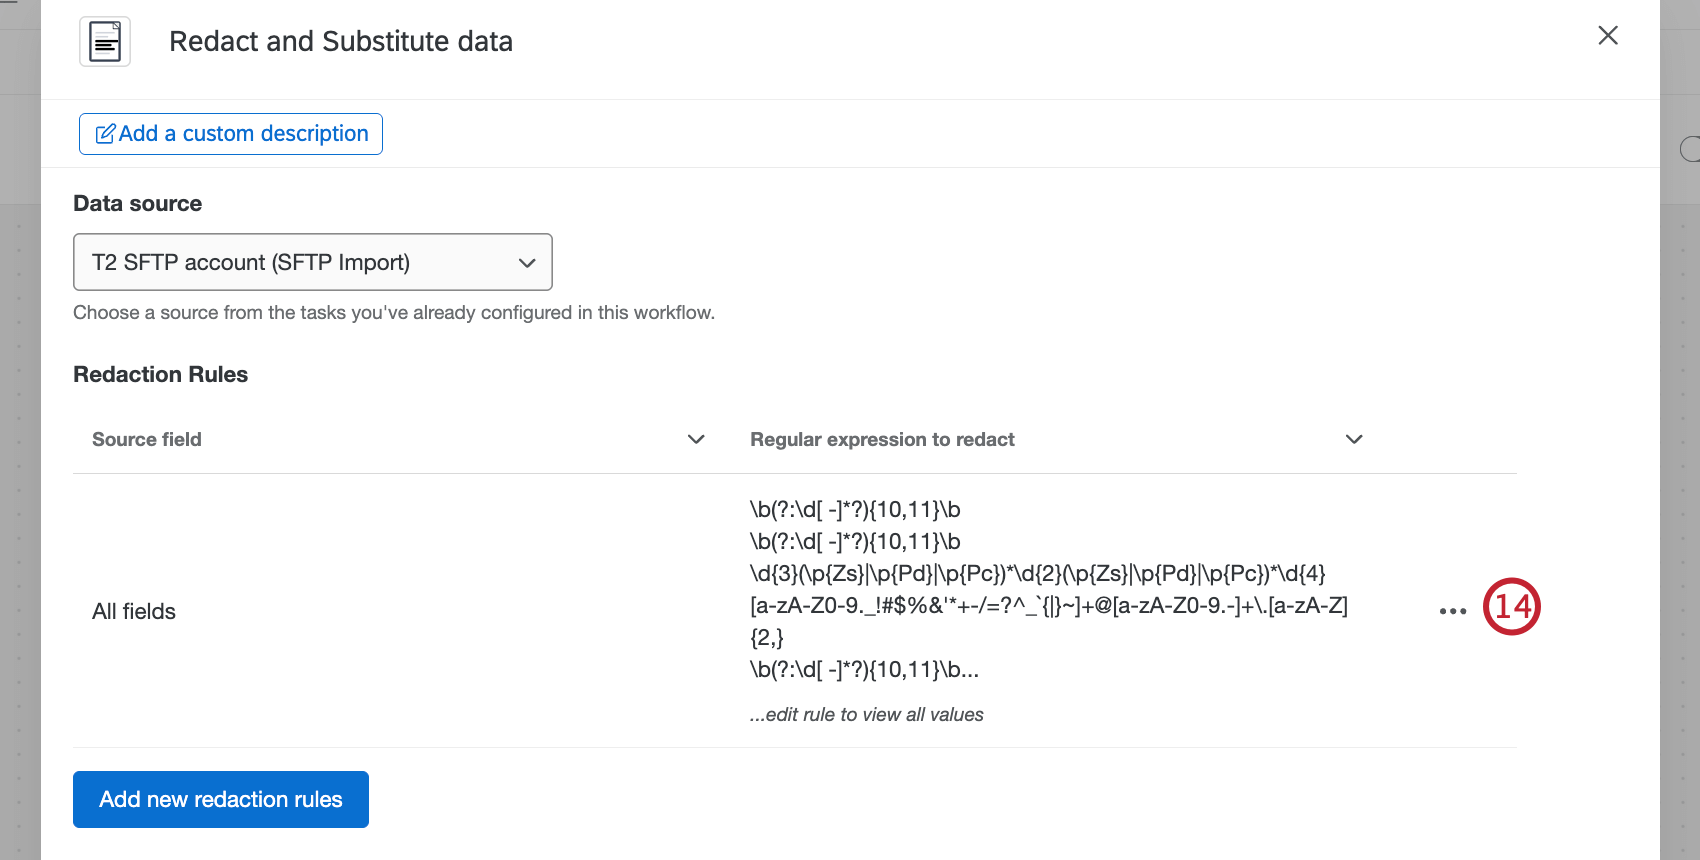
Select a data source from the tasks you’ve already configured in the workflow.

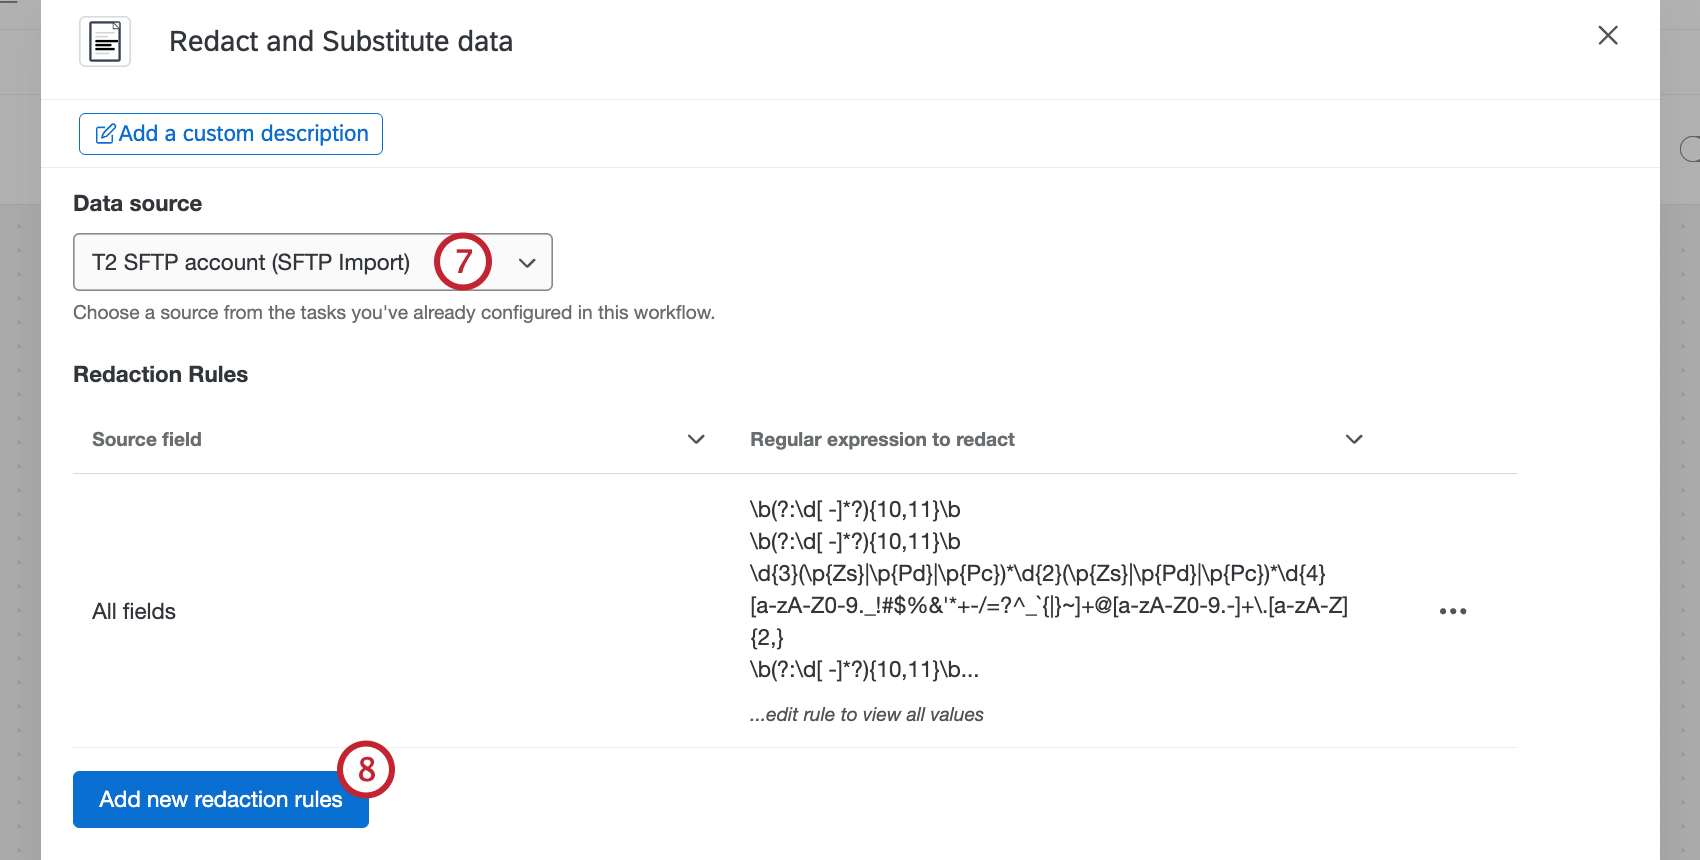
Click Add new redaction rules to add a redaction rule.
Use the dropdown to select a field or fields to redact from. You can also select Redact all fields to create a rule that redacts every field in your data source.


Qtip: Redacted fields will be replaced with ‘XXXX’.
To manually enter your redaction rule, input the regex(es) to redact in the text box. You must use RE2 regular expression syntax, and multiple regexes must be separated by line breaks.
To upload your redaction rule, select Choose file and upload a text file with your regex(es).
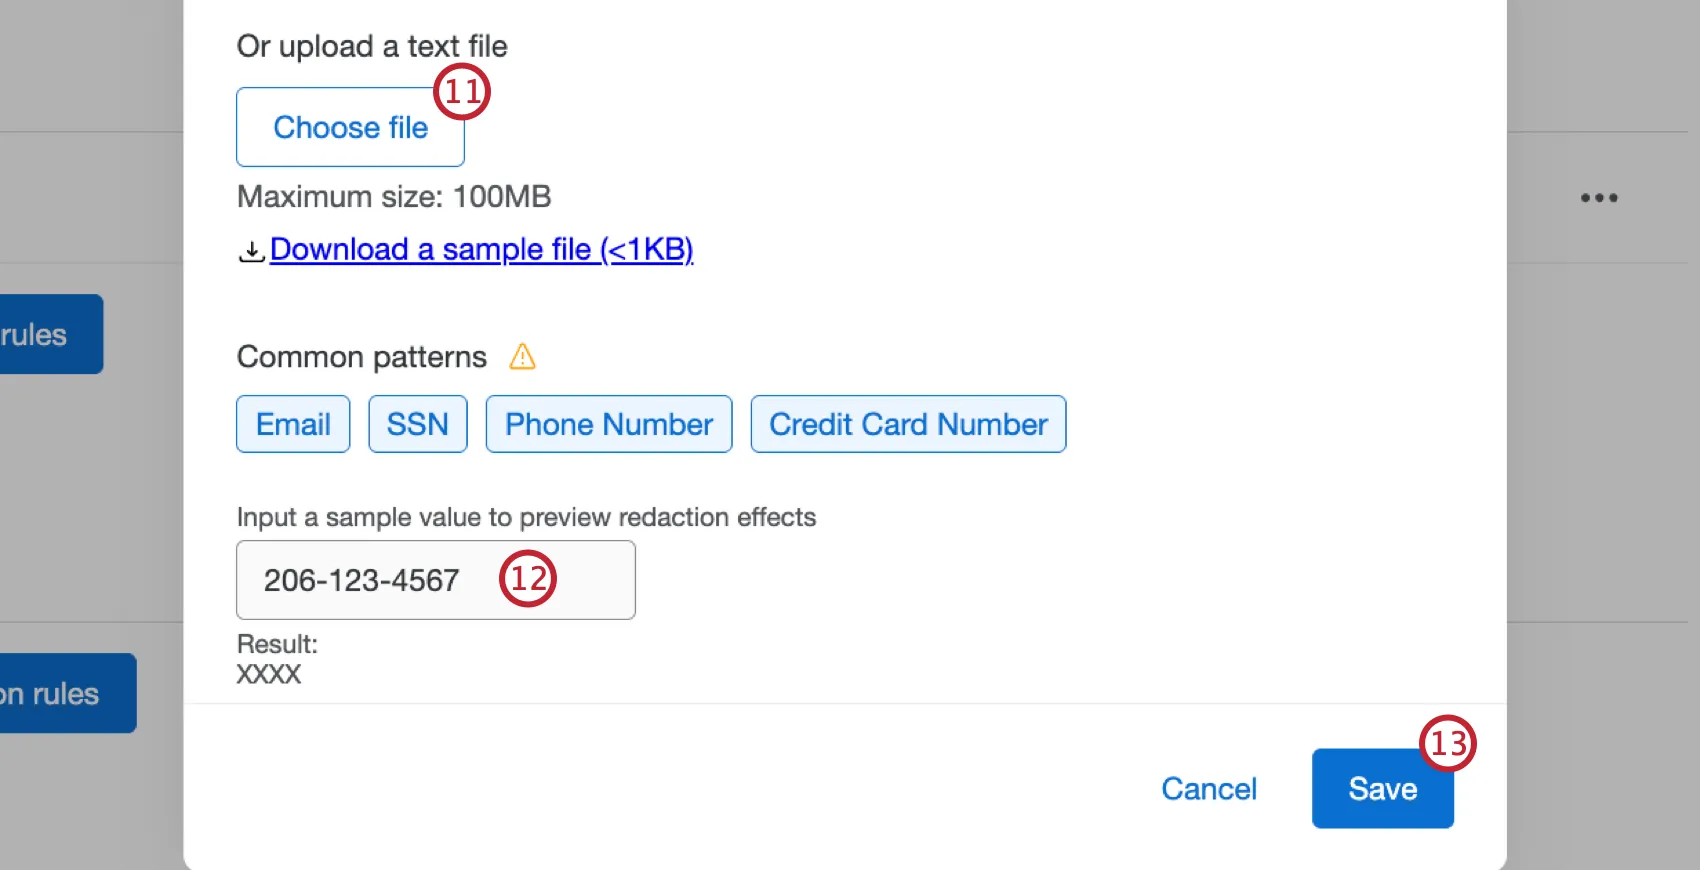

Qtip: Select Download a sample file to download a sample text file with regex.
To test your redaction rule, enter a sample value in the text box. You can then preview what the result will be after your redaction rule is applied.
Once you’ve finished configuring your rule, click Save.
To add more redaction rules, repeat steps 8-13. You can also click the 3 horizontal dots to edit or delete an existing rule.

Click Add new substitution rules to add a substitution rule.
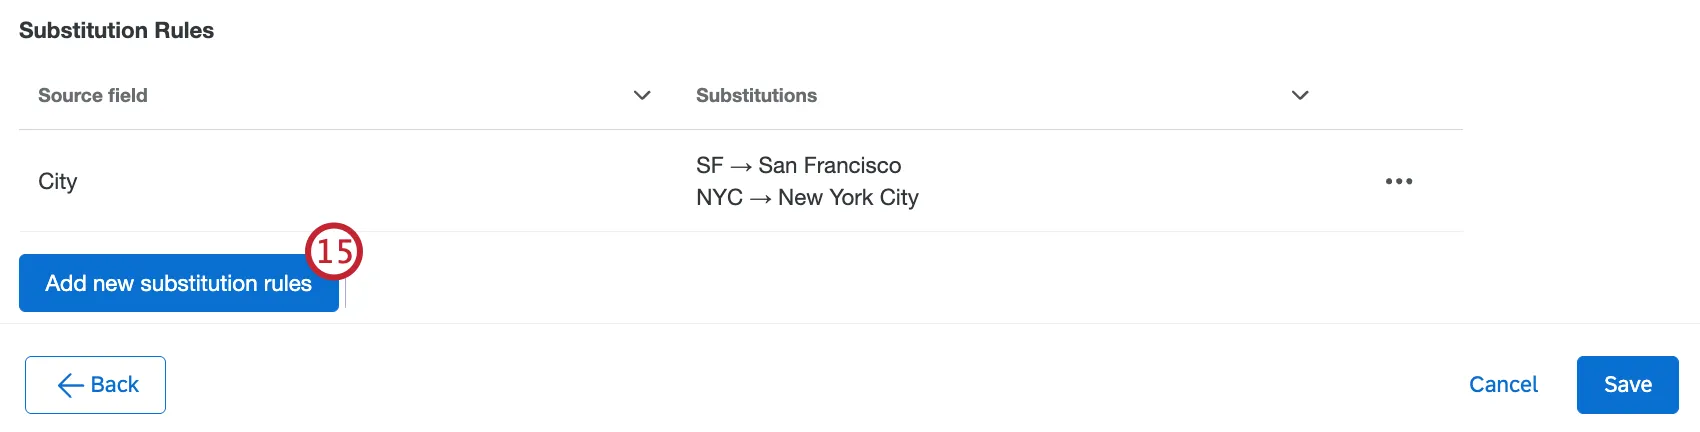

Use the dropdown to select a field or fields to substitute from. You can also select Substitute all fields to create a rule that substitutes every field in your data source.
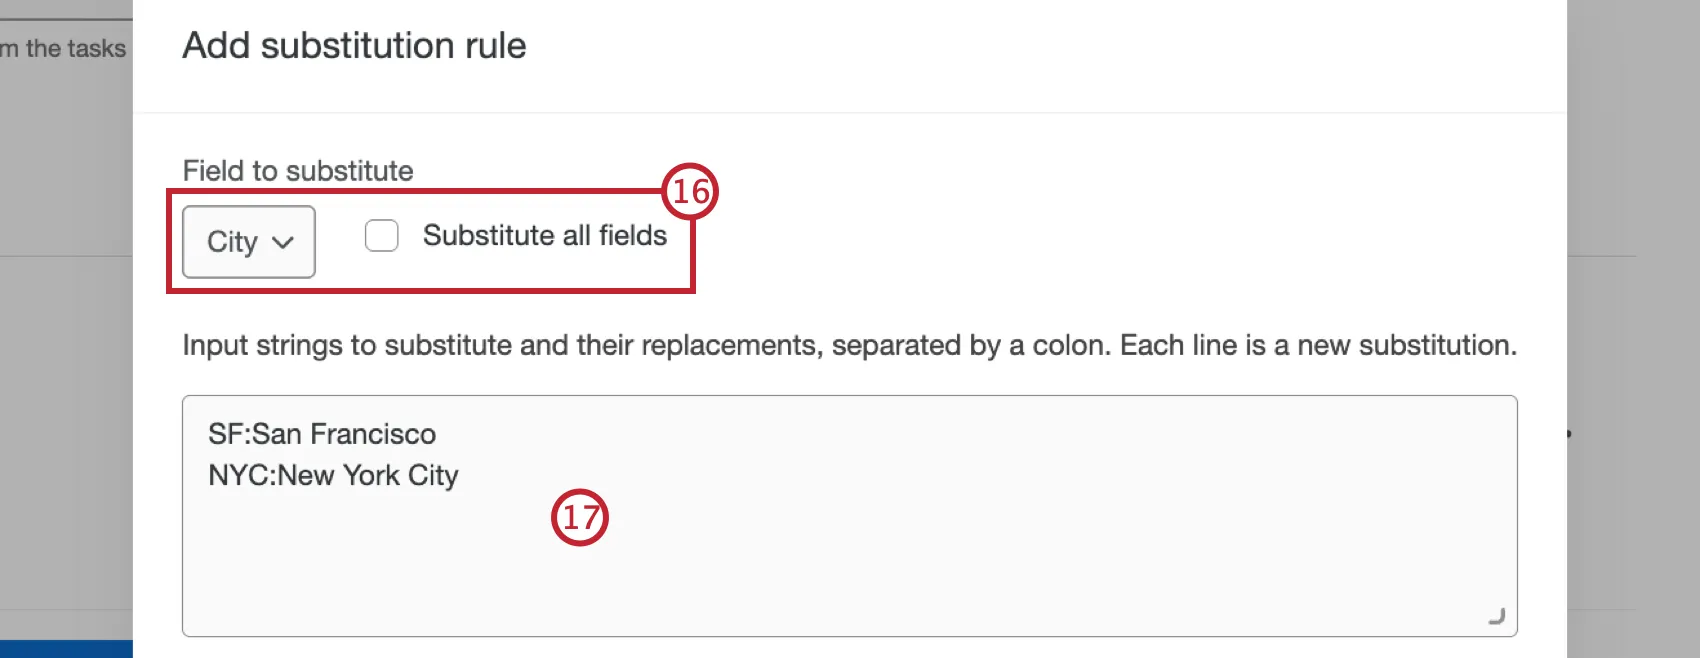

To manually enter your substitution rule, input the strings to substitute and their replacements in the text box, separated by a colon. Each line is a new substitution.
To upload your substitution rule, select Choose file and upload a text file with your substitutions.

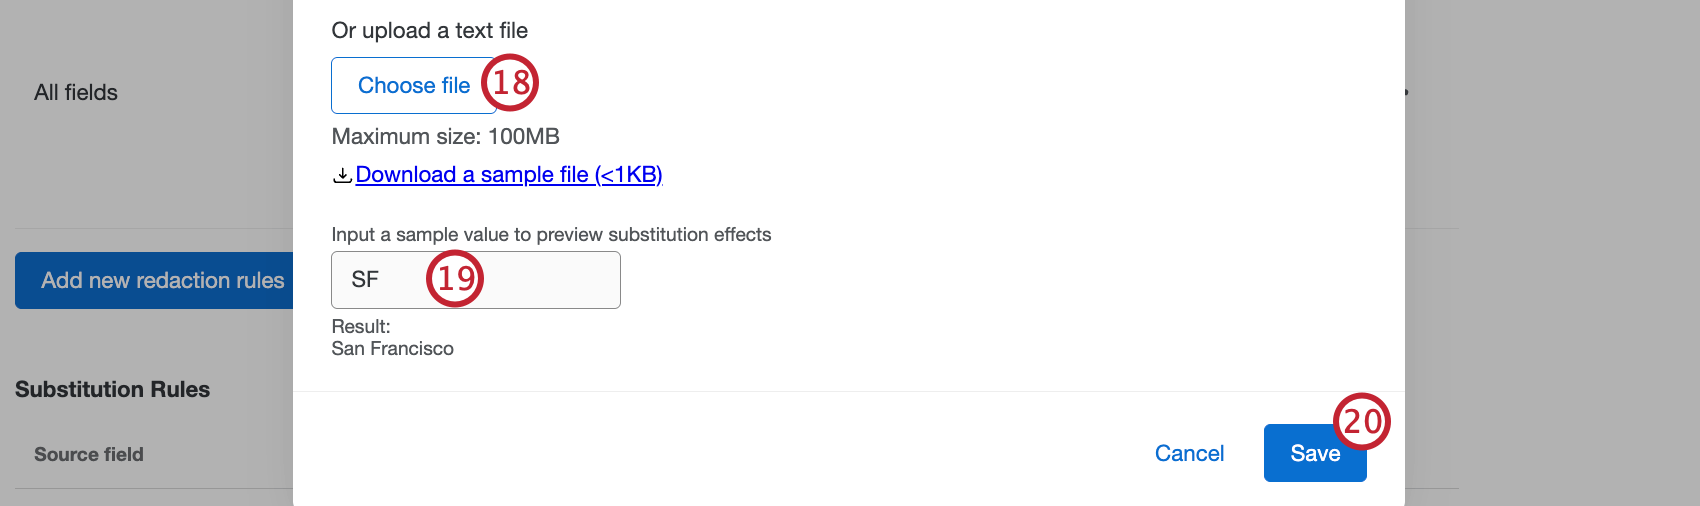
Qtip: Select Download a sample file to download a sample text file with regex.
To test your substitution rule, enter a sample value in the text box. You can then preview what the result will be after your substitution rule is applied.
Once you’ve finished configuring your rule, click Save.
To add more substitution rules, repeat steps 15-20. You can also click the 3 horizontal dots to edit or delete an existing rule.
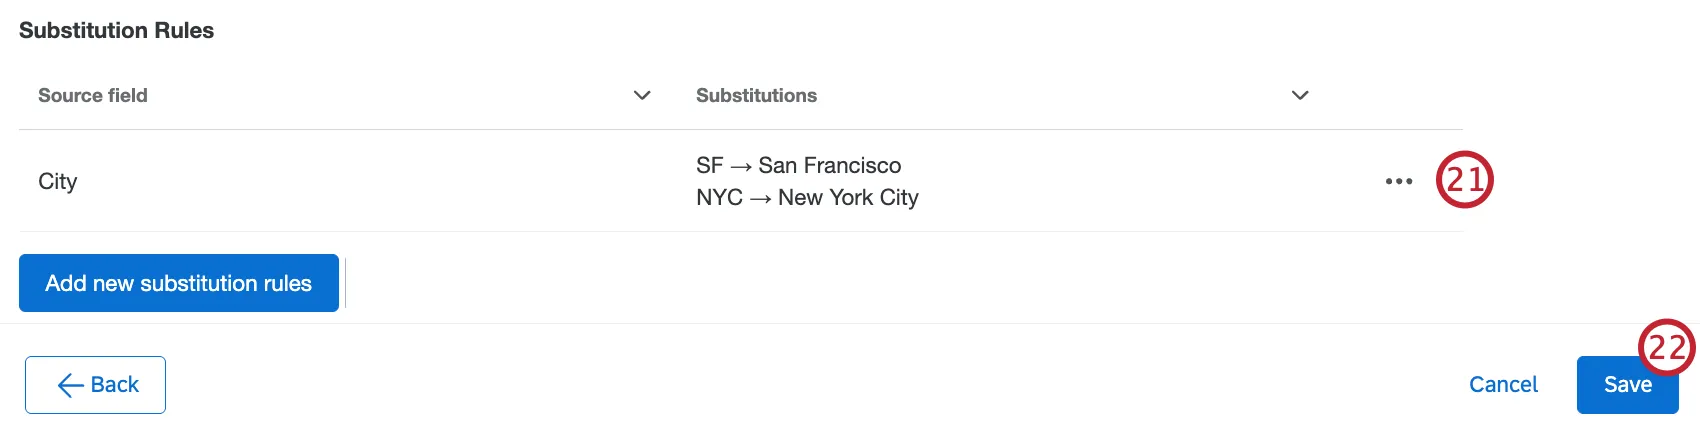

When you’re finished adding redaction and substitution rules, click Save.
That's great! Thank you for your feedback!
Thank you for your feedback!