
Experience ID Segments Event
What's on this page
About Experience ID Segments Events
As contacts are added to or removed from your segments, you can automatically set off different tasks, such as sending notifications (such as emails or Slack messages), creating tickets (in Qualtrics, Freshdesk, or elsewhere), and much, much more. You can also set workflows when a contact opts into or out of a segment.
Example: Send a welcome message with a survey invitation whenever a customer becomes a member of a high value segment.
Example: Notify your customer escalation team over Slack or email whenever a contact is added to a segment filled with customers at risk of leaving the company.
Creating a Segment
Before you set up workflows based on segments, you need to create a segment. See XM Directory Segments for detailed steps.
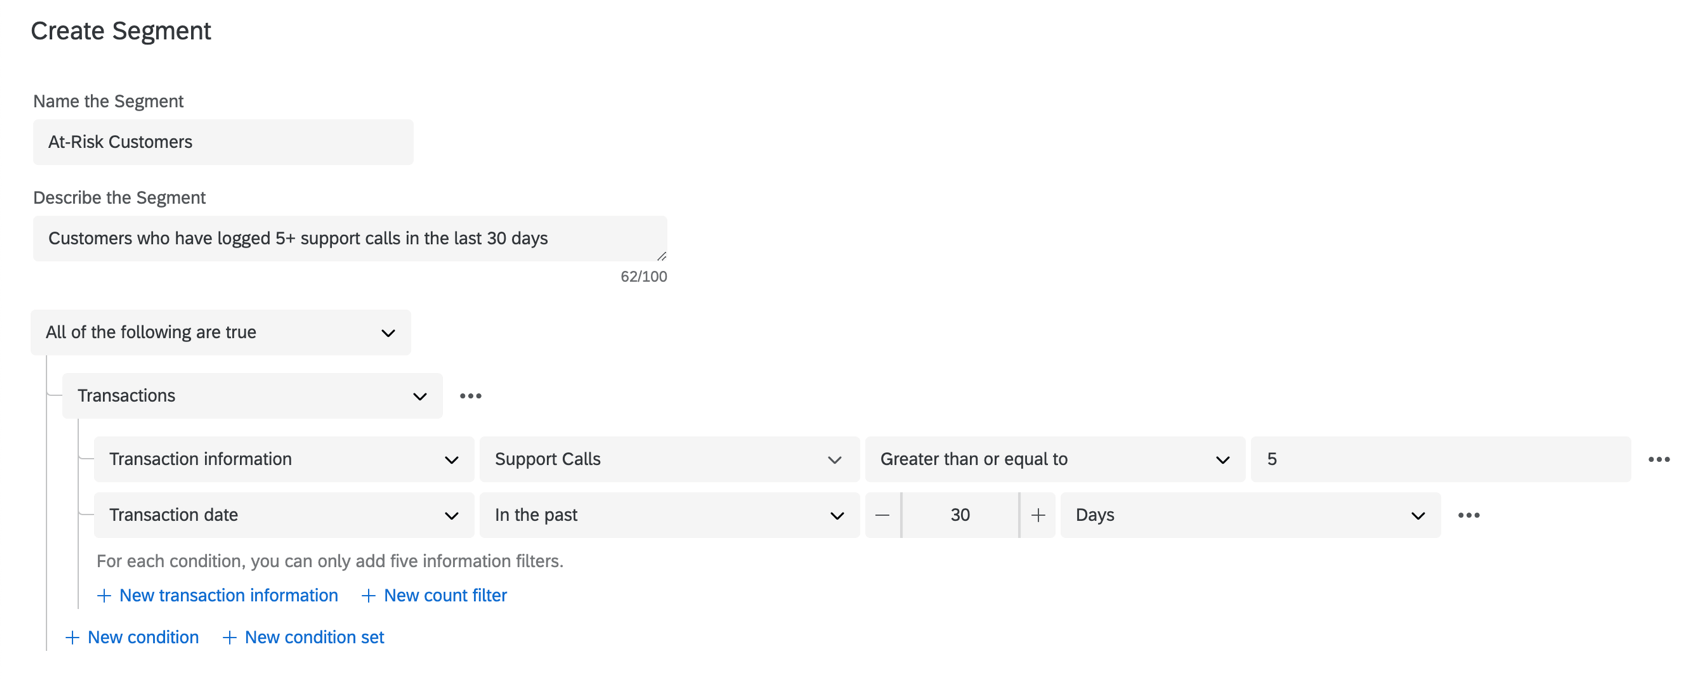
Example: Think carefully about what you want to use your segments for and the information available to you. For example, you could create a segment called “At-Risk Customers” that looks for customers who have had 5 support calls in the past 30 days. You can use transactional data to identify the number of support calls.
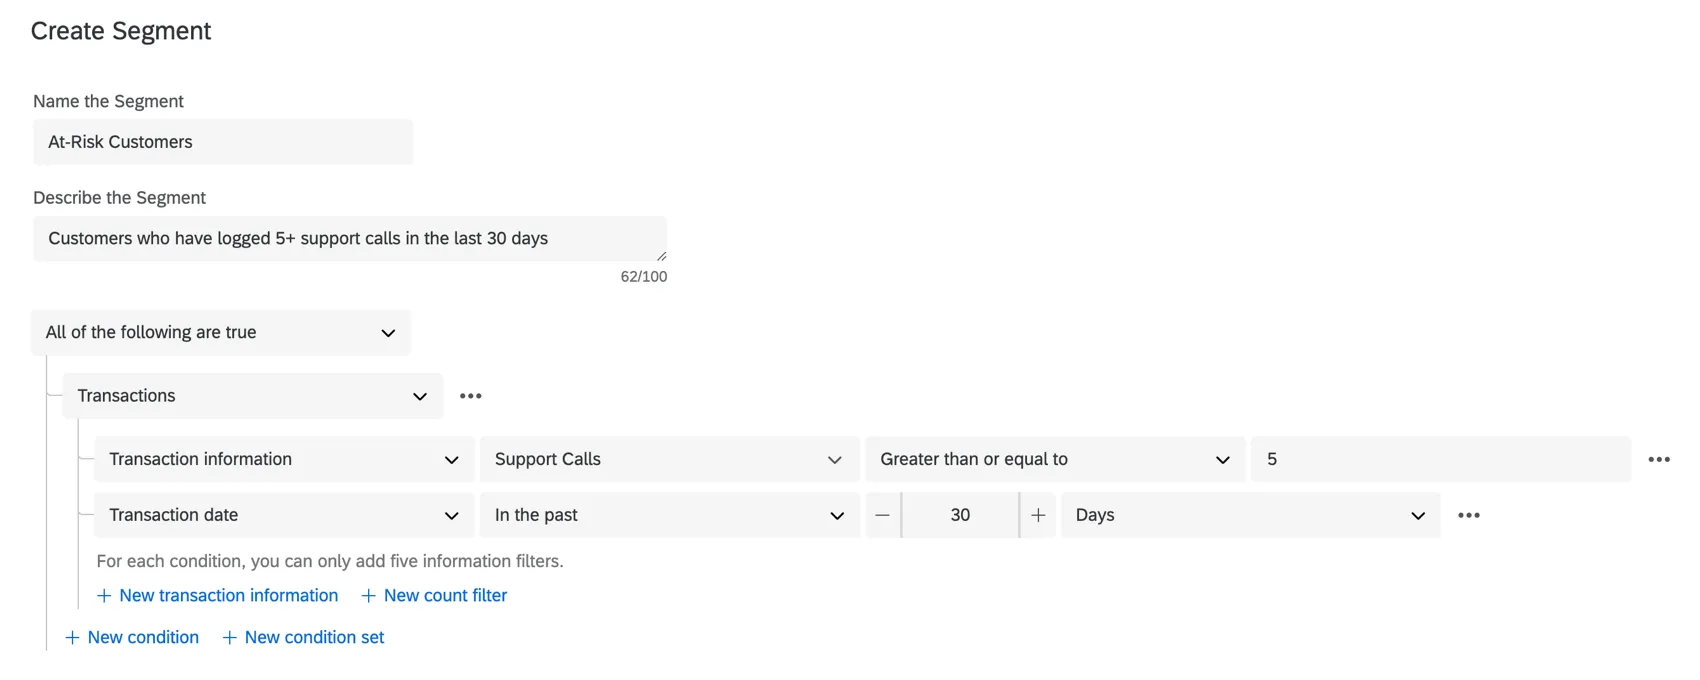
When a new contact is added to this “At-Risk Customers” segment, you can then create tasks for your team. For example, create a Zendesk ticket asking that your team to call the customer as part of a recovery campaign.
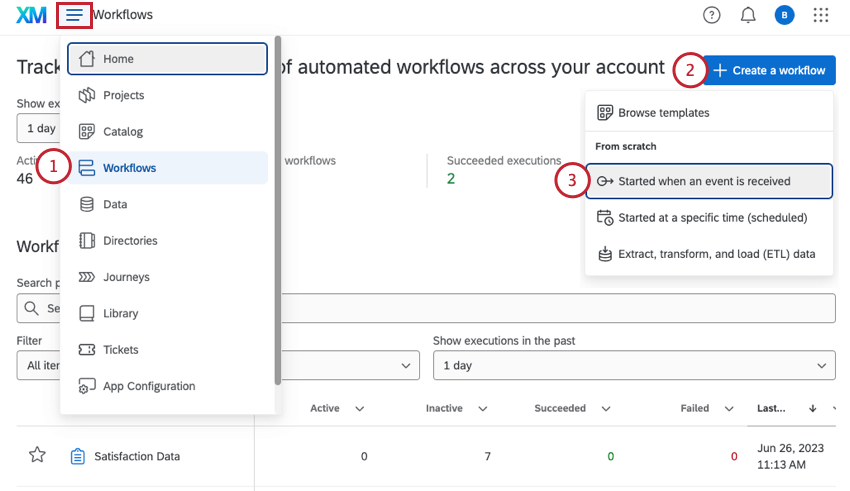
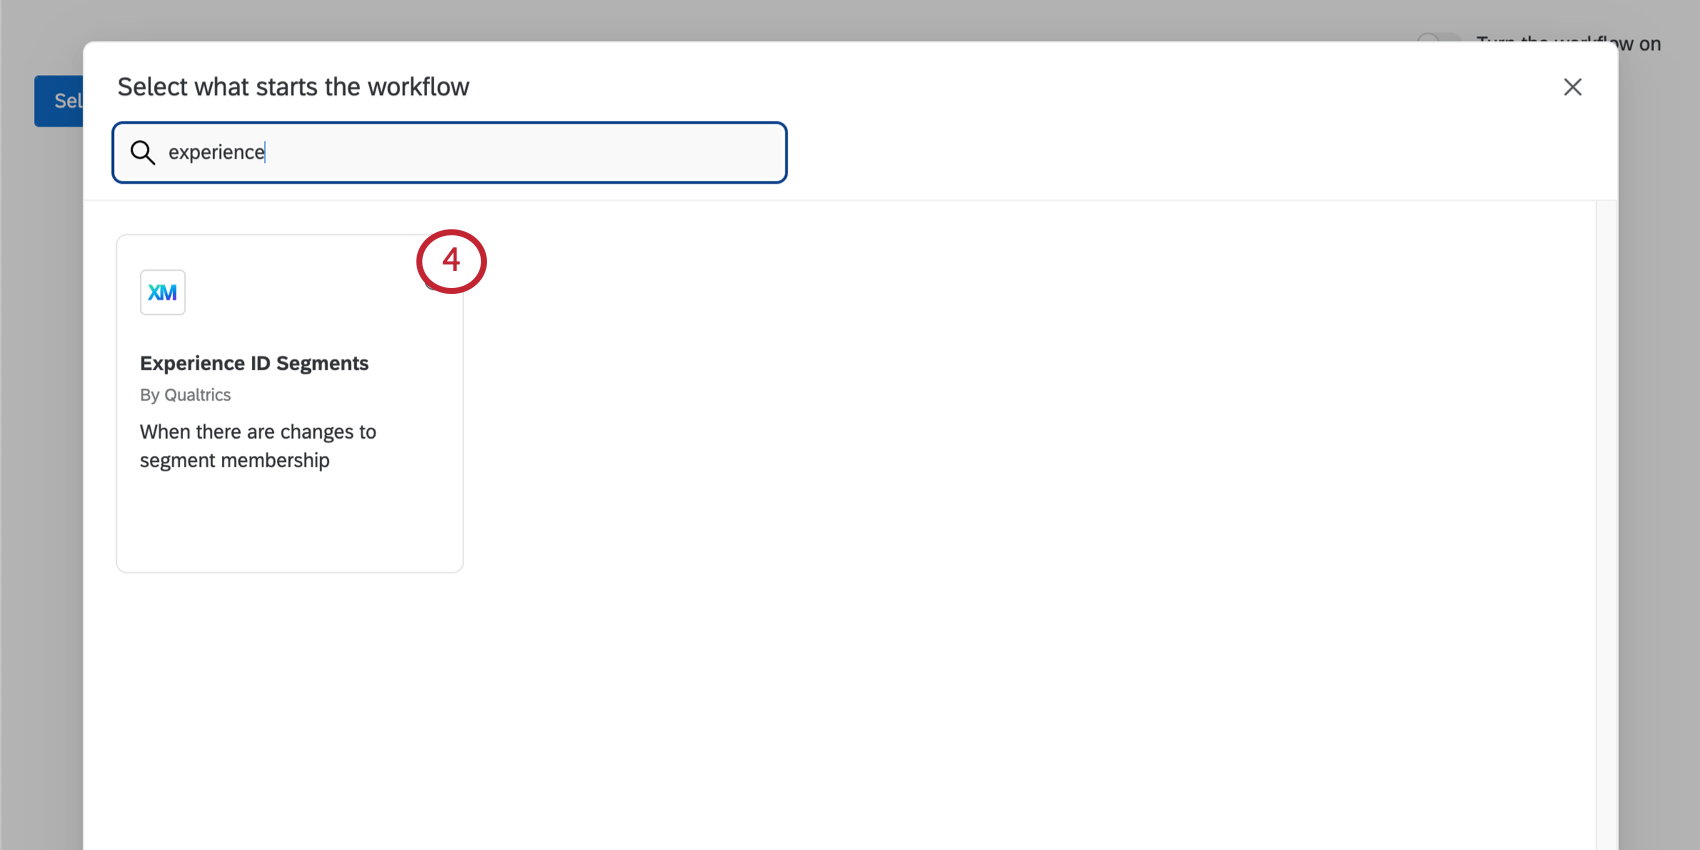
Step 1: Creating an Experience ID Segments Event
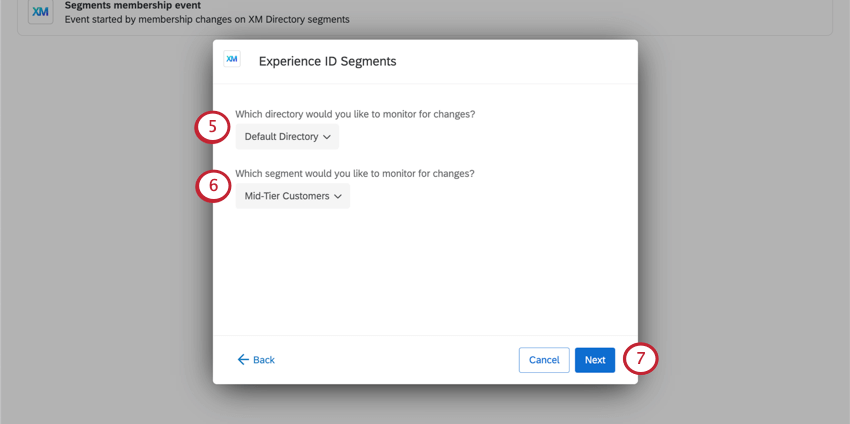
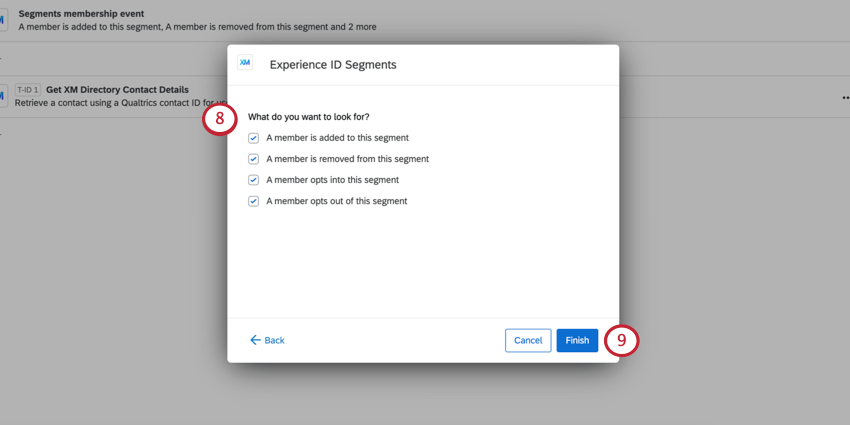
- A member is added to this segment
- A member is removed from this segment
- A member opts into this segment
- A member opts out of this segment
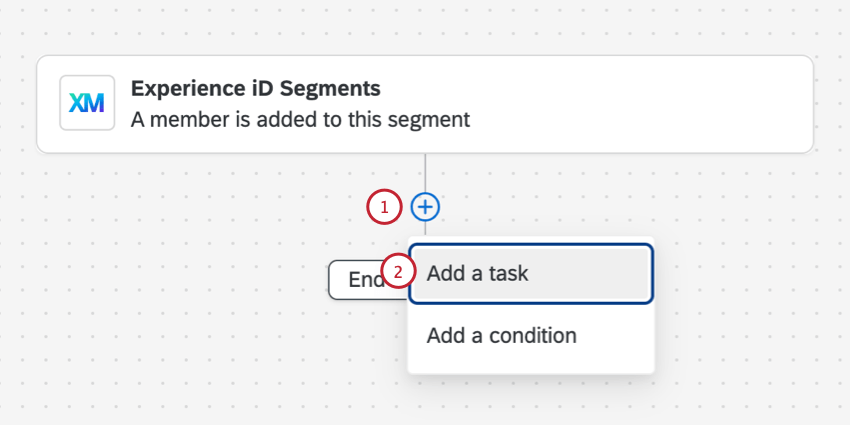
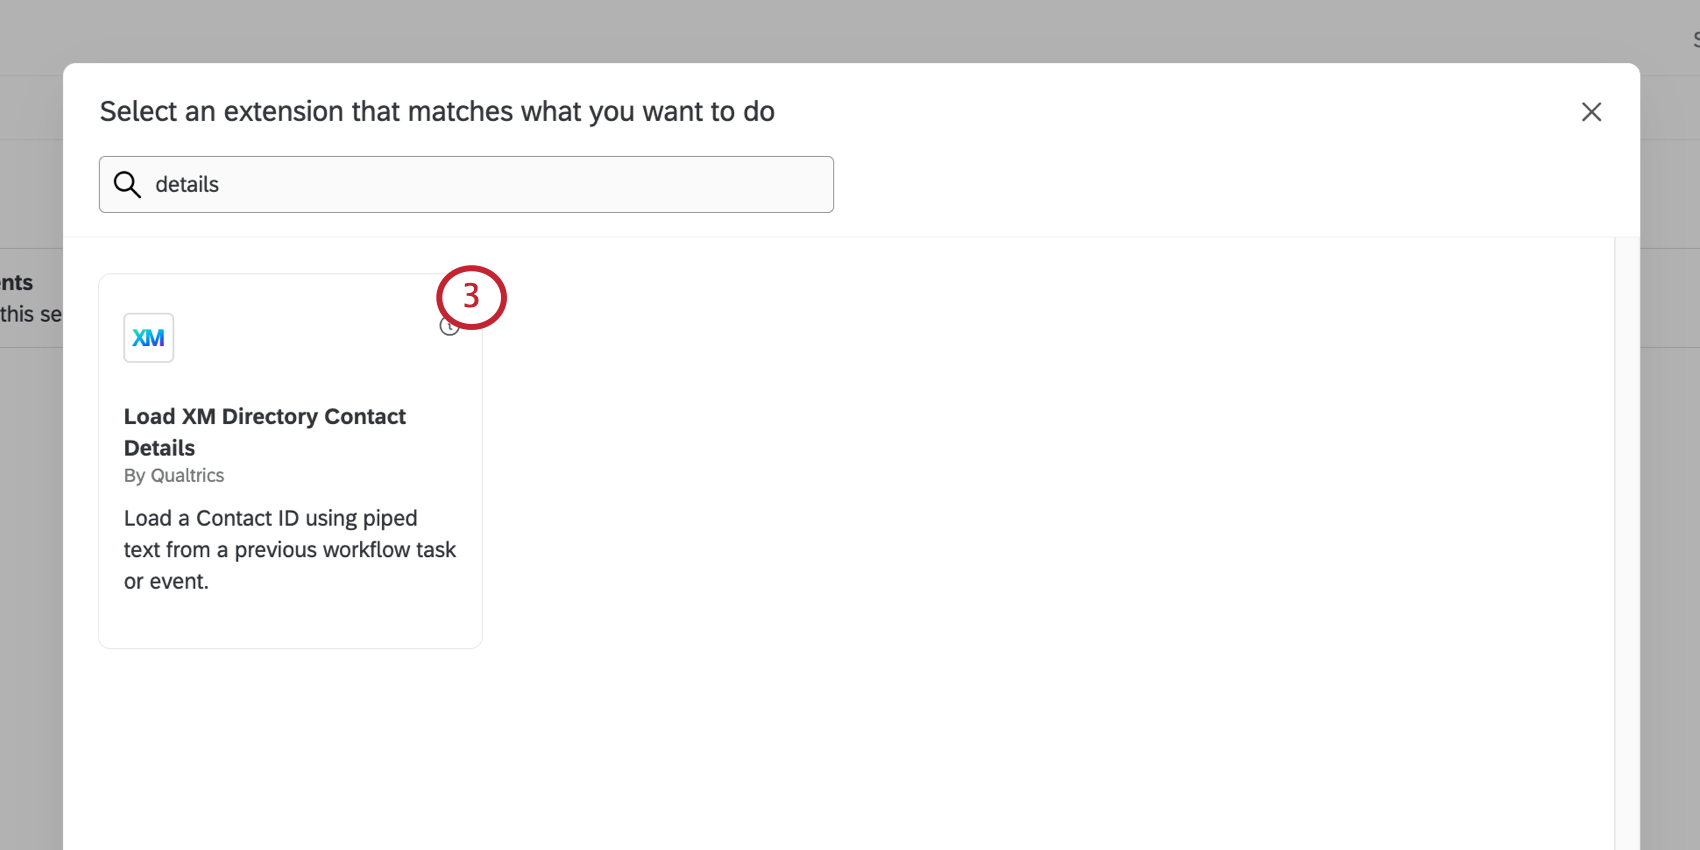
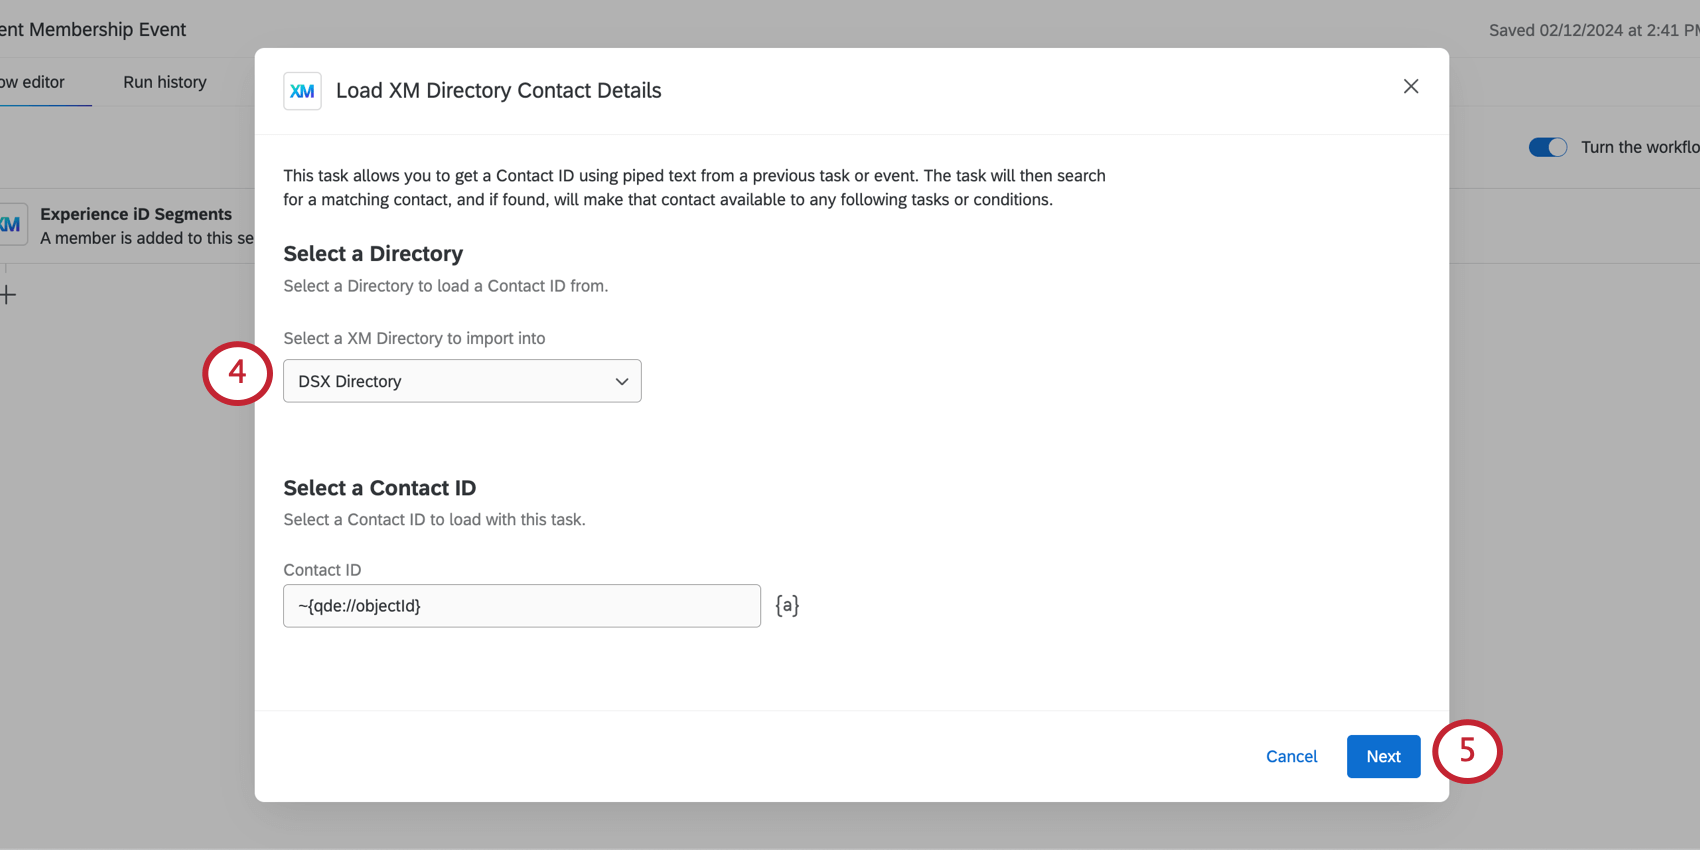
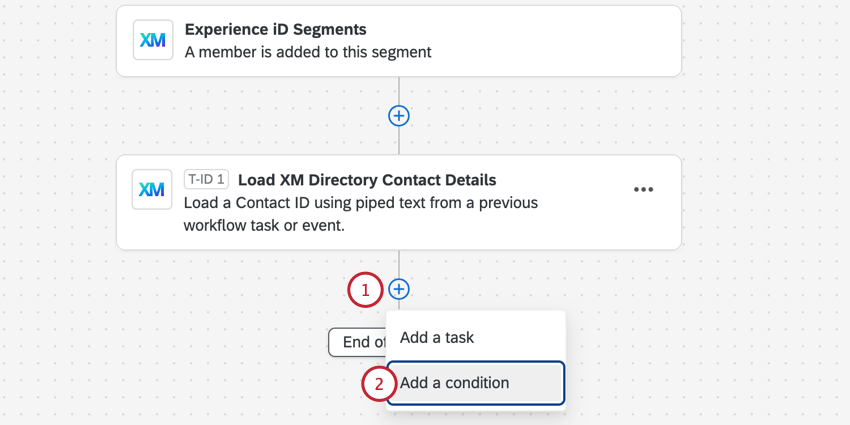
Step 2: Adding a Load XM Directory Contact Details Task
Now you’ll add a task to your workflow called “Load XM Directory Contact Details.” This step is technically optional, but it can be extremely important if you want to do one or both of the following:
- Add conditions to your workflow Example: You only want this workflow to fire if a contact has a phone number filled out, since you’re sending a text message to new members.

- Add piped text to the next task in your workflow Example: You’re sending a message to your segment’s contacts, and to welcome them, you want to address them by name. (Or include other contact-specific information.)
Qtip: The “Load XM Directory Contact Details” task is useful when you have a contact ID but no contact information, because it will find the information associated with that ID. Right now, this task’s only use is with the “Experience ID Segments event.”

Step 3: Adding Conditions to the Workflow
This step is optional, but can help you narrow down the scenarios where your workflow begins.
Example: You only want a workflow to start if a specific contact leaves the segment.
Qtip: If you need help finding the IDs described here, see the Finding Qualtrics IDs support page.
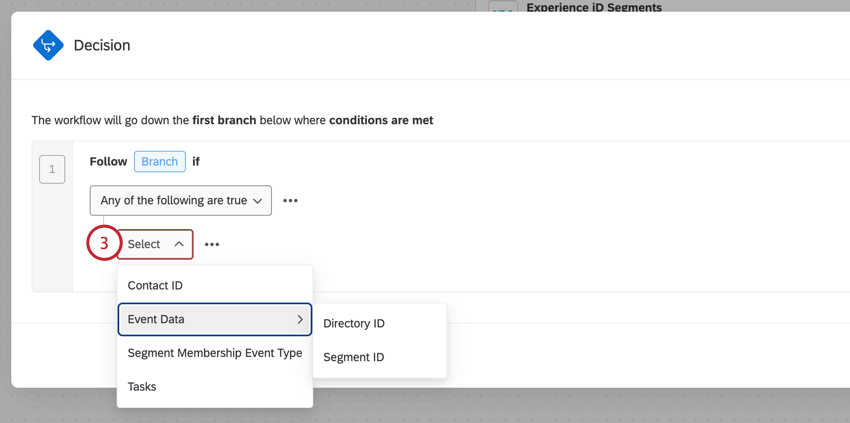
- Contact ID: Qualtrics-generated ID that identifies the individual contact.
- Event Data:
- Directory ID: Qualtrics-generated ID that identifies the directory. Also known as a Pool ID.
- Segment ID: Qualtrics-generated ID that identifies the segment.
- Segment Membership Event Type: Specify the membership event types that should be included or excluded in these conditions. This can be helpful if you’ve selected multiple types segment membership change and want something different to happen for each one.
- Task: Select a previous task, such as the Load XM Directory Contact Details task you just created. This option is helpful if you want to base conditions on other contact details you pulled, such as first name, language, and more.
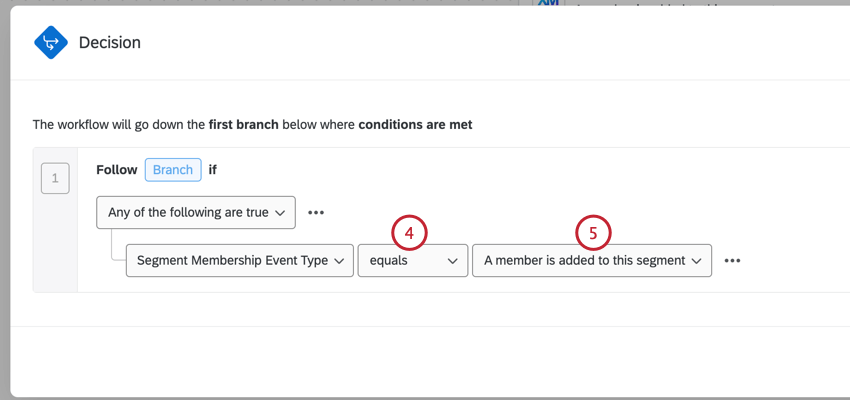
Qtip: If you are basing your value on an ID, you will probably only use the equals and doesn’t equal options.
Qtip: Qualtrics IDs are case sensitive.
For more information on workflow conditions, see Creating Conditions.
Step 4: Completing the Workflow
Now it’s time to decide what you want to happen when a segment’s membership changes. Are you sending an email? Creating a ticket? Something else? Browse the support site to learn more about the different tasks available for your workflow.
Make sure you add your task after the Load XM Directory Contact Details task and after the conditions, if you have them.
Qtip: When you’re finished creating your workflow and ready for it to start, make sure it is enabled.

That's great! Thank you for your feedback!
Thank you for your feedback!