
Action Set Advanced Options
What's on this page
Qtip: If you don’t have access to any of the features described on this page, reach out to your Account Executive. For more information about the differences between Digital Feedback and CustomerXM for Digital, see Digital Feedback vs. CustomerXM for Digital.
About Action Set Advanced Options
You can find Advanced Options for any intercept action by clicking Options on the top right of the action set.

Qtip: Action Set Advanced Options won’t appear in the guided workflow for Website / App Feedback.
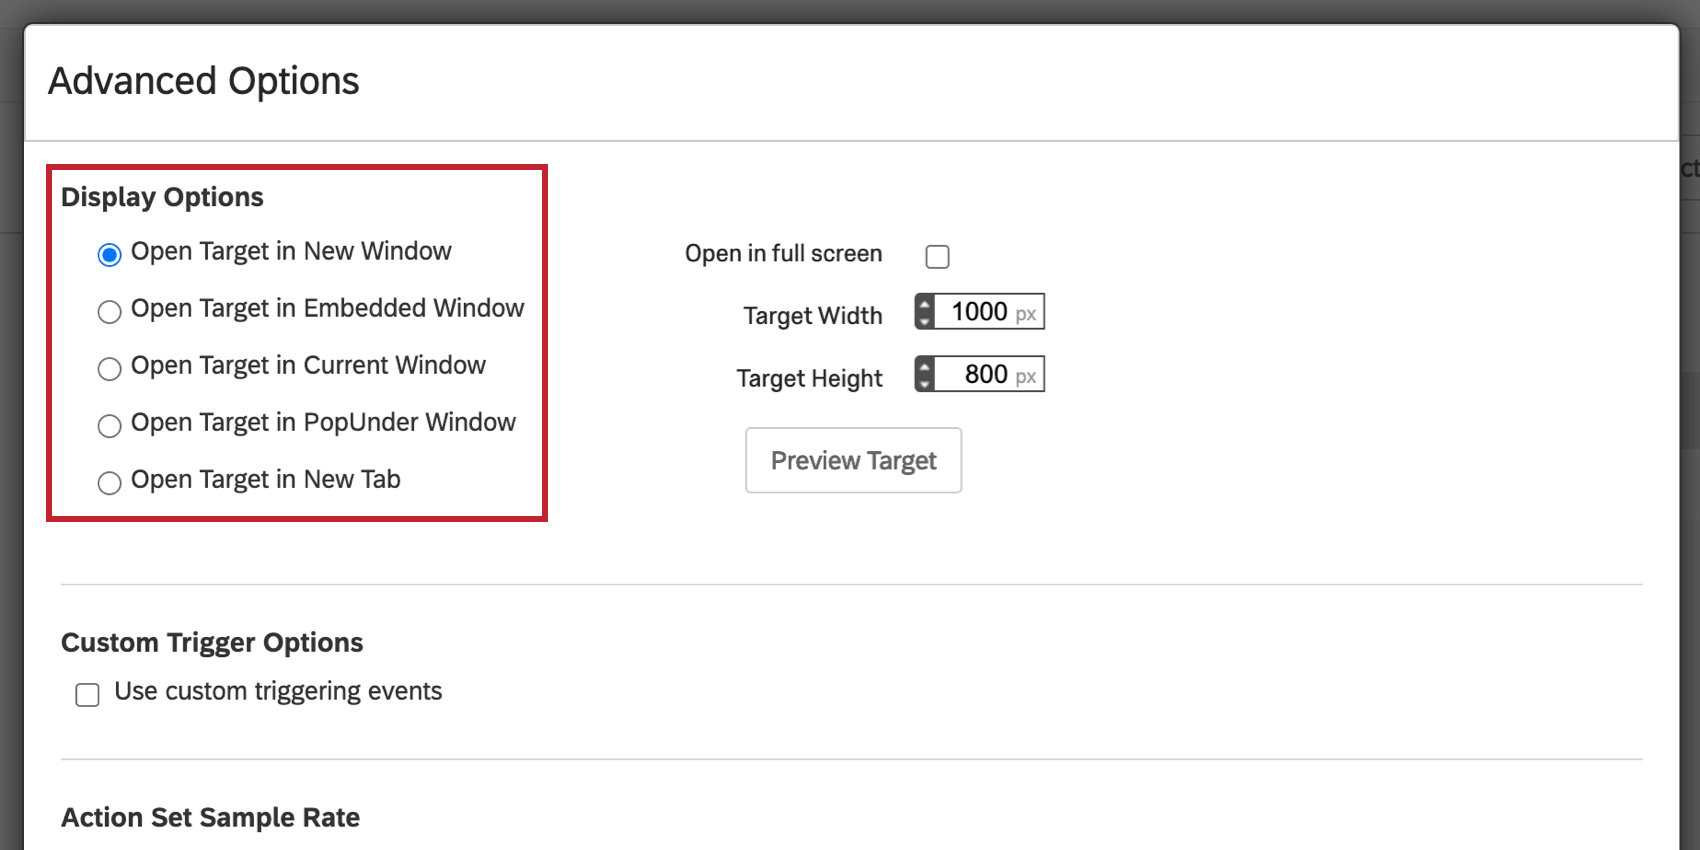
Display Options
With most intercepts, you will have a target website that opens when the visitor interacts with the creative. Using Display Options, you can choose how this target opens when visitors interact with it.
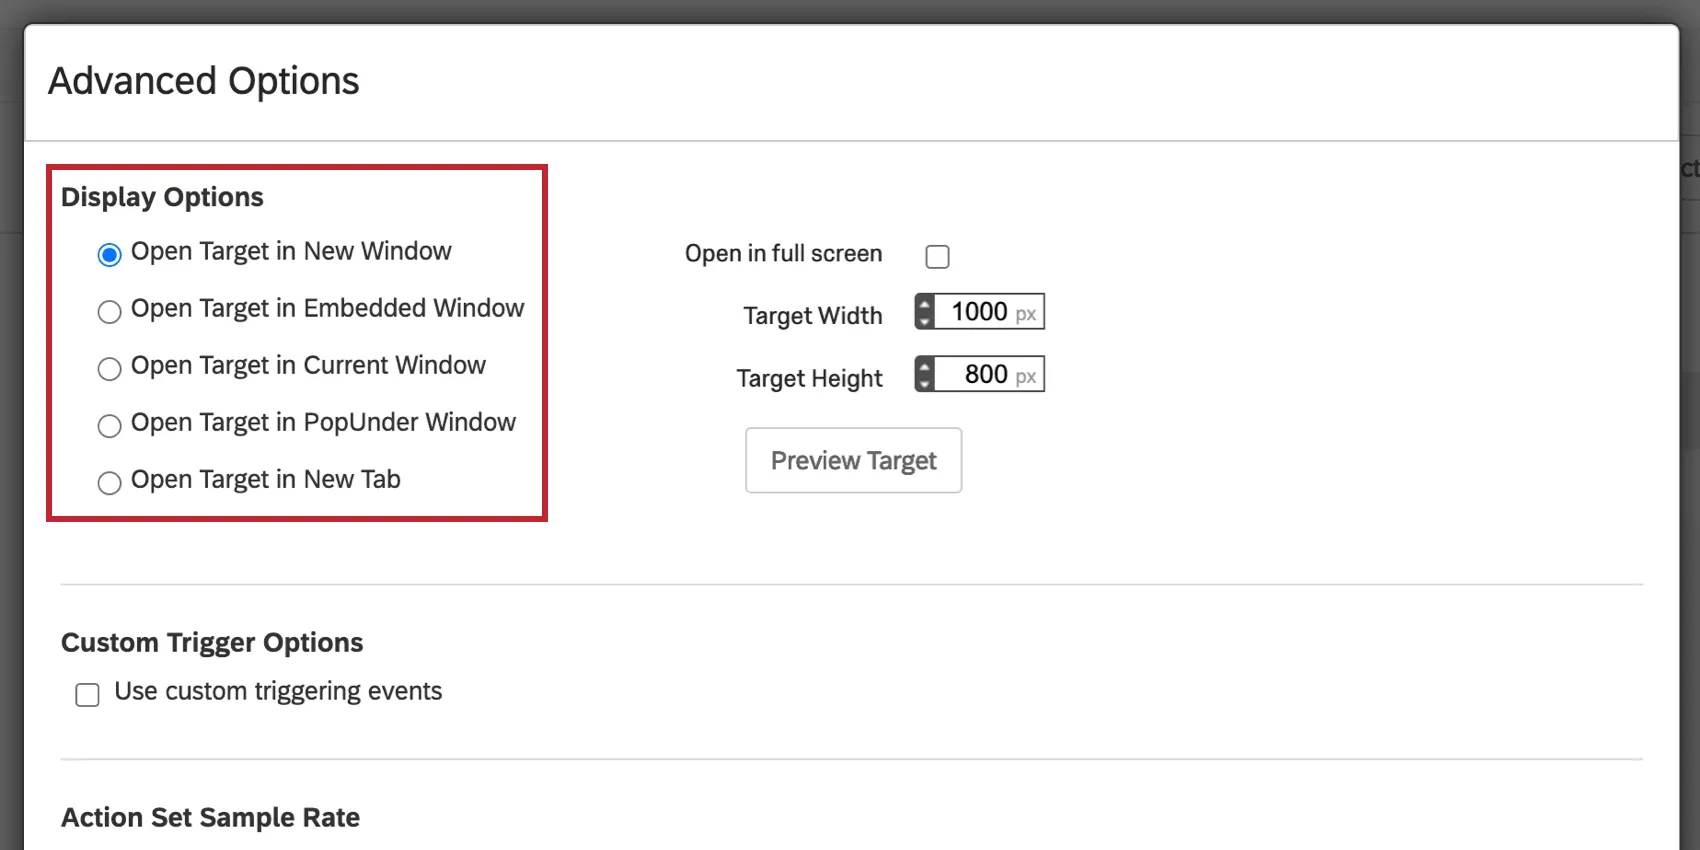
Open Target in New Window
Let’s say you don’t have an Embedded Target, but a regular target link. When you select Open Target in New Window, the target will open in a new browsing window when it’s clicked on.
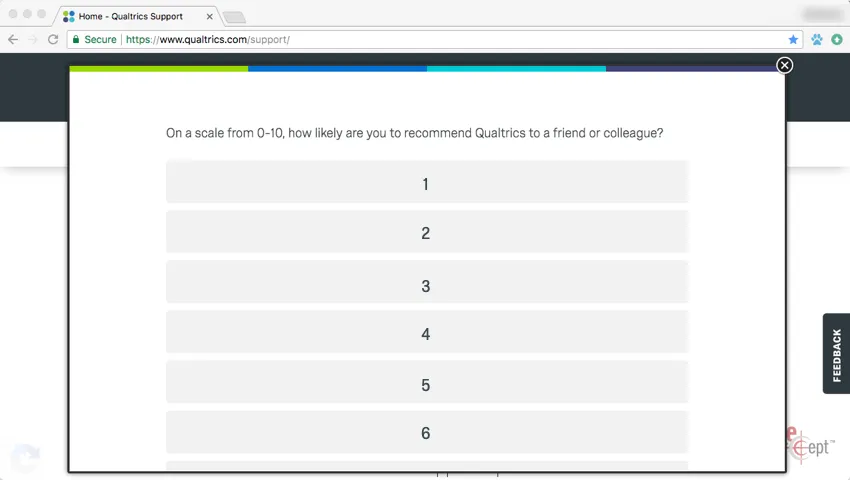
Example: The target of this creative is opened in a new window so the visitor has a choice of either completing the survey now or saving it for later and continuing to navigate the website.

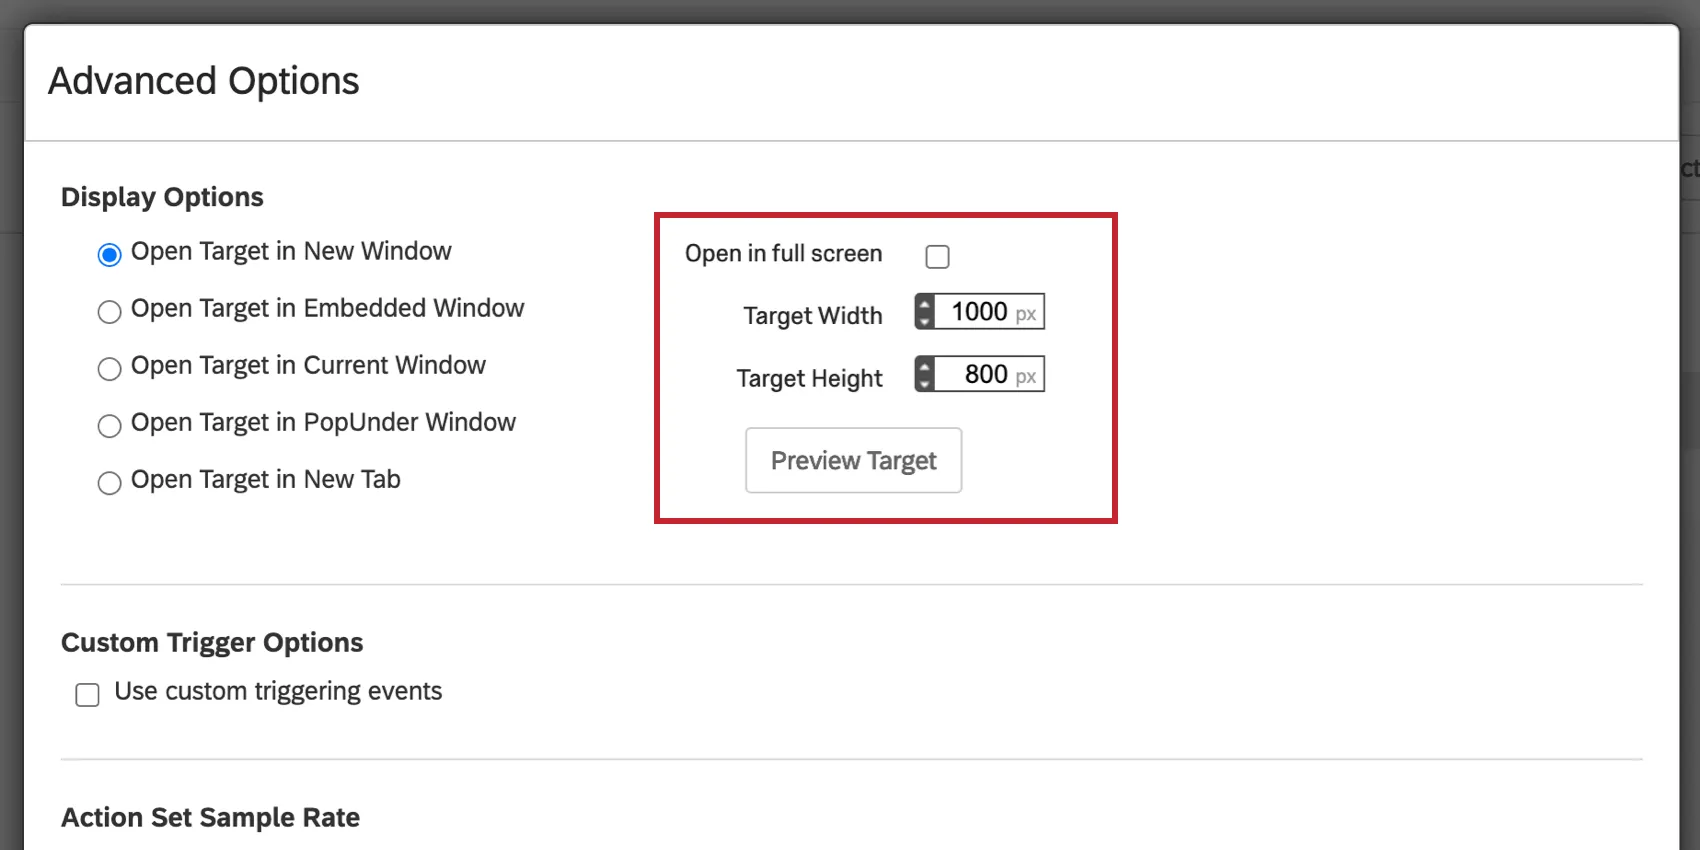
Once you’ve selected this option, you can specify to have the window Open Full Screen, or you can set a specific width and height for the new window.
Open Target in Embedded Window
Let’s say you do not have an Embedded Target, but a regular target link. When you select Open Target in Embedded Window, the target will open in a new Pop Over-style window that’s embedded on the page.
With this setting, visitors don’t need to leave your web page to view the new content, and ad blockers are less likely to block the target than if a new window was generated.
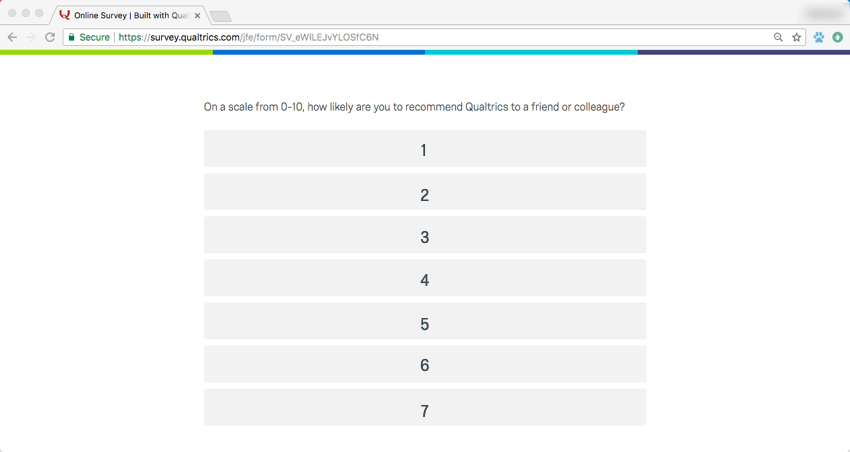
Example: This target opens as an embedded window so it will appear as a seamless part of the website experience.
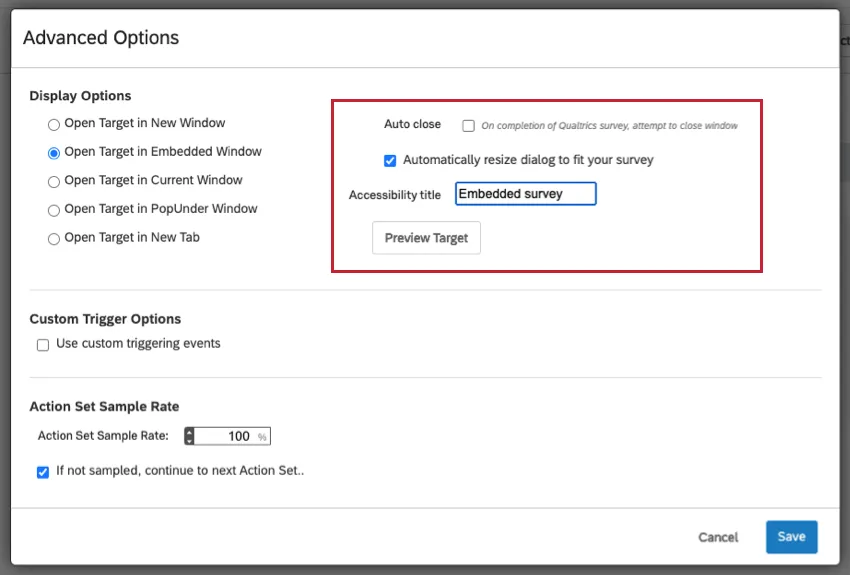
Once you’ve selected this option, you can specify the width and height of the embedded window. If your action’s Target is a Qualtrics Survey, consider checking Auto close so the embedded frame will close automatically when the survey is finished. Click Automatically resize dialog to fit your survey to have the window best fit according to the length of the first page of your survey. To make your Creative accessible to web visitors who are visually impaired, make sure to add an Accessibility title that will be read by the screen reader when the visitor navigates to the embedded window.
Open Target in Current Window
Let’s say you do not have an Embedded Target, but a regular target link. When you select Open Target in Current Window, this option will redirect visitors from their current page to the target website. This can be useful when you want to direct flow of traffic on your website to specific pages.
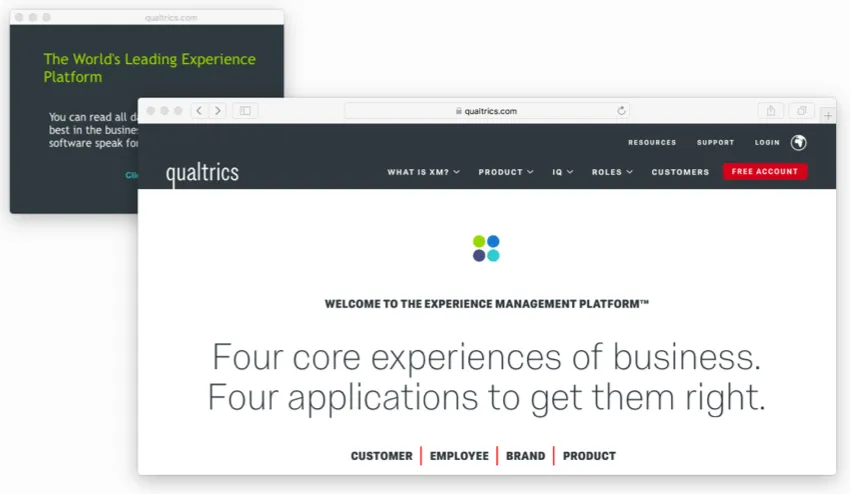
Example: For this website, the target opened in the current window, replacing the original web page.

There are no additional settings to specify for this option. The target will display in the current window and not affect the window’s height and width.
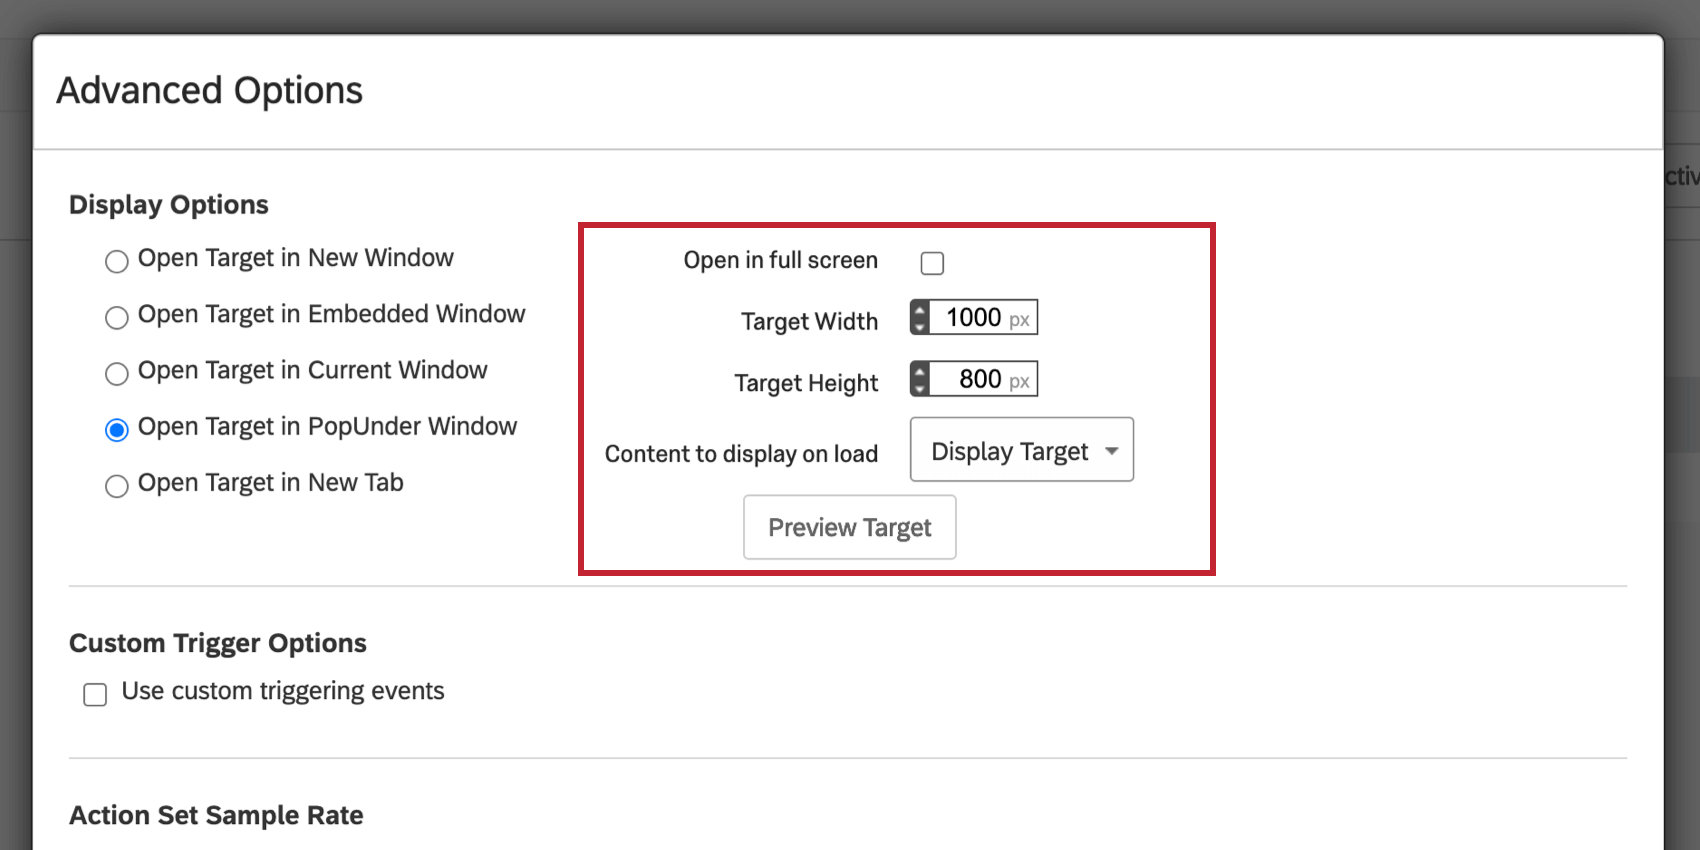
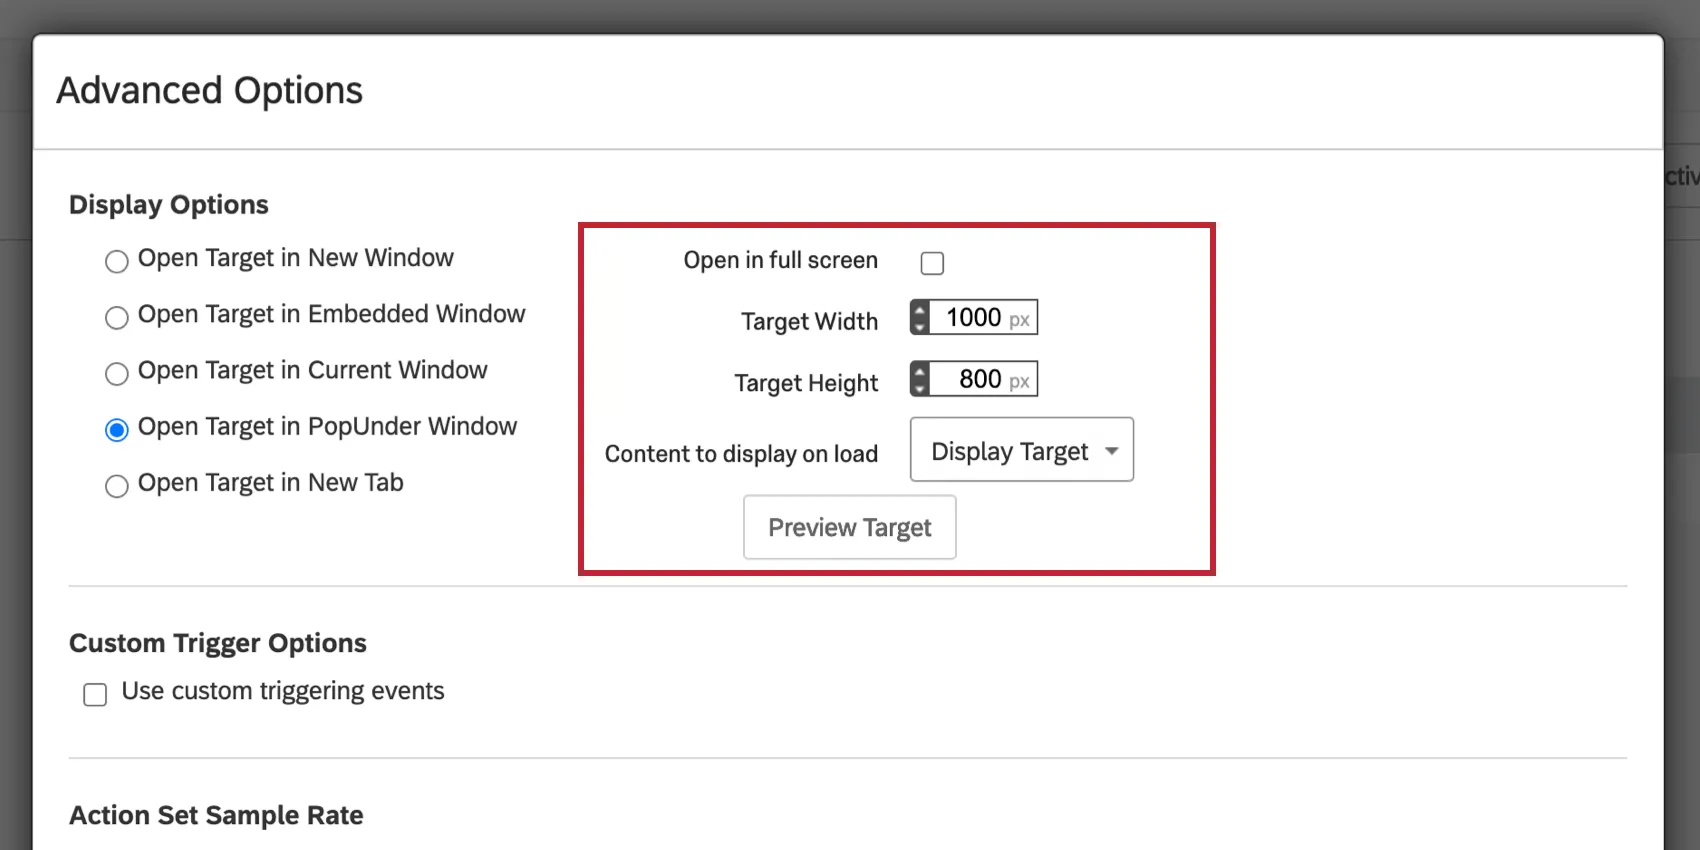
Open Target in PopUnder Window
Let’s say you do not have an Embedded Target, but a regular target link. When you select Open Target in PopUnder Window, this option will open the target in a Pop Under window. This window is hidden behind your website and comes forward once the visitor closes your website.
Example: In this example, we want to invite visitors at the beginning of their visit to take a survey, but then not show the survey until the end. Opening the survey as a Pop Under window is a great way to discourage early participation.
Once you’ve selected this option, you can specify to have the window open full screen, or you can set a specific width and height for the window.
If you’re implementing an Opt-In Site Exit design, you will specify the Pop Under under the Content to display on load dropdown. For example, you can choose a Pop Under you’ve created to be displayed instead.
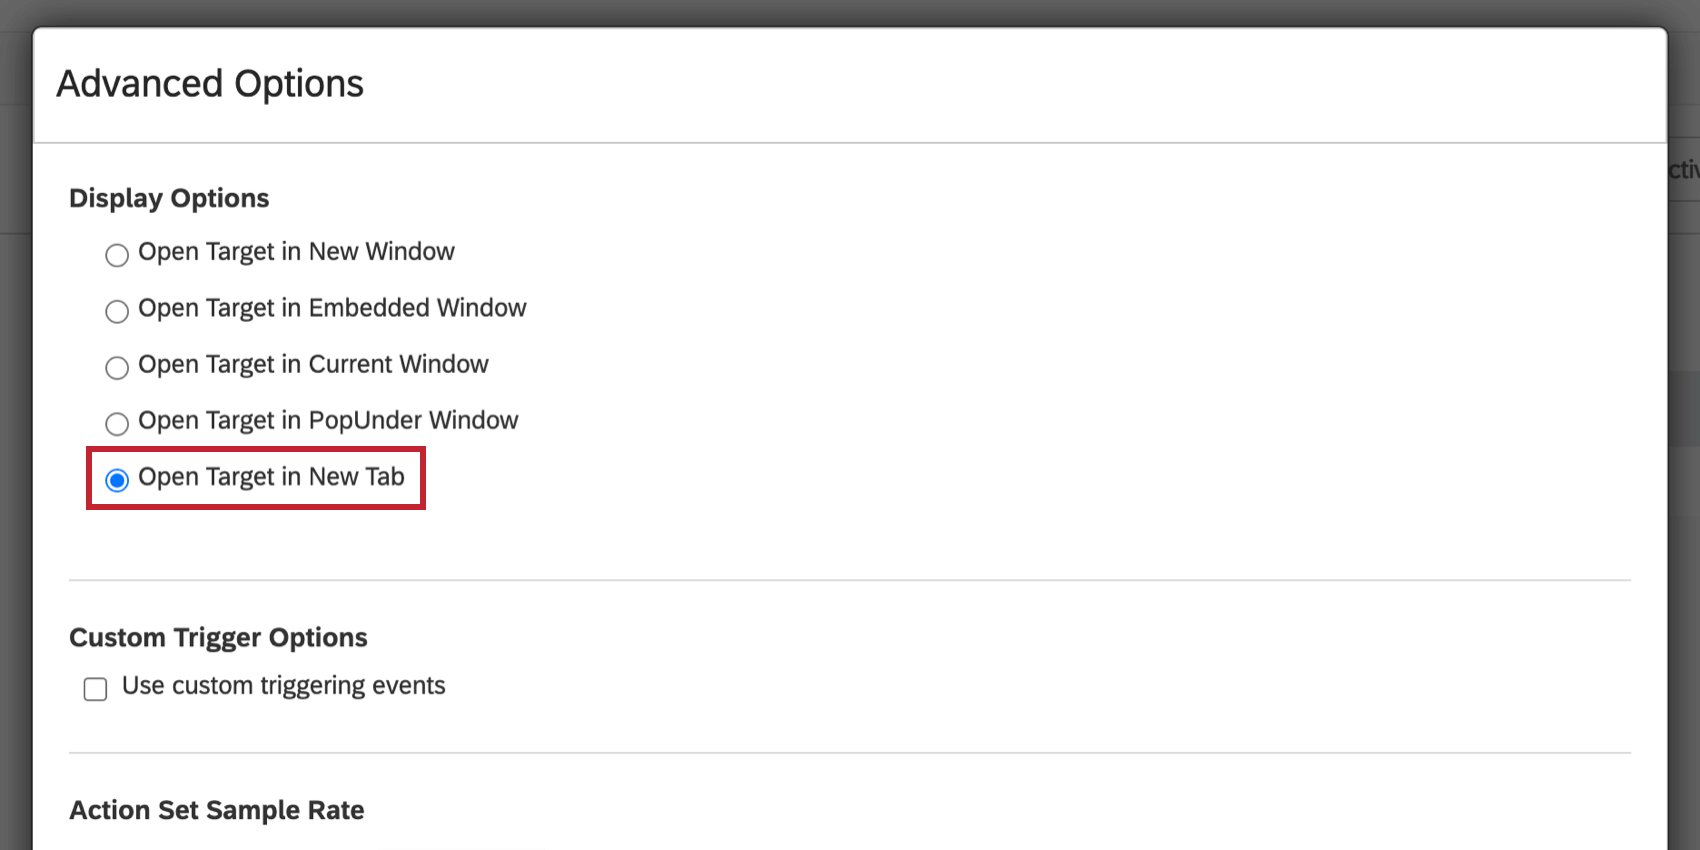
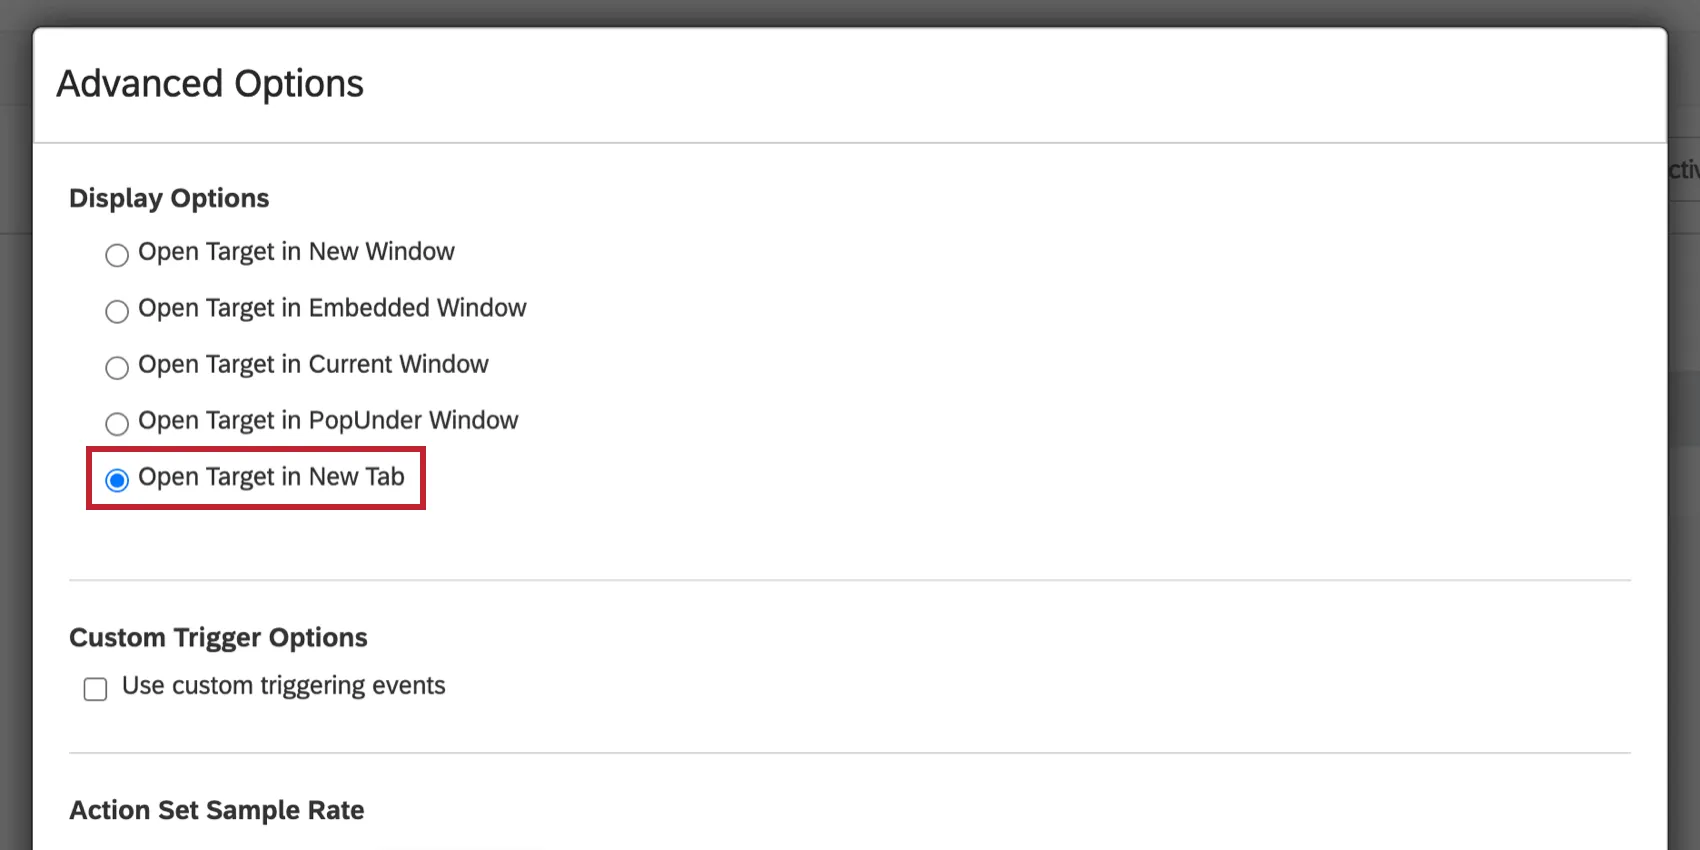
Open Target in New Tab
Let’s say you do not have an Embedded Target, but a regular target link. When you select Open Target in New Tab, this option will open the target website in a new tab when the visitor clicks the link in the intercept. This option can be useful when you want your visitors to be shown a different page while allowing them to keep their spot on the current page.
Replace Creative Contents
Custom embedded feedback creatives will have the additional option to select Replace Creative Contents. This option will replace the existing content of the target HTML element with the content of the custom embedded feedback creative. See Custom Embedded Feedback Options for more information.
Custom Triggering Options
By default, creatives will show as soon as the visitor meets the criteria for them. However, you can use Custom Triggering Options to specify certain events that must take place on the page before the creative will display. Once the project deployment code runs and all conditions are evaluated and pass for this action set, the action set will wait for the triggering event.
Trigger On Click
With this option selected, the creative will not appear until the visitor has clicked somewhere on the webpage.

By default, the Apply trigger to entire page option is checked, which allows a click anywhere on the page to trigger the creative. If you deselect this option, you can specify a single HTML ID that a visitor must click in order to trigger the creative.
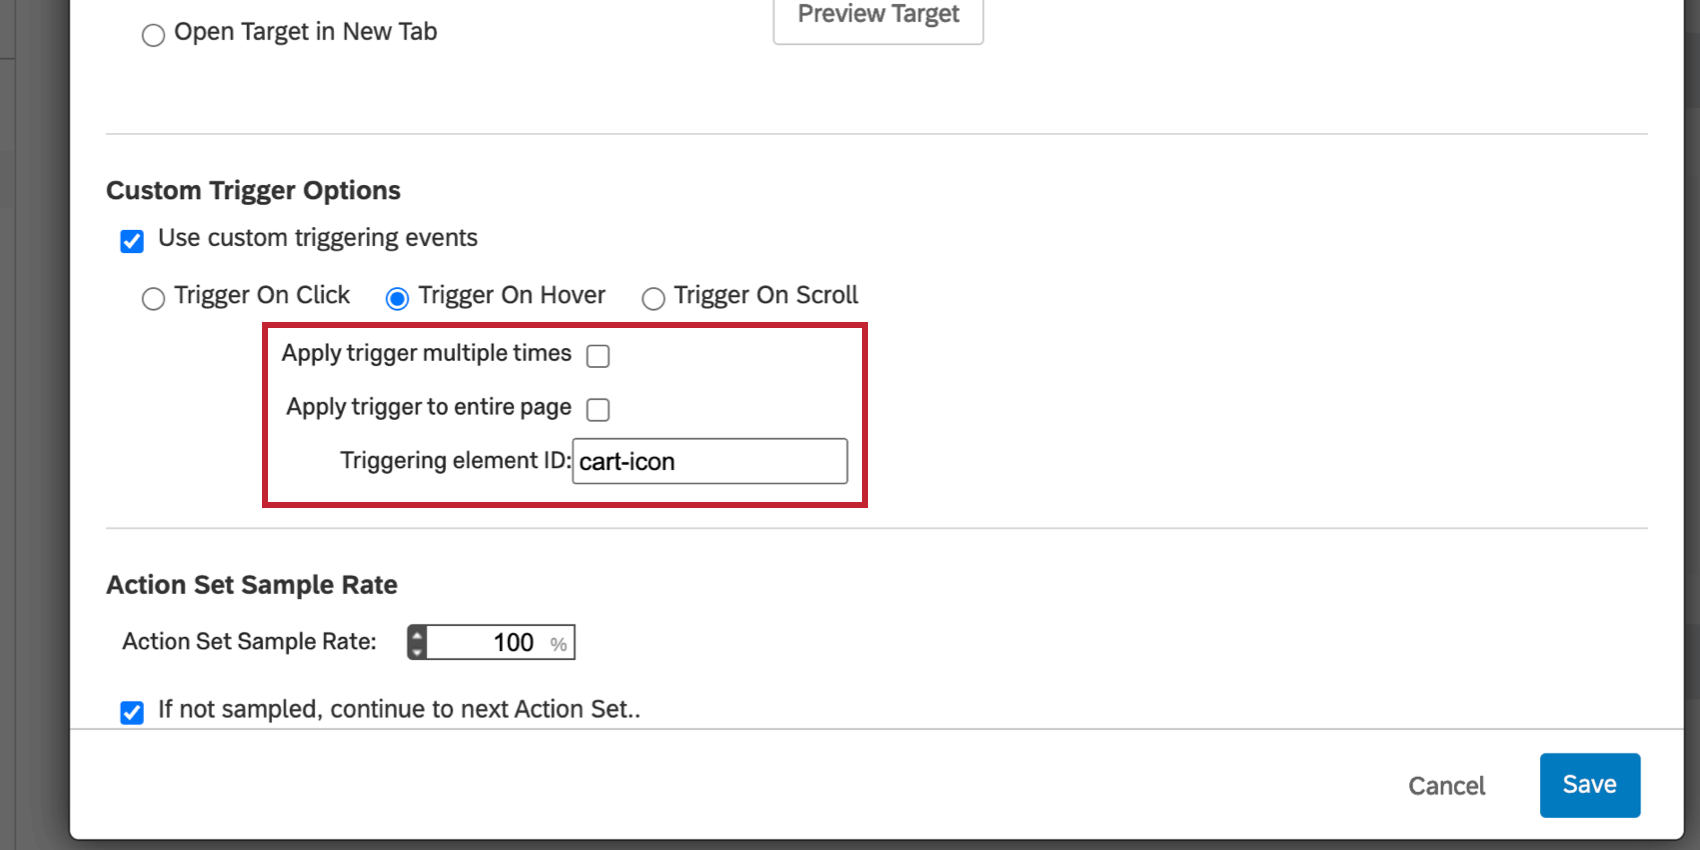
Trigger On Hover
With this option, the creative will appear after the visitor has hovered over a specific portion of the page.

By default the Apply trigger to entire page option is checked, which allows a hover anywhere on the page to trigger the creative. You may consider deselecting this option in order to specify a single HTML ID that a visitor must hover over in order to trigger the creative.
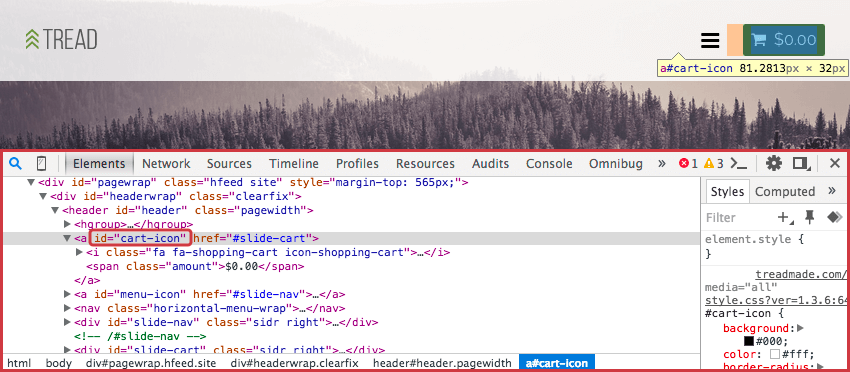
Finding the HTML ID
For the above options (Trigger on Click and Trigger on Hover), you may want to specify the element ID on your site that will trigger the Action Set. For example, you could trigger your Pop Over to show once the visitor clicks on or hovers over a shopping cart button.

Qtip: Use your browser’s Inspect Element function to determine the HTML ID of an element. In most browsers, simply right click on the portion of the page you would like to inspect and select Inspect Element.
Trigger on Scroll
With this option, the creative will display after the visitor has scrolled through a percentage of your web page.
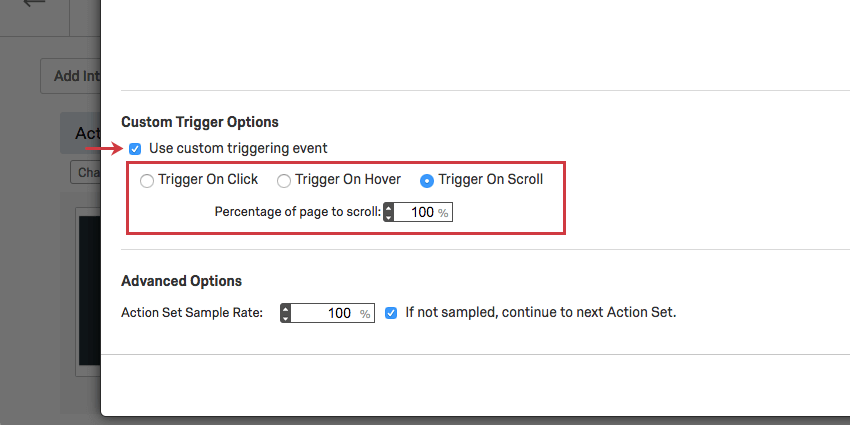

For example, on a product search page, if the visitor scrolls 80% down the page without selecting a product, you might display a Pop Over asking if they would like to get help finding what they need through live chat.
Qtip: Pop Unders interact uniquely with the Trigger On Hover and Trigger On Scroll conditions. When using Pop Unders, note that they will not appear until the visitor’s first click after they have met the scroll, click, or hover condition.
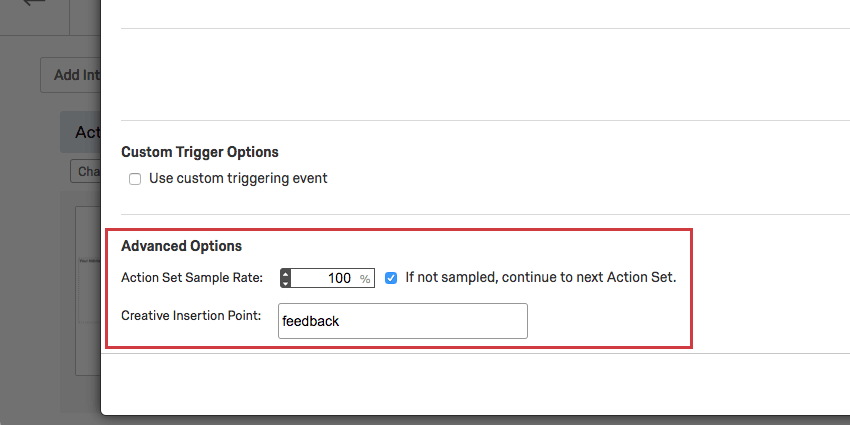
Advanced Options
Within each action set, there is also a specific set of advanced options. This includes the Action Set Sample Rate and, for certain creatives, the Creative Insertion Point.
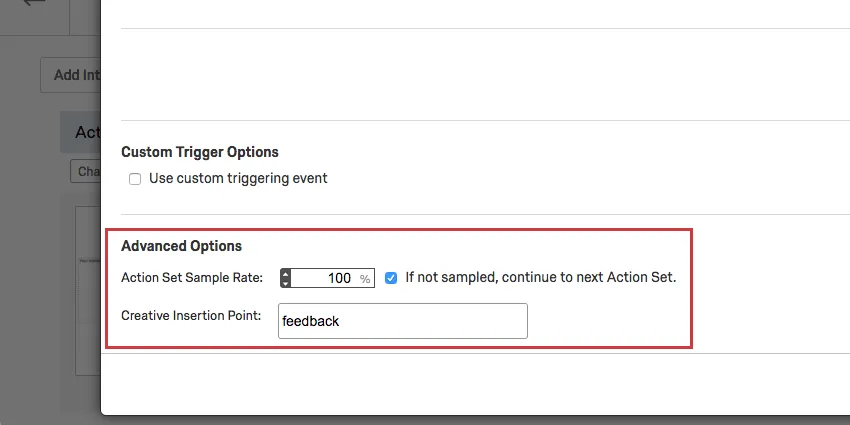
Action Set Sample Rate
You can use the Action Set Sample Rate to sample visitors at the action level.
With a 50% sample rate, 50% of those who would qualify for the action would receive it. For the other 50%, if the If not sampled, continue to next Action Set option is selected, Qualtrics will check to see if they qualify for another Action Set. If this option is not selected, the visitor will not see a creative.
Example: You have two creatives you want to randomize amongst your visitors.
Creative Insertion Point
Custom Embedded Feedback, Embedded Link, and Social Media creatives are inserted as part of your page content and require that you specify the HTML ID of the insertion point on your page. For any action that includes these creatives, you will see an additional option to choose a Creative Insertion Point.
Here you will type the ID of the HTML element on your page where you would like the creative to appear. For help finding the correct HTML ID, check out the support pages specific to each creative: Custom Embedded Feedback, and Embedded Link.
That's great! Thank you for your feedback!
Thank you for your feedback!