
Send Emails in XM Directory
What's on this page
About Sending Emails in XM Directory
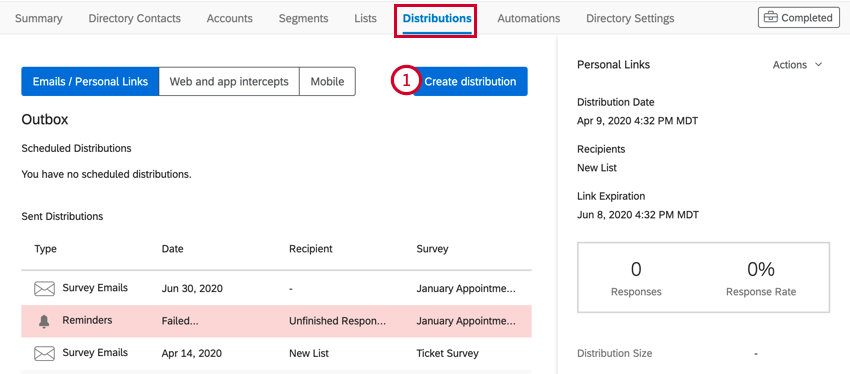
Instead of making you go back to your survey to distribute invitations, XM Directory lets you send emails right from the Distributions tab. Here, you can send plain emails or survey invites to a mailing list, a sample, a segment, or even a single contact at a time.
Qtip: If you are collaborating on a survey with another user who doesn’t have XM Directory, you will not be able to use your mailing lists to distribute the survey. If you want to distribute the survey using your directory, make a copy of the survey on your account, or be sure to create the surveys on your account going forward.
Qtip: Ready to send a reminder or thank you email? See the linked support pages for additional help.
Projects You Can Send Through XM Directory
Qtip: The features discussed in this section are not necessarily included with every license. If you’re interested in getting access, please reach out to your Account Executive.
You can use XM Directory to send invitations for several types of Qualtrics projects. However, not every Qualtrics project type is compatible with XM Directory.
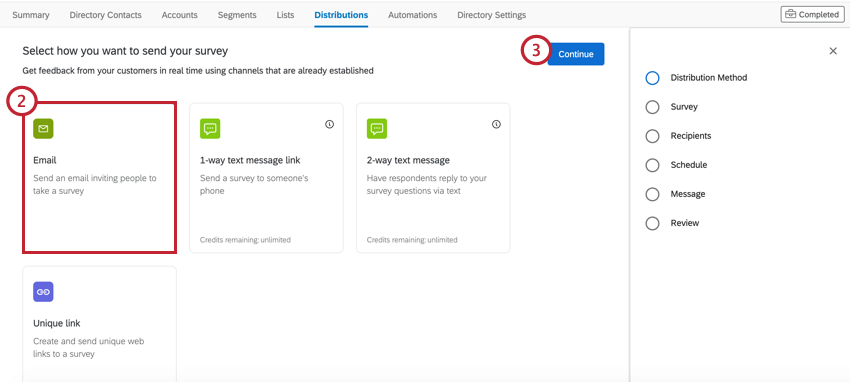
XM Directory can be used to send the following:
- Survey projects
- Conjoint / MaxDiff
- Certain non-EX XM Solutions
Qtip: You can also send emails without a link to any survey.
In contrast, XM Directory cannot be used to distribute any Employee Experience (EX) projects. That means that no EX projects can be used with XM Directory, including Engagement, Pulse, 360, and more.
XM Directory contact data is completely separate from the employee / participant information saved in the Employee Directory. That means that data edited in one directory will never affect the other.
Sending Survey Invites
Attention: In order to comply with the United States federal CAN-SPAM Act, it is advised that you include an opt out link in every email that you send to individuals outside of your organization. There are no exceptions to this requirement when sending emails to individuals outside of your organization. As a Qualtrics user, you will need to ensure that you are complying with the local legislation.
If you’ve removed your opt out link, add it back using the piped text menu.
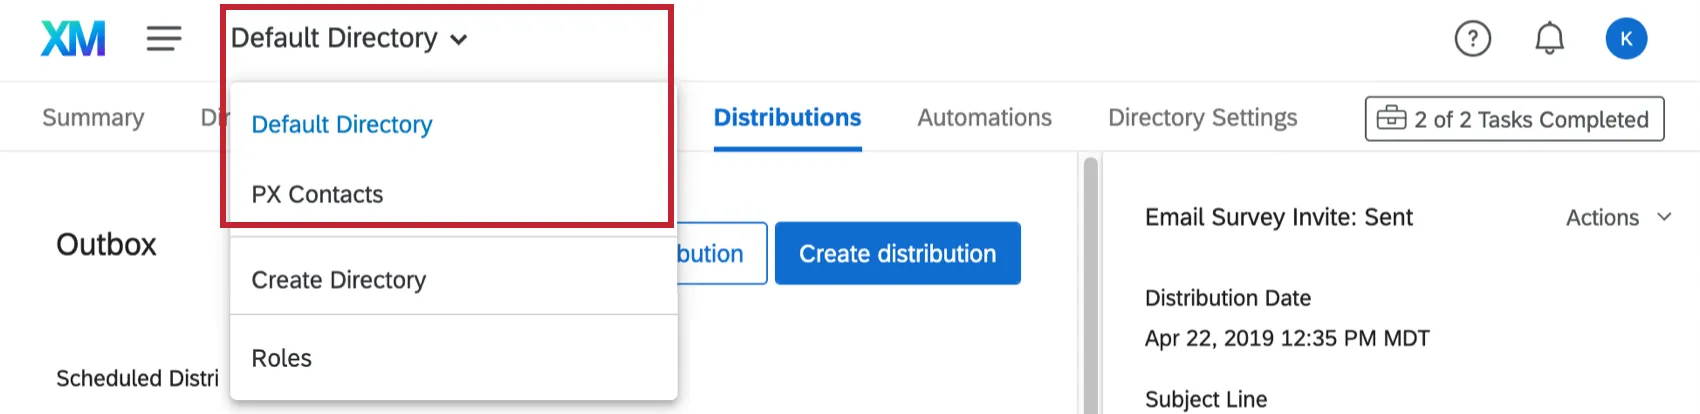
Qtip: If you have access to multiple directories, make sure you’ve selected the correct one before you try to send distributions. Otherwise you might not be able to find the contacts, lists, or segments you want to distribute to.
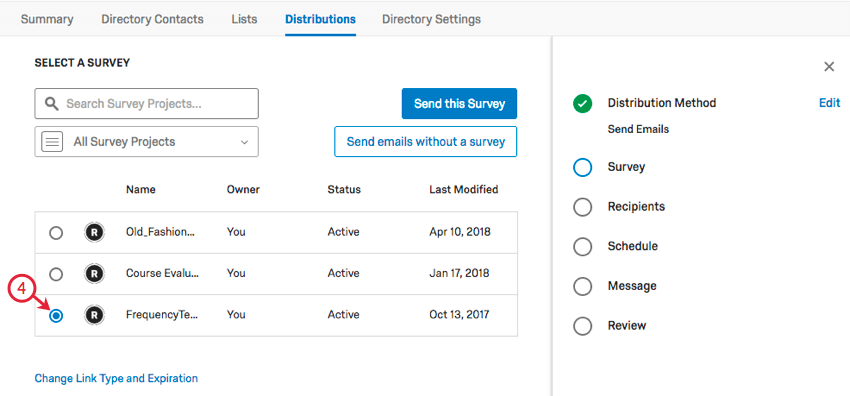
Qtip: You can use the search bar and folder dropdown list to locate your survey.
Qtip: See Link Type and Expiration for more.
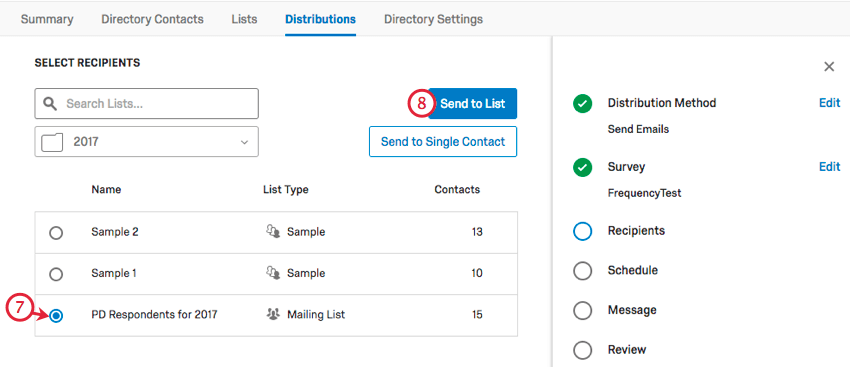
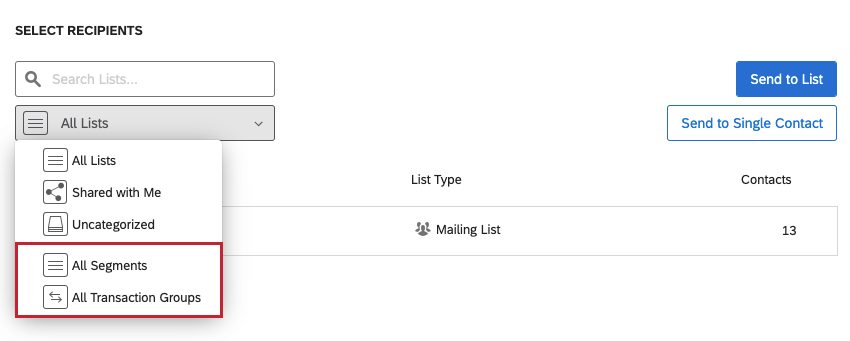
Qtip: You can use the search bar and folder dropdown list to locate your list or sample. The search bar cannot be used to find individual contacts at this time.
Qtip: You can also distribute to a segment or transaction group rather than a contact list or a sample.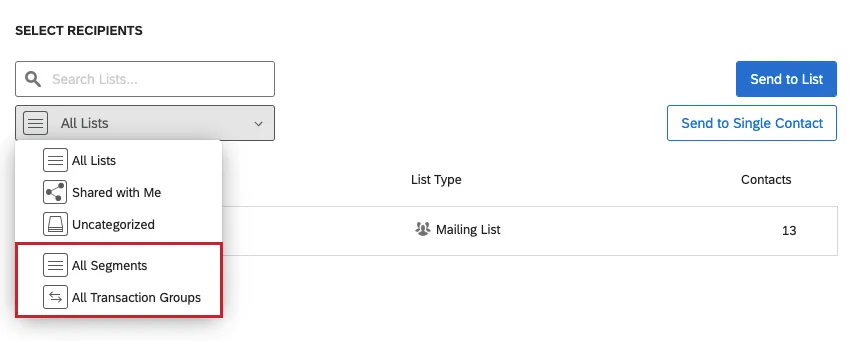
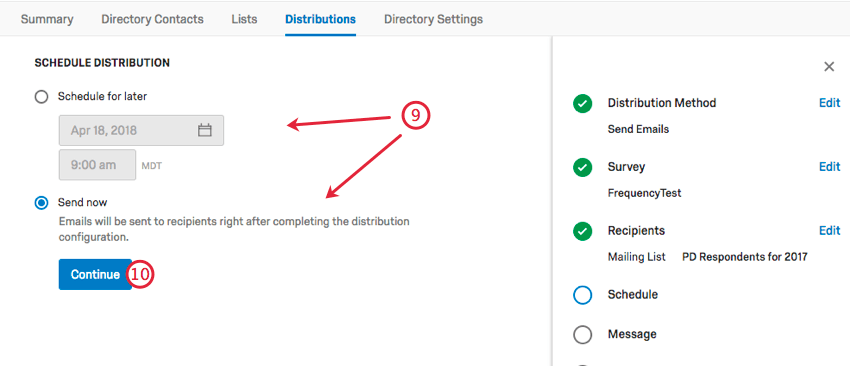
Qtip: If you accidentally schedule it for later, you can make edits to the distribution, including cancelling it or changing when it goes out. Once a distribution is sent, it cannot be retrieved.
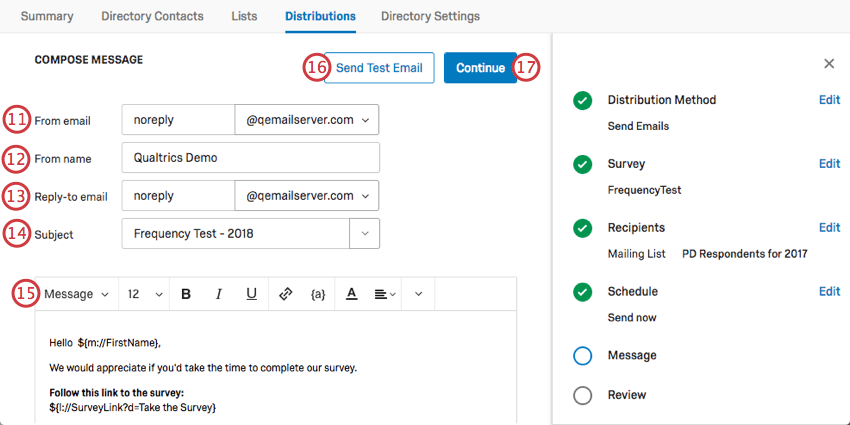
Qtip: You can use whatever name you want (e.g., MyCompany@qemailserver.com), but the domain has to be a Qualtrics-approved one. This improves your email’s legitimacy and decreases the chances it’ll bounce. If your organization has a custom email domain set up, this will also appear as an option.
Qtip: See our section on Customizing Emails.
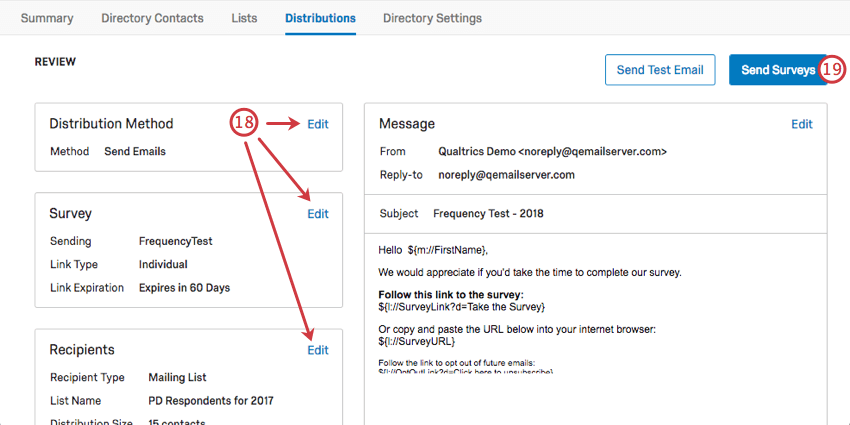
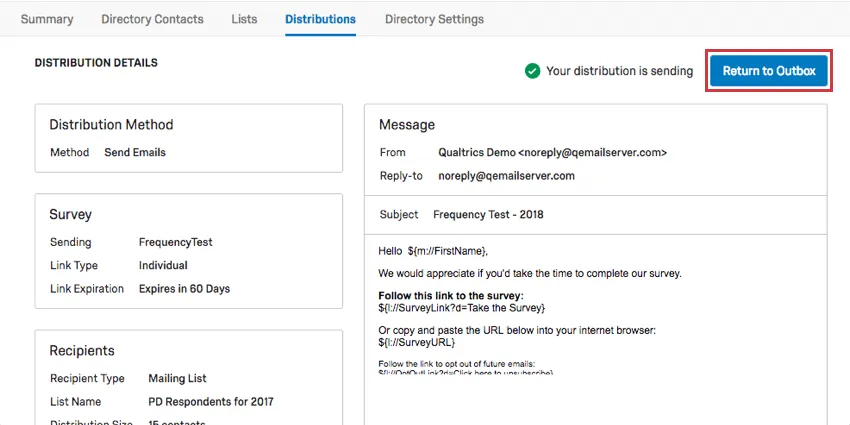
The Edit buttons will disappear when your distribution has sent. Click Return to Outbox to go back to your outbox. Here you can start another distribution or manage past distributions.
Customizing Email Messages
Customizing email messages in XM Directory is very similar to how it is done in the Distributions tab of a project.
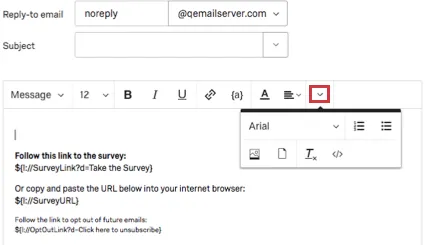
One of the main differences is that part of the rich content editor is hidden under a dropdown, as shown below. This rich content editor does not include inline questions.
For additional assistance, see the following pages:
- Customizing Your Email Message: Beyond typing a generic message, email invitations can be customized with the participant’s contact list information. This page goes through important piped text you will need.
- Using the Opt Out Link: Learn about the opt-out link.
- Distributing in Multiple Languages: Learn how to create a message with multiple language versions and how to make sure they get to the right contacts.
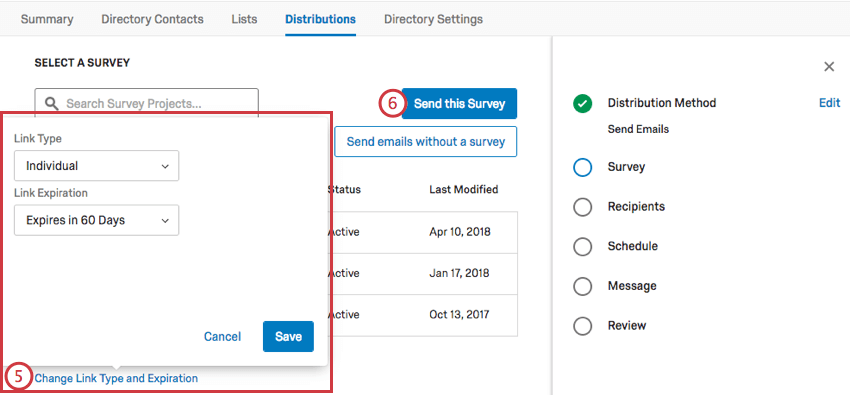
Link Type & Expiration
When selecting the survey you want to distribute, you can change the link type of the link to the survey, and you can change the expiration.

Link Type
The link type determines how contact information is recorded in the survey and whether the respondent can respond more than once to the survey.
- Individual Link: Each participant receives a personalized link that can only be used once. Contact information from the mailing list is associated with the response in the survey. This is the default link type.
- Multiple Completes Link: Each participant receives a personalized link that can be used multiple times. Each time this link is used, a new response is added to your results and the same contact list information is recorded. Note that reminder and thank you emails are not compatible with this link.
- Anonymous Link: Each participant receives the anonymous link, which does not record contact information. Note that reminder and thank you emails are not compatible with this link.
See more about Link Types on the Email Survey Invitations page.
Link Expiration
The link expiration determines how long links last until they cannot be used to access the survey anymore.
Once a link has expired, this cannot be reversed.
Qtip: Link expiration is separate from survey availability dates and incomplete survey response settings. See more at Distribution and Survey Expirations.
Send to Single Contact
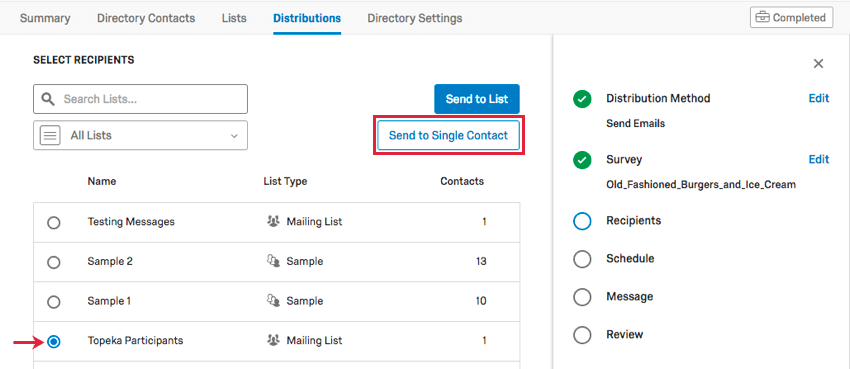
You can also send emails to an individual contact in a mailing list. Once you have reached the Select Recipients page, select a mailing list, and then select Send to Single Contact.

Qtip: You cannot send to an individual contact if you have a sample selected. You must have a mailing list selected.
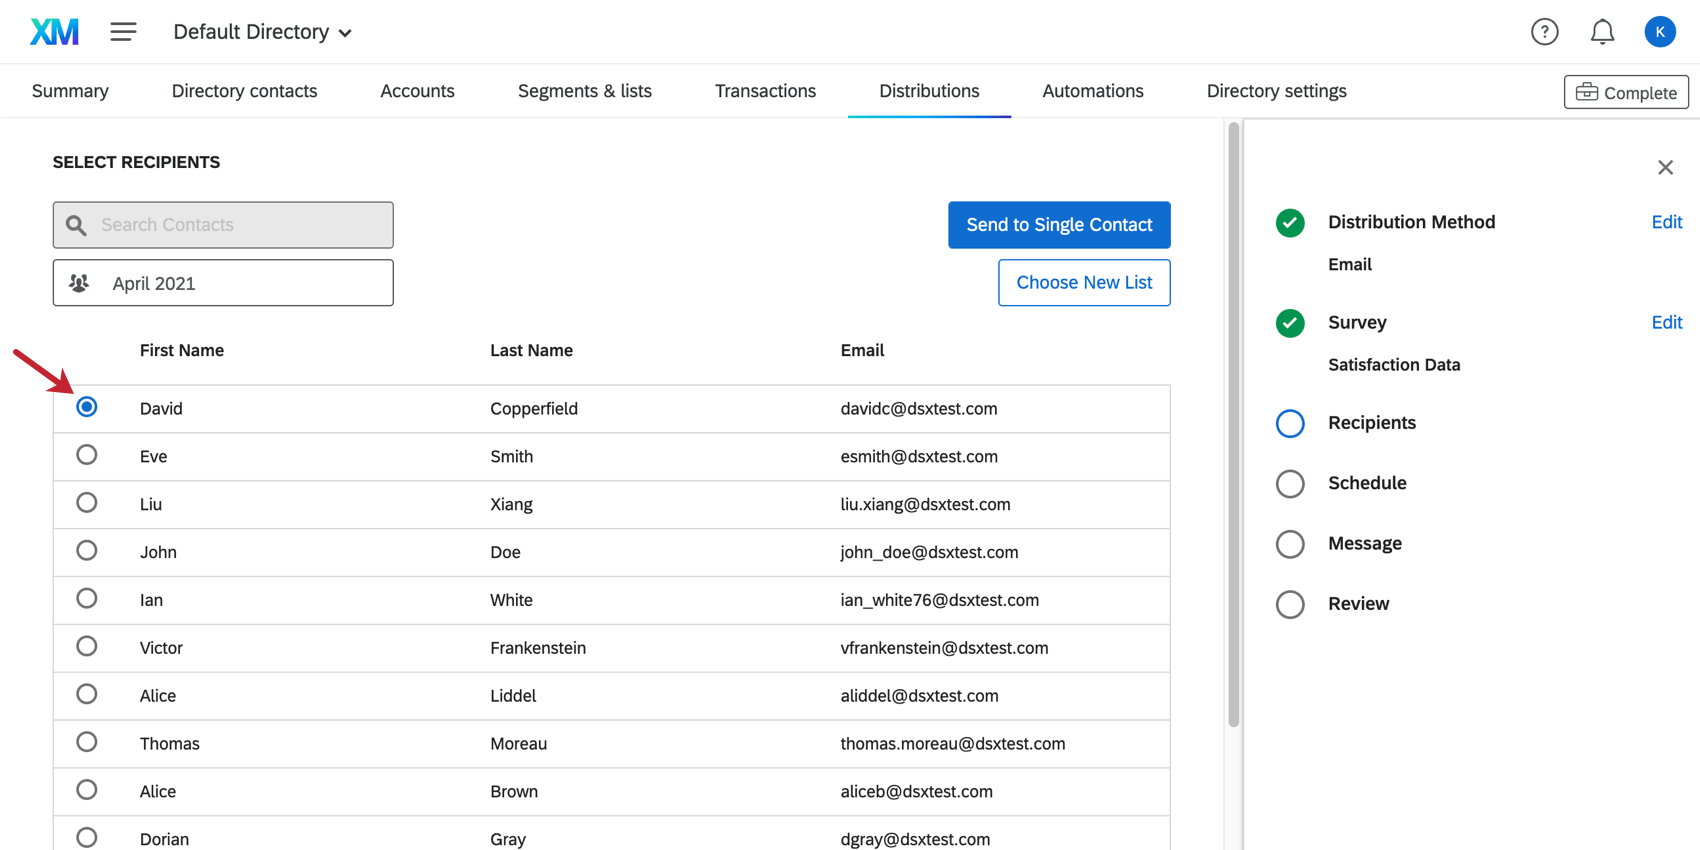
Once you’ve moved to the next page, you can select the contact you wish to email. Remember that you can only choose one at a time, and that only members of the mailing list are shown.
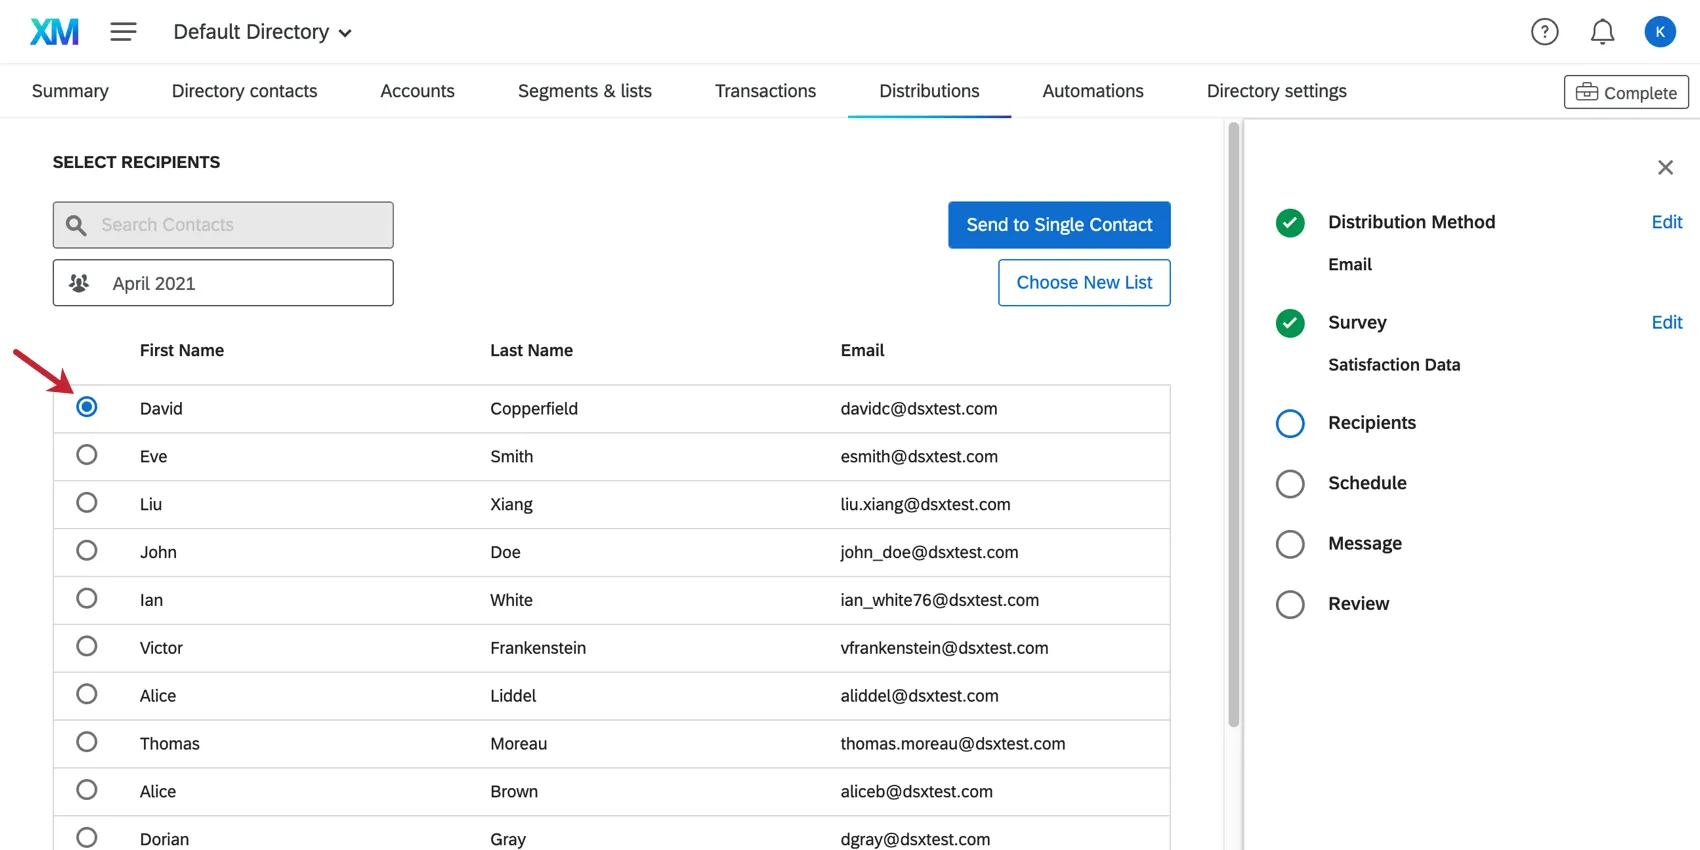
After selecting the desired contact, click Send to Single Contact to proceed with your email or select Choose New List to choose another mailing list instead.
Qtip: The search bar cannot be used to find individual contacts at this time.
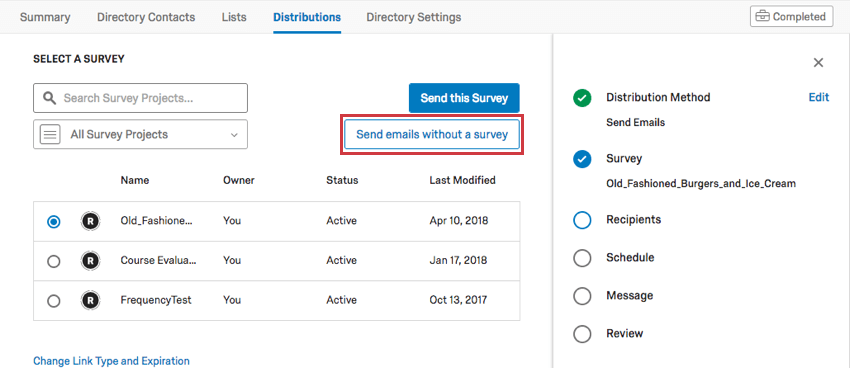
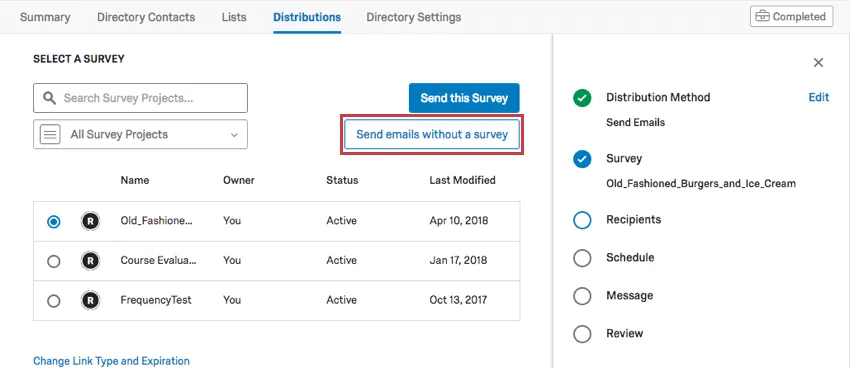
Send Emails Without a Survey
Do you need to send a message to your mailing list, but not necessarily a whole survey? You can send emails without surveys.
Everything about creating an email without a survey is the same as a survey invite, except that on the Select a Survey page, you click Send emails without a survey.
Emails without surveys can still be tracked in a contact’s timeline.
Attention: In order to comply with the federal CAN-SPAM Act, it is advised that you include an opt out link in every email that you send to individuals outside of your organization.
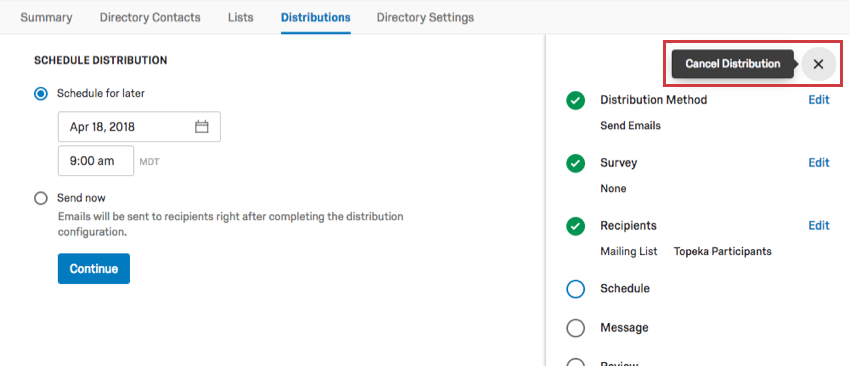
Cancelling & Resuming Distributions
At any point while creating a distribution, you can cancel it. Go to the X in the upper-right of the page.

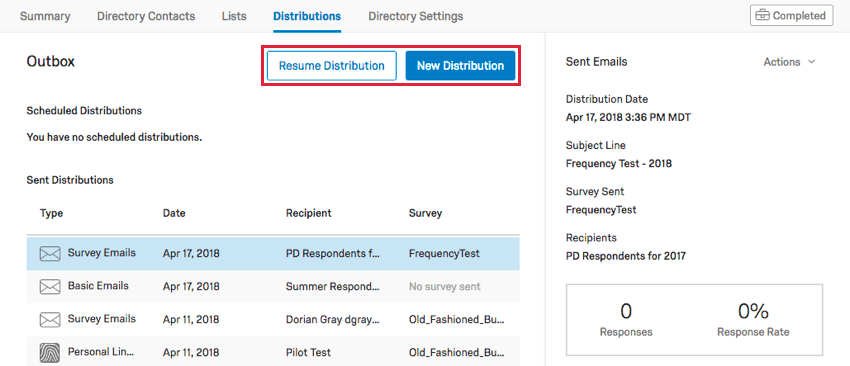
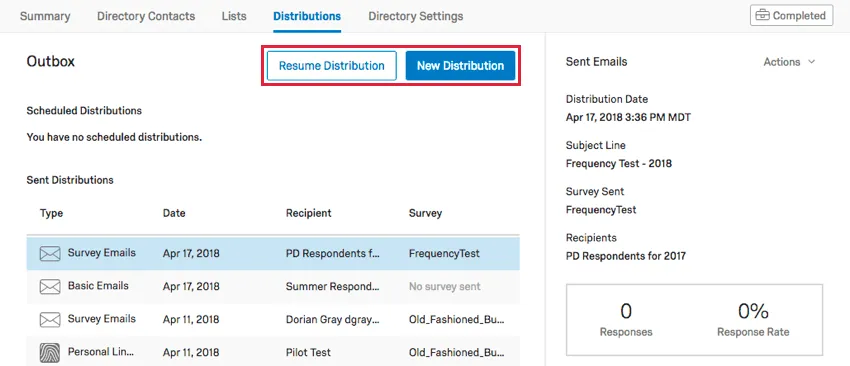
If you leave the Distributions tab, you can come back and resume where you left off by clicking Resume Distribution. You can also erase this distribution and start over by going to New Distribution.
FAQs
What’s XM Directory? / Where’s Target Audience?
What’s XM Directory? / Where’s Target Audience?
How can I tell if I have XM Directory or XM Directory Lite?
How can I tell if I have XM Directory or XM Directory Lite?
For admins, being able to tell whether or not you have XM Directory Full or XM Directory Lite on your license is easy. Admins of XM Directory have access to many more features than the average XM Directory Lite user, including the Summary tab, the Directory Contacts tab, and Directory Settings.
However, even if you’re not an admin, you can often tell whether you have XM Directory Full or XM Directory Lite in one of the following ways: If you’re still not sure which feature you have, reach out to a Brand Administrator. Brand Administrators who are unsure can reach out to their Account Executive or Account Services.
Can I edit multiple scheduled distributions at the same time?
Can I edit multiple scheduled distributions at the same time?
That's great! Thank you for your feedback!
Thank you for your feedback!