-

Qualtrics Platform -

Customer Journey Optimizer -

XM Discover -

Qualtrics Social Connect
Randomizer
About Randomizers
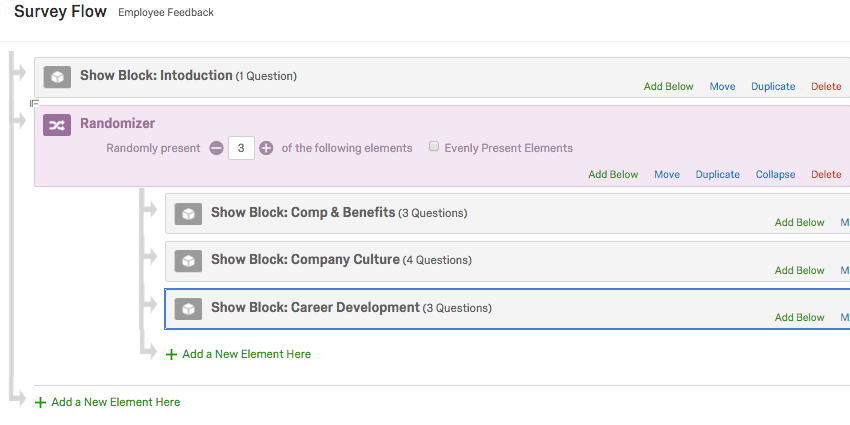
With a randomizer in your survey flow, you can randomly present question blocks, embedded data, and other survey flow elements to your respondents.
Adding a Randomizer
Any items in your survey flow can be randomized. This randomization can happen at any point in the flow.
To add a Randomizer
- Navigate to the Survey tab and open your Survey Flow.
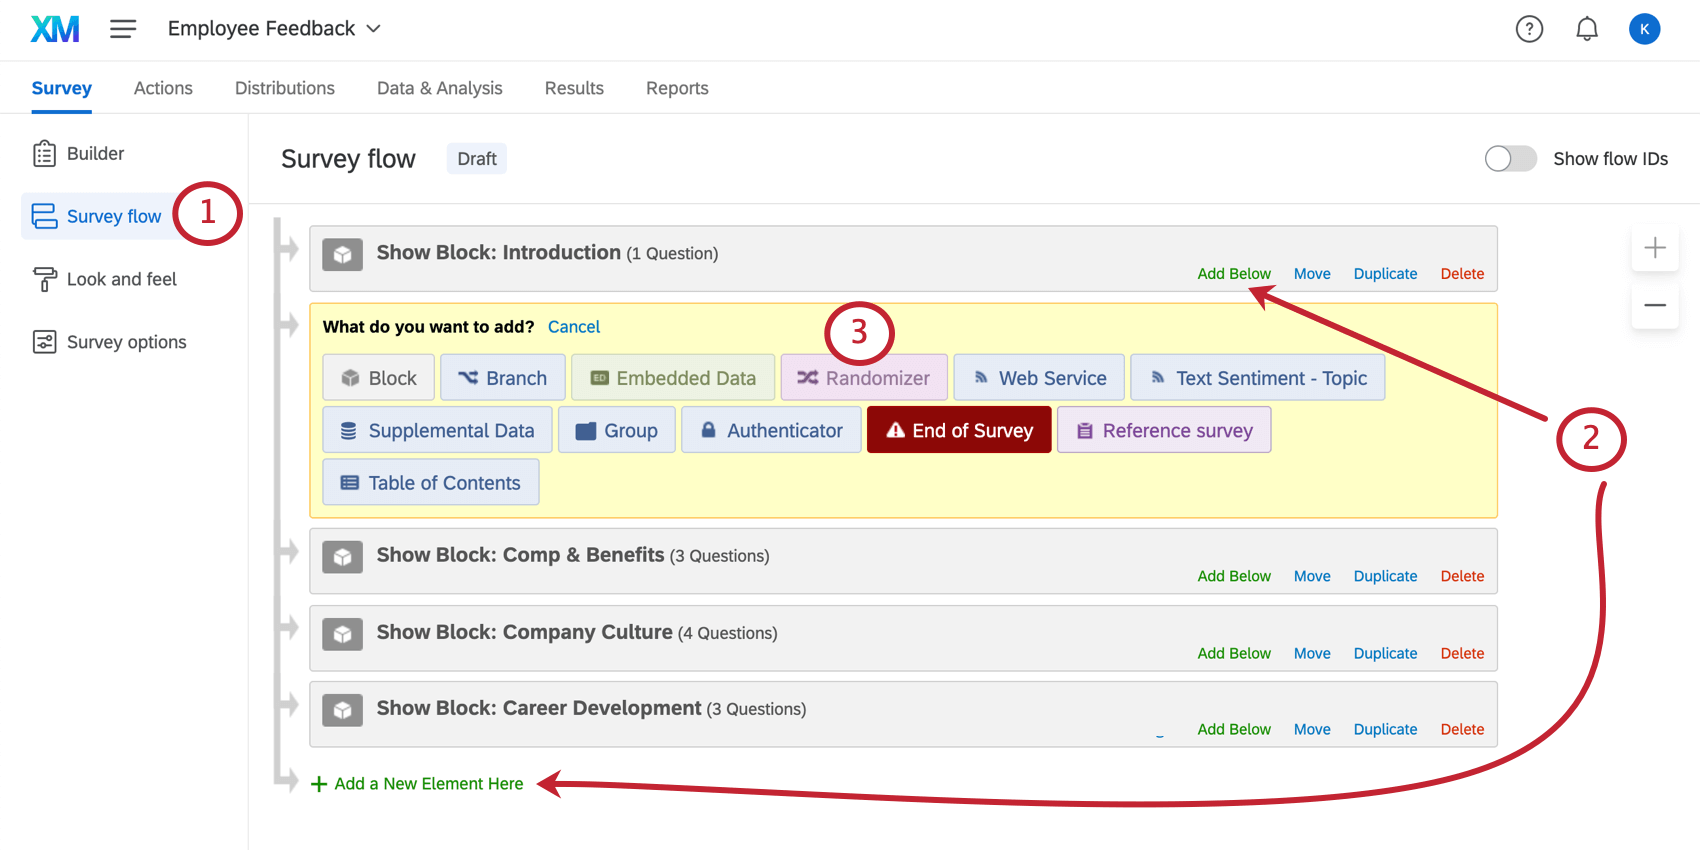
- Click Add Below or Add a New Element Here.
- Select Randomizer.
Qtip: If the randomizer isn’t created exactly where you want it in the survey flow, don’t worry. You can move elements in the survey flow by selecting the item and pressing ↑ or ↓ on your keyboard. You can also click and hold Move to drag and drop the element in your survey flow.
- Move the elements you want to randomize so they are nested under the randomizer.
 Qtip: Elements included under a randomizer are grouped together, so moving your randomizer in the survey flow will also move the elements within it.
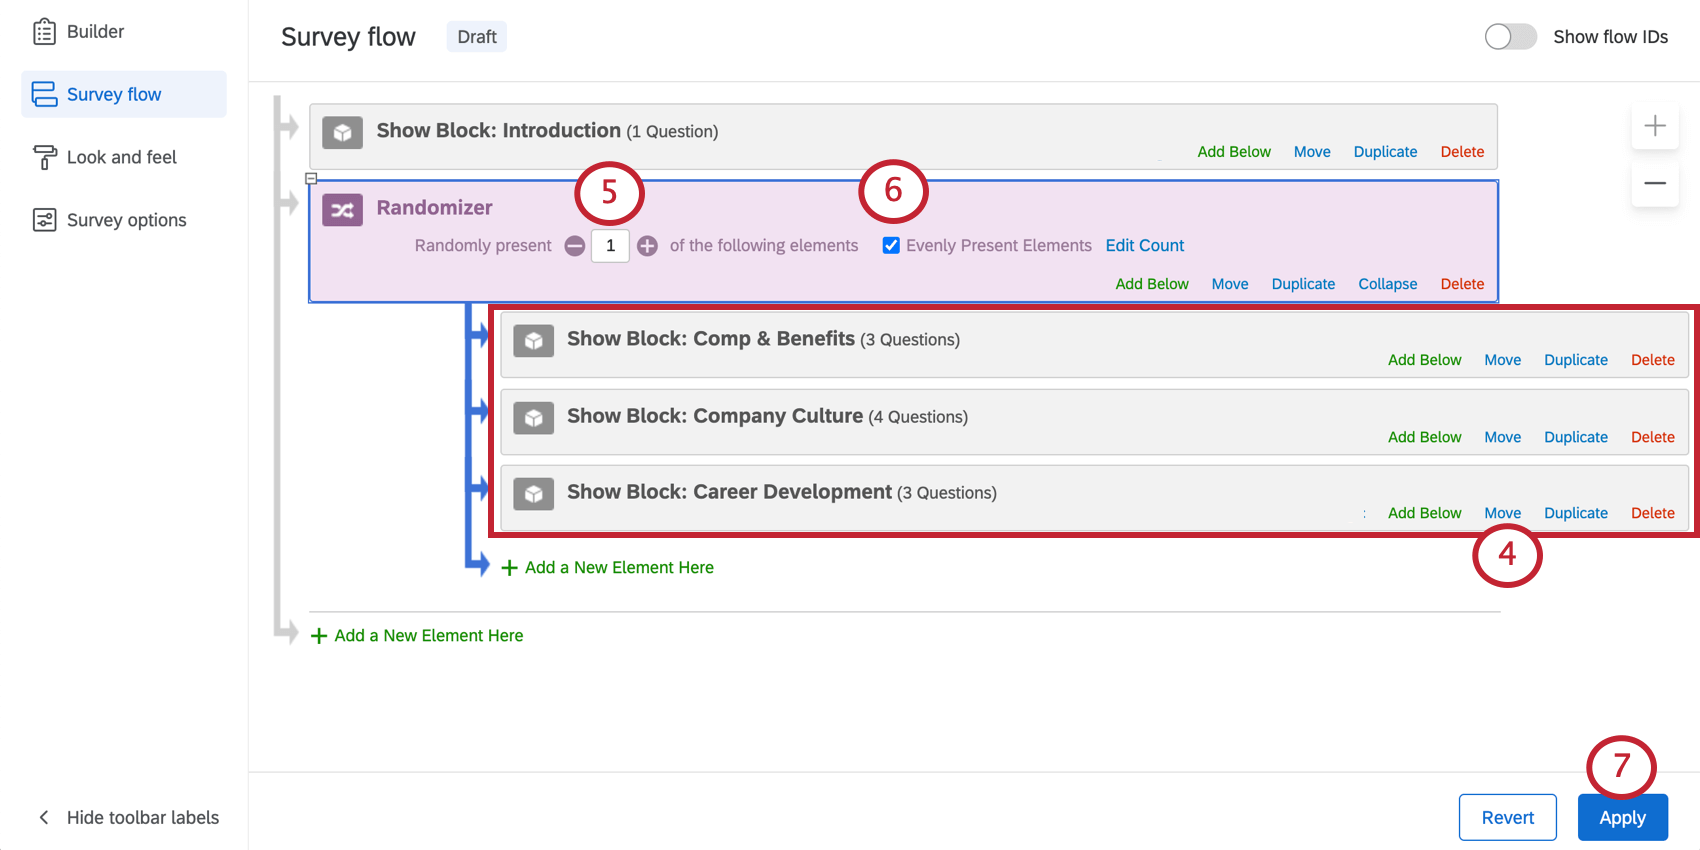
 - Enter the number of elements you want to present to your respondents.
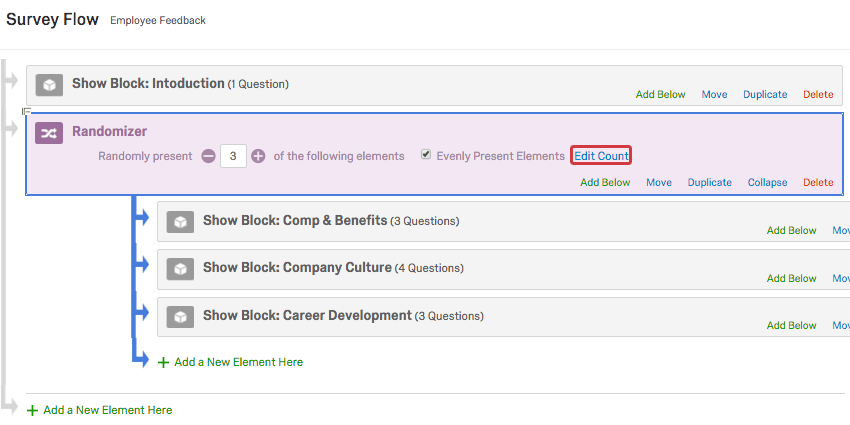
- If desired, click the checkbox for Evenly Present Elements to present each element a roughly equal number of times across all respondents.
- Click Apply.
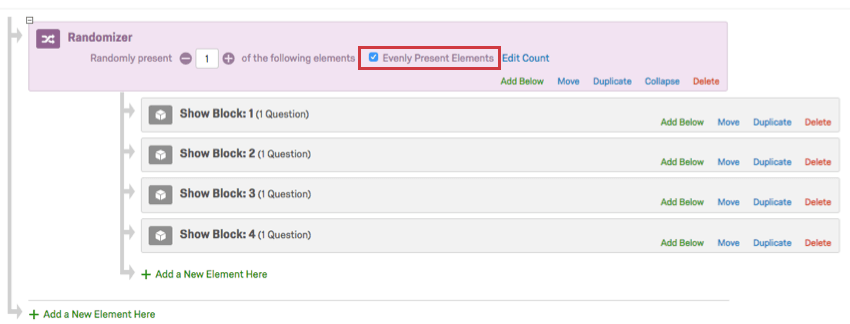
Evenly Present Elements
When selected, “Evenly Present Elements” makes sure that even as elements are randomized, they are randomized evenly. This setting keeps careful watch on the counts to ensure every element is presented an equal number of times.
When deselected, items are randomly presented with no attention paid to whether the number of times they’ve been presented is equal or not.
Editing Counts
When Evenly Present Elements is selected, you can click Edit Count to view how many times each element has been displayed.
These numbers should be roughly the same, but you can override the counts if you need to temporarily give preference to a specific element. In the below example, if you set question block Comp & Benefits to “5” and the others are set at “15”, the Comp & Benefits block will be displayed 10 times in a row to “catch up” with the other blocks and ensure even presentation.
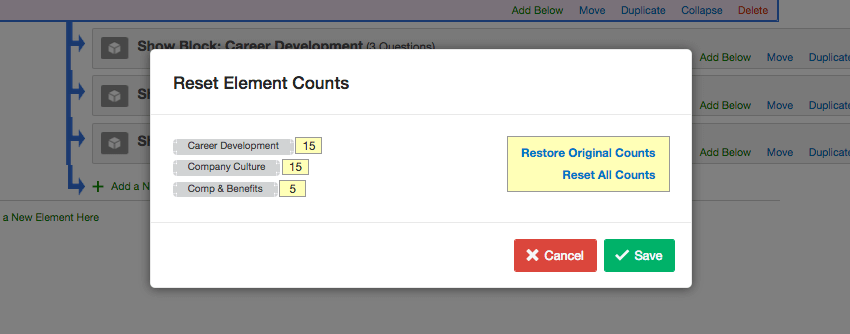
You also have the option to reset all counts back to 0 or to restore all counts to what they were before you changed them.
- Restore Original Counts: This option will restore the counts back to their original number before you edited them.
Warning: This option only restores counts for the timeframe in which you have the Edit Counts window open. If you edit your counts, save the changes, then return to edit the counts, the Restore Original Counts option will not revert your counts to before your edits.
- Reset All Counts: This option will set the count for all elements to 0.
Using the Randomizer with Other Elements
In addition to blocks, you can use the randomizer to randomize other elements in the survey flow. For example, you can use a randomizer to randomly assign specific embedded data labels to each respondent or to randomly send your respondents to different survey endings with end of survey elements.
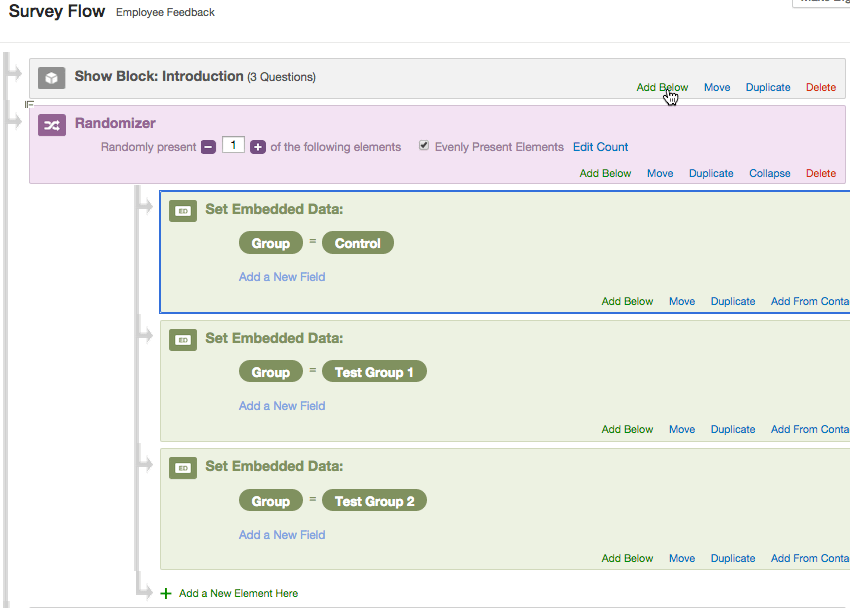
Each respondent is randomly assigned to a group. Later in the survey flow, this group value can be used as criteria in branch logic, display logic, and other logic.
You can also randomize branches to show elements conditionally or to group multiple elements together (like blocks, end of survey elements, and embedded data). Even if you don’t want to conditionally present items, you’ll need to use a branch to group them together.
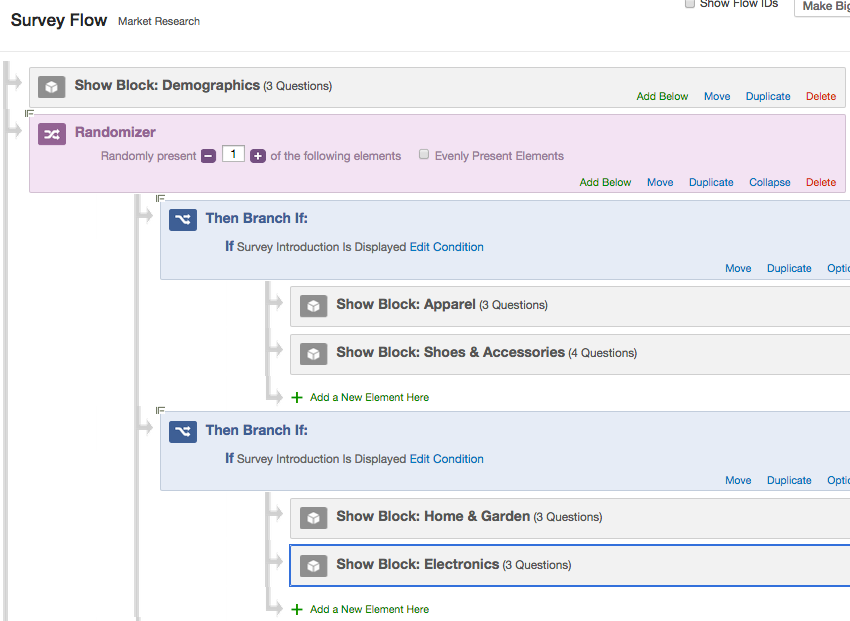
In this survey, respondents are shown the Demographics block, and then randomly assigned to 1 of the 2 branches. If they are assigned to the first branch, they are shown Apparel and Shoes & Accessories and then directed to the end of the survey. If they are assigned to the second branch, they are shown Home & Garden and Electronics.
To group multiple elements
If you are not planning on setting different conditions with branches, you can use the group element to keep elements grouped together in the survey flow.
- Navigate to the Survey tab and open your Survey Flow.
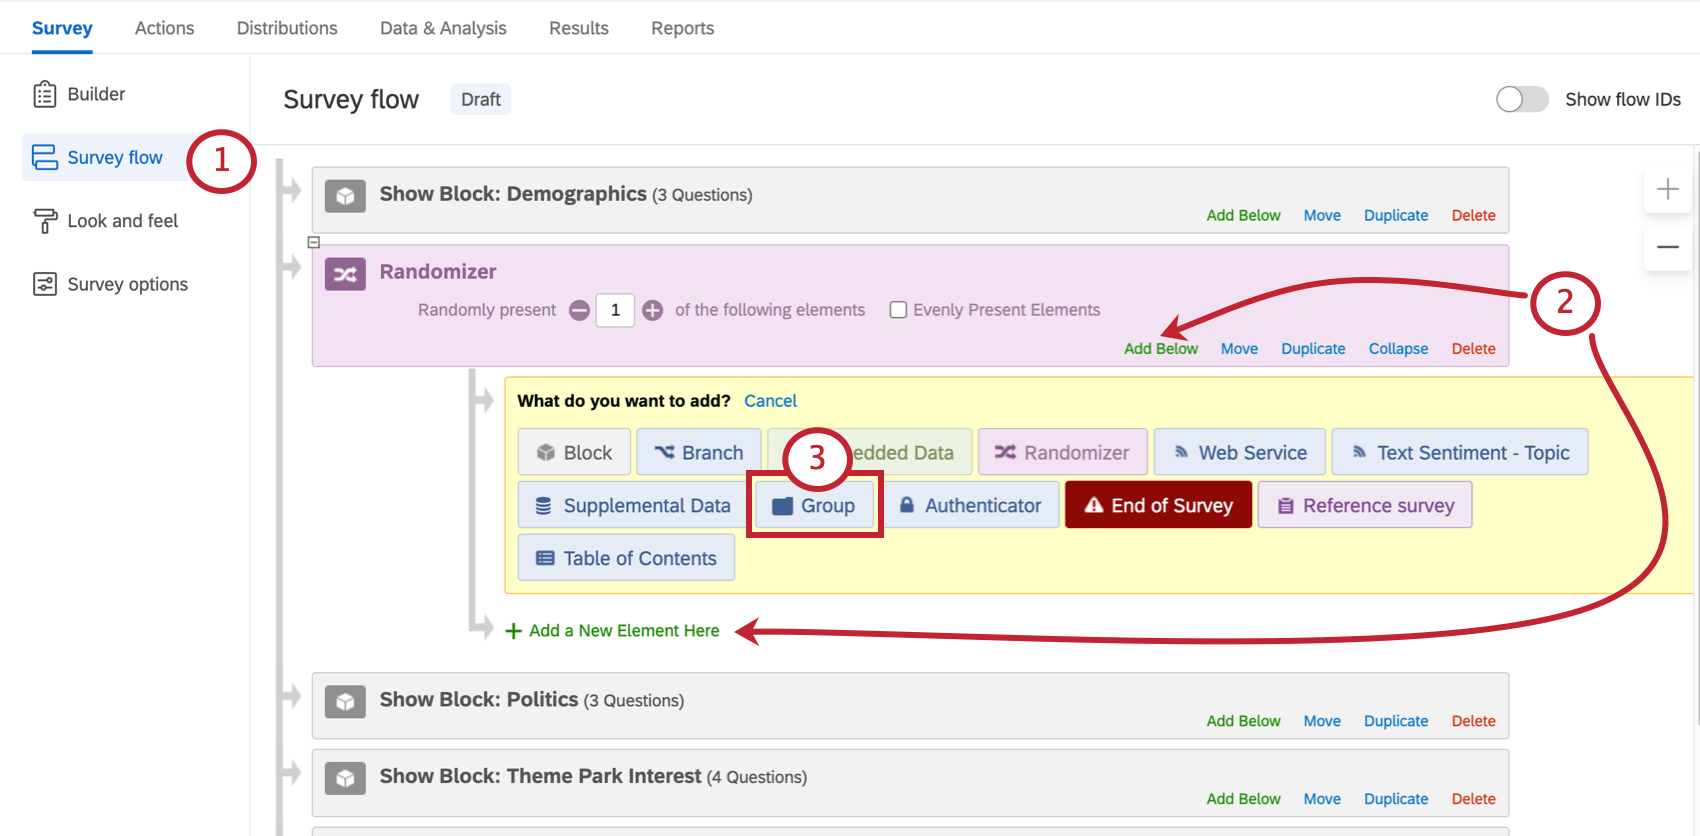
- Click Add Below or Add a New Element Here under the randomizer.
- Select Group.
- Move elements that belong in a set under the group.
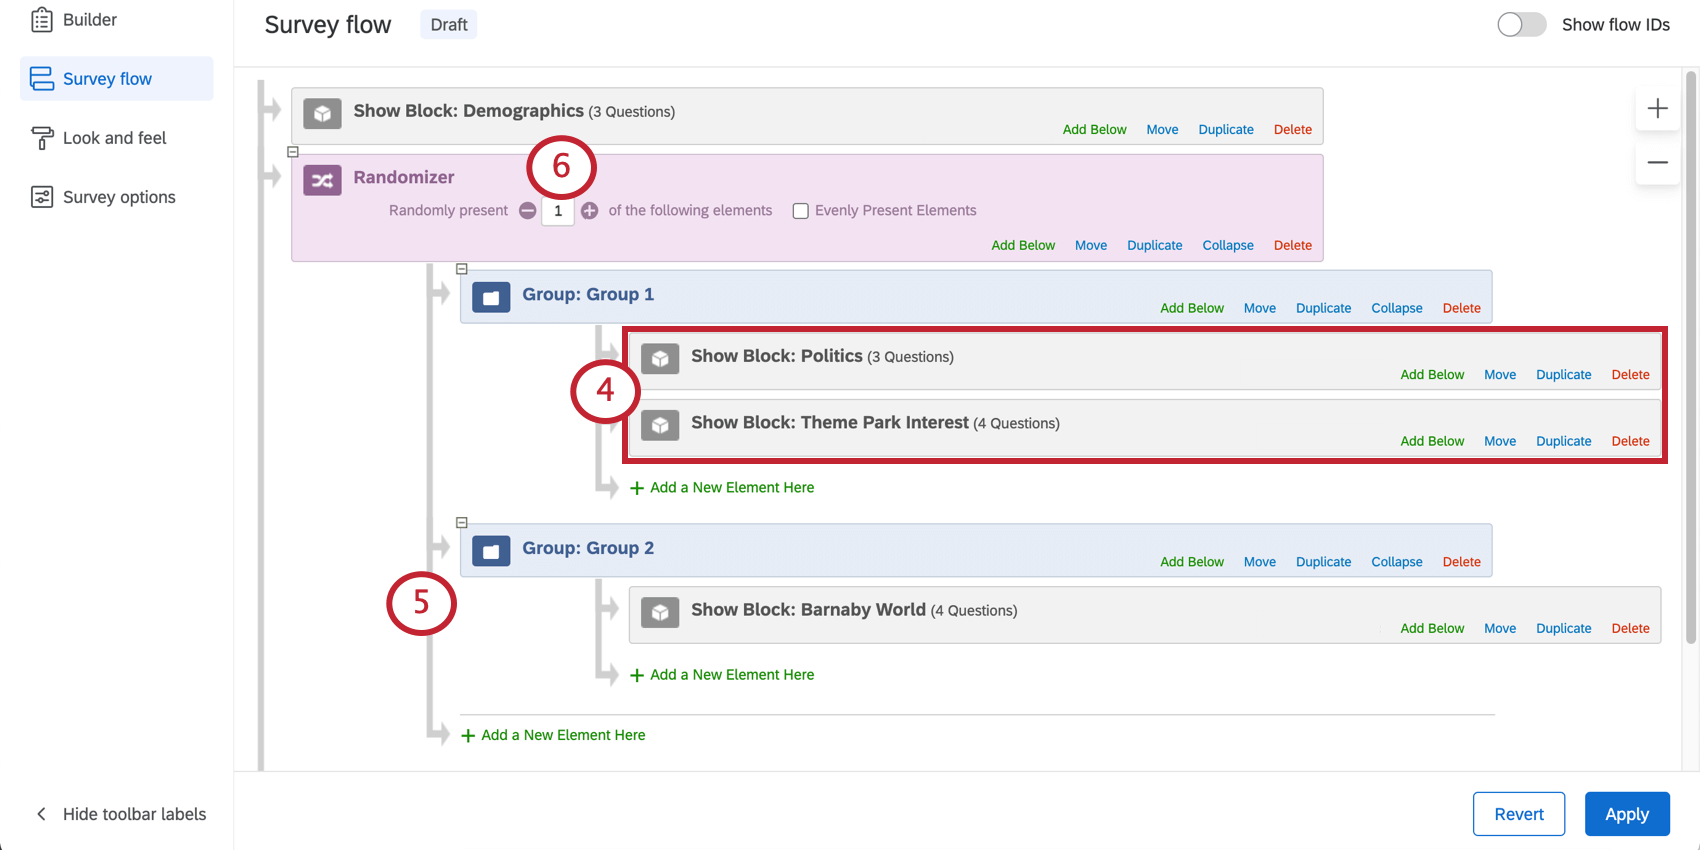
- Repeat steps as needed until all groups and sets are in place.
- Adjust your randomizer count accordingly.
Export Randomized Viewing Order
Downloading randomization data allows you to view the order in which your survey elements were displayed to respondents.
Each survey flow element has a unique Flow ID, which can be viewed when you open the survey flow and select Show Flow IDs.
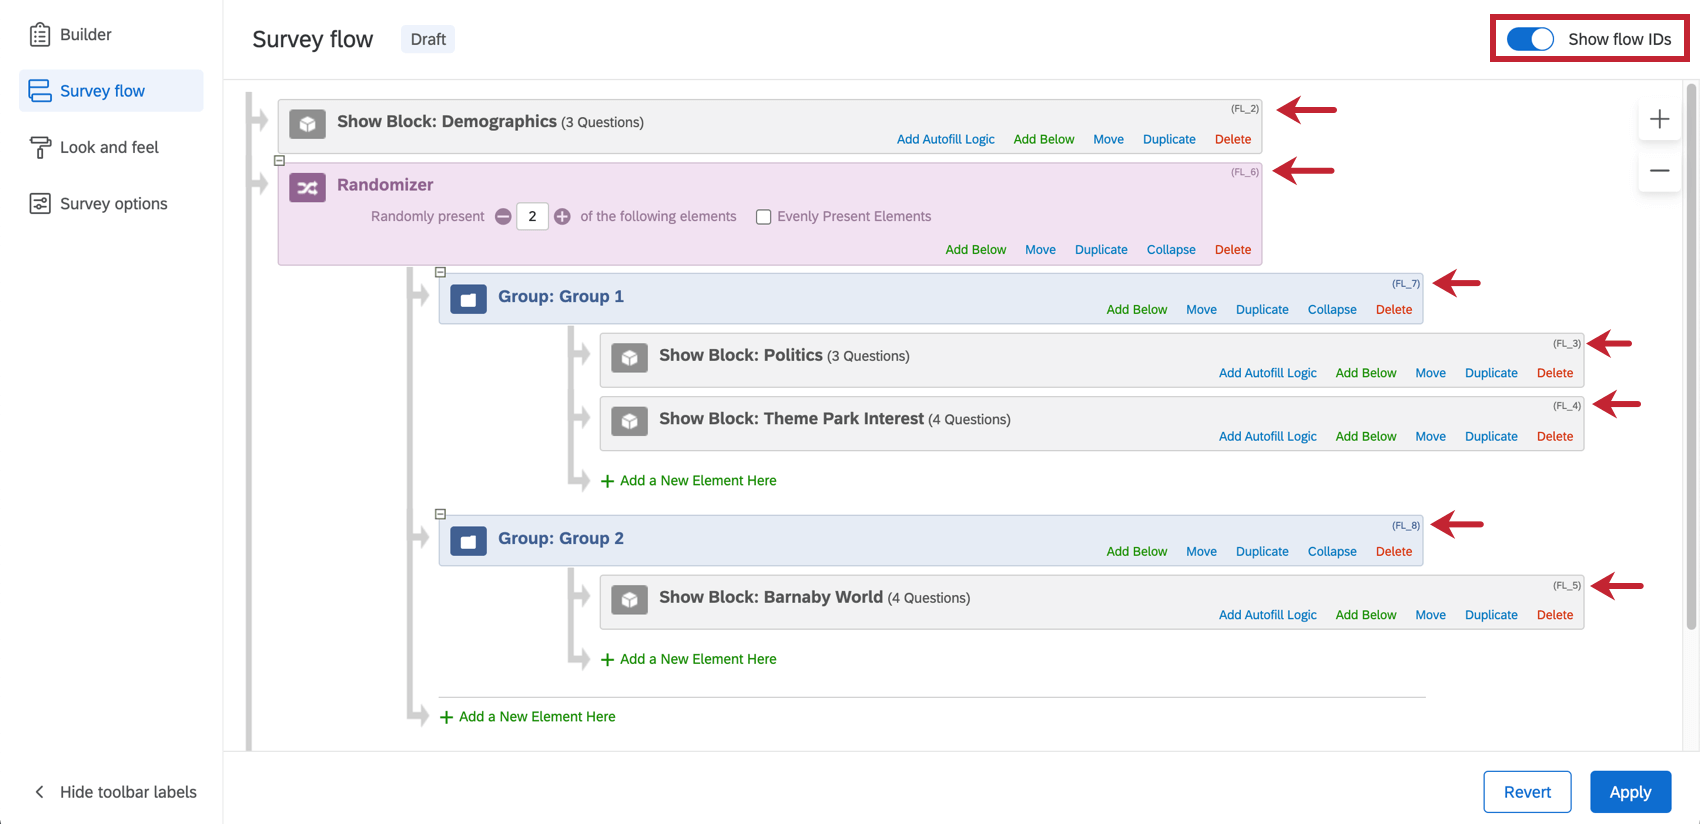
These IDs are used in the exported data to identify which elements within the randomizer were shown to the respondent. This column of data usually appears towards the end of the exported data file.

Types of Projects this Feature Is Available In
Randomizers are compatible with every type of project that lets you customize a survey. This includes: