
Extract Data from Qualtrics File Service Task
What's on this page
About Extracting Data from the Qualtrics File Service
The Qualtrics File Service is a secure and isolated file store API where you can upload files. Using workflows, you can process data you’ve stored in the Qualtrics File service for use elsewhere in Qualtrics. For example, you can store company contacts to the Qualtrics File Service, then regularly import them to your directory.
Example: You can combine the “Extract Data from Qualtrics File Service” task with other loader tasks, such as the add contacts and transactions to XMD task.
Qtip: For information on general limits that apply to ETL workflows, see Workflow Limits. For any task-specific limits, refer to the information on this page.
Connecting to the Qualtrics File Service
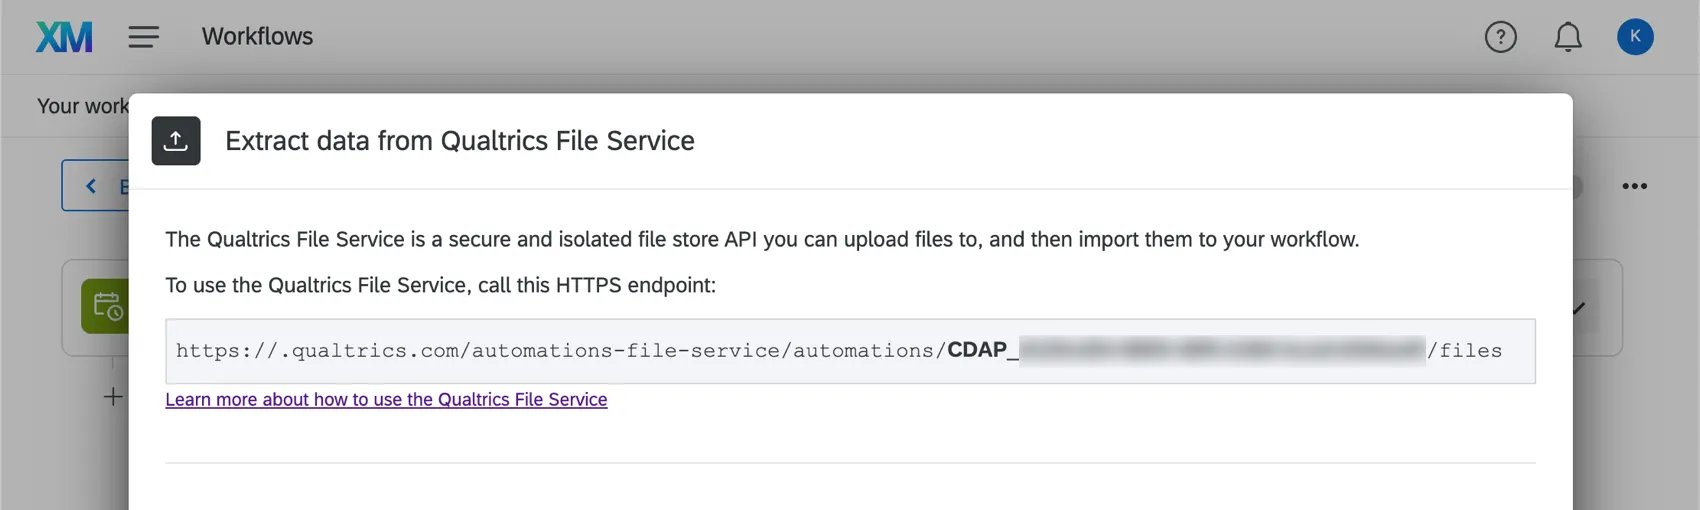
The Qualtrics File Service (QFS) is a secured file store API that allows you to upload files for this automation to import.
Attention: You may need to work with your IT or Software Engineering team to integrate with the Qualtrics File Service.
To use the QFS, upload a file to an HTTPS endpoint, which will be provided in a grey box (shown below), as multipart form-data.
When the automation is scheduled to run, it’ll process any files that have not been processed by the automation yet, including newly uploaded ones.
To use the Qualtrics File Service, you’ll need to call the HTTPS endpoint provided. If the file is generated from the system, you’ll want to provide the API documentation and the following example implementation to your IT or Software Engineering team to integrate with our service.
Example: This example is in cURL format. See the API Overview support page on how to generate an API token.
For Mac and Unix users:curl -X POST -H "X-API-TOKEN: [YOUR API TOKEN]" \
-F 'file=@/path/to/import/file/sample-file.txt' \
https://datacenterid.qualtrics.com/automations-file-service/automations/AU_XXXXXXXXX/filesFor Windows users:
curl -X POST -H "X-API-TOKEN: [YOUR API TOKEN]" ^
-F "file=@/path/to/import/file/sample-file.txt" ^
https://datacenterid.qualtrics.com/automations-file-service/automations/AU_XXXXXXXXX/files
Example: This is a Request Example. See the API Overview support page on how to generate an API token.
POST https://datacenterid.qualtrics.com/automations-file-service/automations/AU_XXXXXXXXX/files HTTP/1.1
Content-Type: multipart/form-data
X-API-TOKEN: [YOUR API TOKEN]

-----------------------------
Content-Disposition: form-data; name="upfile"; filename="sample-file.txt"
Content-Type: text/plain

[FILE DATA]
-----------------------------
Manually Manage Uploaded Files with API
You can also manually manage uploaded files using the Qualtrics API. The following links explain how to interact with the Qualtrics File Service API:
- List all files uploaded for this automation.
- Upload a file to be used by this automation.
- Get the metadata associated with a file.
- Get the contents of a file.
- Remove a file.
At times, these API calls will ask for an automationId. Qualtrics will provide you with this information, formatted as AU_XXXXX.
Before You Get Started
Before you get started extracting data from the Qualtrics File Service, take the following considerations into account:
- What do you want to do with your data? Take a look at the available loader tasks for a list of options.
- Do your files fit a consistent format? For example, files you hope to import in the same workflow should have the same headers / columns / fields, even if the values differ. Example: You set up a workflow to regularly upload contacts from the Qualtrics File Service to XM Directory. Every file has columns for Firstname, Lastname, Email, Phone, UniqueID, and Location.

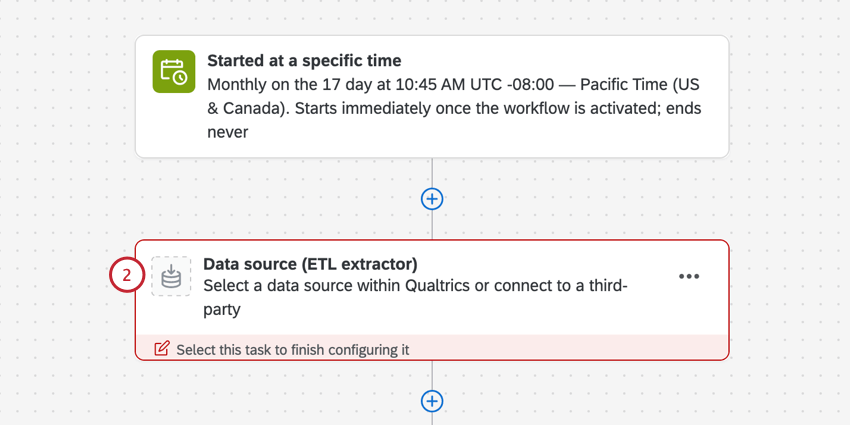
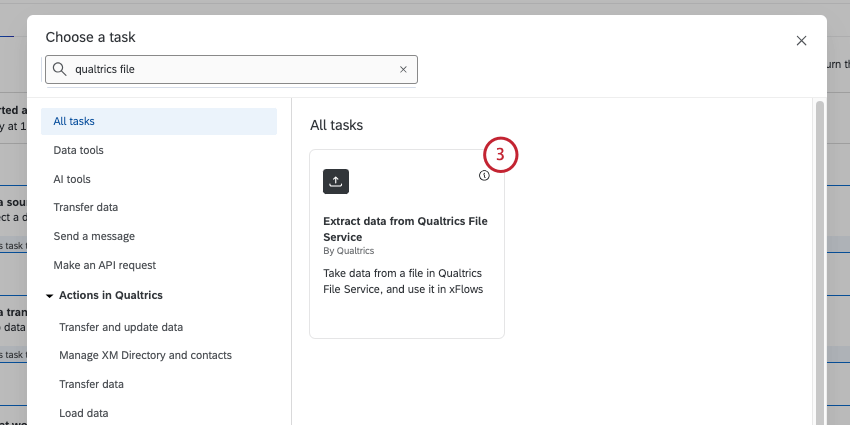
Setting Up an Extract Data from Qualtrics File Service Task
Qtip: Files processed by this workflow will be deleted from the Qualtrics File Service.
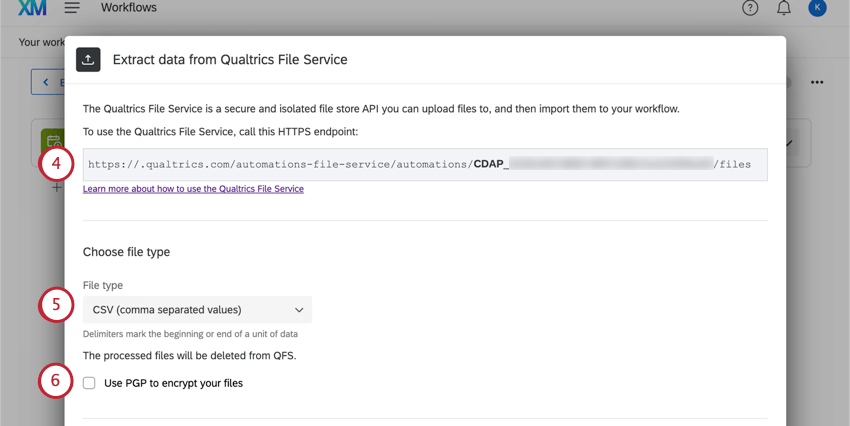
- CSV (comma separated values)
- TSV (tab separated values)
- Custom delimiter: This option is available if you’re using a delimiter other than tabs or commas in your file. Enter the character you use in the field provided. (E.g., ; or | ).
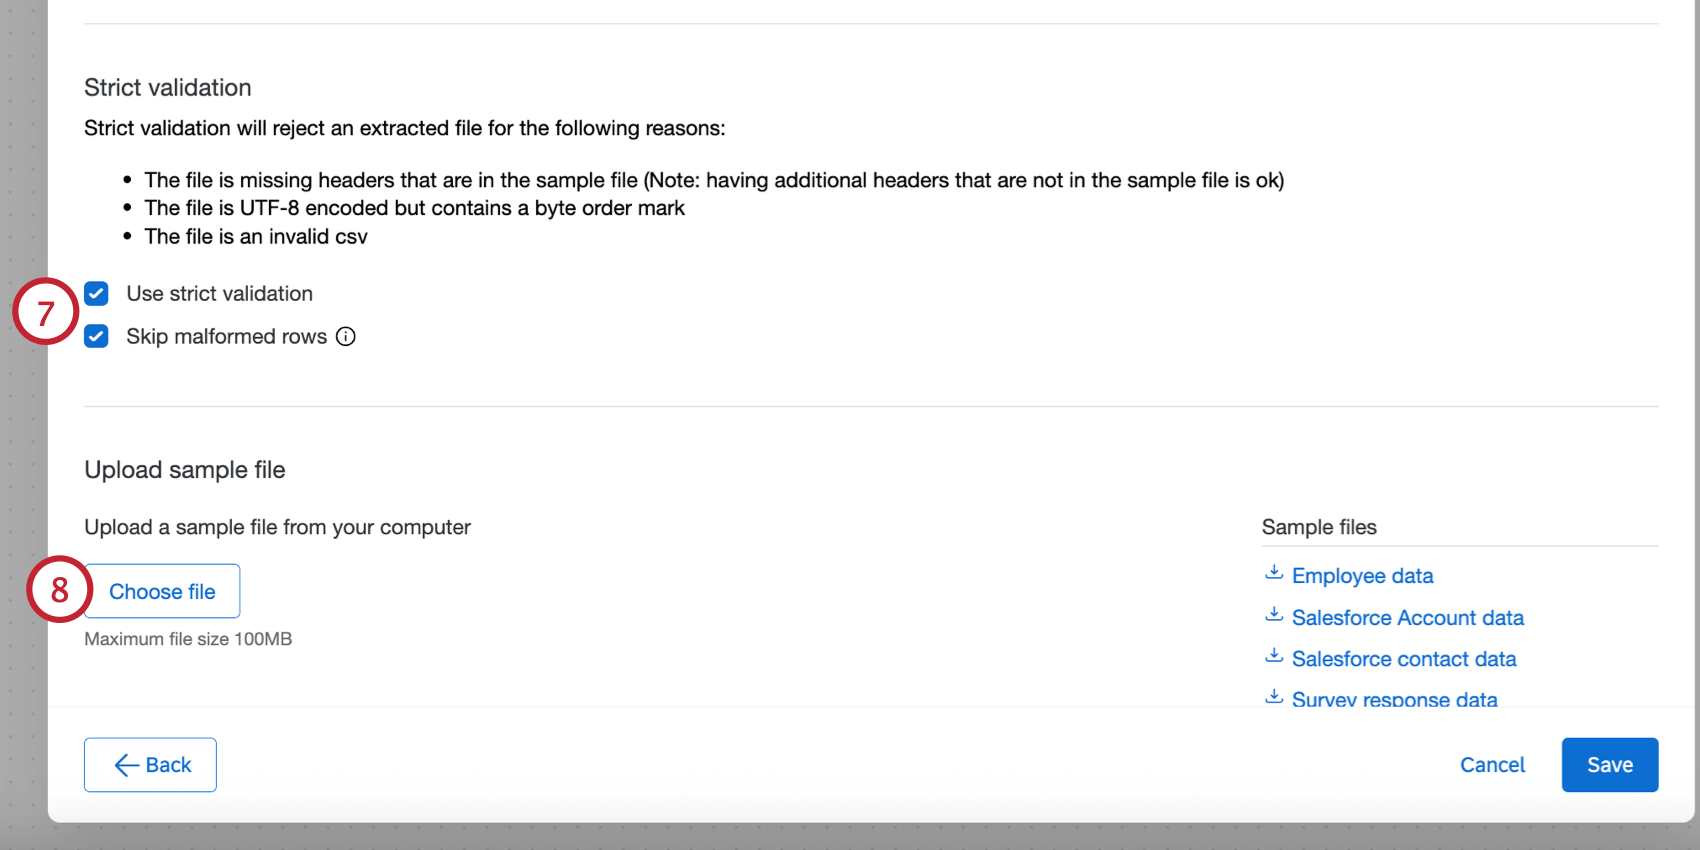
Qtip: If you’d like, you can download the sample files in the task, or download the files in the Example Files section. The only supported file encoding format is UTF-8. Some spreadsheet softwares save files as Unicode UTF-8, which is different from UTF-8, if you are getting unexpected errors. Please ensure that you are exporting in UTF-8 format and not Unicode UTF-8. See CSV & TSV Upload Issues for more troubleshooting steps.


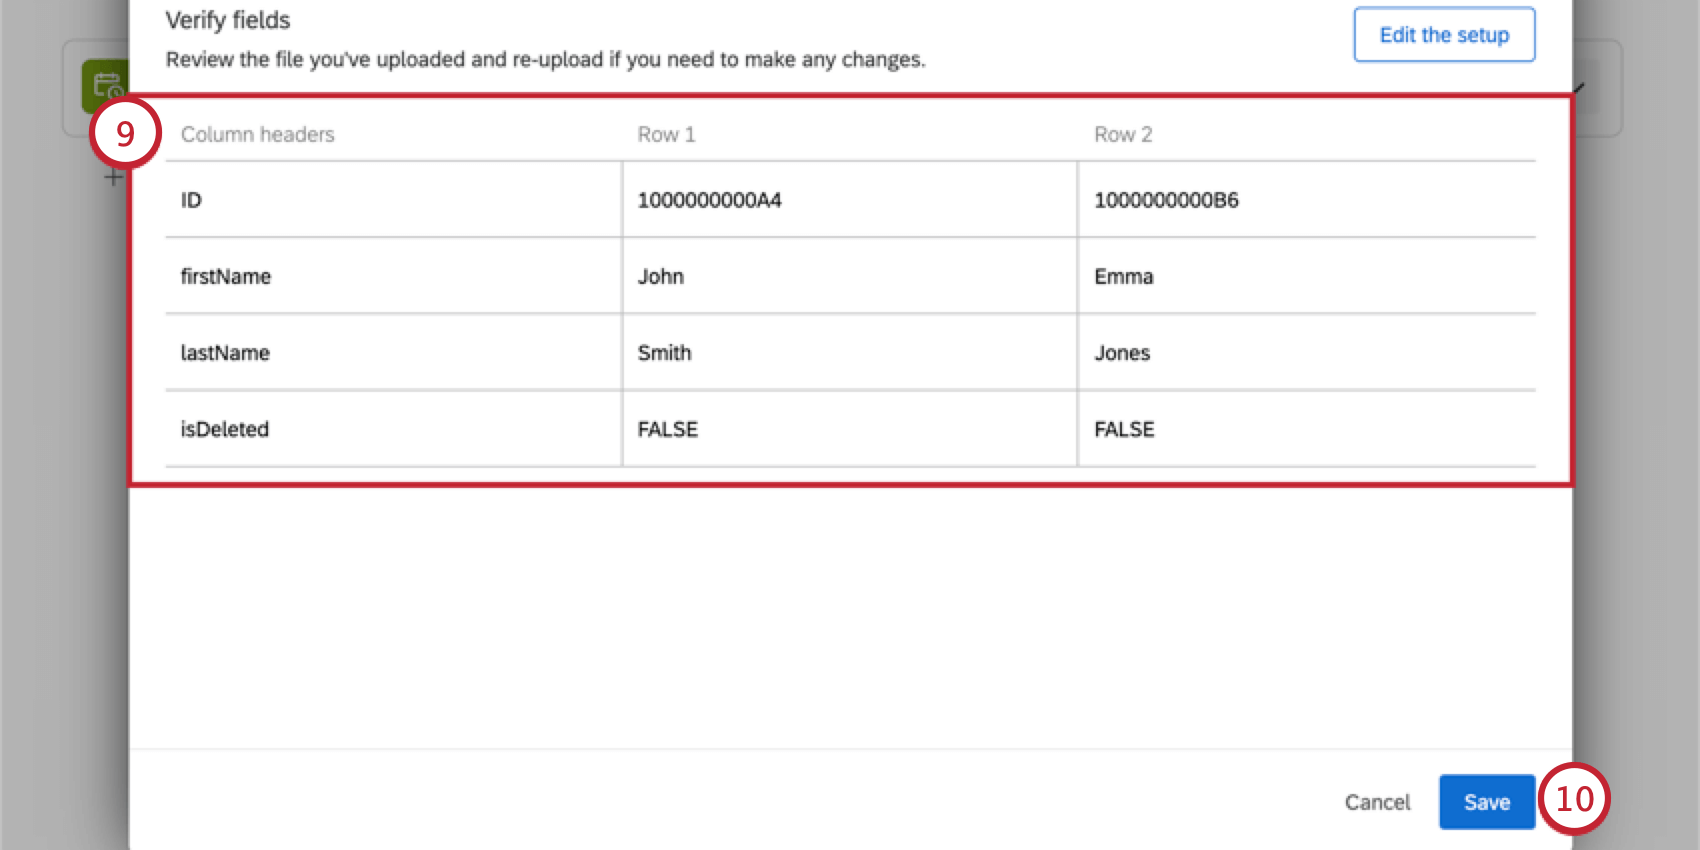
Qtip: If you want to upload a different file or make other changes, click Edit the setup.
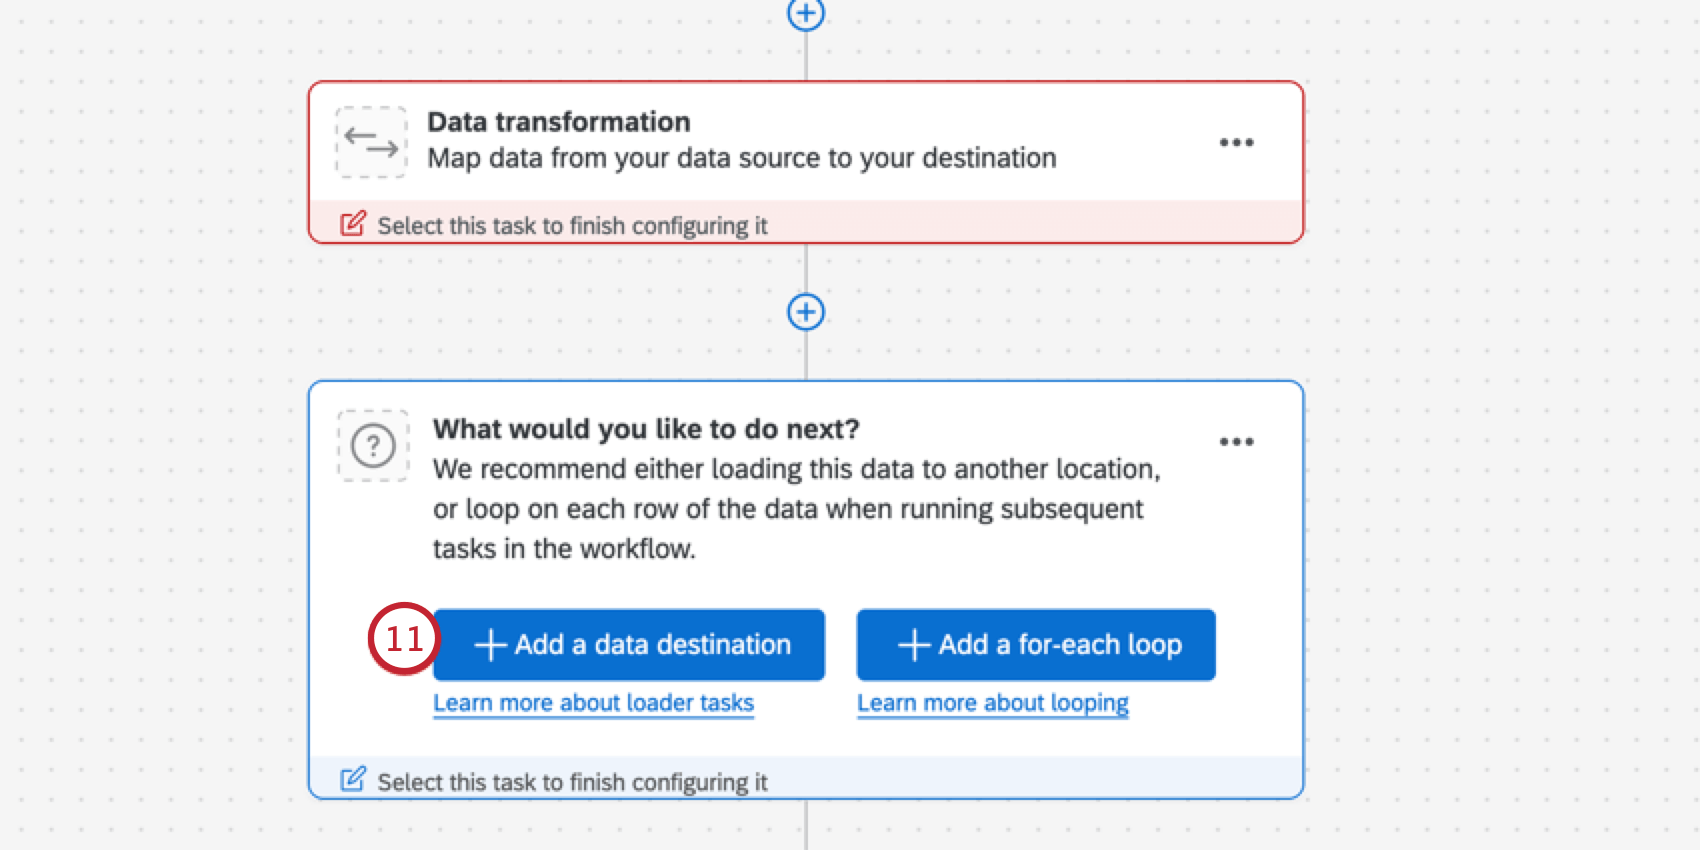
Qtip: To restrict what happens next, you can also create conditions based on the number of files or rows imported before you add a loader task.
FAQs
What custom delimiters can I use to upload contacts to XM Directory with workflows?
What custom delimiters can I use to upload contacts to XM Directory with workflows?
~
&
*
"
_
That's great! Thank you for your feedback!
Thank you for your feedback!