
K-12 Education: Remote Learning Pulse
What's on this page
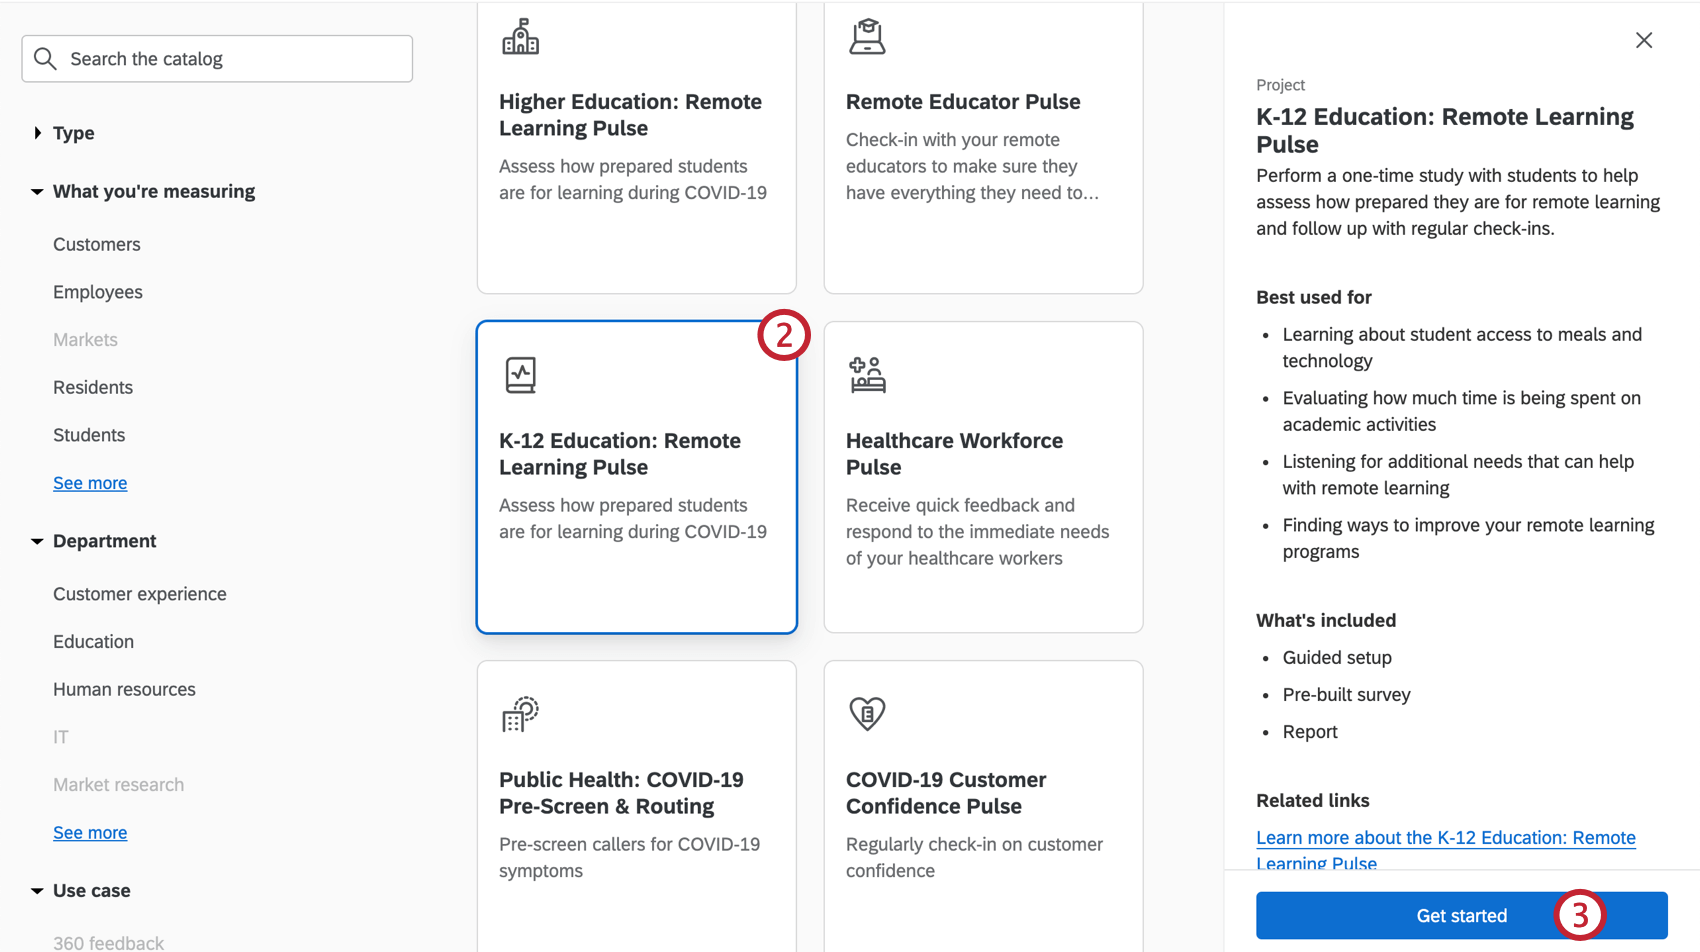
About the K-12 Education: Remote Learning Pulse XM Solution
Many K-12 schools are facing the difficult challenge of keeping students and staff safe, while ensuring every student can keep learning. The K-12 Education: Remote Learning Pulse helps you understand if your students and their families are prepared for a shift to remote learning and if they have what they need to succeed in this new environment. This solution will also help you identify areas for improvement so that vital learning progress can continue.
This solution consists of two studies you can choose from – the Snapshot and the Check-In – both created by Qualtrics XM scientists. Each of these studies also comes with its own built-in report.
Qtip: All users with existing Qualtrics licenses have access to this solution. In addition, we are offering these solutions for free to companies based in India. If you are based in India and do not have a Qualtrics account, see this page for more information on how you can get access to this solution.
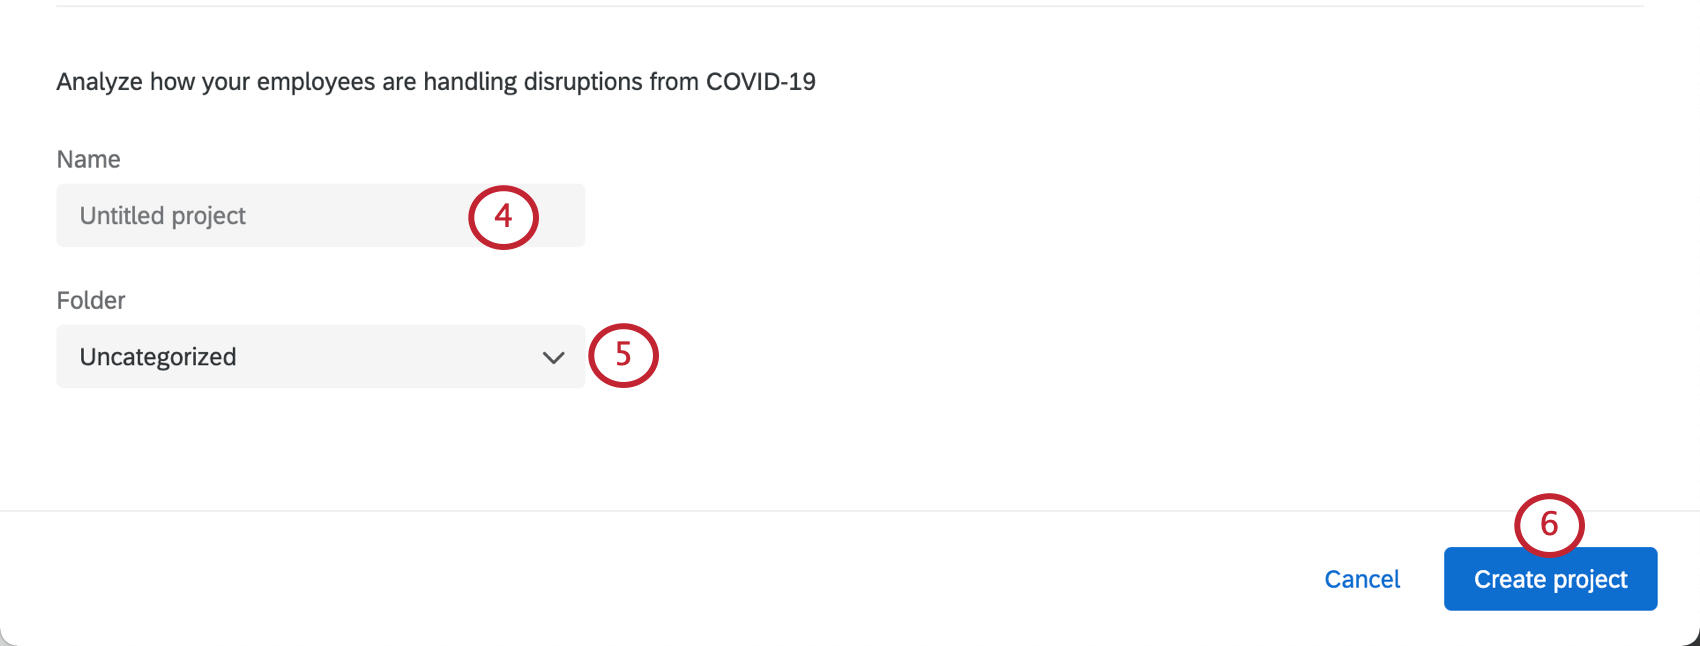
Creating a K-12 Education: Remote Learning Pulse
Qtip: All users with existing Qualtrics licenses have access to this solution. In addition, we are offering these solutions for free to companies based in India. If you are based in India and do not have a Qualtrics account, see this page for more information on how you can get access to this solution.
Qtip: This XM Solution is only available in English. You will only be able to make this project if your account language is set to English. However, you can upload translations or auto-translate using Google Translate for content as needed. See FAQs for more details.
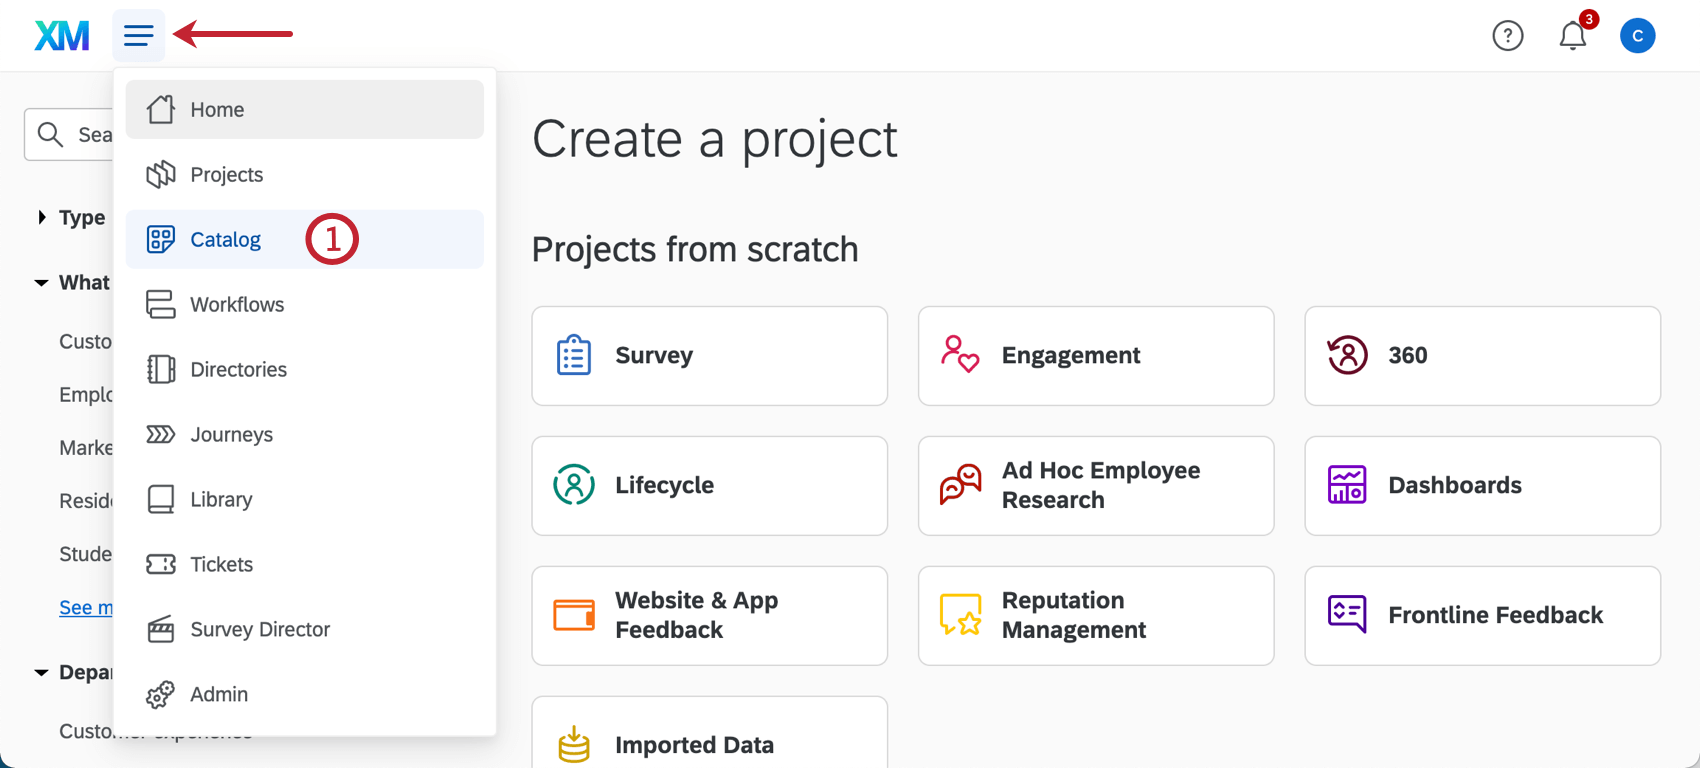
Qtip: A project can also be created from the Projects or Homepage.
Qtip: You can also use the search in the catalog to find this project.
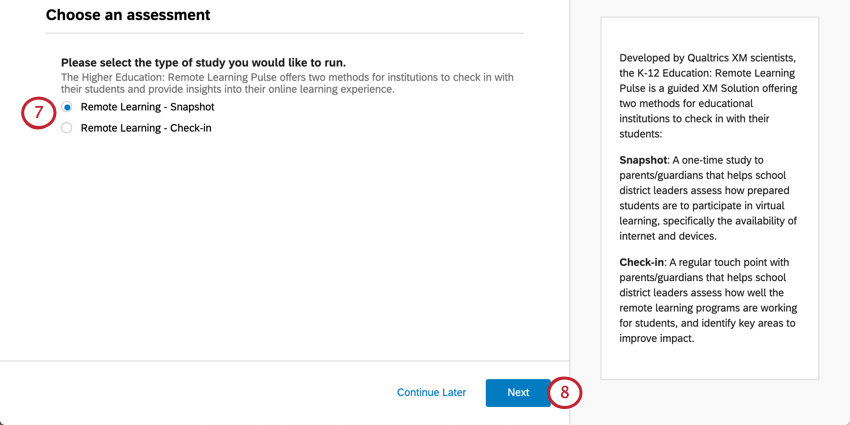
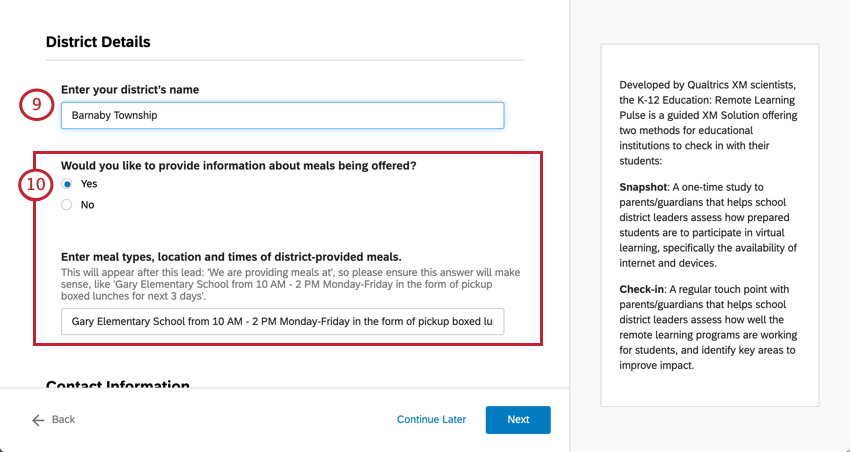
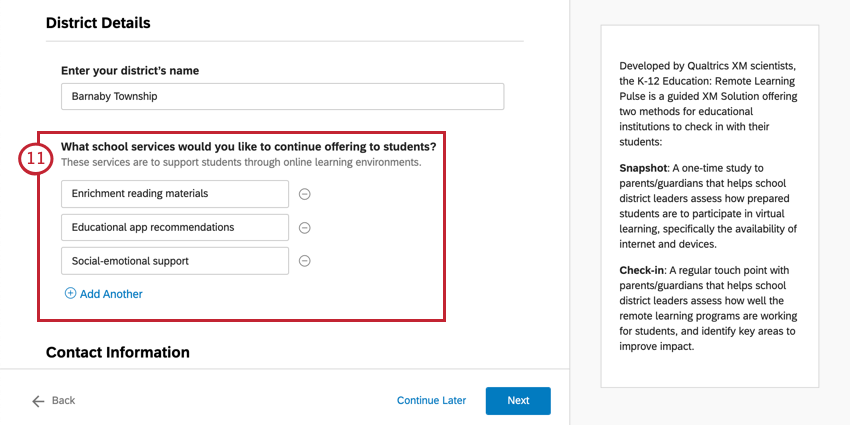
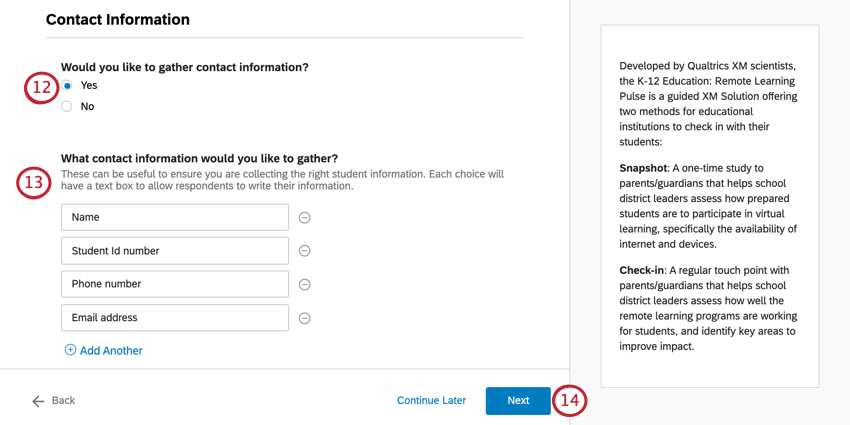
- Remote Learning – Snapshot: A one-time study to parents/guardians that helps school district leaders assess how prepared students are to participate in virtual learning, specifically the availability of internet and devices.
- Remote Learning – Check-in: A regular touch point with parents/guardians that helps school district leaders assess how well the remote learning programs are working for students, and identify key areas to improve impact. Qtip: If you choose one option and then later decide you’d prefer to work with the other, please create another, separate K-12 Education: Remote Learning Pulse.

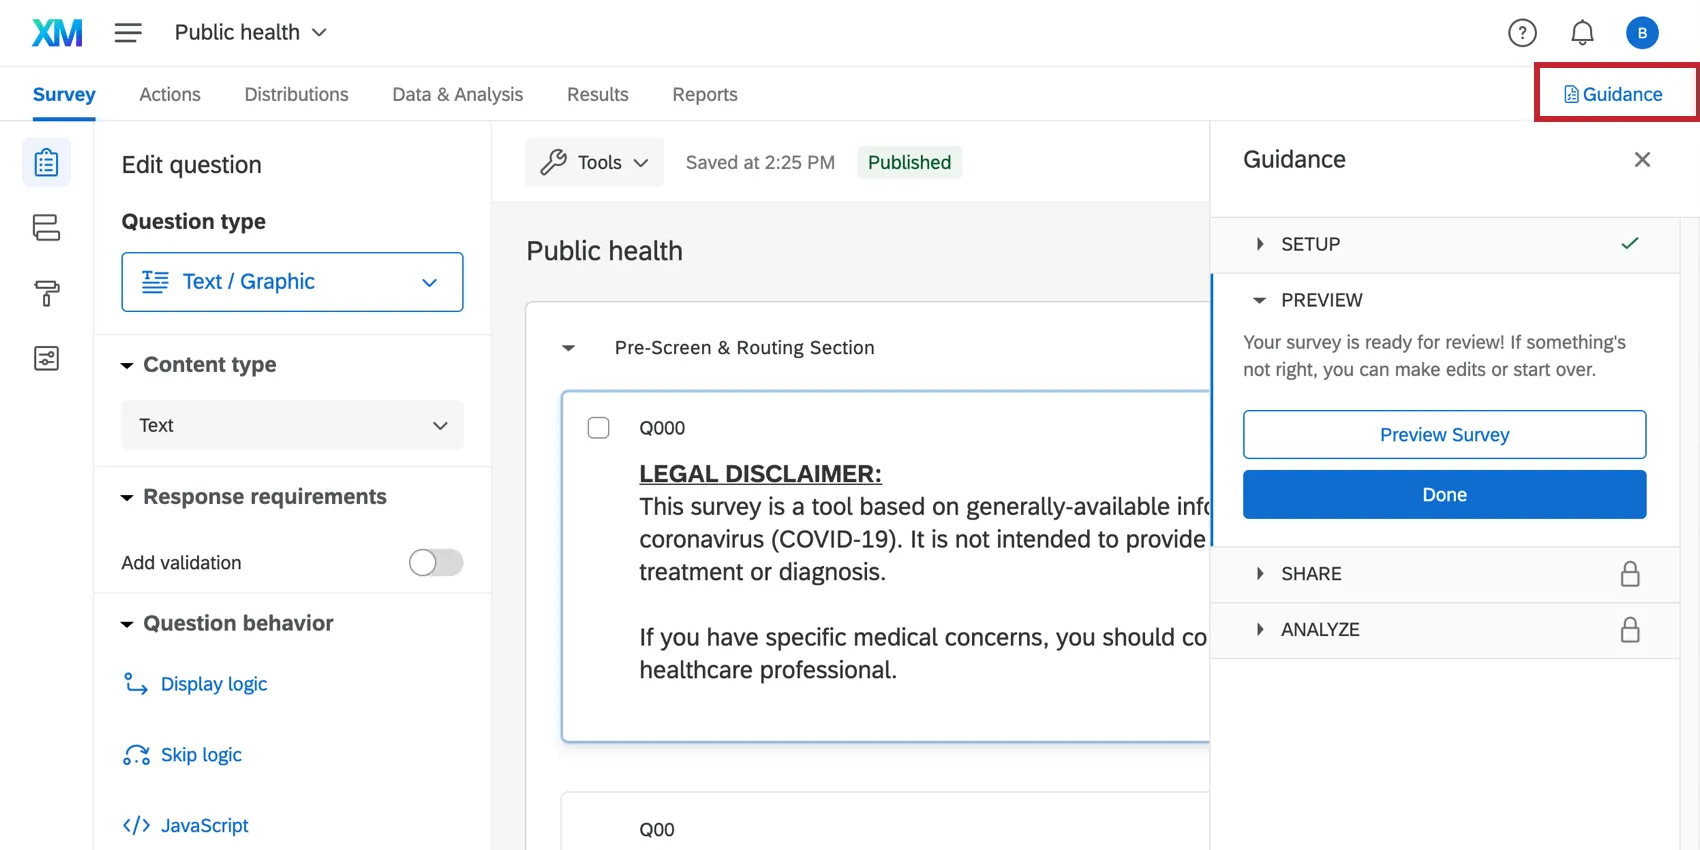
Qtip: Did your survey Preview not appear? Make sure your browser doesn’t block pop-ups on Qualtrics.
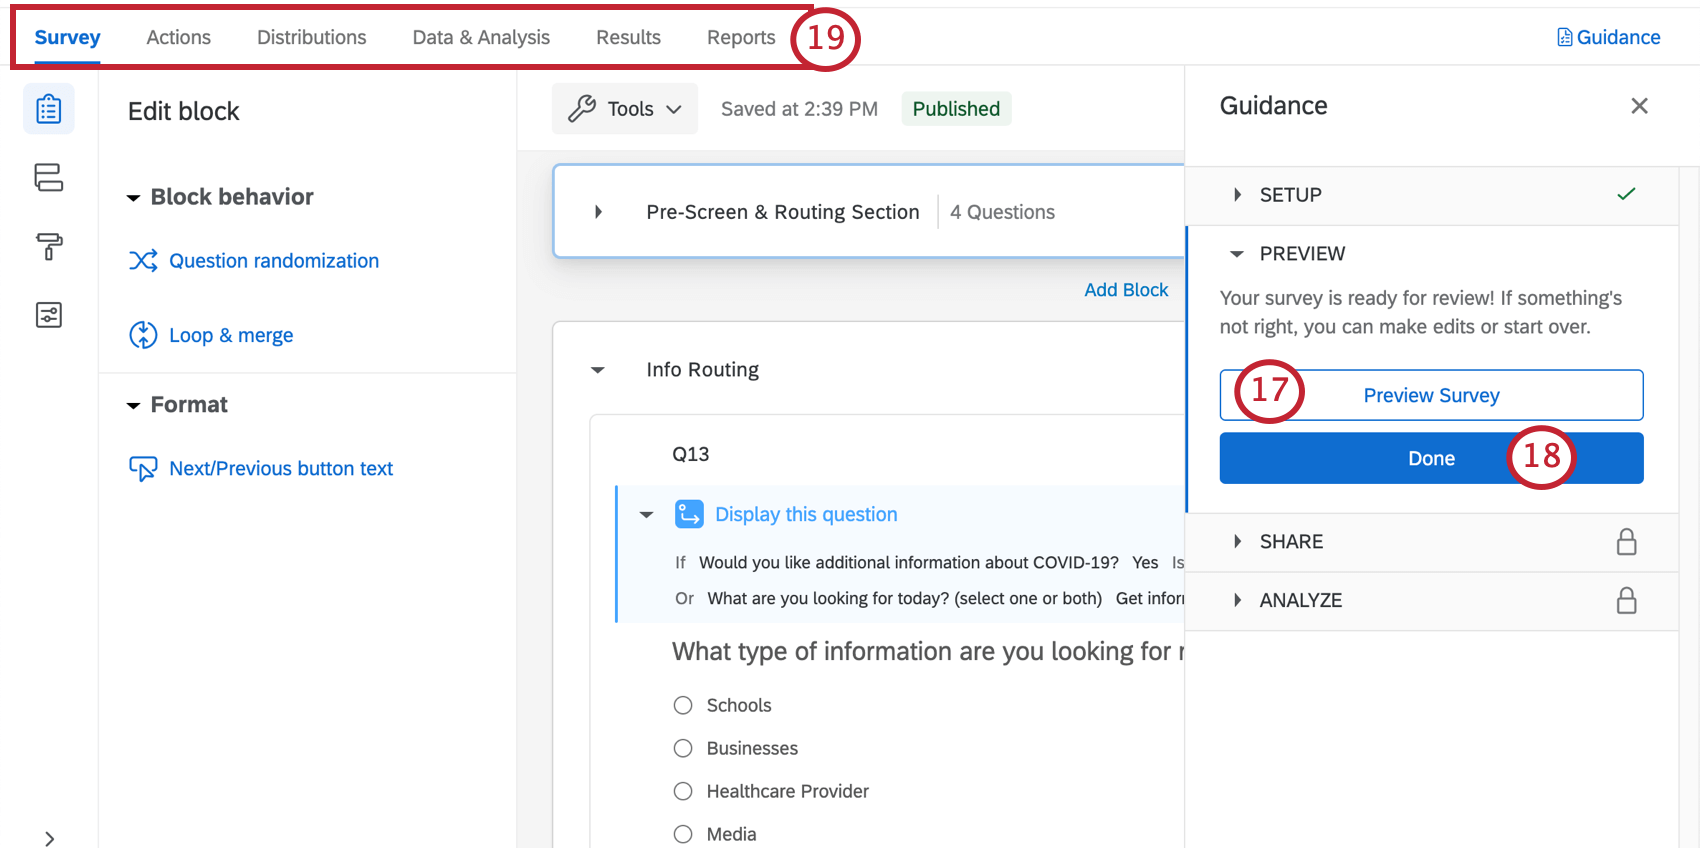
Qtip: After completing the initial setup, you can review the guided setup steps by clicking Guidance in the top-right corner of your project.

Remote Learning Pulse Survey Customization
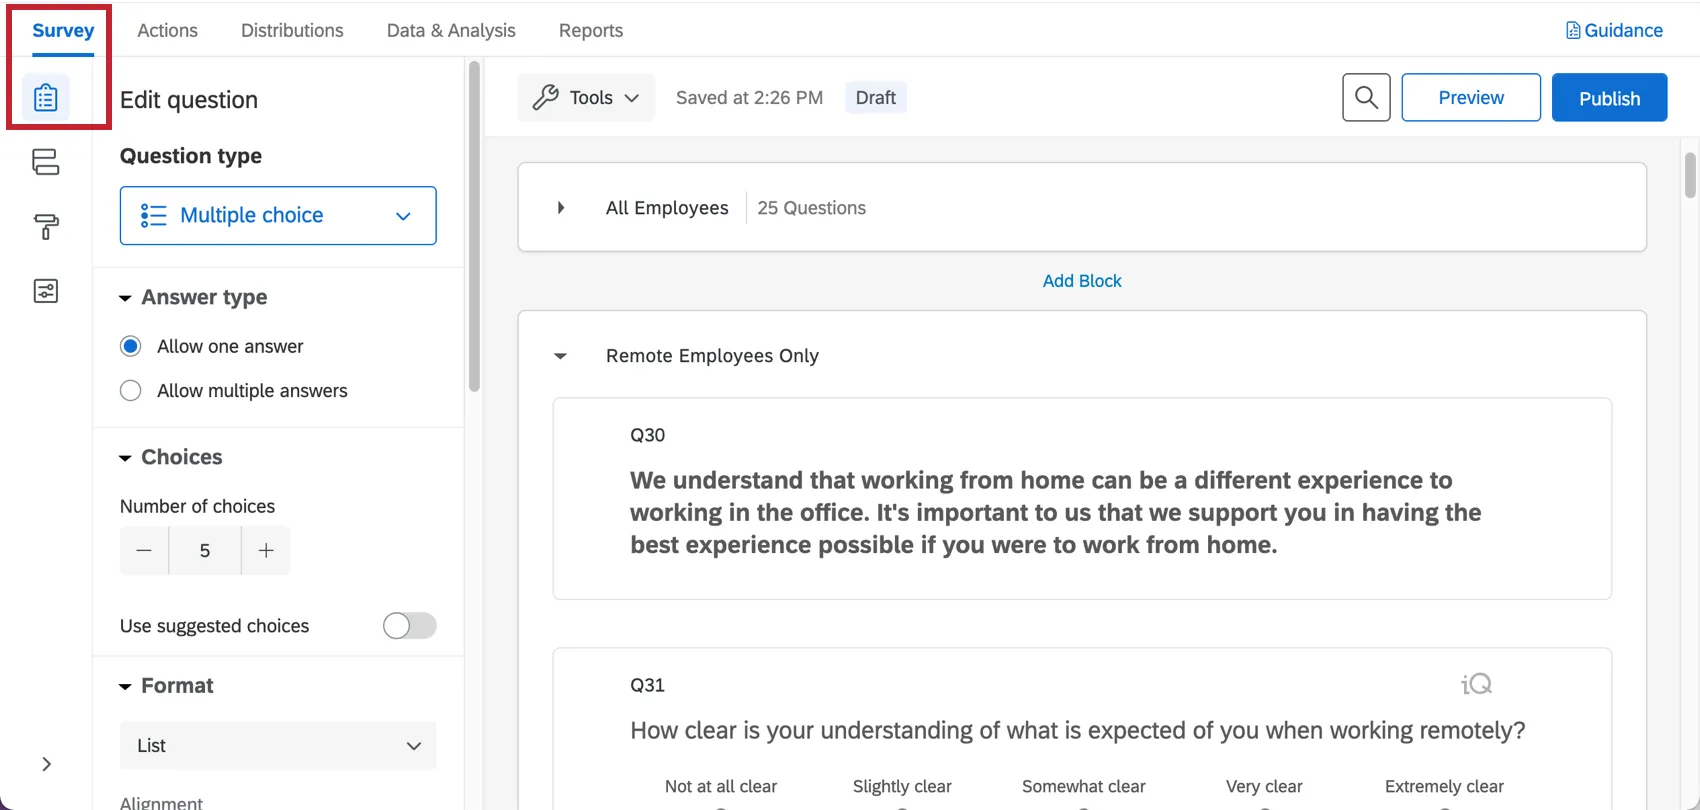
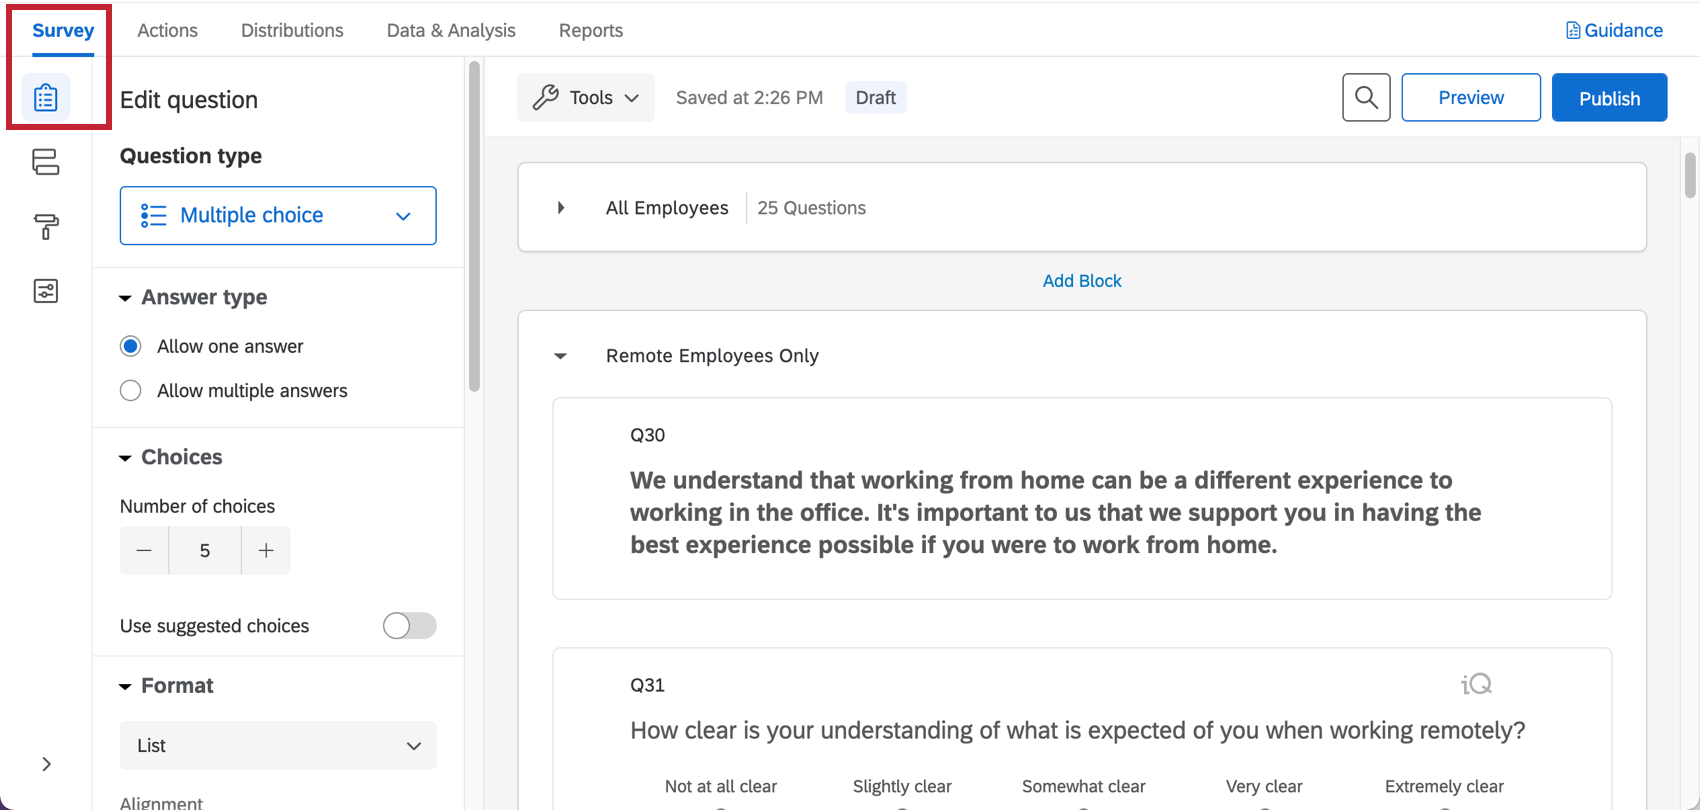
If you want to see the questions in your survey or edit them, click the Survey tab. Once inside the survey builder, you can add new questions, tweak the wording on existing ones, edit the survey theme, and much more.
If there’s particular functionality you’d like to add, try searching the Support Site, or use the Support Site’s menu to the left to pick a page. In this section, we’ll cover some of the fundamentals of survey editing.
Qtip: The questions included in this survey were developed by our top subject matter experts. We advise trying to keep your survey as similar to the original template as possible, and not making too many large-scale changes.
Adding and Editing Questions
Warning: It’s important to make edits to the survey before you distribute it to recipients. If possible, avoid making edits to a survey actively collecting data, or you may risk invalidating your data and changing the premade reports that come with this solution. See Testing / Editing an Active Survey.
You can add as many additional questions as you want. However, keep in mind that the shorter the survey, the more likely recipients are to fill it out.
For guides to adding and editing questions, see:
Qtip: For surveys like these, we generally advise sticking to multiple choice and text entry questions.
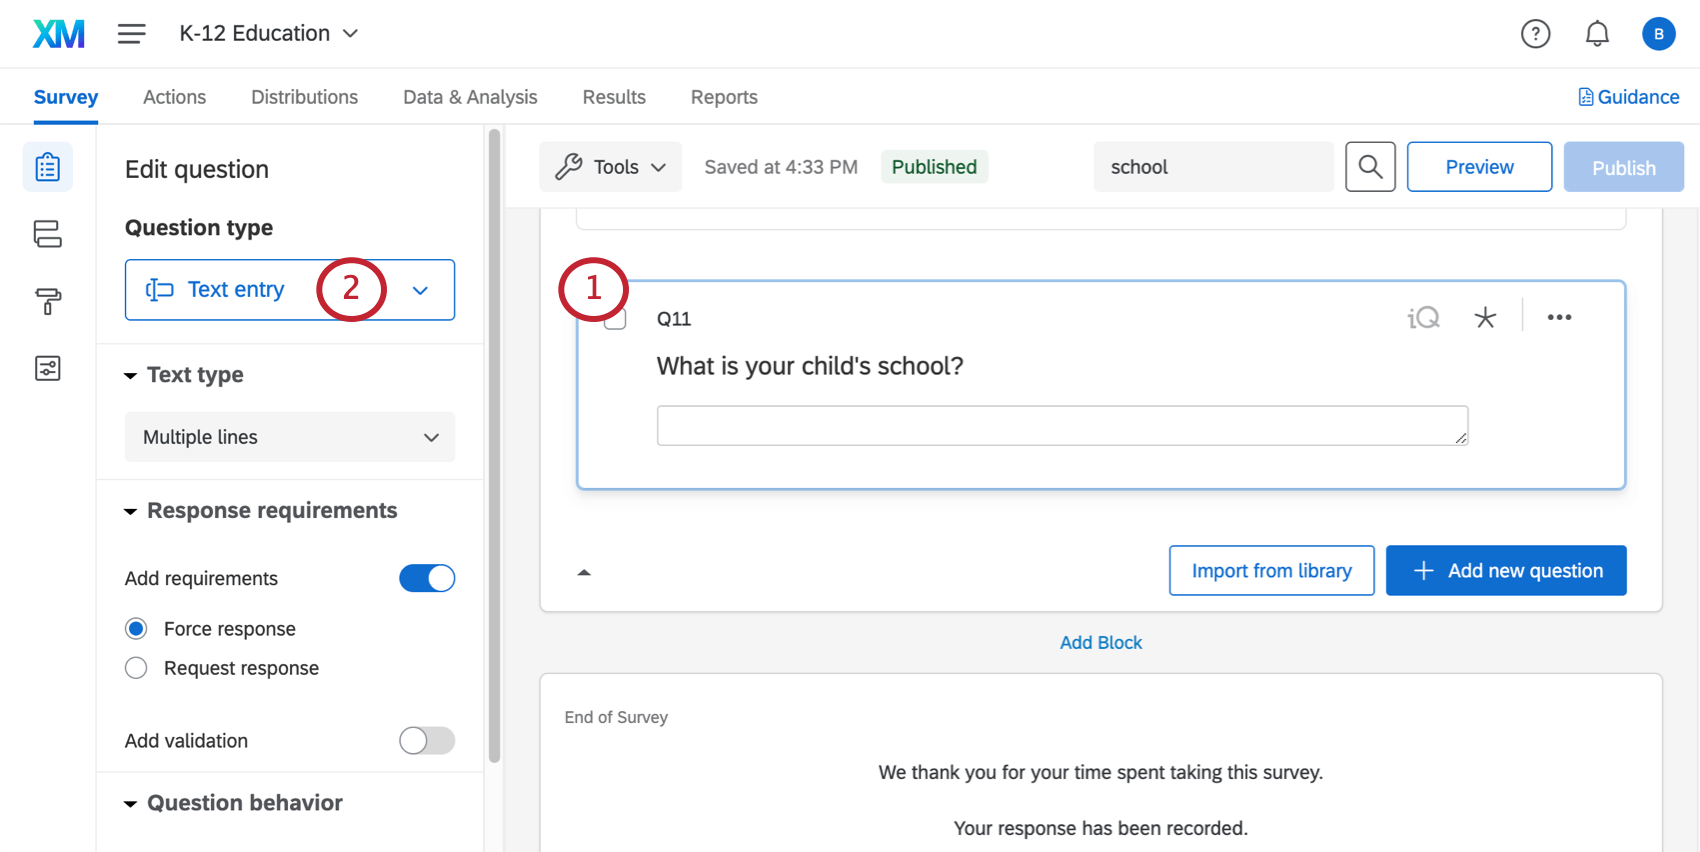
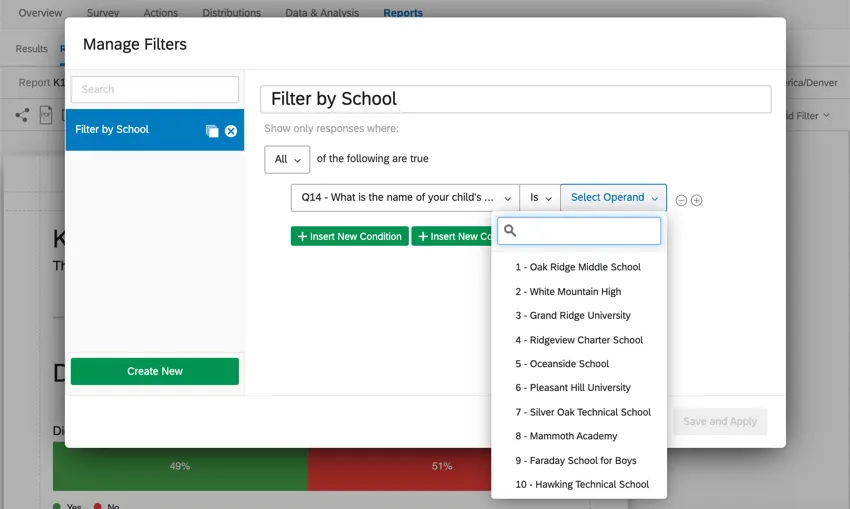
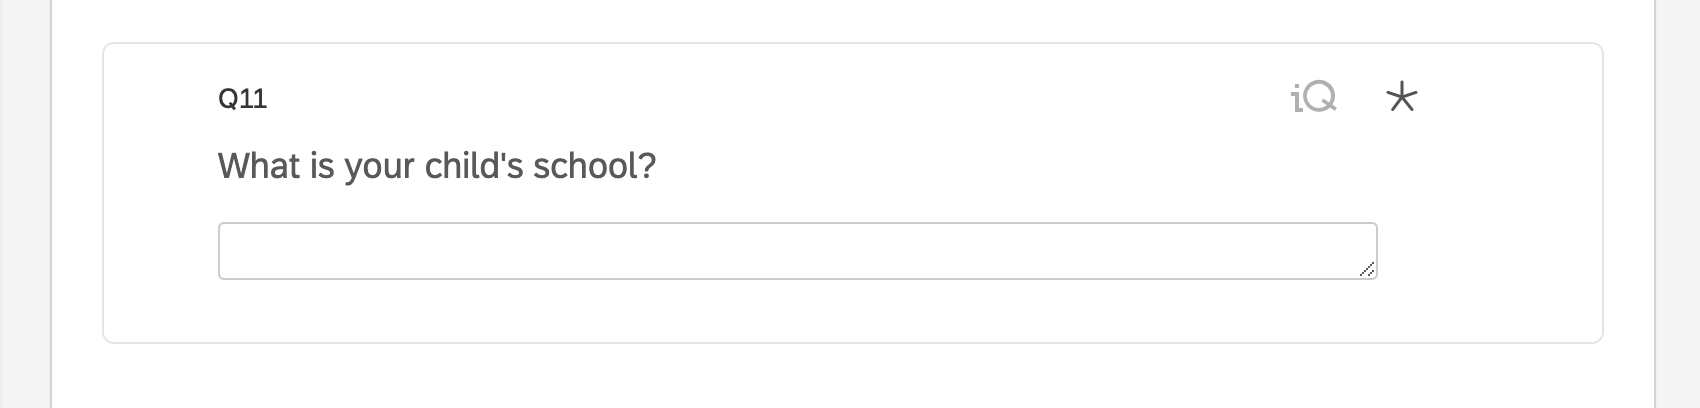
Getting a Filter-Ready List of Schools
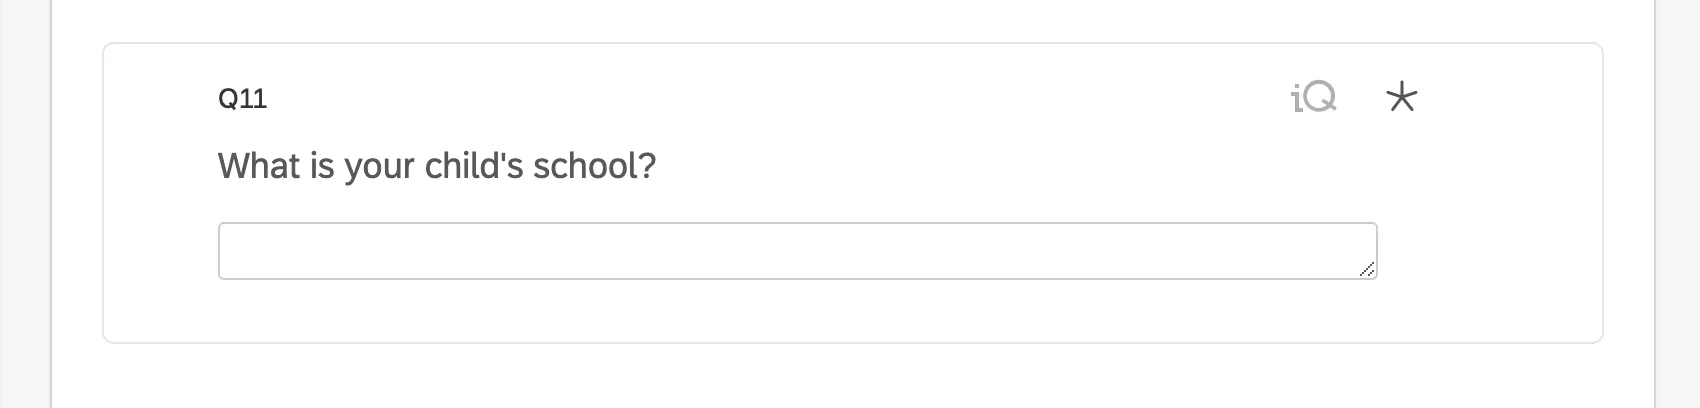
For ease of use, the survey currently asks parents/guardians to type the name of the school their child attends. However, if you want to be able to filter data and reports by school, you should change this question to a multiple choice question and add a list of schools to choose from.
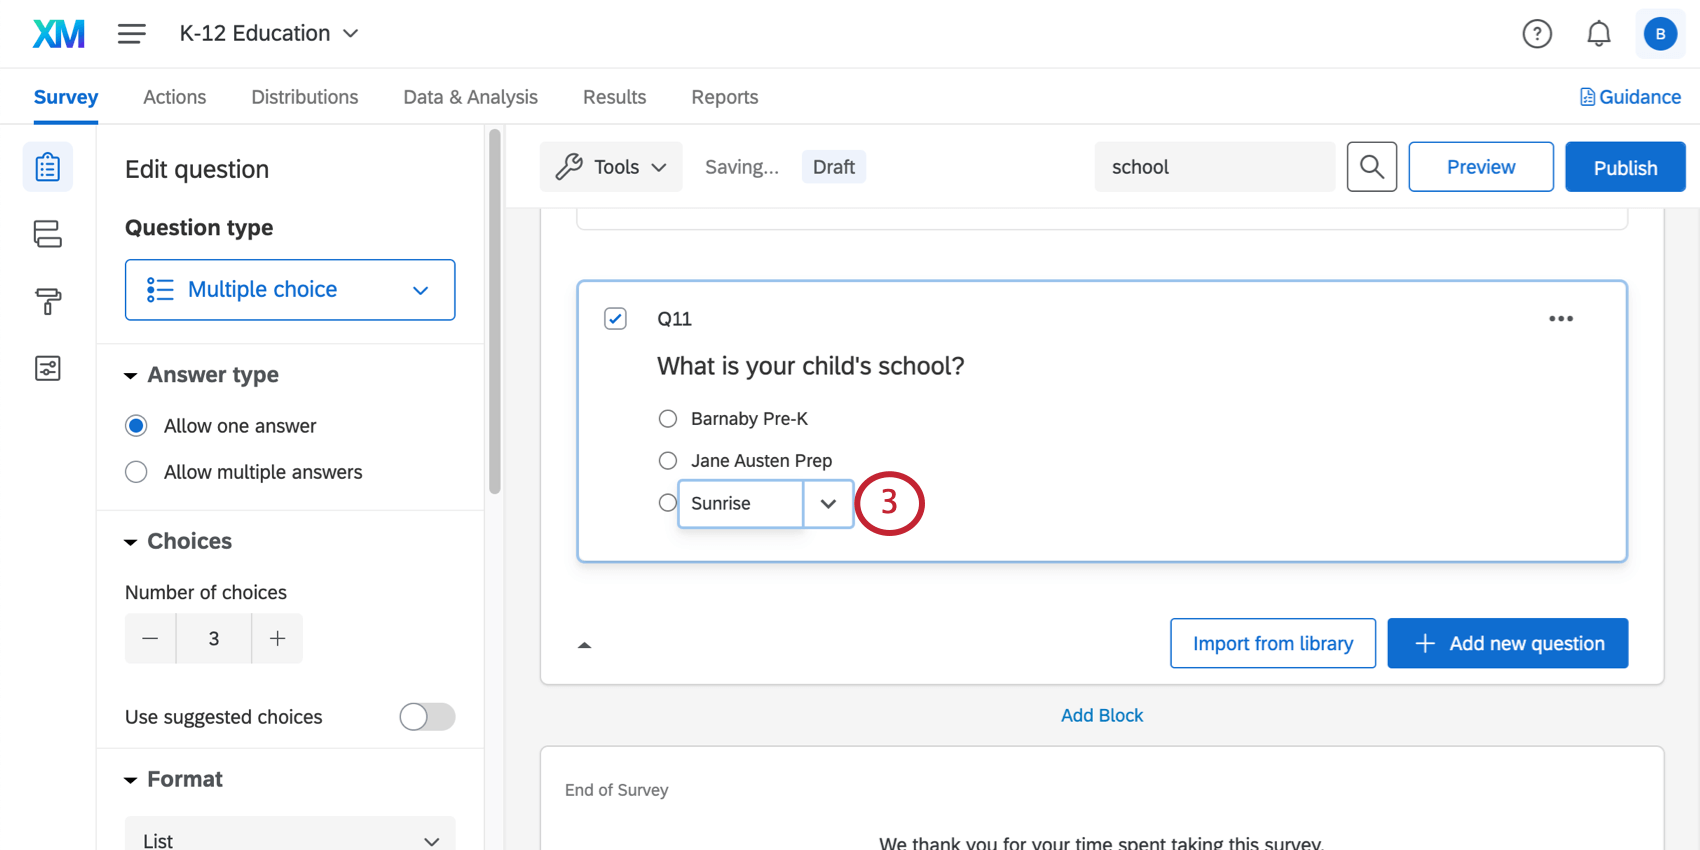
You are now free to filter reports and filter data based on schools!
Deleting and Restoring Questions
Warning: If you delete a question, it’ll affect the premade report and the display logic included with this solution! Be prepared to fix all the display logic in your survey, and to either make edits to the report or create a new report from scratch. We generally advise you not to delete any questions!
If you have sent a question to the trash, it is possible to restore it. To roll back many changes at once, see also how to revert a survey back to a previous version.
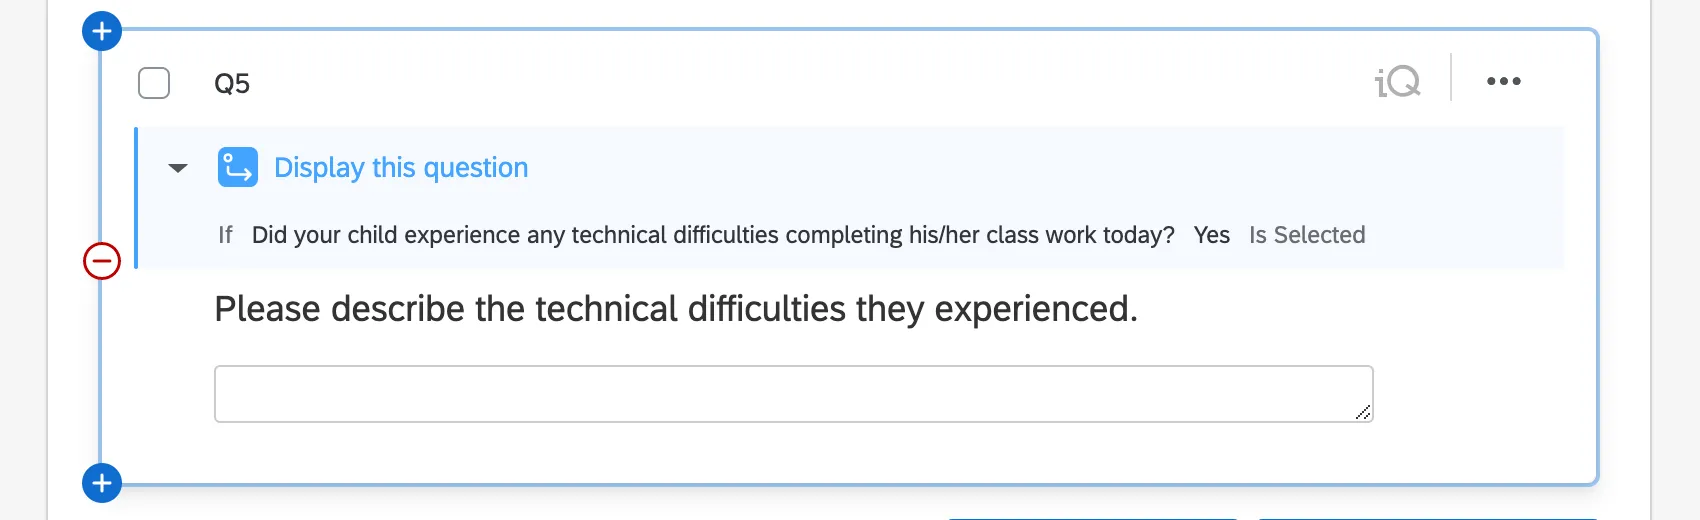
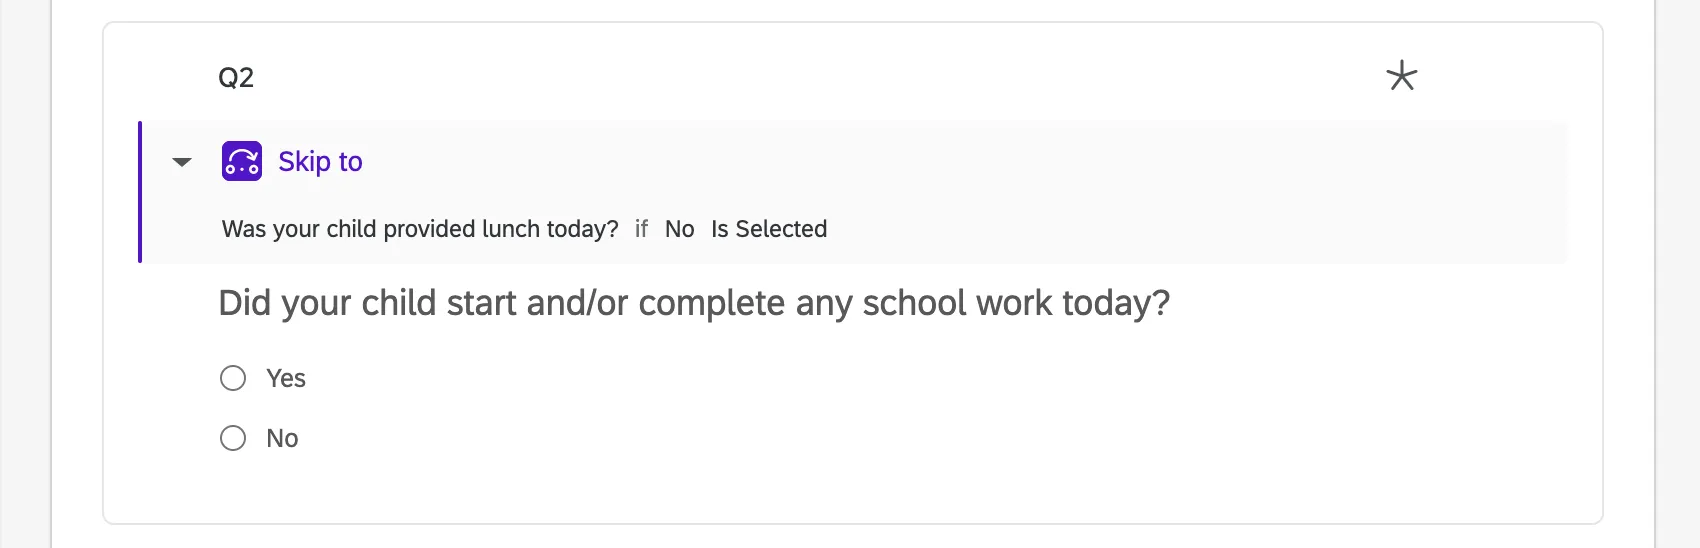
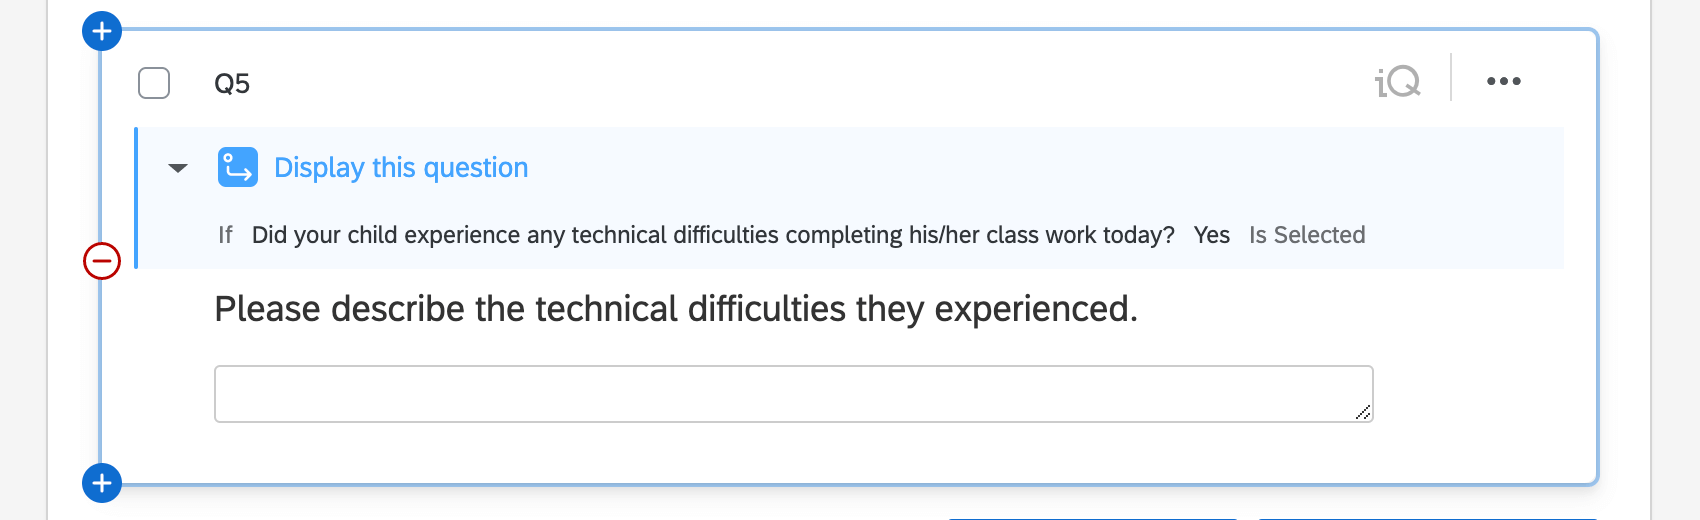
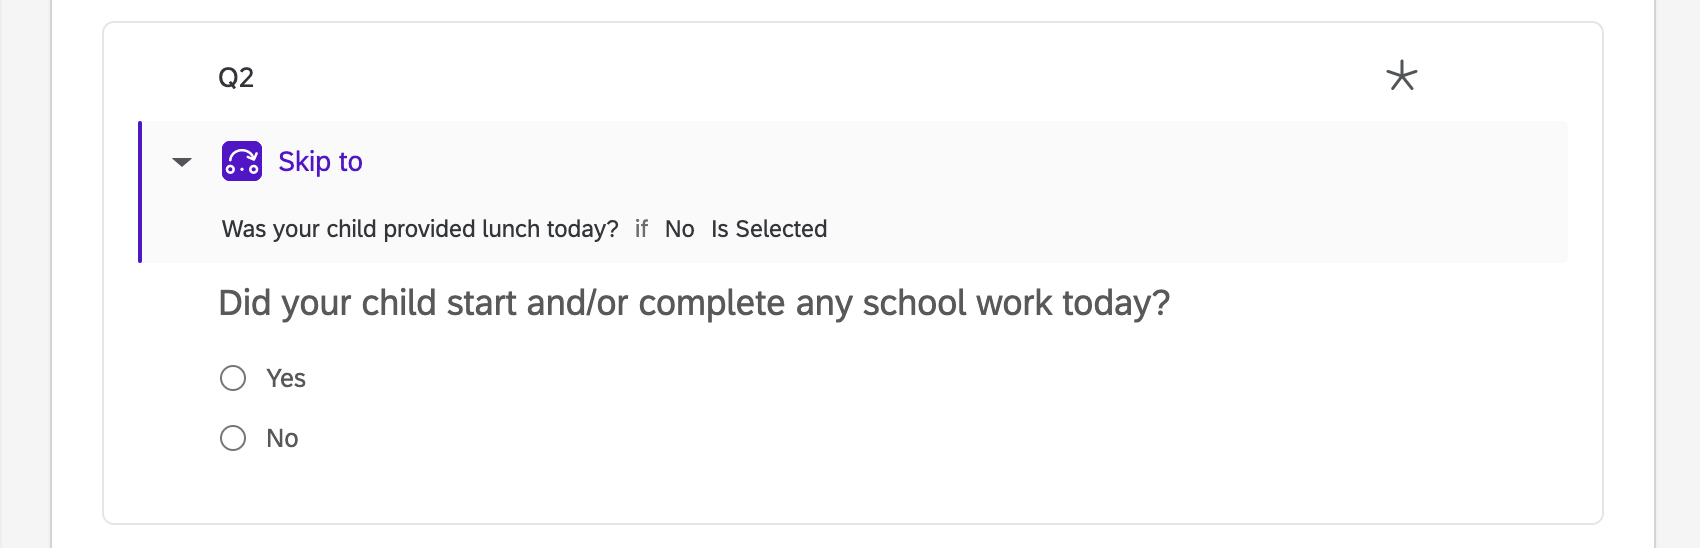
Display and Skip Logic
This solution comes with custom display logic. Display logic affects what questions respondents see, based on previous answers they provided. For example, we can ask additional questions based on whether or not the parent indicated issues while accessing online learning resources.
This solution may also come with custom skip logic. Skip logic can force the respondent to skip several questions if an answer they provide means several following questions no longer apply to them. Skip logic is always used to skip forwards; it cannot send someone backwards in the survey.
Warning: When you remove or edit a question, it can affect skip or display logic on another question. Be sure to double-check your survey before making these edits!
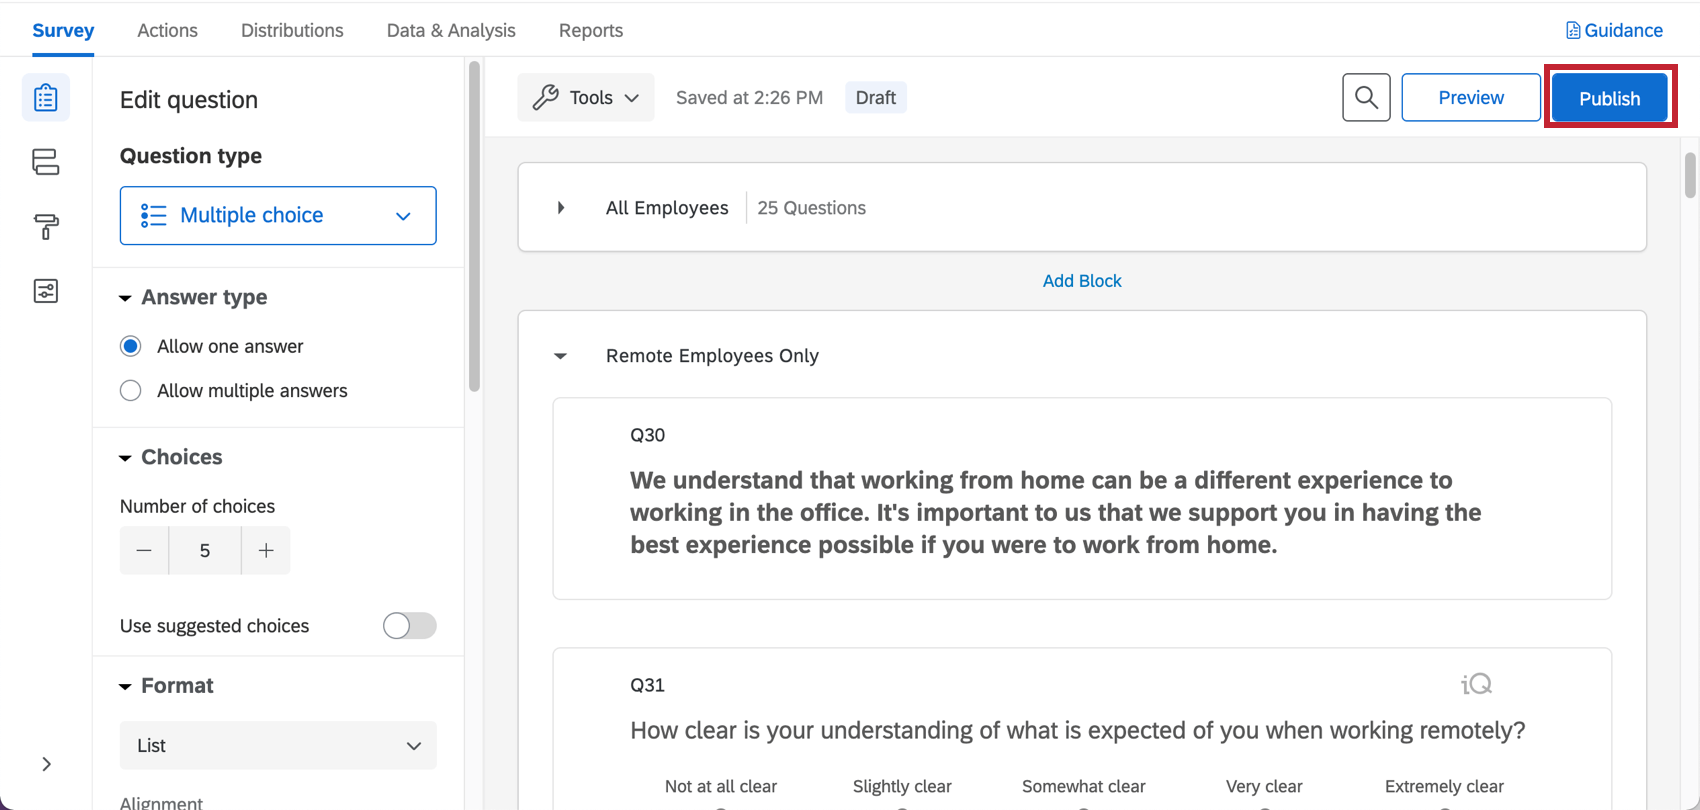
Saving and Publishing
All edits you make are saved automatically; however, they won’t necessarily be pushed to the live version of the survey. When you are finished with all of your edits and are ready to generate a link and share the survey with your recipients, remember to click Publish in the upper-right.
For more on how this works, see Survey Publishing & Versions.
Distributing the K-12 Education: Remote Learning Pulse
When you are ready to distribute the K-12 Education: Remote Learning Pulse solution, it’s super quick and easy to do so:
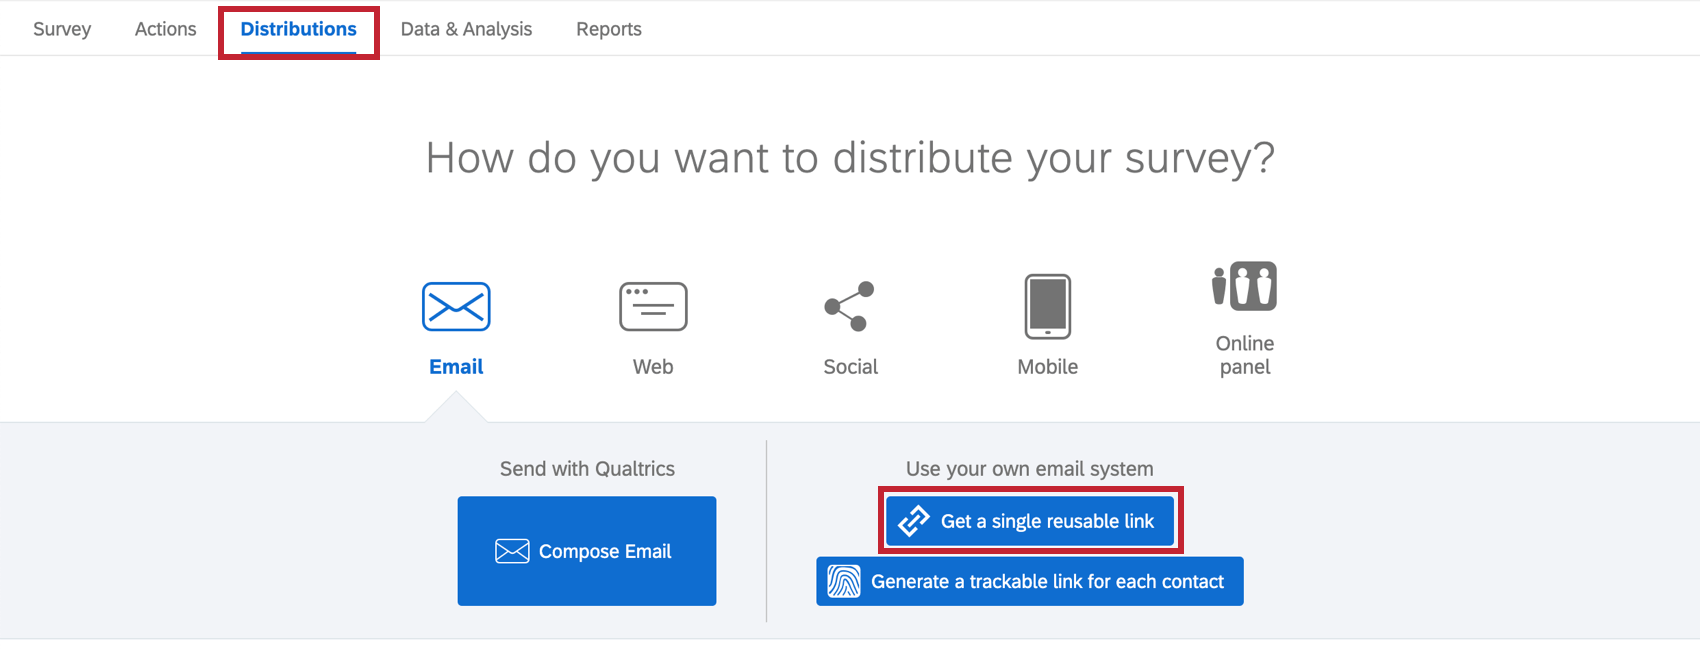
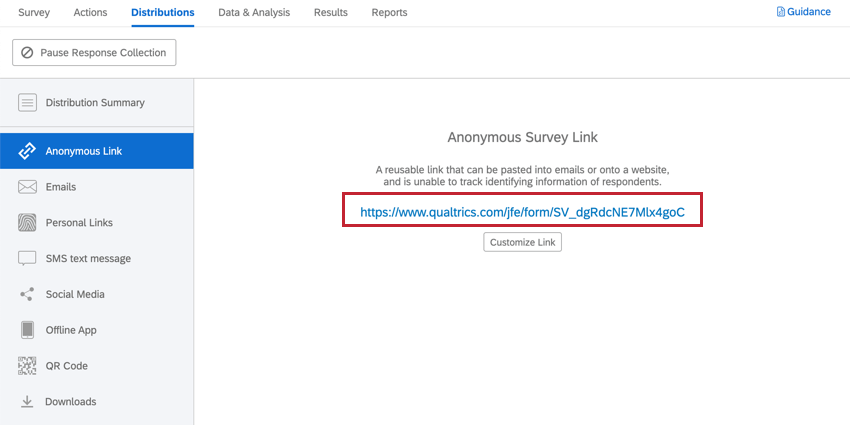
Qtip: If you publish changes, the menu that opens will give you your anonymous link.
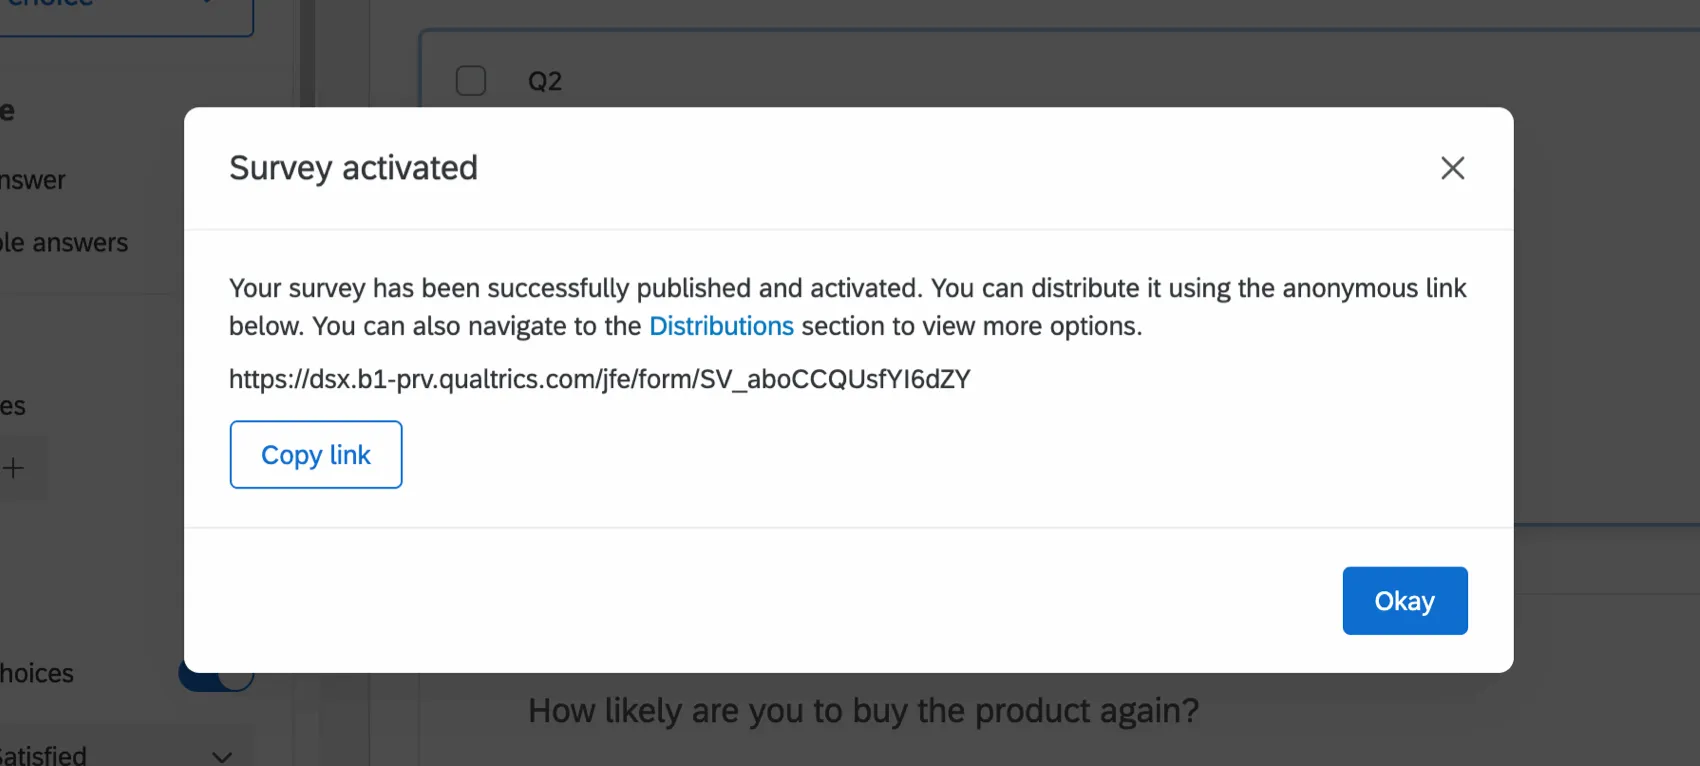
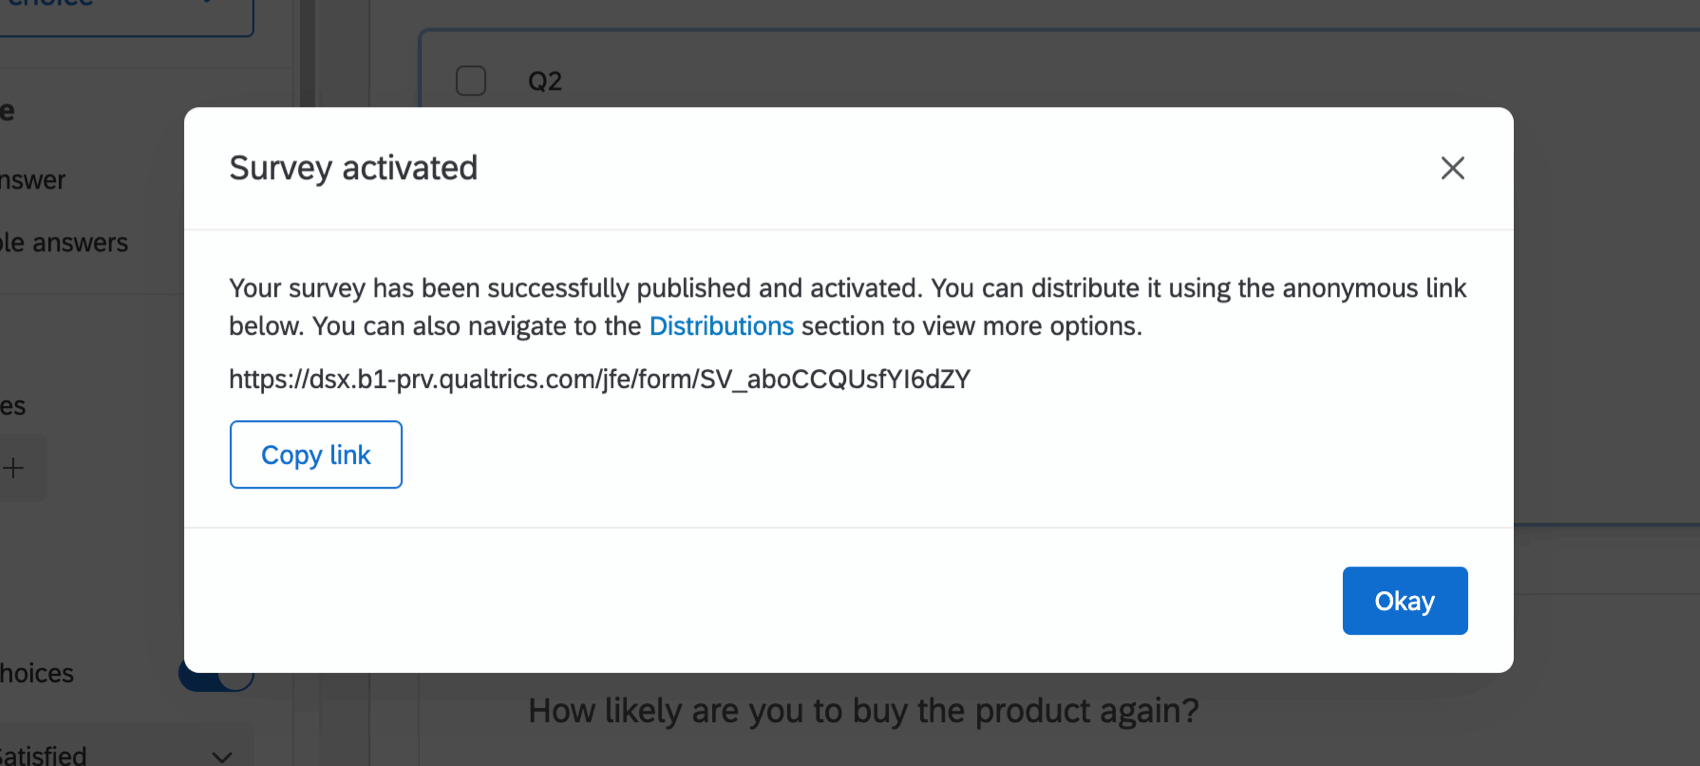
Other Methods of Distribution
We recommend using the anonymous link method described above, because it’s the quickest and easiest distribution method.
If you are interested in other methods of distribution, such as emailing from Qualtrics, see the Distributions Basic Overview for a list of options. Please note that depending on your license, not all options may be available, and some may be restricted.
Qtip: This survey specifies that it must be completed once per child. If you distribute through email to a Qualtrics contact list, parents/guardians will not be able to retake the survey for additional children unless you change the link type while writing the email.
Reports
Premade Reports
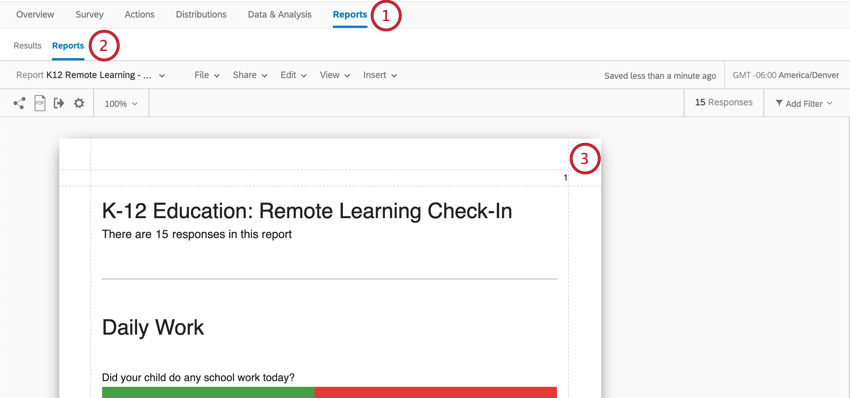
Our XM Scientists have developed a special report for each version of this XM Solution. This report gives an overview of the results, and is ready to share as soon as you have collected data.

Qtip: This report will not generate charts and tables until you collect data. Try completing the survey through the preview button if you want to test what these reports look like with data. Remember you can always delete preview data later.
- Sharing the Report: You can share a PDF copy of this report with your colleagues, or even create a link where anyone can view the report! See Sharing Your Advanced-Report.
- Making New Reports: You can click File and then New to create a new report from scratch if needed. Use the report name dropdown to navigate between reports.
- Customizing Reports: See Advanced-Reports Basic Overview to get started customizing your reports.
Qtip: The premade report was developed by our top subject matter experts. We advise trying to keep your report as similar to the original template as possible, and not making too many large-scale changes.
Warning: Do not delete the premade report! If you do, this report will not be retrievable, and you will have to make a new one from scratch.
Other Ways to View Data
While Advanced-Reports include an expert premade report, this report is limited to showing 250 comments for a given Text Entry question (those are the open feedback questions). To see a full set of responses, you’ll want to use one of the other reporting options described below.
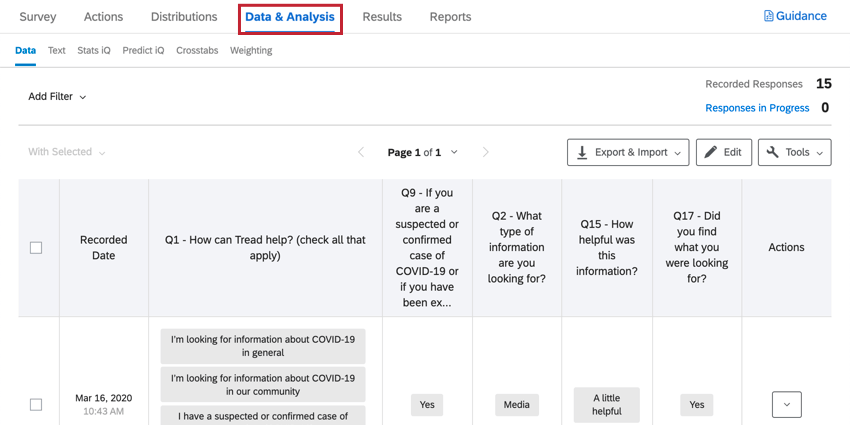
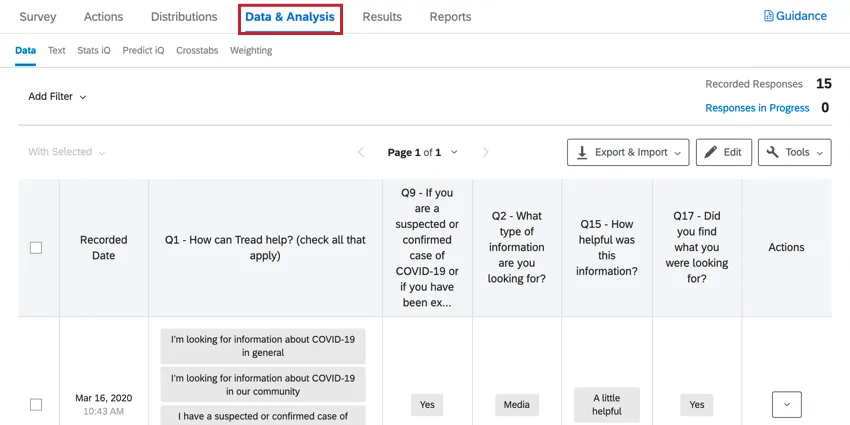
Data & Analysis allows you to edit data, export a spreadsheet of all responses, filter your responses, and much more.
Results-Reports give a quick overview of your data, and do not require you to work from scratch. They have different charts and graphs than Advanced-Reports, and are generally there to help you get quick assessments of data.

Qtip: There is no CX Dashboard associated with this XM Solution. If you are on a Qualtrics license with CX Dashboards, you can map this XM Solution’s data to a dashboard just like any other Qualtrics survey.
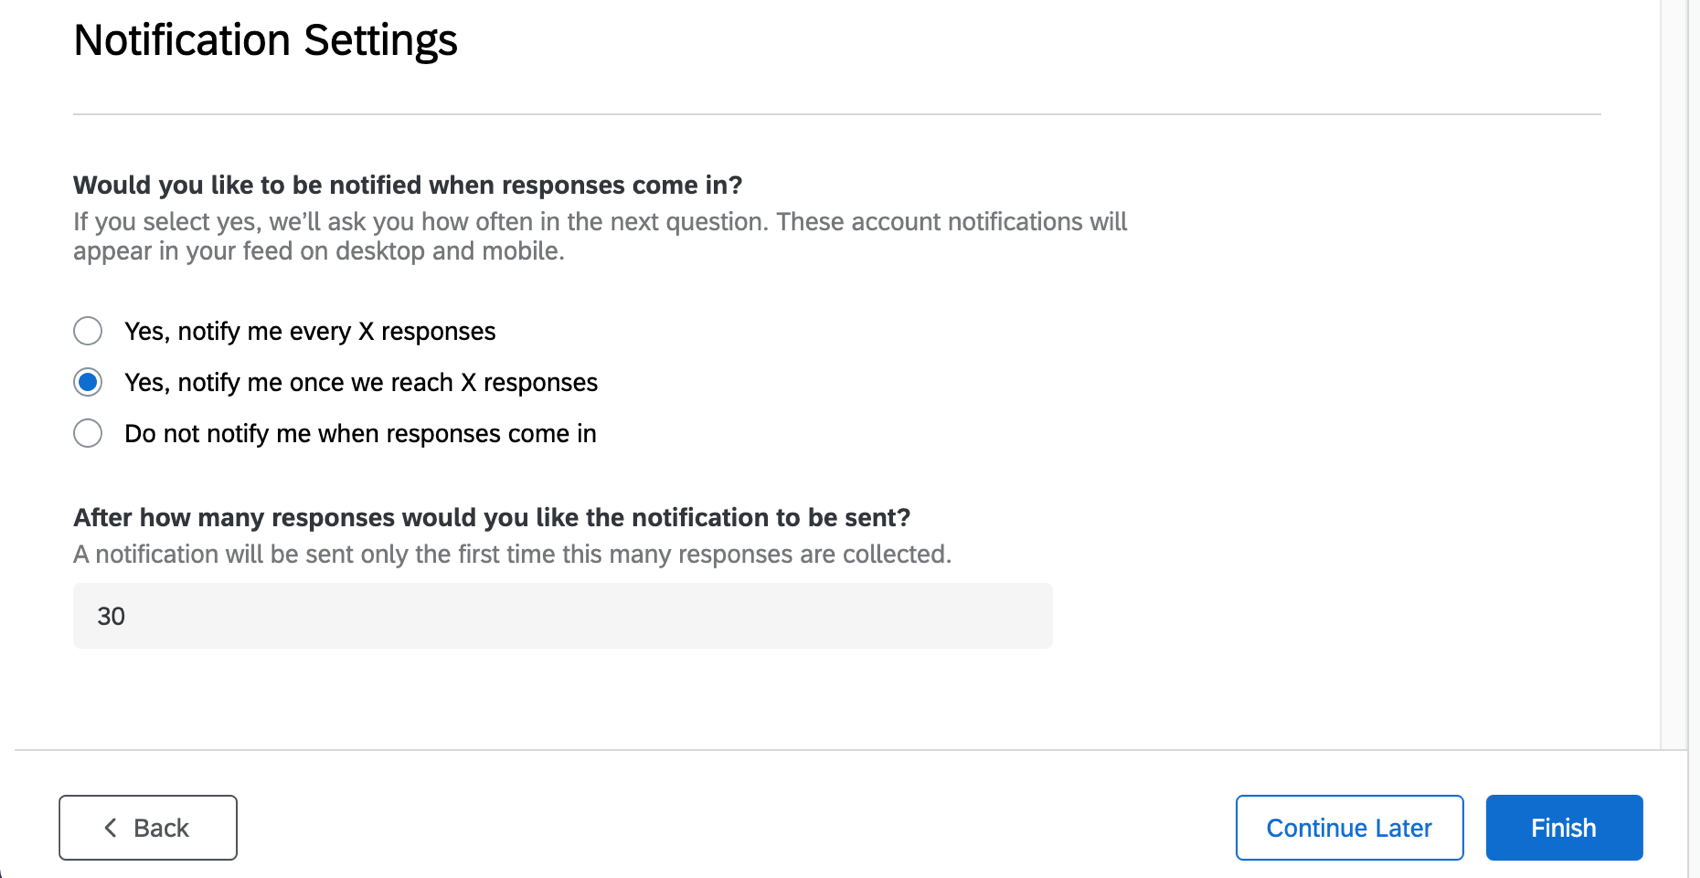
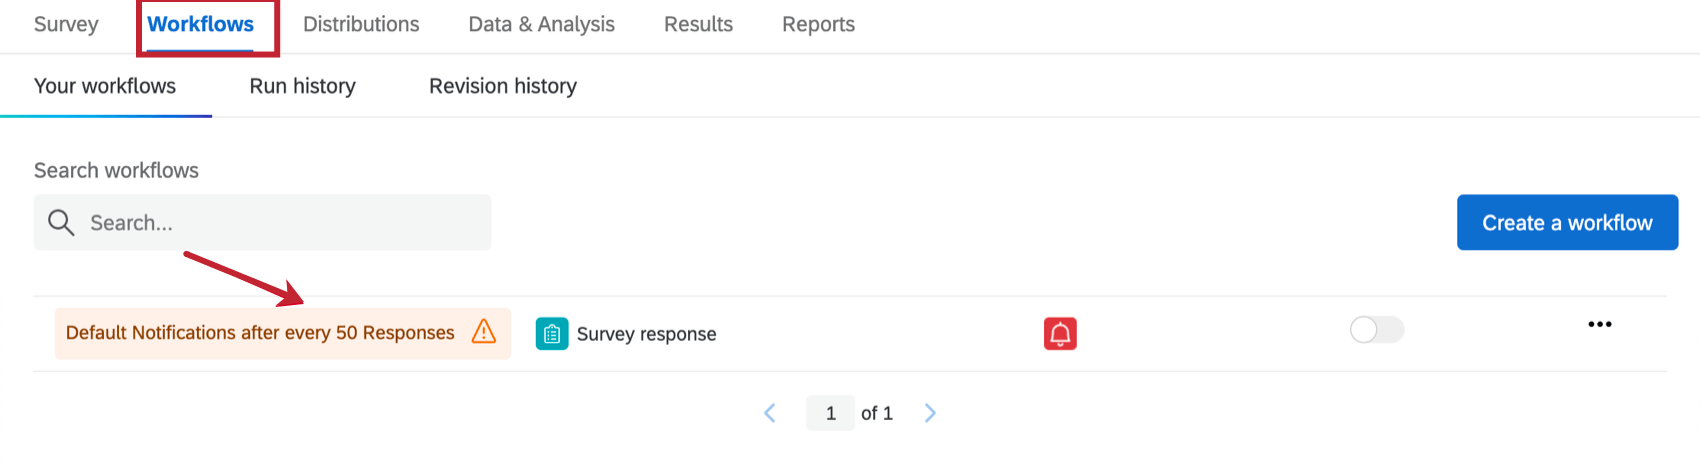
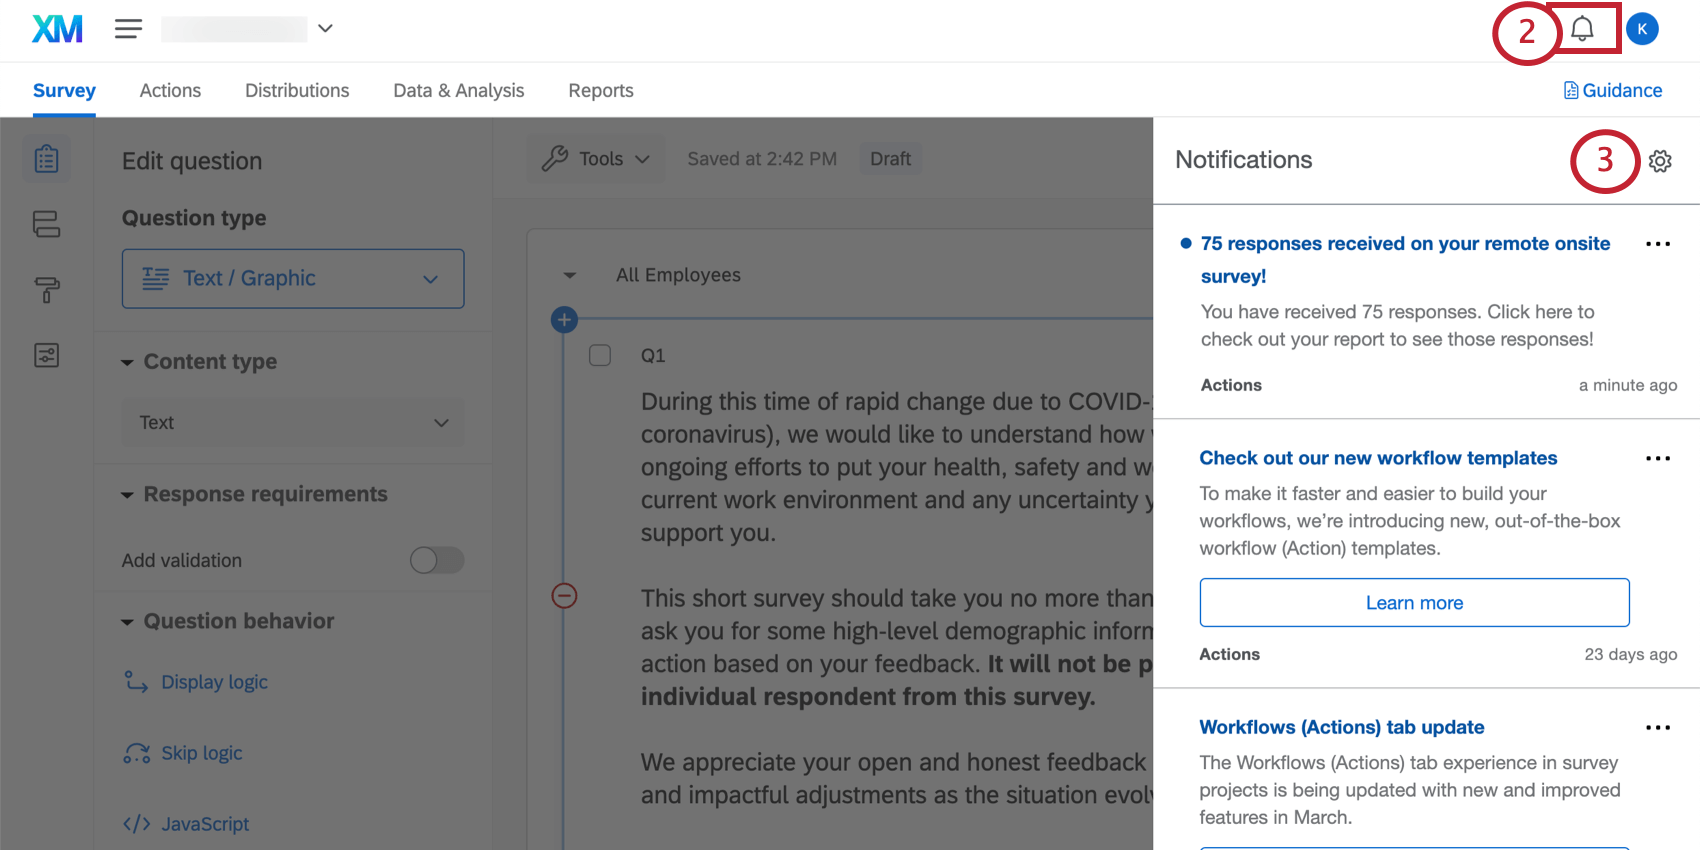
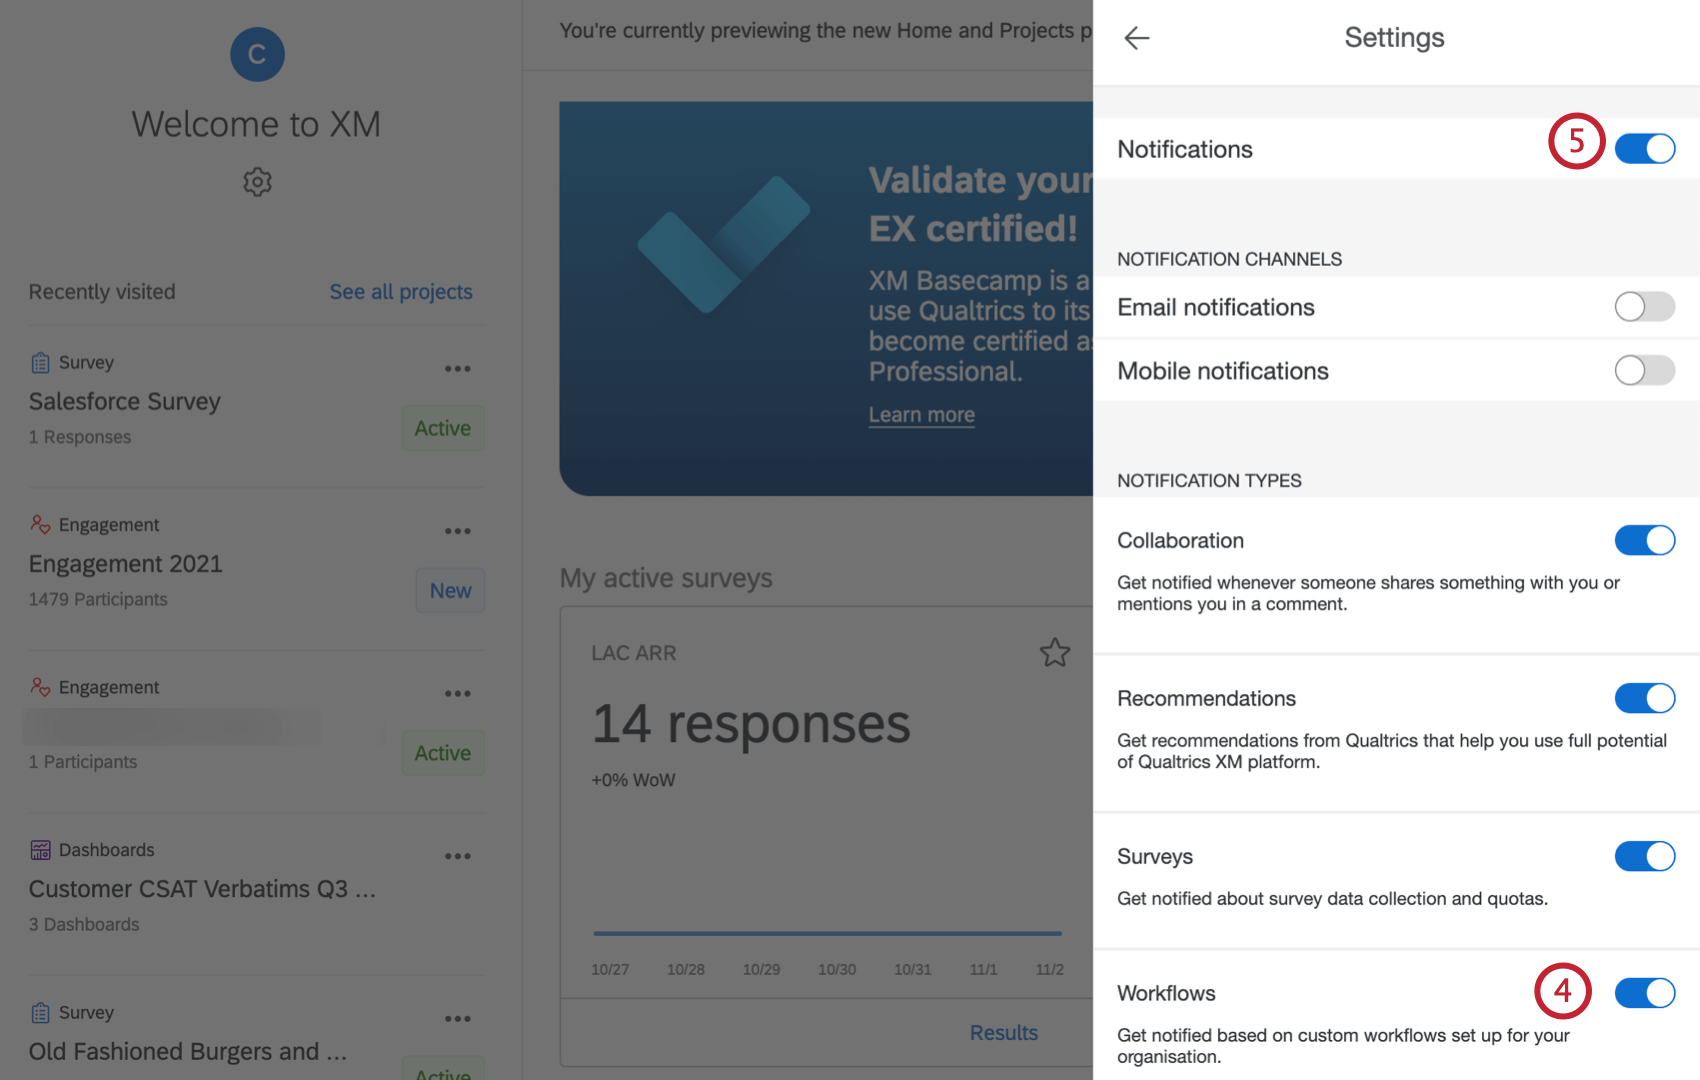
Response Notifications
Depending on how you set up your guided project, there may be notifications built in. These can be found in the Workflows tab, and may require additional setup to complete.

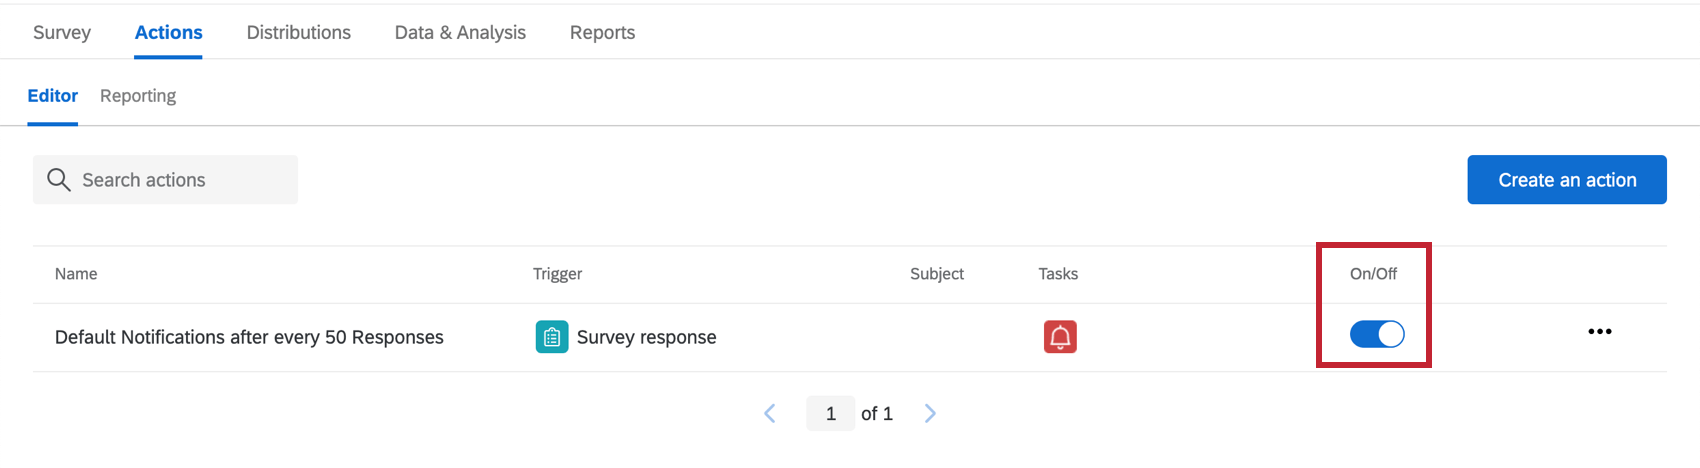
Qtip: Once you’ve configured the notifications feed task as desired, make sure it is enabled.

As needed, you can either review or edit:
- Who receives the notification
- The conditions under which the condition are sent
- The message included in the notification
Depending on the frequency you chose, these conditions are set up with one of the following:
Do not edit the conditions on these workflows, the corresponding embedded data in the survey flow, or the quotas involved.
If you don’t want to receive this notification after all, you may delete the workflow or disable the workflow (if it is not already disabled). Please note that once you delete a workflow, it cannot be retrieved.
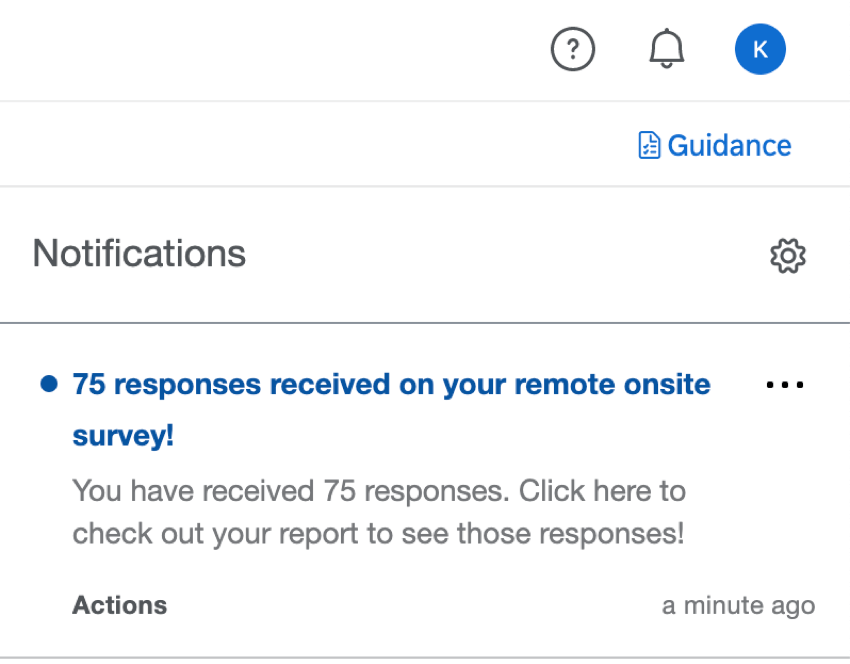
Viewing Reports

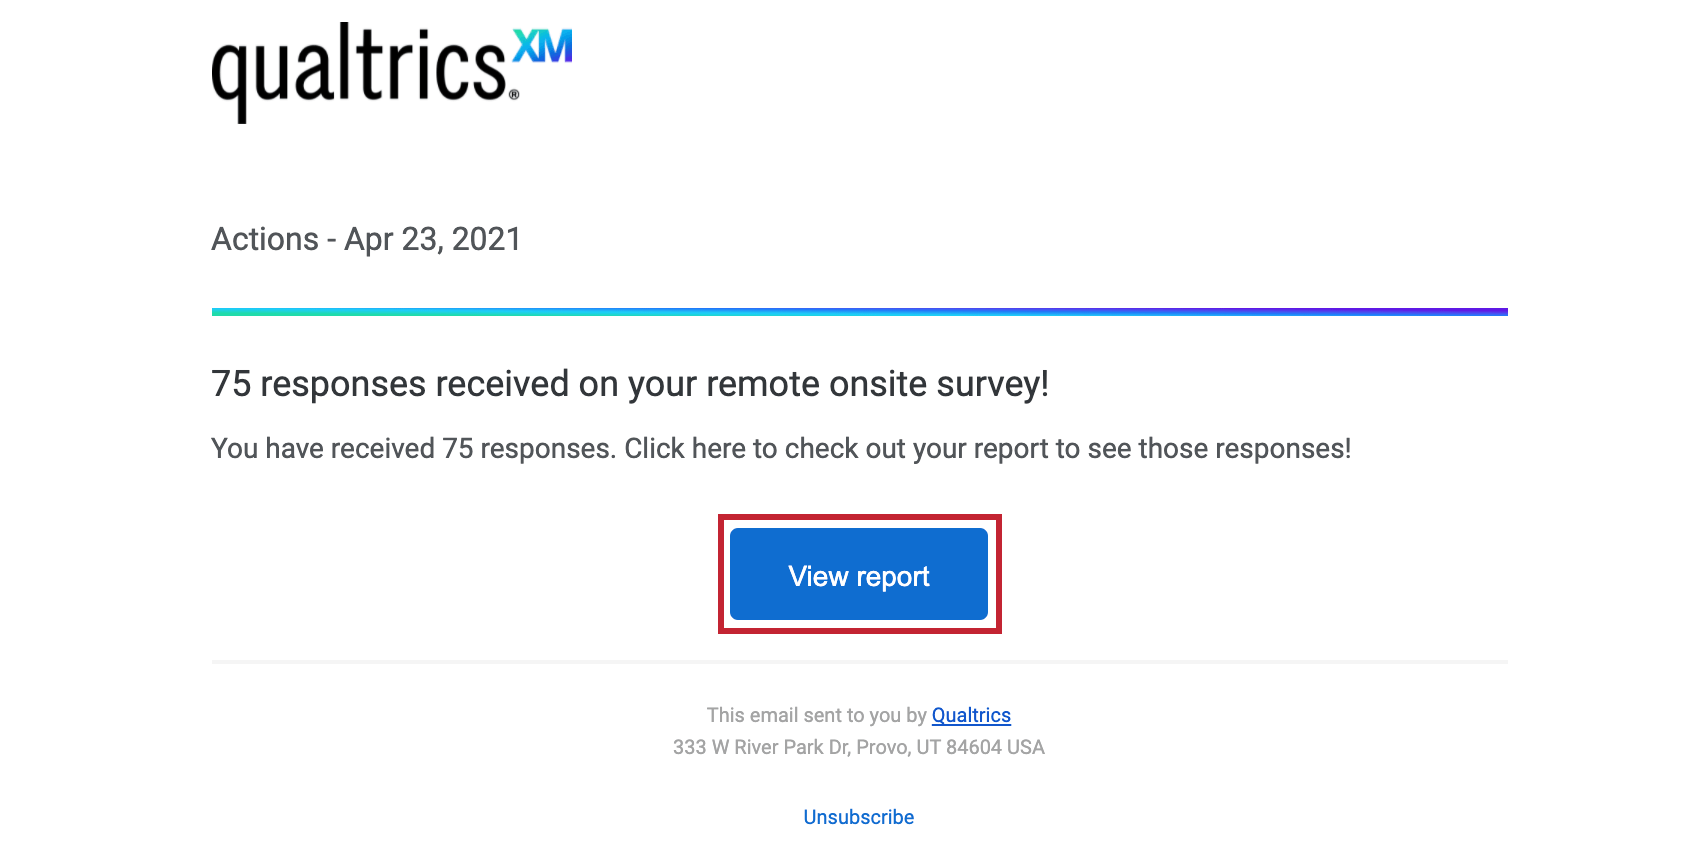
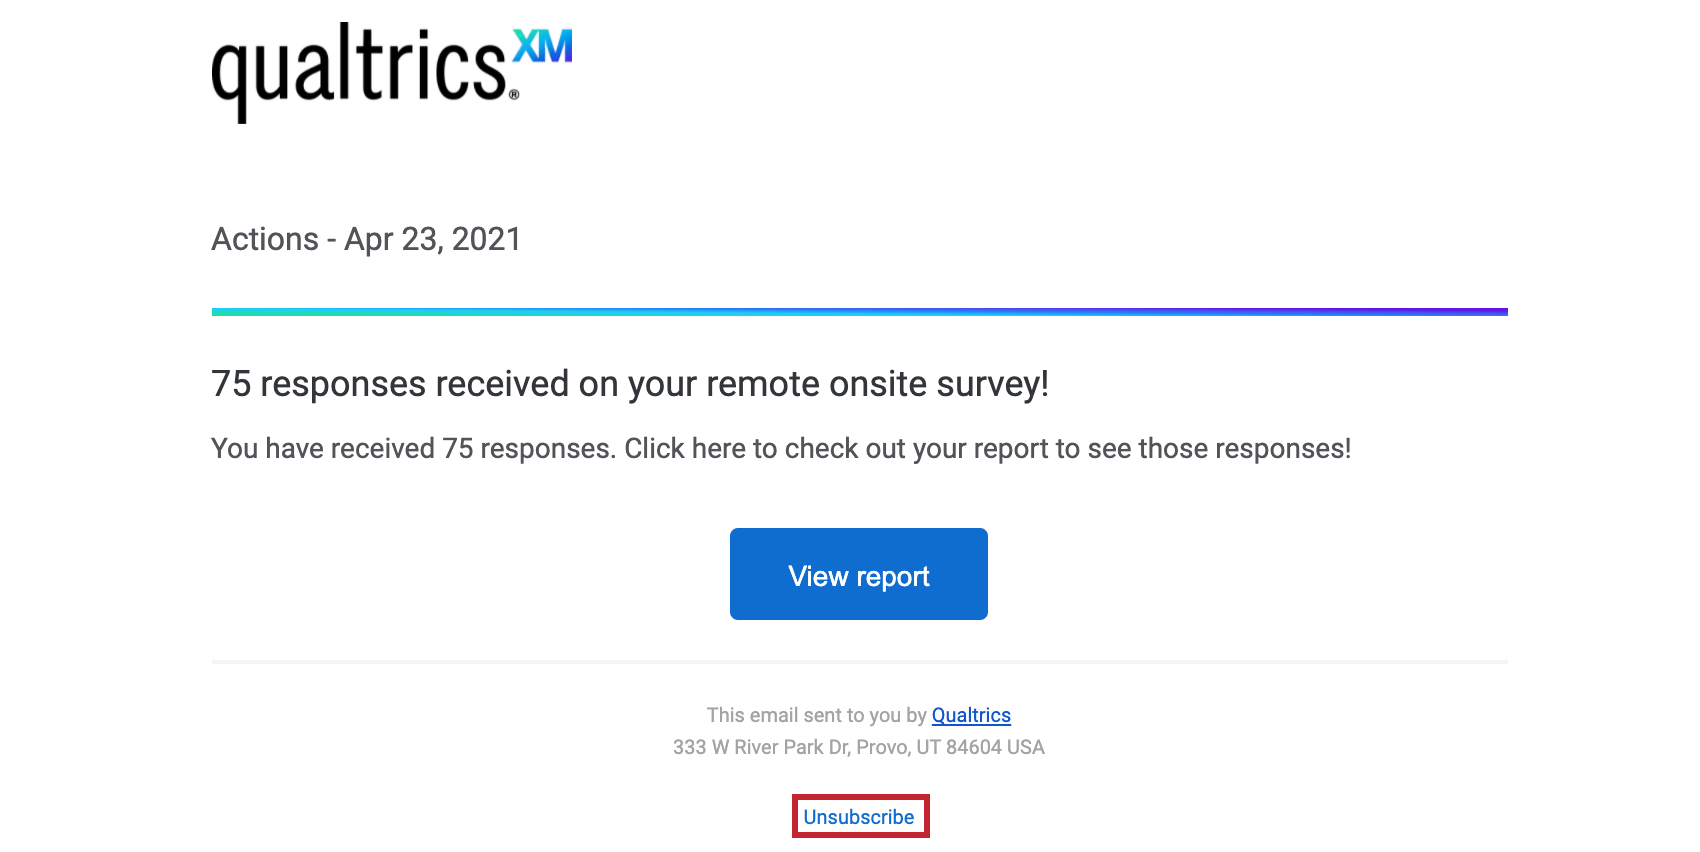
View report: Clicking View report in the email or clicking the in-product notification will take you to the Reports section of the Reports tab of your project, where you should see the pre-built report.
Qtip: If you’re clicking these buttons from your email, you may need to log into your account before you are taken to these tabs.
Unsubscribing from Notifications
If you no longer wish to receive notifications, you can click unsubscribe at the bottom of the email.

Qtip: This will unsubscribe you from all notifications. You cannot unsubscribe from a specific project.
Subscribing to Updates
Most users will be subscribed to these automatically. However, if you unsubscribed and find you want to start receiving them again, you can do the following:
Qtip: Users that have 10 or more active surveys that have received responses in the last 2 weeks will not be automatically subscribed.
Terms of Use: COVID-19 Solutions
Expiry Dates
The following terms only apply to customers who sign up from the “Here to Help” or “Return to Work” landing pages or via Qualtrics Surveys. Prior to expiration on 30th November 2021, these customers will need to export their data or upgrade to a paid product.
Qtip: Existing customers will have access to the content for the life of their license with Qualtrics.
Access to the following solutions is subject to expire on 30th November 2021. Users will be notified in advance of access being terminated. This is applicable to the Return to Work Pulse, Remote + Onsite Work Pulse, Public Health: COVID-19 Pre-Screen & Routing, High Education: Remote Learning Pulse, K-12 Education: Remote Learning Pulse, Remote Educator Pulse, Dynamic Call Center Script, Customer Confidence Pulse (1.0), Brand Trust Pulse, Supply Continuity Pulse, and Healthcare Workforce Pulse solutions.
Response and Email Limits
- New customers who are based in India and sign up from the “Here to Help” or “Return to Work” landing pages with a work email will get their own provisioned brand up to 500k responses total. This is applicable to the Return to Work Pulse, Remote + Onsite Work Pulse, Public Health: COVID-19 Pre-Screen & Routing, High Education: Remote Learning Pulse, K-12 Education: Remote Learning Pulse, Remote Educator Pulse, Dynamic Call Center Script, Customer Confidence Pulse (1.0), Brand Trust Pulse, Supply Continuity Pulse, and Healthcare Workforce Pulse solutions.
- Customers who sign up for access to the COVID-19 solutions as described above will be limited to 1K emails per week per user.
New customers who sign up from the “Here to Help” or “Return to Work” page with a personal email will be provisioned a free account with up to 500 responses for each Return to Work Pulse or Remote + Onsite Work Pulse survey. This is also the case for new customers who sign up via Qualtrics Surveys. The full COVID-19 solutions will only be available to new customers who sign up with a work email on the “Here to Help” or “Return to Work” pages as indicated above.
Other Free COVID-19 XM Solutions
The following COVID-19 XM Solutions are free to customers with existing licenses and to customers based in India. Click the name of the Solution for more guided support:
- Remote + On-site Work Pulse
- Public Health: COVID-19 Pre-Screen & Routing
- COVID-19 Customer Confidence Pulse
- Higher Education: Remote Learning Pulse
- K-12 Education: Remote Learning Pulse
- COVID-19 Dynamic Call Center Script
- Healthcare Workforce Pulse
- Remote Educator Pulse
- Supply Continuity Pulse
- COVID-19 Brand Trust Pulse
- Return to Work Pulse
FAQs
How can I change the background/theme of my survey?
How can I change the background/theme of my survey?
Is this COVID-19 XM Solution localized?
Is this COVID-19 XM Solution localized?
Although the guided setup cannot be translated at this time, you can upload translations to your survey or auto-translate using Google Translate as needed.
See the specific support page for each COVID-19 XM Solution for questions related to each solution's localization.
What will happen if I redo the setup assistant on my XM Solution?
What will happen if I redo the setup assistant on my XM Solution?
If you want to start the setup assistant over, do the following: Please note that if you want to start over from scratch, you can also create a new XM Solution instead.
Are there any premade text topics for analyzing my text responses about COVID-19?
Are there any premade text topics for analyzing my text responses about COVID-19?
Is this solution HIPAA compliant?
Is this solution HIPAA compliant?
If you have specific questions or concerns, we encourage you to seek your own legal advice about what additional steps, if any, you need to take to comply with applicable privacy laws or company policies. We have included suggested consent statements in these materials but you will need to confirm whether these statements are adequate or need to be modified to meet your specific needs.
That's great! Thank you for your feedback!
Thank you for your feedback!