
Creating a Project
What's on this page
About Creating a Project
Qualtrics offers an array of different projects. Most projects include a survey, a distribution record, and a collection of responses and reports. You can create a new survey project from scratch, from a copy of an existing survey, from a template in your library, or from an exported QSF file.
Attention: Surveys cannot be larger than 16MB. To see the size of your survey, export it as a QSF file.
Attention: It is not currently possible to copy a guided solution project.
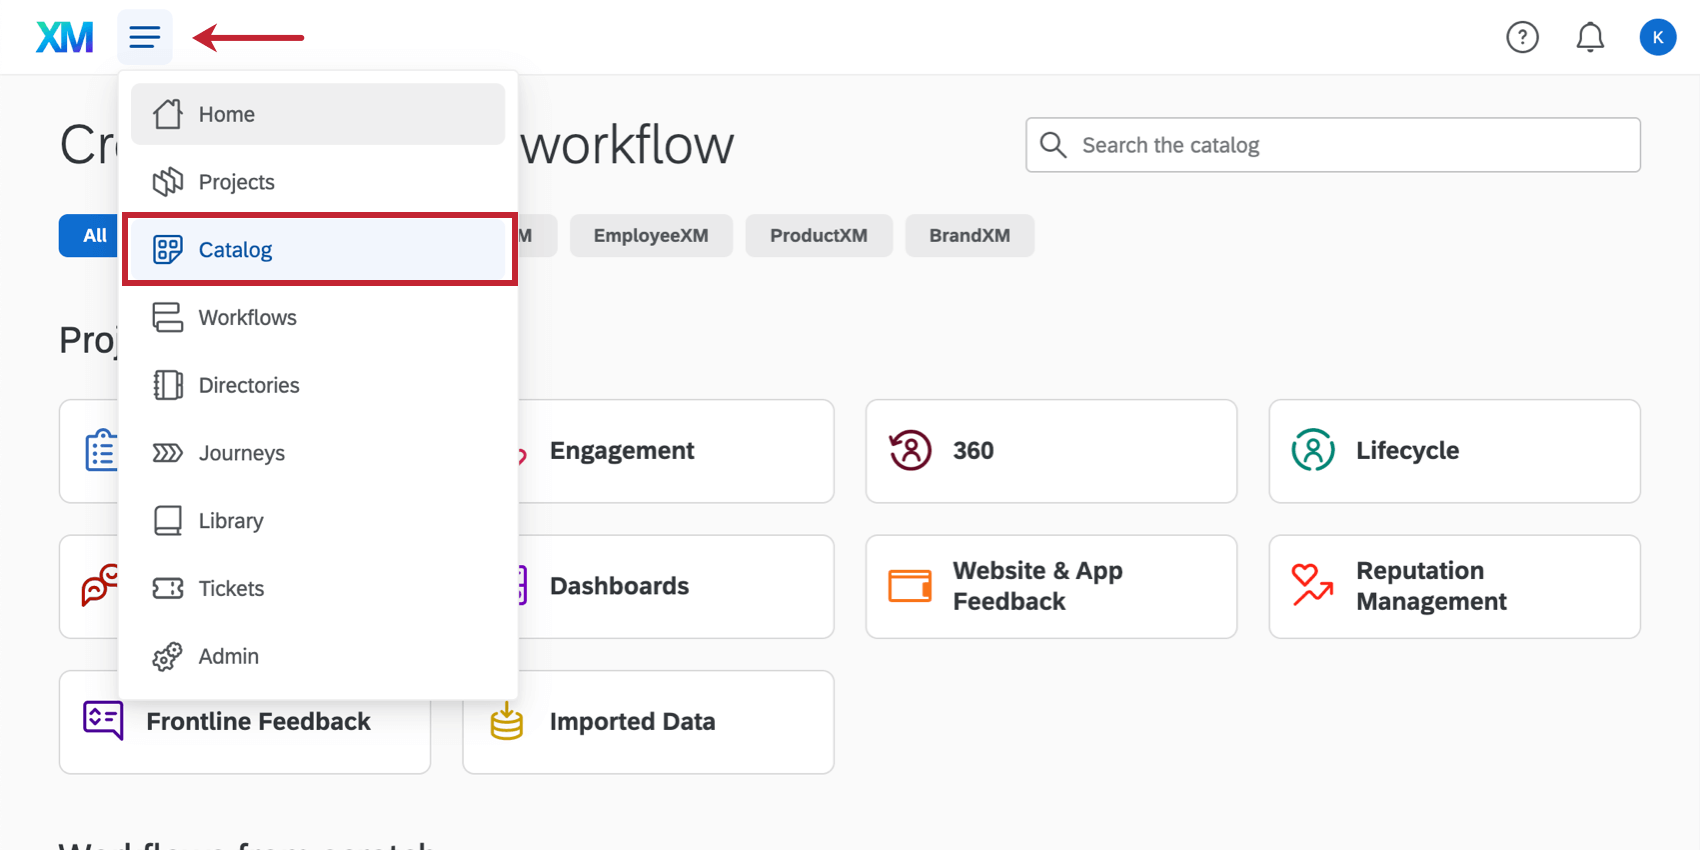
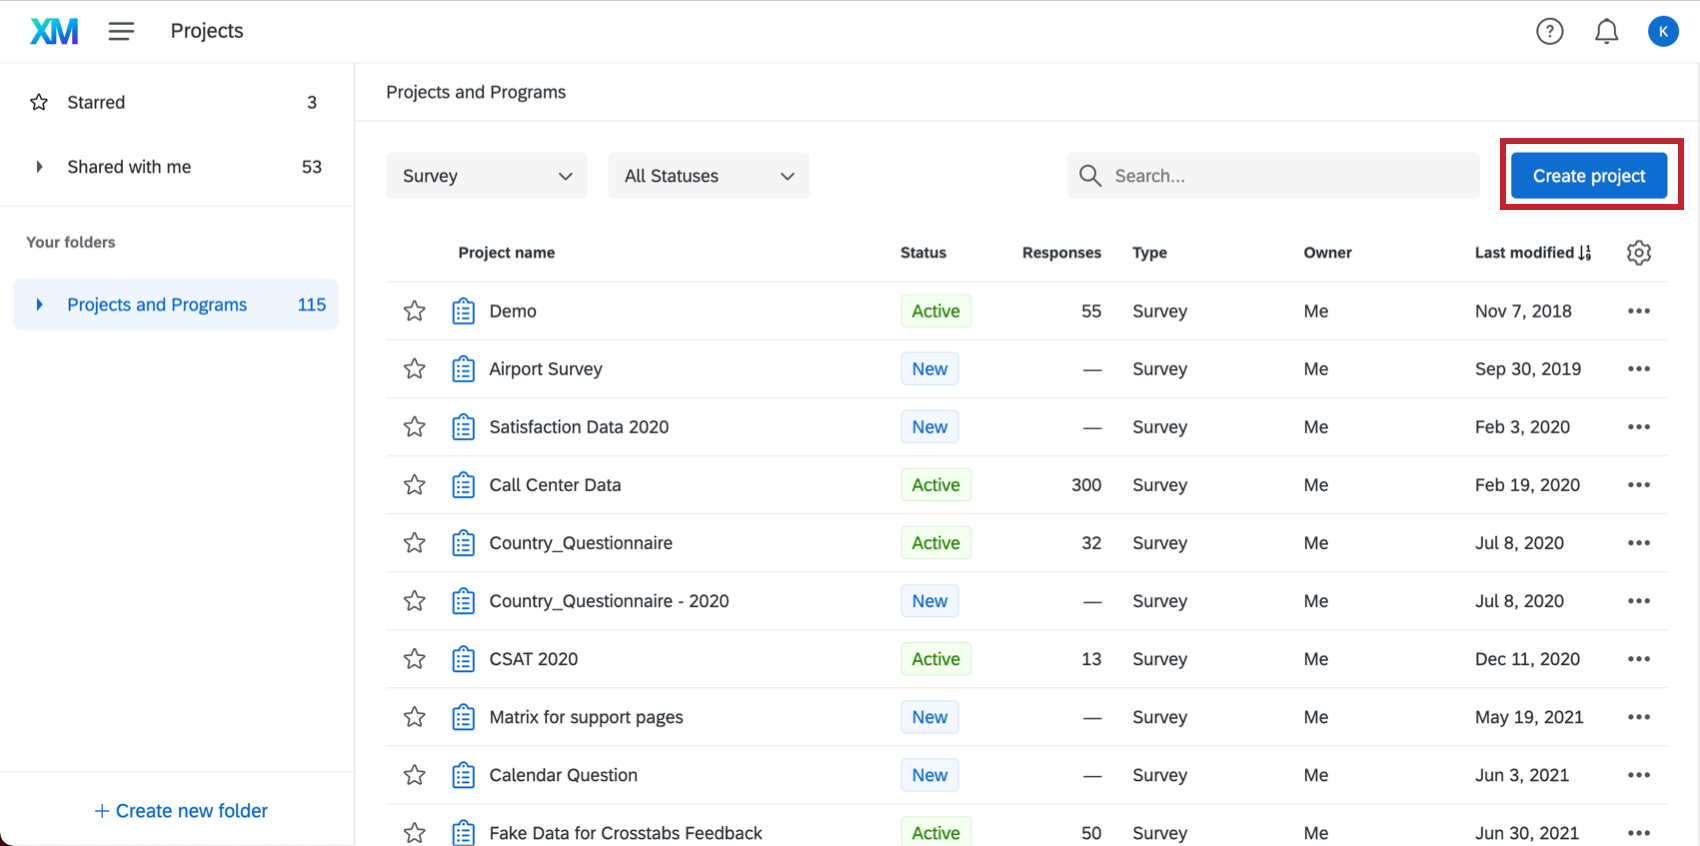
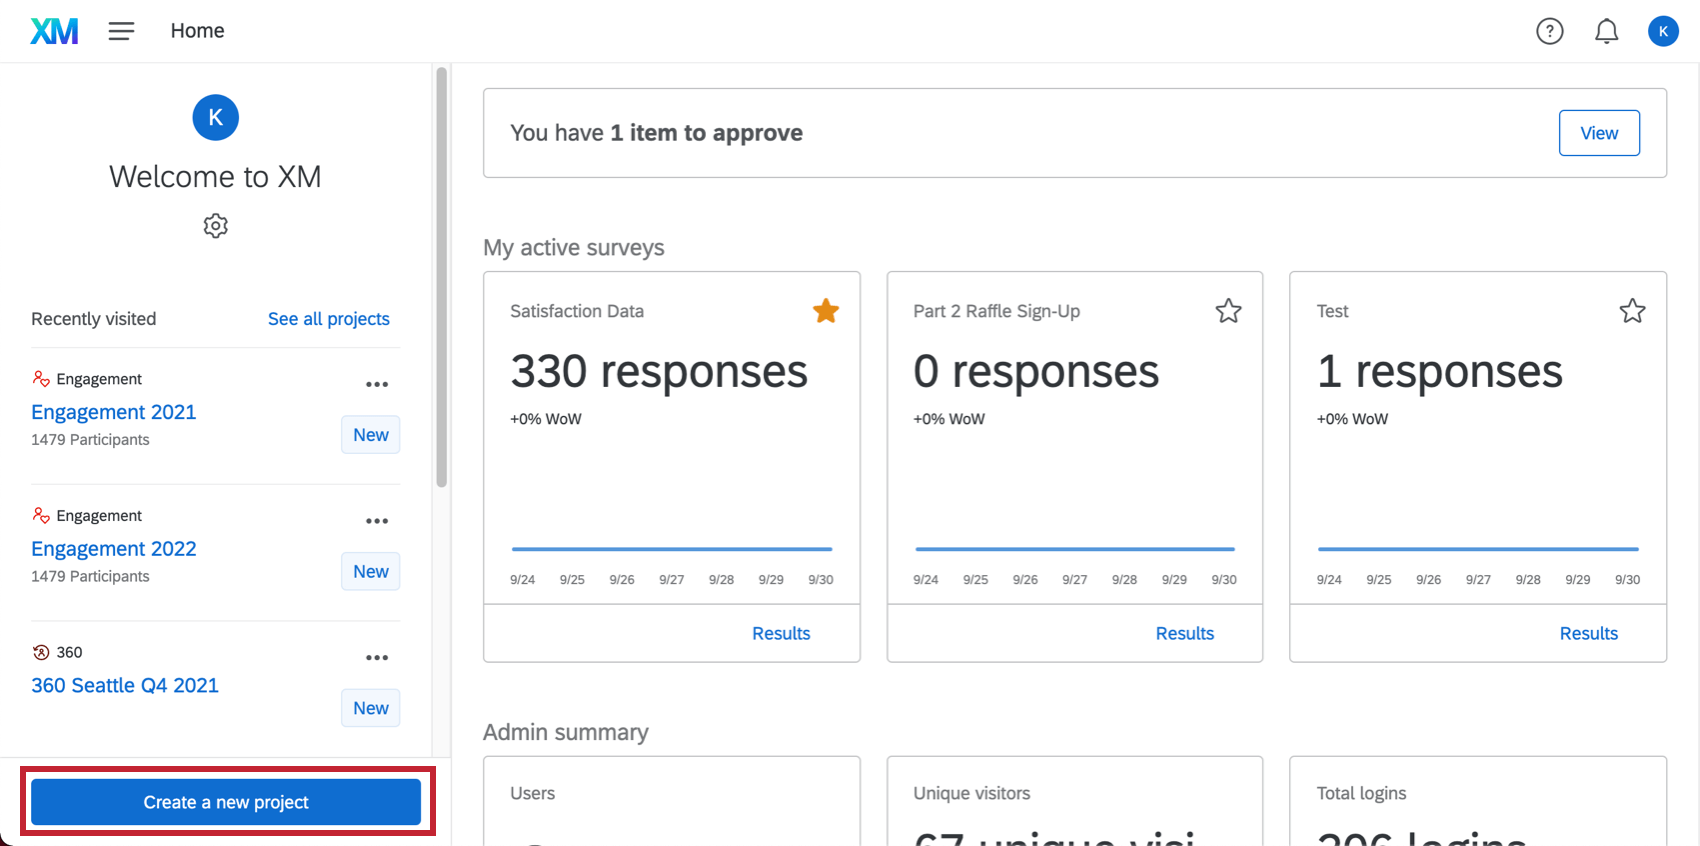
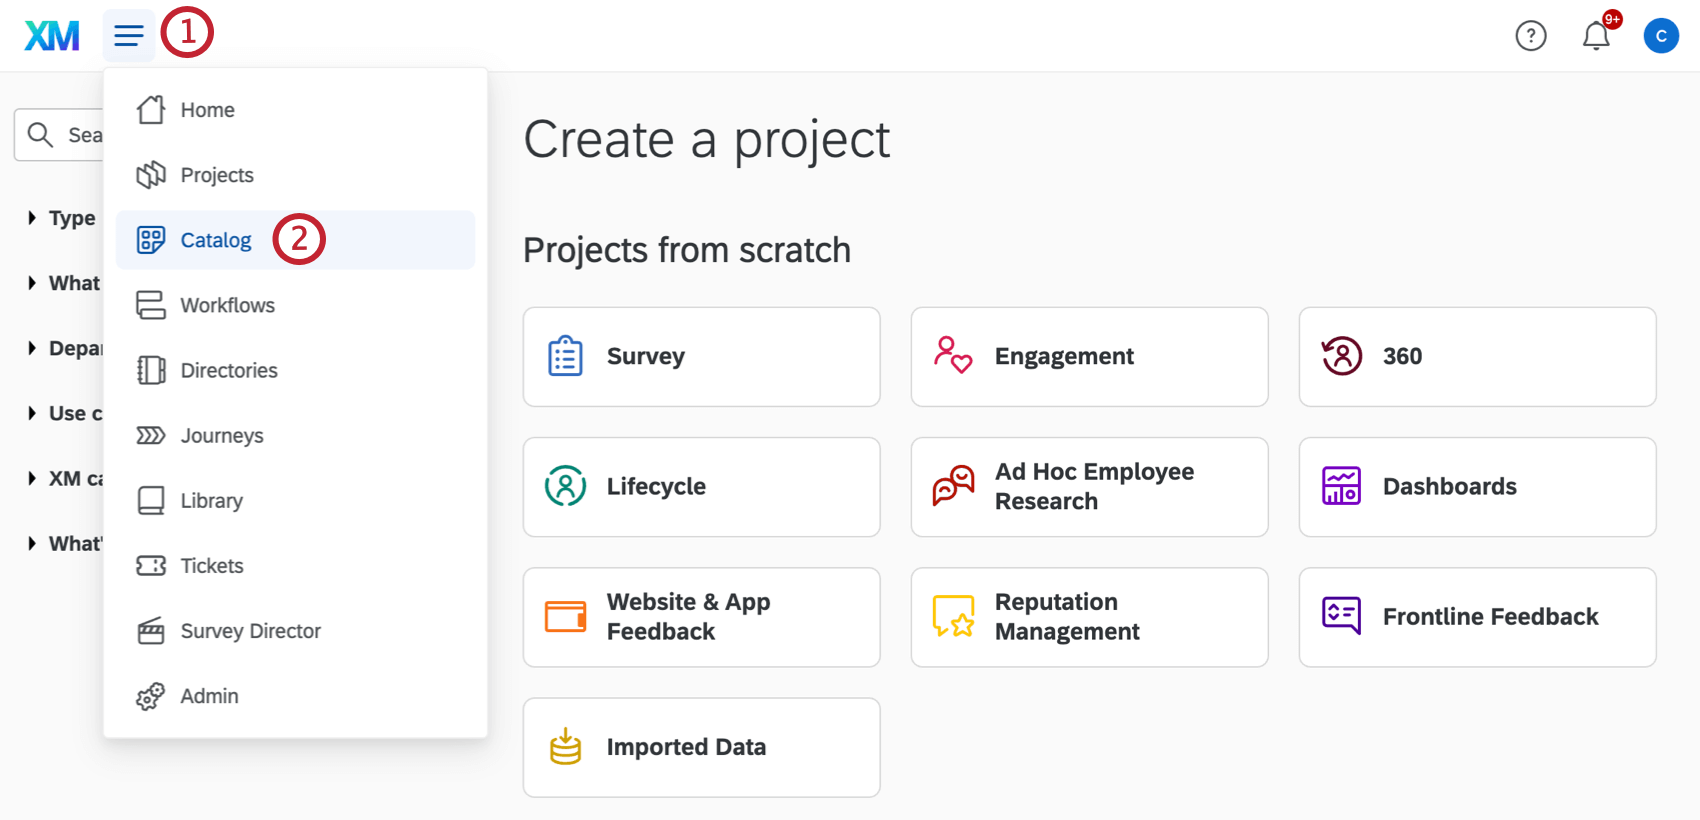
Browsing the Catalog
The catalog is where you can find all the different types of projects you can create in your Qualtrics account. There are 3 ways to get to the catalog:
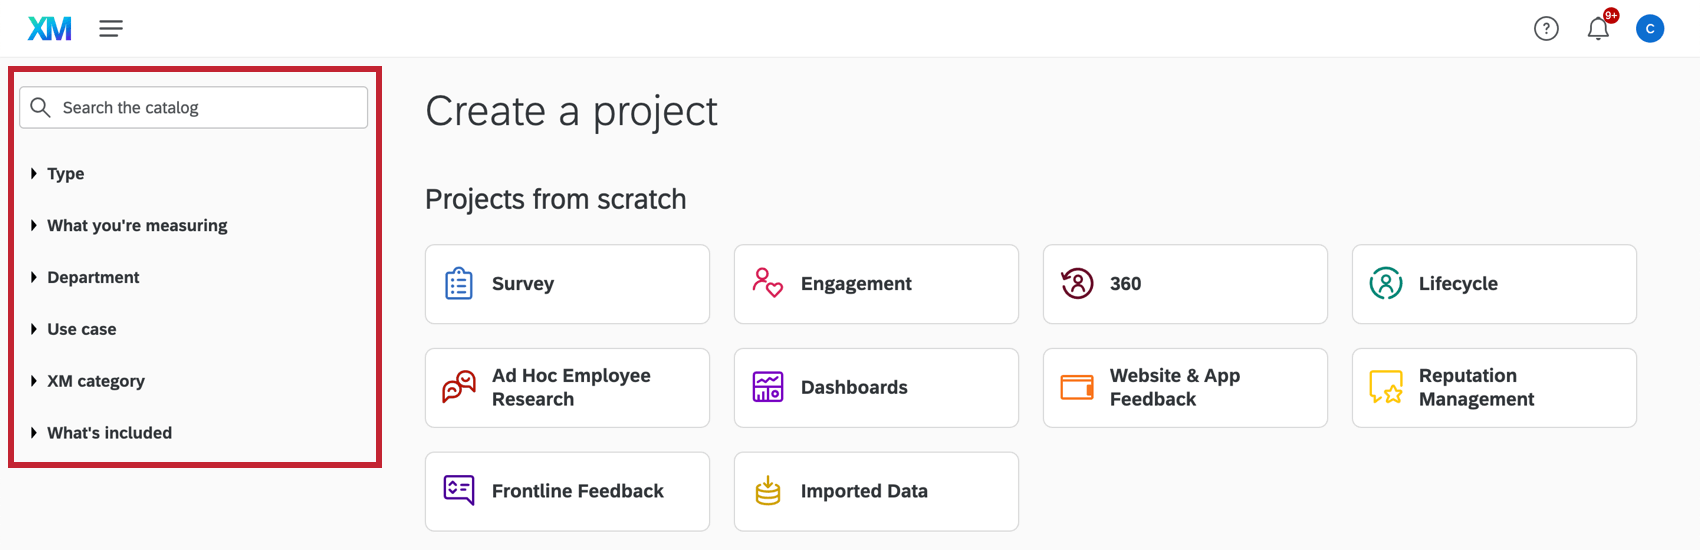
Along the side, you can use the filter groups to narrow down what options you have to choose from. There are a lot of different things you can pick from in the catalog, and what you see will depend on your license and your account permissions. Clicking on an item will filter the catalog to display only the projects that meet that criteria. You can click on additional items to further narrow the available options. Items will be grayed out if they cannot be combined with your current filter criteria. You can also use the search function to search projects by keyword.

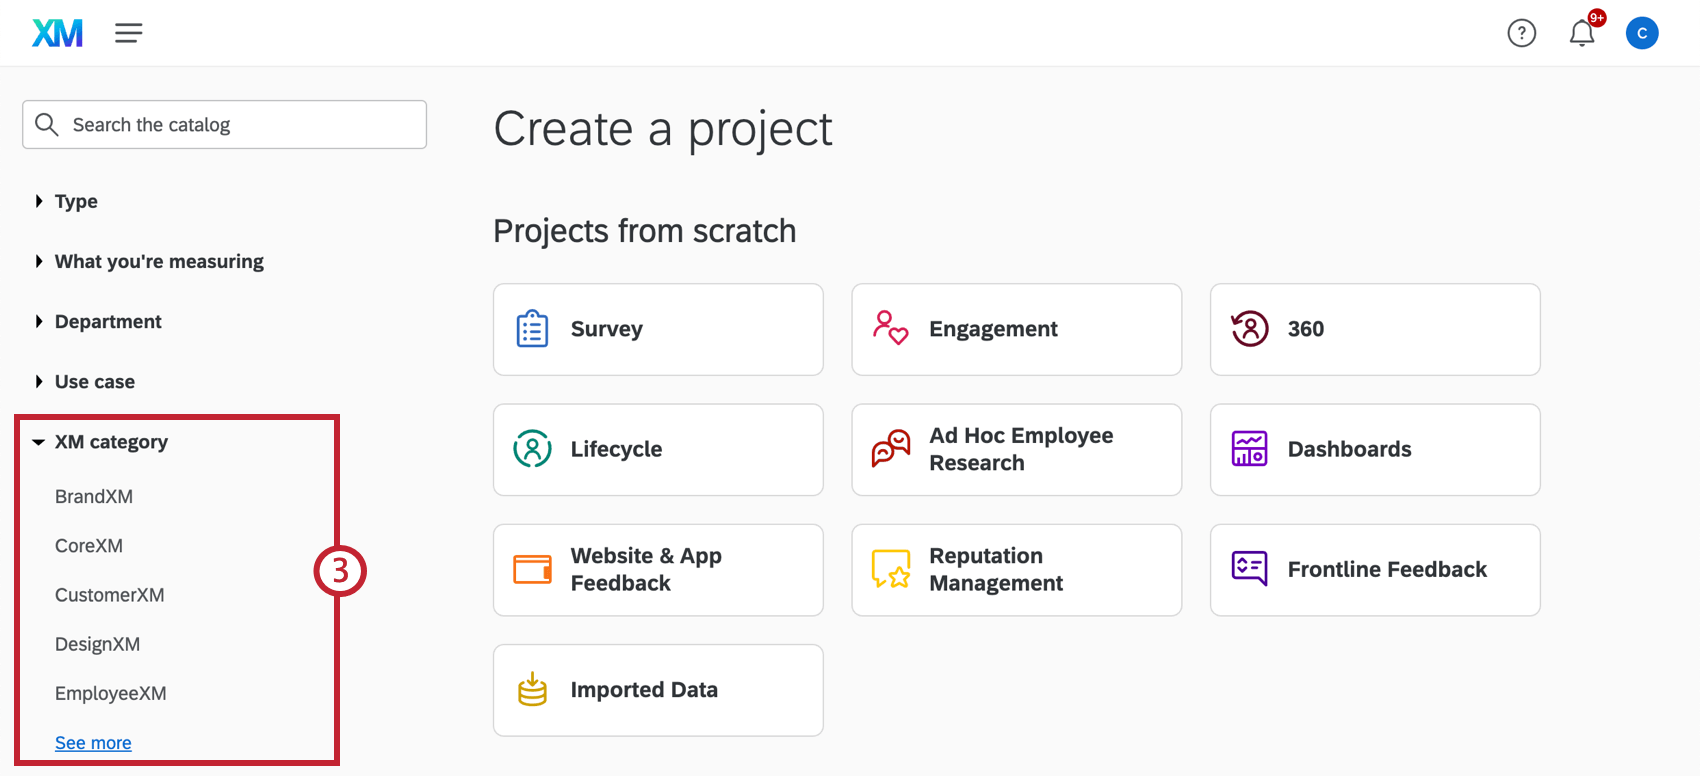
Available Filter Groups
- Type: The type of project.
- What you’re measuring: The audience being measured (e.g., Customers, Employees, Website and app visitors).
- Department: The department that is being measured (e.g., Customer experience, Human resources, IT).
- Use case: The goal for the project (e.g., Brand tracking, Market research, Workplace experience).
- XM category: The product category (e.g., BrandXM, CoreXM, CustomerXM).
- What’s included: What is included in the project (e.g., Guided setup, Pre-built dashboard).
Qtip: Selecting items from different filter groups will narrow your search, as only projects that meet all of your selected criteria will be displayed. Selecting items from the same filter group will broaden your search. In the screenshot below, the catalog will display both CoreXM and EmployeeXM projects.

Qtip: To get access to features you don’t have, talk to your Brand Administrator. They can either adjust your permissions if it’s a feature your brand has already purchased, or they can reach out to your brand’s Account Executive if you are interested in upgrading your license.

- Projects from scratch: Create a new project without starting from a template. This is where you’ll find options such as Surveys, Dashboards, Website & App Feedback, Frontline Feedback, Imported Data, and more. See a list of project types.
- Programs: When you create a program, it can come with a whole host of pre-built projects, such as expert-designed surveys, dashboards, and intercepts, all in one container with key metrics highlighted on the first page.
- Guided projects: These are more complex than templates in that they take you through the survey creation, distribution, and reporting process process step-by-step. The content in guide projects are based on industry-standard research designs and perfected by subject-matter experts.
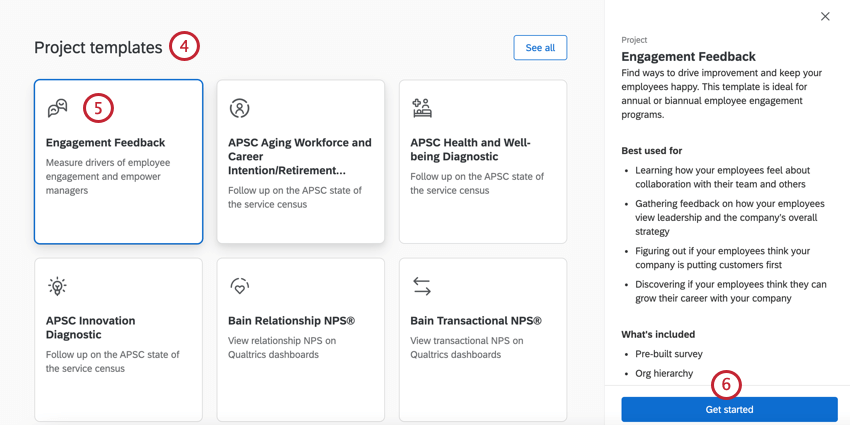
- Project templates: Instead of starting with a blank project, you can also start with a Qualtrics template. These pre-made projects provide a starting place for Experience Management, with content developed by subject-matter experts.
Qtip: Sometimes not all available templates or guided solutions will be listed at once – click the See all button to expand the list.
Creating a New Survey Project
Blank survey projects are surveys you build from scratch.

Qtip: When created, the project will fall in the default “Uncategorized” folder. You can always move your survey to a different folder later on. See our organizing your projects page for more information about folders and subfolders.
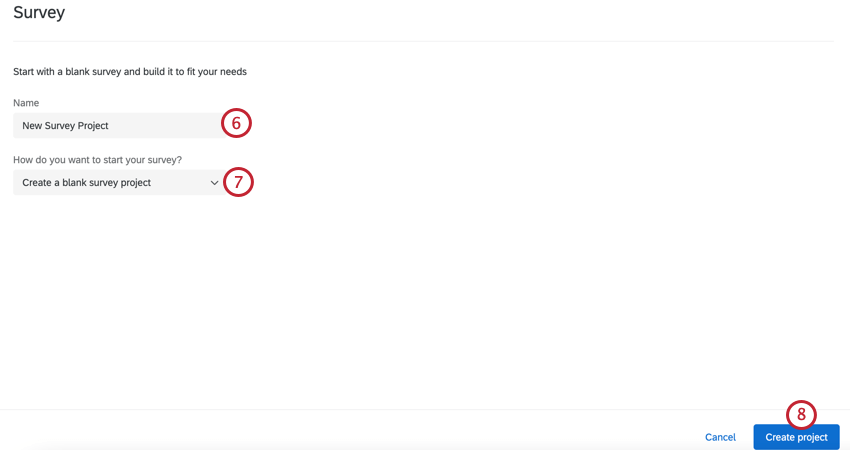
After clicking “Create project,” you’ll be taken to the Survey tab where you can begin adding questions to your survey.
For most people, you will want to make sure CoreXM is selected when you create a project, but you can select Survey in almost any category you have access to. The category you choose for your survey cannot be changed later. It is there for you to organize your projects by theme. These categories also allow you to access other softwares, such as CX Dashboards (under CustomerXM) or Engagement projects (under EmployeeXM).
Creating from a Copy
Attention: It is not currently possible to copy a guided solution project.
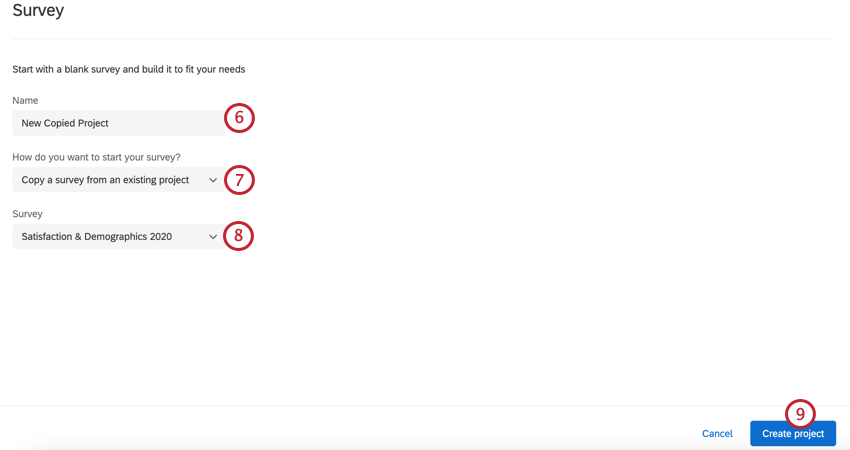
After clicking “Create project,” you’ll be taken to the Survey tab where you can begin editing your survey.
Qtip: Copied surveys will retain all the same settings as the original survey. This includes survey availability dates, incomplete survey response settings, look and feel settings, etc.
Qtip: You can copy a project to an other user’s account in your organization by using the project actions menu.
Creating from the Library
You can copy a survey from a library and use it as a template for your new project. You can copy from your personal library, your organization’s library, and the Qualtrics Library (which contains many ready-to-use surveys).
Qtip: To learn more about libraries, view our library overview and library surveys pages.
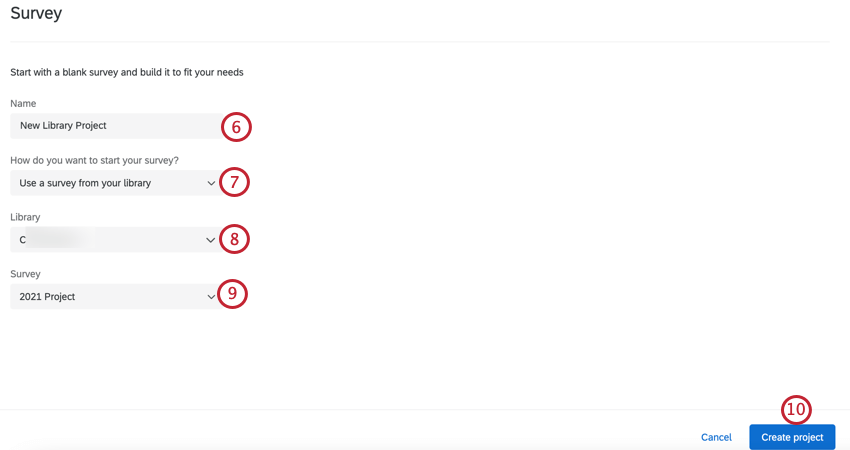
- Personal library: Choose from one of your own surveys.
- Group library: Choose from surveys owned by a group.
- Qualtrics library: Choose from surveys within the Qualtrics database. Choose the library from which you want to pull the survey.
Qtip: You can also use surveys in your library as reference surveys.
Creating from a File
Any Qualtrics user can let you make a duplicate of their survey by giving you the survey’s QSF file. The QSF file acts as the survey template – it contains all the same settings, but none of the collected data. If you need to move a survey to a different account or duplicate a colleague’s project without getting access to the original, this method is great for you.
Before you can upload a survey to your Qualtrics account, you or the survey’s owner needs to get you the QSF file of the survey. See the linked support page for more instructions.
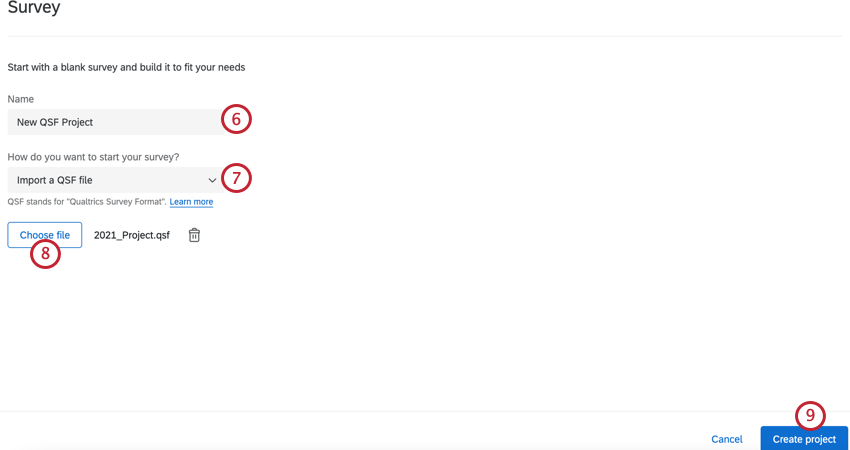
After clicking “Create project,” you’ll be taken to the Survey tab where you can begin editing your survey.
Qtip: Imported surveys will retain all the same settings as the original survey. This includes survey availability dates, incomplete response settings, look and feel settings, etc.
Qtip: To learn more about importing survey files, visit our importing and exporting surveys page.
Creating Projects from Guided Solutions
Solutions help you build questions and blocks based on information you set, such as product names or the method you’d like to use to collect information. The question structures used in solutions are based on industry-standard research designs and perfected by subject-matter experts. Solutions are different from templates, in that templates create a survey for you, whereas solutions take you step by step through the survey creation, distribution, and reporting process.
For details, see the Guided Solutions support page.
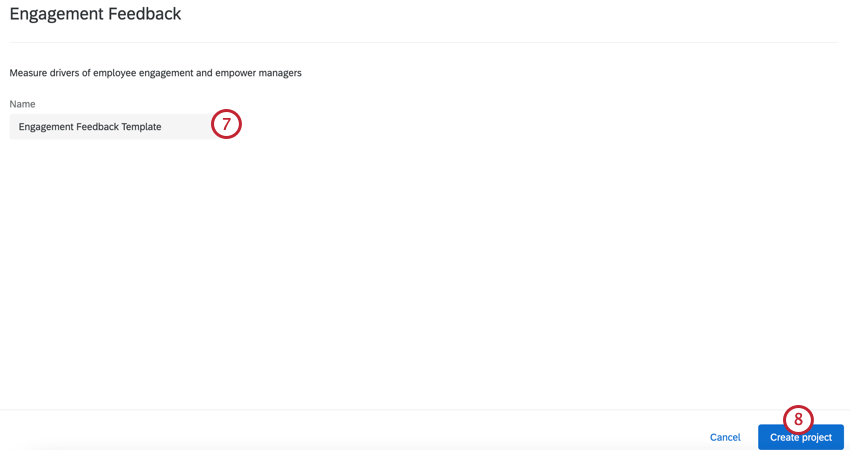
Creating from a Template
Instead of starting with a blank project, you can also start with a Qualtrics template. These pre-made projects provide a starting place for Experience Management, with content developed by subject-matter experts.
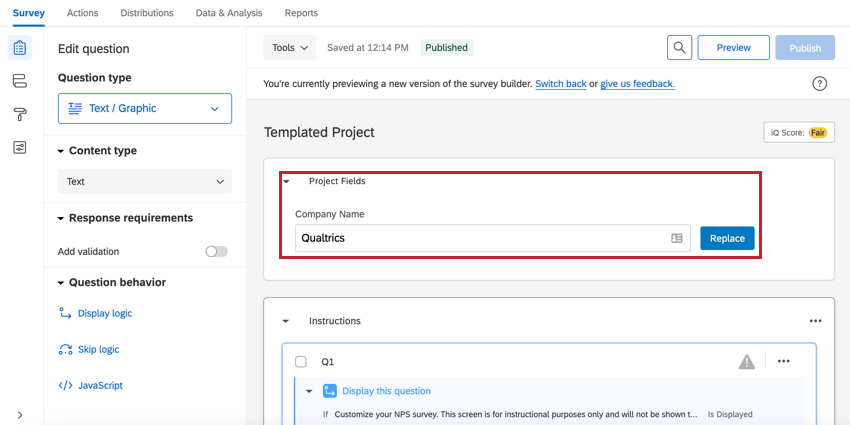
For templates that ask for additional information, you can edit this at any time. Simply navigate to the Project Fields section at the top of the survey editor.

Project Types
When you create a project in Qualtrics, you have several options for project type. Each Qualtrics software has its own unique strengths, so the project type helps determine which software you can use.
FAQs
How do I rename my project?
How do I rename my project?
How do I assign my projects to a folder?
How do I assign my projects to a folder?
Can I restore a deleted project?
Can I restore a deleted project?
What is the XM platform?
What is the XM platform?
What does CX/EX/BX stand for? / What does _ Experience mean?
What does CX/EX/BX stand for? / What does _ Experience mean?
- Customer Experience (CX): Learn more about your customers' experience with your company. Build beautiful dashboards to display your data, or target users on your site using creative intercepts.
- Employee Experience (EX): These projects are specially designed to get at the heart of your employees’ experience working for your company, and provide actionable results and dynamic reports. Assign relationships and easily create individual reports with 360, or survey the whole company and create a secure dashboard that only reveals data based on each employee’s position in the company hierarchy.
- Brand Experience (BX): Find out what’s working and what isn’t for your brand’s reputation, and build towards a better experience for your customers.
That's great! Thank you for your feedback!
Thank you for your feedback!