
Org Hierarchies Tools (EX)
What's on this page
Qtip: This page describes functionality available to Engagement and Pulse projects, but not Lifecycle or Ad Hoc Employee Research projects. For more details on each, see Types of Employee Experience Projects.
About Org Hierarchies Tools
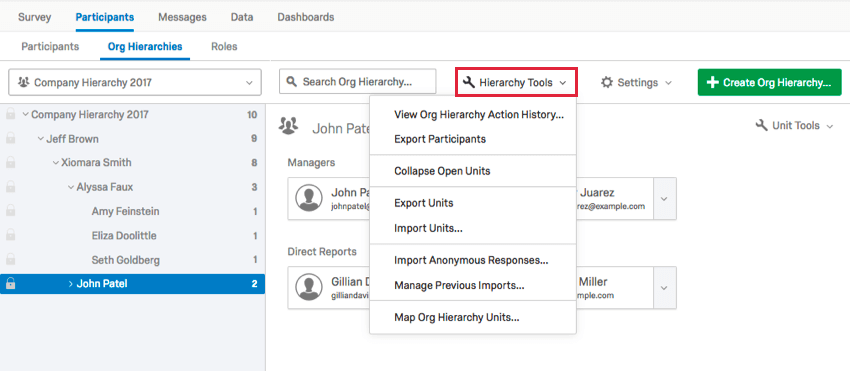
Once you have generated your hierarchy, you will have access to a Hierarchy Tools menu containing several features to help you navigate and manage your newly made hierarchy.
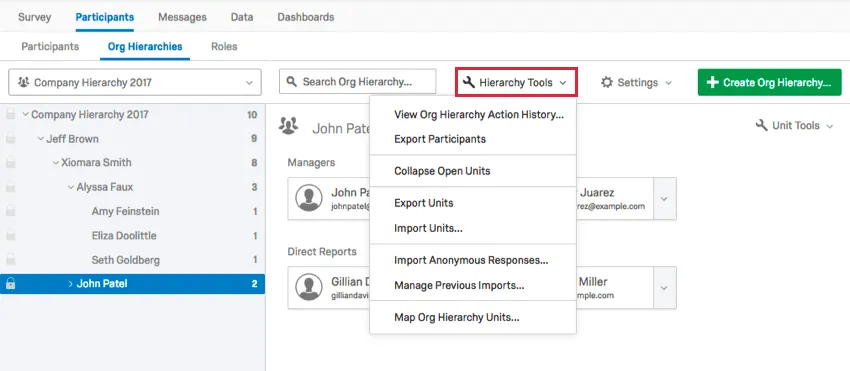
This page covers the following options: View Org Hierarchy Action History, Export Participants, Collapse Open Units, and Import/Export/Remove Delegates.
See our pages on Org Hierarchies Export & Import Options and Map Org Hierarchy Units for more information on the other options in the Hierarchy Tools menu.
View Org Hierarchy Action History
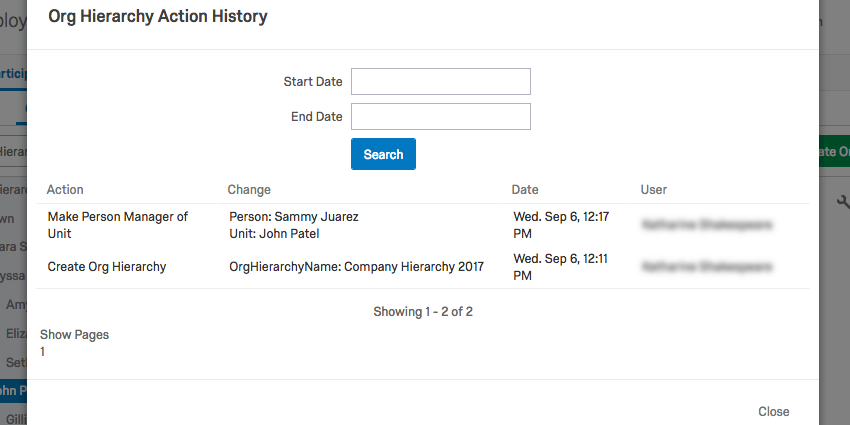
The View Org Hierarchy Action History will show every action taken on the hierarchy inside the platform, including when it was uploaded and what changes were made to it.
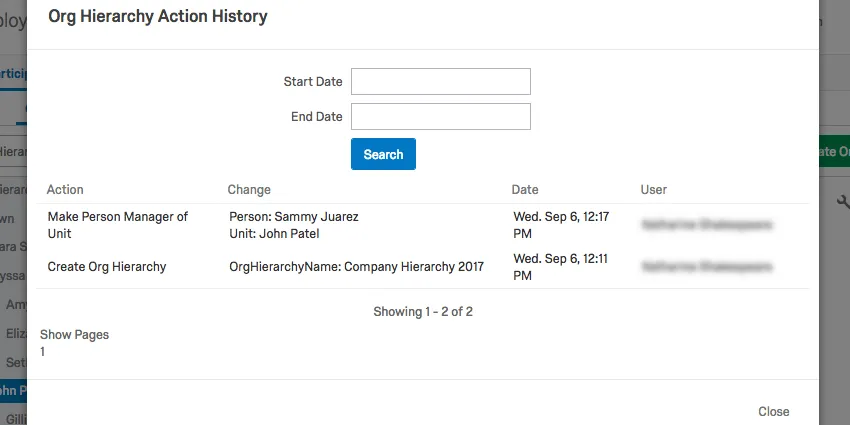
In the image above, a participant in the hierarchy was made manager.
You can also restrict your history by a Start Date and End Date.
Export Participants
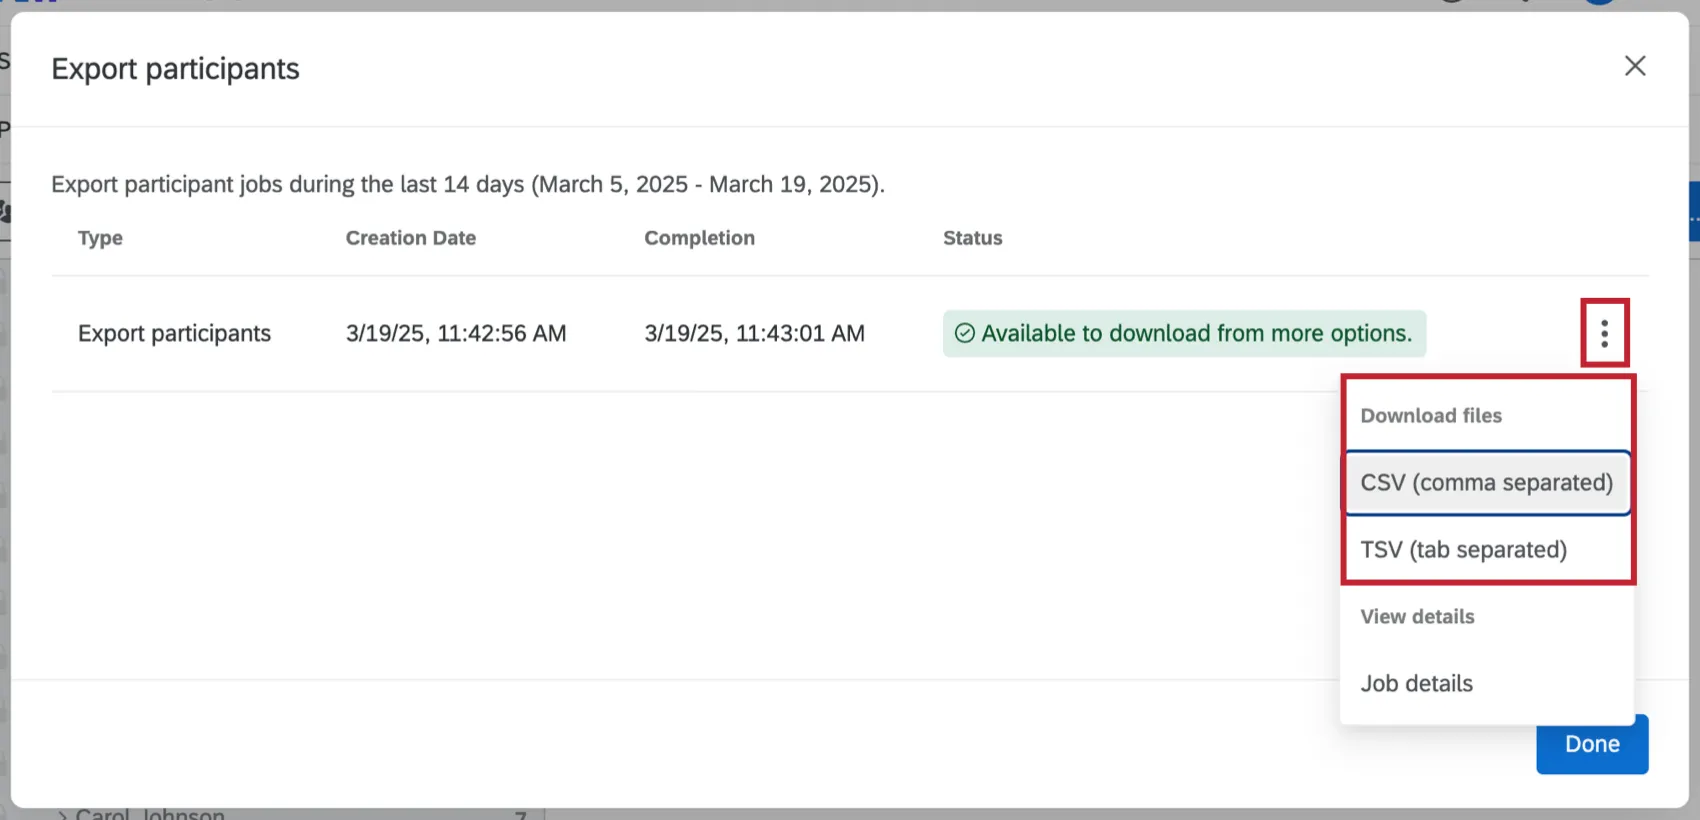
The Export Participants option will open a table with the export jobs from the previous 14 days. Click the 3 dot menu to the right of an export job and select CSV or TSV to download a file of the participants and metadata relevant to the hierarchy to your computer.
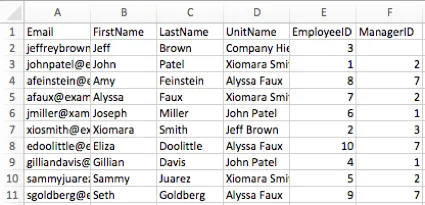
Example: You may have saved your participants’ gender, age, and hiring date as metadata, but if you built a Parent-Child hierarchy, this option will only download each participants’ EmployeeID, ManagerID, and UnitName (the name of the unit the participant belongs to), because that’s the only metadata relevant to the hierarchy.
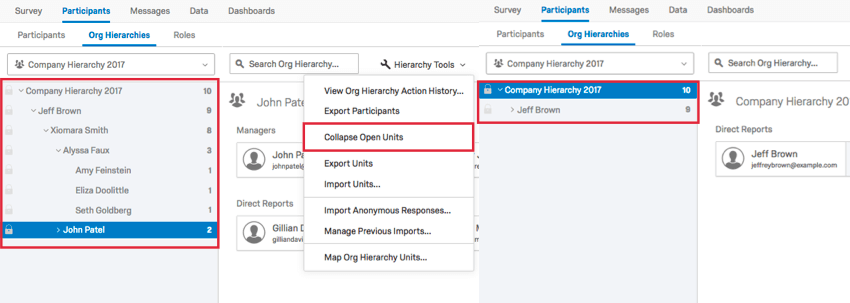
Collapse Open Units
If you select Collapse Open Units, then the units you have open will close up.

This option is useful if you have a large hierarchy you’ve been looking through, and you want to simplify what you’re looking at to find something located elsewhere in the hierarchy.
Export Units & Import Units
You can export a CSV of your hierarchy units and then make certain changes that you can then import. See the Export Units and Import Units support pages for more details.
Import Anonymous Responses
You can import responses into your project that are not connected to any specific participant. To learn more, see the Import Anonymous Responses support page.
Manage Imports / Exports
With this option you can view a history of imported responses, exports, and hierarchy deletion jobs. See Manage Imports/Exports for more details.
Map Org Hierarchy Units
After you’ve built your hierarchy, you may want to make sure it aligns with one you’ve built from a previous year. The ability to Map Org Hierarchy Units is useful because it allows you to dynamically display historical data in your dashboards. To learn more, see the Map Org Hierarchy Units support page.
Delegated Permissions Bulk Setup
Qtip: This feature is only available for Employee Engagement and Pulse projects.
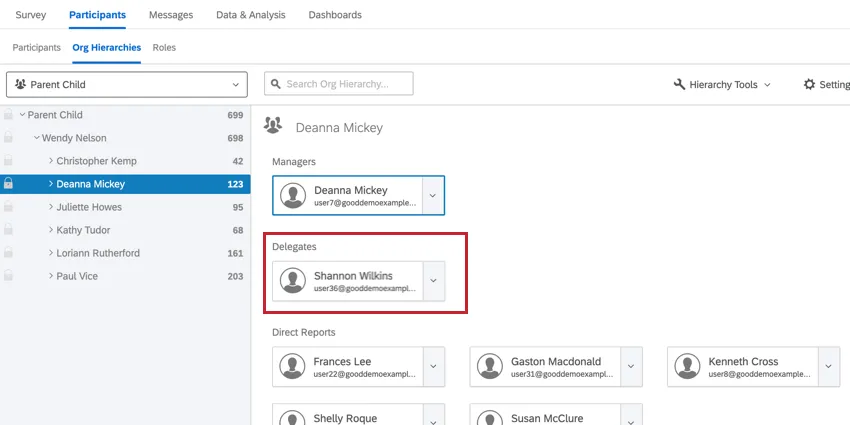
Delegated permissions let you assign dashboard permissions for individuals allowed to view data outside of their hierarchy unit. After being added, delegates will appear in their assigned units in the hierarchy. Delegate responses will not be tied to the unit for reporting purposes, but the inclusion of the delegate position will aid in quickly and dynamically permissioning these employees to see the appropriate dashboard data. After adding delegates, you can assign them dashboard permissions using roles.
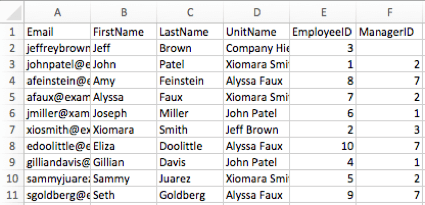
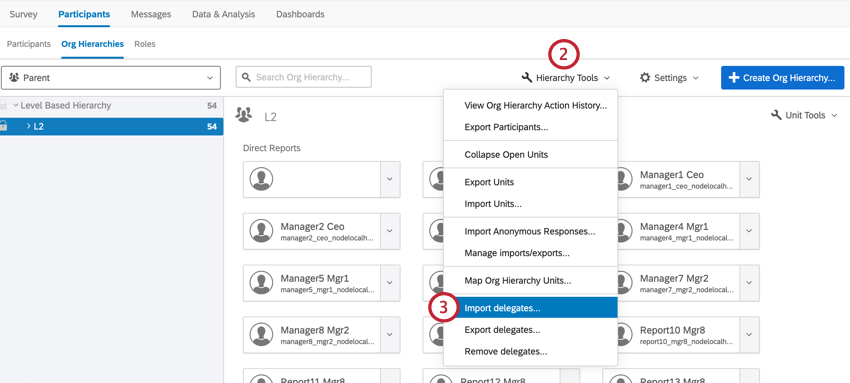
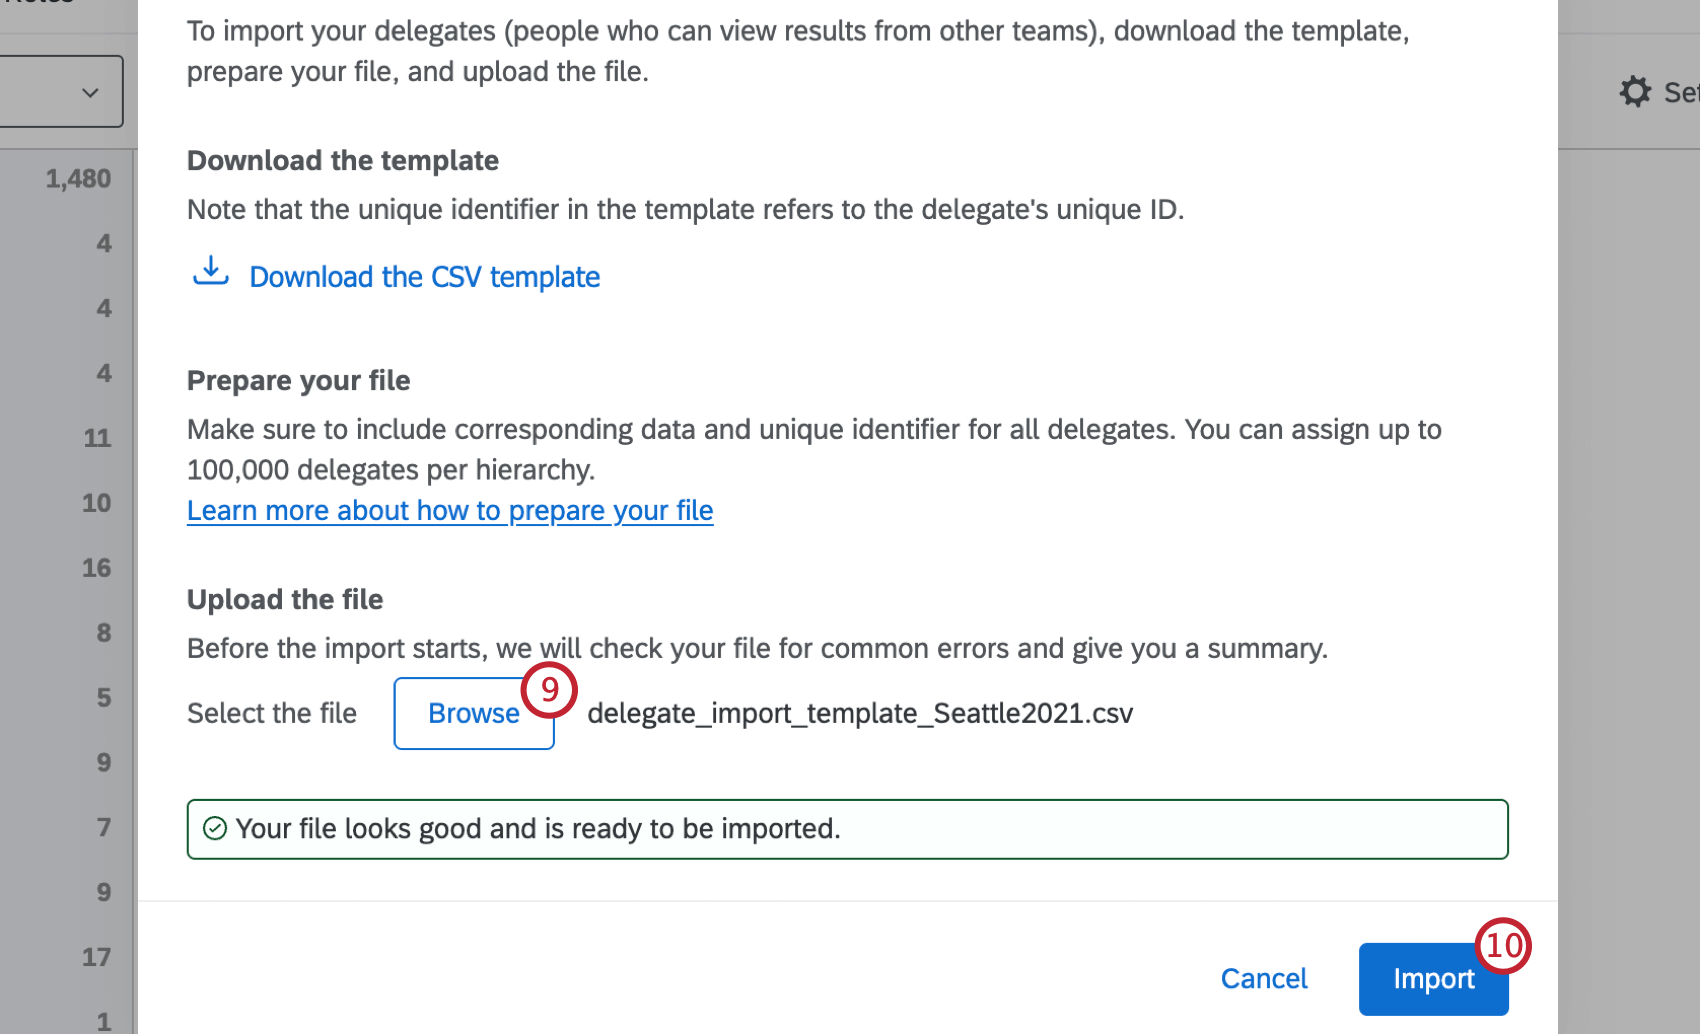
Importing Delegates
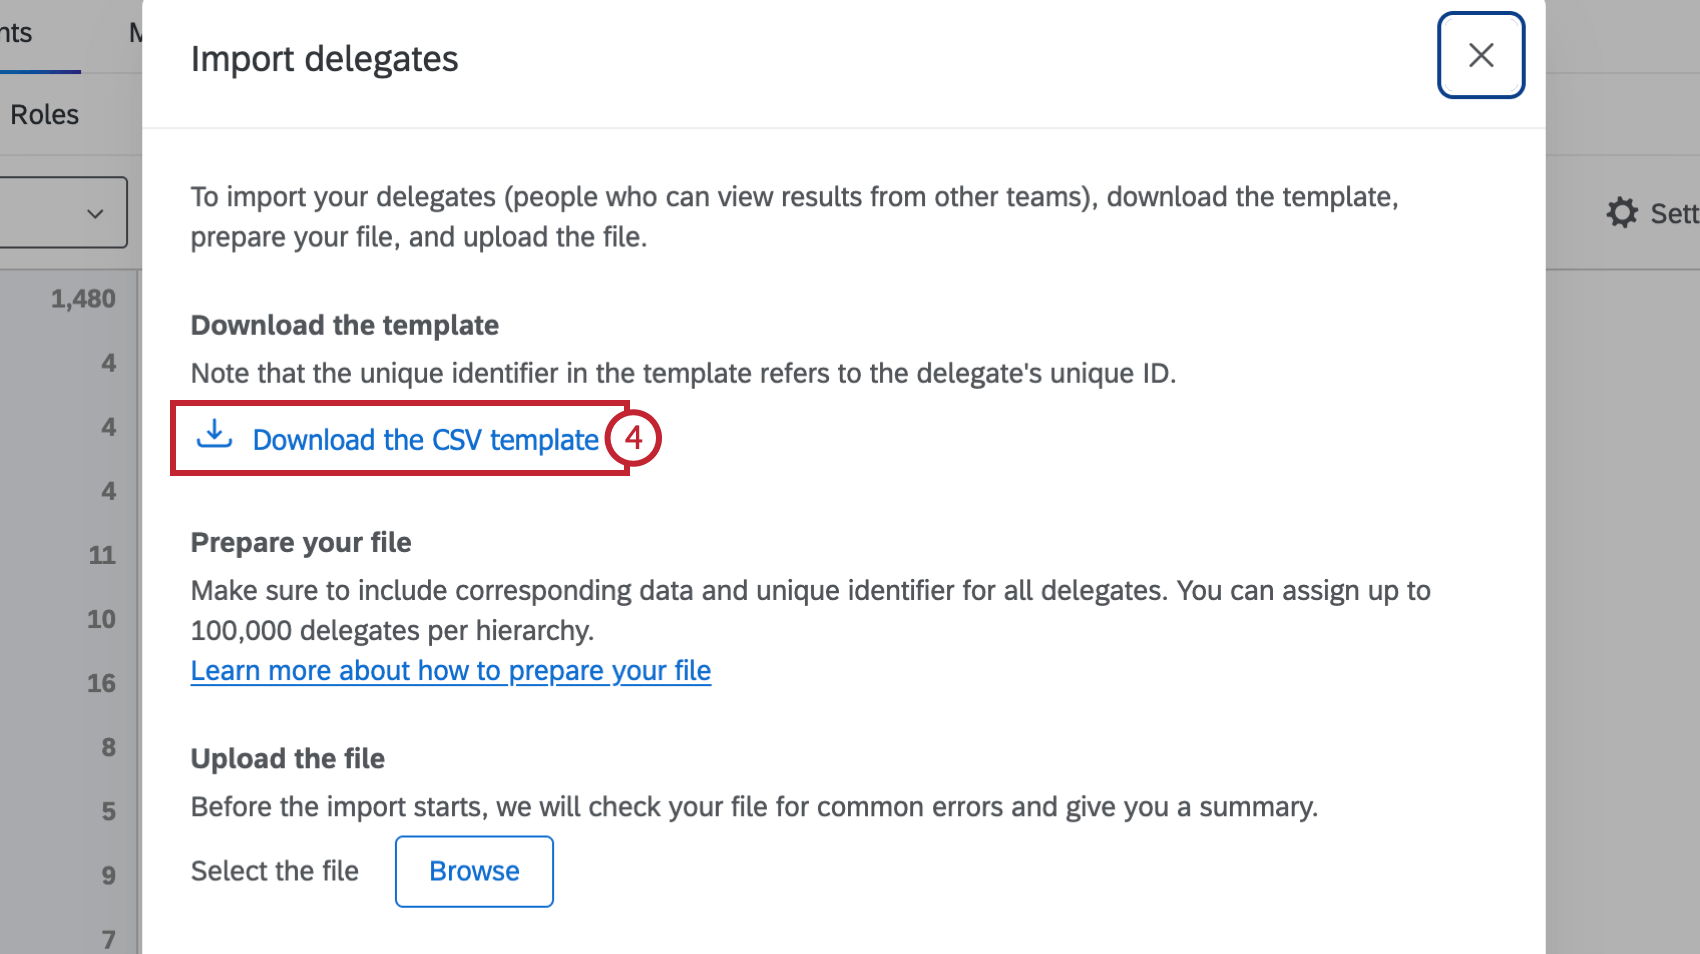

Qtip: A parent-child hierarchy will require the use of the Manager ID field and a level-based hierarchy will require use of all the specified levels. If inserting multiple delegates into the same unit or the same delegate for multiple units, specify those actions on separate rows in the file.
Attention: You can have up to 100,000 delegates in a hierarchy.
When your import is finished, you can use the Manage Imports/Exports option to retrieve an error file if any of your delegates failed to import.
Qtip: After adding delegates, they will appear in your hierarchy. You can edit your delegates to remove them from your hierarchy one-by-one.

After importing your delegates, use roles to assign them dashboard permissions!
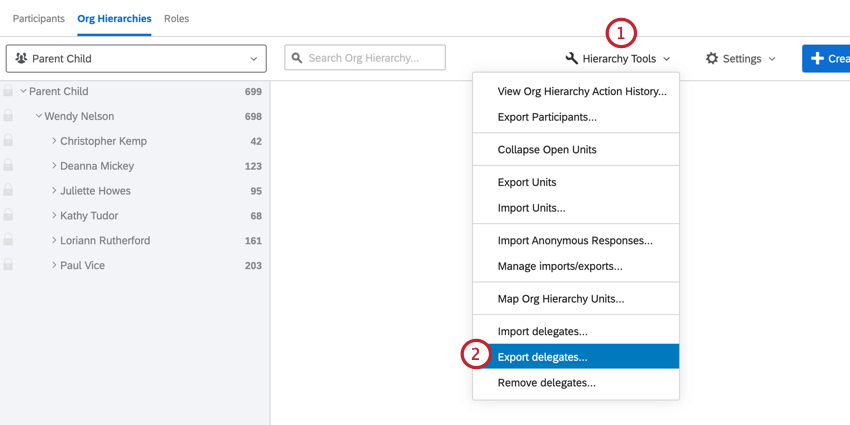
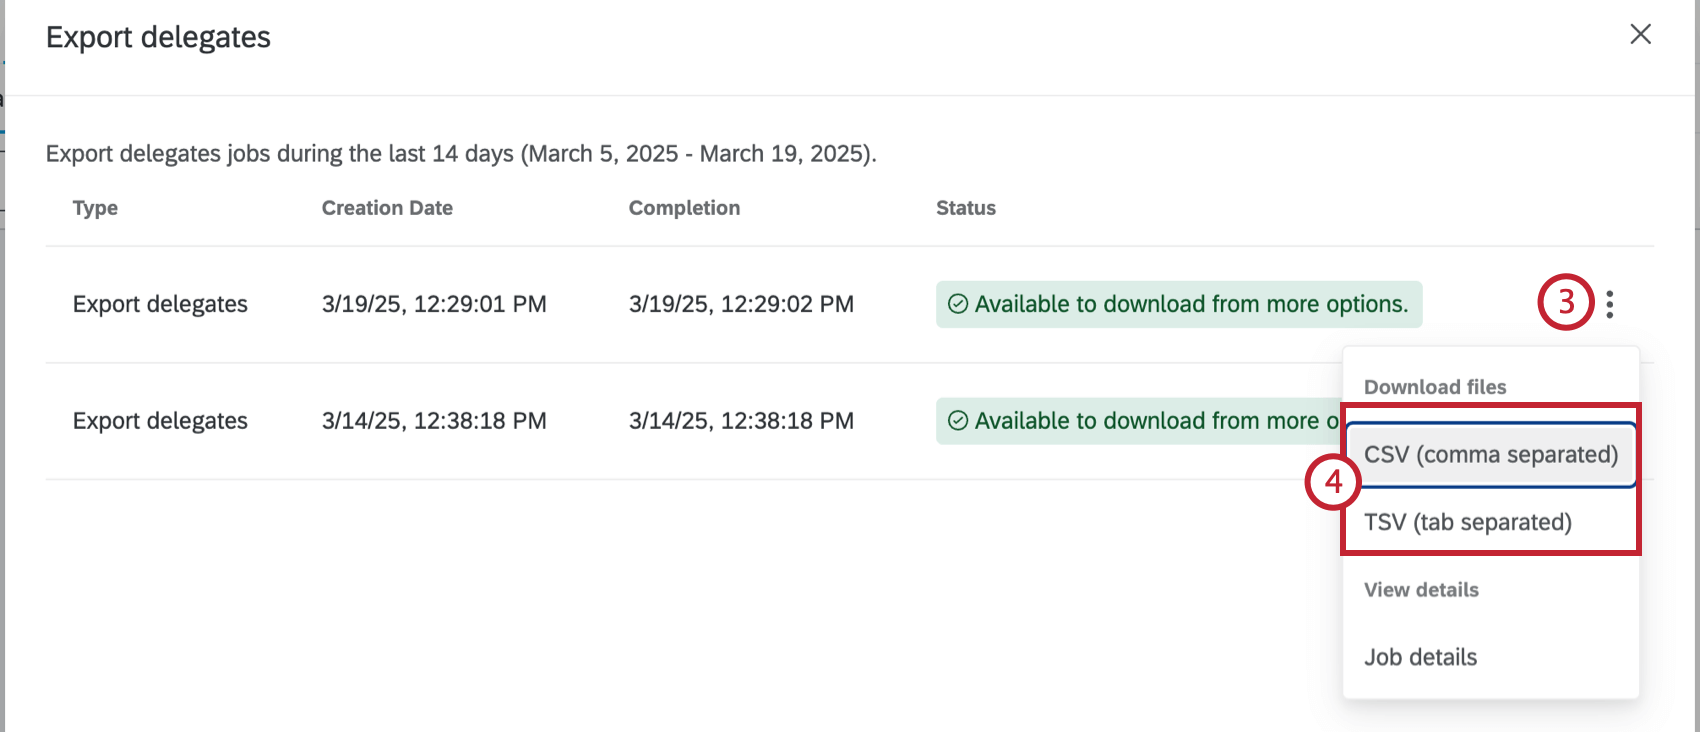
Exporting Delegates
You can view delegates in a specific unit by navigating to that unit in the org hierarchies tab. To view all delegates in the hierarchy, you will need to export your delegates.
Qtip: You cannot use the hierarchy search to find delegates.
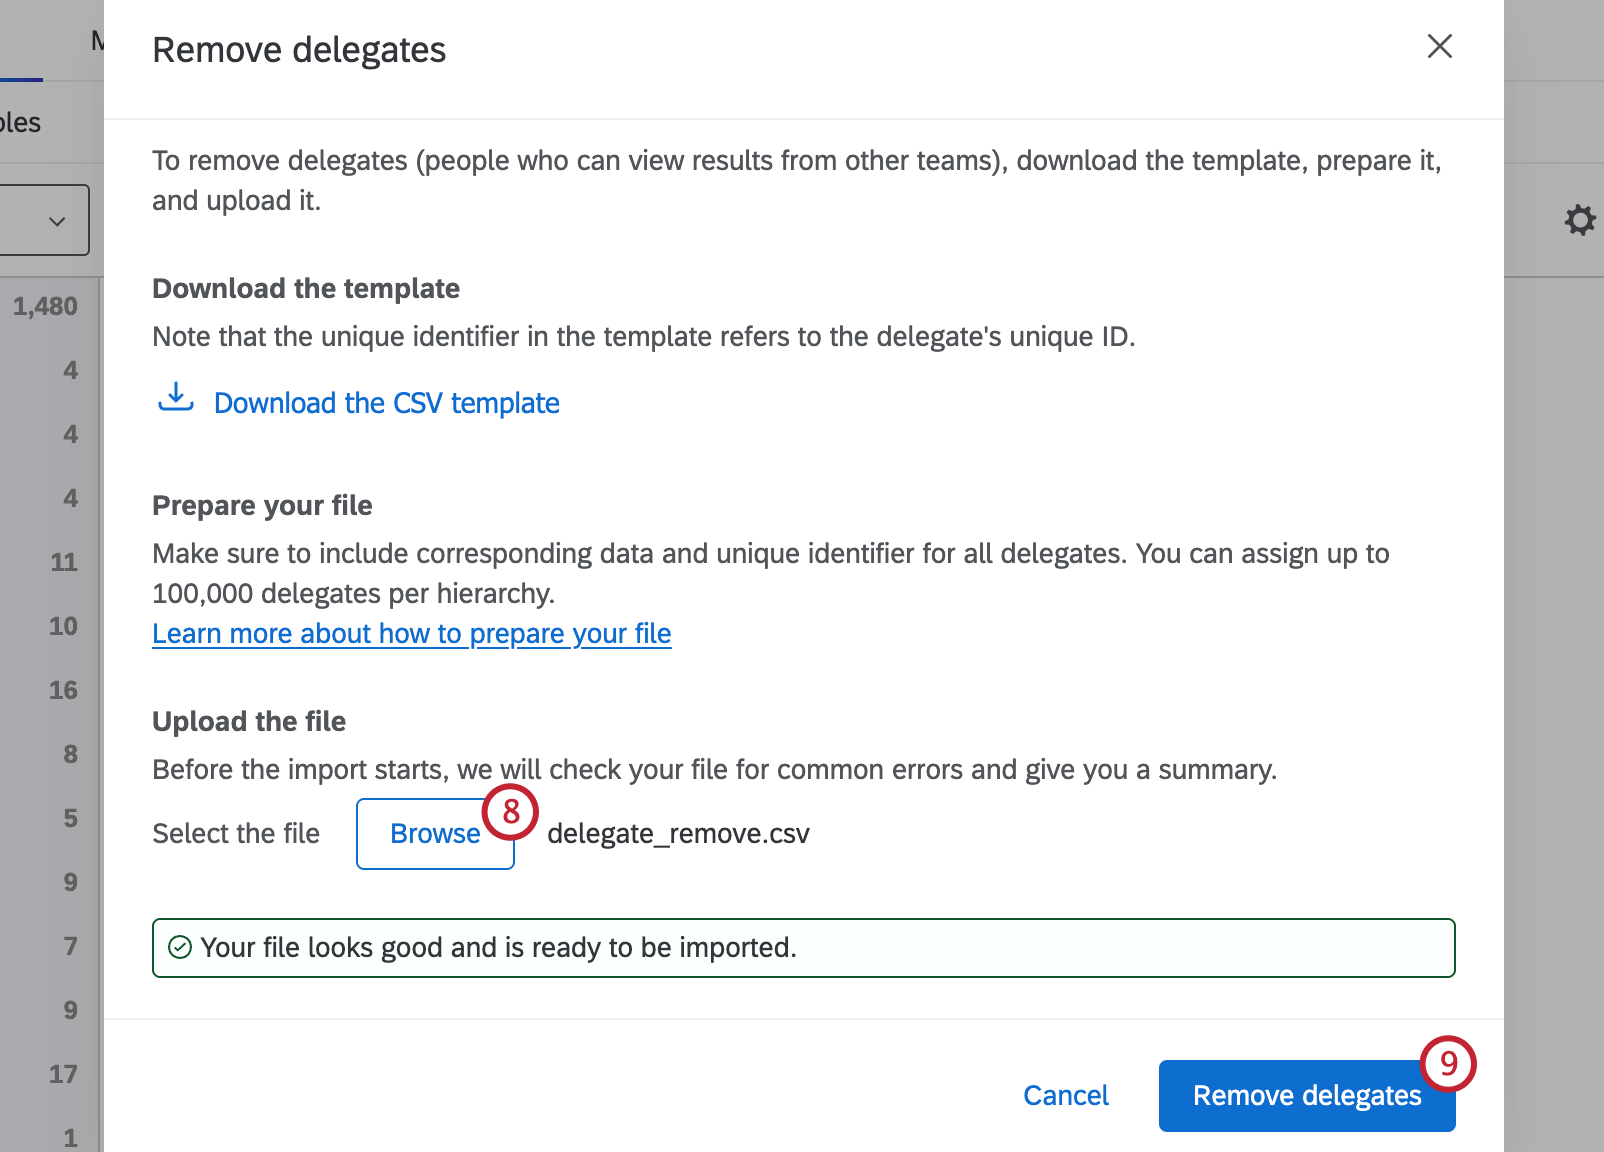
Removing Delegates In Bulk
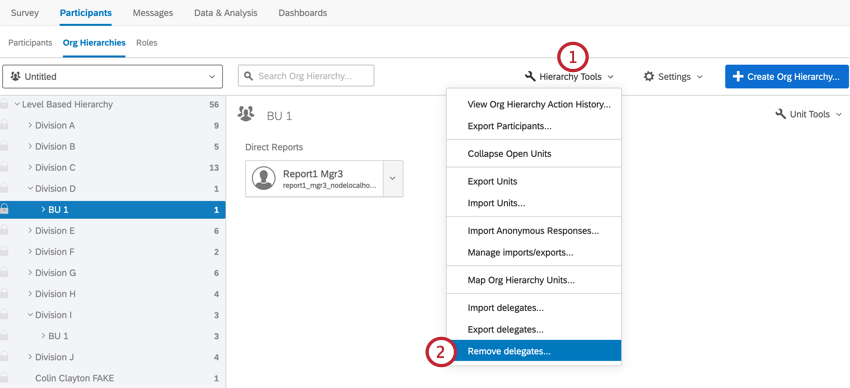
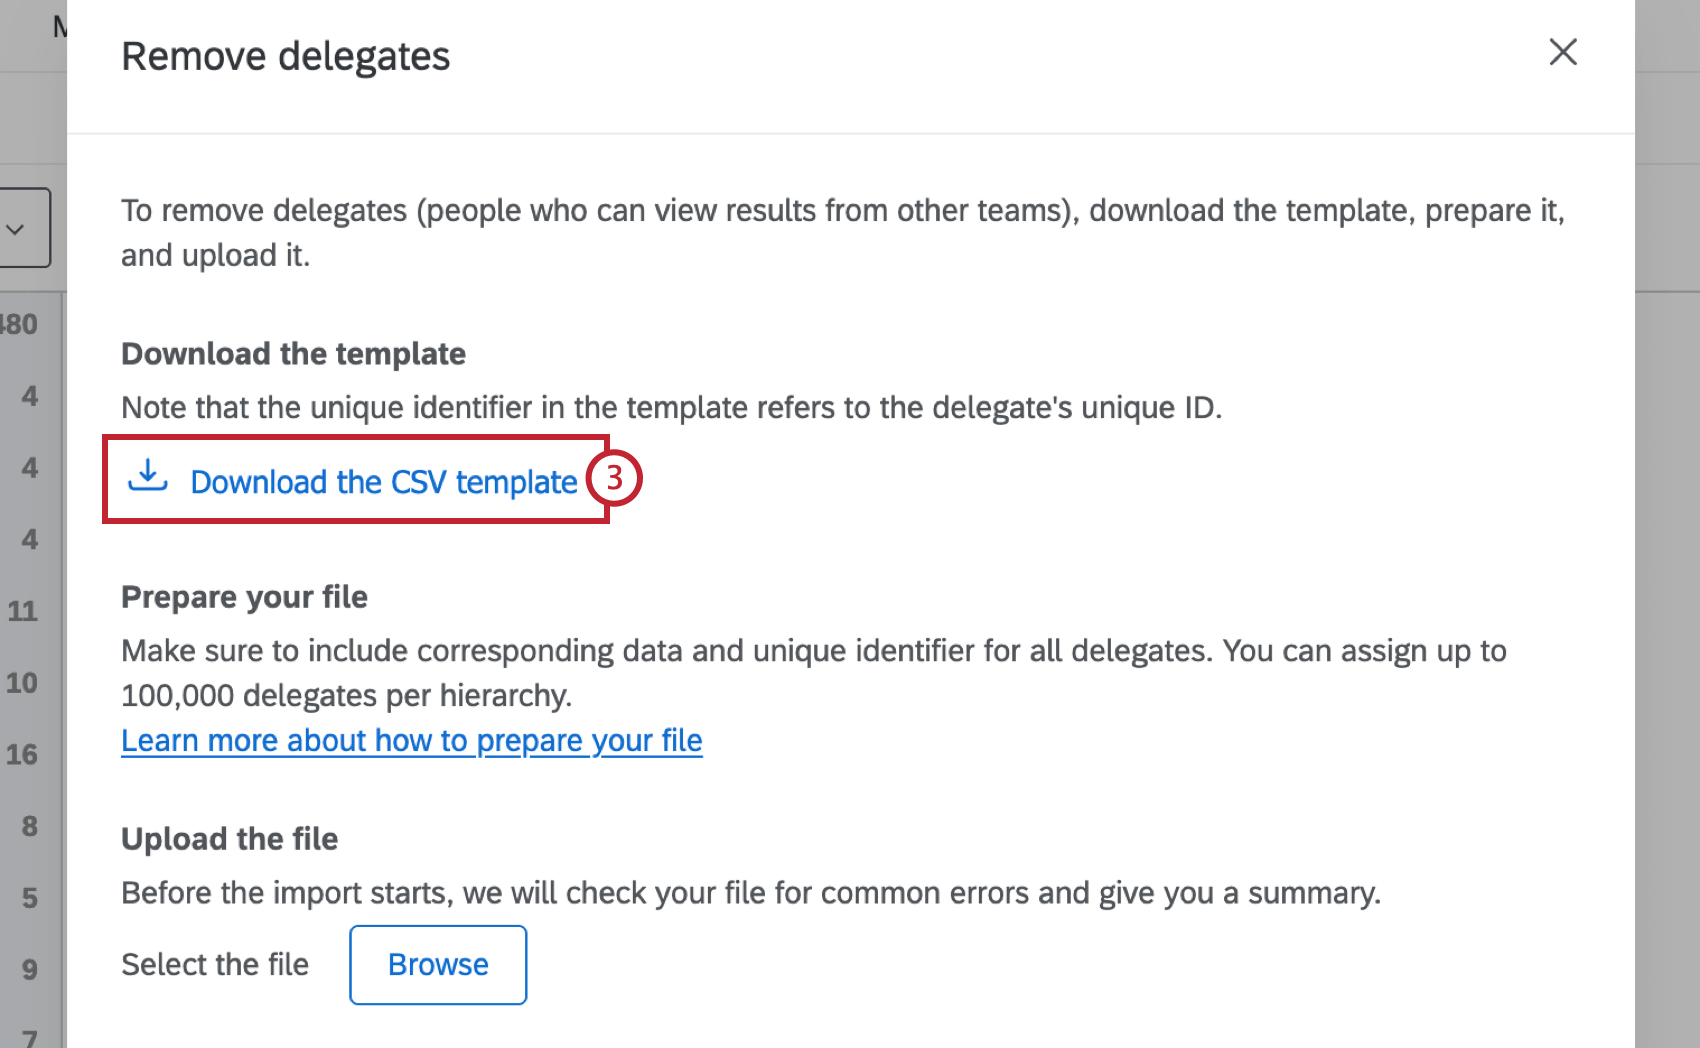
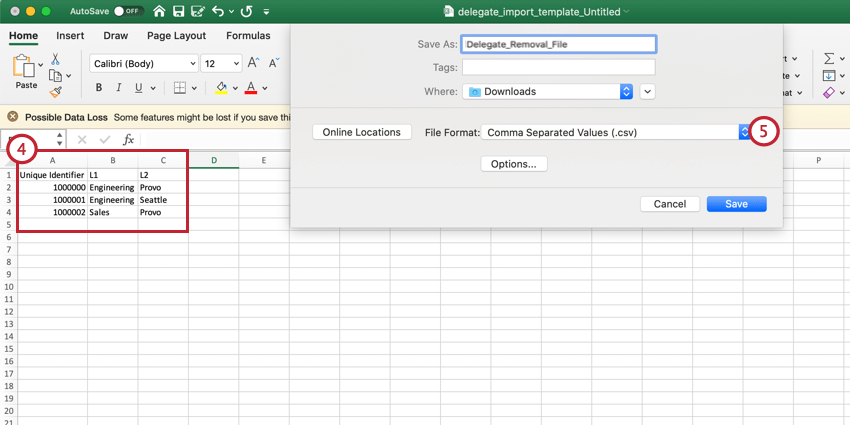
Qtip: A parent-child hierarchy will require the use of the Manager ID field and a level-based hierarchy will require use of all the specified levels. If inserting multiple delegates into the same unit or the same delegate for multiple units, specify those actions on separate rows in the file.
Attention: You can have up to 100,000 delegates in a hierarchy.

FAQs
Can I automate changes to my Engagement org hierarchy?
Can I automate changes to my Engagement org hierarchy?
To learn more about automating employee directory changes, see Load Users into EX Directory.
That's great! Thank you for your feedback!
Thank you for your feedback!