-

Qualtrics Platform -

Customer Journey Optimizer -

XM Discover -

Qualtrics Social Connect
Mailing List Options
About Mailing List Options
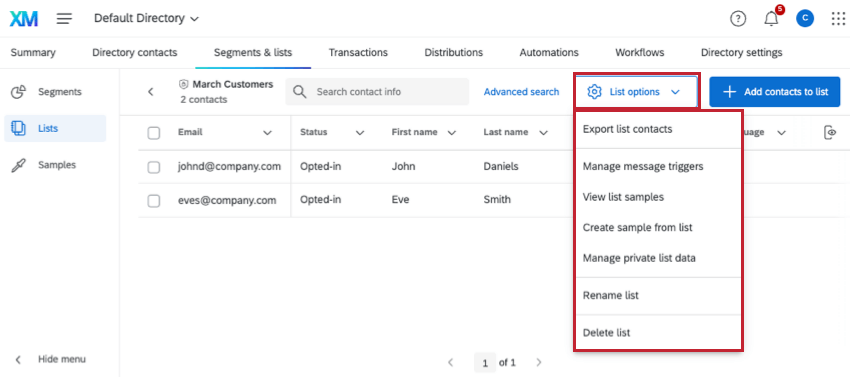
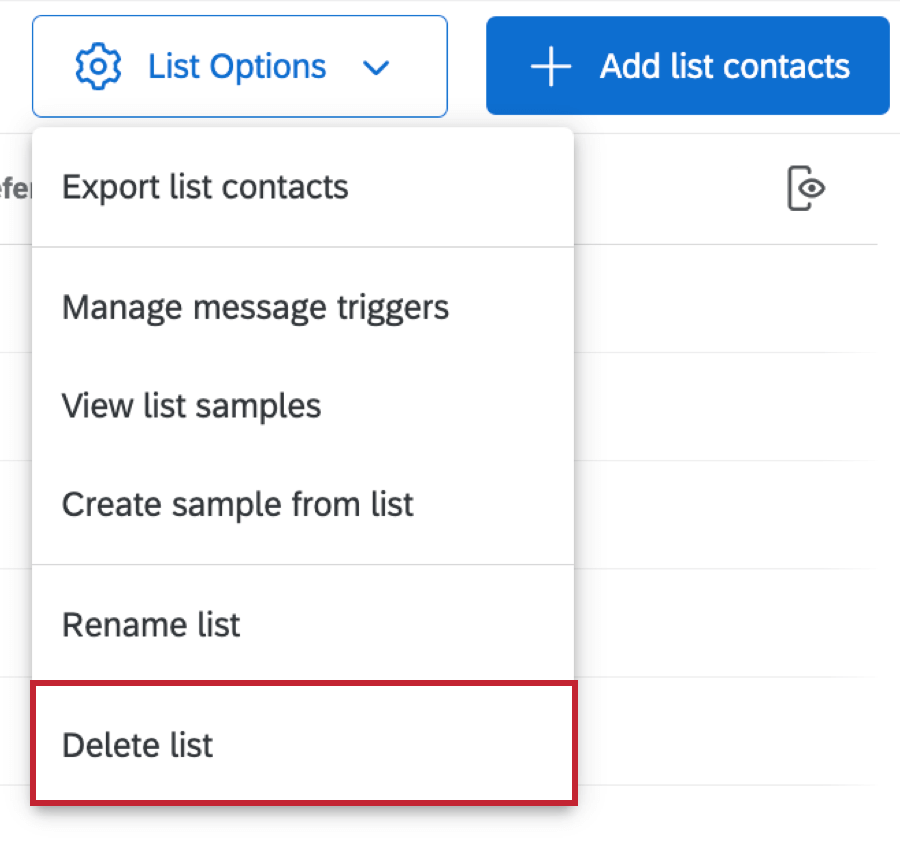
When you are inside of a mailing list or a sample, there is a List Options button in the upper-right corner. This button allows you to manage your list in many ways, including by adding samples, exporting the list, renaming the list, and deleting the list.
Exporting All List Contacts
You can export your mailing list in a file format of your choosing.
- Click List Options.
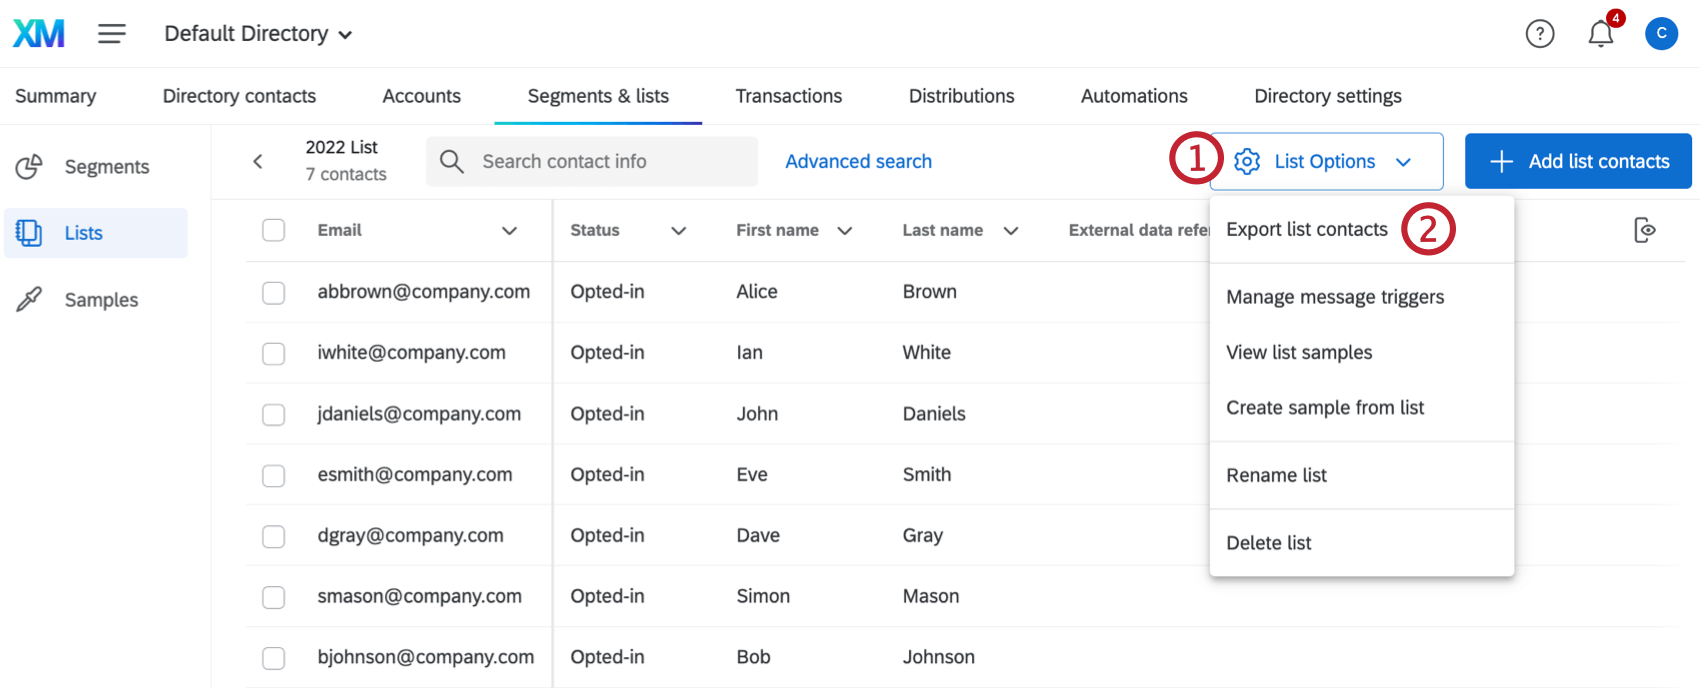
- Click Export list contacts.
- Select a File Format.
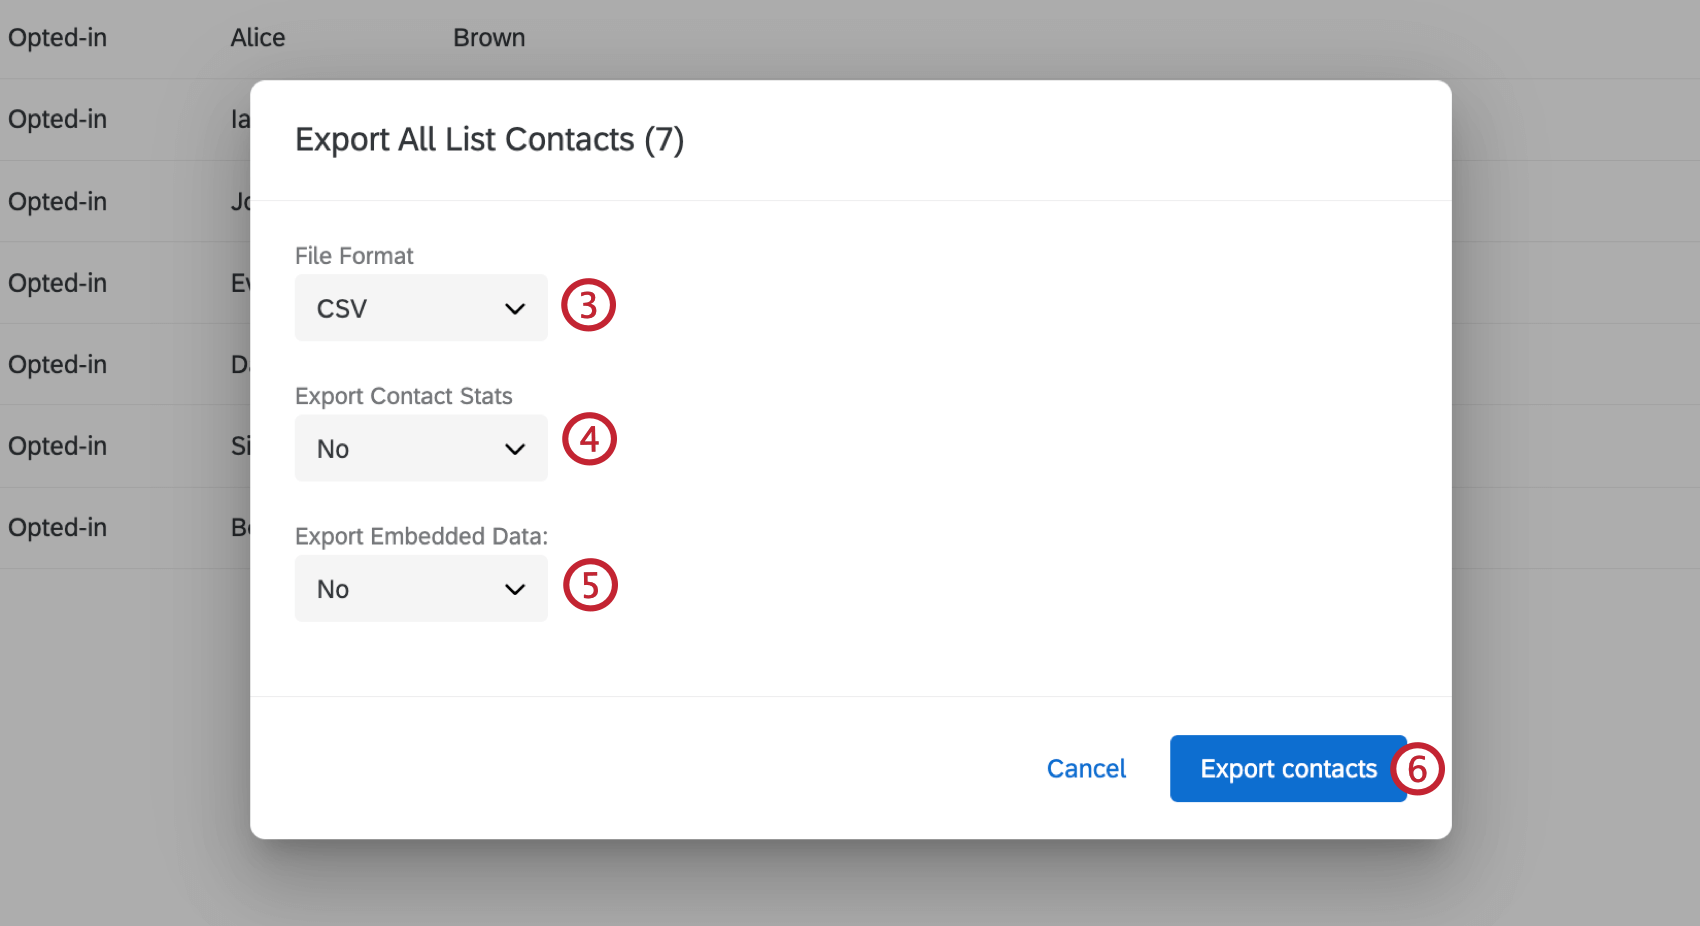
- Choose whether to Export Contact Stats. This is information about contact frequency, response rate, etc.
- Choose whether to Export Embedded Data. Yes exports all Embedded Data, No exports none, and Specify Embedded Data allows you to choose which fields to export.
- Click Export contacts.
Export Sample Contacts
You can export all the contacts in a sample using the same workflow after going to List Options and selecting Export sample contacts.

Specify Embedded Data
To specify embedded data, simply select fields from the menu on the right. Selected fields appear along the bottom of the menu.
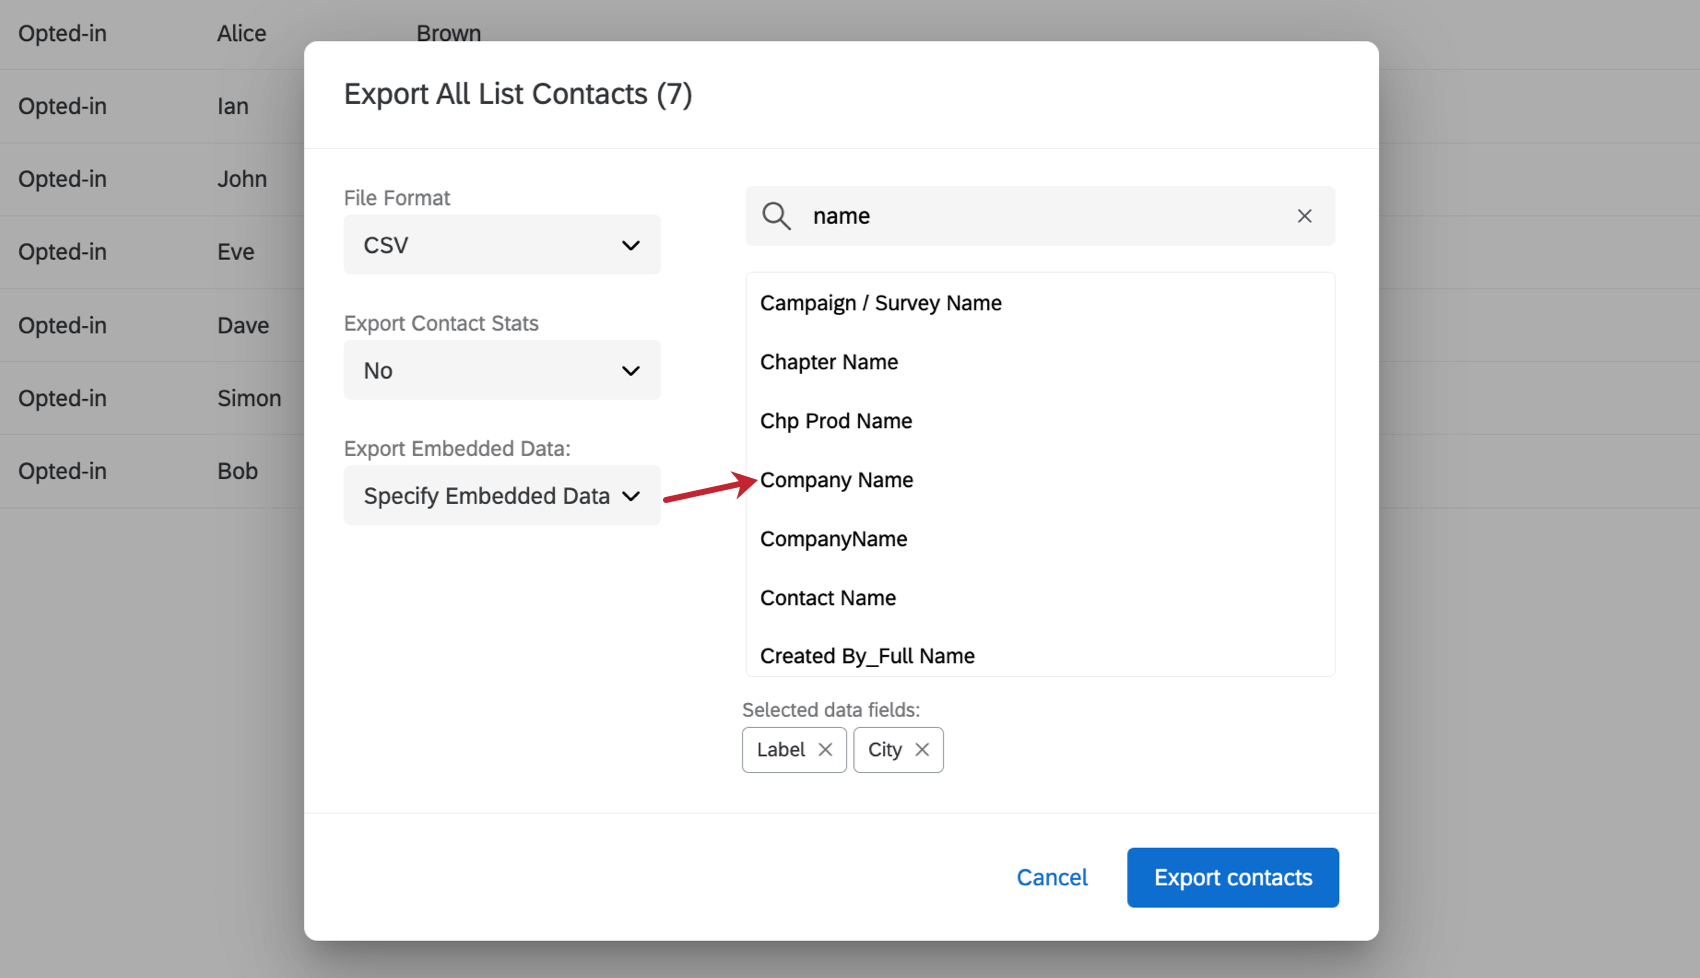
To remove fields, click the X next to their names.
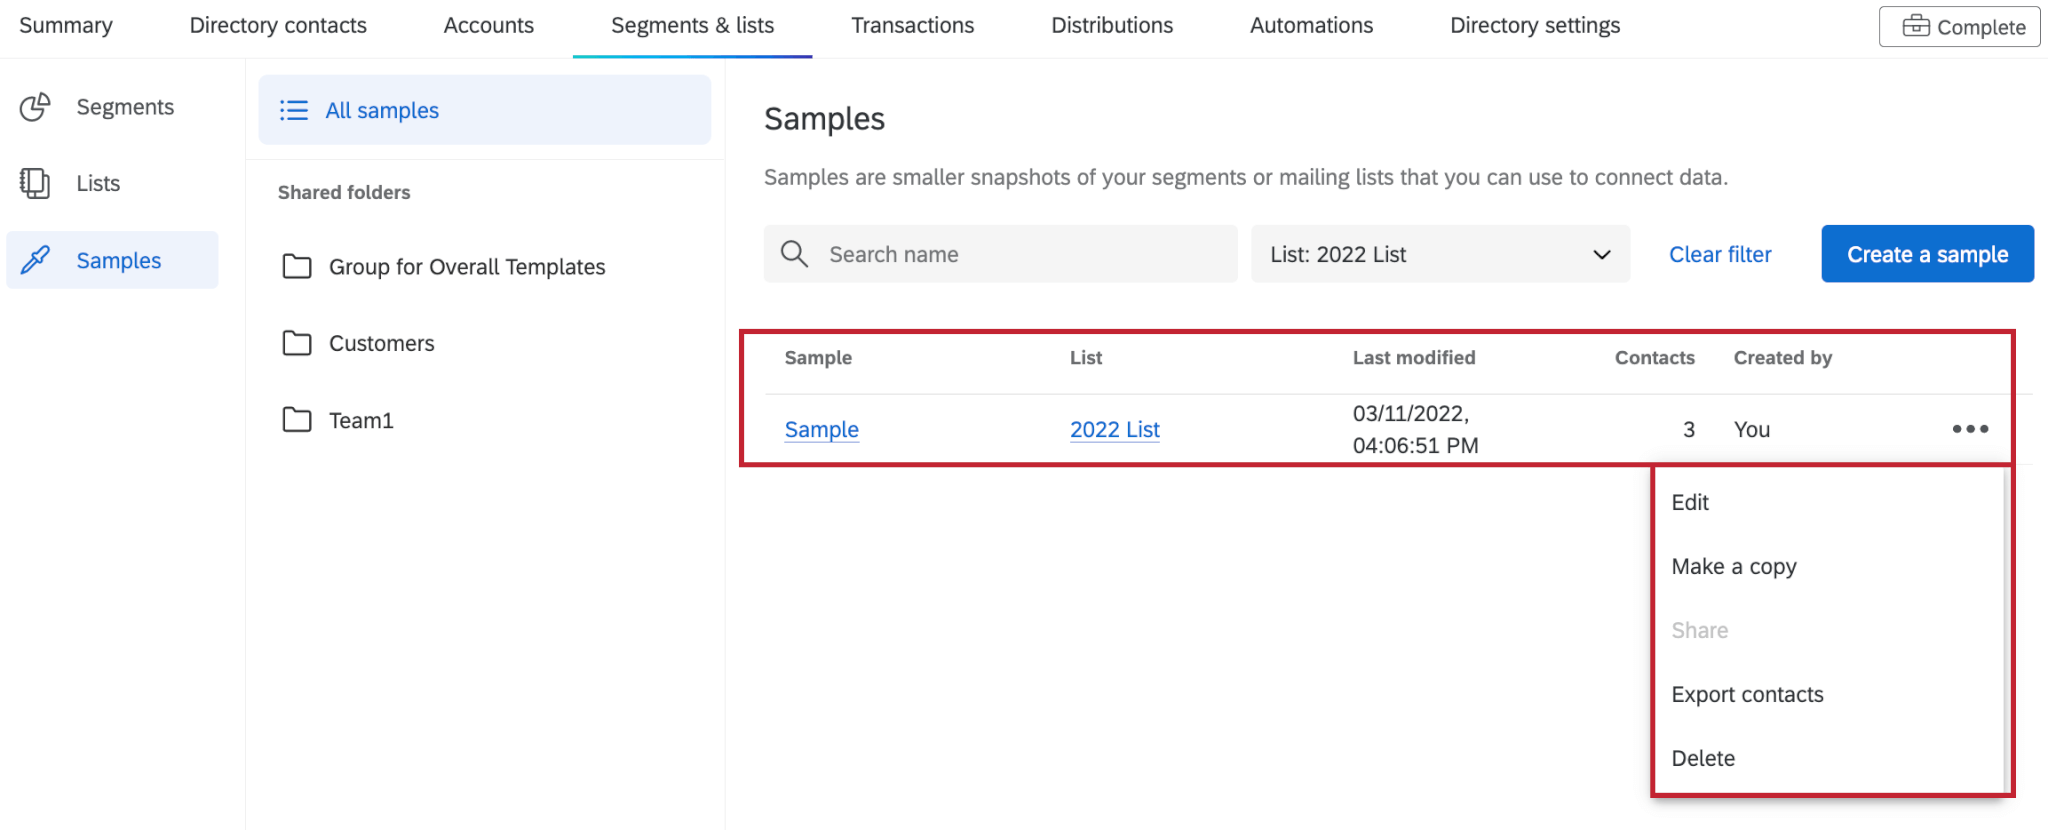
View List Samples
Selecting View list samples will take you to the Samples tab, where you can view a list of the samples you’ve created for this mailing list. You can also use the 3 dots on the right of each sample to edit, copy, export, or delete it.
Manage Message Triggers
Message Triggers send out an email when a contact is added to a chosen mailing list. This email can go to any email address you want, or to the contact themselves.
For more details, see Message Triggers in Workflows.
Create Sample from List
Create Sample from List will take you to the sample creation screen.
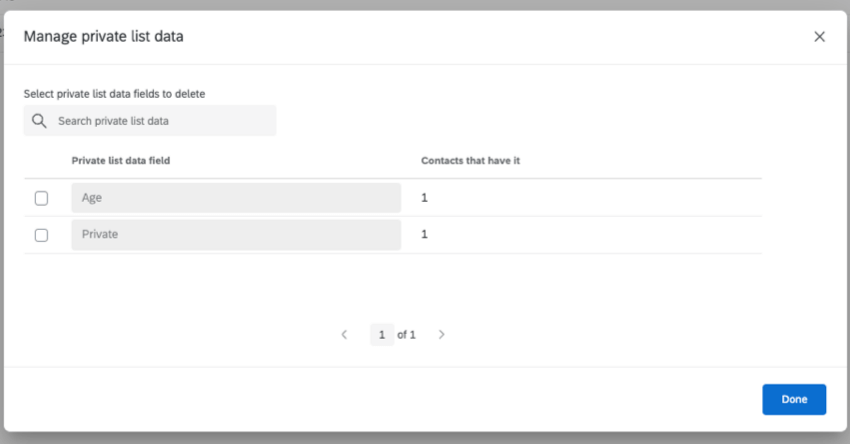
Manage Private List Data
Selecting Manage private list data will display all private data fields that exist within the mailing list. You can search for fields, view how many contacts have a value for that field, and delete fields.
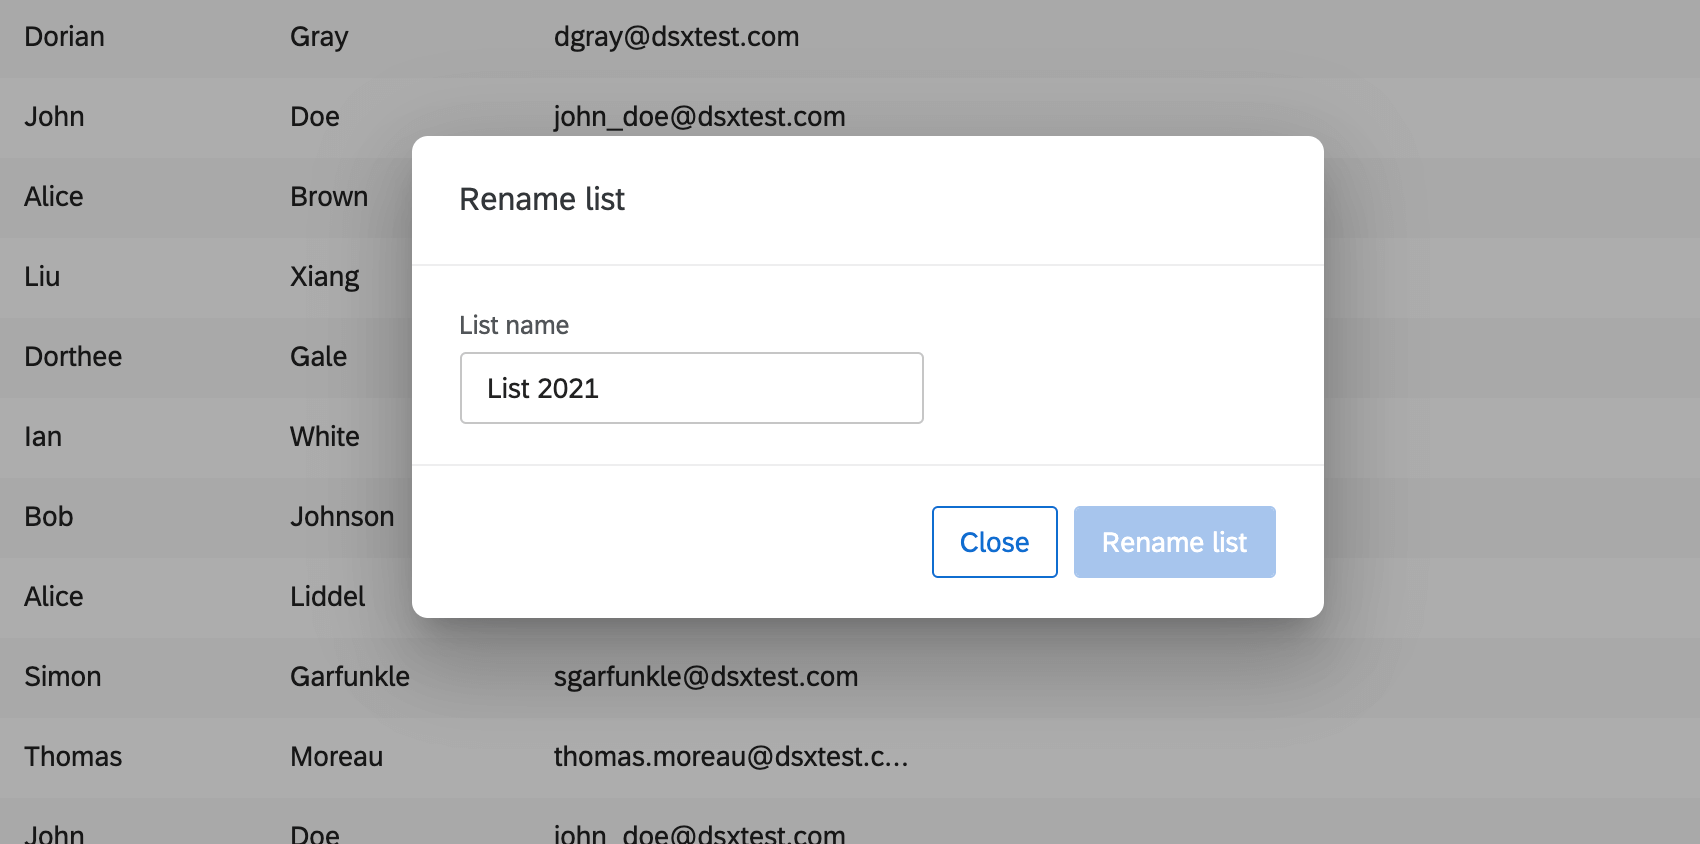
Rename List
After you select Rename list, type the new name in the field. Then click Rename list.
Delete List
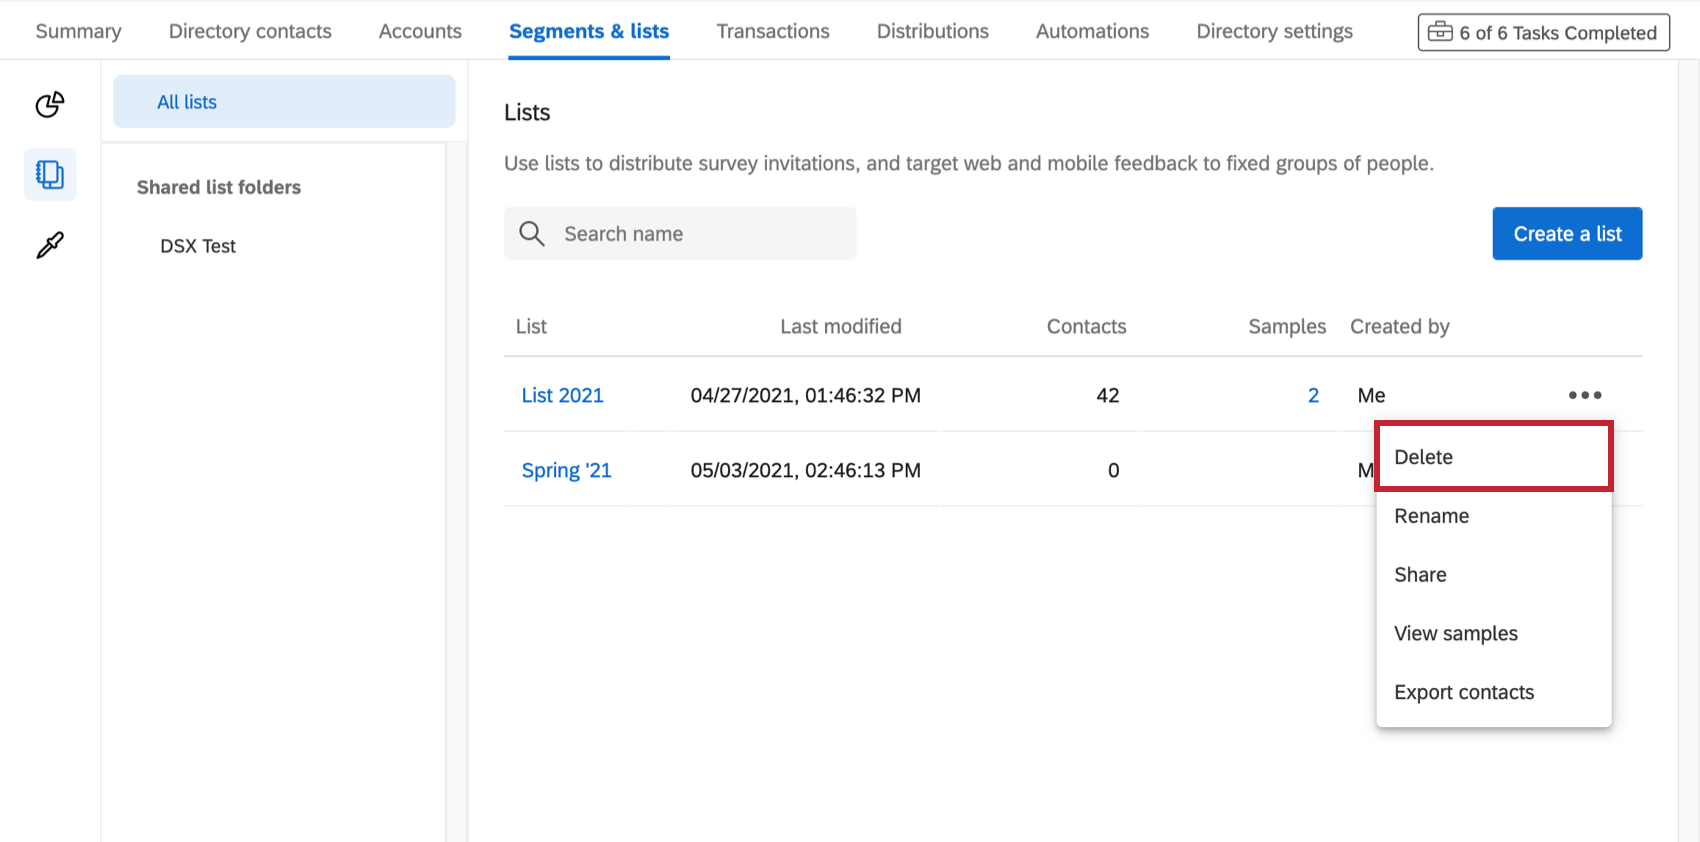
You can delete a mailing list or a sample by selecting Delete list/Delete sample under List Options.
You can also find it under the dropdown arrow next to a list on the Segments & lists tab.
Once deleted, these lists are irretrievable. The contacts will still exist in the directory and in any other lists they’ve been added to.
Any distributions sent with this list will no longer have links in the history, and any link not clicked will be disabled; however, any links opened with responses in progress will still work and be able to submit a response complete with contact information.
Completed survey responses will remain in the contact’s timeline. No response data will be deleted from the survey.
The results of deleting a sample is the same as deleting a mailing list.
Sample List Options
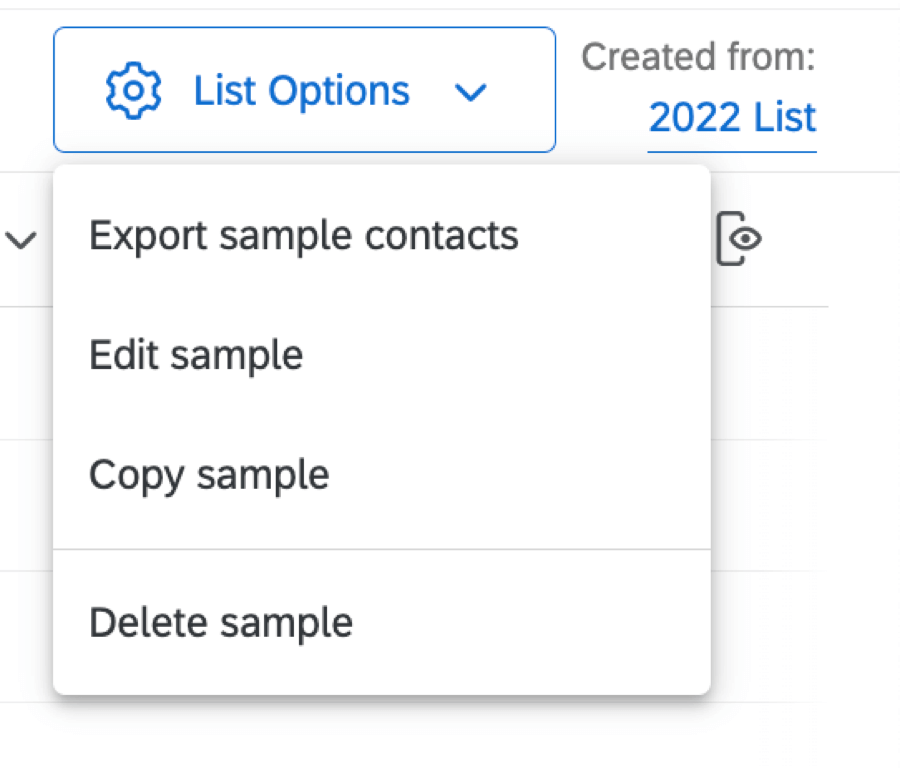
- Export Sample Contacts: Export your sample. This works just list exporting your mailing list.
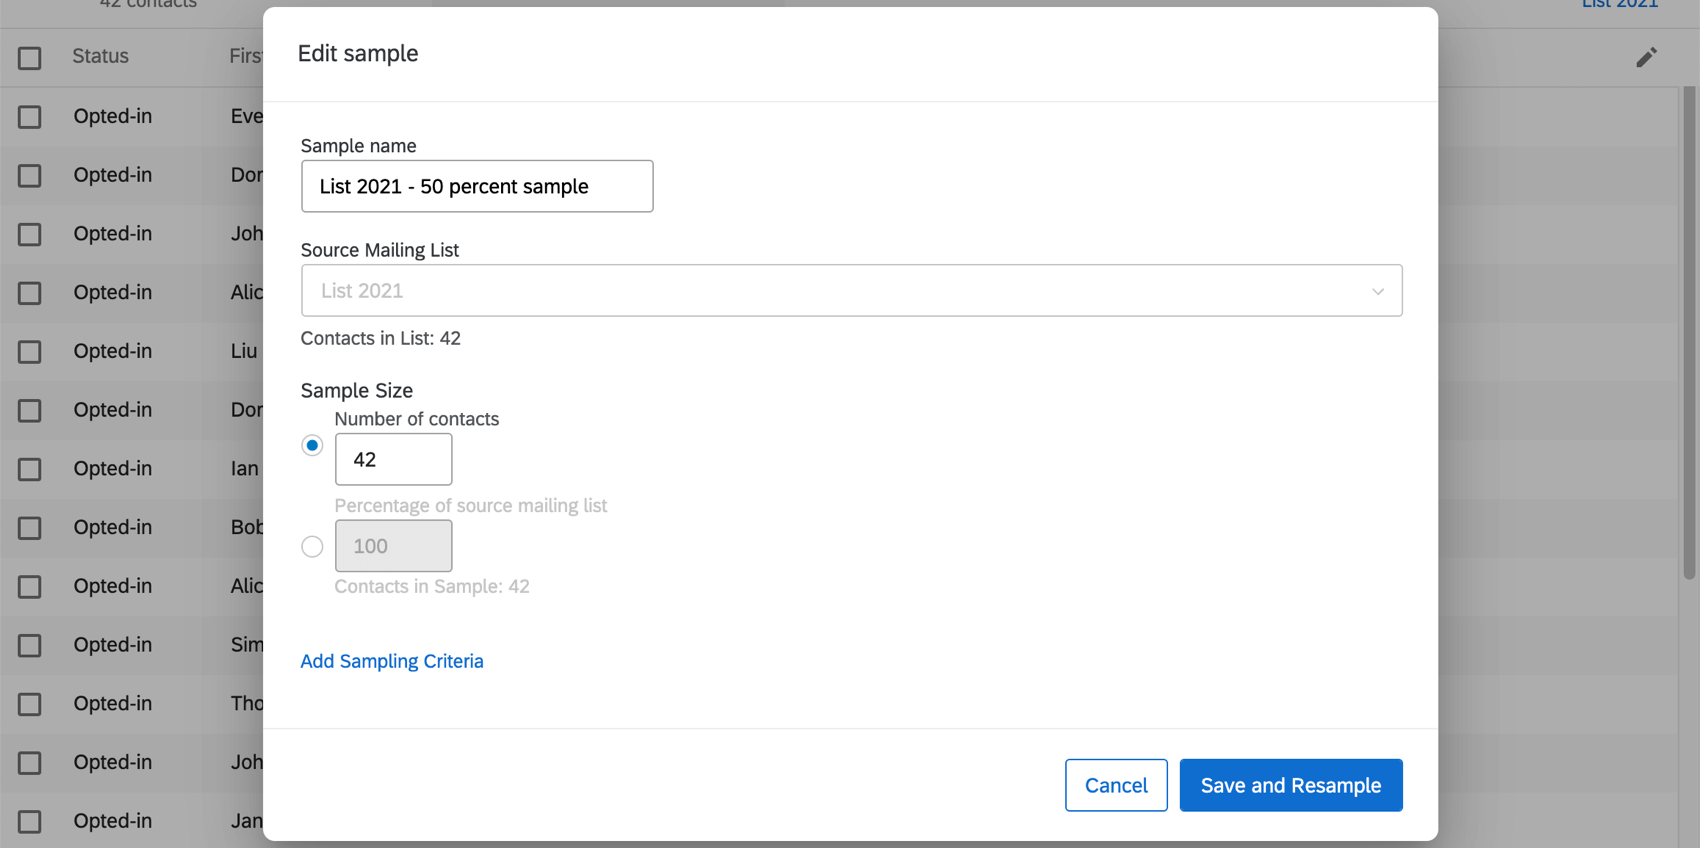
- Edit Sample: Change the name, sample size, and sampling criteria. Once you click Save and Resample, the sample will be taken again according to the conditions.
- Copy Sample: Create a copy of the sample.
- Delete Sample: Delete the sample.
Merge Duplicate Contacts
Sometimes you may accidentally add the same email address to a mailing list multiple times. It’s easy to merge these duplicates together using Merge duplicate contacts.
With this feature, you can only consolidate duplicates based on email addresses. You cannot identify duplicates using any other field. (E.g., last name, ID number.)
- Open your mailing list.
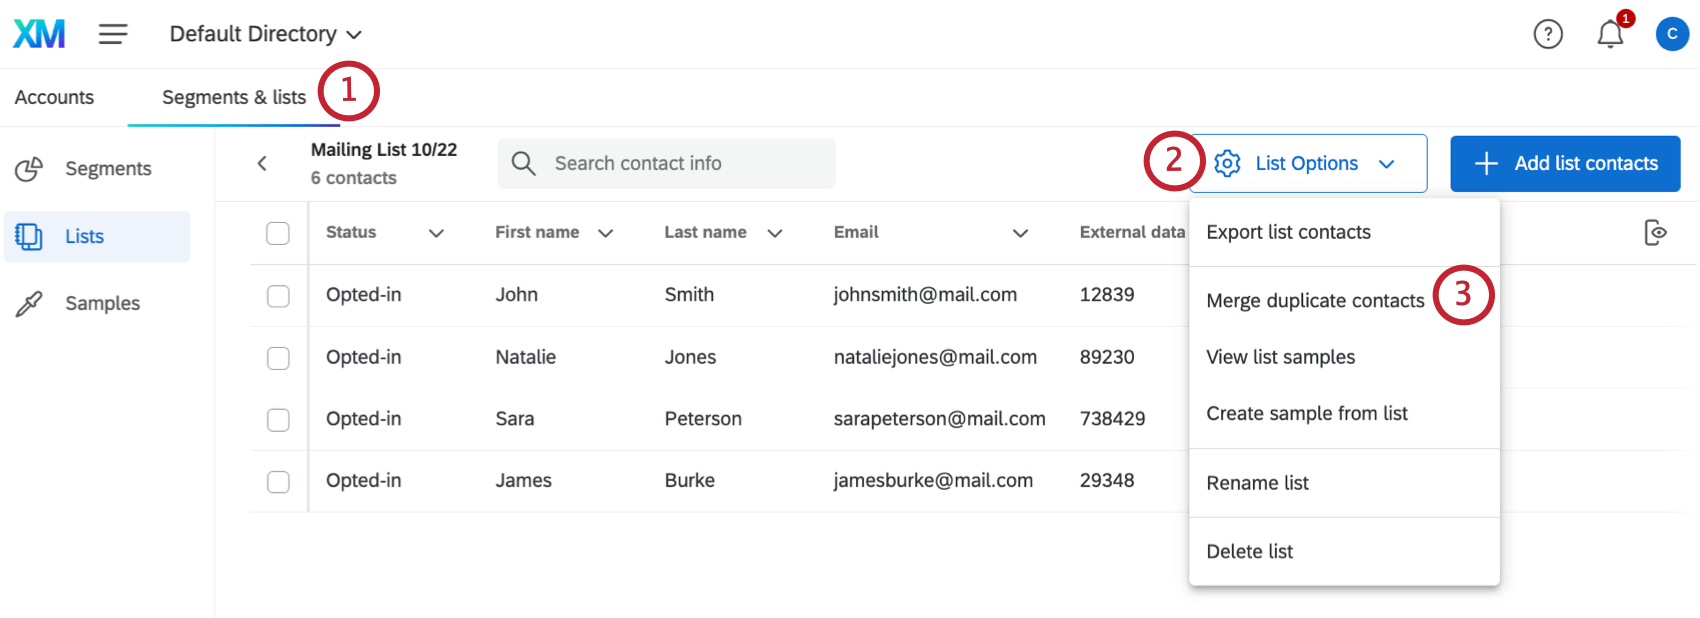
- Click List Options.
- Select Merge duplicate contacts.
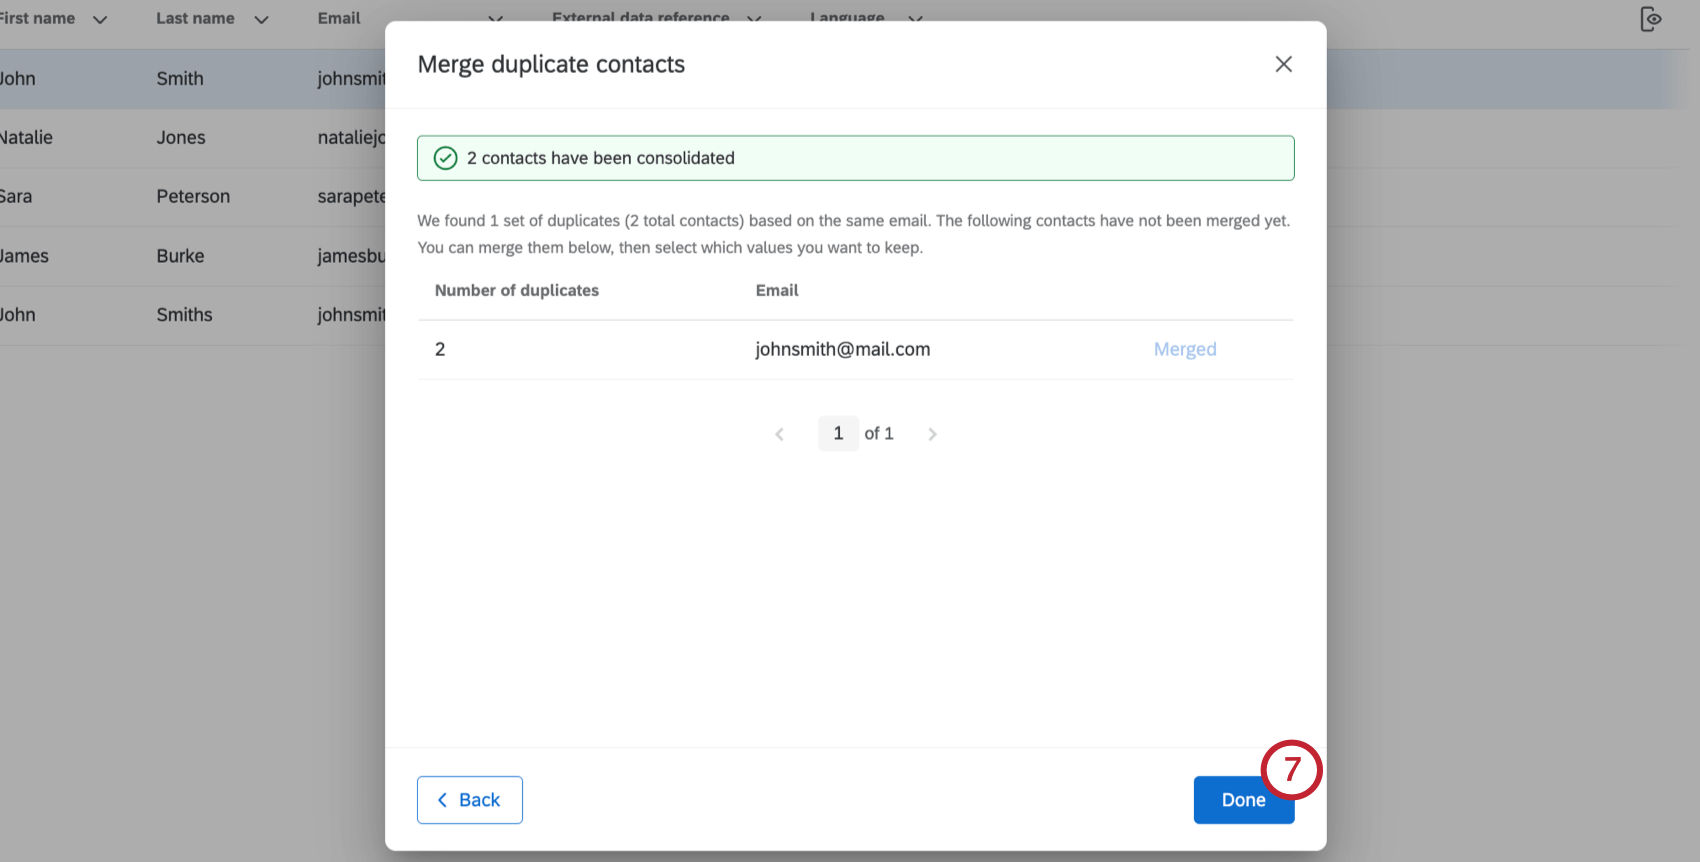
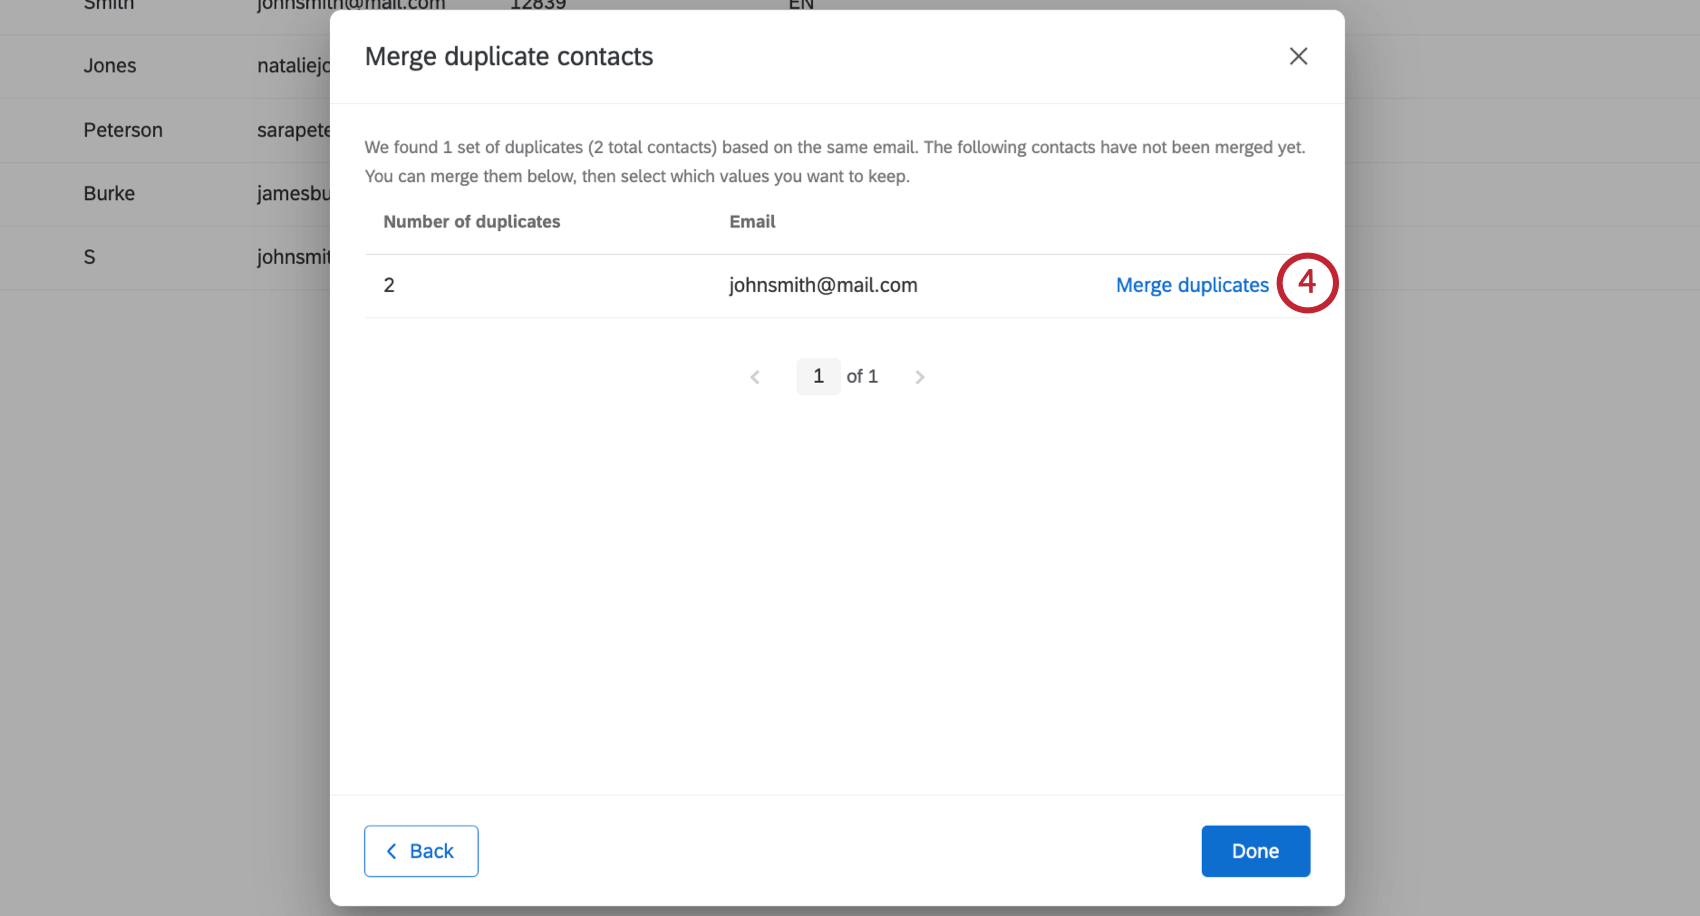
- Qualtrics will search for contacts in the list that have the same email address. Once duplicates have been found, click Merge duplicates.
- You will see a list of fields that have different values. Use the dropdown to select the value you want to keep.
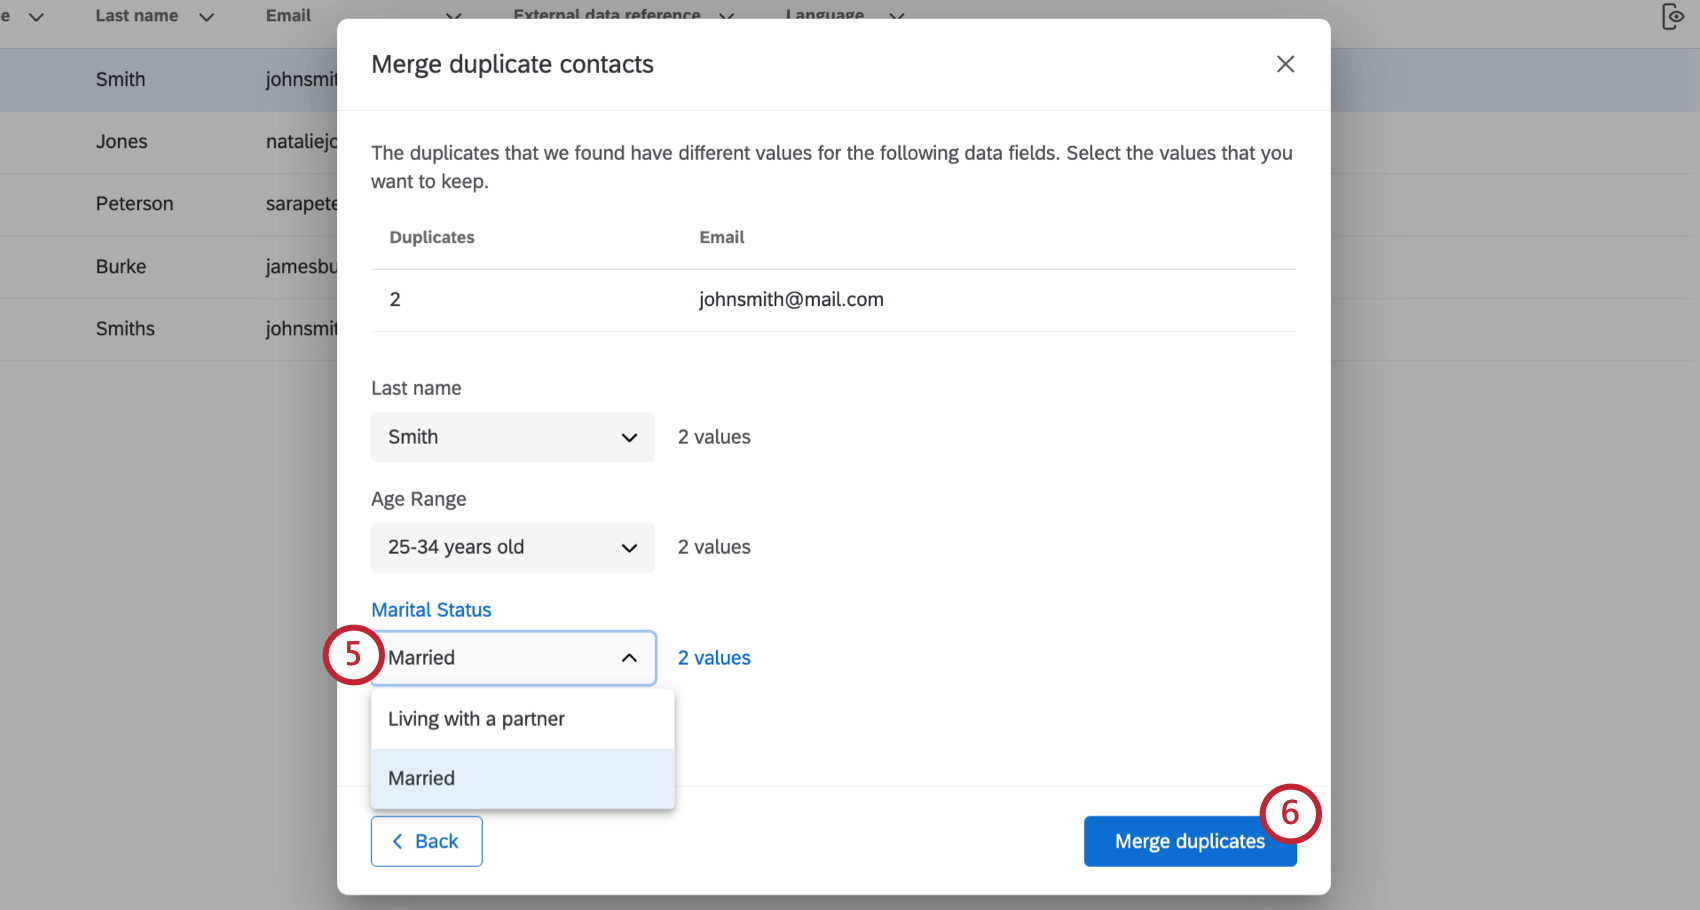 Qtip: You can only keep 1 value per field. The option you don’t choose will be erased.
 - When you’re finished, click Merge duplicates.
- You can consolidate any other matches that were found. If you’re finished, click Done.