-

Qualtrics Platform -

Customer Journey Optimizer -

XM Discover -

Qualtrics Social Connect
Retake Survey Link
About the Retake Survey Link
Retake survey links allow you or your respondent to go back into a survey response and edit it after it’s been submitted. This is useful if a respondent wants to change their answer to a question, or if the respondent’s incomplete response was closed because of inactivity, but they would still like to finish the survey.
This page covers how retake links work in surveys, XM Solutions, Conjoints, and MaxDiff projects. For retakes in Employee Experience projects, see either Retake Survey Link (EX) or Retake Survey Link (360).
Retake Link Types
There are 2 types of Retake Survey links:
- Retake Response: The edited response replaces the original response.
- Retake as New Response: The edited response is saved in addition to the original response.
In both cases, the link starts the survey at the beginning. The respondent’s original answers are prepopulated in the survey, and any questions they didn’t answer will be blank. You can leave these answers as they are or make changes as you progress through the survey. In either case, the retake counts as a new auditable response for your license.
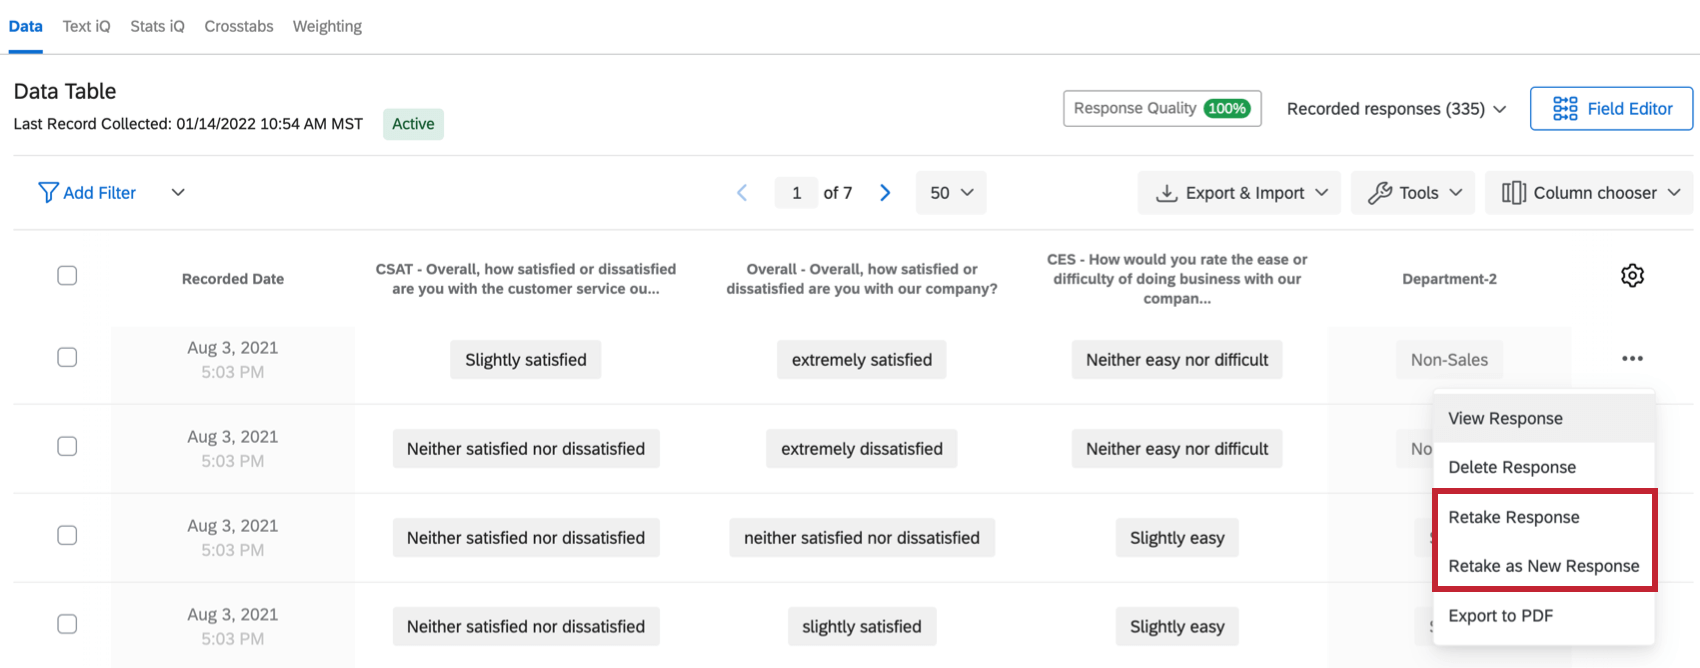
Issuing Retake Links
- Navigate to the Data section of the Data & Analysis tab.
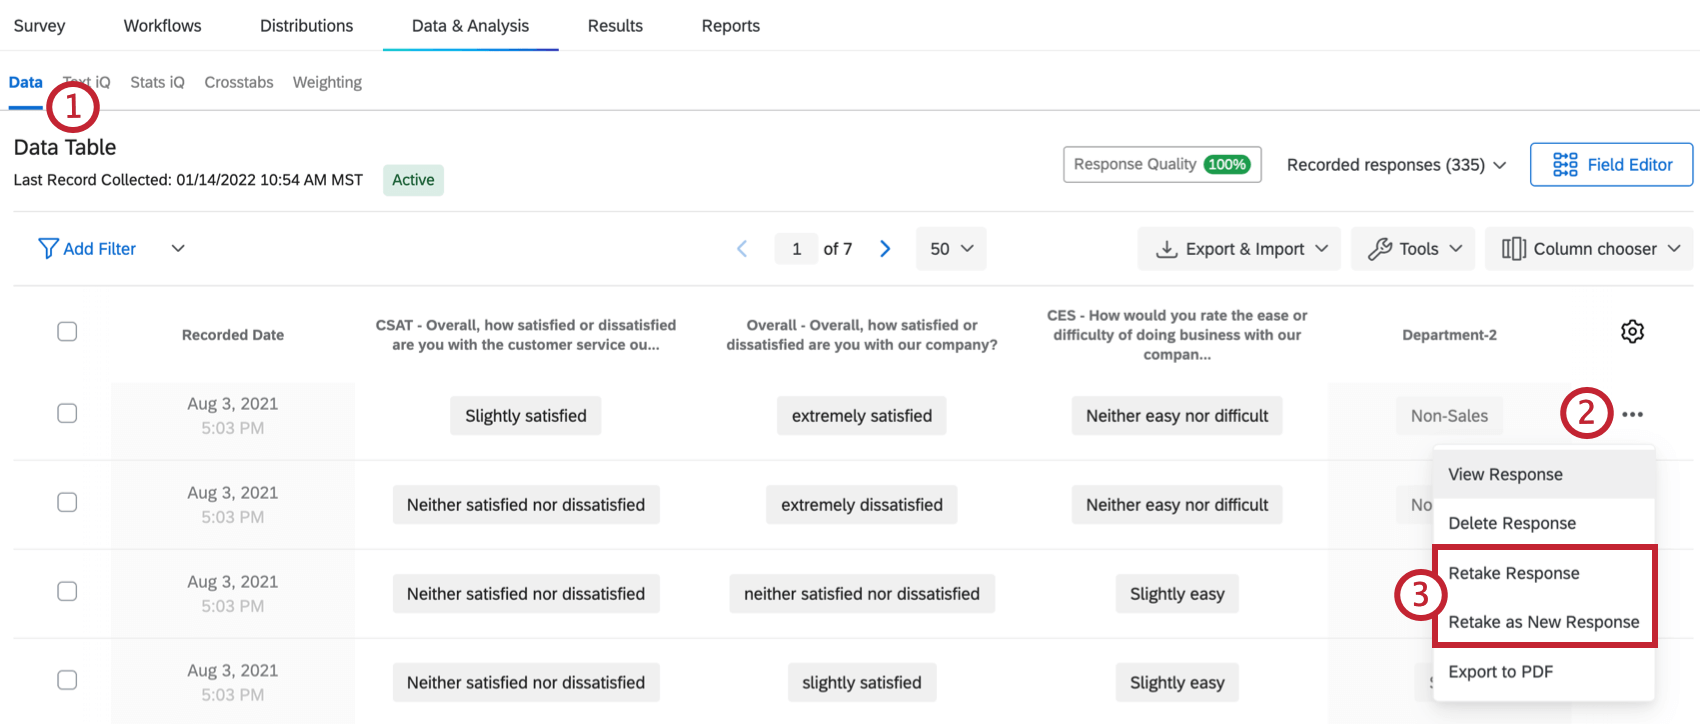
- Select the 3 dots next to the response you need to retake.
Qtip: To make finding the response easier, we recommend having a survey question that asks for some identifying information. You can then use response filtering to quickly locate the response.
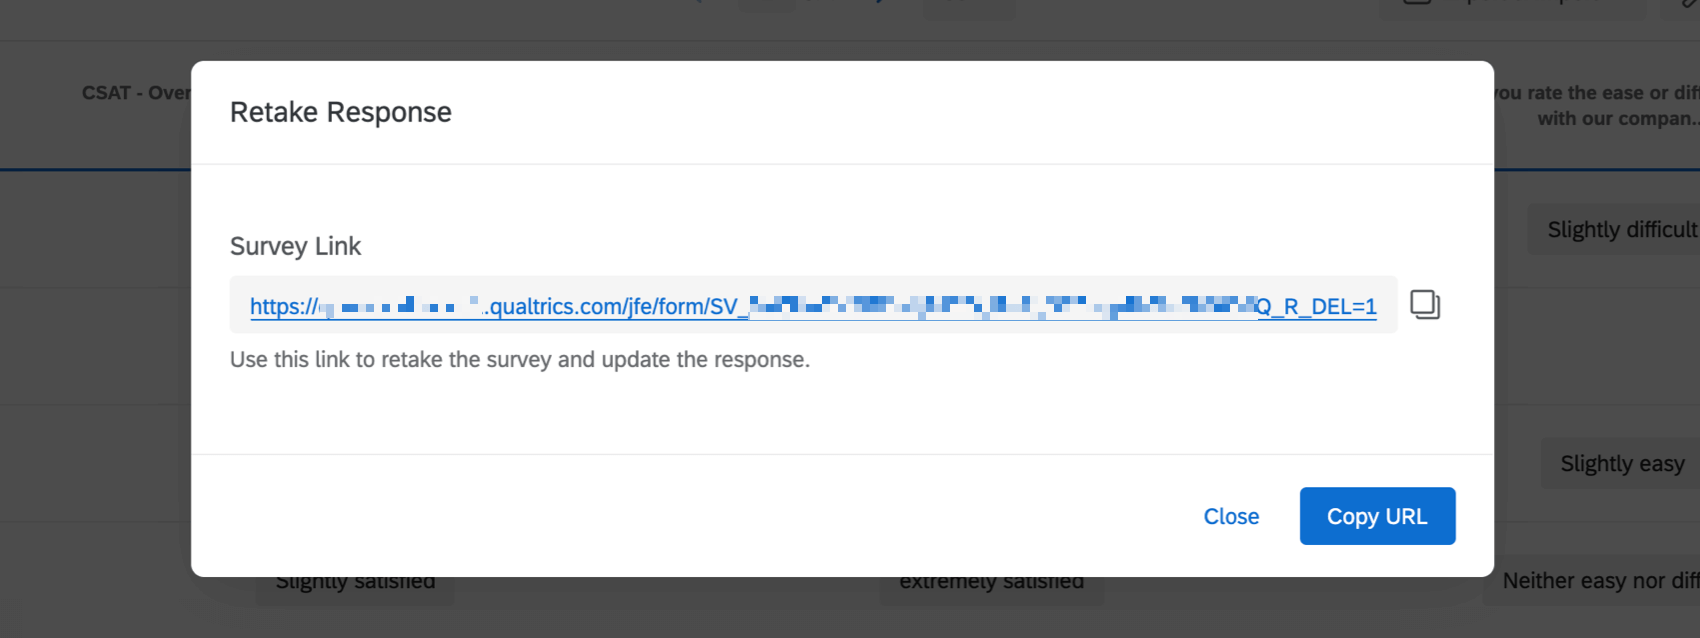
- Select the retake link type.
- Copy the link that pops up. Anyone can use this link to retake that particular response.
Building a Retake Link
Sometimes it’s necessary to immediately send a retake link to a respondent or another person once the initial survey is submitted. For example, you might have a survey filled out by job seekers, which then triggers an email with the retake link to your Human Resources department. HR then fills out additional questions about the applicant and resubmits the information.
- Navigate to the Workflows tab of your survey.
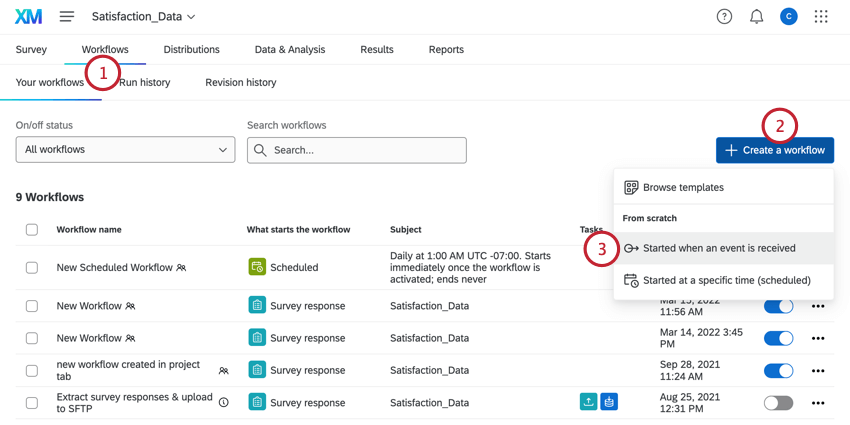
- Create a new workflow.
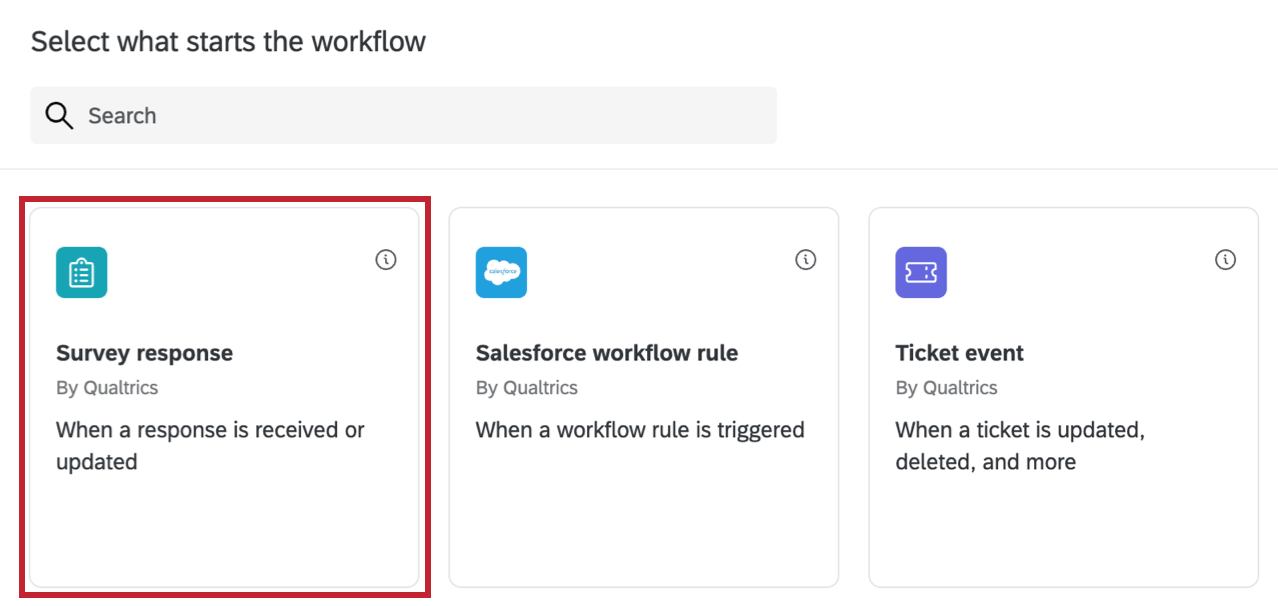
- Select Started when an event is received.
- Select the Survey Response event.
- Choose the types of responses that will trigger the workflow. See types of survey response events for more information about these options. Most of the time, you’ll choose Newly created responses.
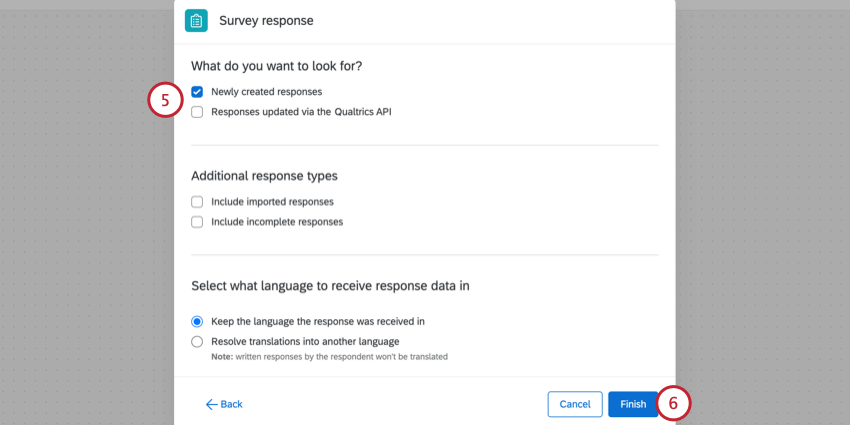
- Click Finish.
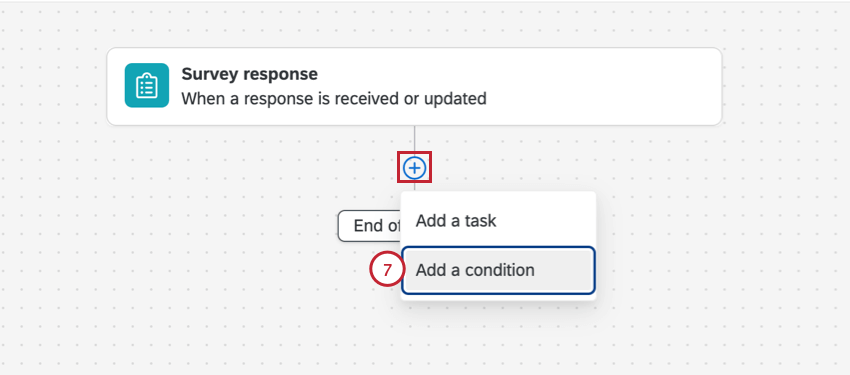
- Click the plus sign (+ ) and select Add a condition.
- Create a condition for Embedded Data Q_URL doesn’t contain Q_R.
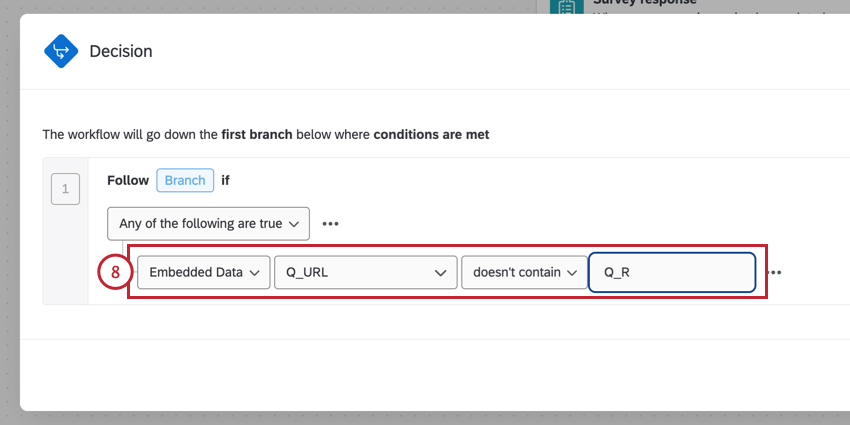 Attention: Adding this condition ensures that only the original survey response prompts a retake link by checking that the URL associated with this response doesn’t contain the retake tag. Without this condition, the respondent will also receive this email workflow after they take their retake link survey.
 - Navigate to the Distributions tab of your survey.
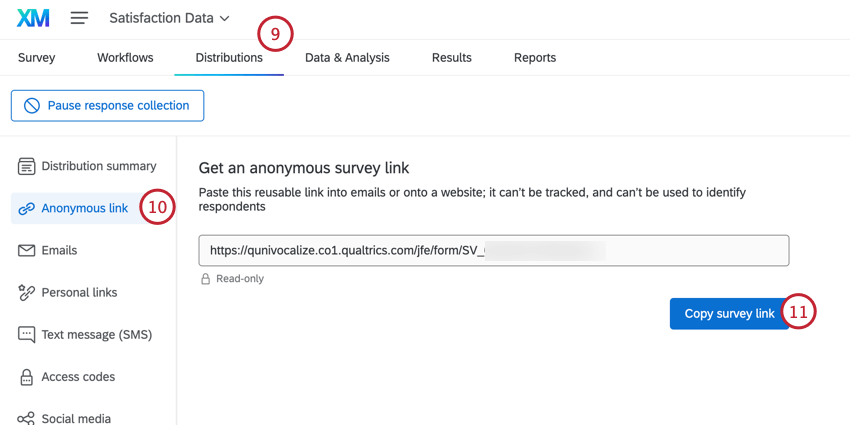
- Select Anonymous Link.
- Click Copy survey link to copy the anonymous link for your survey.
- Return to the Workflows tab and select the workflow you created earlier.
- In the workflow, click the plus sign ( + ).
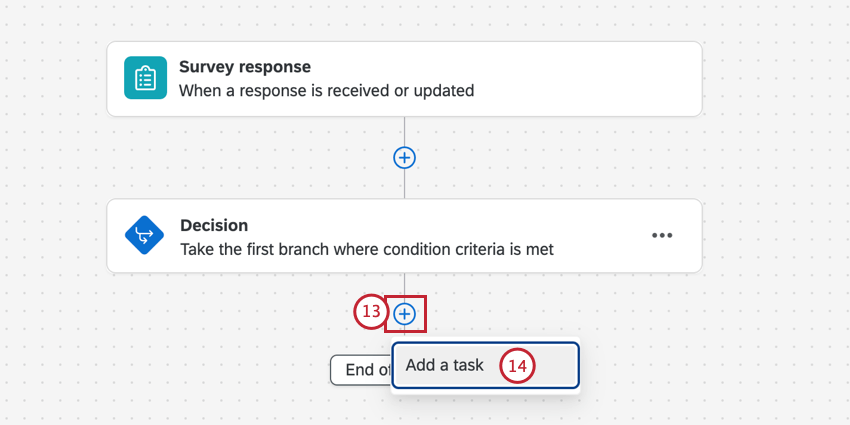
- Select Add a task.
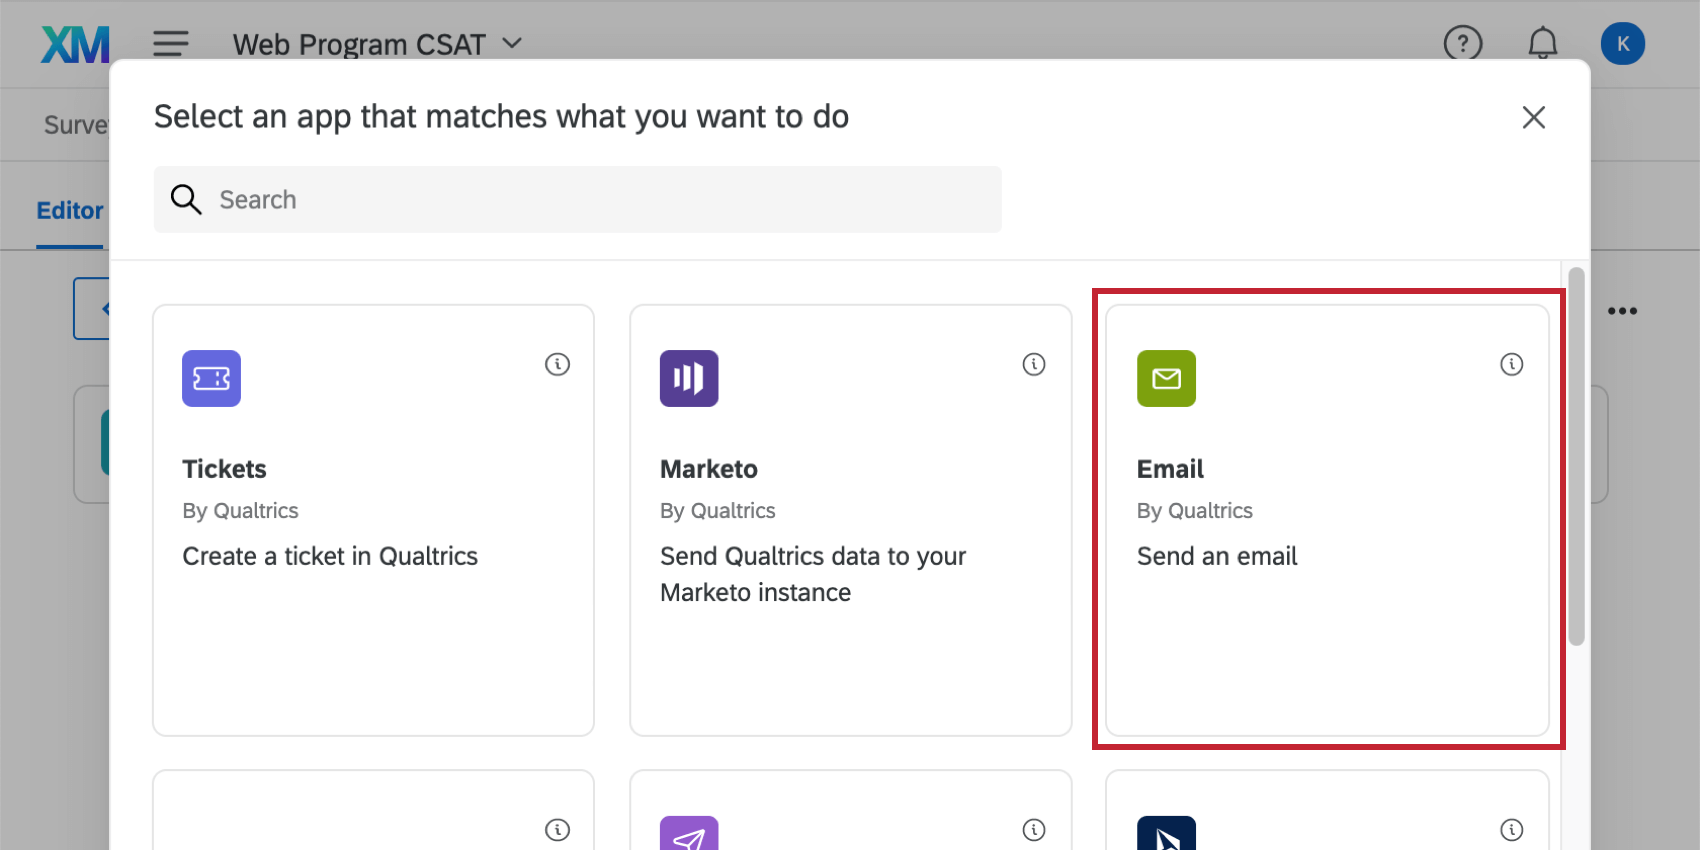
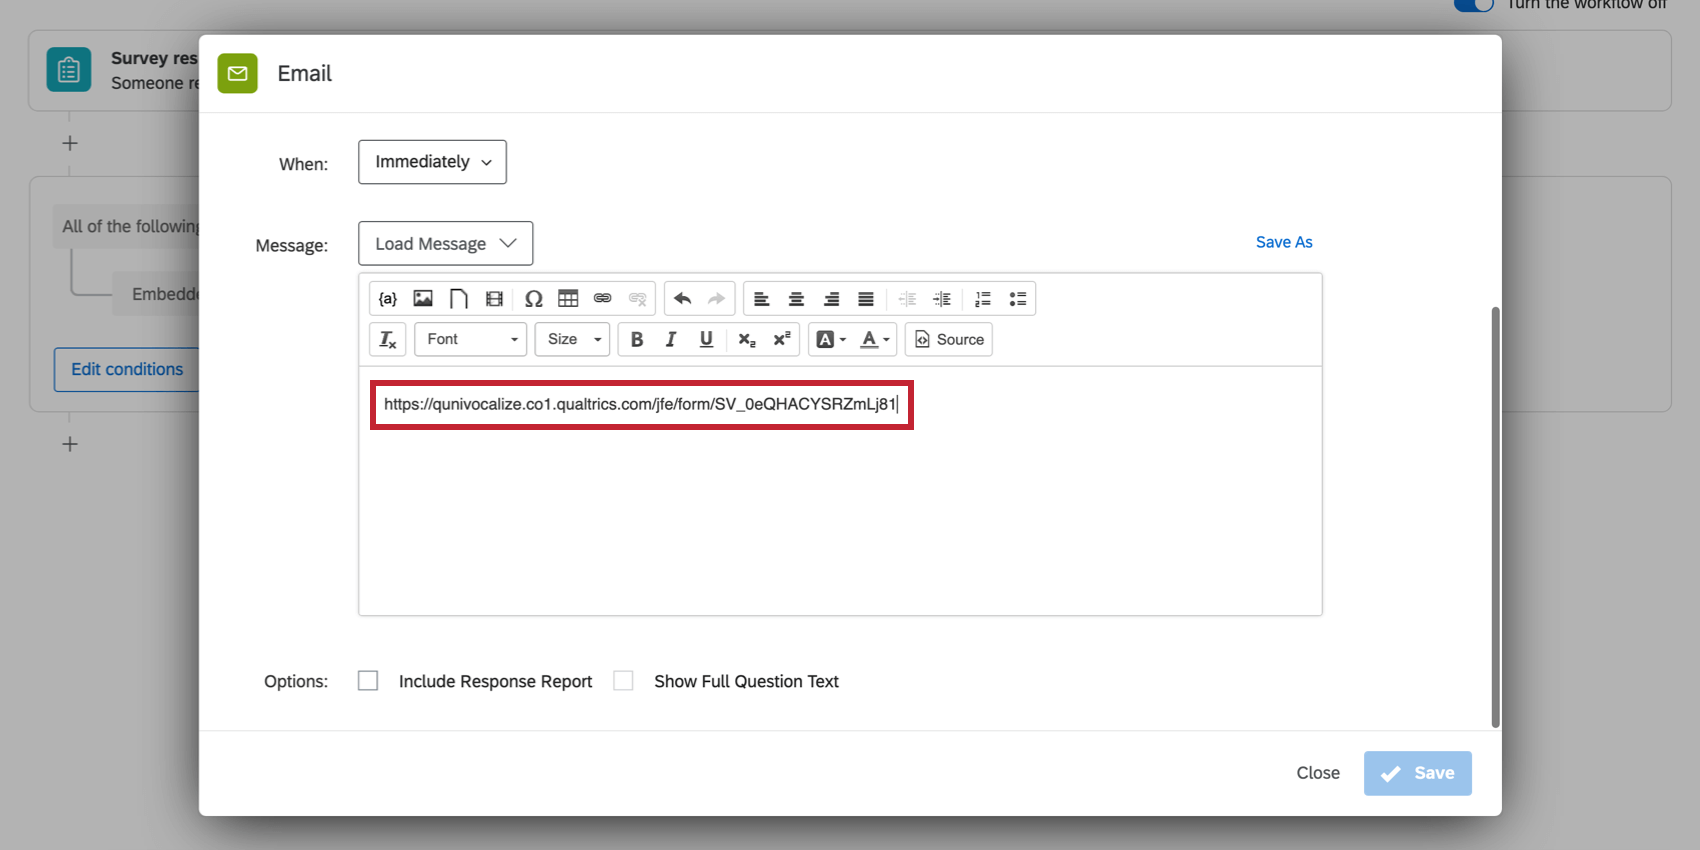
- Choose the email task.
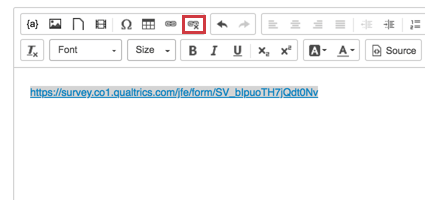
- Paste the anonymous link into the body of the email.
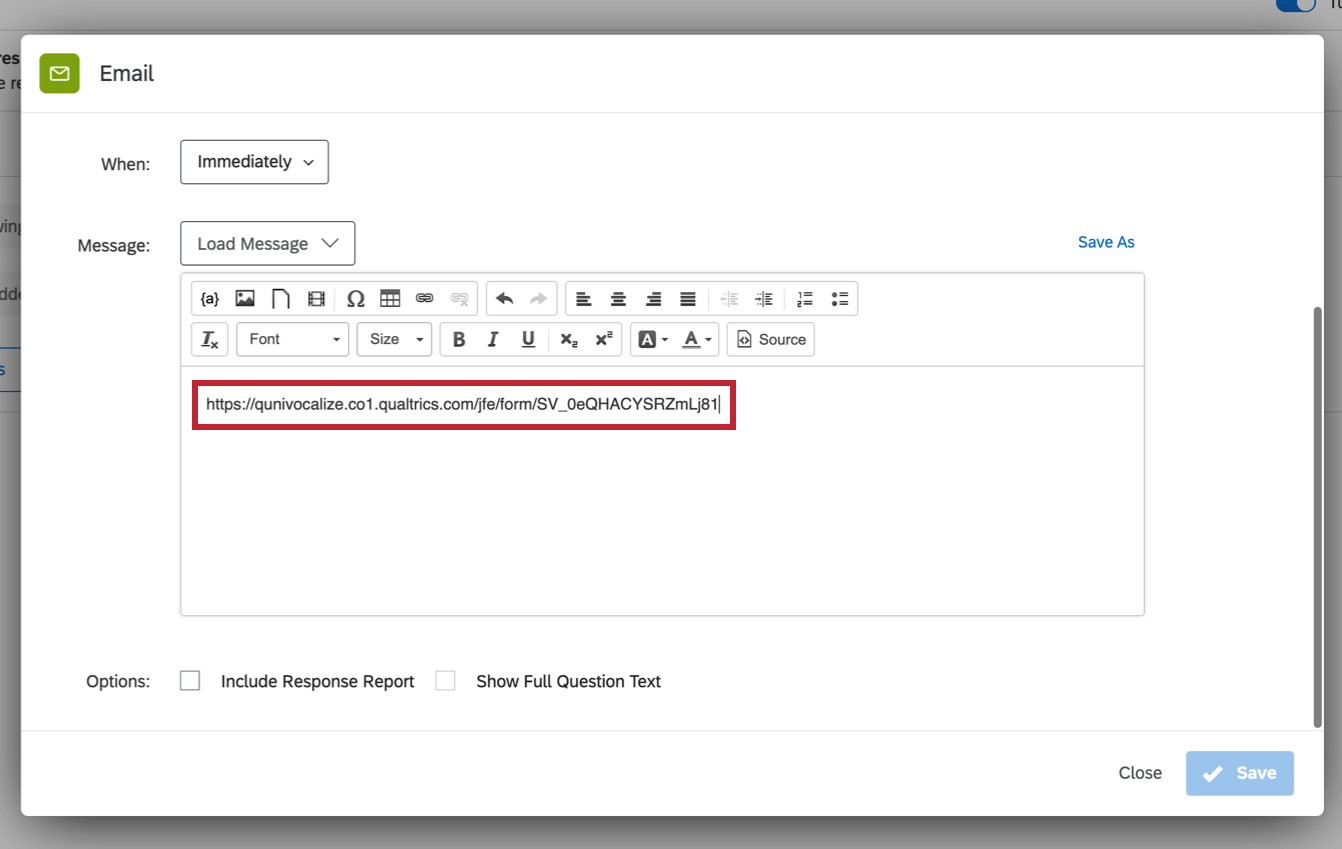 Qtip: Be careful that you don’t paste in a hyperlink here! This can prevent you from properly editing your link. If your anonymous link is blue and clickable, then highlight the text and click the break hyperlink icon.
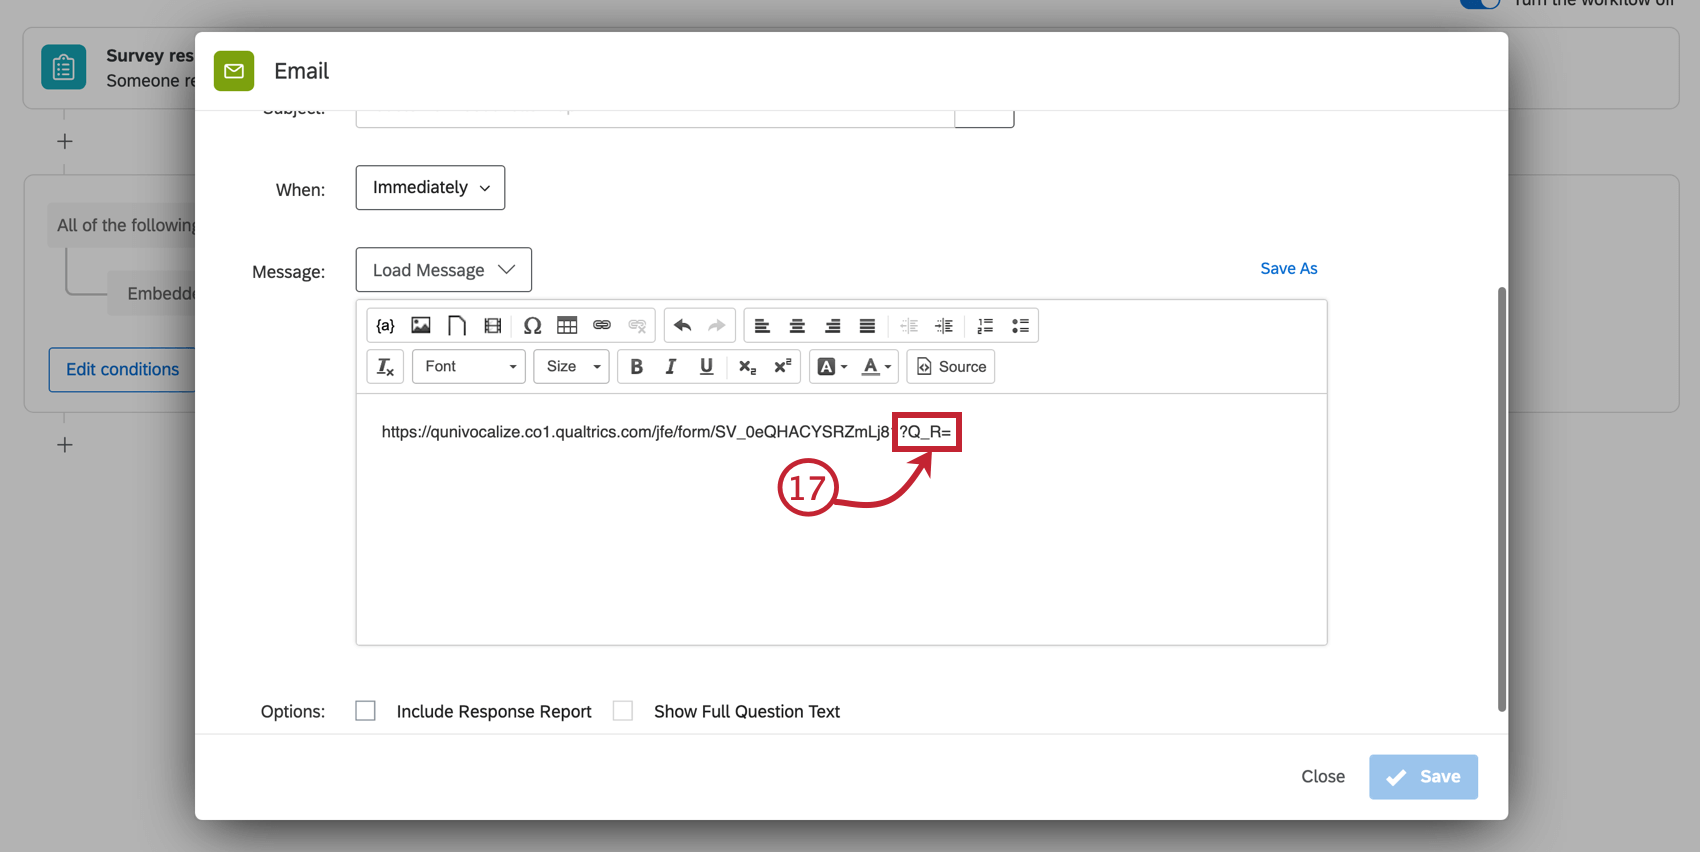
- Append “?Q_R=” to the end of the URL.
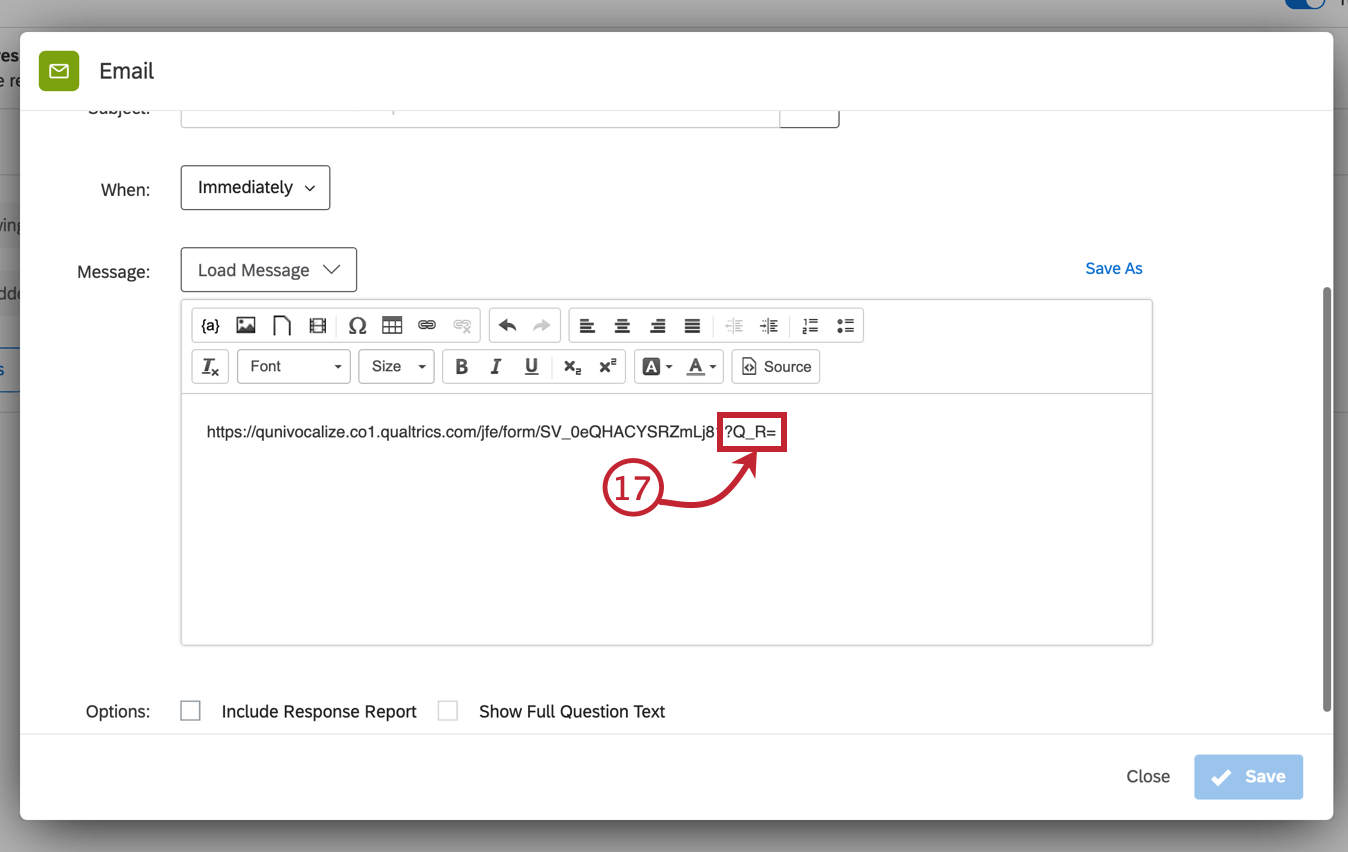 Example: If the URL was brandid.qualtrics.com/jfe/form/SV_1234567890, then the link is now brandid.qualtrics.com/jfe/form/SV_1234567890?Q_R=
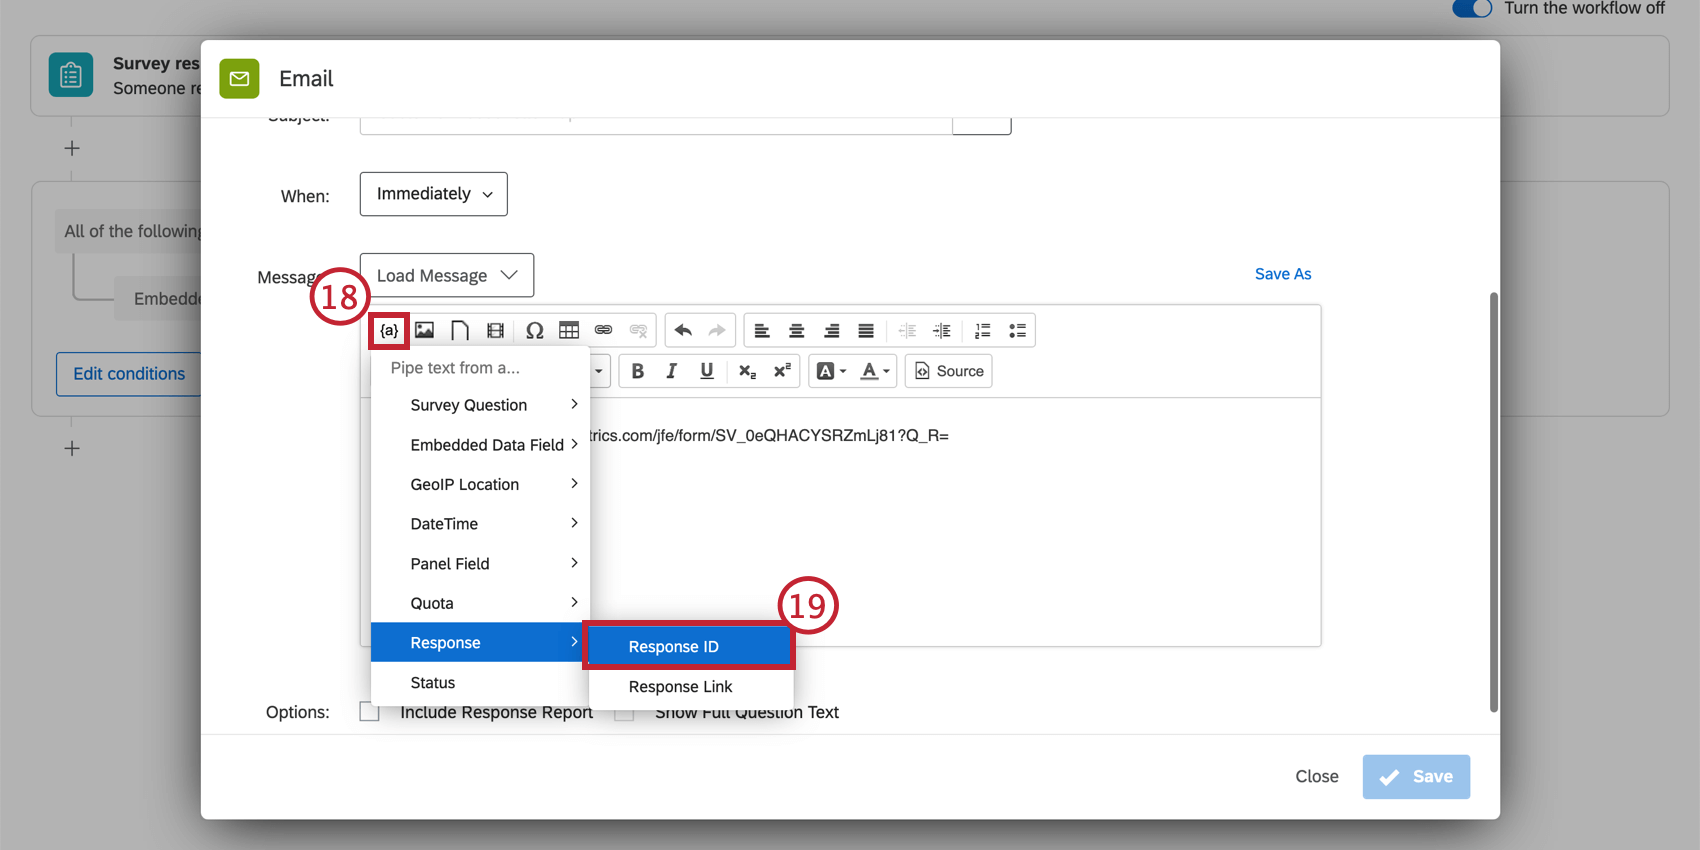
 - Place your cursor after the equal sign in your URL and click the piped text icon {a}.
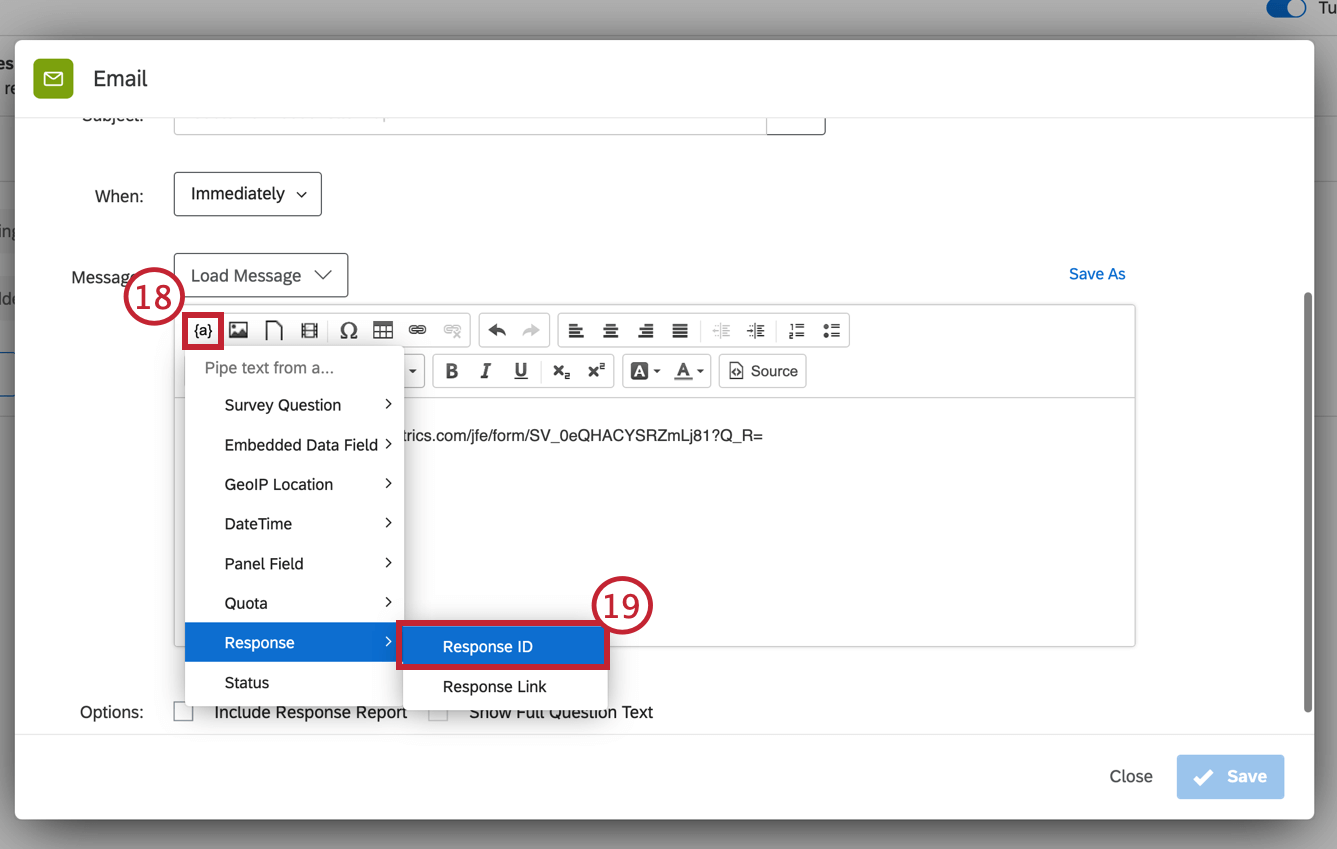
- Hover over Response and select Response ID.
Example: After selecting Response ID, your link should look like this: brandid.qualtrics.com/jfe/form/SV_1234567890?Q_R=${e://Field/ResponseID}
- If you want the retake link response to replace the original response, append “&Q_R_DEL=1” to the end of the link, after the Response ID piped text. If you want to keep the original response, skip this step.
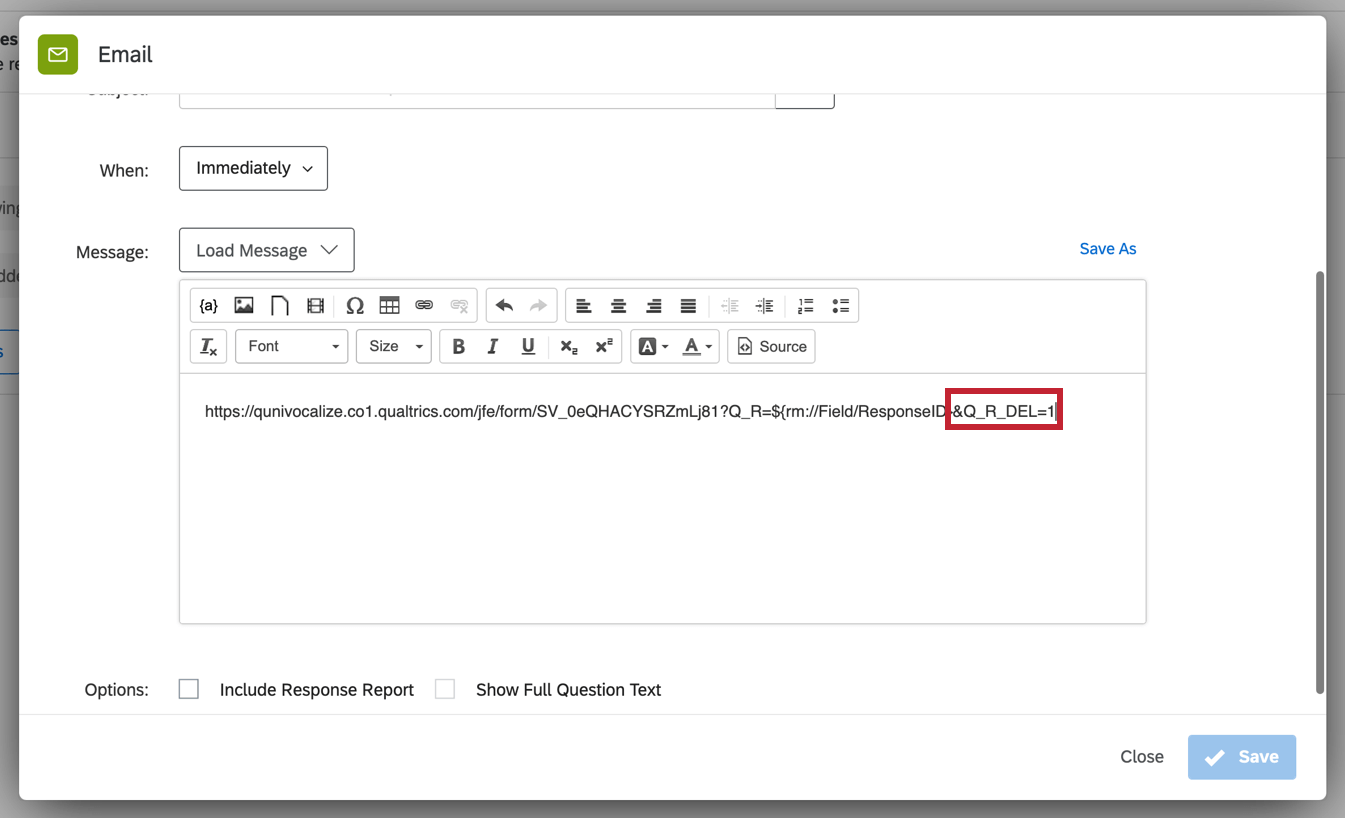 Example: If you wanted the retake to replace the original response, your link would look like this: brandid.qualtrics.com/jfe/form/SV_1234567890?Q_R=${e://Field/ResponseID}&Q_R_DEL=1Qtip: If this new link seems too long, you can make a clickable word or phrase in your email instead by inserting a hyperlink.Qtip: When a survey respondent uses this retake link with Q_R_DEL=1 at the end, their old response will be deleted as soon as they submit the last page of the survey. If a respondent just clicks the link without filling out the survey, their old response will not be deleted. If a respondent partially completes the retake but stops before submitting, and incomplete responses are set to record, the incomplete retake will eventually be recorded as a new, separate response that does not overwrite the original.
 - Finish setting up your email task. See Email Task if you have questions about setting up this task.
- When finished, click Save.

The individual who receives the email task will have a link that allows them to see the original response and change its answers.
Displaying Certain Content During Retakes
It’s possible to set up your survey so that certain questions appear only when a retake link is used (for example, when you have a reviewer going over responses, or you’re sending a form to a manager to review and sign). This section walks through how to set your survey up this way.
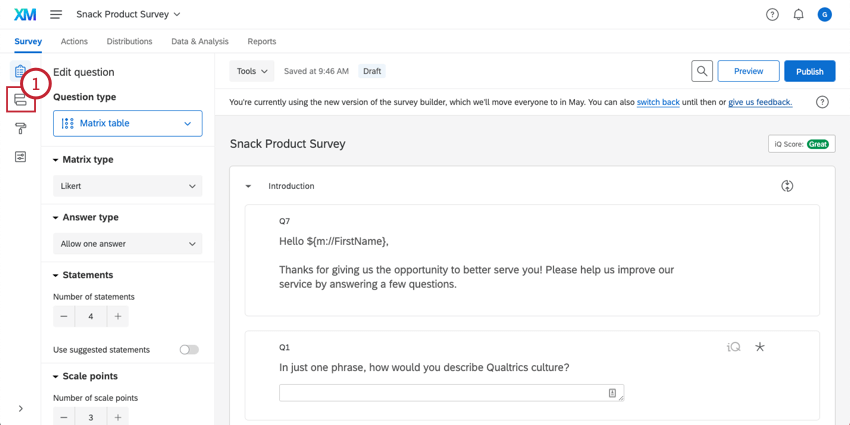
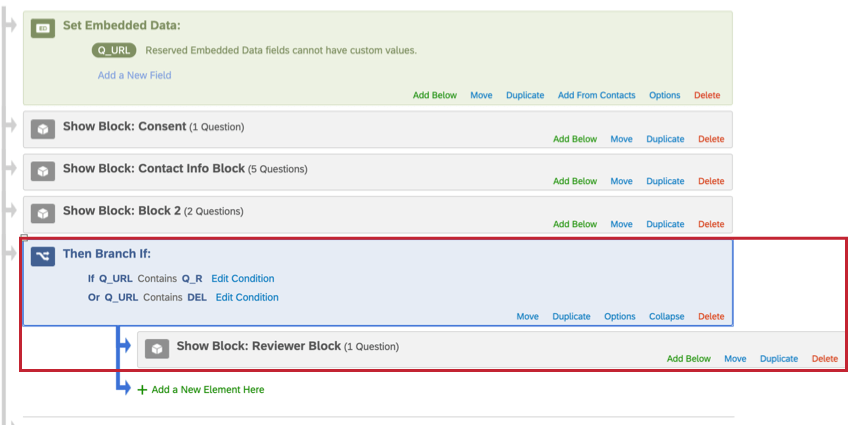
- Once you’ve finished building your survey questions, navigate to the Survey flow.
- Click Add a New Element Here.
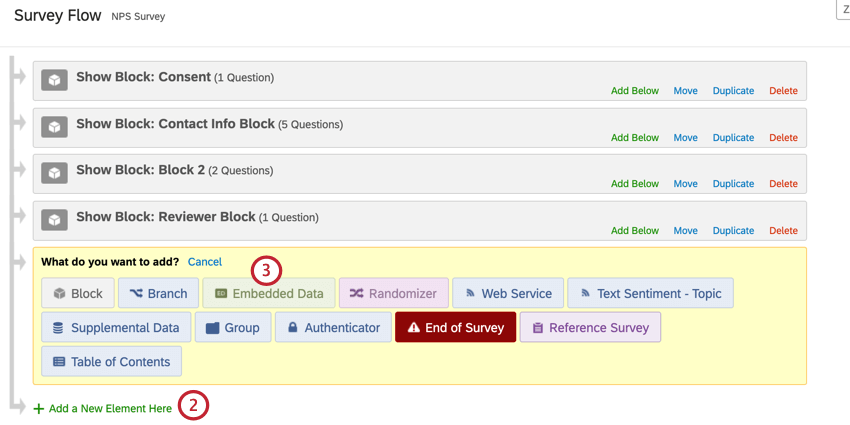
- Select Embedded Data.
- Add the field Q_URL.
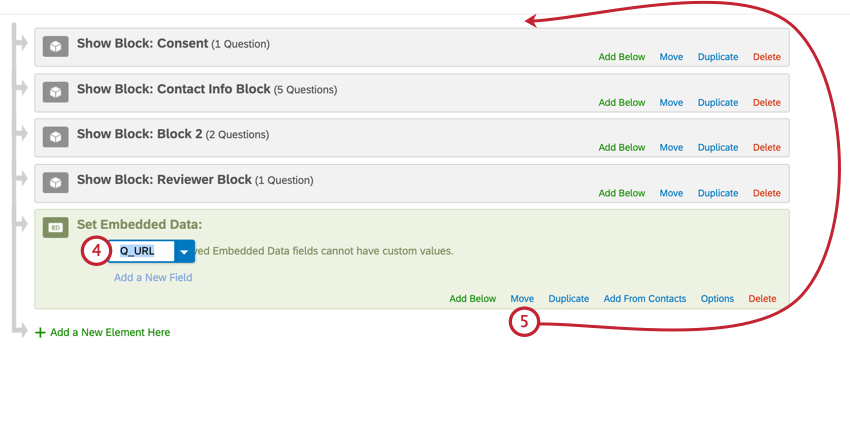
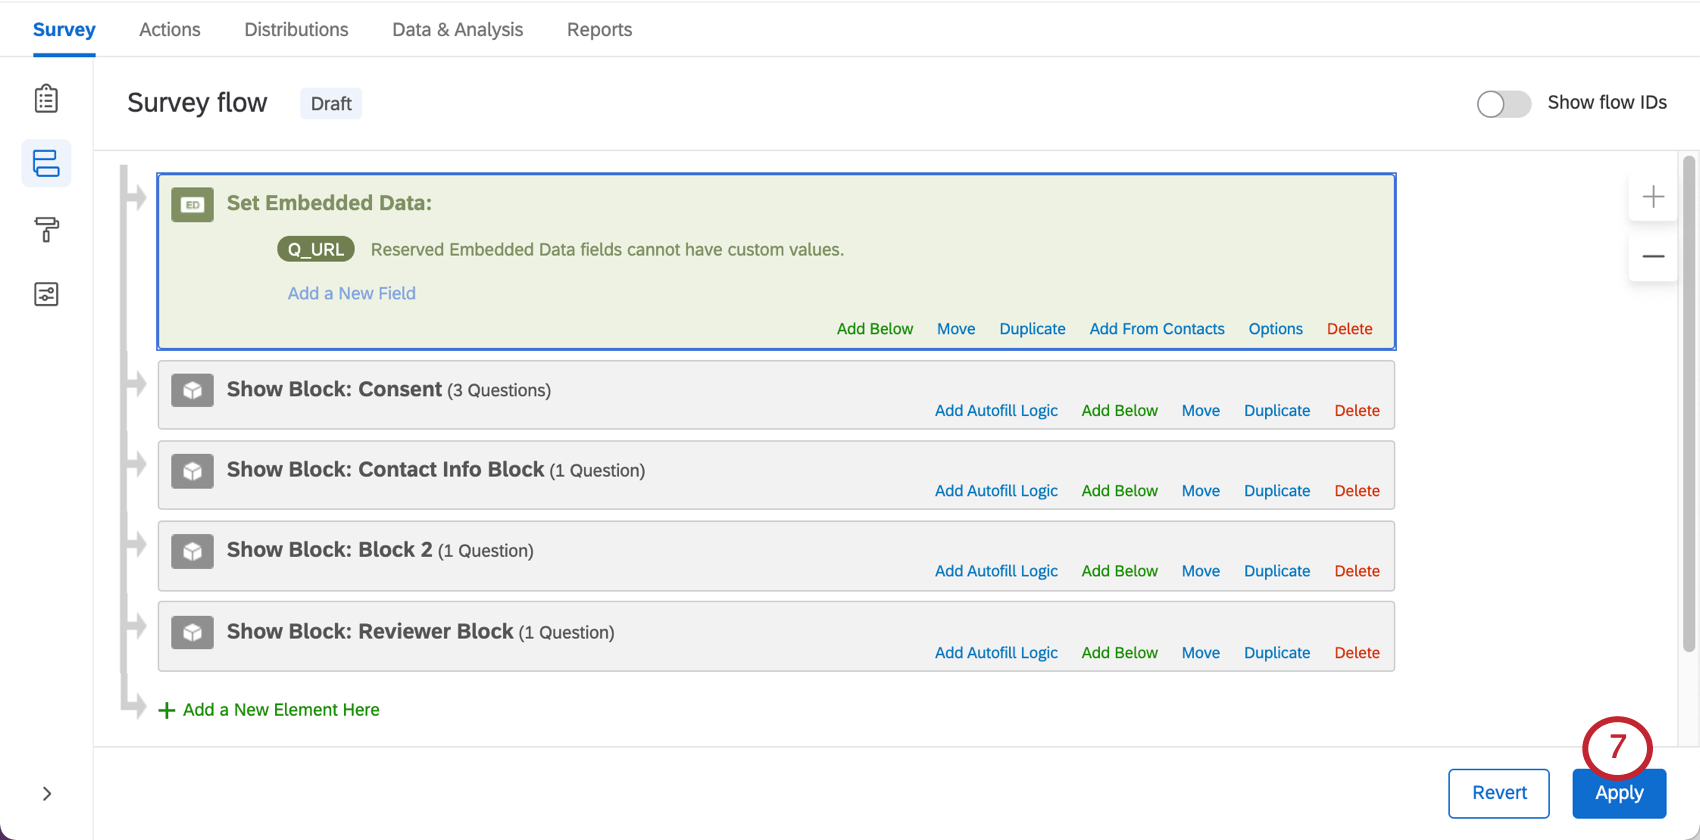
- Move your embedded data element to the top of your survey flow.
- Click Apply.
- In the survey builder, find the question that you want to only appear during retakes.
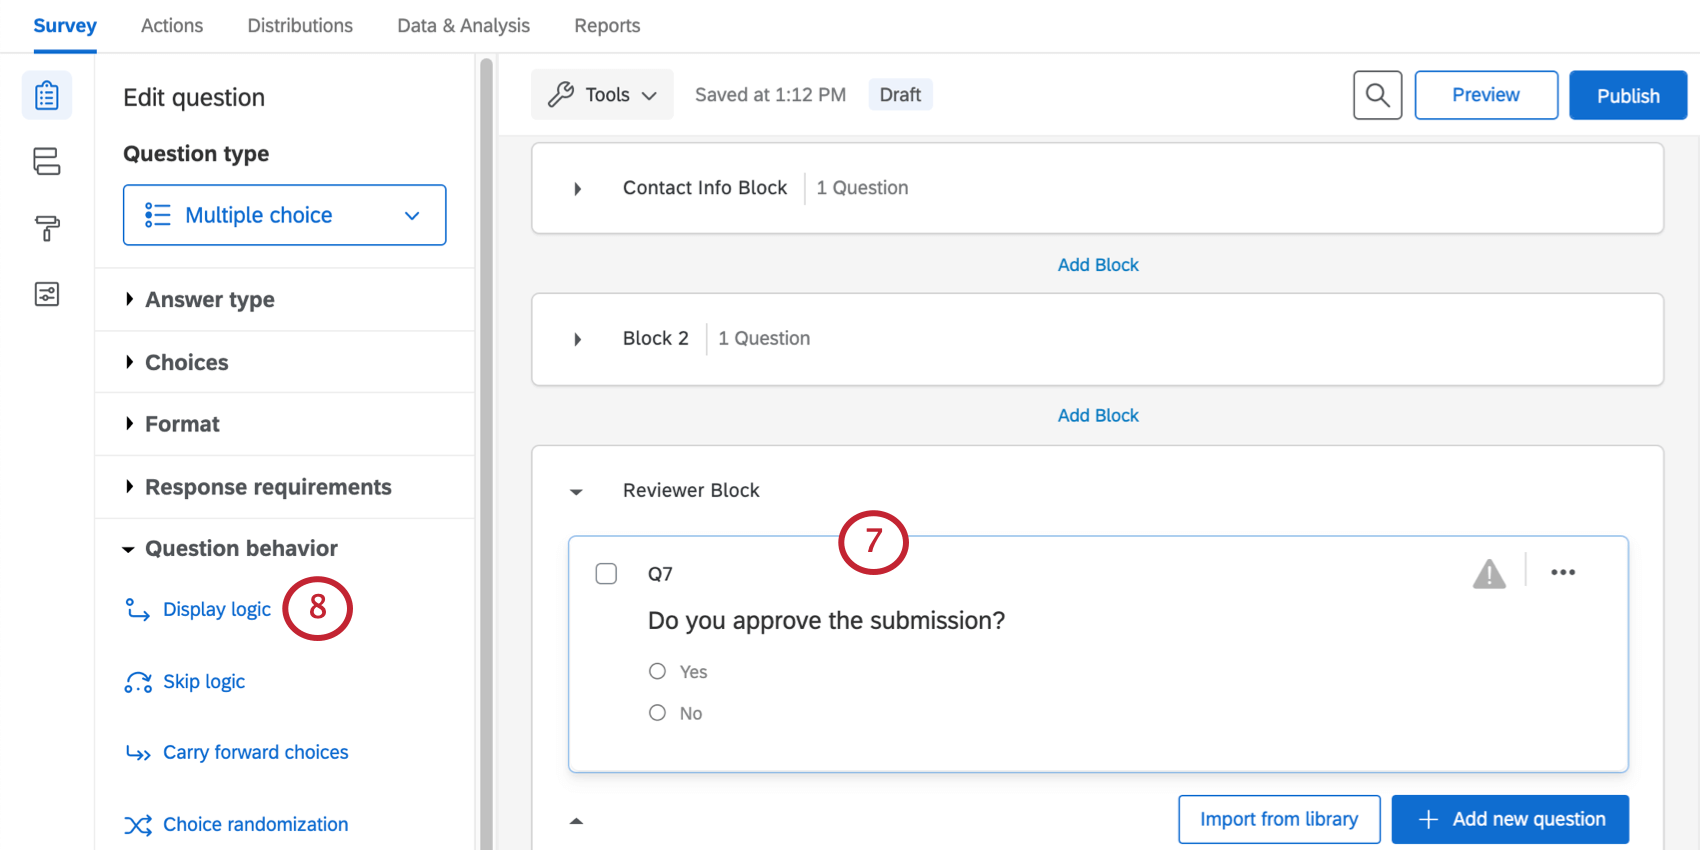
- Under Question behavior, select Display logic.
Warning: You should only add the display logic to additional questions you want the reviewer to see. You don’t want to hide any of your original questions from the reviewer, as the retake link will not save responses to any questions not displayed to the reviewer.
- Choose Embedded Data to base the logic on.

- Enter Q_URL as the embedded data field.
- Select Contains as the operator for your logic.
- Enter Q_R as the embedded data value.
- Click the plus sign ( + ) to add a second logic condition.
- Make sure the logic conditions are separated by Or.
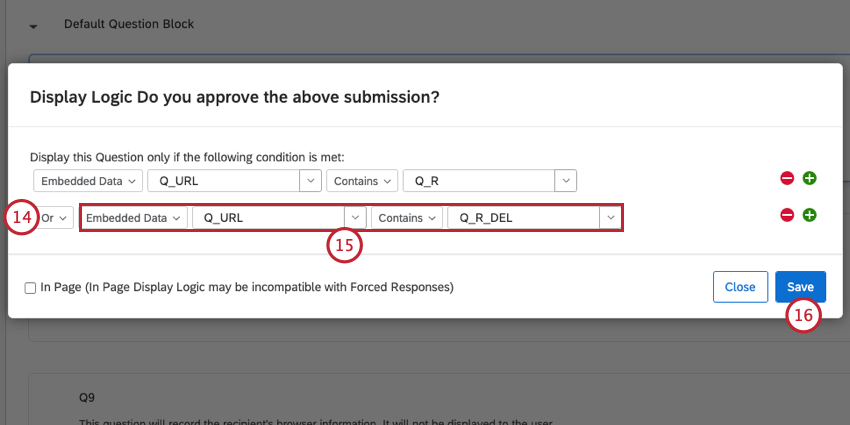
- Create a condition for Embedded Data Q_URL Contains Q_R_DEL.
- Click Save.
Warning: Make sure that you have only added display logic to additional questions you want the reviewer to see. You shouldn’t hide any of your original questions from the reviewer, as the retake link won’t save responses to any questions not displayed to the reviewer.
Hiding Certain Content During Retakes
To prevent the second survey taker (a reviewer or manager, for example) from viewing or changing answers entered by the initial survey taker, you can hide the questions with a timing question. This method will ensure that even though the second survey taker won’t see the questions you choose to hide, the initial response data will save properly with the response.
- Determine which questions you would like to hide, and make sure they are in the same block and will display on the same page to survey takers. See Timing a Question or Set of Questions for more details on how to set this up.
- Create a new question at the top of the block of questions you would like to hide.
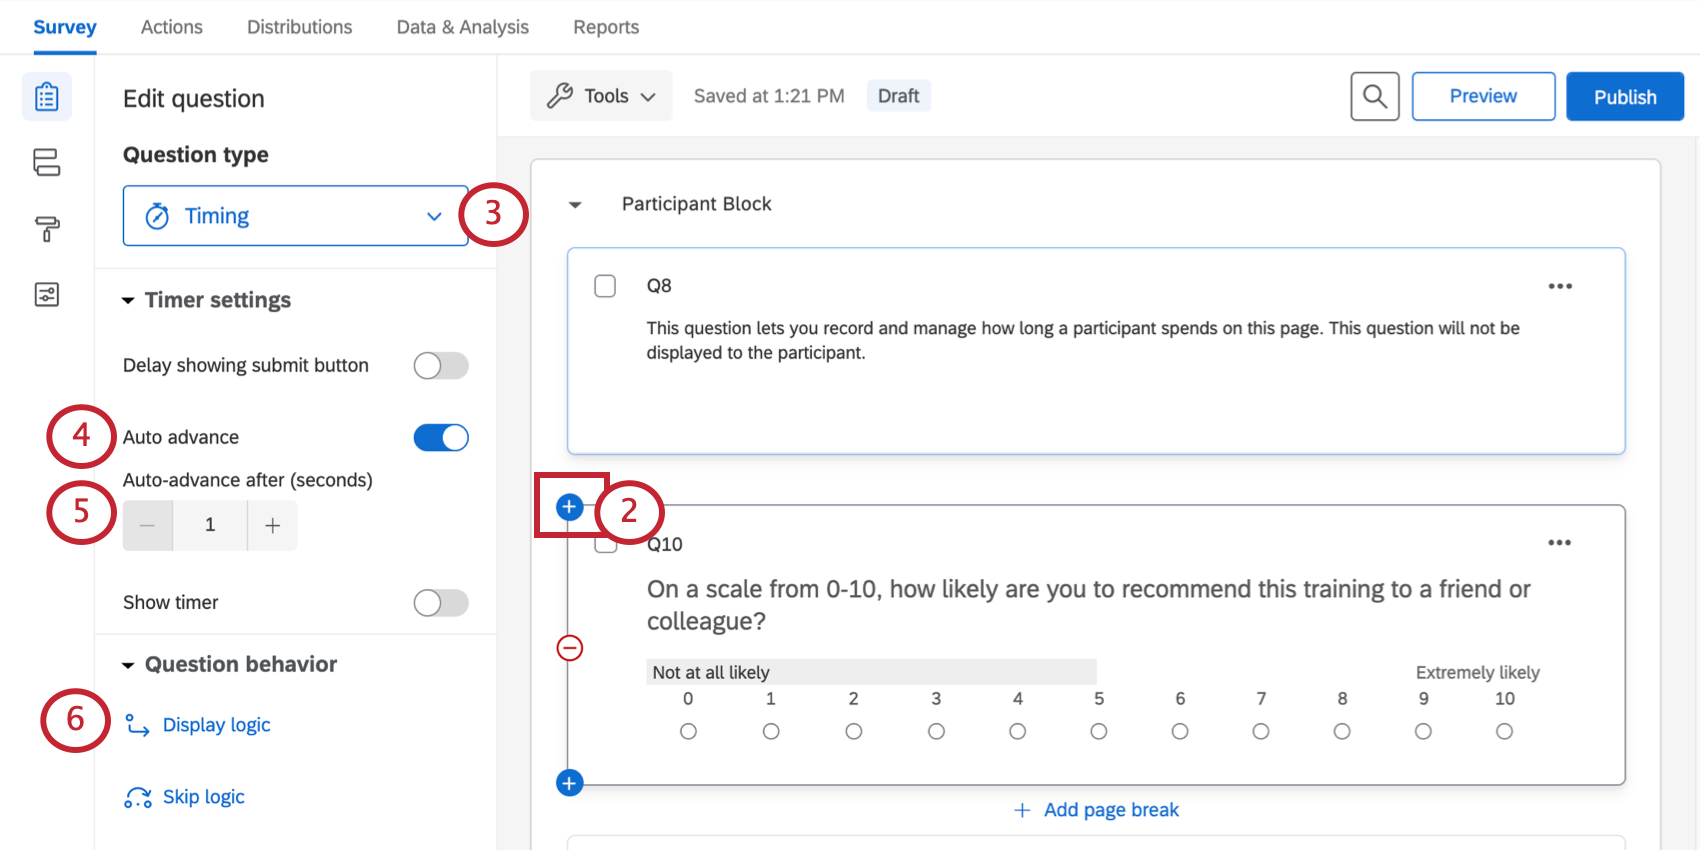
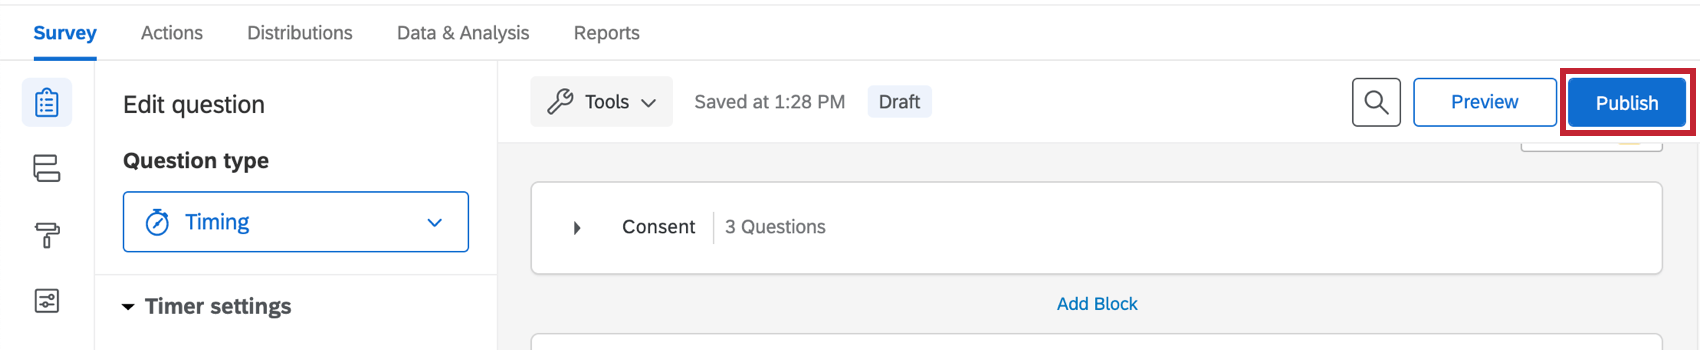
- Under Question type, select Timing.
- Enable Auto advance.
- Change the Auto-advance after (seconds) option to 1.
- Under Question behavior, select Display logic. See Display Logic for more details on this feature.
Attention: You must use display logic to selectively time the reviewer’s response. If you forget to add display logic to your timing question, the survey will skip these questions for everyone!
- Choose Embedded Data to base the logic on.
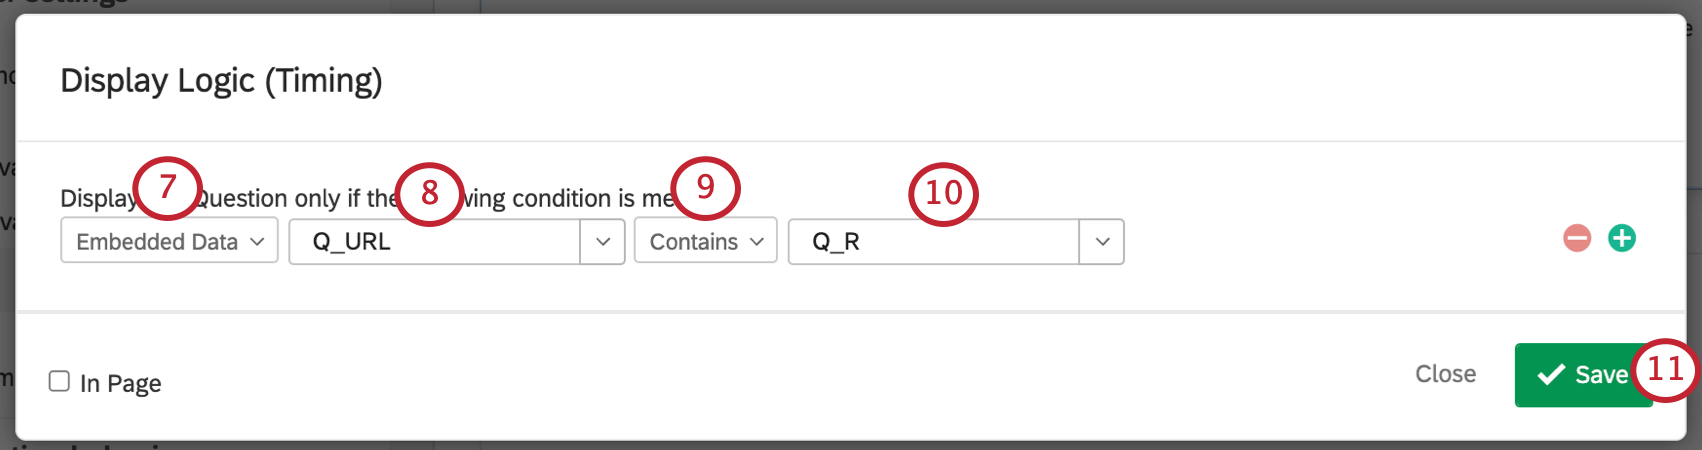
- Enter Q_URL as the embedded data field.
- Select Contains as the operator for your logic.
- Enter Q_R as the embedded data value.
- Click Save.
- Repeat this process for any other blocks or questions you would like to hide from reviewers.
- Publish your changes.
This setup will cause the page of questions to auto-advance after 0.1 seconds. This means that the questions won’t be displayed to or editable by the reviewer. However, since the original answers will be submitted through the auto-advance setting, those answers will be saved with the response.