-

Qualtrics Platform -

Customer Journey Optimizer -

XM Discover -

Qualtrics Social Connect
Creating a Qualtrics Social Connect Account
About Creating a Qualtrics Social Connect User Account
This page walks through the process of setting up your personal Social Connect user account.
Setting Up a Qualtrics Social Connect User Account
When an account administrator adds you as a new user, you will receive an email to confirm your email address. Confirm your registration by clicking the Confirm Registration button in the email.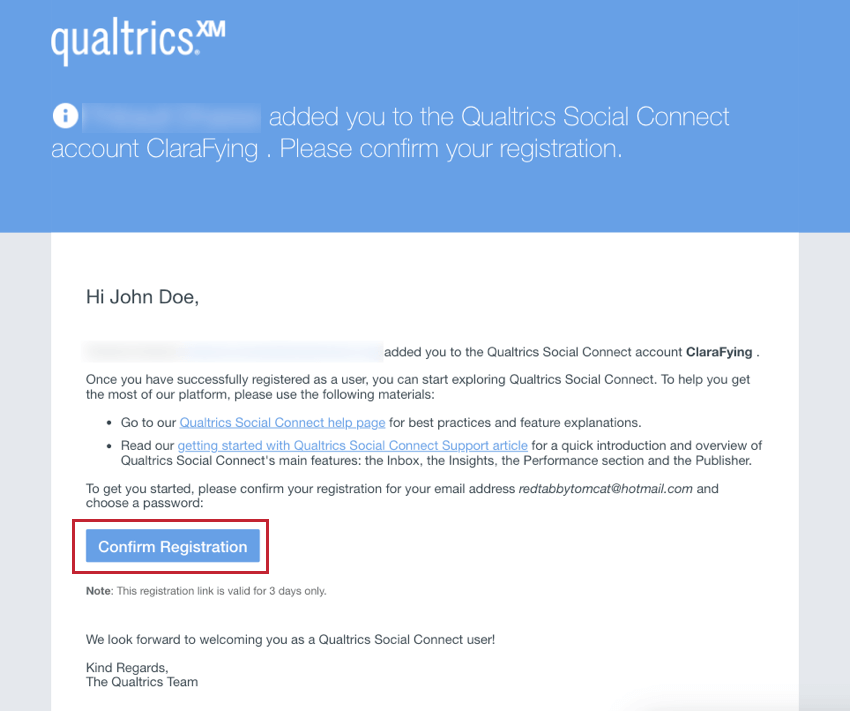
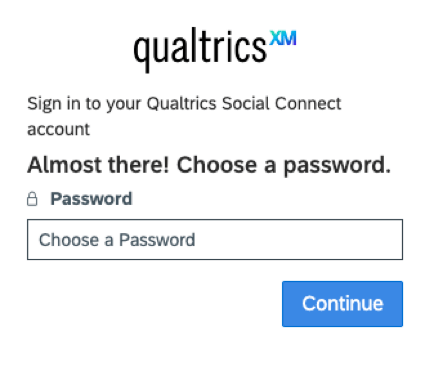
You will be redirected to a Social Connect landing page, asking you to choose a password. Your password should at least include one uppercase letter and one special character. Click Continue after setting your password.
After successfully creating a password, you will land in the Social Connect inbox. Once logged in, add personal information:
- Click the user icon in the top right corner.
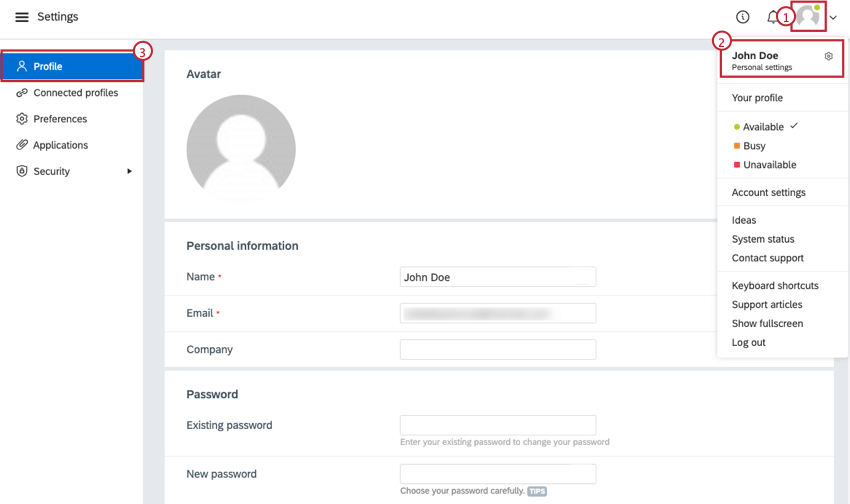
- Select Personal settings.
- Go to the Profile section.
- Update the your identifying information:
- Avatar: Social Connect uses Gravatar (Globally Recognized Avatar), which is based on your email address.
- Name: Your name that will appear to other Social Connect users in your organization. This field is required.
- Email: Your email address. This field is required.
- Company: Add your company name. This field is optional.
After logging in for the first time, set your account preferences:
- Click the user icon in the top right corner.
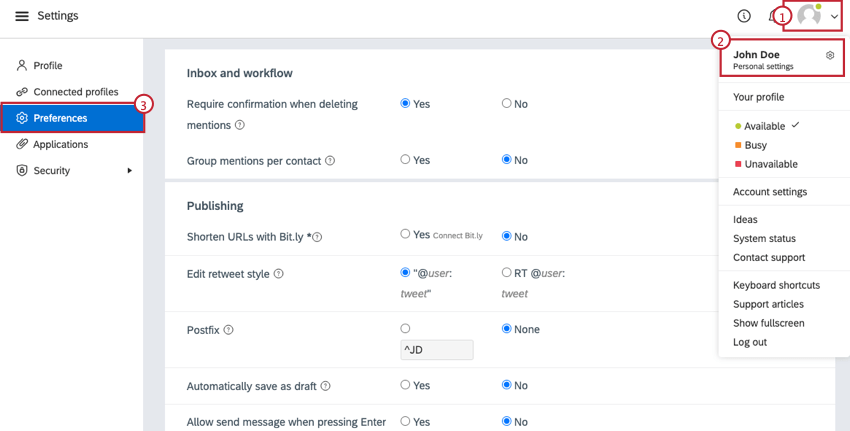
- Select Personal settings.
- Go to the Preferences section.
Here you will be able to adjust preferences related to the Inbox, publishing, notifications and more.
Two Factor Authentication
Two factor authentication adds an extra layer of security to your Social Connect account by requiring an extra code when logging in. This code is provided by a third-party authenticator app, usually on your mobile device.
Enabling Two Factor Authentication
An account administrator can enable two factor authentication for all users in their account in the Security settings. Once enabled, users will be prompted to set up two factor authentication when they log in.
Using your Social Connect Account
After setting up your user account, you’re ready to start using Qualtrics Social Connect! What you do next often depends on whether you’ve been added to a new Social Connect account, or if you’re joining an existing account. See the sections below for more information about each scenario.
Starting out in a new Social Connect account
Below are some steps that will help you in the process of setting up a new account:
- Set up your topics and projects with keyword queries and social profiles to define your tracking.
- Add other users to start working in a team.
- Set up your mailboxes to organize mentions.
- Set up a custom dashboard so you can quickly see all the statistics, mentions, and charts that matter most to you in one place.
- Get familiar with the terms used in Social Connect.
Starting out in an existing Social Connect account
When you have been added to an account that has already been set up, chances are that the topics and workflow have already been created. However, there’s always room to personalize your account, although it might be best to do this in consultation with your account administrator.
- Get in touch with your account administrator to check whether you need to or are allowed to create extra topics, mailboxes, and dashboards:
- Create a new topic with keyword queries and social profiles to define your tracking.
- Set up a custom dashboard so you can quickly see all the statistics, mentions, and charts that matter most to you in one place.
- Set up mailboxes to organize mentions.
- Get familiar with the terms used in Social Connect.
Login URLs
There are 2 different URLs you can use to access Social Connect:
- App.engagor.com: Use this link to log in to your live Social Connect account.
- Beta.engagor.com: Use this link to log in to a beta version of Social Connect. The beta environment allows you to test new features and try out changes that will not impact your live Social Connect account.