
Getting Started with Employee Engagement
What's on this page
Getting Started
This guide walks you through every step necessary to launch your Employee Engagement project.
Below is a list of all the content you should have prior to building your project:
- The list of questions/items you want included and their associated category/driver
- The list of employees that will be taking the survey
- Final drafts of the email messages (invites and reminders)
- A general idea of the information you want to report in your dashboard
Templates to Get You Started
Throughout these Getting Started pages, we will provide example files to guide your first Employee Engagement project. However, there’s another resource available to you to make this go even faster. Every Employee Experience customer gets access to template projects, which include survey questions, messages, and dashboards developed by our subject-matter experts.
For our Employee Engagement users, we recommend the EX 25 Annual Baseline. This solution measures drivers of employee engagement and enables managers at every level to action and drive improvements. With research-based and validated engagement survey items and pre-configured dashboards from Qualtrics, this solution is ideal for annual or biannual employee engagement programs.
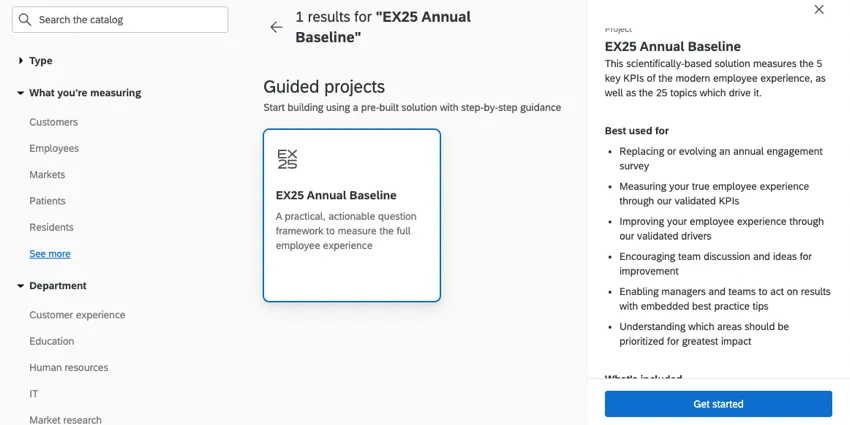
The EX 25 project can be found when you create an EX project and look at the Guided projects section.
Qtip: For Lifecycle templates, see Templates for Employee Experience. Note that while similar, Lifecycle projects are not the same as Employee Engagement projects.
Guided Project Creation
Need help building an Engagement project from scratch? Check out the in-product guidance to help you get started. By answering a few short questions, Qualtrics will build a beginning Engagement survey for you based on the updated Qualtrics EX25 methodology. You can then further customize this survey for your organization’s specific needs.
Qtip: You’ll need the “Access Guided Engagement” user permission enabled to use this feature. Additionally the “Engagement Standard Short,” “Engagement Standard Medium,” and “Engagement Standard Long” extension permissions should be enabled.
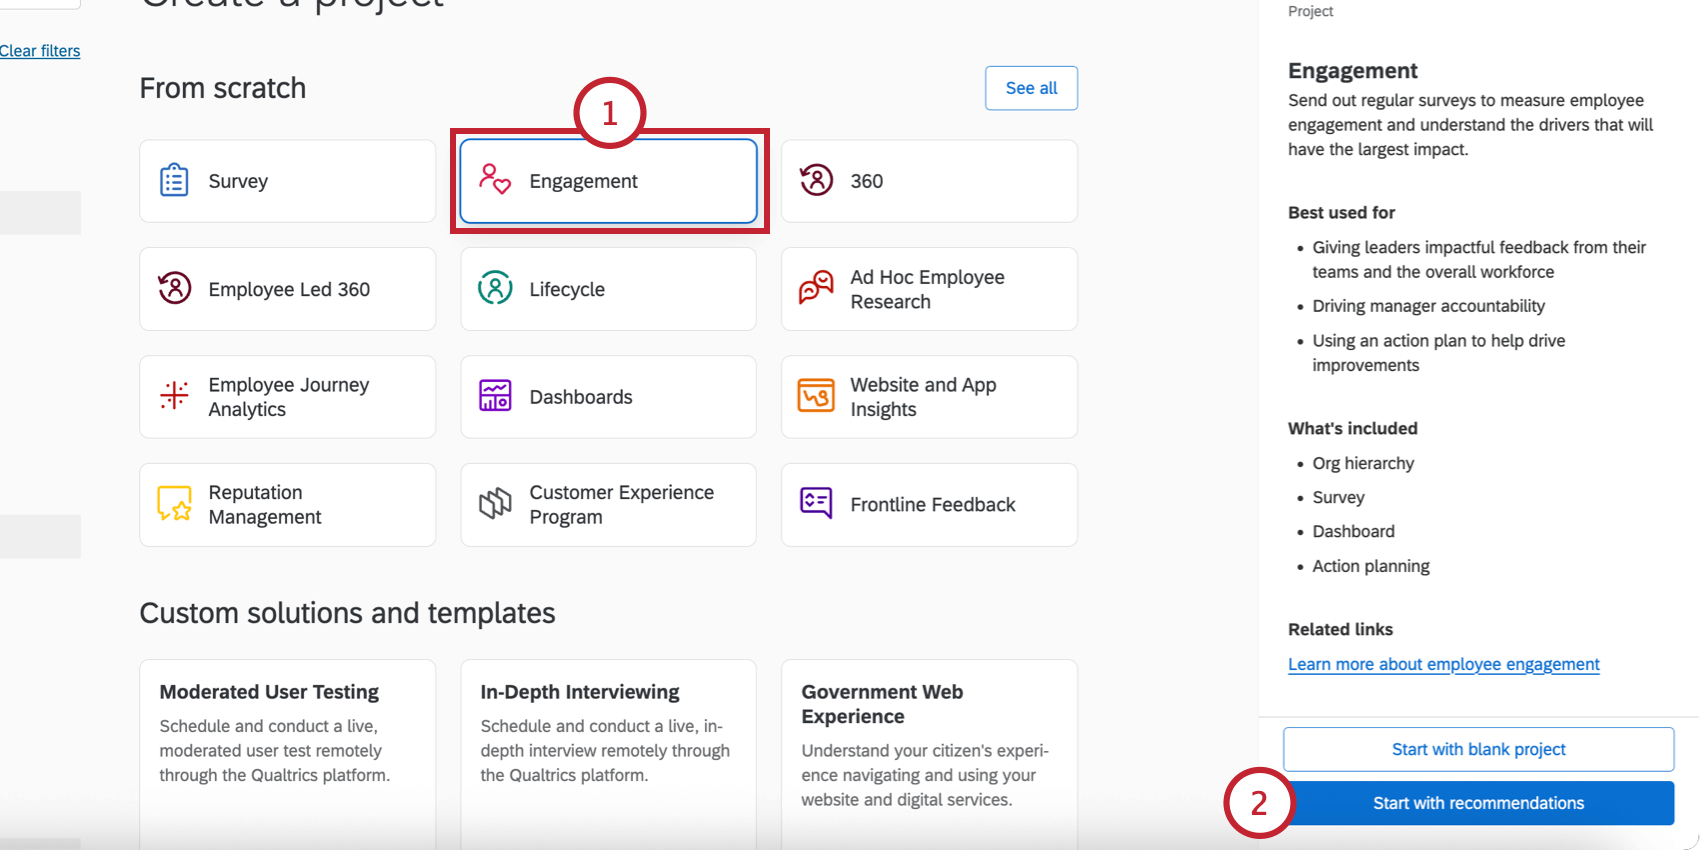
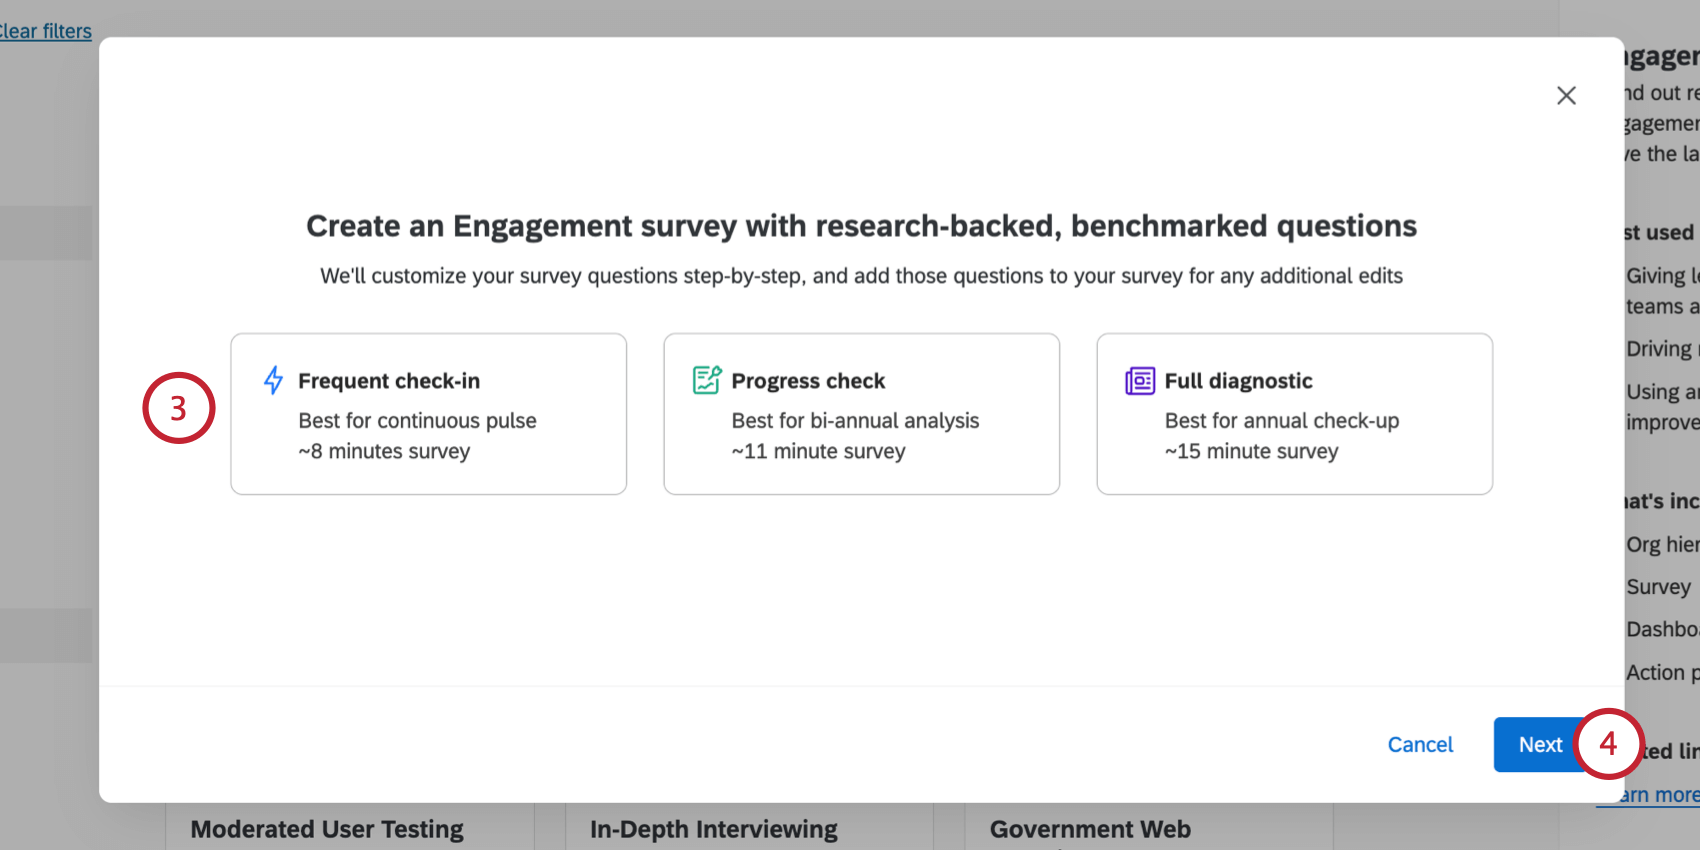
Qtip: These options are controlled by the “Engagement Standard Short,” “Engagement Standard Medium,” and “Engagement Standard Long” extension permissions. If one or more of the above templates are unavailable to you, then contact your Brand Administrator and ask them to enable the associated permission for you.
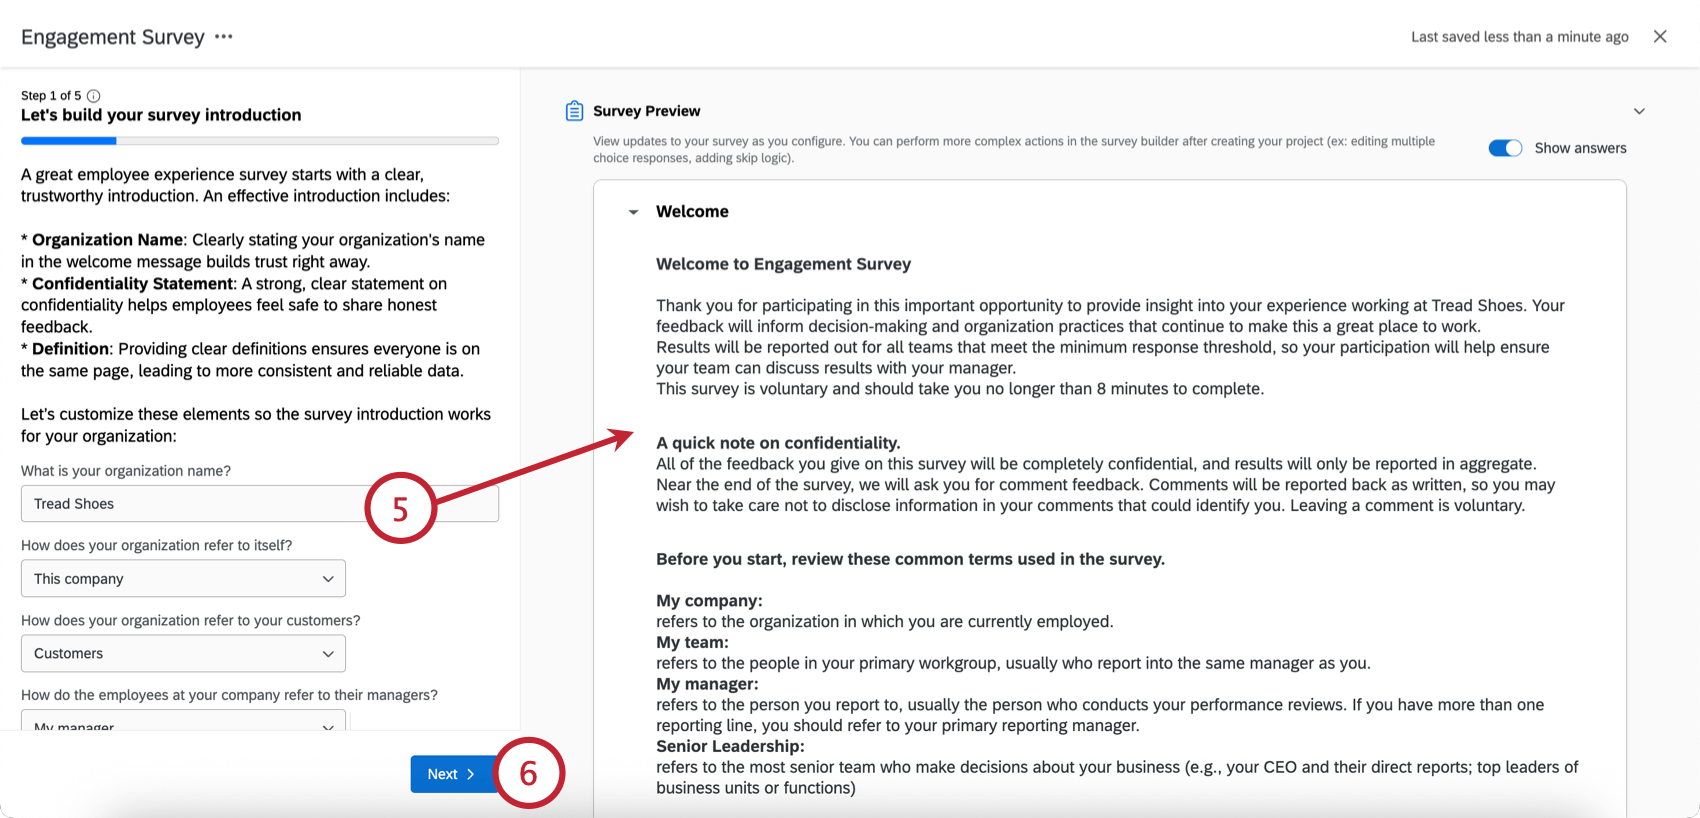
Qtip: You can click Show answers to hide or display the responses to preview questions. You can hide or display the entire survey preview by clicking the arrow at the top of the preview.

- Introduction: Customize your organization name and internal terminology.
- KPIs: Choose the KPIs you’d like to focus on.
- Drivers: Select the drivers that impact your KPIs.
- Open Ended: Add open ended questions to your survey.
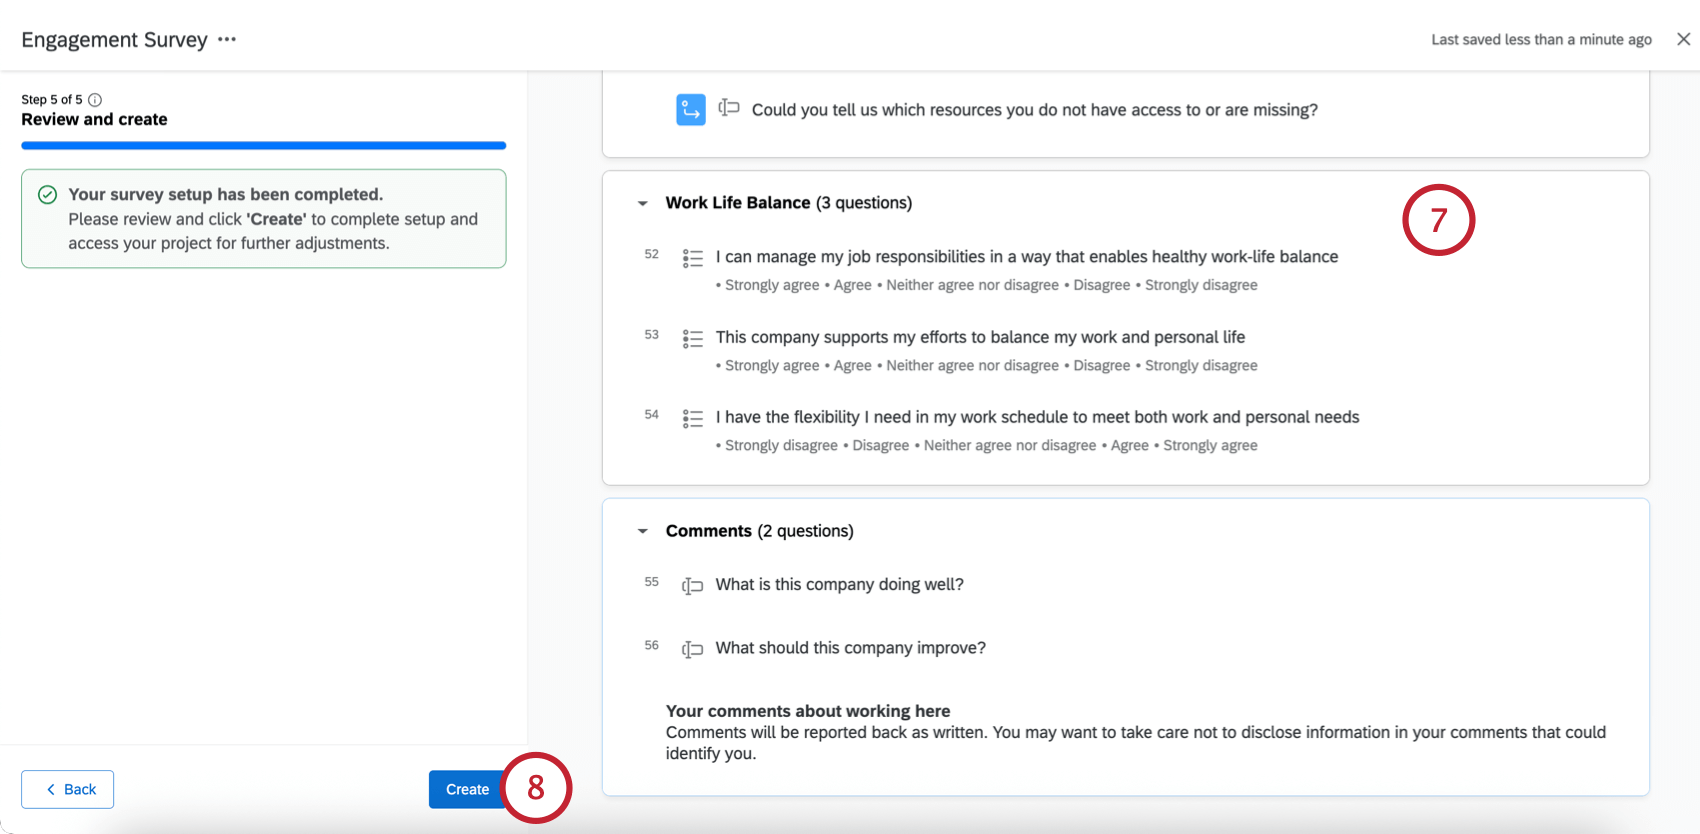
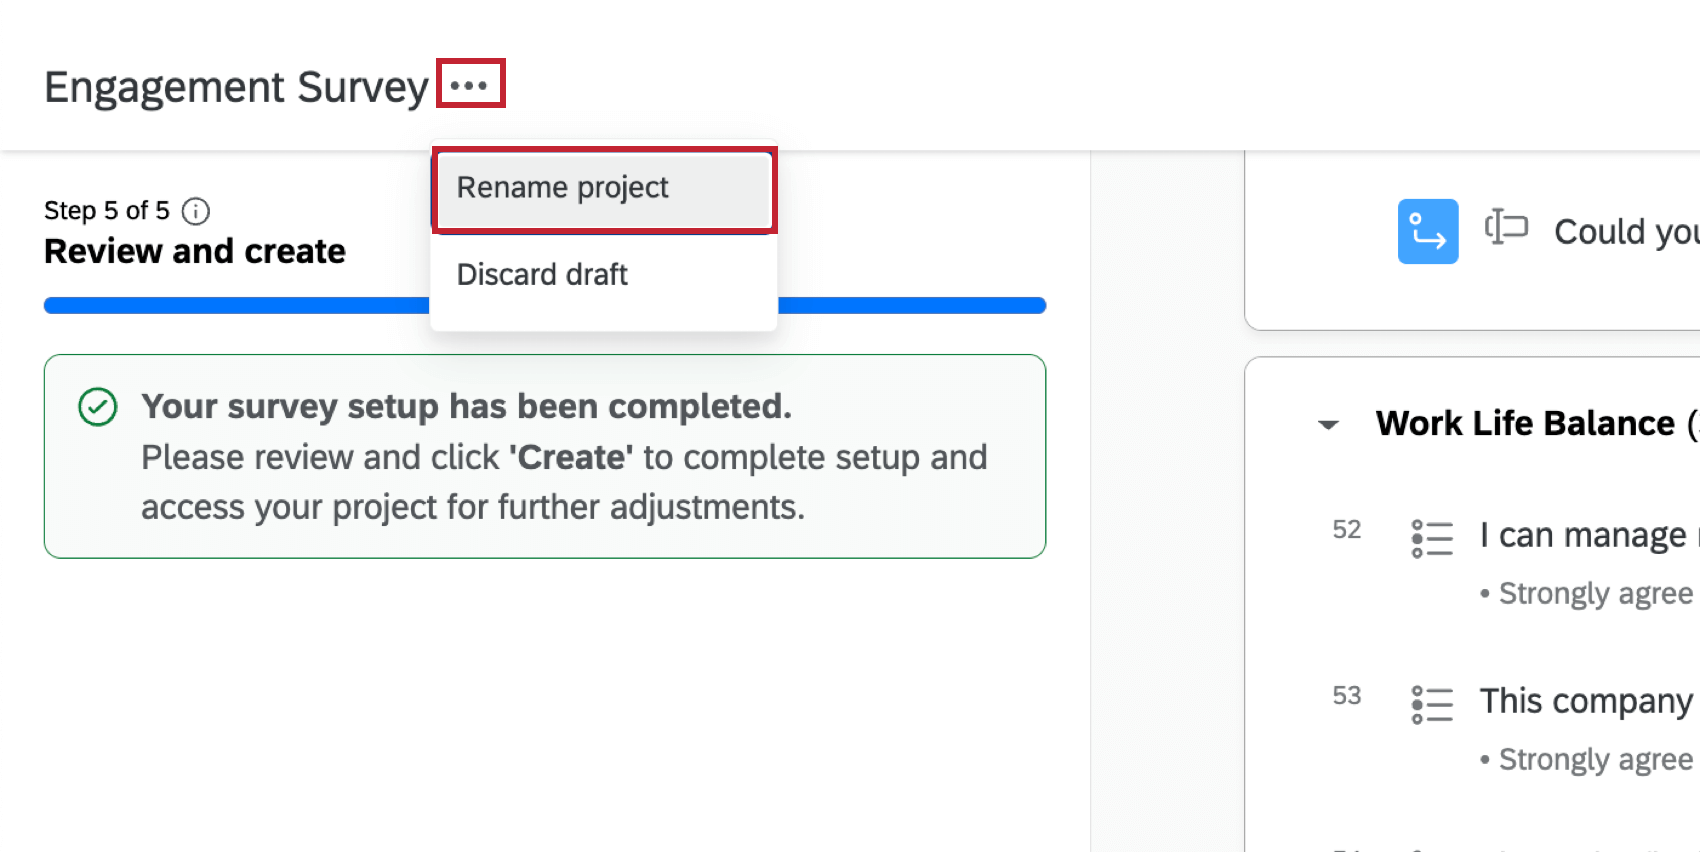
Qtip: To rename your project before creating it, click the menu next to the project name and click Rename project. Alternatively, you can double-click the project name to edit it.
Qtip: Your project will contain certified questions that can be customized if needed. These questions are translated into 35 languages.
Overview Tab
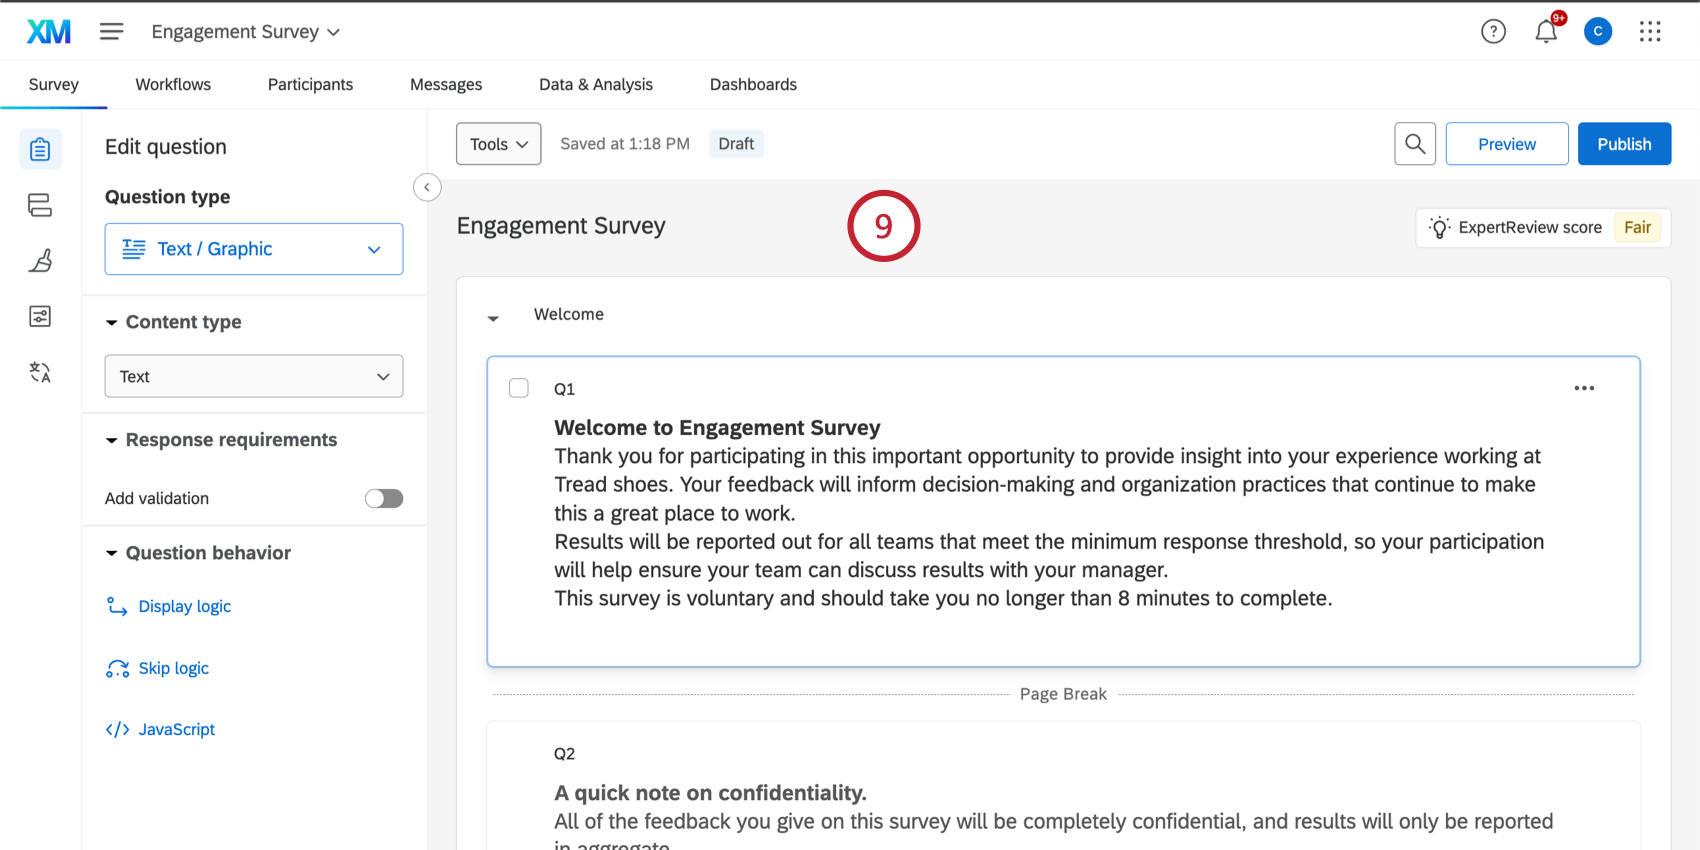
The Overview tab of your Engagement project will walk you through the major steps of setting up your project. You’ll be brought here automatically if creating a project through the guided flow. Projects created from scratch will start in the “Survey” tab, but you can navigate back to the “Overview” tab at any time if you need assistance with any step of the setup.
Please complete these steps in order from top to bottom. Completed steps will have a green check mark. You can click Modify next to any completed step to edit your setup. Any uncompleted steps will say Start, which you can click to begin that step in the setup process. If a step is grayed-out, then you must complete a previous step first.
Below is an overview of each step, with links to more in-depth resources about each step in the process.
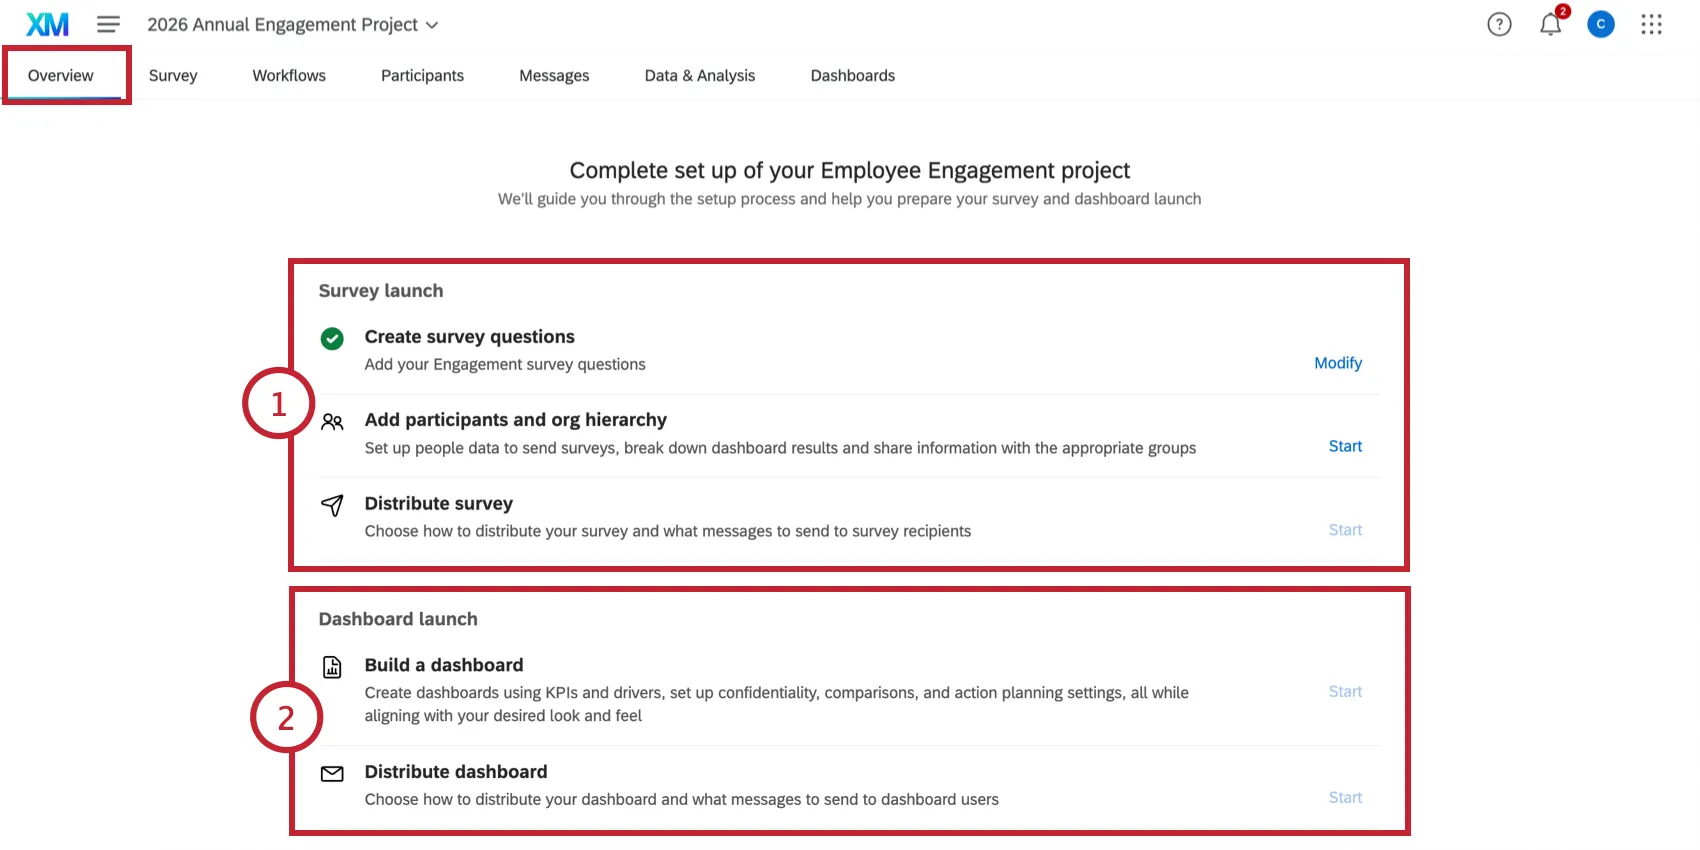
- Create survey questions: Add and remove questions. If you used the guided flow to create a project, you’ll have questions already in your project that you can customize. You can customize all aspects of the survey taking experience in this step. See Building Your Engagement Survey for an overview.
- Add participants and org hierarchy: Upload participants to your project and build an org hierarchy. See Preparing a Participant File for help formatting your upload file, and Adding Participants for more information about the different upload methods available to you. After your participants are uploaded, you can generate your org hierarchy. Qtip: The guided import flow will walk you through the steps to create a file, upload participants, and build an org hierarchy. If your project does not contain any participants, then you will automatically start the guided flow when beginning this step. We strongly recommend using this flow instead of manually adding participants if you are new to Engagement projects.

- Distribute survey: Active your project and send your survey to your employees. At this stage in your project, you’ll be sending a survey invite email.
- Build a dashboard: Create a dashboard to visualize your data. This step will launch the guided flow to build a baseline dashboard, which you can then customize.
- Distribute dashboard: After your survey is complete and your dashboard is finalized, you can send an invite to stakeholders to view the dashboard.
FAQs
How can I stay up to date on new Qualtrics features?
How can I stay up to date on new Qualtrics features?
To access these release notes, you need an XM Community account. These accounts are free for any users with a Qualtrics account. This support page contains information for how to register an XM Community account.
Once you're logged into the XM Community, head over to the Weekly Product Updates Introduction Post. This post contains all the information you need to get started with subscribing to product updates!
What are EX Dashboards?
What are EX Dashboards?
That's great! Thank you for your feedback!
Thank you for your feedback!