
Customizing a Frontline Feedback Project
What's on this page
About Customizing a Frontline Feedback Project
Qtip: Frontline Feedback projects are an additional purchase. Please contact your Account Executive for more information about this product.
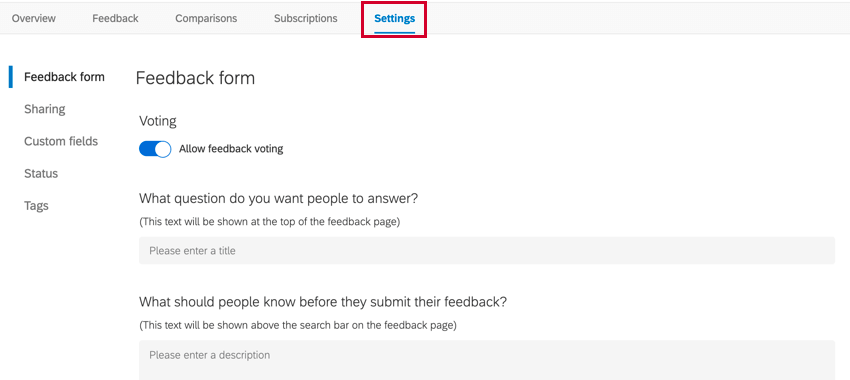
Once you’ve created your Frontline Feedback project, you can customize it to fit your organization’s needs. The Settings tab controls the customization options for your Frontline Feedback project. Here, you can edit what the feedback form looks like, create custom request statuses, and share the project with your users. Information about each setting is below.
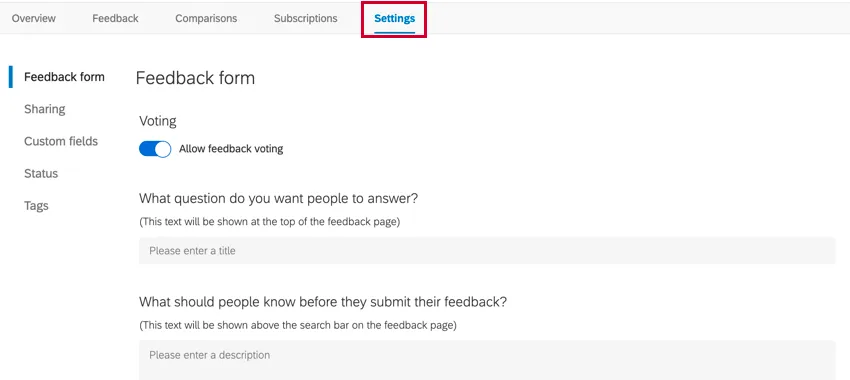
Feedback Form
The Feedback form section allows you to customize the data fields users must fill out when adding feedback to the project. You can also configure what default text users see.
Qtip: When you’re done configuring these settings, be sure to click Save at the bottom of the page!
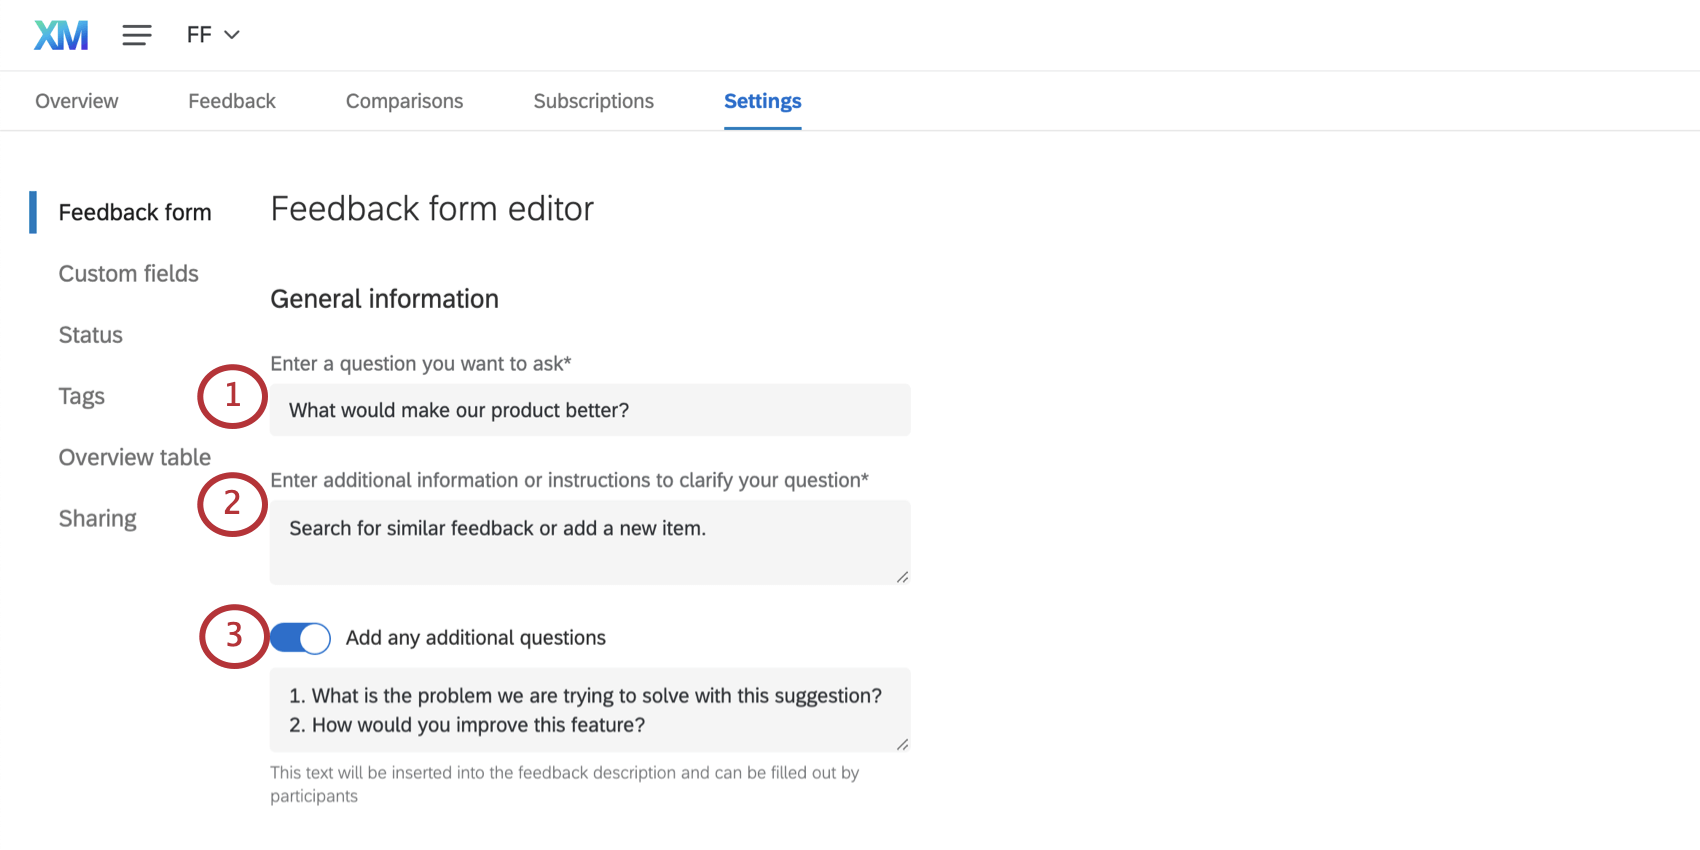
General Information

Qtip: When submitting feedback, your users will see the text you’ve entered prefilled in the feedback description.

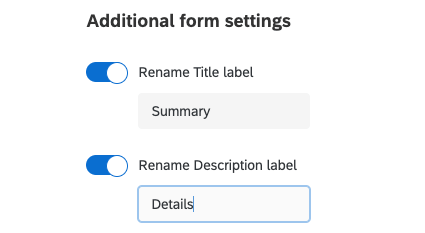
Additional form settings
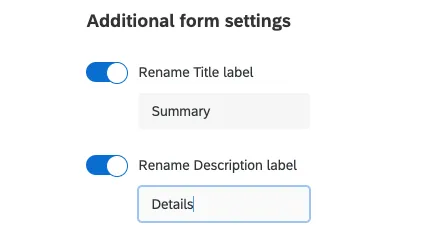
- Rename Title label: This controls what the “Title” field is called when someone’s submitting new feedback.
- Rename Description label: This controls what the “Description” field is called when someone’s submitting new feedback.
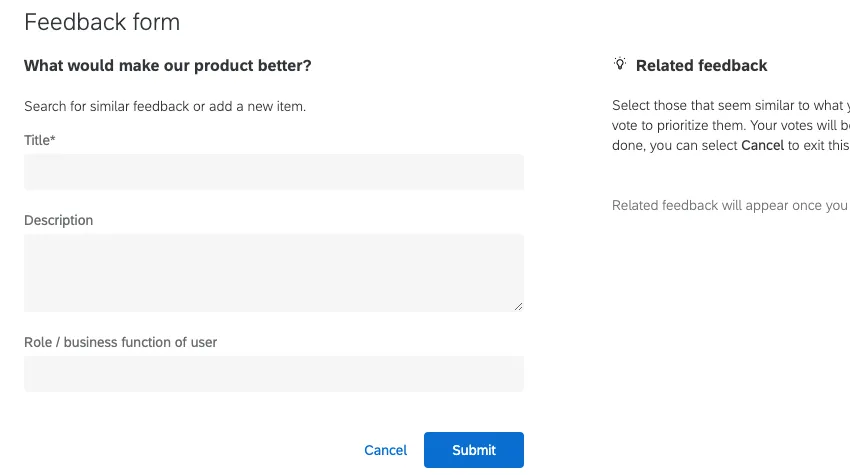
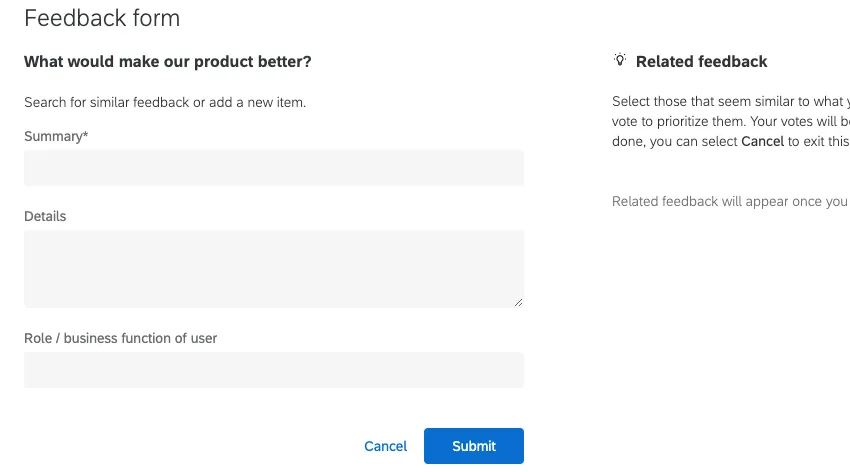
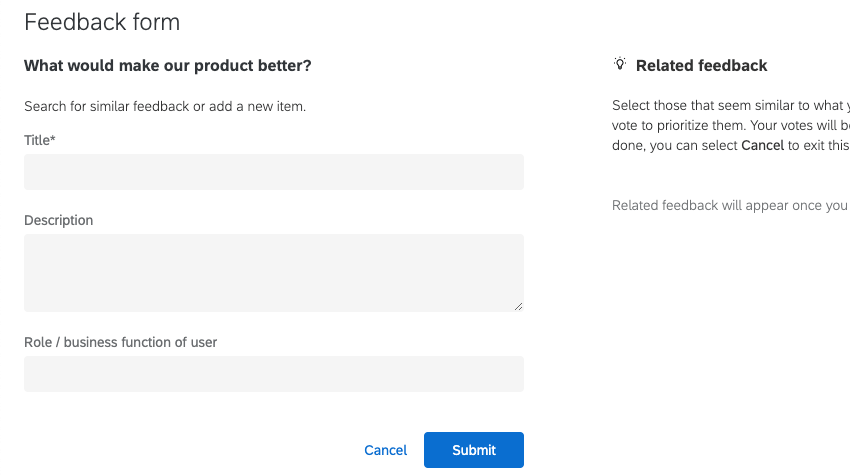
Example: When these settings are not enabled, this is the default form:
By comparison, here we’re calling the title “Summary” and the description “Details:”
Field Settings
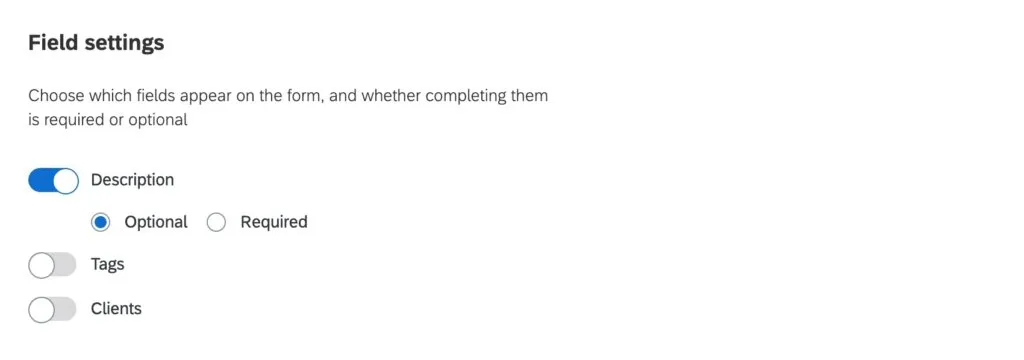
Select the description, tags, or clients you want users to add to each feedback submitted. Once a field is toggled “on,” you’ll have the option to select whether this field will be optional or required. Required fields will be marked with an asterisk.
By default, the description toggle will be on and marked as optional. If you no longer need to use the description field (say, if you set up text custom fields), then you can toggle the description off, which will remove it from both the feedback form and the feedback view.
Permissions
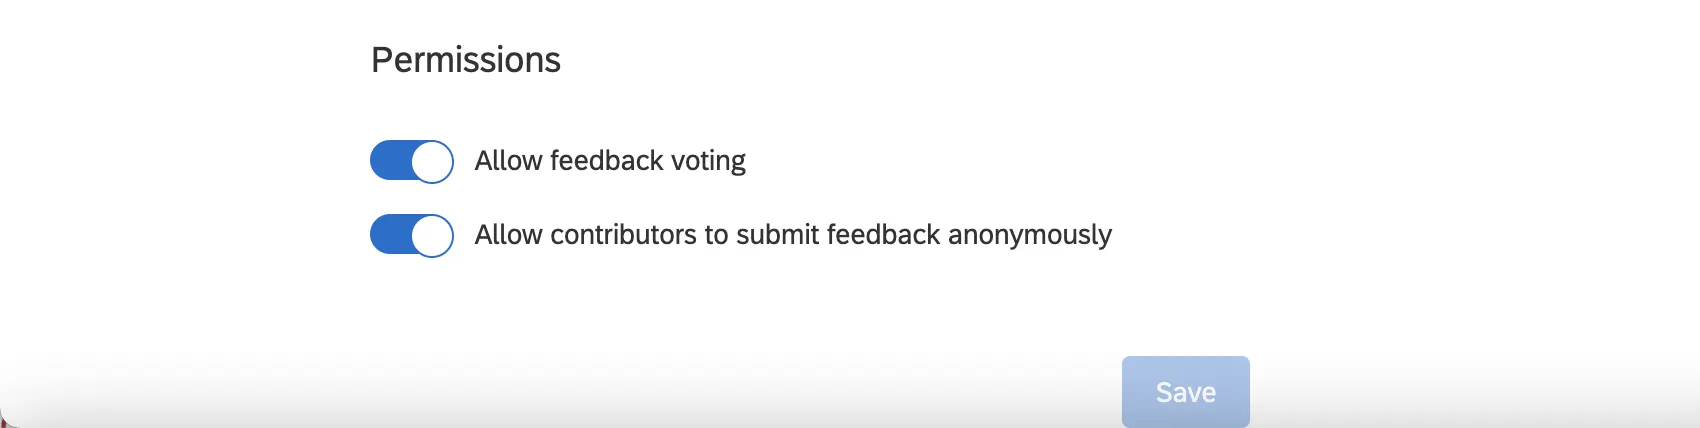
- The Allow feedback voting setting allows users to upvote existing feedback. You can enable or disable this at any time.
- The Allow contributors to submit feedback anonymously setting allows users to submit anonymous feedback requests and comments on requests.
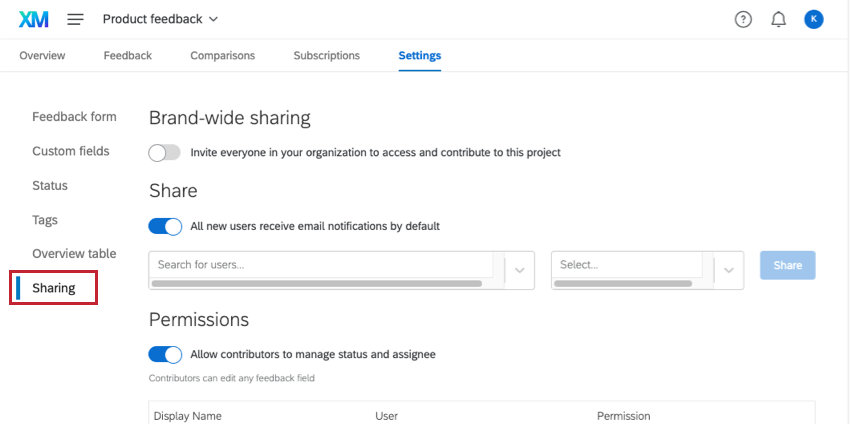
Sharing
The Sharing settings allow you to determine who in your license can access the Frontline Feedback project. You can also determine the level of access users will have within the project.
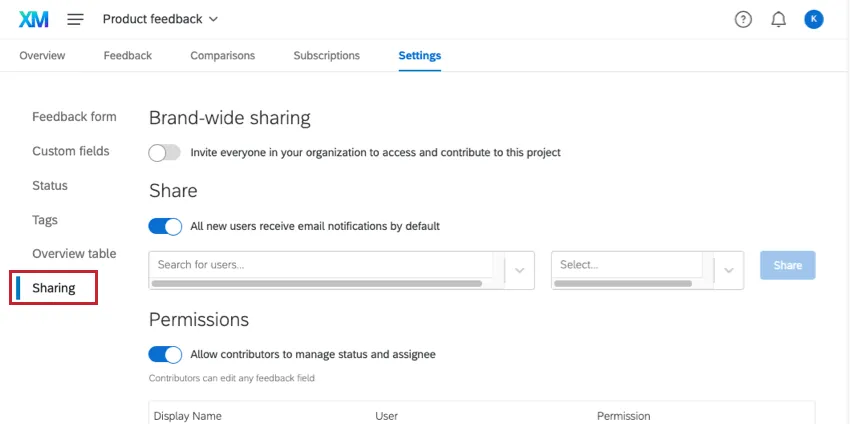
Brand-wide Sharing
Brand-wide sharing can be used to quickly give access to all users in your Qualtrics license at once. Just enable Invite everyone in your organization to access and contribute to this project.
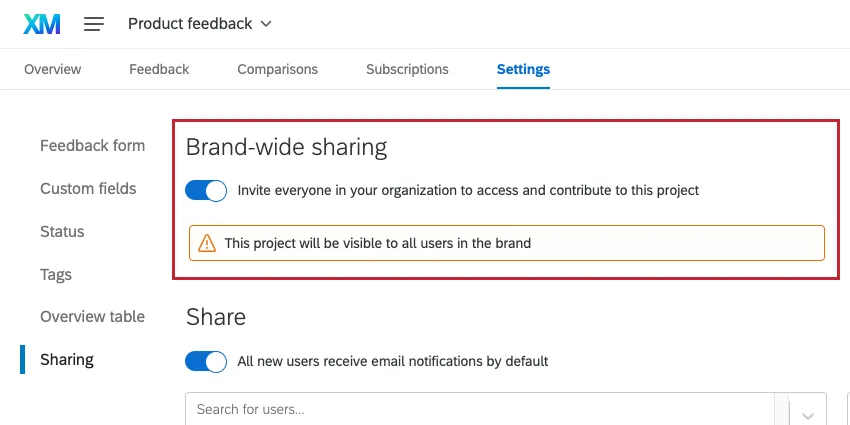
When this option is enabled, everyone in the brand will be able to interact with existing feedback and submit their own feedback, as well as create and manage their own collections and comparisons. Contributors can also edit feedback clients and tags, add assignees to feedback, and subscribe to feedback.
Qtip: To give individual users a different level of access, see Individual Sharing below.
All users in your license will be able to access this project from their Projects page.
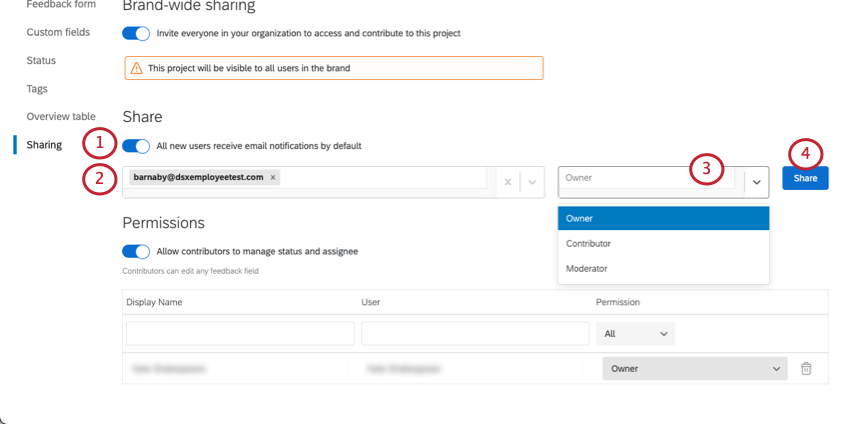
Individual Sharing
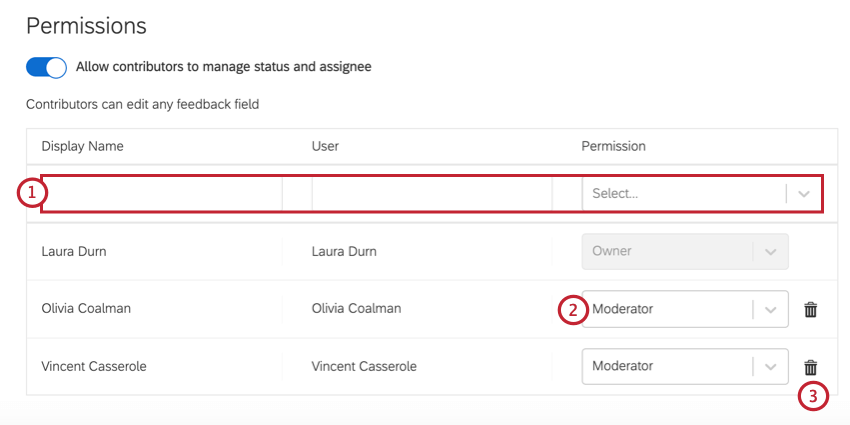
You may individually manage who has access to your project. When giving access to individuals, you can also determine the level of access each person has.
-
- Moderator: Users can edit and delete all feedback and comments within the project, as well as contribute their own feedback.
- Read only: Users will be able to read existing feedback and view comparisons, but not submit feedback of their own.
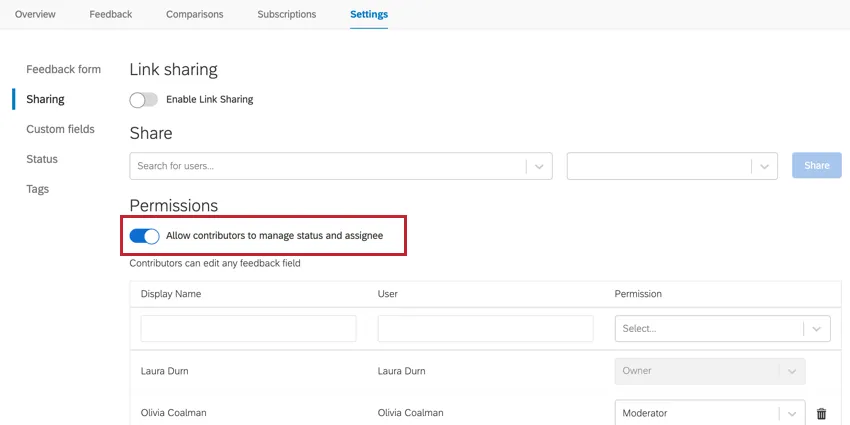
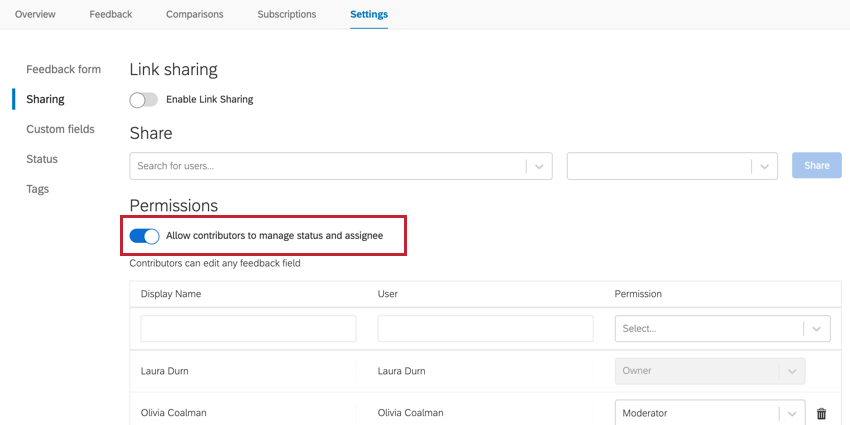
- Contributor: Users will be able to interact with existing feedback and submit their own feedback, as well as create and manage their own collections and comparisons. Contributors can also edit feedback clients and tags. Qtip: By default, contributors cannot manage feedback statuses or assignees. If you would like to allow contributors to perform these actions, enable the Allow contributors to manage status and assignee toggle.

- Owner: Users will be able to manage all feedback for the project, as well as any project settings.
Qtip: All user roles have the ability to manage subscriptions for their account.
Once you’ve shared the project with individual users, you can manage their access in the Permissions section.
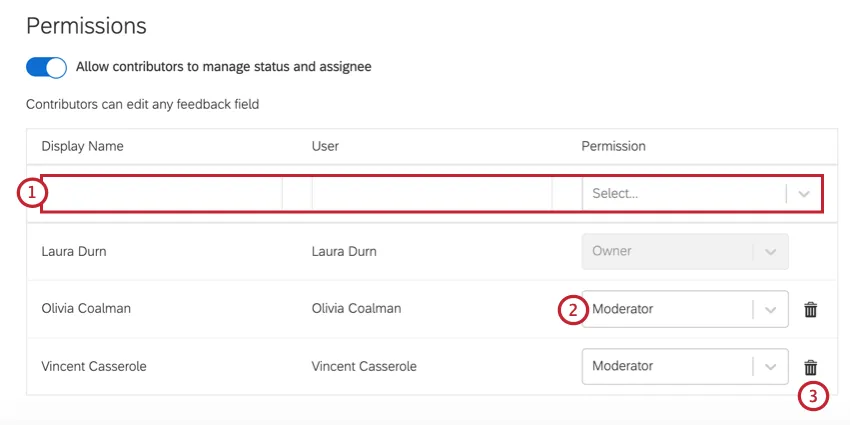
In this section, you can perform the following tasks:
Qtip: If the “Display Name” for a user is blank, this means they have not yet accessed the Frontline Feedback project.
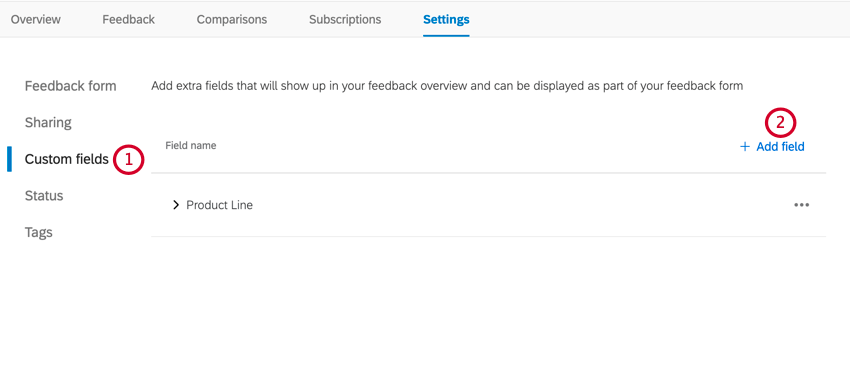
Custom Fields
In the Custom Fields section, you can create extra fields that display in the feedback form and the overview on feedback requests. When submitting a feedback request, the person submitting the feedback will be able to select values for the custom fields. You can use custom fields to filter your feedback requests.
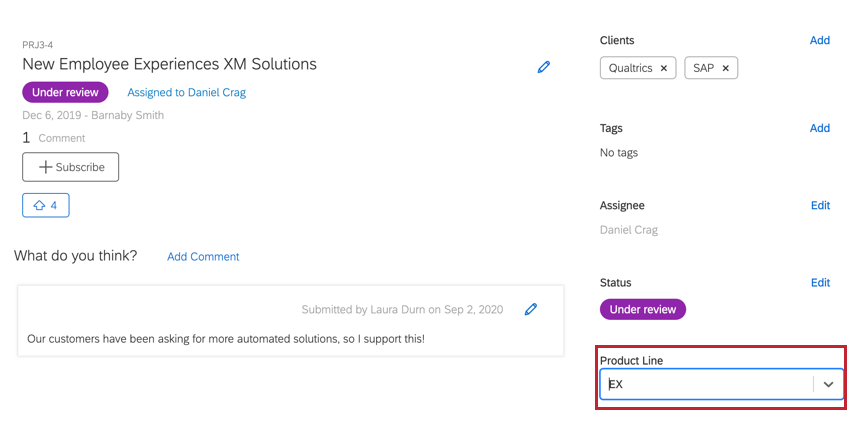
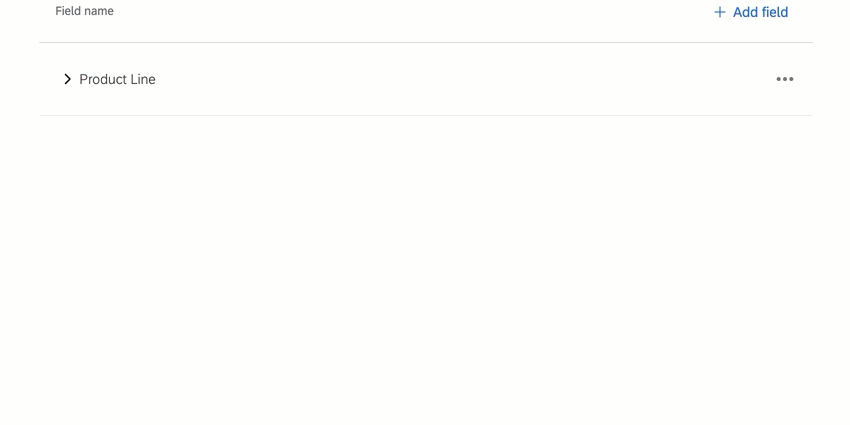
Example: In this example, we’ve created a custom field called “Product Line.” A dropdown menu is available for selecting the value for this field.

Creating Custom Fields
Qtip: You may create up to 50 custom fields in your project.

- Multiple choice – All one answer
- Multiple choice – Allow multiple answers
- Text entry – Single line
- Text entry – Multiple lines
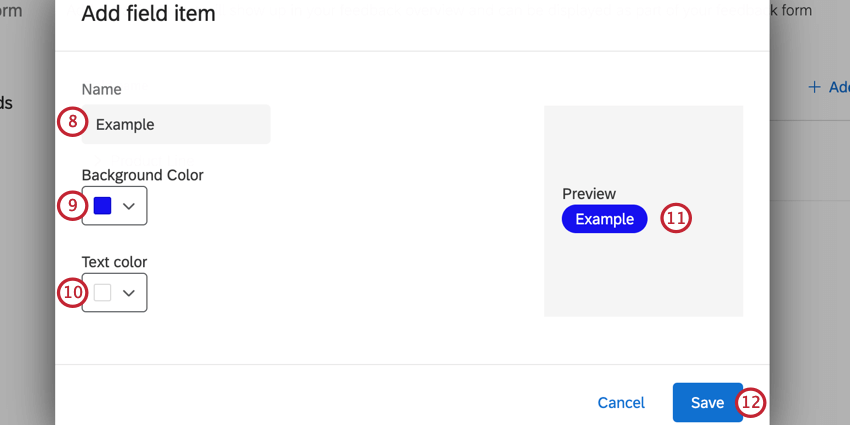
Qtip: You can have up to 200 items for a field.
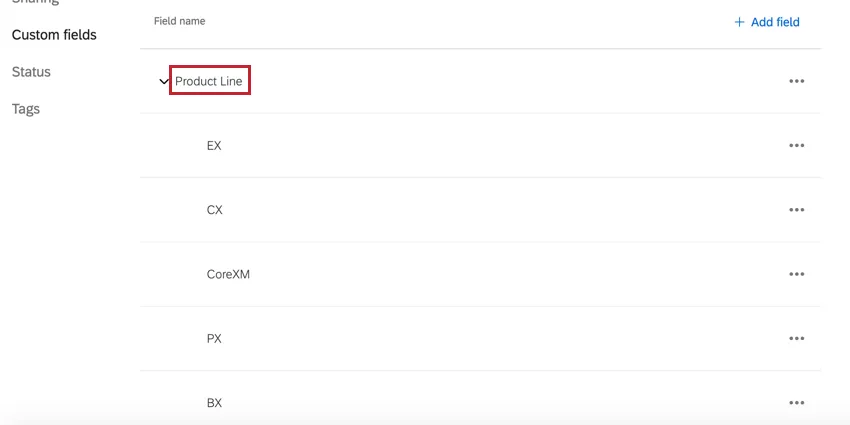
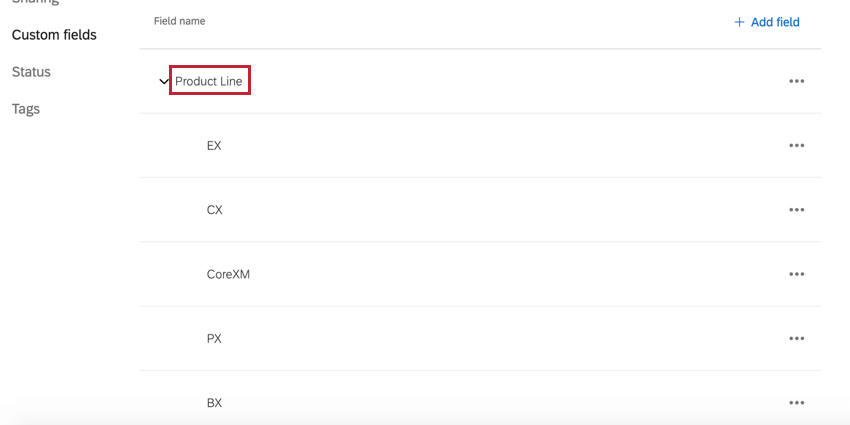
Example: In this example, we’ve created a custom field called “Product Line,” and we’ve added 5 different items to the field.
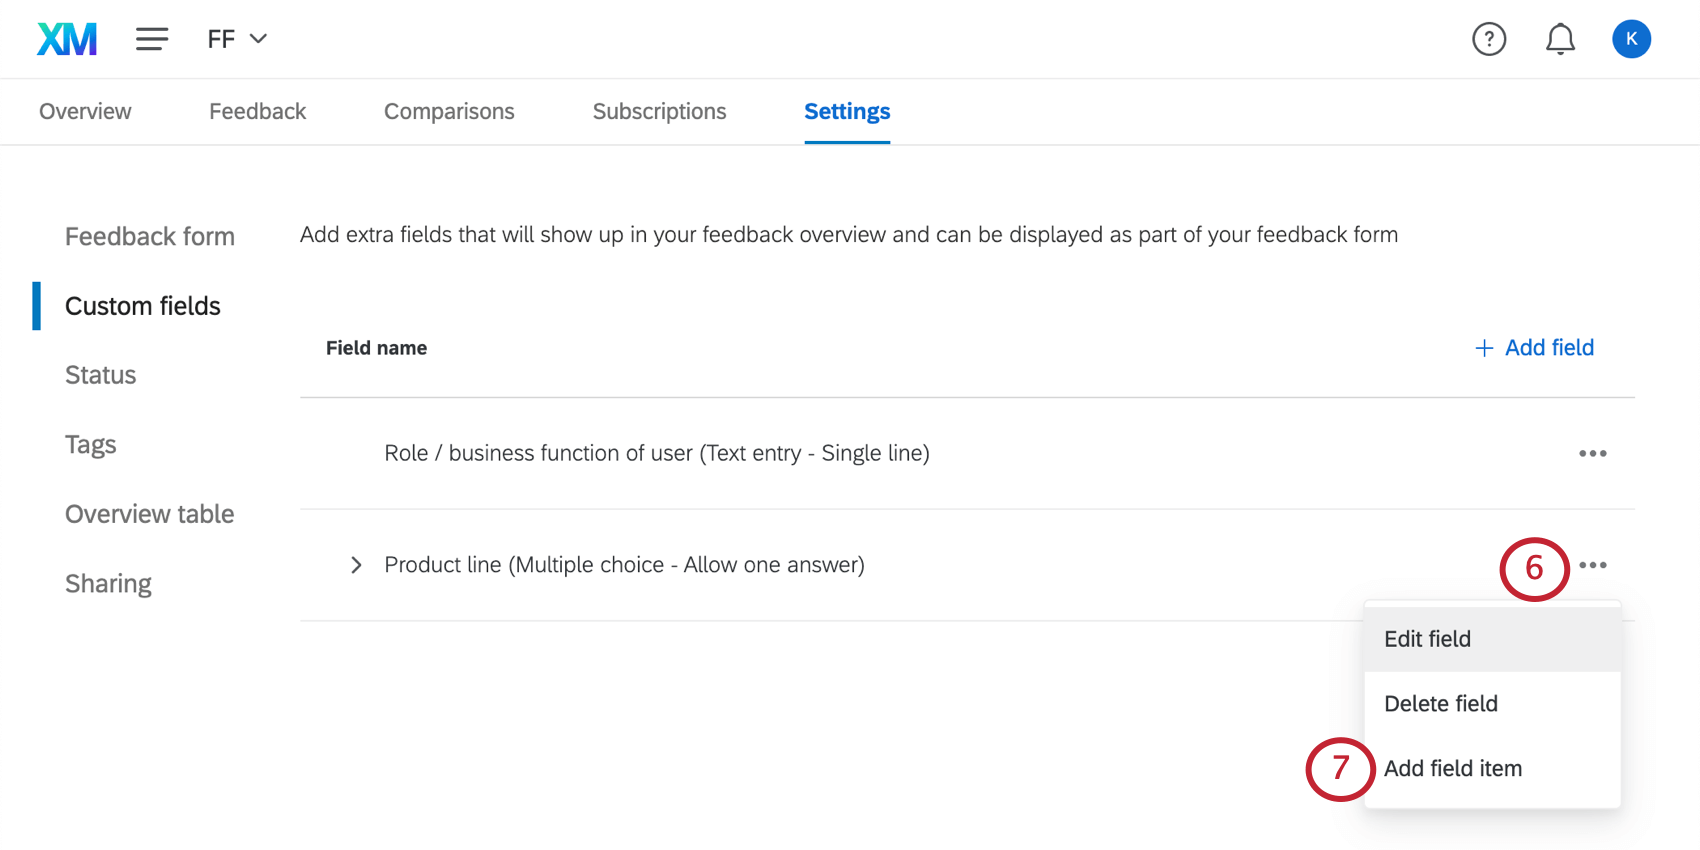
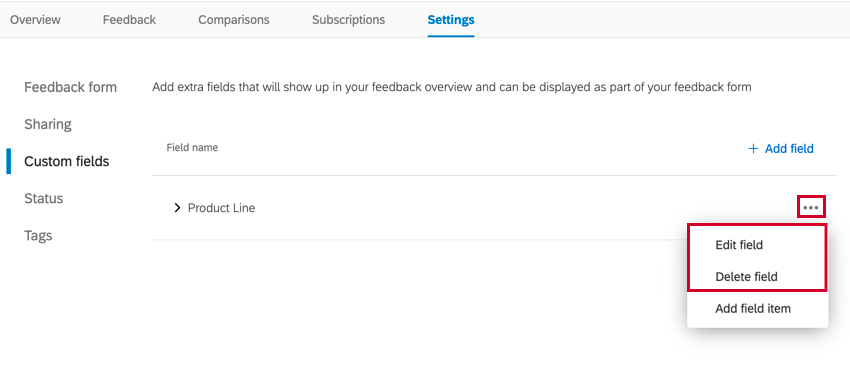
Editing & Deleting Custom Fields
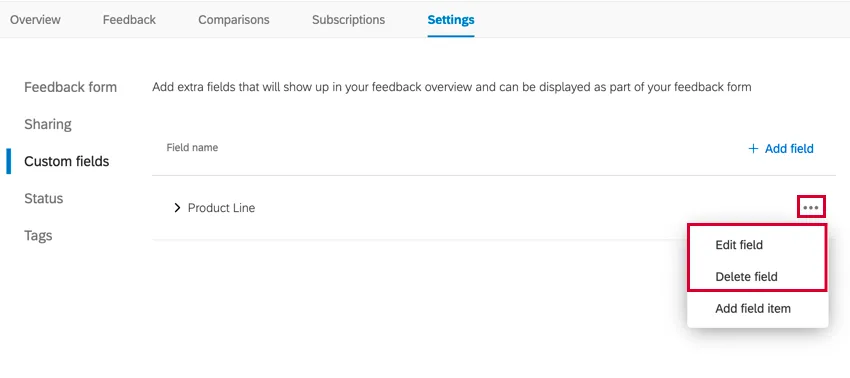
To edit or delete a custom field, click the menu icon next to the field, and then select your desired option.
Qtip: When editing a field, you cannot edit the field type (i.e. switch it from single select to multi select or vice versa). You may only edit the field’s name.
Warning: When deleting a field, the field and all of its items will be deleted from all requests in the project. This action is irreversible. Proceed with caution!
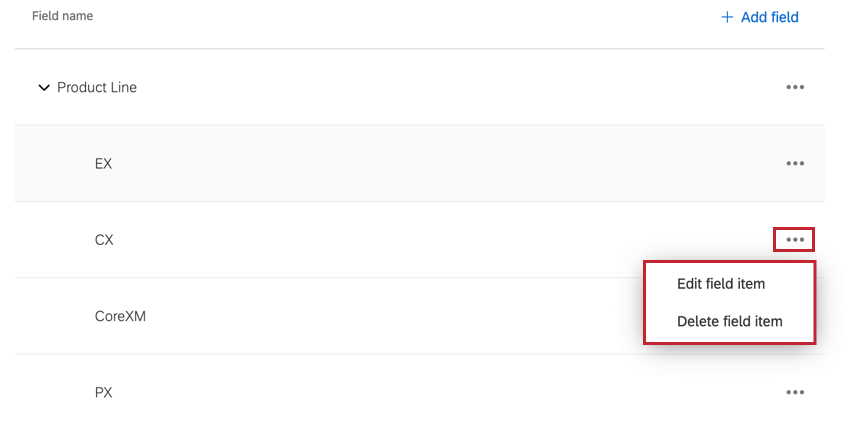
You may also edit and delete individual field items. To delete or edit an item, click the menu icon next to the item, and select your desired option.

Qtip: Items are nested under their parent field. If you don’t see your field items, make sure that your field isn’t minimized by clicking the arrow next to the field name.

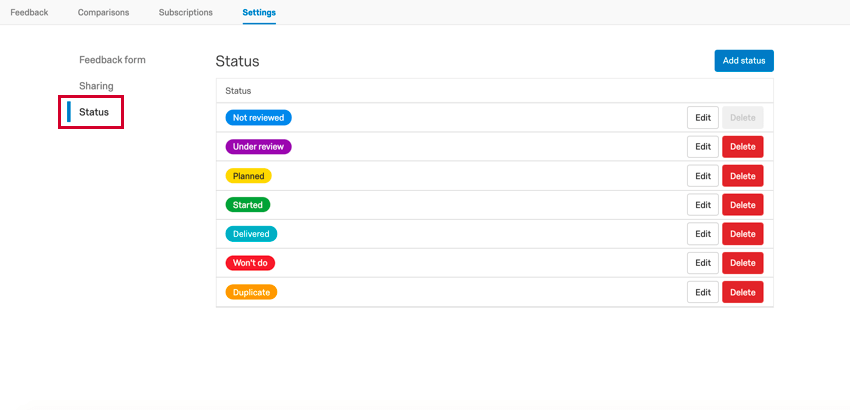
Status
The Status section allows you to configure the statuses that can be applied to feedback requests. Statuses are used to show progress made on feedback, such as marking requests as Under Review, Planned, and Delivered. You can create and delete custom statuses as well as modify any existing statuses.

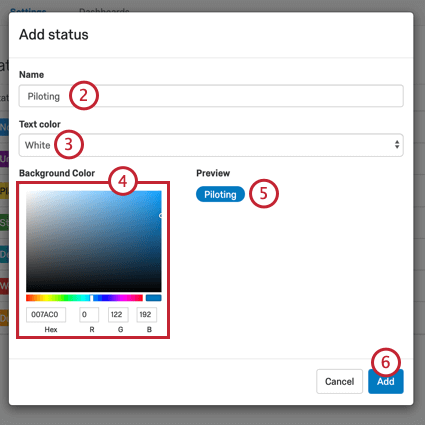
To create a new status:
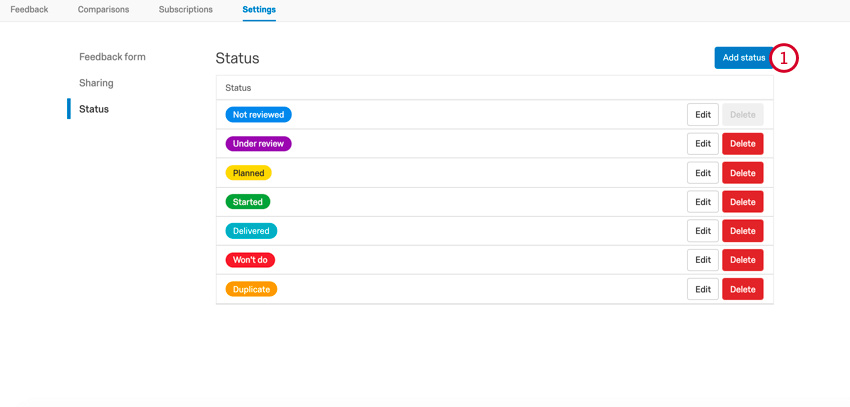
Editing & Deleting Statuses
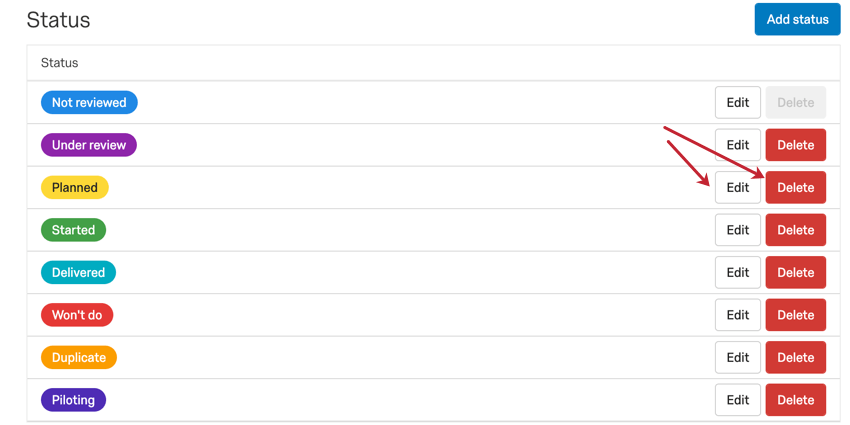
To edit an existing status, click the Edit button next to the status. Click the Delete button to delete an existing status.

Qtip: You cannot delete the default status, but you can edit it. Above, the default status is Not reviewed. This status will be applied to all new feedback requests.
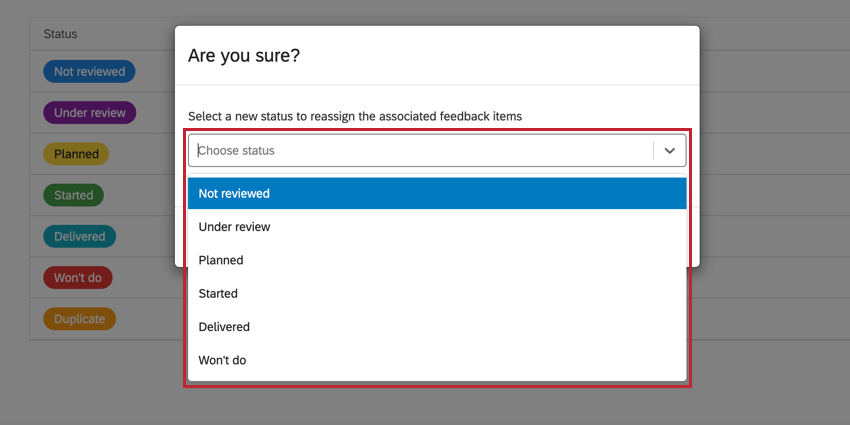
After clicking Delete, you’ll need to assign a new status to any feedback requests that have the status you’re deleting. Use the dropdown menu to choose a status. Note that once a status is deleted, it is irretrievable.

Tags
The Tags section contains all of the tags that users have added to feedback requests in your project. From this tab, you can delete tags from your project.
Qtip: To create tags, navigate to any feedback ticket and click Add in the Tags section. More information can be found on the Managing Feedback page.
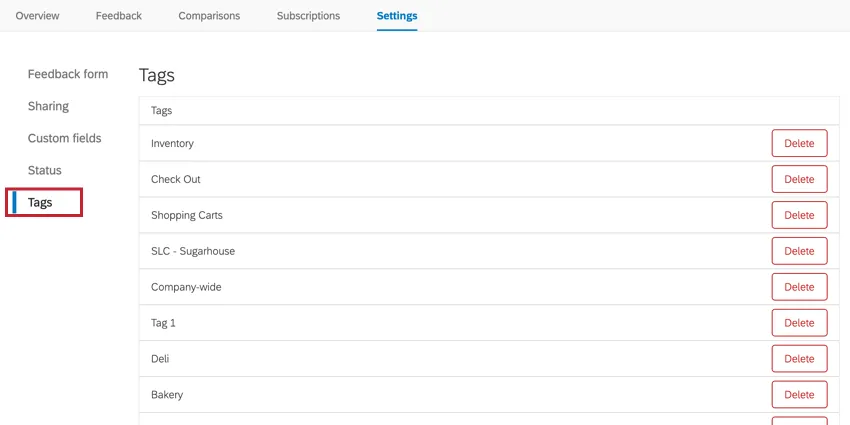
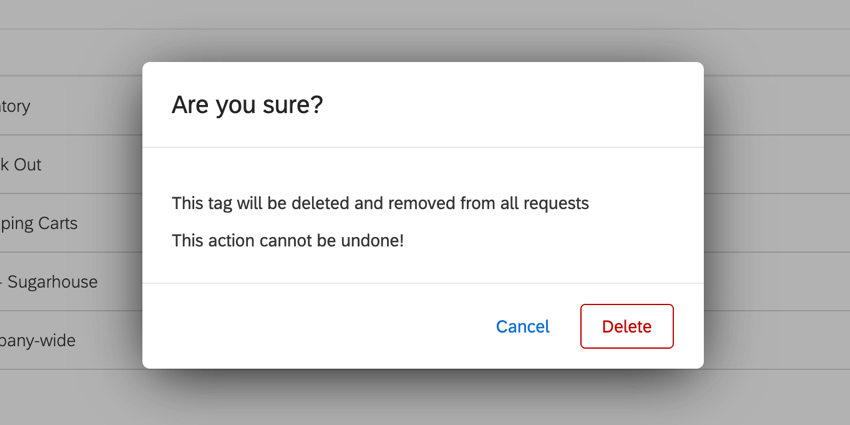
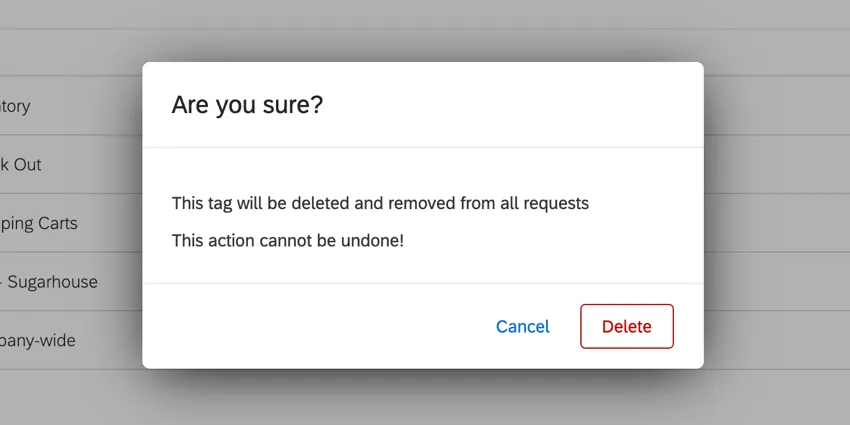
To delete a tag, click Delete next to the tag you want to remove. You’ll be asked to confirm your decision. Proceed with caution, as deleted tags are removed from all feedback requests, and this action is irreversible!
That's great! Thank you for your feedback!
Thank you for your feedback!