-

Qualtrics Platform -

Customer Journey Optimizer -

XM Discover -

Qualtrics Social Connect
Setting Up Dashboard Viewer
About Setting Up Dashboard Viewer
The Dashboard Viewer app provides a standalone workspace for dashboard users to view and engage with the BX, DX, and CX dashboards they have access to. Dashboard managers can configure the app, customize settings, and manage viewers so that dashboard users have a simplified and efficient experience.
Dashboard Viewer can only be configured and activated by users with the Manage Dashboard Viewer App permission enabled. Brand Administrators have this enabled by default. Once it is activated, all users with the Use Dashboard Viewer App permission have access to this app. See Permissions for more information.
For more information on configuring apps, see App Configuration Overview.
Configuring the Dashboard Viewer App
Dashboard Viewer must be configured and activated before users can have access to it. As you make changes, the preview on the right will update dynamically to display those choices. After activation, any changes to the dashboard configuration will need to be published before those changes are activated in users’ accounts.
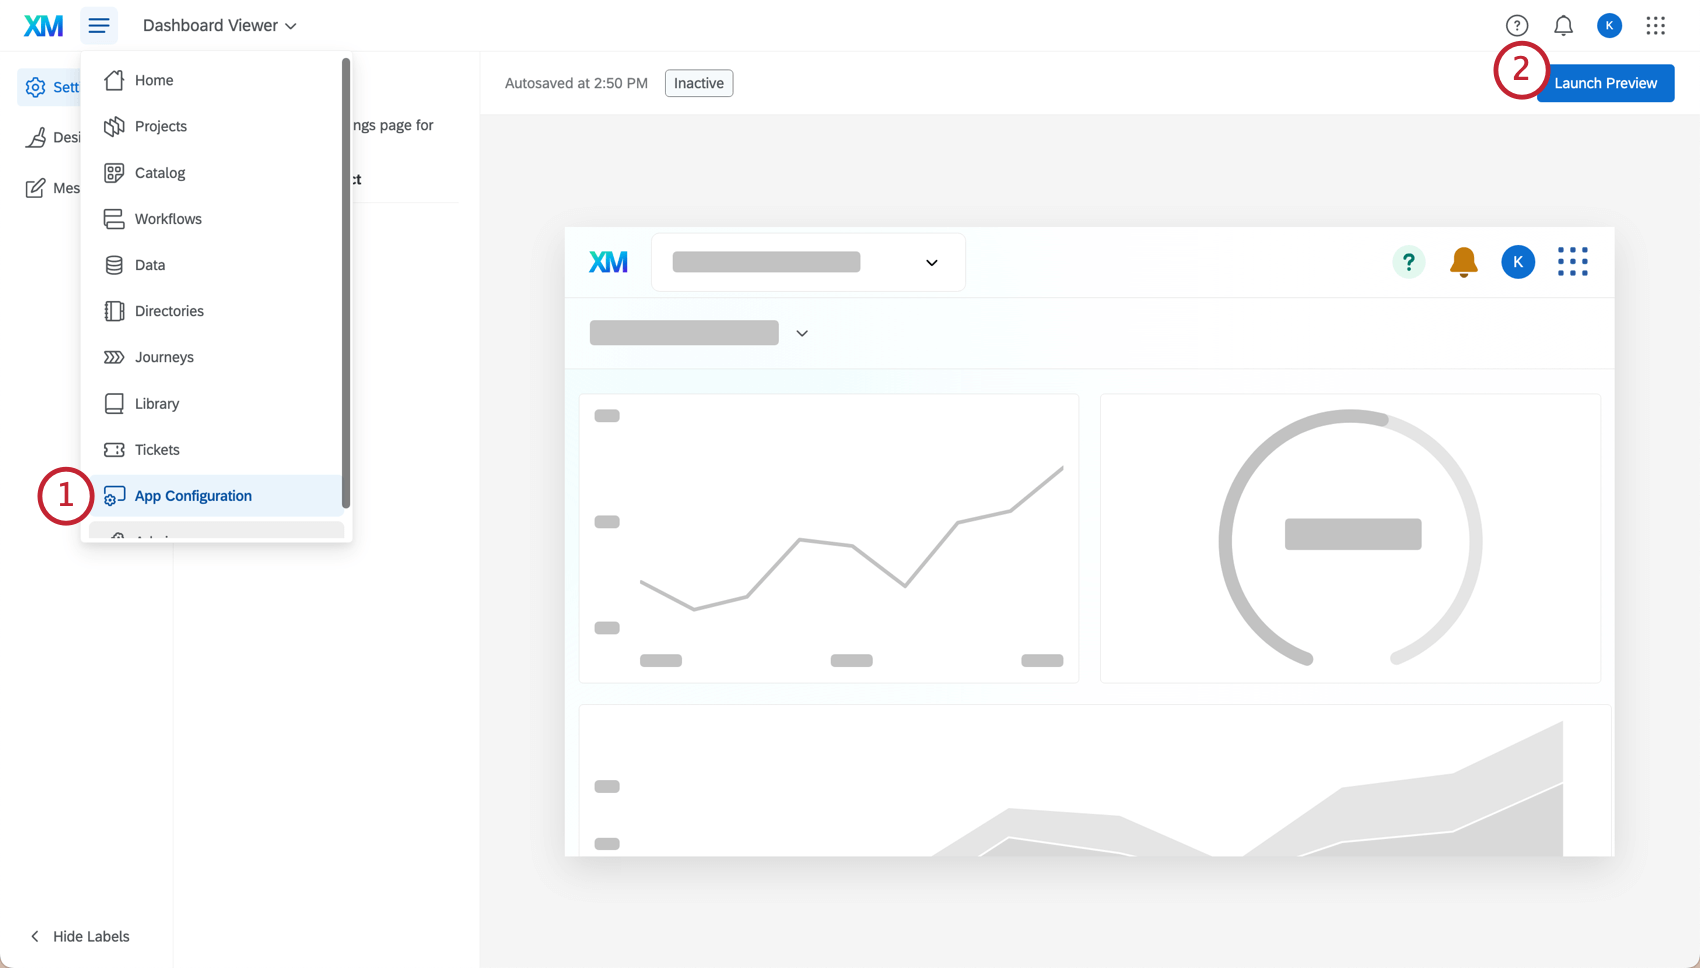
- Navigate to App Configuration in the menu.
 Qtip: If App Configuration isn’t an option, be sure that your Manage Dashboard Viewer App permission is enabled. If you are a Brand Administrator, this will be enabled by default.
- Click Launch Preview. Launching the preview allows anyone with the Manage Dashboard Viewer App to test the app before publishing changes to dashboard users.
- Edit the app’s Settings, if you’d like.
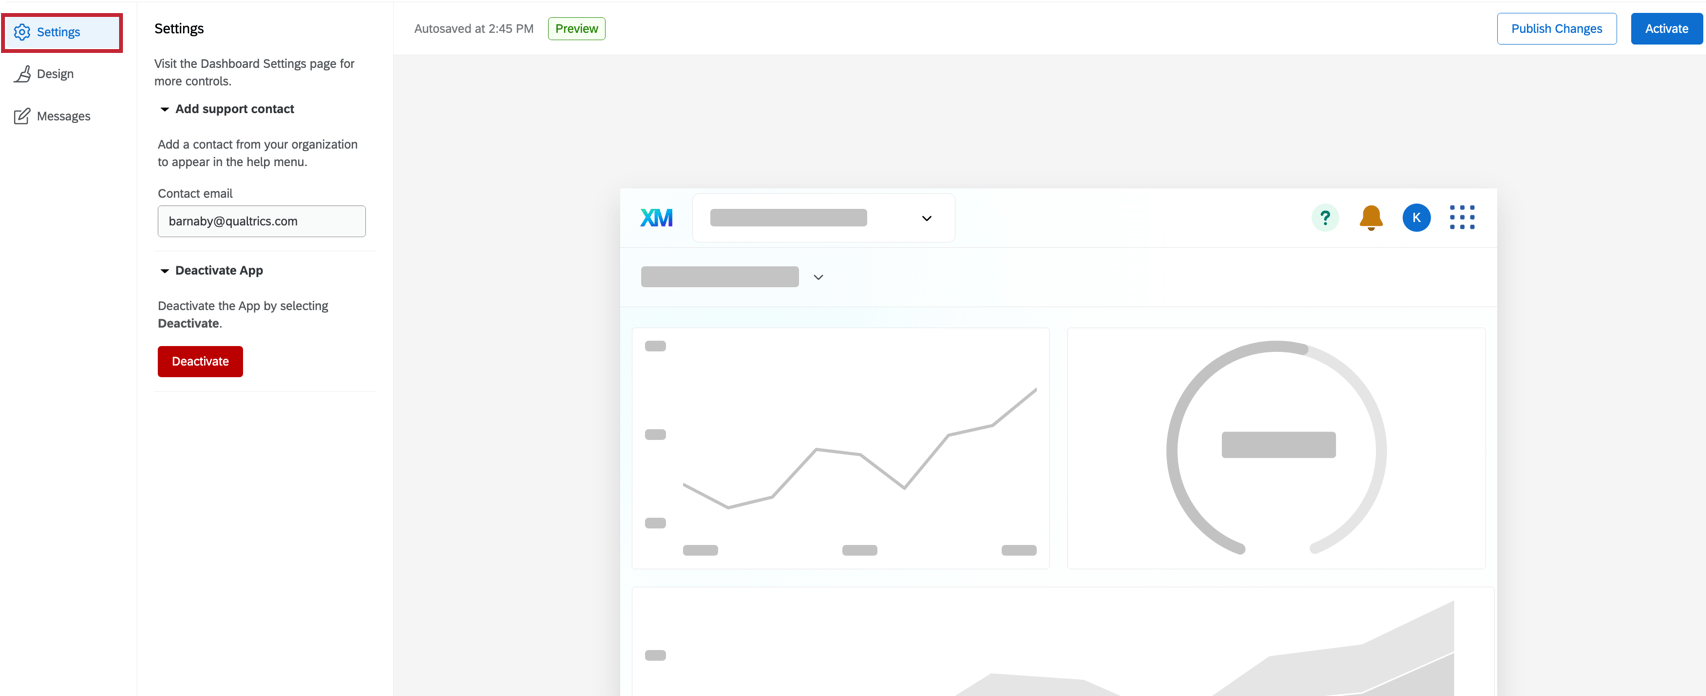
- Add support contact: Add the contact email that will appear in the help menu, if you’d like. This is optional and allows users to reach out to a contact for support.
- Deactivate App: You can deactivate the app if you would like to remove access for all users.
- Edit the app’s Design to include a logo or custom color for the header.
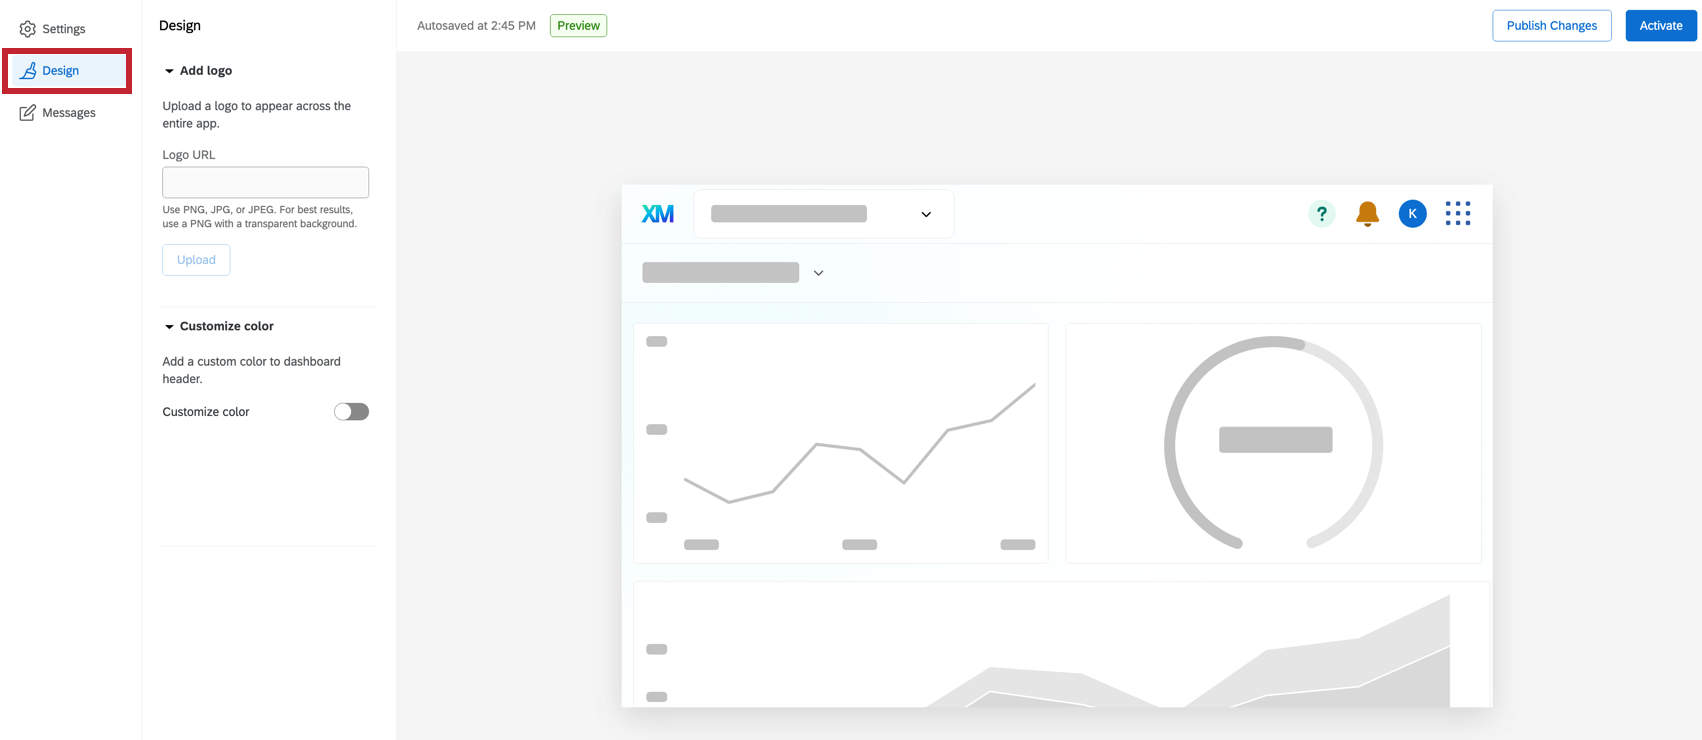
- Add logo: To add a logo to the dashboard, input the URL of the image to be shown in the app, then click Upload. This logo will appear in the top-left corner of the dashboard viewer app for your entire organization.
- Customize color: To change the color of the dashboard header, enable the customize color switch and then indicate which color you would like to change it to.
- Edit the app’s Message to display important information to viewers. Enable Set date/time for message to expire and indicate when the message should be removed.
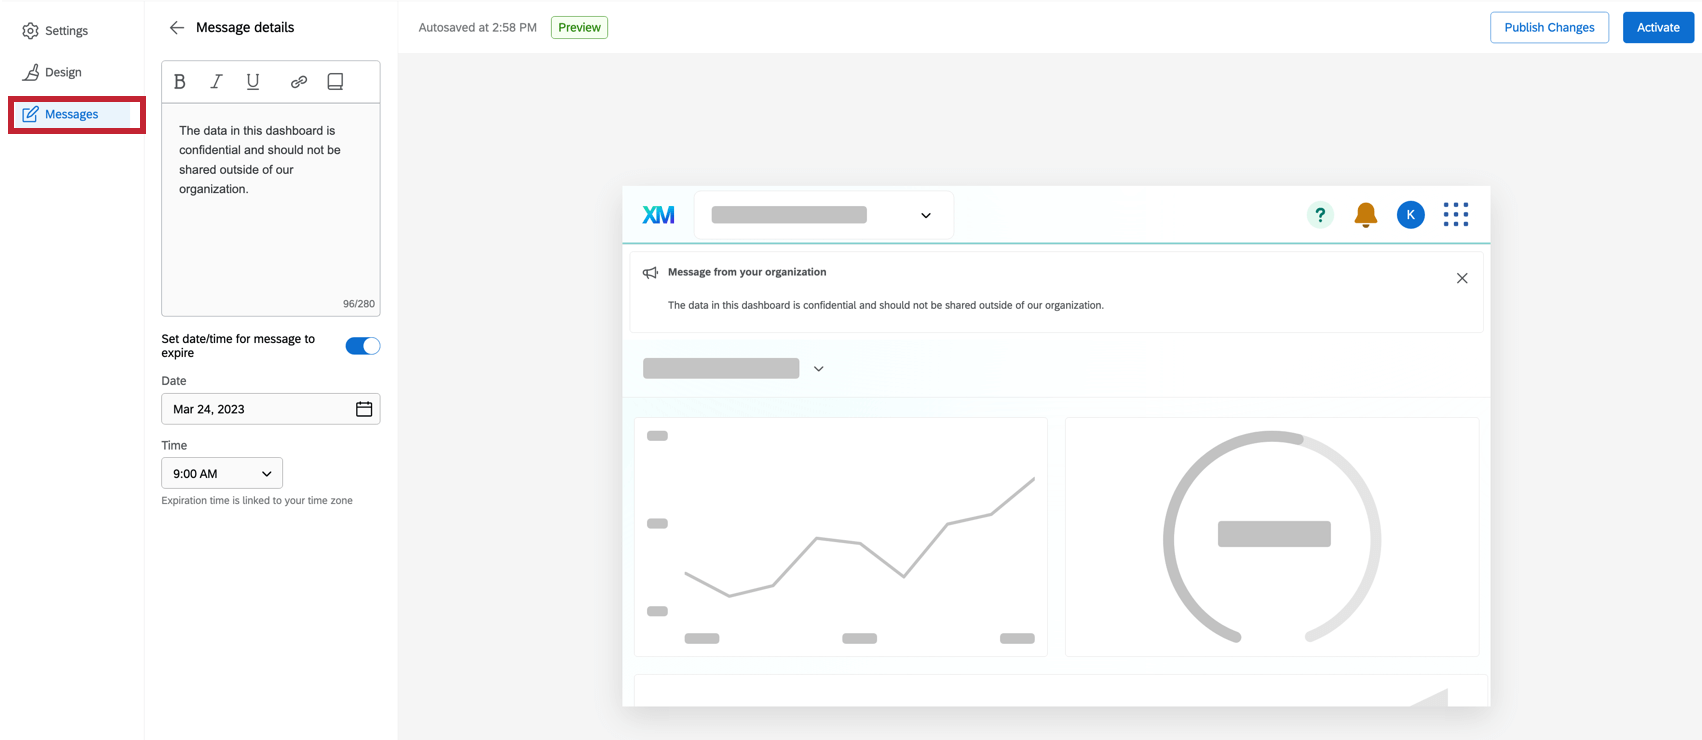
- Once you’re finished configuring the app, click Activate to give your whole organization access. You will still be able to make changes to the settings page.
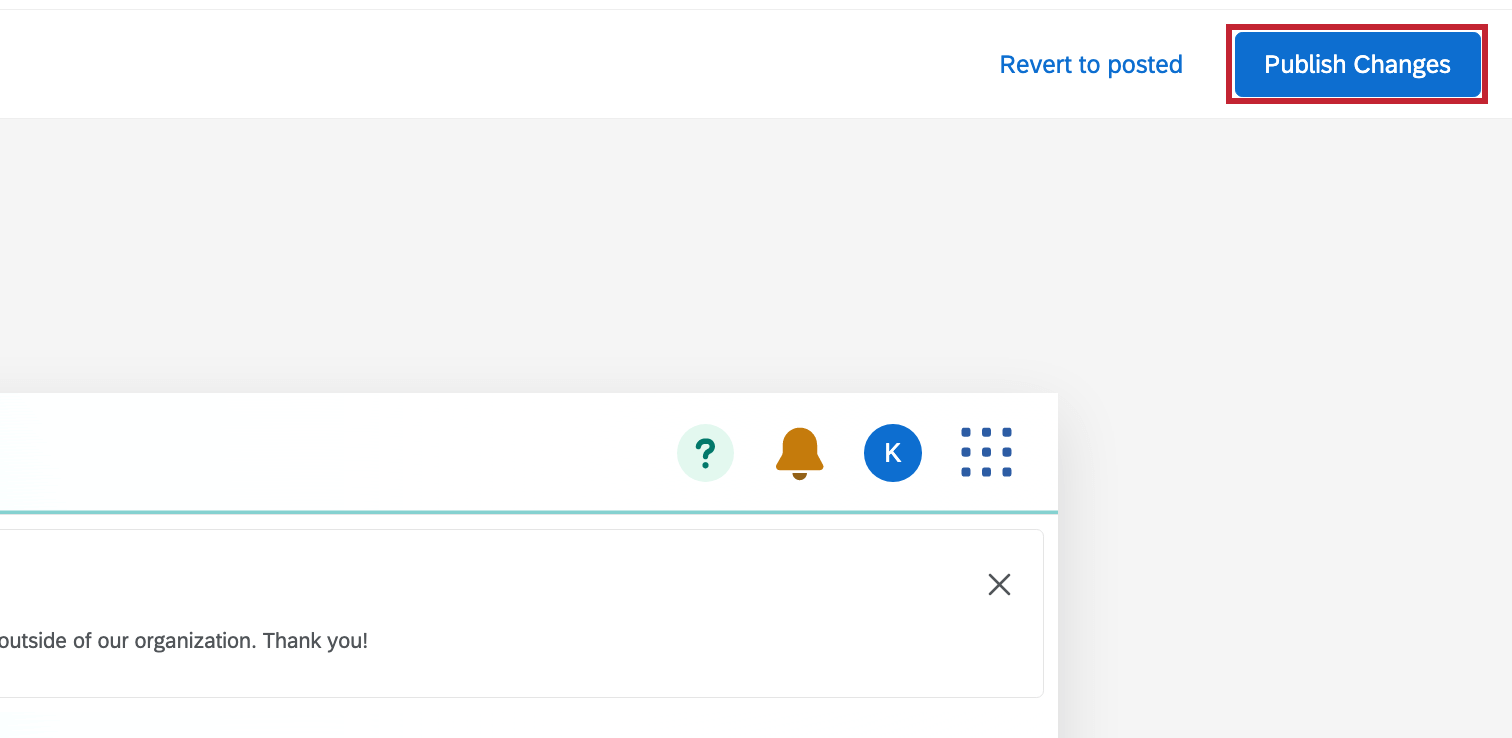
Qtip: If you make any changes to the app configuration after activating, be sure to Publish Changes in order to update the app for users. If you haven’t published the configuration yet, you will be prompted to Launch Preview.
Viewing Dashboard Viewer App Status
While configuring Dashboard Viewer, you can view the status in the top-left corner of the preview.
The available statuses are:
- Inactive: Dashboard Viewer is not activated. Select Launch Preview to begin activating it.
- Preview: A preview of Dashboard Viewer is life for administrators. Select Activate to roll it out to your whole organization.
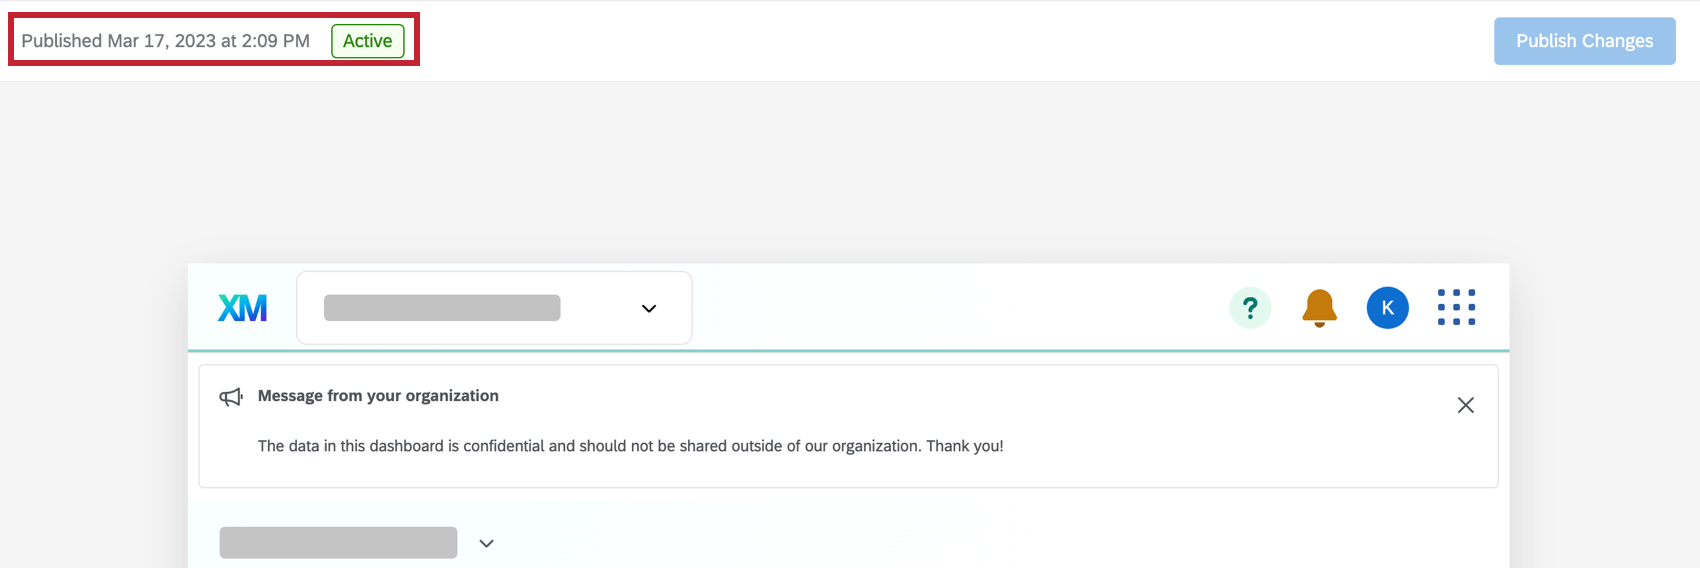
- Active: Dashboard Viewer is activated. Published changes will be visible to anyone with access.
Previewing Dashboard Viewer
Once you’ve configured Dashboard Viewer, you can enable a preview before it is available for your whole organization. Anyone with the Manage Dashboard Viewer App permission enabled will have access to this preview. See Previewing Apps for instructions for activating the preview.
Activating Dashboard Viewer
Once Dashboard Viewer has been configured and the preview has been activated, you can activate it for your whole organization. See Activating Apps for instructions for activating the app.
DEACTIVATING DASHBOARD VIEWER
See Deactivating Apps for information on deactivating Dashboard Viewer.
Permissions
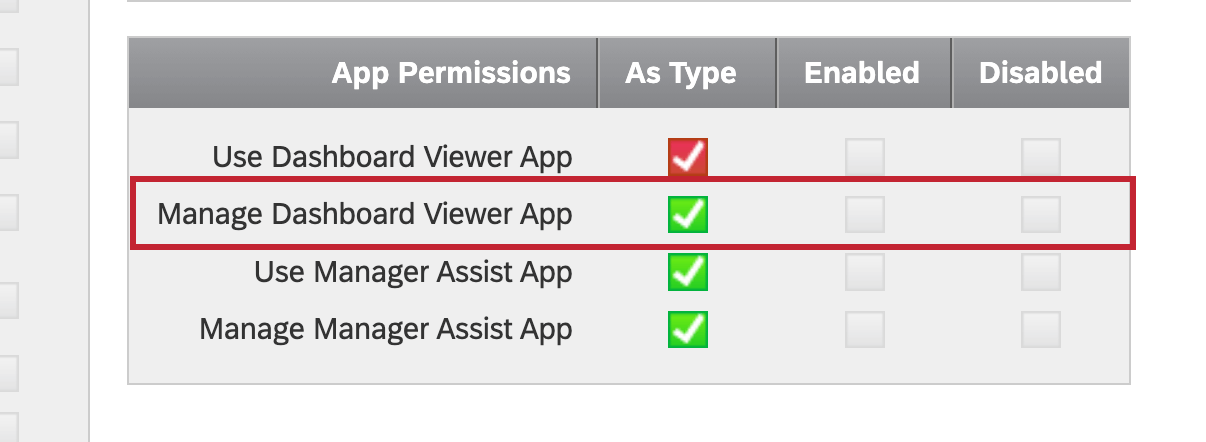
There are 2 permissions that control who has access to Dashboard Viewer. You can use these permissions to restrict who can view and edit Dashboard Viewer.
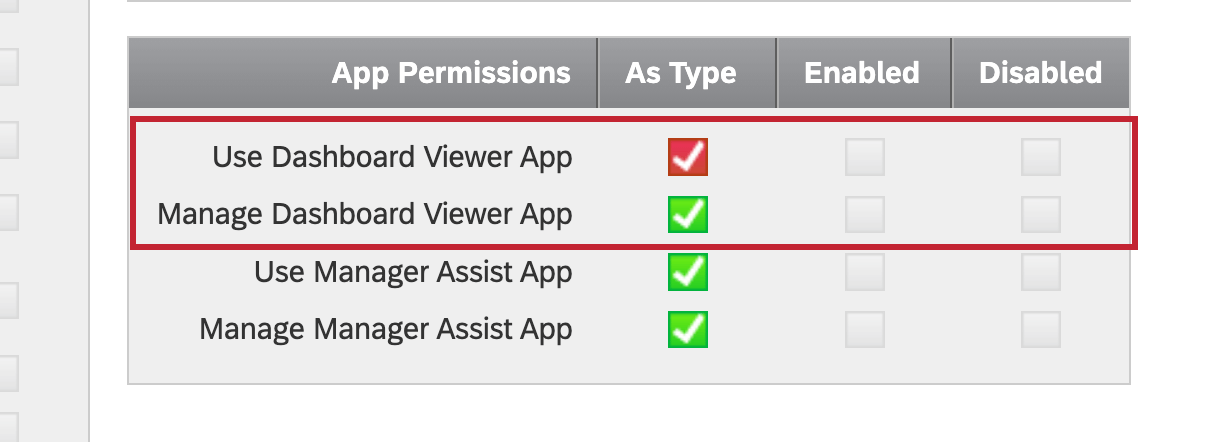
- Use Dashboard Viewer App: This permission allows users to use Dashboard Viewer once it is fully activated. This is enabled by default for Brand Administrators.
Qtip: Users with only this permission enabled will not be able to see the Dashboard Viewer preview.
- Manage Dashboard Viewer App: This permission allows users to configure, preview, and activate Dashboard Viewer. This is enabled by default for Brand Administrators.
USER TYPES
To enable Dashboard Viewer permissions for specific users types, configure permissions through the User Types settings in Admin.
- Select Admin from the global navigation menu.
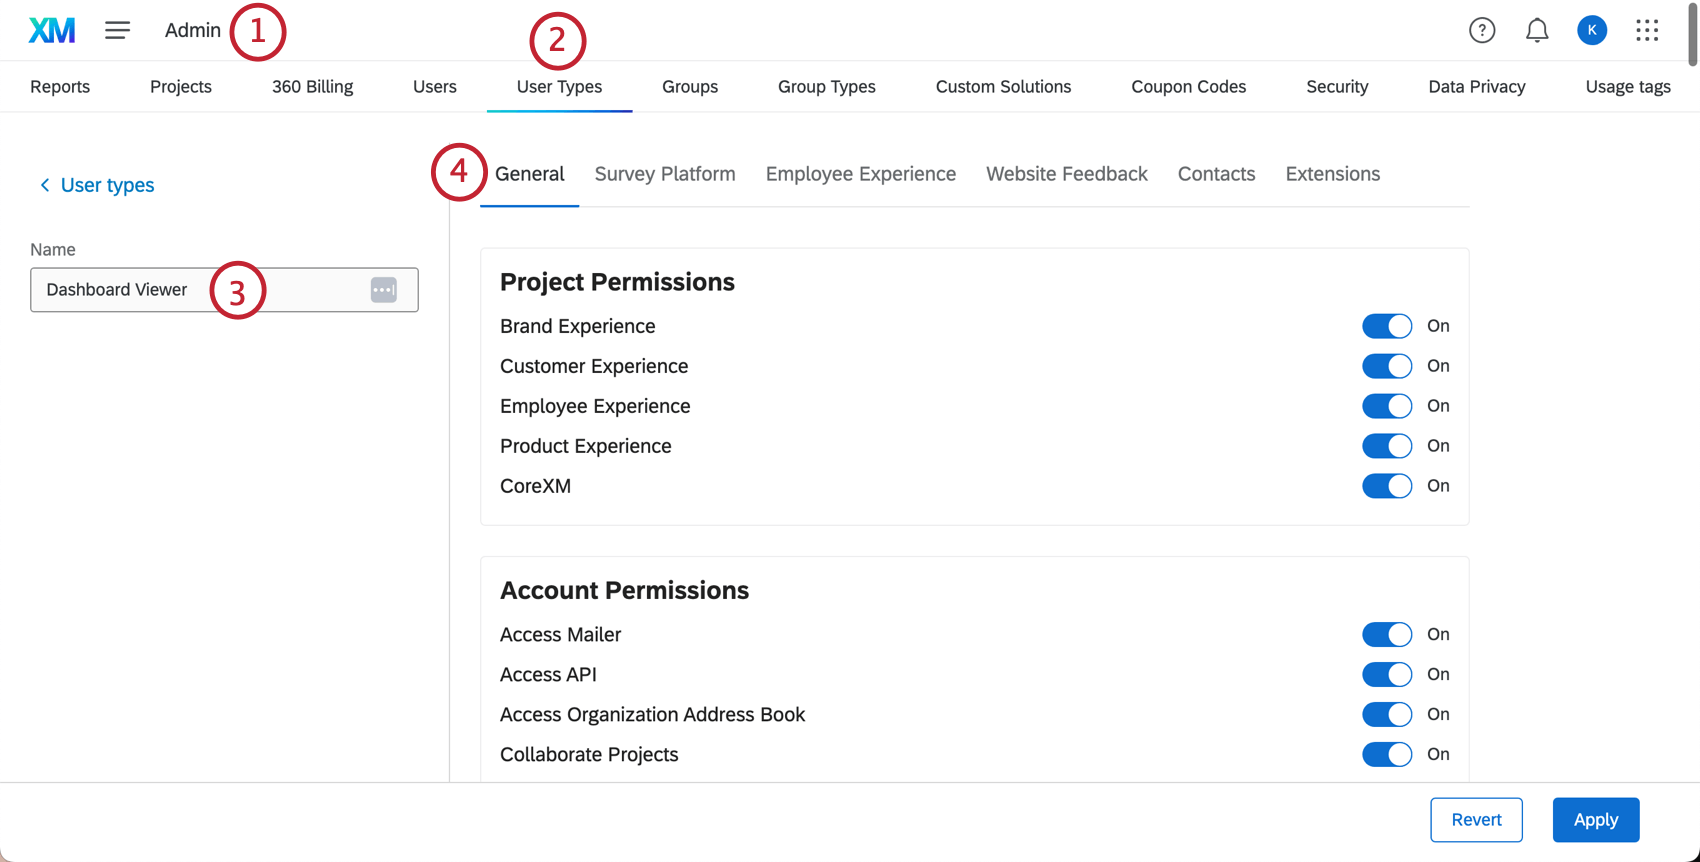
- Click on the User Types tab.
- Select an existing user type, or create a new one.
Attention: Dashboard Viewer permissions can only be enabled and disabled for custom user types, not default user types.
- Click on the General permissions tab.
- Scroll to the AppPermissions section.

- Configure the dashboard viewer permissions you would like to give this user type. See the section above for more information on their utility.
- Click Apply.