
Data to Collect (DXA)
What's on this page
About Configuring Data to Collect
Session replay reconstructs how a user experiences your website. As part of this analysis, you’ll want to make sure your data is set up to your liking. For example, you may want to group certain pages, capture specific visitor details, or create custom events that will later enhance your analyses.
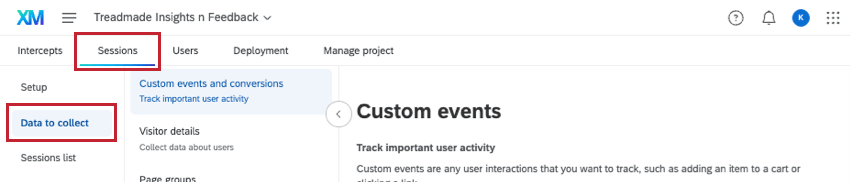
To get started, go to Sessions, then Data to Collect.
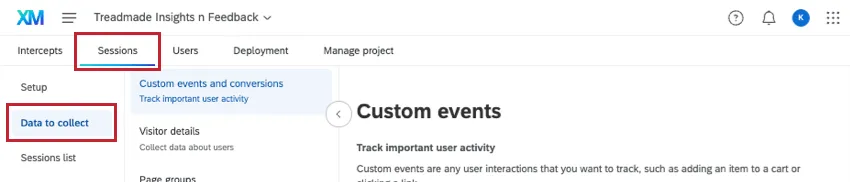
There are 3 sections in Data to collect: Custom event and conversions, Visitor details, and Page tags.
Attention: Make sure you save your changes in each section before moving to the next section, or you will lose your changes!
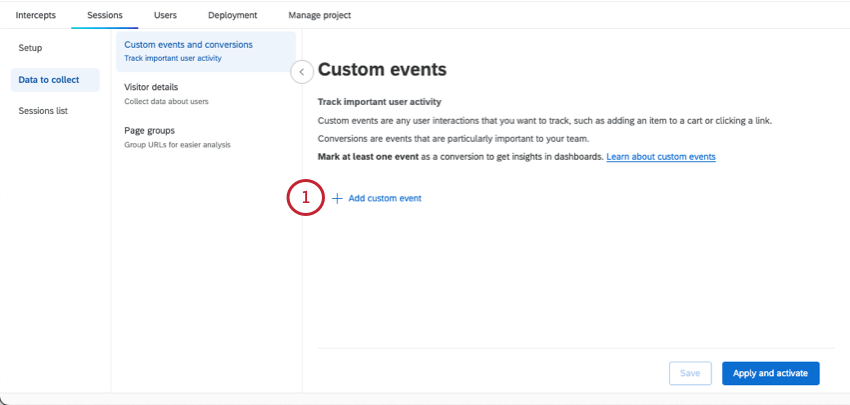
Custom Events
Custom events capture the number of times a visitor interacts on your website for specific web events that you want to track, such as adding an item to a cart, clicking a link, or completing a purchase. These events allow you to gather data on how visitors are engaging, or not engaging, with your website to further enrich your session replay data. Unlike visitor details, this information is not static. You can add custom events within the Custom events section of Data to collect.
Qtip: You can have up to 30 custom events per project.
Adding a Custom Event
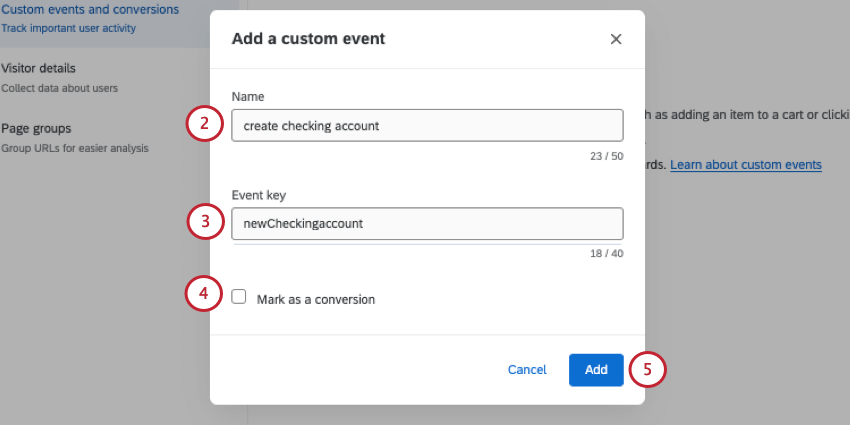
Attention: You must mark at least 1 event as a conversion to create a digital opportunities widget in your dashboard.
Qtip: Verify your event key with your development team to ensure they are correct.
Attention: Your development team will need to add the tracking tag name and tracking code tag ID to your website. These should match the event name and event key you entered within Qualtrics.
Attention: Once you’ve defined your event, you will need to trigger, or “emit,” that event on your website. There are a variety of ways to do so; see Triggering Custom Events for Session Replay.
Conversions
Marking a custom event as a conversion lets you track if your users converted during their visit to your website. This allows you to get insights about the business impact of problems on your website, by quantifying the potential revenue that can be recovered by resolving frustrating user experiences.
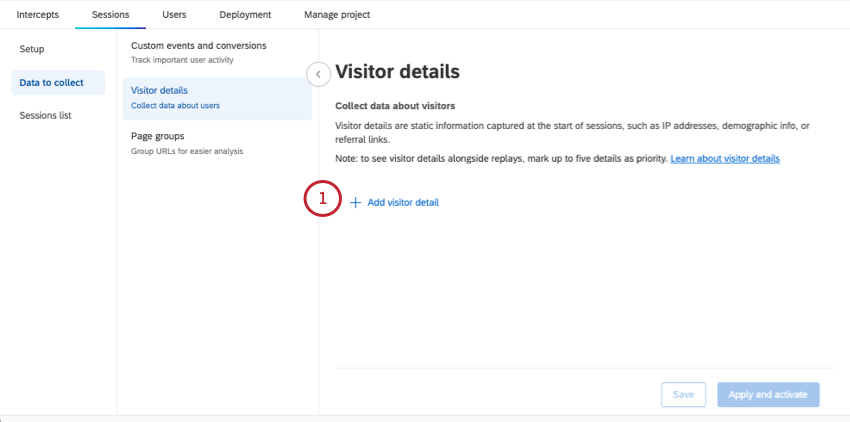
Visitor Details
Visitor details are additional static information you want to capture about website visitors, such as IP address or demographic info. Details are captured at the beginning of a session and don’t involve visitor interactions on your site. You can add visitor details within the Visitor details section of Data to collect.
Qtip: You can add a maximum of 30 visitor details within each Website / App Insights project.
Adding Visitor Details
Attention: Make sure any visitor details you add are available on your website before the code snippet runs.
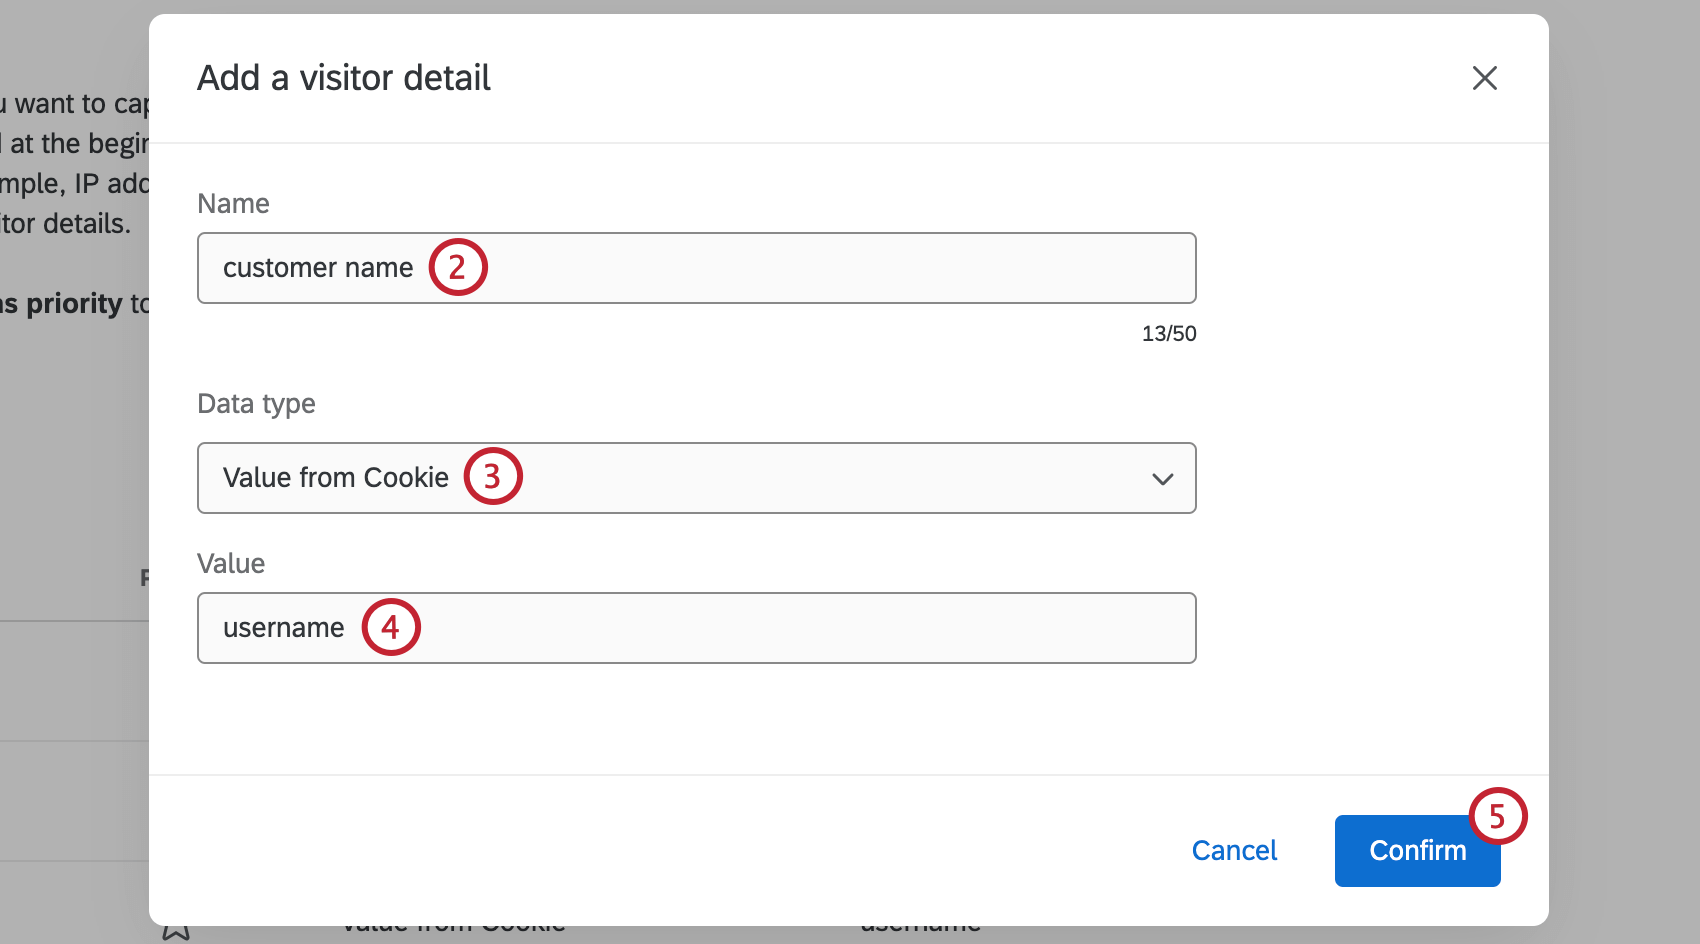
- Static: The value for the visitor detail is manually entered and will not change across sessions or users.
- From Cookie: The value for this visitor detail comes from a website cookie.
- From Javascript: The value for this visitor detail is coming from JavaScript code.
- IP Address: The value for this visitor detail is your customer’s IP address. This field is set automatically so you don’t have to provide a value. Attention: IP addresses are not masked or anonymized.

- Static: Enter the exact value that will be visible in the session recording.
- Value from Cookie: Enter the name of the cookie that will be searched for on the page.
- Value from Javascript: Enter the JS expression that will be searched for on the page.
- IP Address: This is set automatically and you don’t need to set a value.
Once you’ve created a visitor detail, you can click the 3 horizontal dots to the right and Rename or Delete the detail.
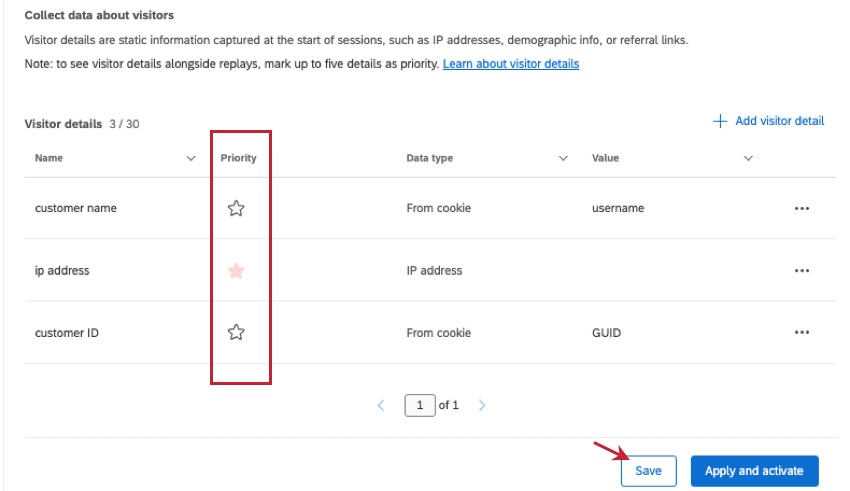
Marking Details as Priority
After adding visitor details, you can mark up to 5 visitor details as priority to display those details when viewing session replays.
Click the star next to each visitor detail you want to mark as a priority. Make sure to save or apply changes when you’re done to save your edits.
Qtip: Using the header, you can sort by name of visitor detail, data type, or value.
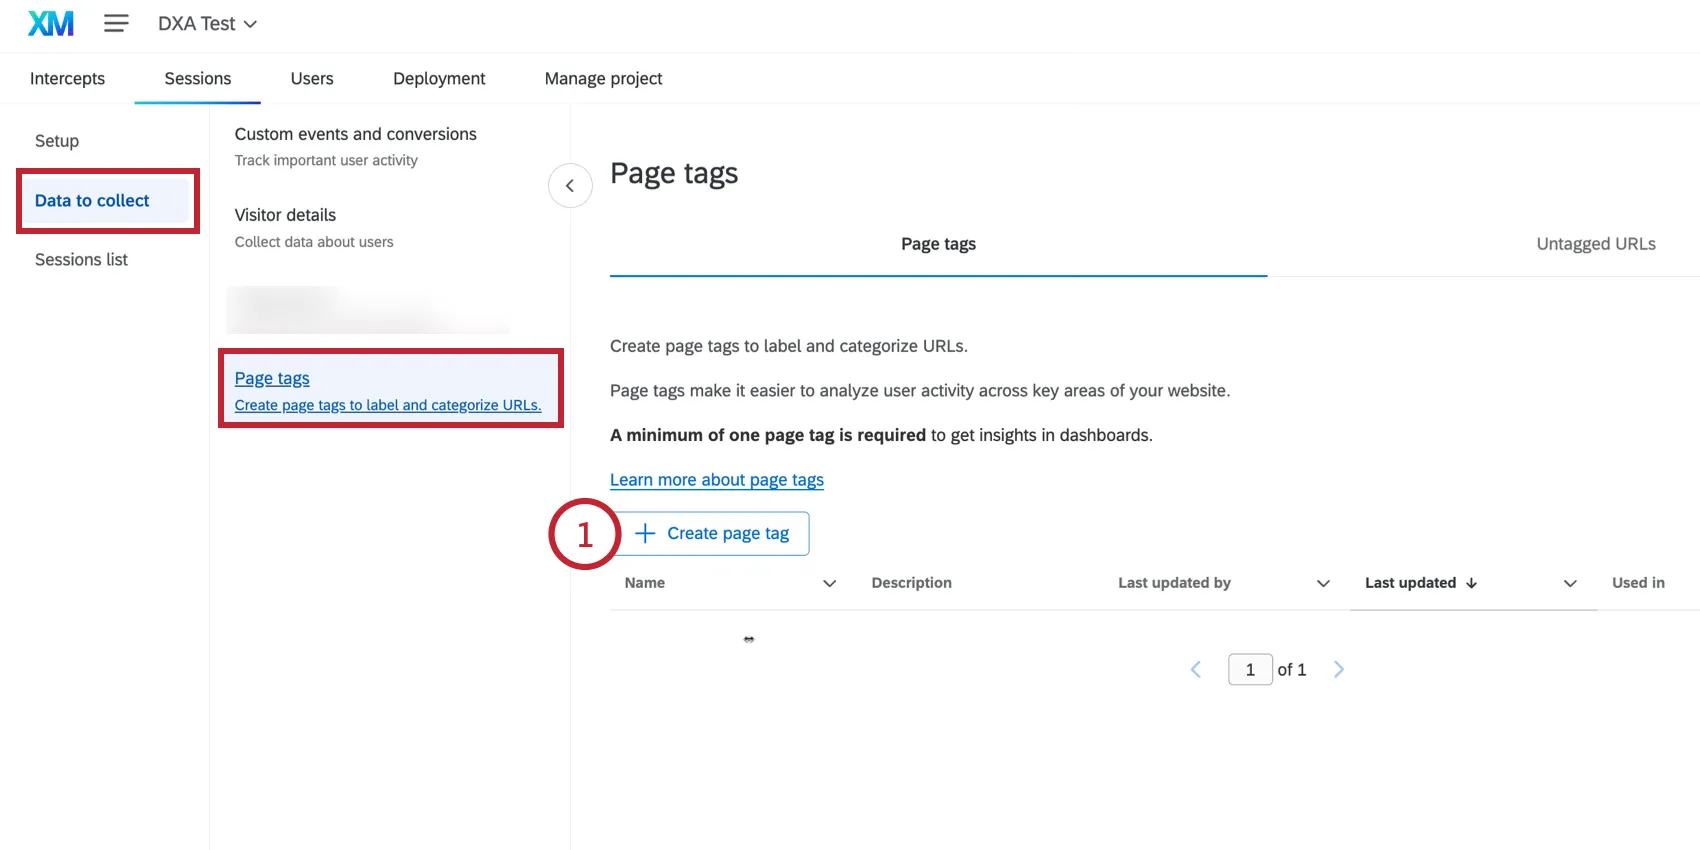
Page Tags
Qtip: This feature replaced “page groups,” offering the same base functionality with notable improvements, including the ability to create heatmaps and funnels based on page tags.
Page tags are a collection of individual URLs on your website that fall into 1 page type, such as the individual pages that make up a checkout experience. You can create page tags in the Page tags section of Data to collect tab in your DXA project. You can then display data related to the page tags in a dashboard or use them inside Digital Assist. Page tags are evaluated against all URLs in a recorded session.
Qtip: A minimum of 1 page tag is required to use the digital opportunities widget in your dashboard.
Qtip: It is possible for sessions to have more than 1 page tag.
Creating a Page Tag
Click Create page tag.
Name the page tag.

If desired, add a description for the tag. This is optional.
Choose how you’d like your page tagging rules to be evaluated:
- Any of the following is true: If you have multiple rules, only 1 rule must be true for the page to be tagged.
- All of the following is true: If you have multiple rules, all rules must be true for the page to be tagged.
Select a condition for URLs that will be included in the page tag.
Attention: All URLs that match the conditions will be tagged with the page tag. When previewing the URLs that meet the page tag criteria, all URLs containing "?" and "#" will be excluded in the preview. However, these pages will still be tagged with the page tag, and they will appear when you create a heatmap or filter session replays by the tag.
- URL is exactly: Tag a specific URL on your site.
- URL starts with: Tag a set of URLs that all begin with the same string (for example, “qualtrics.com/support/” for all pages on the Qualtrics support site).
- URL contains: Tag a set of URLs that all contain the same string (for example, “support” for all pages on the Qualtrics support site).
- URL ends with: Tag a set of URLs that all end with the same string (for example, “settings” for any support pages that discuss settings).
Regex: A sequence of symbols and characters expressing a string or pattern to be searched for within a URL. For more information on regex, see RegexOne’s documentation.
Attention: Custom coding features are provided as-is and require programming knowledge to implement. Qualtrics Support does not offer assistance or consultation on custom coding. You can always try asking our community of dedicated users instead. If you’d like to know more about our custom coding services, please contact your Qualtrics Account Executive.
- URL does not contain: Tag a set of pages that do not contain a string (for example, “support” for all pages on the Qualtrics website except the support site).
Enter a value for your condition. All URLs that meet the conditions for this value will be included in the page tag.
To add multiple conditions, click Insert condition below.
Click on Preview matching URLs to view the URLs that meet the page tag rules.
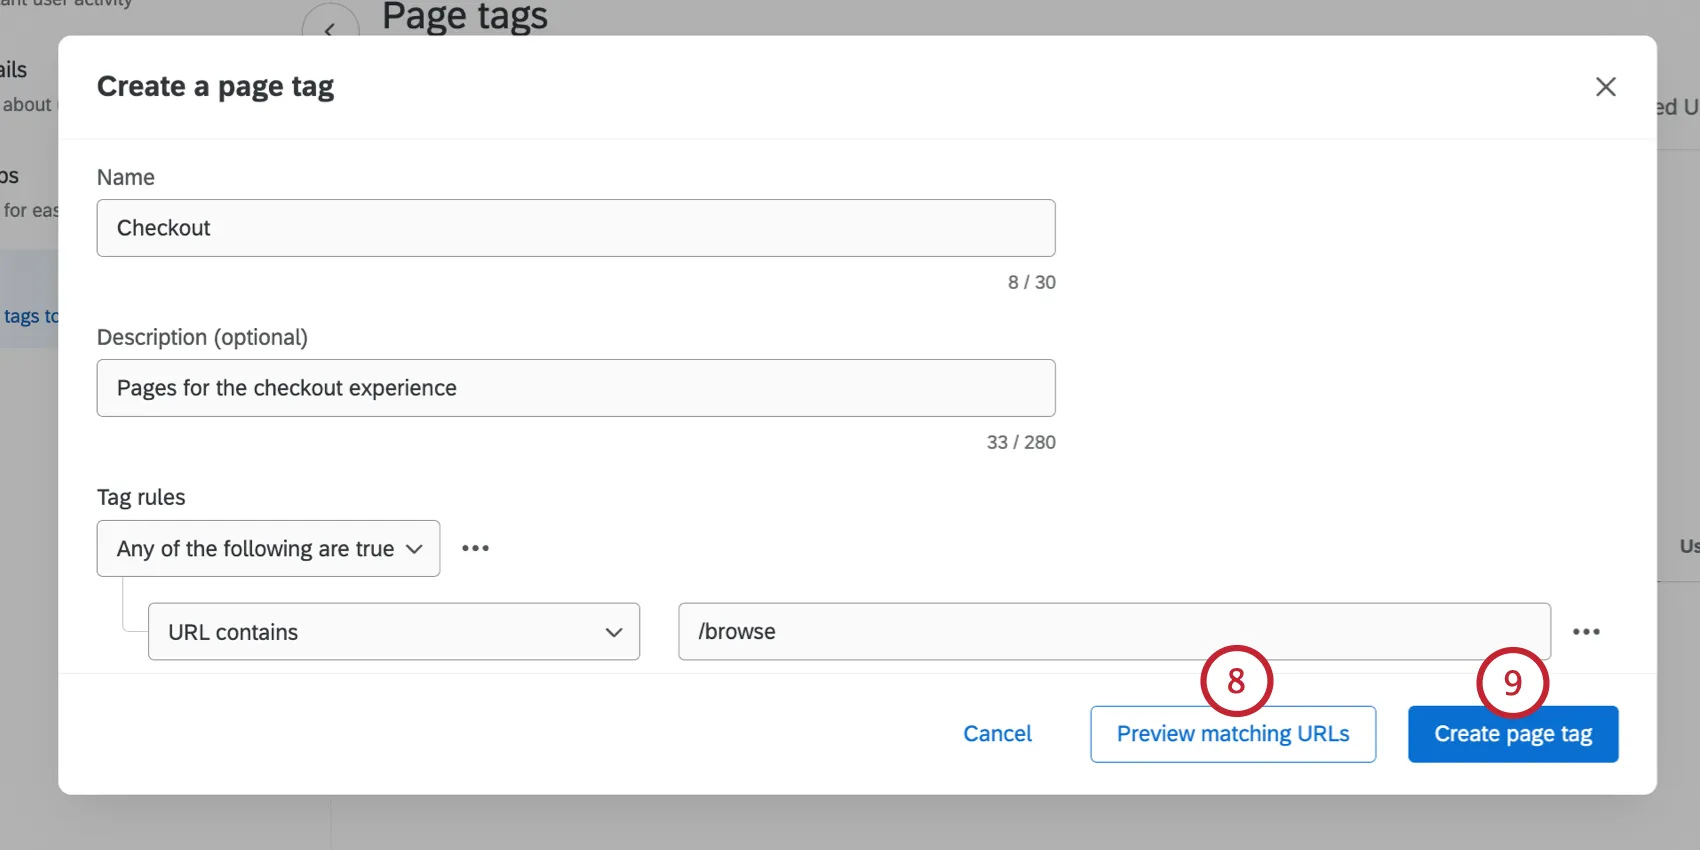
Click Create page tag.
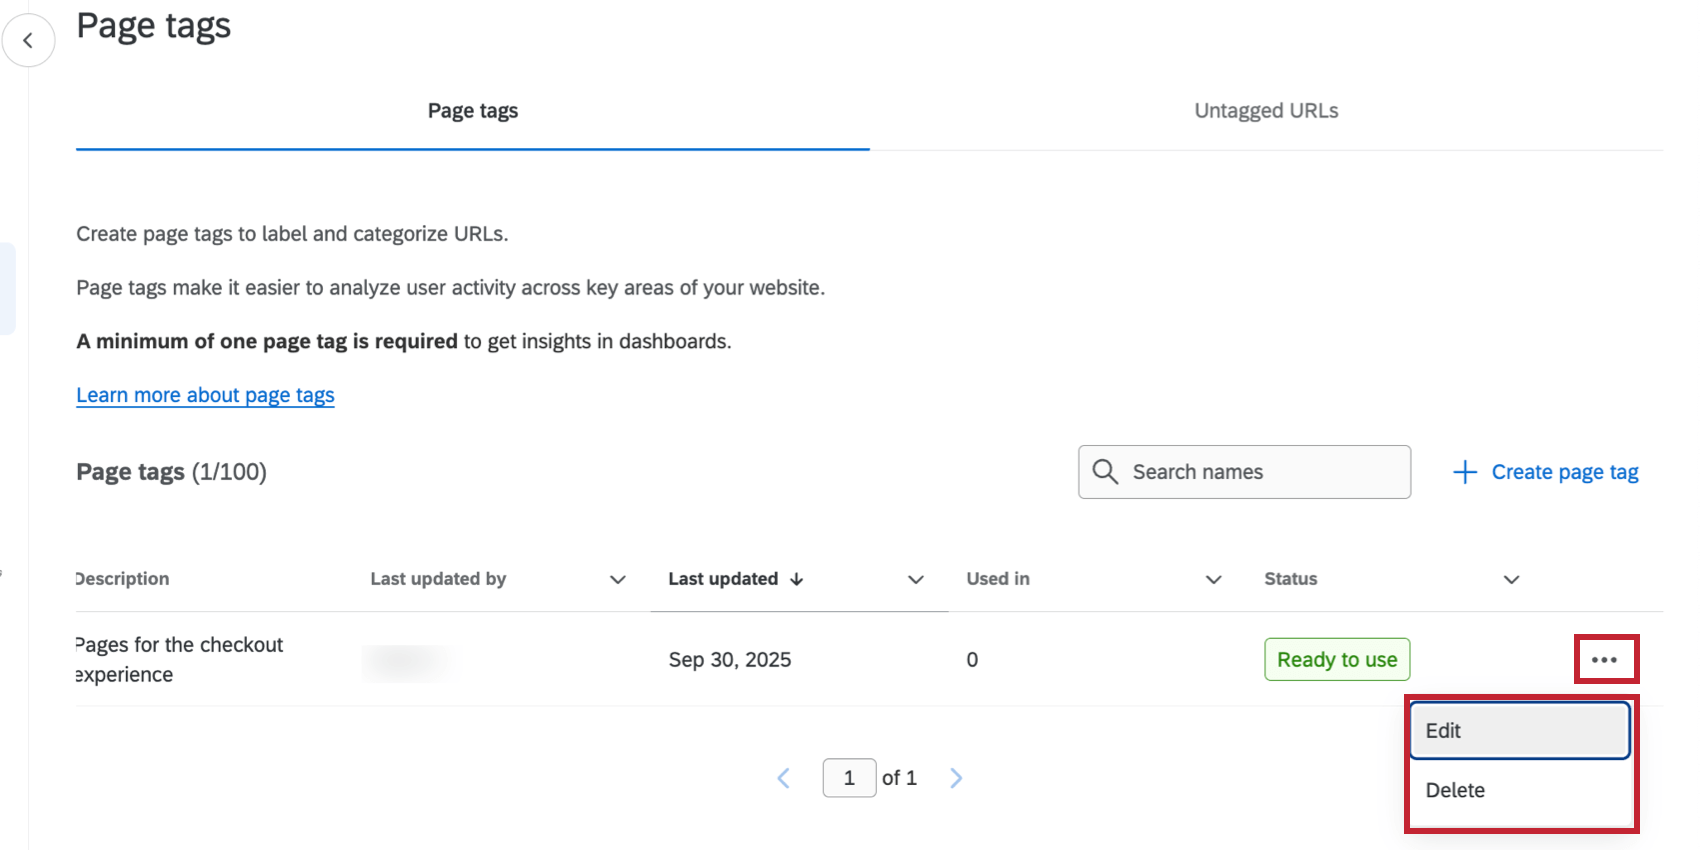
Page Tag Options
After creating a page tag, click the three dot menu to access the following options:
- Edit: Edit the page tag (name, description, and tag rules).
- Delete: Delete the page tag.
Qtip: If you edit or delete a page tag, it will still be present in existing sessions that have already been captured. Only newly collected sessions will contain the updated page tags.
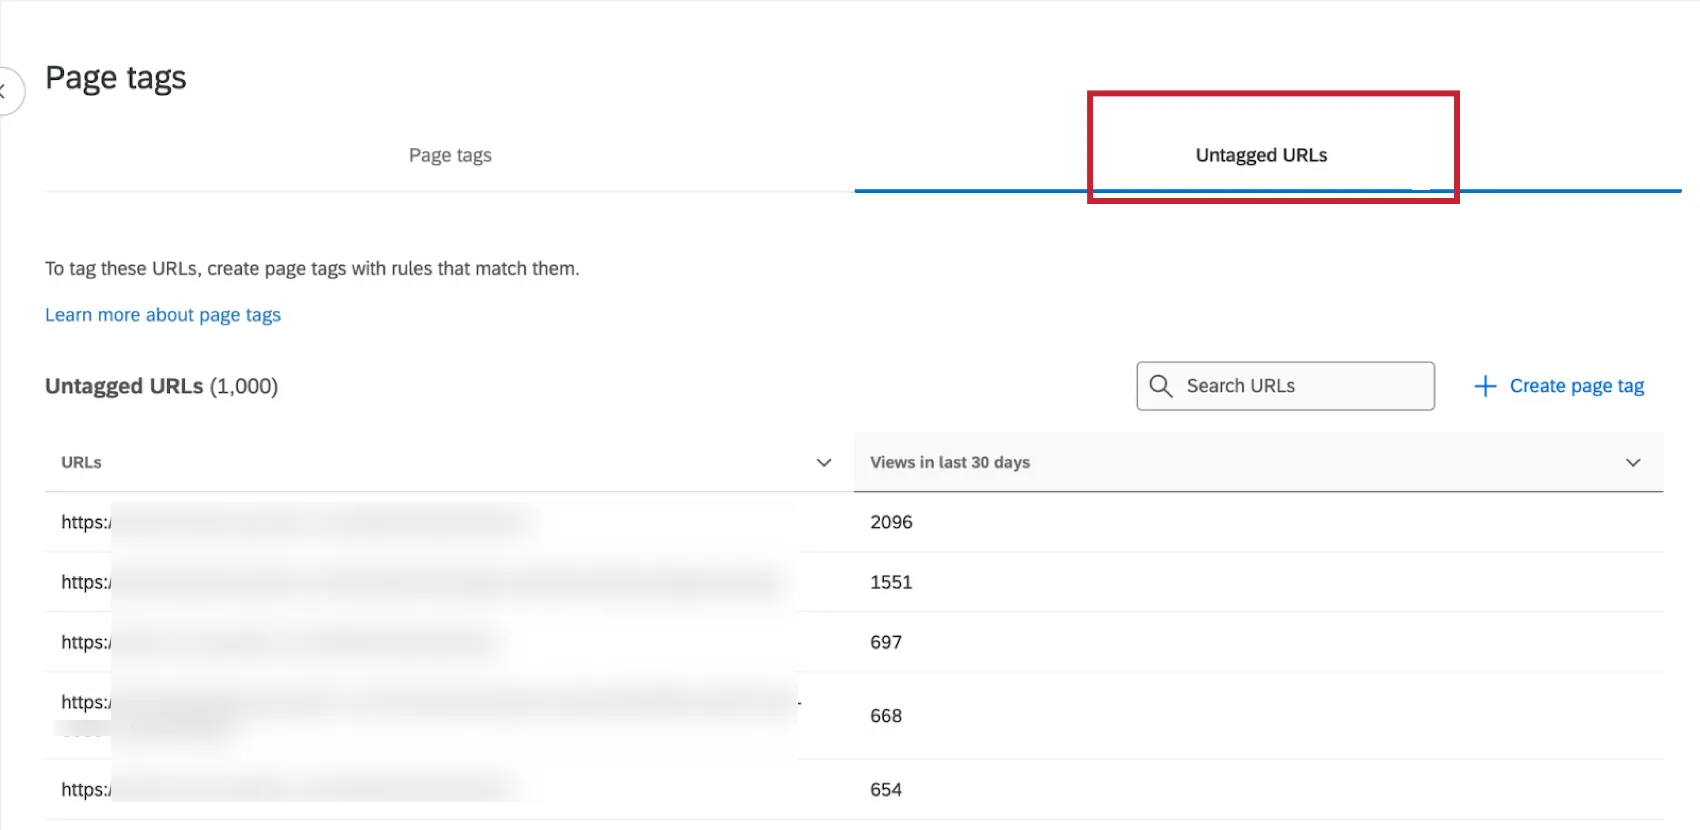
Previewing Untagged URLs
The Untagged URLs section allows you to preview URLs that have been captured by DXA but have not yet been mapped to a page tag. This is useful for identifying other areas of your site that are ripe for analysis.
Reporting on Page Tags
Once you’ve created page tags, you can report on them with the following:
- Digital Assist
- Creating Heatmaps: Use page tags as criteria for your heatmaps.
- Creating Funnels: Use page tags as steps in your funnels.
- Digital Experience Dashboard
- Viewing Data in a Dashboard: View page tag data associated with sessions. Your dashboard page must have a filter for the page tag name.
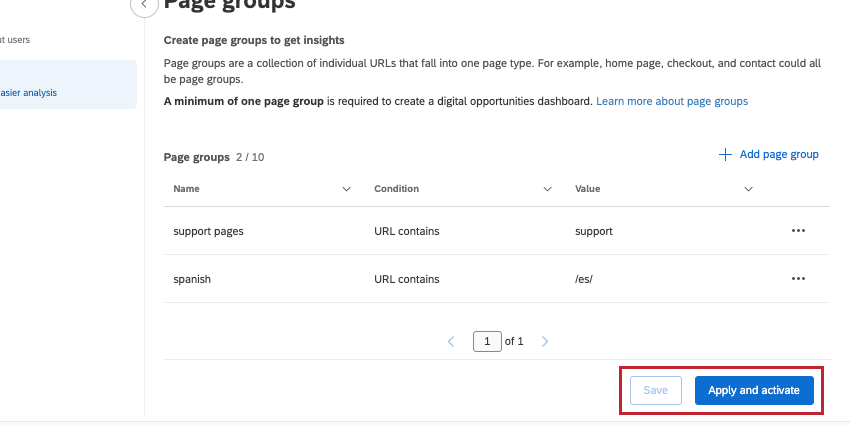
Saving and Applying Changes
Attention: Make sure you’ve tested session replay before you turn it on.
When you make changes to any session replay settings, these changes must be saved or applied before navigating anywhere else within your project or account. If you leave the page without saving or applying your changes, all new changes will be undone.

To save changes you’ve made, click Save. This will save your configuration and allow you to use it in testing, but your changes won’t be applied to session replays or any dashboards using session replay data.
To apply changes you’ve made to session replays and any dashboards using session replay data, click Apply and activate.
Qtip: It may take several hours for dashboards to reflect these changes.
That's great! Thank you for your feedback!
Thank you for your feedback!