
Creating Tickets Manually (Discover)
What's on this page
About Creating Tickets Manually
In addition to automated ticket creation, Qualtrics Contact Center Quality Management (CCQM) has ways to enable your team to create tickets manually, straight from a document. Here are 2 common examples of why manual tickets can be useful:
- Manual coaching opportunities: Managers and coaches can create a ticket manually for an interaction that achieved the target score, but still contains coachable moments.
- Feedback rebuttals: Representatives and managers can create a ticket manually to trigger a rebuttal when they disagree with how a particular behavior was evaluated. Rebuttals are completed in document explorer. For more information about appeals and rebuttals, see Appeals and Rebuttals.
Setting Up in Engage
Before your team can create tickets right from a document, you need to set up your ticket workflow in Engage. To do this, you’ll set up the same Engage workflow you would for automated tickets. The difference is that the act of clicking the Create Ticket button in a document overrides the usual conditions of the workflow, meaning that instead of requiring a Discover alert to trigger, a ticket can be made immediately.
Qtip: This means that if you already have an automated ticket workflow set up in Engage, you don’t need to set another workflow up to make manual tickets work.
Follow all of the steps on Creating Tickets Based On Discover Alerts, including the steps to create a Discover alert and link to it in Engage. Here are some best practices for manual tickets:
- Template names: When you set up your workflow, you name your template in Step 9. This is the same template teams can choose when they manually create tickets from a document.
- Alerts vs. manual: Manual and alert-based tickets can come from the same workflow, and this is best practice. If you absolutely want to separate these workflows, or if you only want manual tickets, you still need to connect to an alert. However, you can add conditions to your alert or your workflow that are so exclusive, they’re impossible to meet. This ensures the workflow is never triggered by its linked alert, so it only triggers for manual tickets instead
Qtip: In Discover, make sure you give users who should be able to create tickets the Manual Ticket Creation permission.
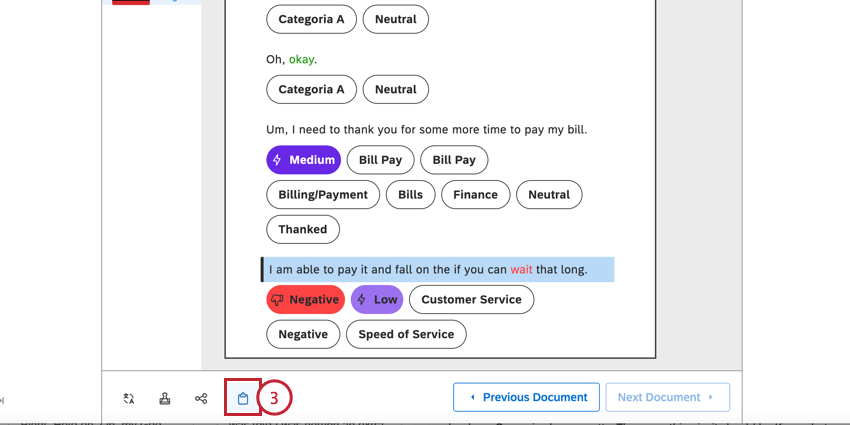
How to Create a Ticket Manually
Qtip: You need the Manual Ticket Creation permission to create tickets from a document, as shown below.
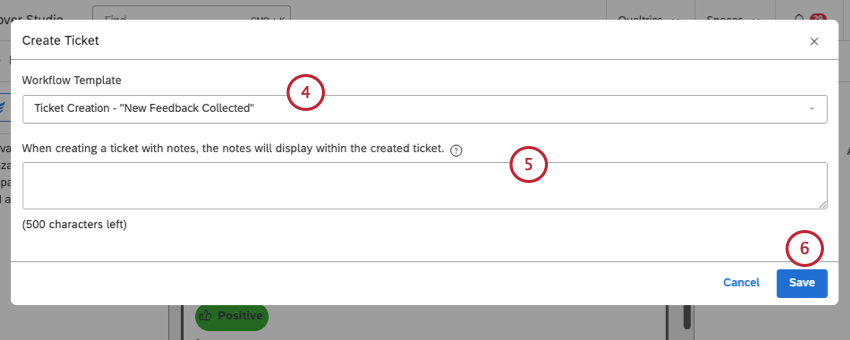
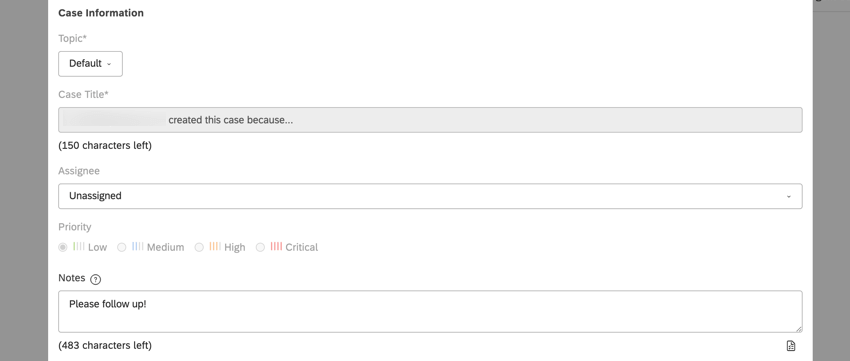
Ticket Criteria
When you create a ticket manually, you may specify different ticket parameters, depending on the selected template.

Qtip: This topic is automatically populated based on the selected template.
Qtip: You can reference attributes selected for Metadata by typing the attribute names inside curly brackets, for example, {Author Name}.
Qtip: Alerts can only be assigned to users with the Activation Lead license. When you tie an alert to an organization hierarchy, the Assignee field is automatically set to Organization. This means that tickets will be assigned to users at corresponding hierarchy levels.
- Low
- Medium
- High
- Critical
FAQs
What is XM Engage?
What is XM Engage?
That's great! Thank you for your feedback!
Thank you for your feedback!