
Elevations in Bain Outer Loop Actions
What's on this page
Attention: This feature is only available to users on the new simplified pricing and packaging plans or customers who actively participated in the Preview Program for this feature. For more information, see Qualtrics Public Preview. If you have questions about your Qualtrics pricing and packaging plan, reach out to Account Services.
About Elevations
Elevations are issues that require additional attention beyond standard escalation processes for your organization. After creation, these elevations are triaged and assigned to owners to action. This may include creating initiatives to address specific elevations or groups of elevations.
Elevations are accessed in the Elevations tab. This tab is accessible to every user in the project.
Qtip: For an overview of Bain Outer Loop Actions projects, see Bain Outer Loop Actions Overview.
Creating Elevations
All users can create elevations within the Elevations tab. These are often created by users with the Contributor role. For more information on project roles, see User Roles & Personas.
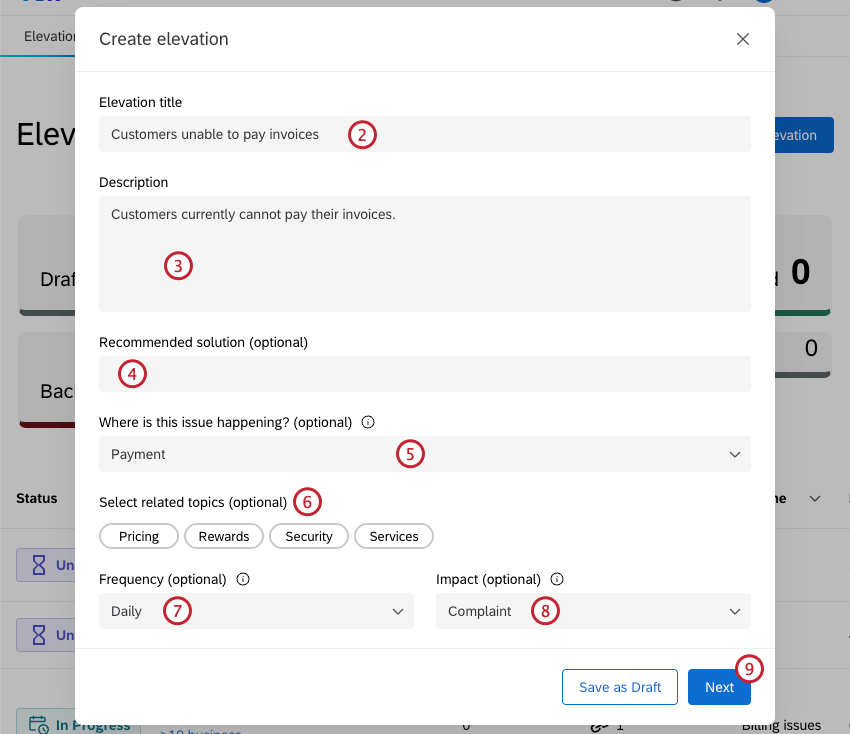
- Attrition Risk: Clear evidence that a customer or customer segment is at risk of leaving, based on repeated negative feedback, severe unresolved issues, or predictive indicators of churn.
- Complaint: A serious expression of dissatisfaction from a customer or group of customers that signals a breakdown in product, service, or process, with potential reputational or financial consequences.
Attention: In some industries this is a specific designation with a specific resolution process required for regulatory reasons. - Escalation: An issue raised to leadership because it is recurring, cross-functional, or visible enough to require attention, but not yet severe enough to be labeled a formal complaint.
- Annoyance: A minor friction point that irritates customers but has limited impact on loyalty or economics if left unresolved.
- Opportunity: A positive customer idea or unmet need that could create incremental value if pursued.
- Unknown: Impact isn’t clear and requires further investigation before categorizing.
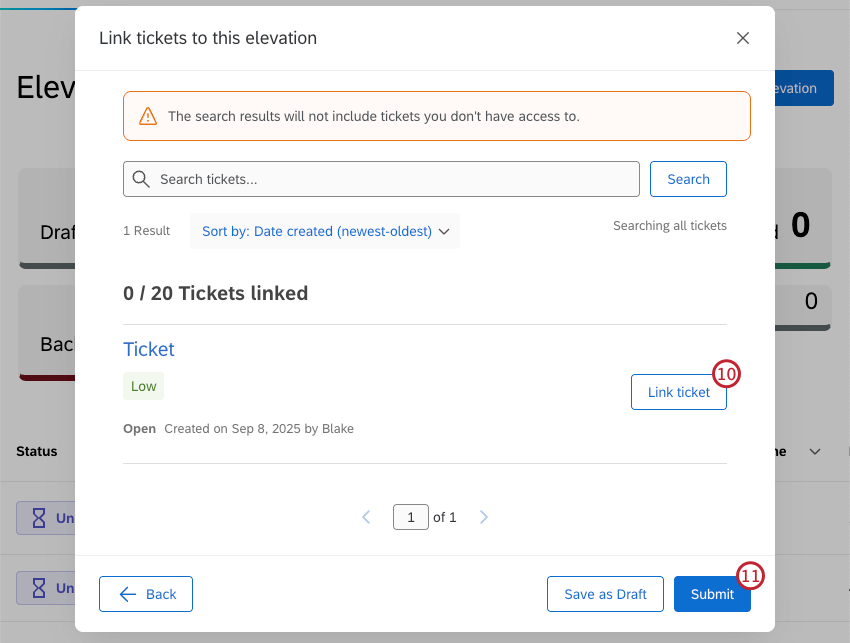
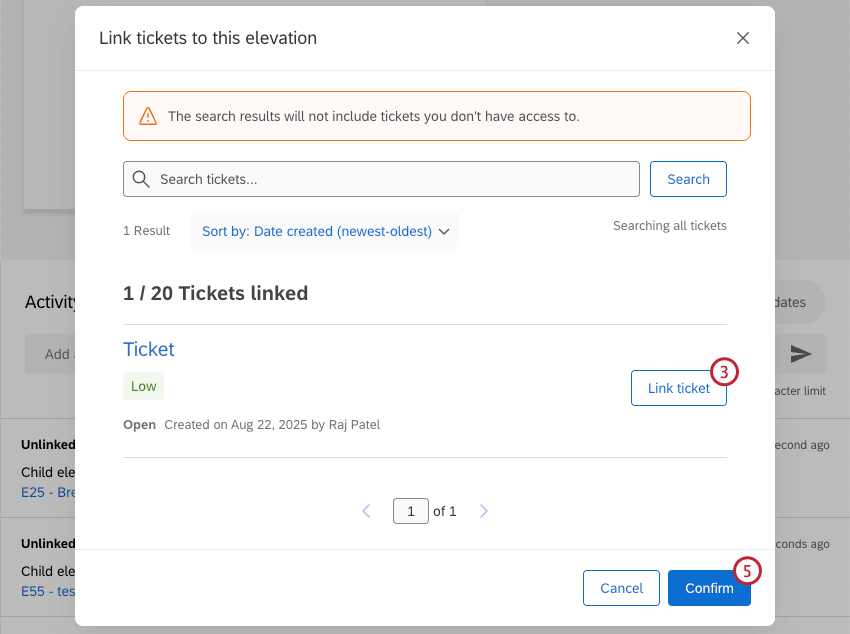
Qtip: The search results will only include tickets you have access to.
Qtip: If you aren’t ready to submit your elevation, click Save as Draft to save your progress. The elevation will appear within the elevation table with a status of Draft.
Viewing Elevations
Within the Elevations tab you can view a table of all elevations you have access to, or click into an individual elevation to view more details about it.
The elevations and details you see depend on the user persona you are assigned within the project. In addition to viewing the elevations you have created, owners will see elevations they need to take action on and resolve, triagers will see elevations they need to review, and contributors will see elevations they have submitted.
Qtip: Project admins will not have access to elevations unless they are assigned an Outer Loop persona.
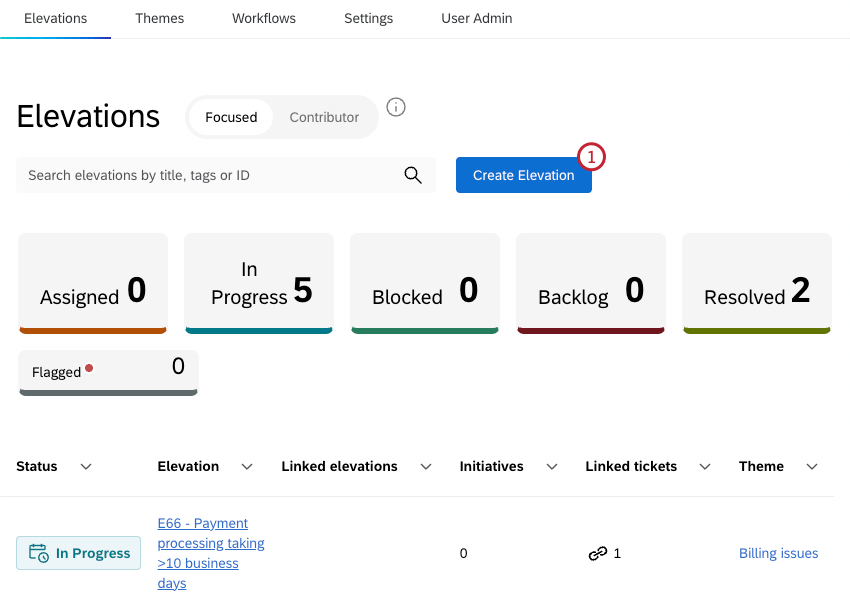
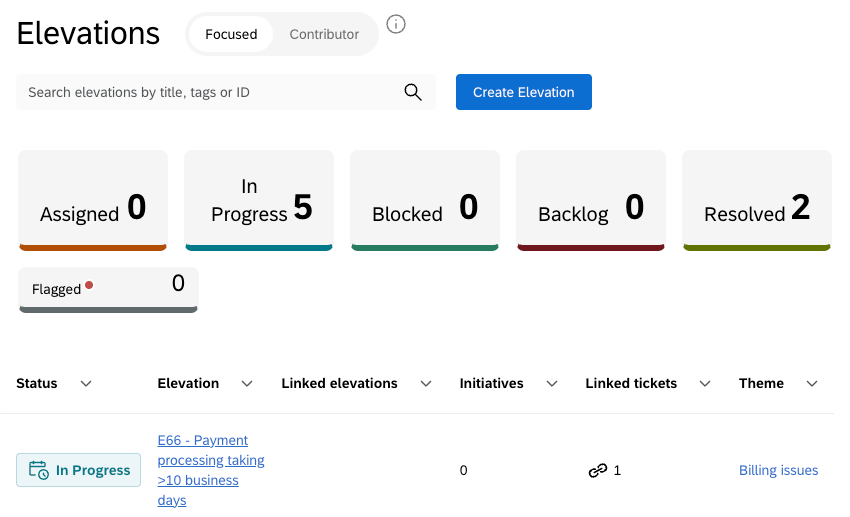
Viewing the Elevations Table

At the top of the table there are filters for each elevation status. This includes pre-set statuses, as well as any custom statuses that have been configured for the project. Click a status to only show elevations with that status. Click again to remove the filter.
You can also sort the table by any column by clicking the arrow to the right of the column name. Click once to sort the column by descending values, twice to sort by ascending values, and a third time to rest the sorting.
If you are a triager or owner, you can switch the table between Focused and Contributor mode. Focused mode will only show elevations that you need to take action on, while contributor mode will only show elevations you’ve created.
Viewing an Individual Elevation
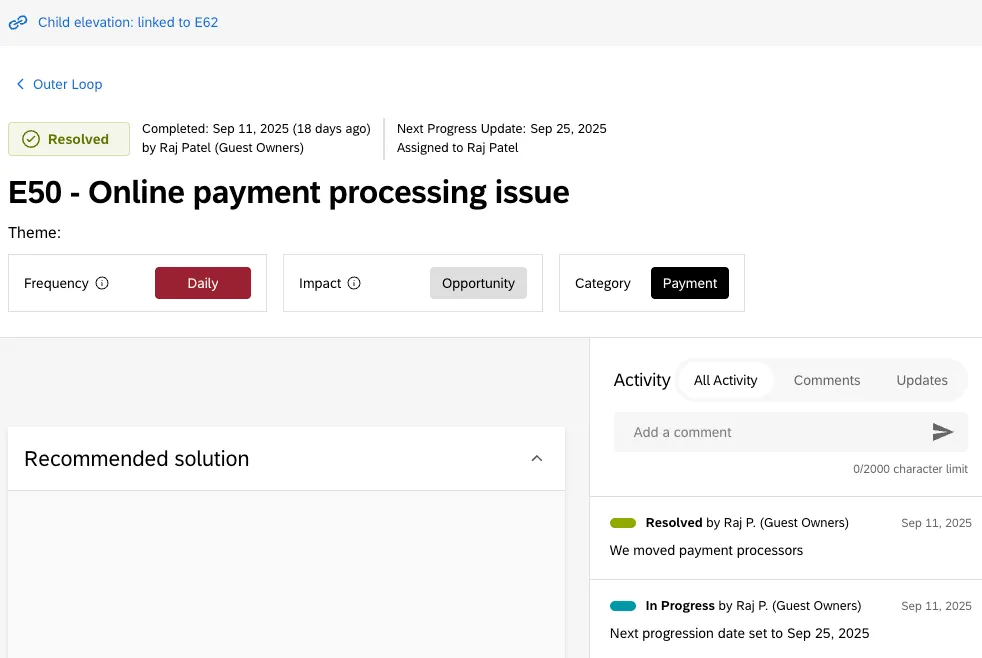
Clicking an elevation will display all the details related to the elevation. The detailed view contains the following sections:
- Recommended solution: Proposed solutions to address the elevation.
- Initiatives: Initiatives that have been created to address the elevation.
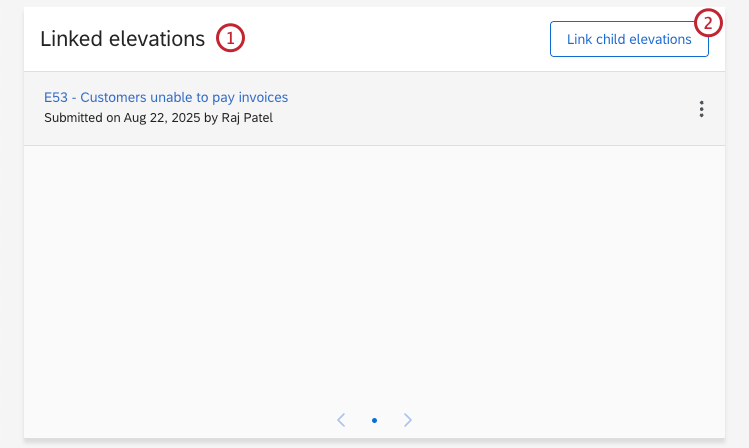
- Linked elevations: View children elevation linked to this elevation.
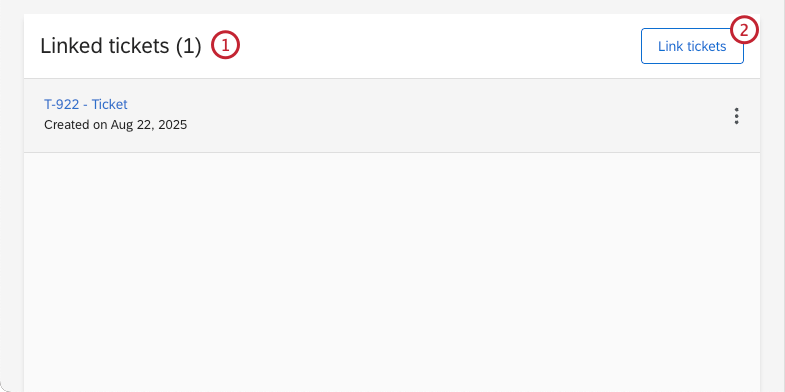
- Linked tickets: View tickets linked to the elevation.
- Activity: View activity logs for actions taken related to the elevation, and add comments.
Actioning Elevations
Once an elevation has been created, there are several actions you can take depending on your Outer Loop persona. For more information on the different personas available, see User Roles & Personas.
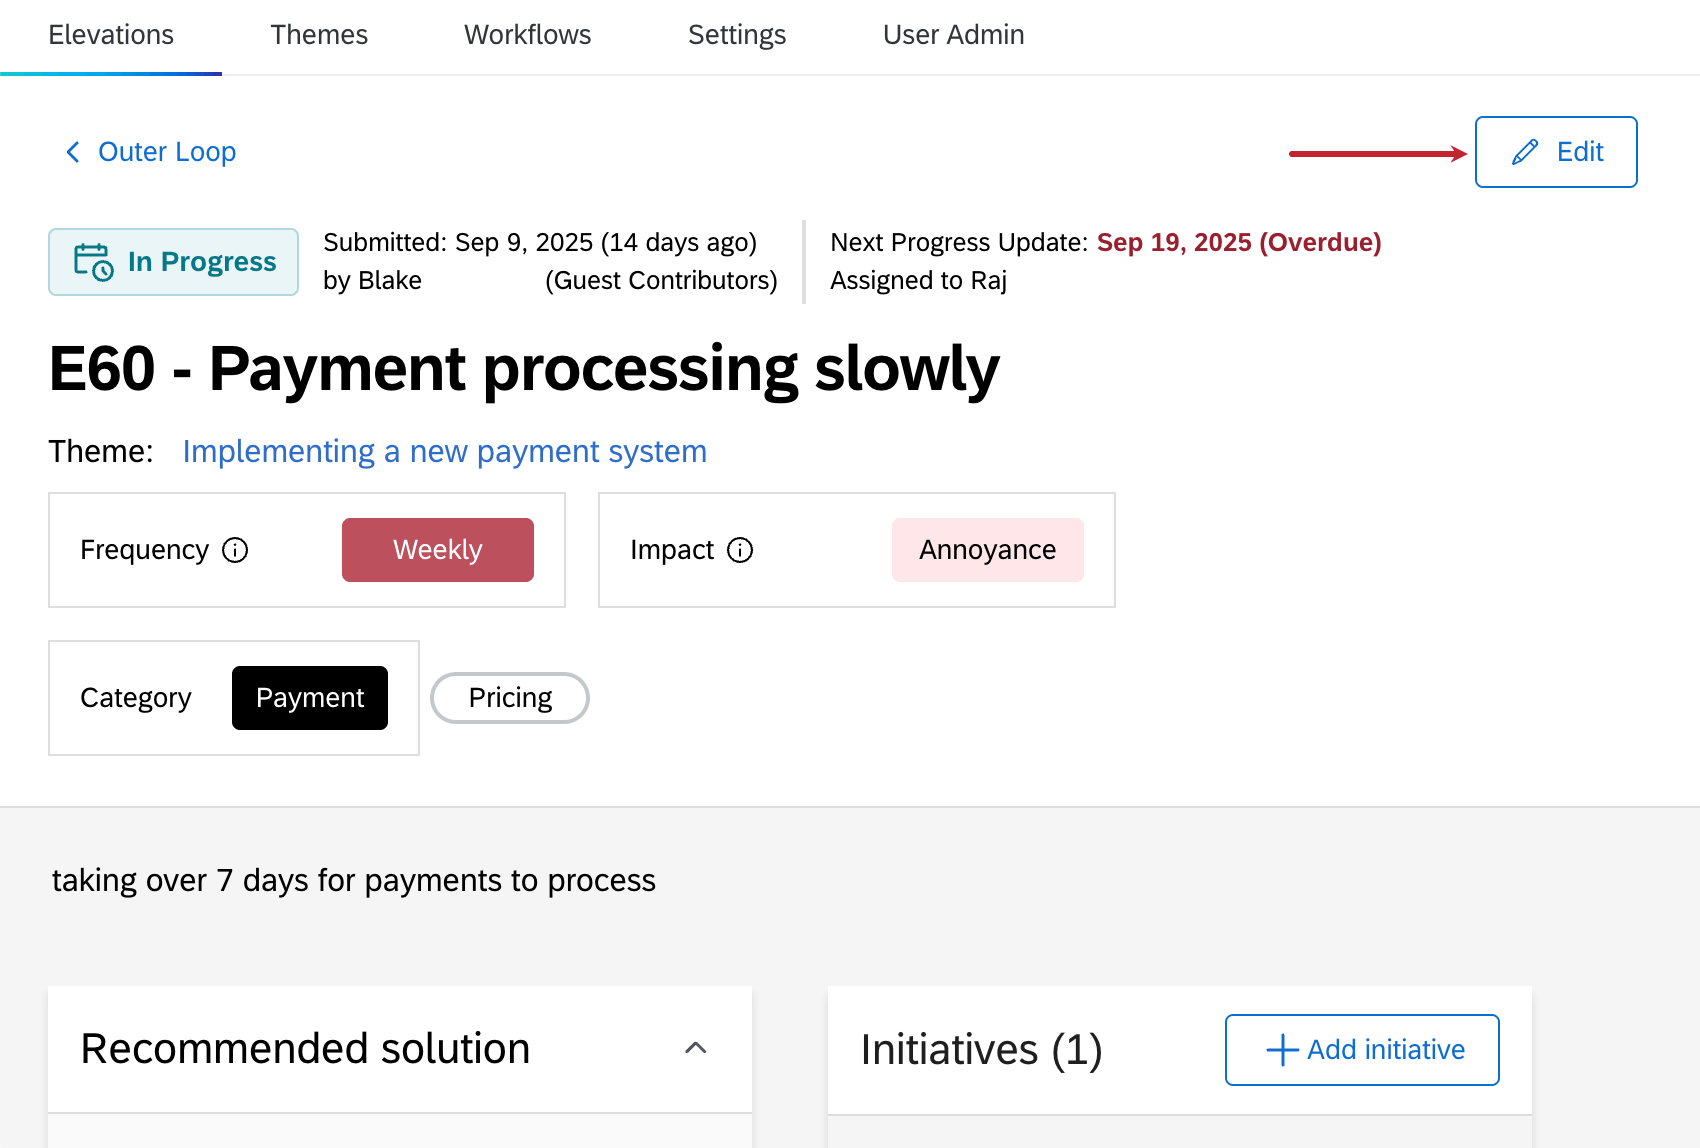
Editing an Elevation
Click Edit to edit details of the elevation. This option is available to the Contributor and Triager personas.
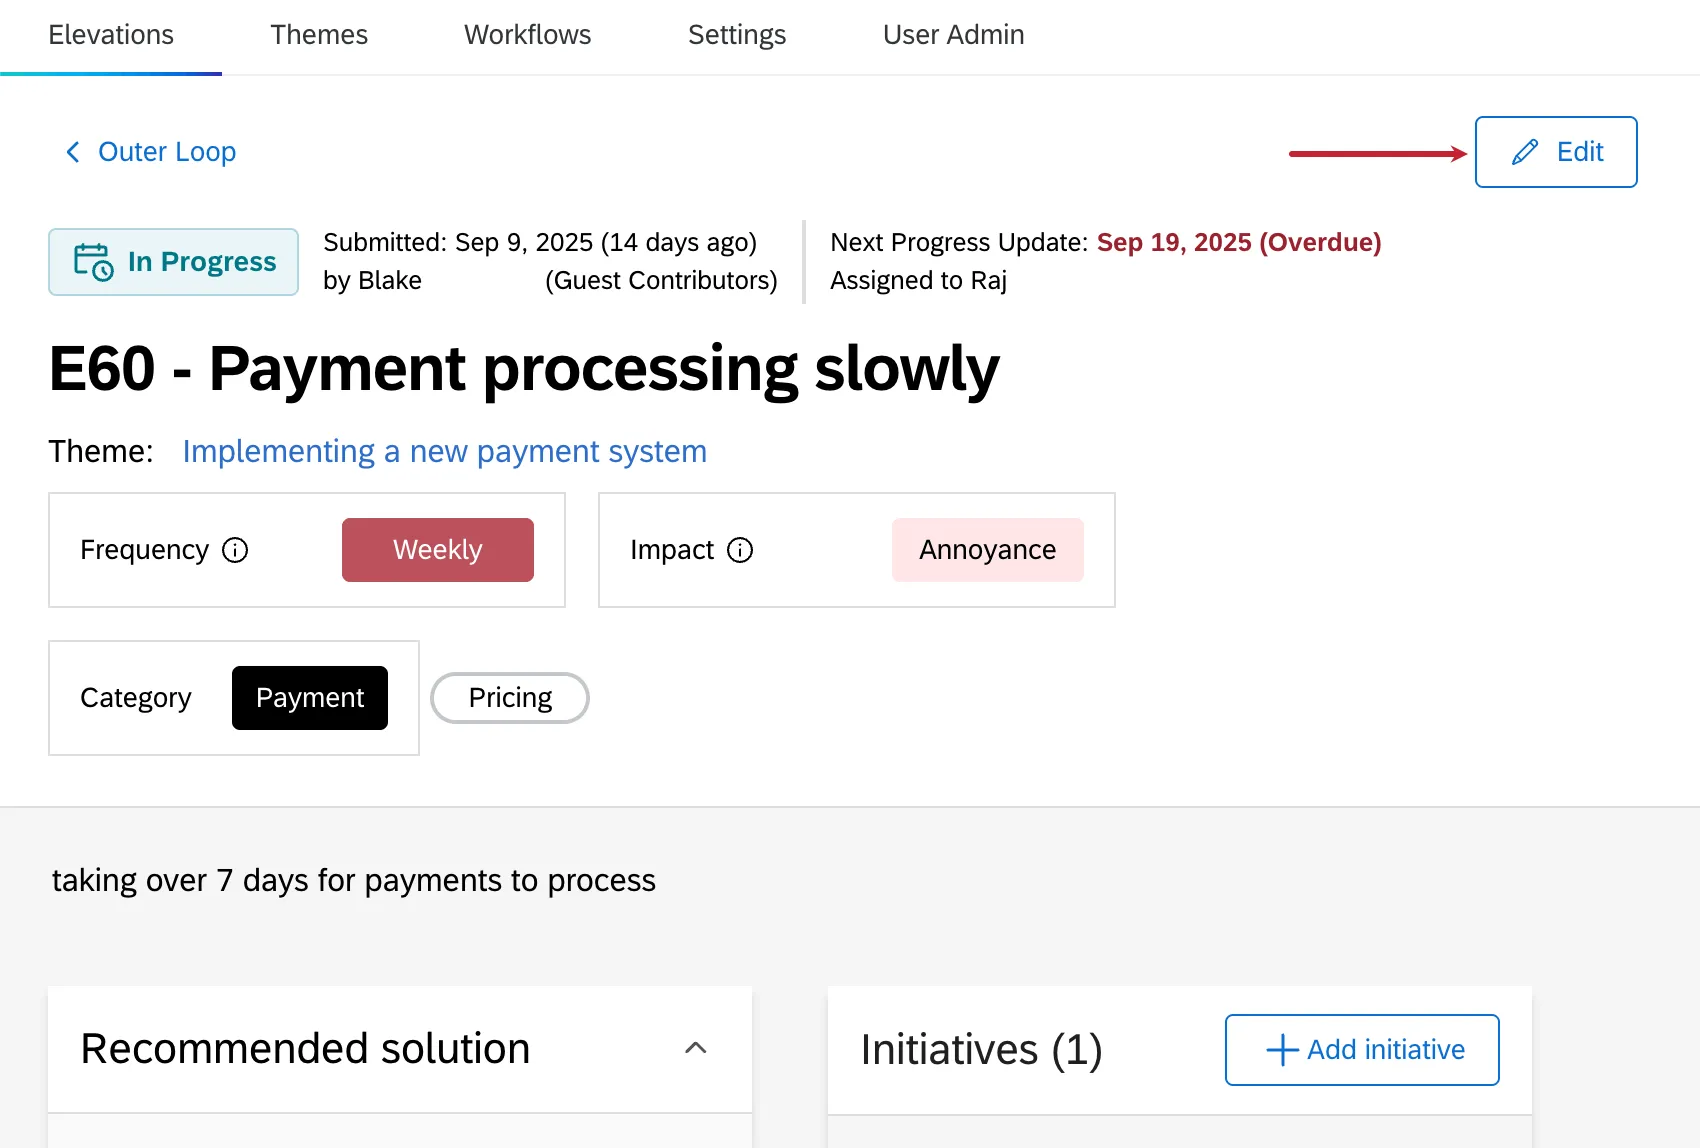
Once you are in editing mode, you can edit the elevation frequency, impact, assign a category and/or topics, edit the elevation name, or enter a recommended solution.
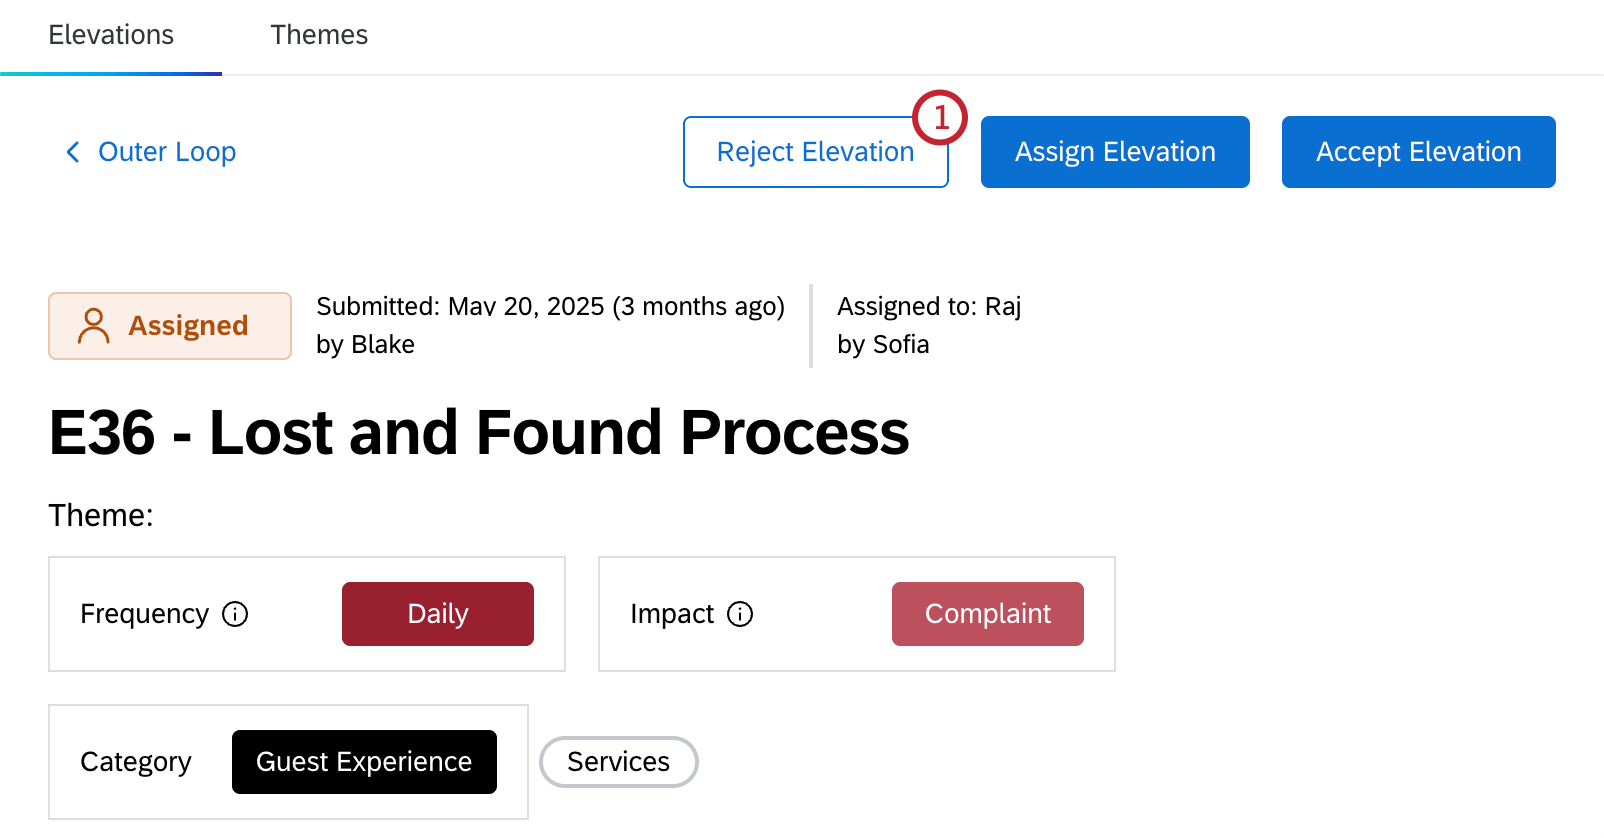
Rejecting an Elevation

- Need more details from contributor: More information is needed from the person that created the elevation. Selecting this status will send it back to the Contributor.
- Duplicate of resolved elevation: This issue has already been created and resolved. Selecting this status will close the elevation as rejected.
- Incorrect assignment: The elevation should not have been assigned to you. Selecting this status will send it back to the Triager.
- Other: You are rejecting the elevation for some other reason. Selecting this status will send it back to the Triager.
This option will show up to users with the Owner Outer Loop persona. Once the elevation is rejected, it will be sent back to the Triager or Contributor so they can take further action.
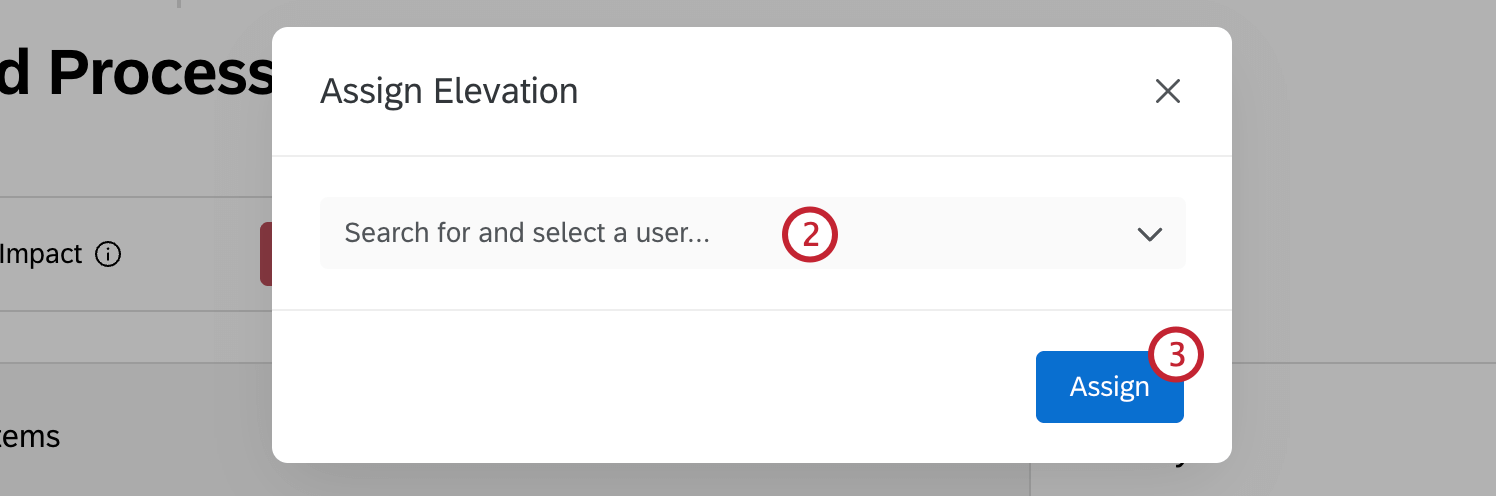
Assigning an Elevation
This option is available to the Triager and Owner user personas.

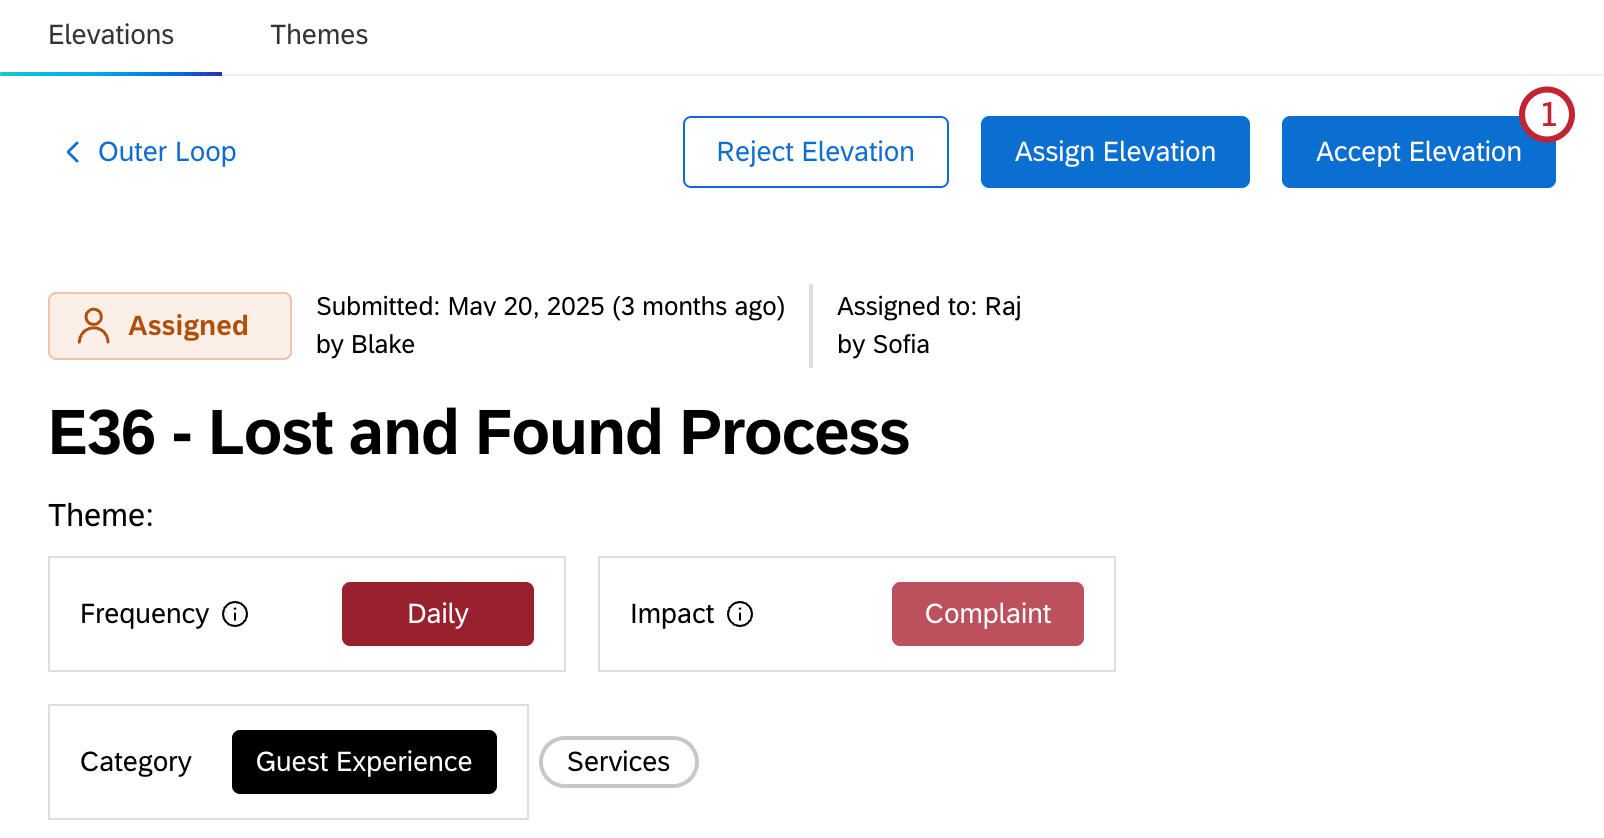
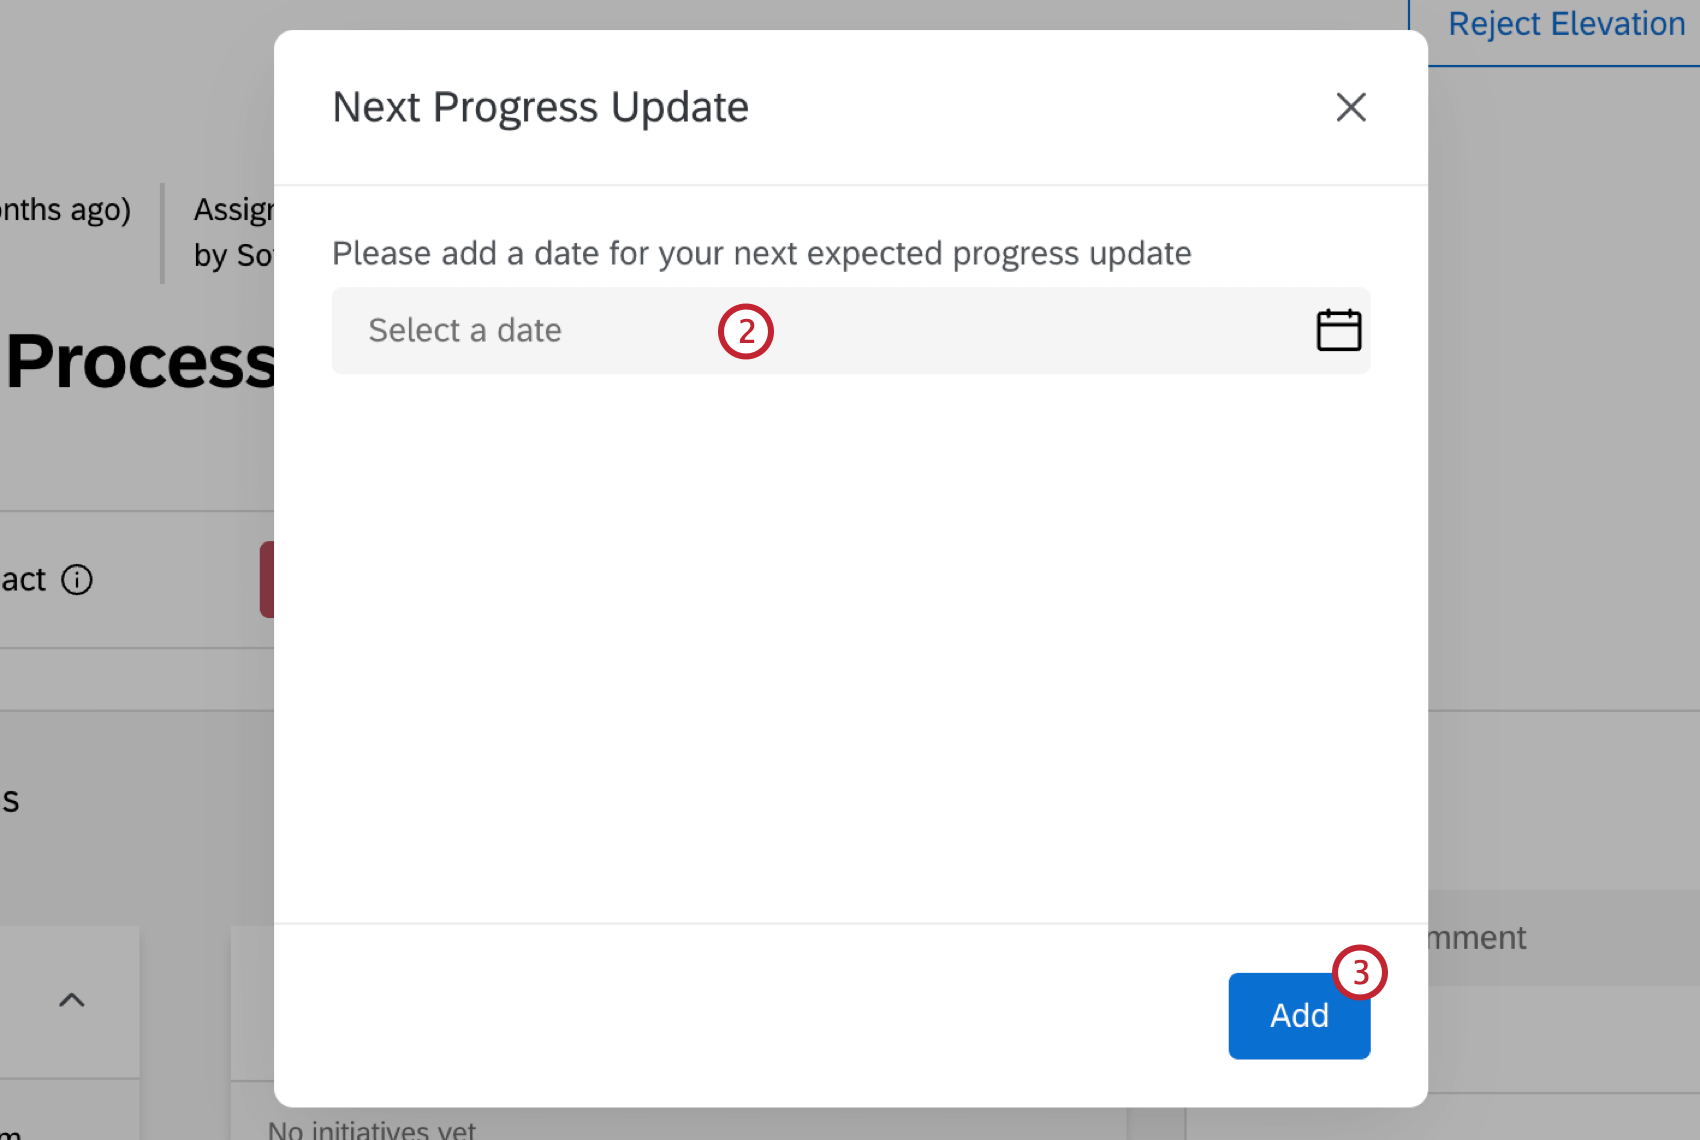
Accepting an Elevation
This option is available to the Owner user persona.
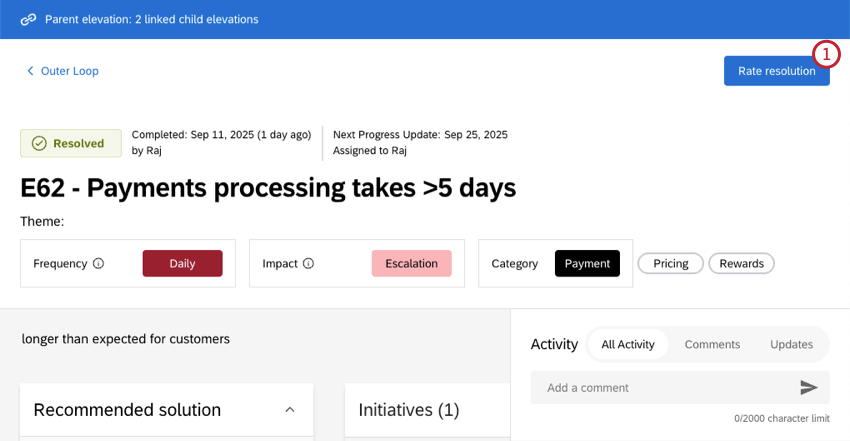
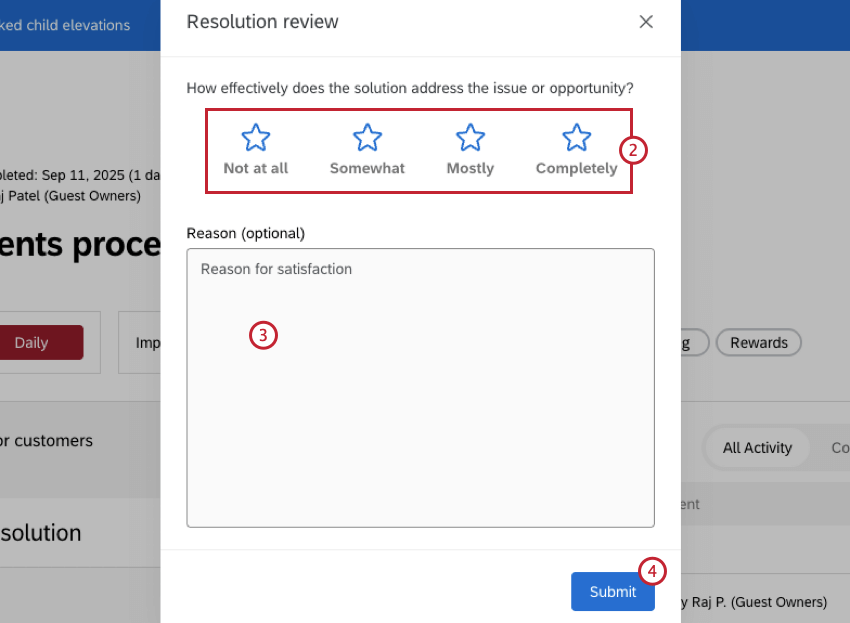
Rating a Resolution
After an elevation has been given the status Resolved, you can rate the resolution. This option is only available to the Contributor user persona.
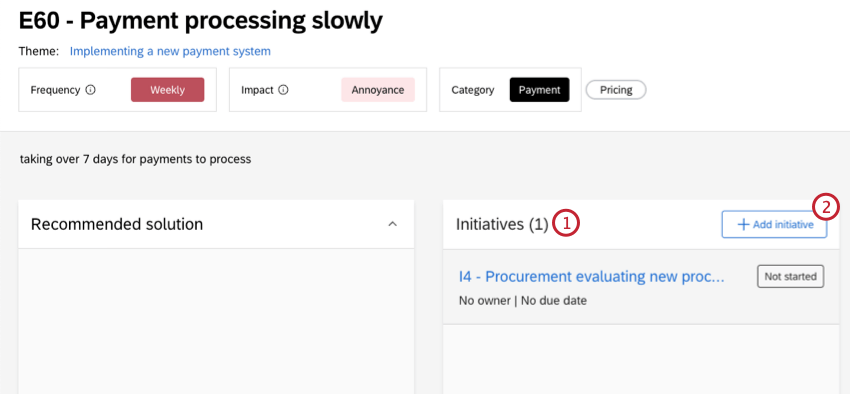
Creating Initiatives
Initiatives can be created to track the work being done to resolve issues raised by an elevation. Multiple initiatives can be created within an elevation.
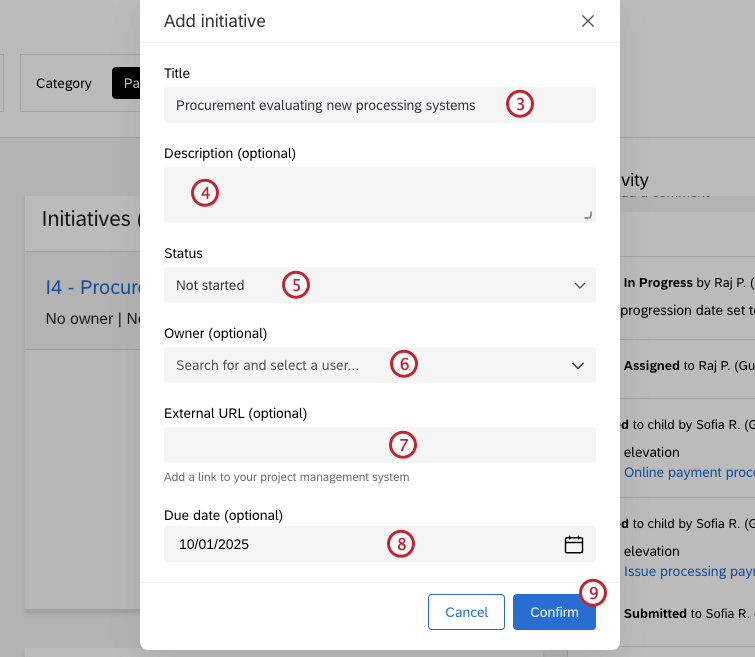
Once an initiative has been created, you can click on it to view and edit its details, including updating the status.
Linking Elevations
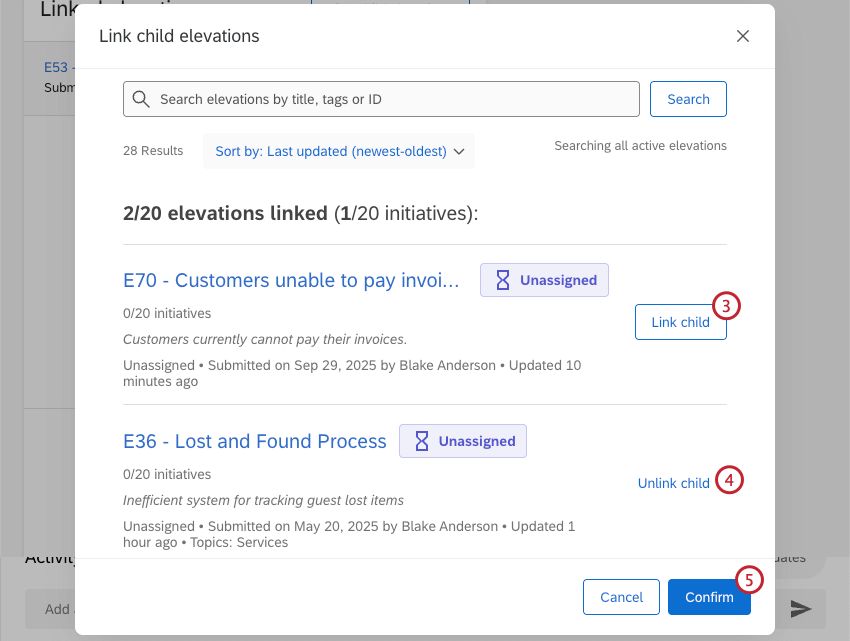
Once you’ve clicked into an individual elevation, you can link other related elevations. This can be useful if there are multiple elevations that are related, or if multiple elevations address the same issue.
Elevations are linked in a parent-child relationship, where the main elevation is considered the parent, and any linked elevations are considered children. Elevations can only be children of 1 parent elevation. Attempting to link elevations that are already linked will replace their current parent.
Attention: A maximum of 20 child elevations can be linked to any parent elevation.
Attention: Child elevations will inherit the status of their parent.
Linking Tickets
Attention: A maximum of 20 tickets can be linked to an elevation. An individual ticket can only be linked to a single elevation.
Once you’ve clicked into an individual elevation, you can link any related tickets that have been created. This can be useful if there are tickets that may provide more context for the elevation.
Qtip: Tickets can also be linked during the initial creation of an elevation.
That's great! Thank you for your feedback!
Thank you for your feedback!