
Themes in Bain Outer Loop Actions
What's on this page
Attention: This feature is only available to users on the new simplified pricing and packaging plans or customers who actively participated in the Preview Program for this feature. For more information, see Qualtrics Public Preview. If you have questions about your Qualtrics pricing and packaging plan, reach out to Account Services.
About Themes
Attention: This tab is not accessible to users with a role of Contributor. For more information on roles within Bain Outer Loop Actions projects, see User Roles & Personas.
Themes allow users to group related elevations under common categories, making it easier to identify patterns. Multiple elevations can be linked to a single theme, which can highlight recurring issues, display their impact, and help prioritize resolution efforts.
The status of a theme is independent from the status of any elevations that are linked to it. As a result, themes can be resolved independently of their linked elevations.
Qtip: For an overview of Bain Outer Loop Actions projects, see Bain Outer Loop Actions Overview.
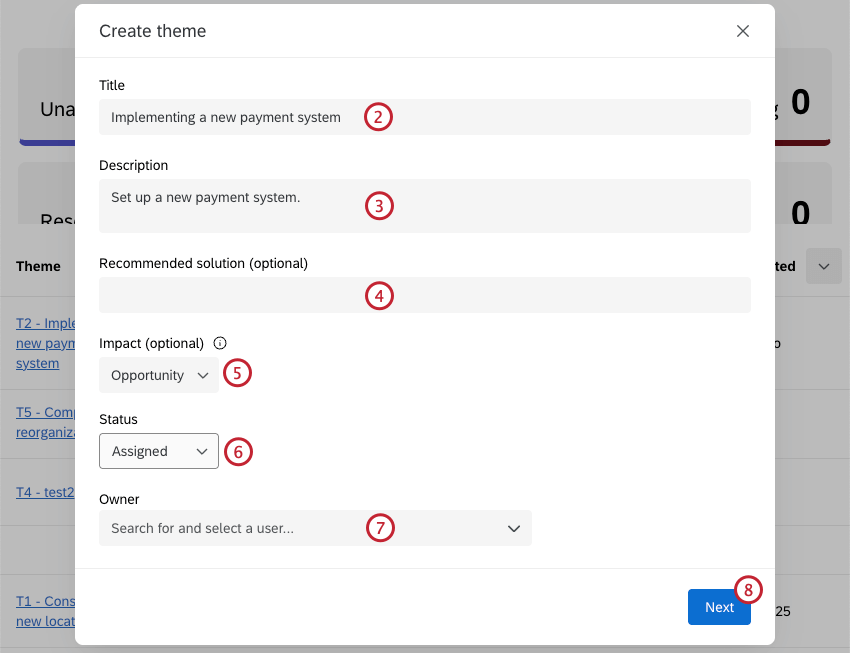
Creating Themes
Users with access to the Themes tab can create new themes. Themes are often created by users with the Triager or Owner role, because they are continually reviewing elevations and can determine common trends.
- Attrition Risk: Clear evidence that a customer or customer segment is at risk of leaving, based on repeated negative feedback, severe unresolved issues, or predictive indicators of churn.
- Complaint: A serious expression of dissatisfaction from a customer or group of customers that signals a breakdown in product, service, or process, with potential reputational or financial consequences.
Attention: In some industries this is a specific designation with a specific resolution process required for regulatory reasons. - Escalation: An issue raised to leadership because it is recurring, cross-functional, or visible enough to require attention, but not yet severe enough to be labeled a formal complaint.
- Annoyance: A minor friction point that irritates customers but has limited impact on loyalty or economics if left unresolved.
- Opportunity: A positive customer idea or unmet need that could create incremental value if pursued.
- Unknown: Impact isn’t clear and requires further investigation before categorizing.
- Unassigned: No owner is assigned to the theme yet.
- Assigned: A specific owner is assigned to the theme.
- In Progress: The theme is being worked on.
- Resolved: The theme has already been resolved.
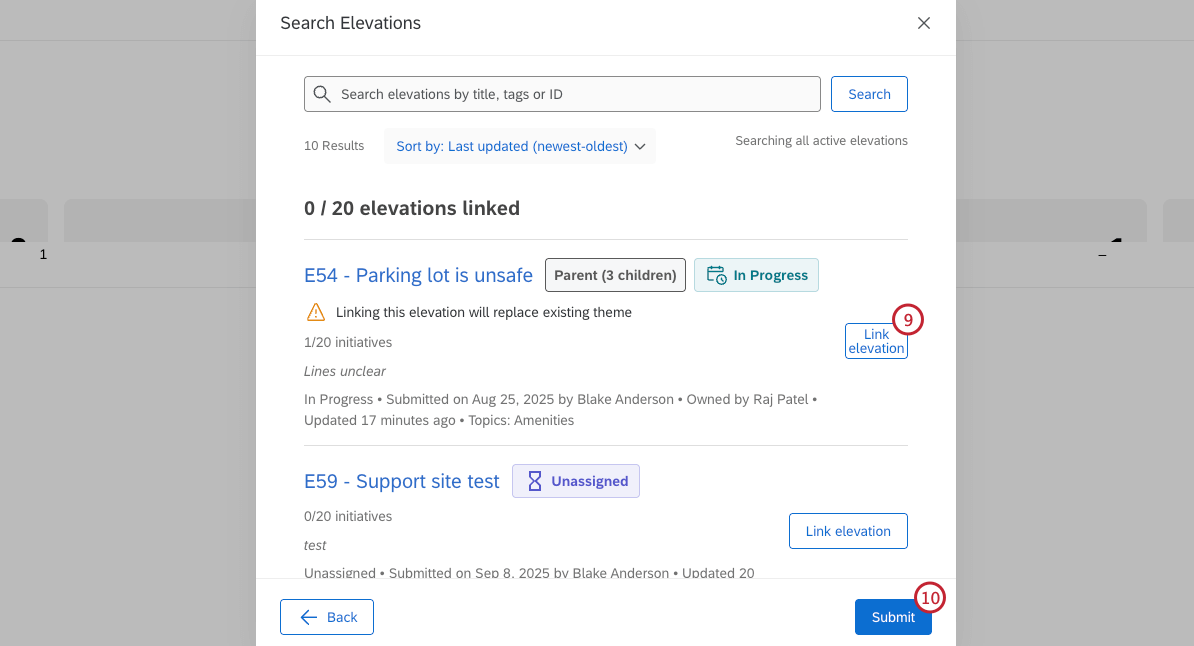
Qtip: You can link up to 20 elevations to each theme.
Viewing Themes
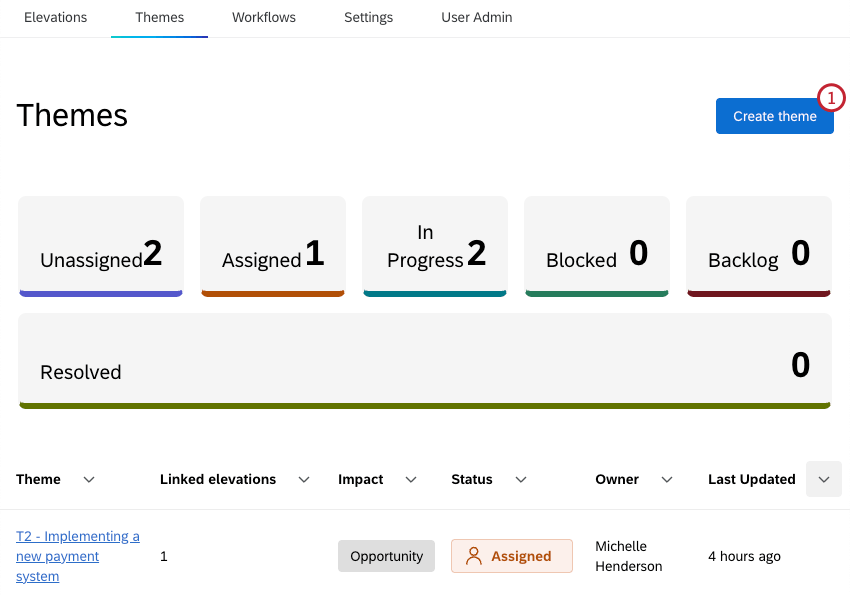
Within the Themes tab you can view a table of all themes created within the project. Clicking an individual theme to view more details about it.
Viewing the Themes Table
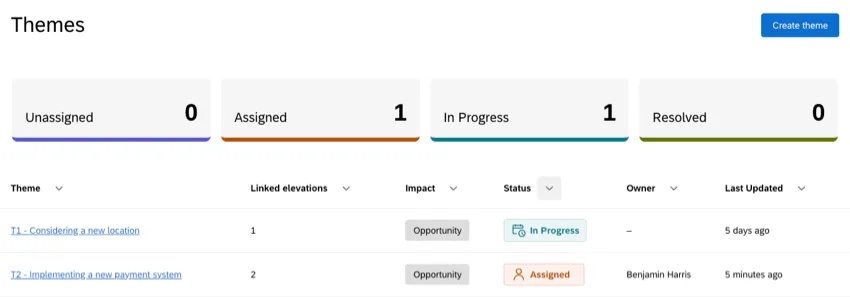
At the top of the table there are filters for each theme status. The statuses include pre-set statuses, as well as any custom statuses that have been configured for the project. Click a status to only show themes with that status. Click again to remove the filter.
You can also sort the table by any column by clicking the arrow to the right of the column name. Click once to sort the column by descending values, twice to sort by ascending values, and a third time to rest the sorting.
Viewing an Individual Theme
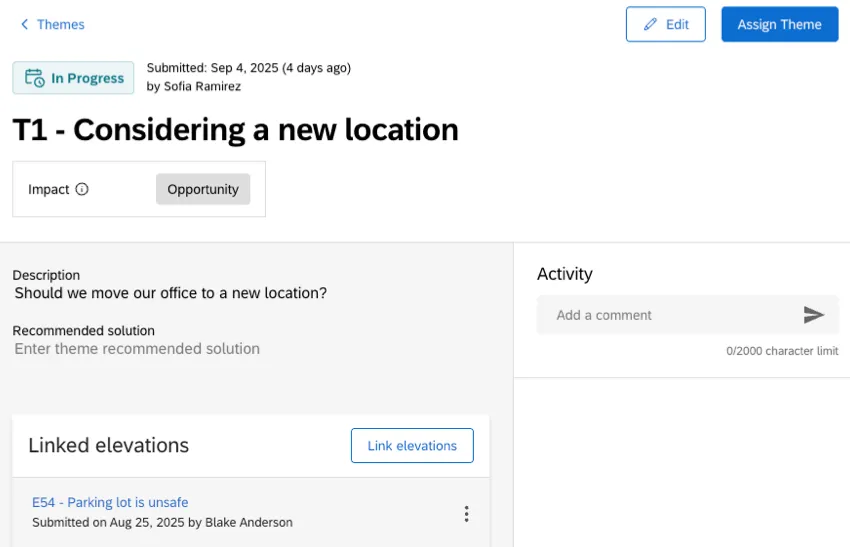
After clicking on a theme, you can see all details related to it. You can also add comments and link elevations to the theme.
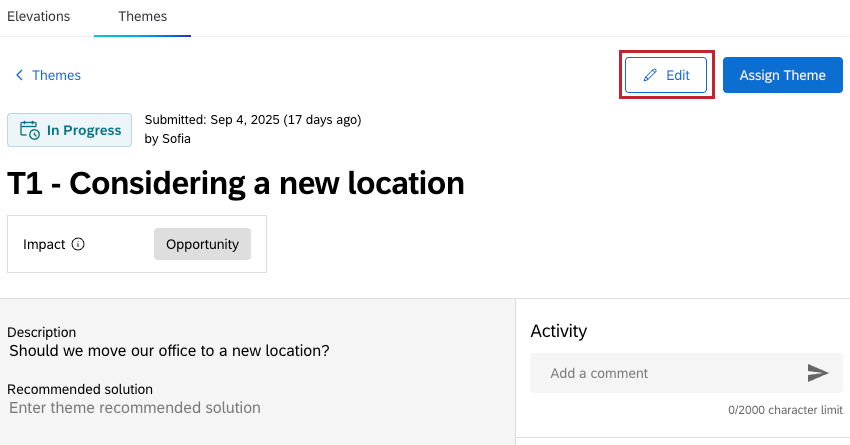
Editing Themes
Once a theme has been created, you can edit any details by clicking Edit in the top right corner of the individual theme view. This includes editing the name, status, impact, and more. This option is only available for the Triager and Owner user persona.
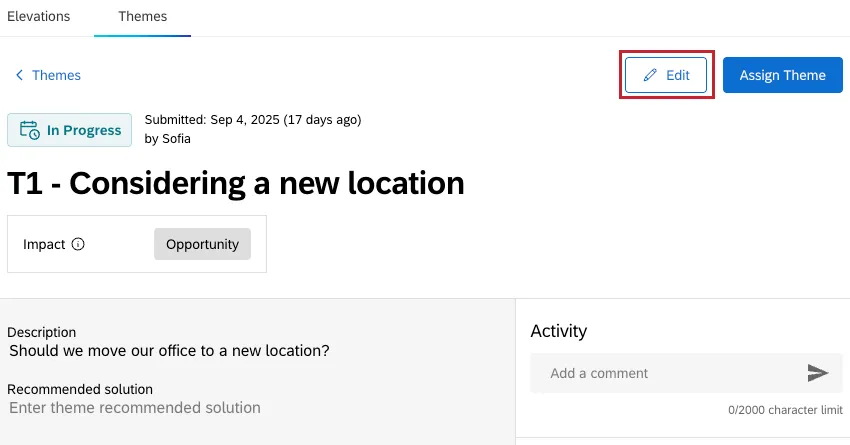
When you’re done editing, click Save to save your changes.
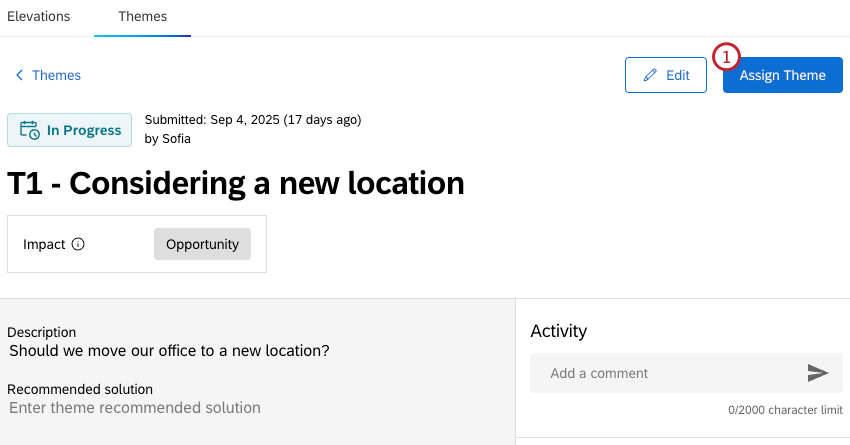
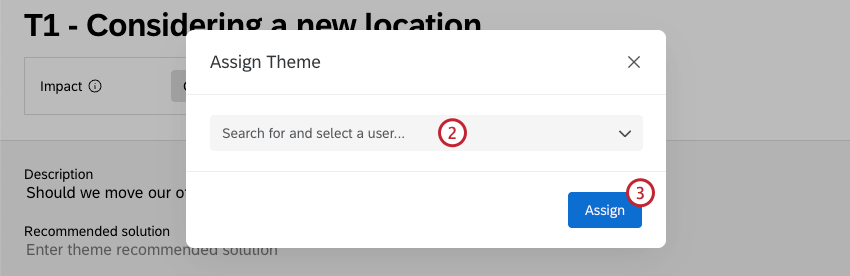
Assigning Themes
Once a theme is created you can assign it to an individual owner. This option is available to the Triager and Owner user persona.
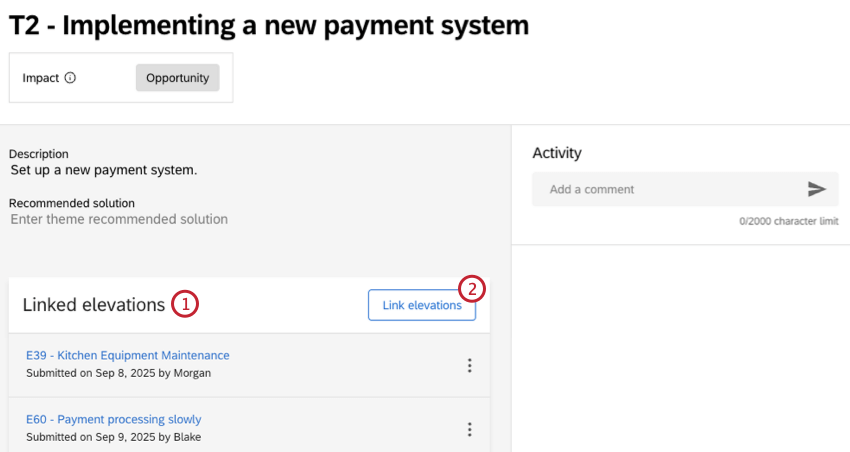
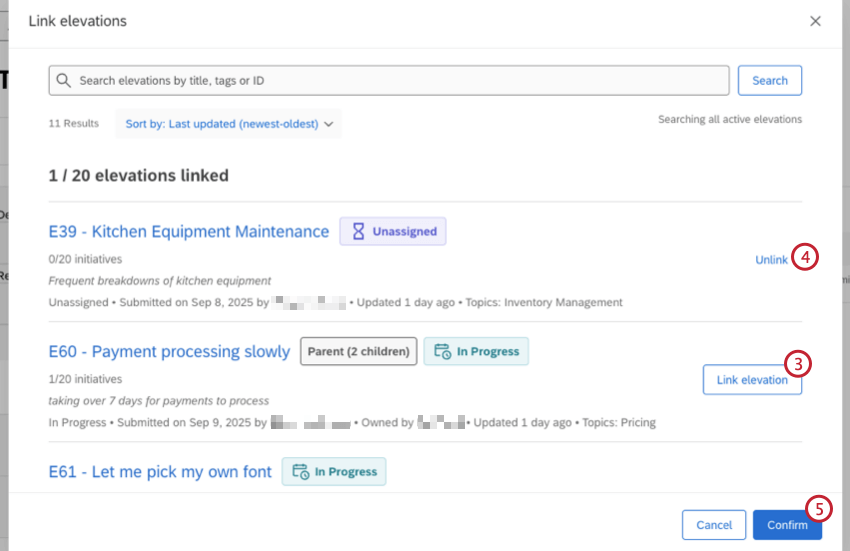
Linking Elevations to Themes
Once you’ve clicked into an individual theme, you can link related elevations. This makes it easier to identify patterns, and can highlight recurring issues you want to address within your elevations.
Attention: A maximum of 20 elevations can be linked to a theme.
Attention: The status of a theme is independent from the status of any linked elevations.
That's great! Thank you for your feedback!
Thank you for your feedback!