-

Qualtrics Platform -

Customer Journey Optimizer -

XM Discover -

Qualtrics Social Connect
Settings Tab (Location Experience Hub)
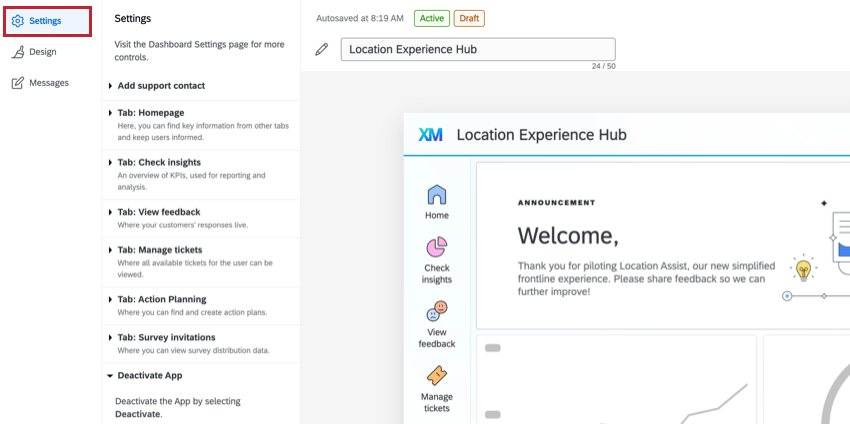
About the Settings Tab
In the Settings tab of the Location Experience Hub, you can choose which tabs to display to users, and edit how those tabs appear. For more information on setting up the Location Experience Hub, see Configuring Location Experience Hub. For an overview, see Location Experience Hub Overview.
Hiding Tabs
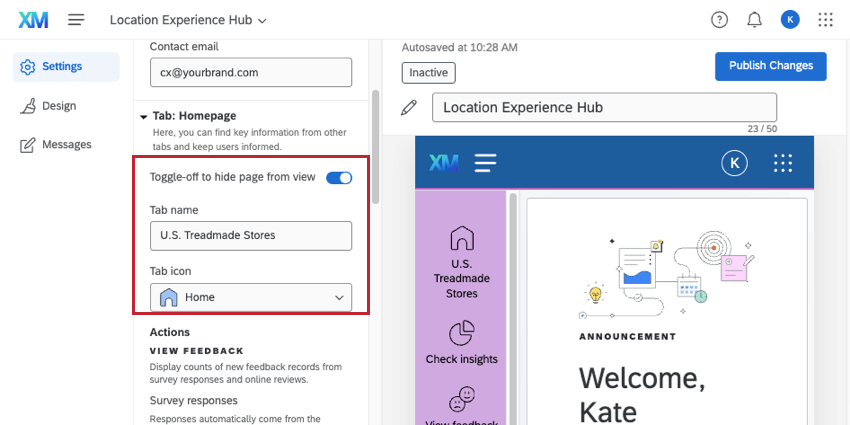
To hide any tabs from appearing in the Location Experience Hub for your organization, select Toggle-off to hide page from view next to the name of the page you want to hide.
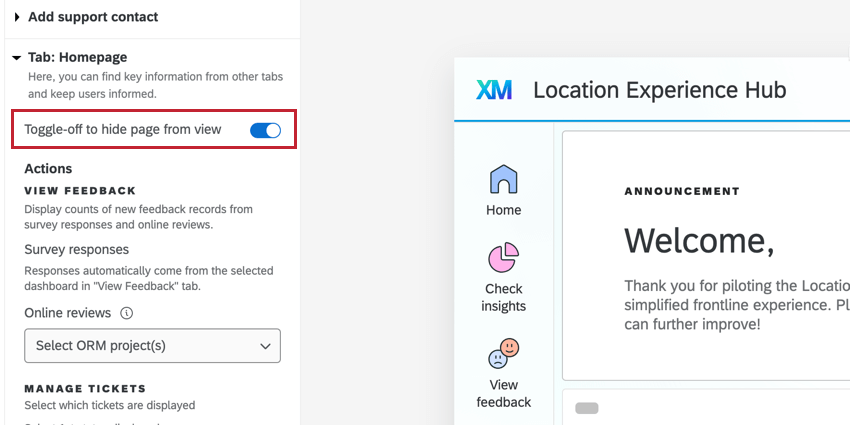
Note that this toggle will only show or hide a tab. You still need to set up the relevant dashboard, tickets queue, etc. for content to appear within each tab.
Dashboard Limitations
When configuring Location Experience Hub tabs, if other users within your organization have the Manage Location Experience Hub App permission, you may see a dashboard selected that you don’t have access to. If you change this selection, you won’t be able to reselect the original dashboard.
To further customize what appears in each tab, if you have access to the dashboard that was selected, you can edit its appearance and data.
Renaming Location Experience Hub
You can rename the Location Experience Hub name that is displayed to users. Click the pencil icon and then type a new name in the box. 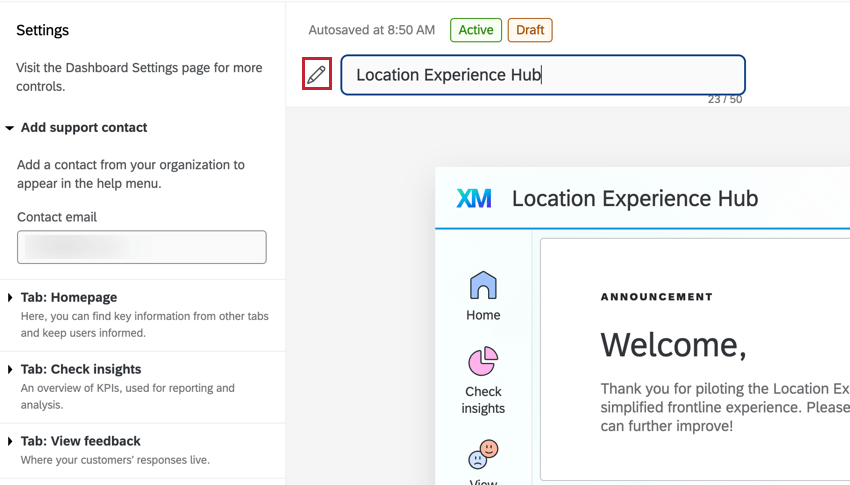
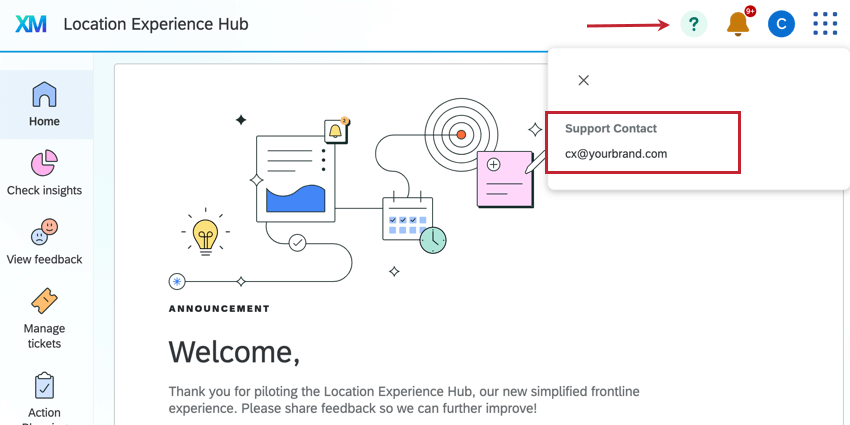
Add Support Contact
Here you can enter a contact from your organization to appear in the help menu. Type the email address of the contact into the text box.
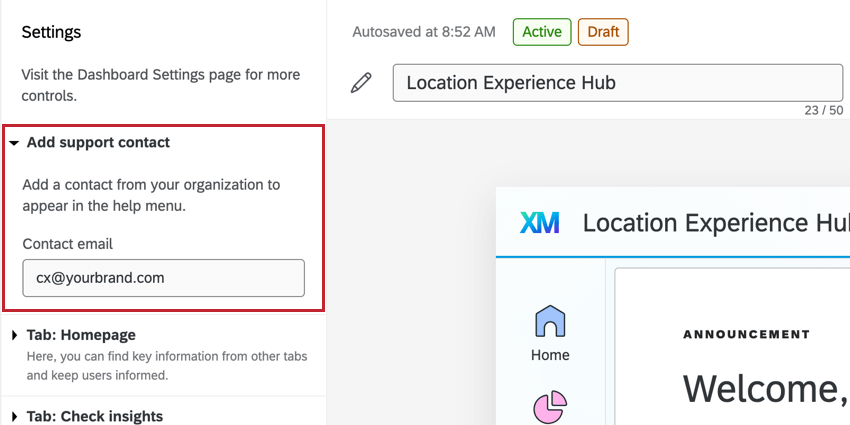
The email address you enter will appear when users click on the help icon within the Location Experience Hub.
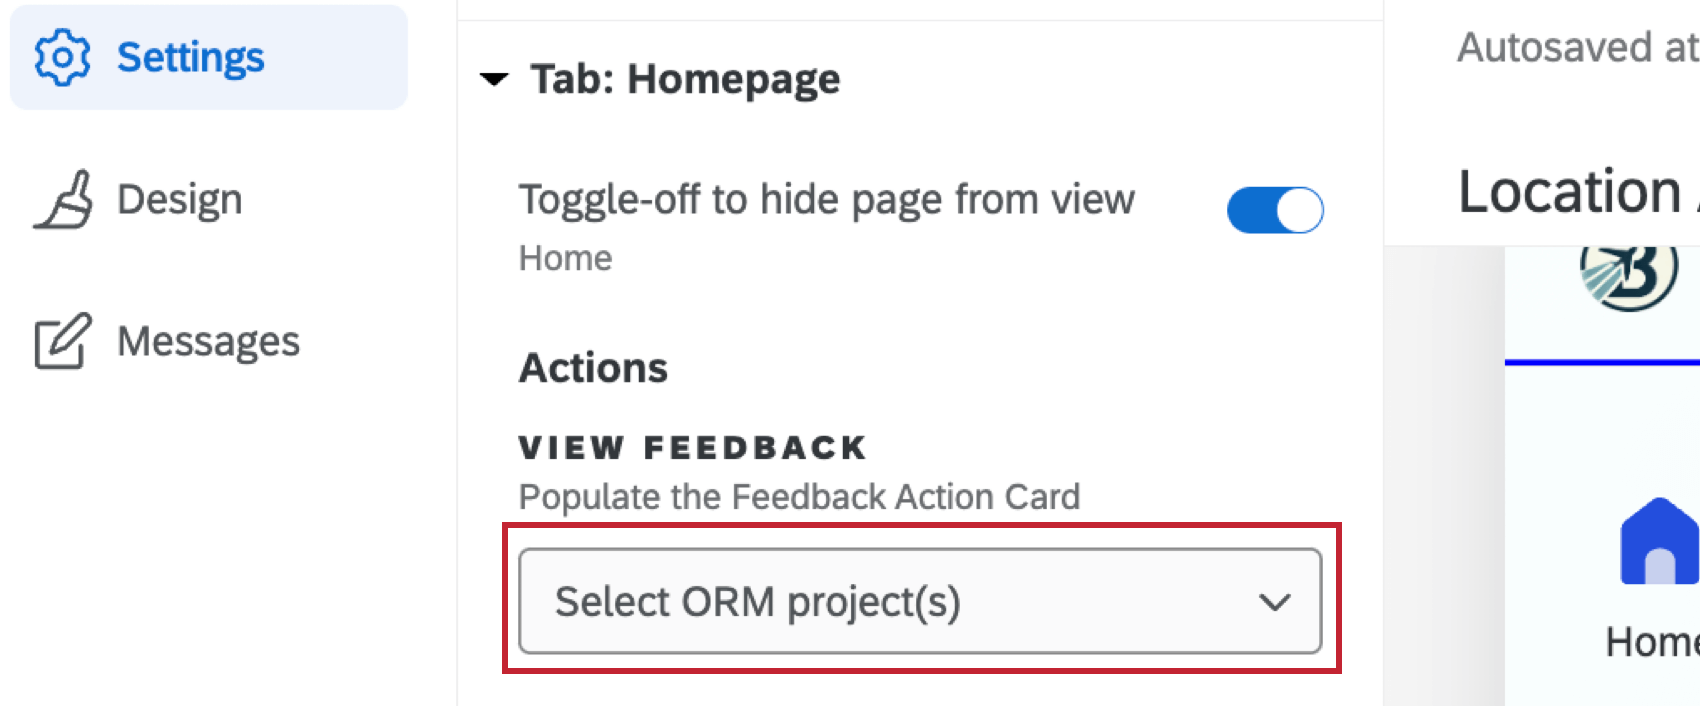
Homepage
Here you can customize the appearance of the Home tab. The options you configure here will affect what is displayed within the Actions and Key Metrics cards on the Home tab.
To start, toggle the homepage on. You can choose a name for this tab and an icon that will appear next to it.
Actions
This card shows recent feedback and tickets for your organization.
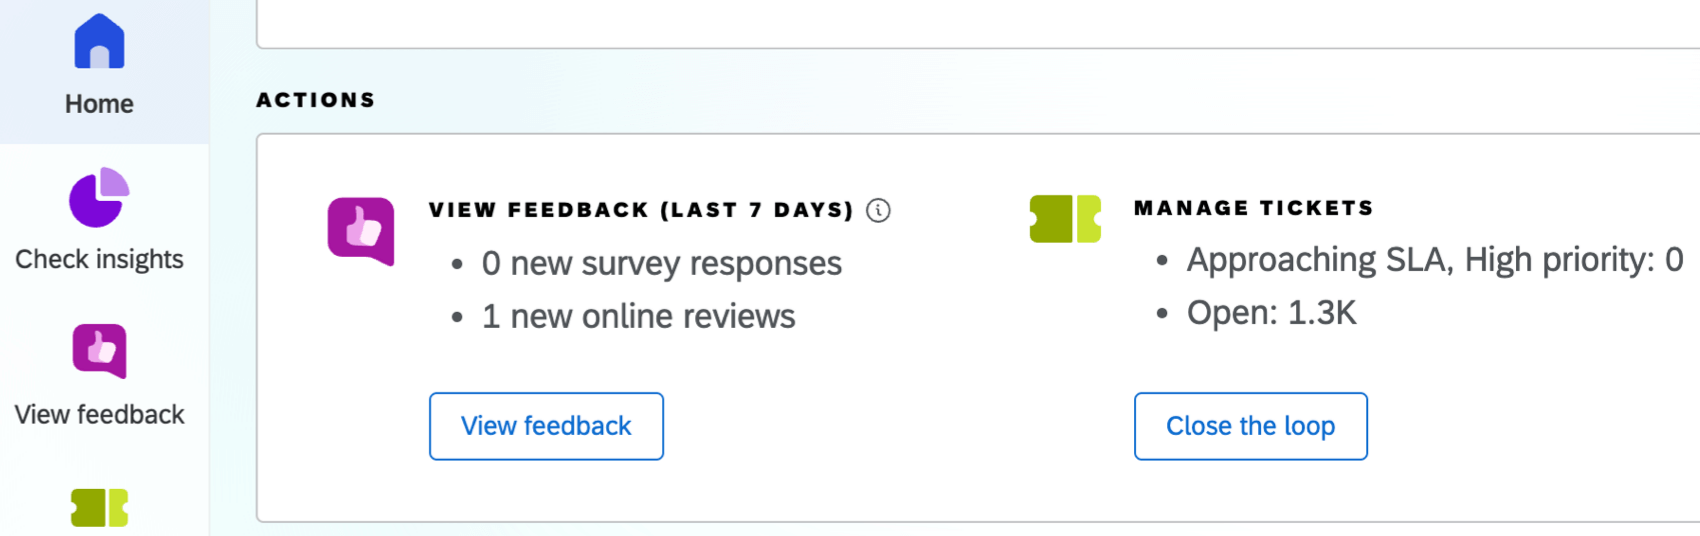
Use the dropdown underneath View Feedback to select a Reputation Management project or projects to contribute to the displayed count of online reviews. This lets you ensure no projects with competitor reviews are selected.
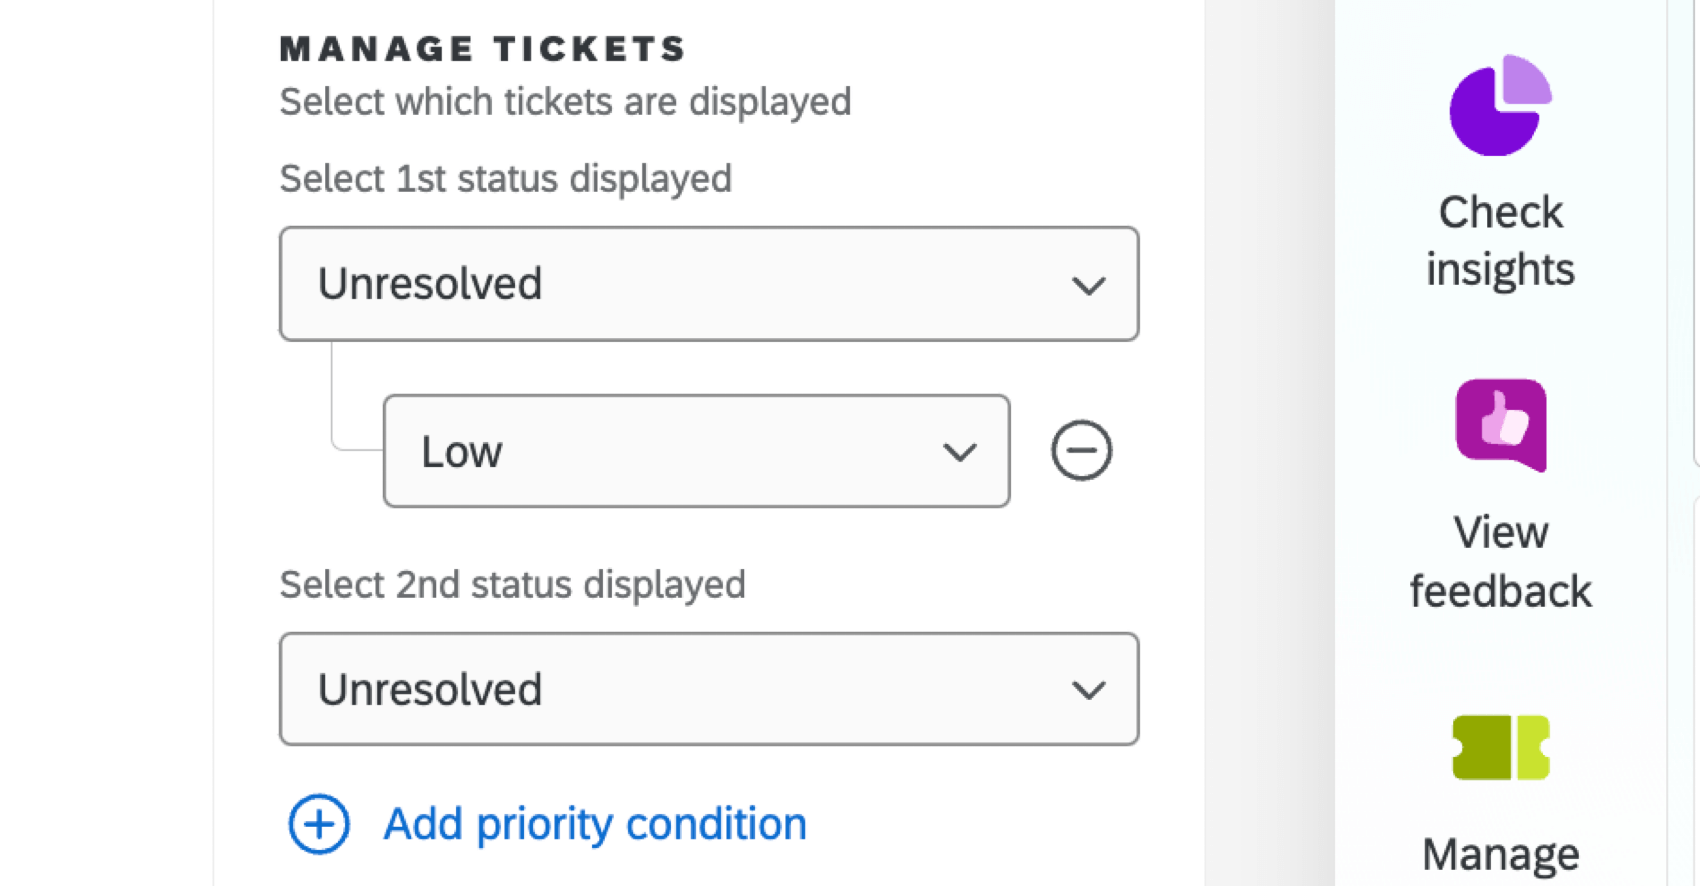
Under Manage Tickets, you can select which ticket statuses will be displayed. Use the dropdowns to select a first and second status. You can also click Add priority condition to only display tickets of your selected status with a specific priority.
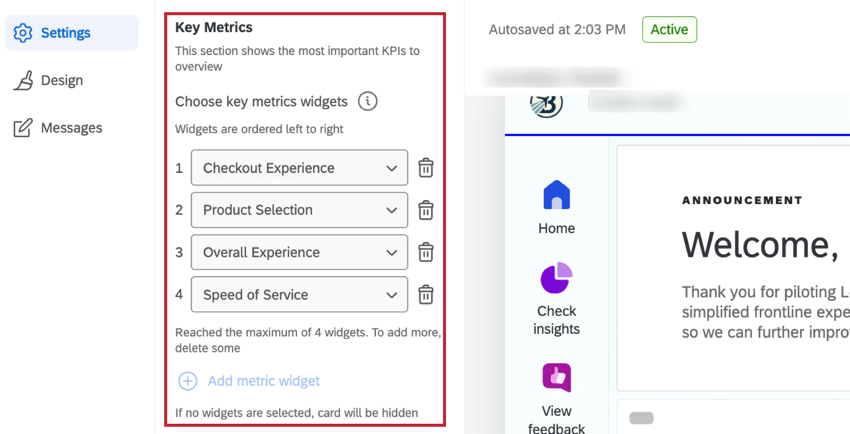
Key Metrics
This card shows key metrics for your organization. To add widgets to this card, you’ll first need to select a dashboard.
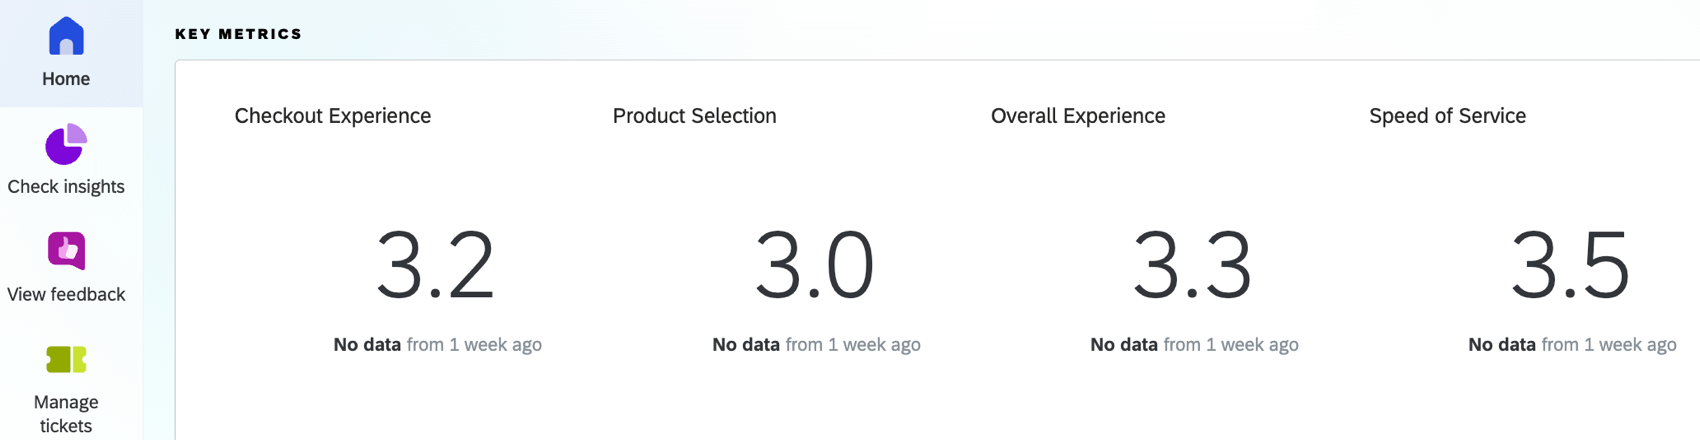
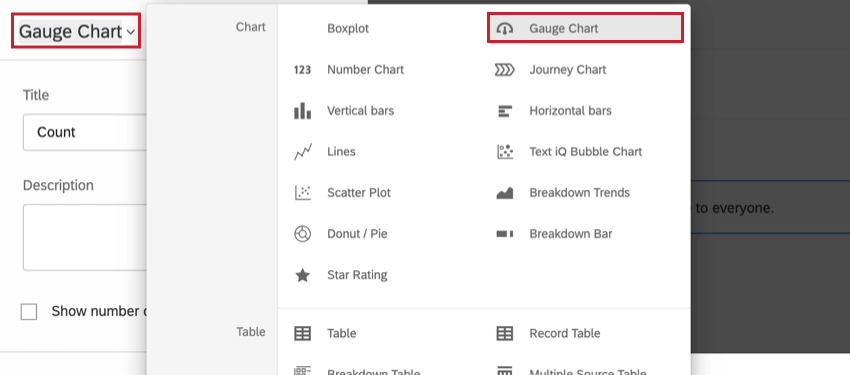
Click Add metric widget to select a widget to display within the Key Metrics section. You can display up to 4 widgets, and widgets will be displayed from left to right. Only number chart and gauge chart widgets can be selected. Click the trash icon to delete a widget.
Qtip: If the number chart or gauge chart you’d like to use isn’t appearing here, then it may be an older version of the widget that isn’t compatible with the Location Experience Hub. You can update the widget by following the steps below:
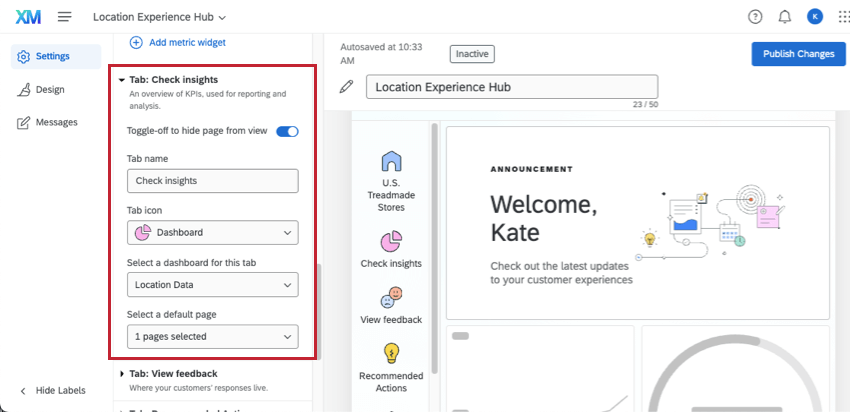
Check Insights
Here you can select a CX dashboard to display key insights. Use the dropdown to select a dashboard you have access to.
- Decide how the tab will be named.
- Select an icon to appear on the tab.
- Use the dropdown to select a dashboard you have access to.
- You can then select a default page from this dashboard that will be shown to users when they visit the tab.
You can use the toggle at the top to hide or display the page to your app users.
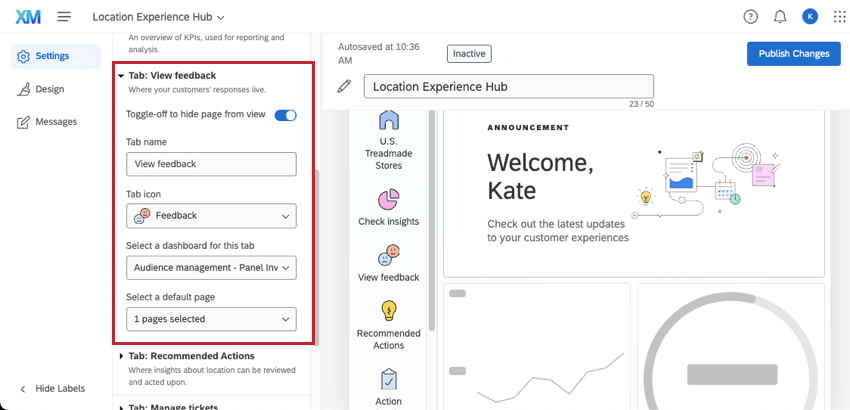
View Feedback
Here you can select a dashboard to display customer feedback and verbatims.
- Decide how the tab will be named.
- Select an icon to appear on the tab.
- Use the dropdown to select a dashboard you have access to.
- You can then select a default page from this dashboard that will be shown to users when they visit the tab.
You can use the toggle at the top to hide or display the page to your app users.
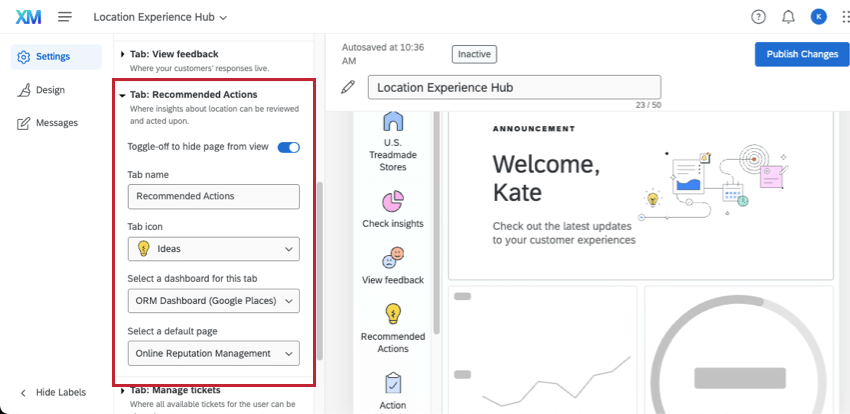
Recommended Actions
Here you can select a dashboard that shows insights about each location and gives users the ability to act on those insights.
- Decide how the tab will be named.
- Select an icon to appear on the tab.
- Use the dropdown to select a dashboard you have access to.
- You can then select a default page from this dashboard that will be shown to users when they visit the tab.
You can use the toggle at the top to hide or display the page to your app users.
Manage Tickets
This page will display a standard view of all tickets and queues. You can set the name of the tab and its icon, but don’t need to customize anything else. When viewing the Location Experience Hub, users can add filters to view tickets for specific teams, groups, statuses, or priorities.
For content to appear here, you’ll need to set up tickets for your organization, including triggering tickets and routing those tickets to users.
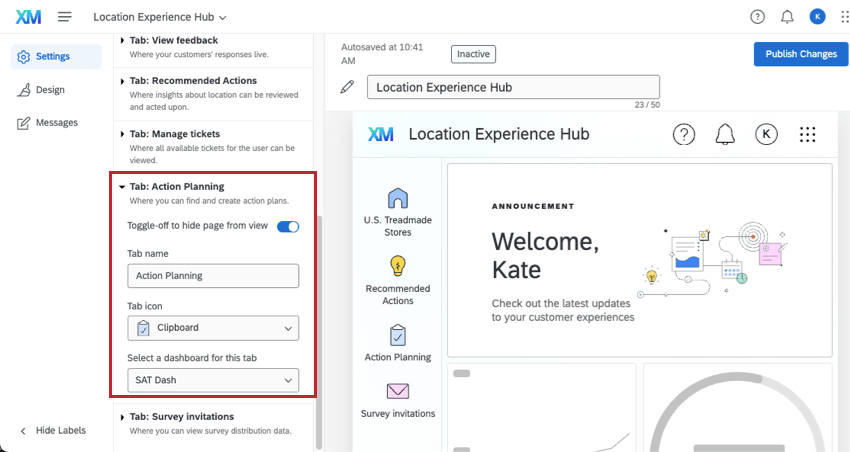
Action Planning
Here you can select a dashboard to display action plans. The dashboard must have CX Action Planning already set up.
- Decide how the tab will be named.
- Select an icon to appear on the tab.
- Use the dropdown to select a dashboard you have access to.
- You can then select a default page from this dashboard that will be shown to users when they visit the tab.
You can use the toggle at the top to hide or display the page to your app users.
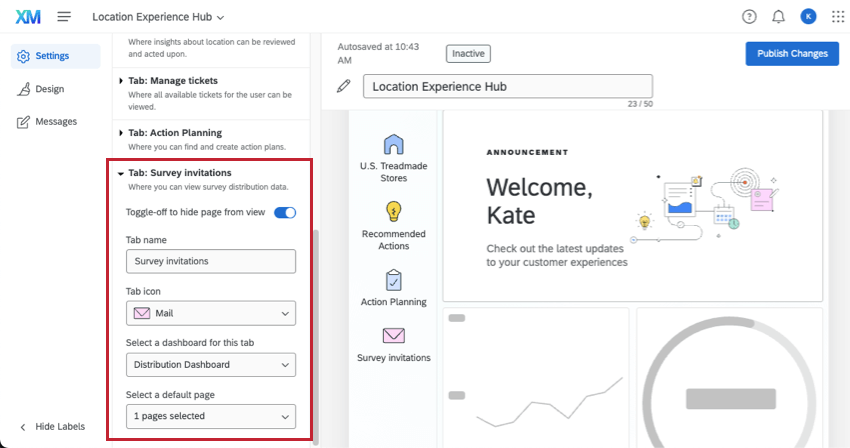
Survey Invitations
Here you can select a dashboard to display survey distribution data. For example, a dashboard that shows respondent funnel data.
- Decide how the tab will be named.
- Select an icon to appear on the tab.
- Use the dropdown to select a dashboard you have access to.
- You can then select a default page from this dashboard that will be shown to users when they visit the tab.
You can use the toggle at the top to hide or display the page to your app users.