-

Qualtrics Platform -

Customer Journey Optimizer -

XM Discover -

Qualtrics Social Connect
Chat Data Project
About Chat Data Projects
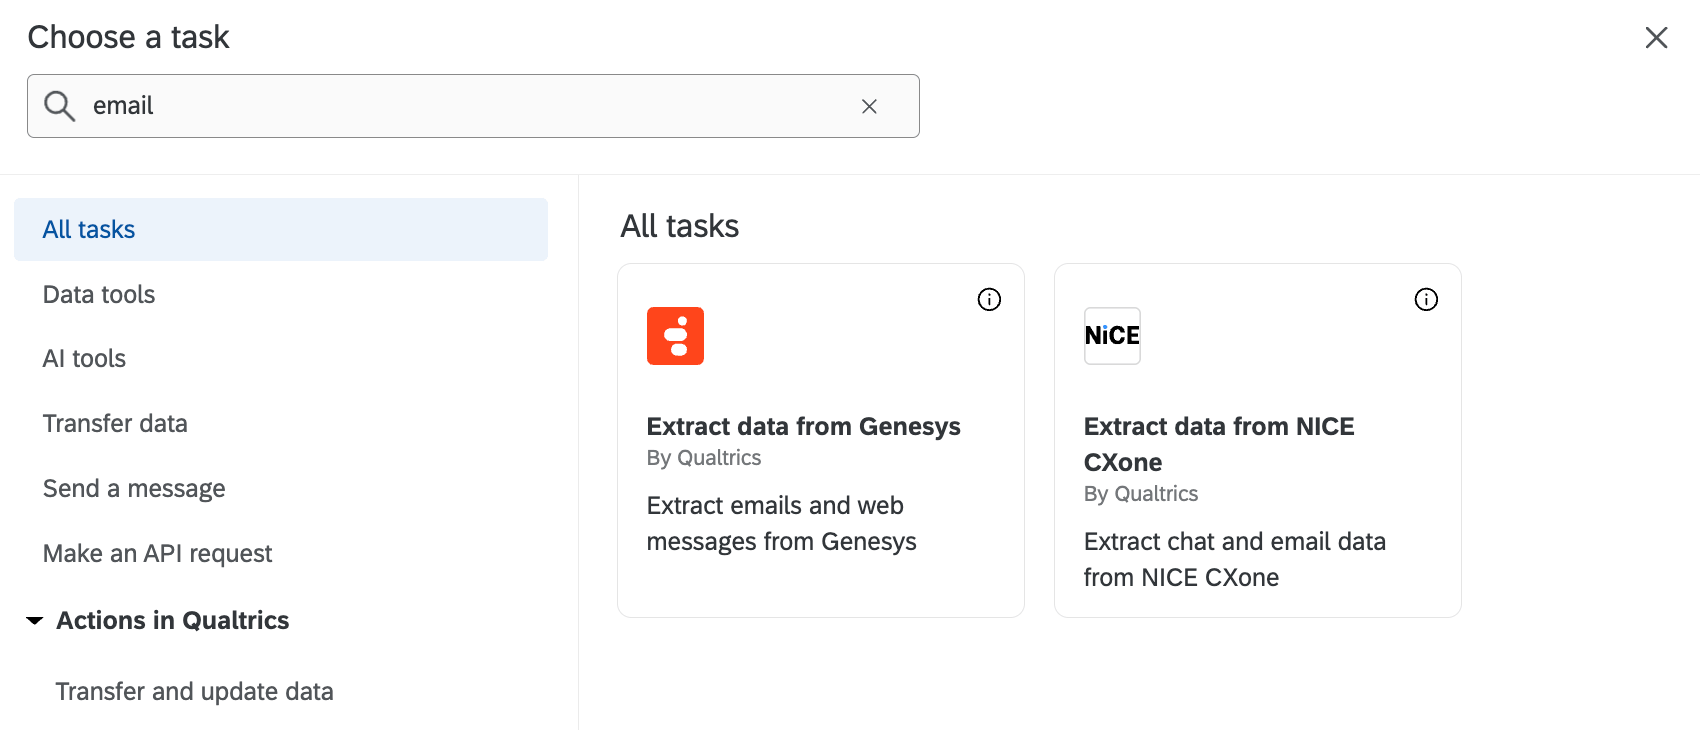
Chat Data projects were designed to fulfill your omnichannel listening needs for chat data. You can use extractor tasks to extract chats from contact center providers like Genesys and NICE CXone, then store that data in your project for further analysis. While the entire, end-to-end program setup can be found on Omnichannel Listening Management, this page focuses more on how to create and navigate your chat data project.
Creating a Chat Data Project
You can create a Chat Data project by going to the Catalog and searching it by name.
- Select Chat Data from the catalog.
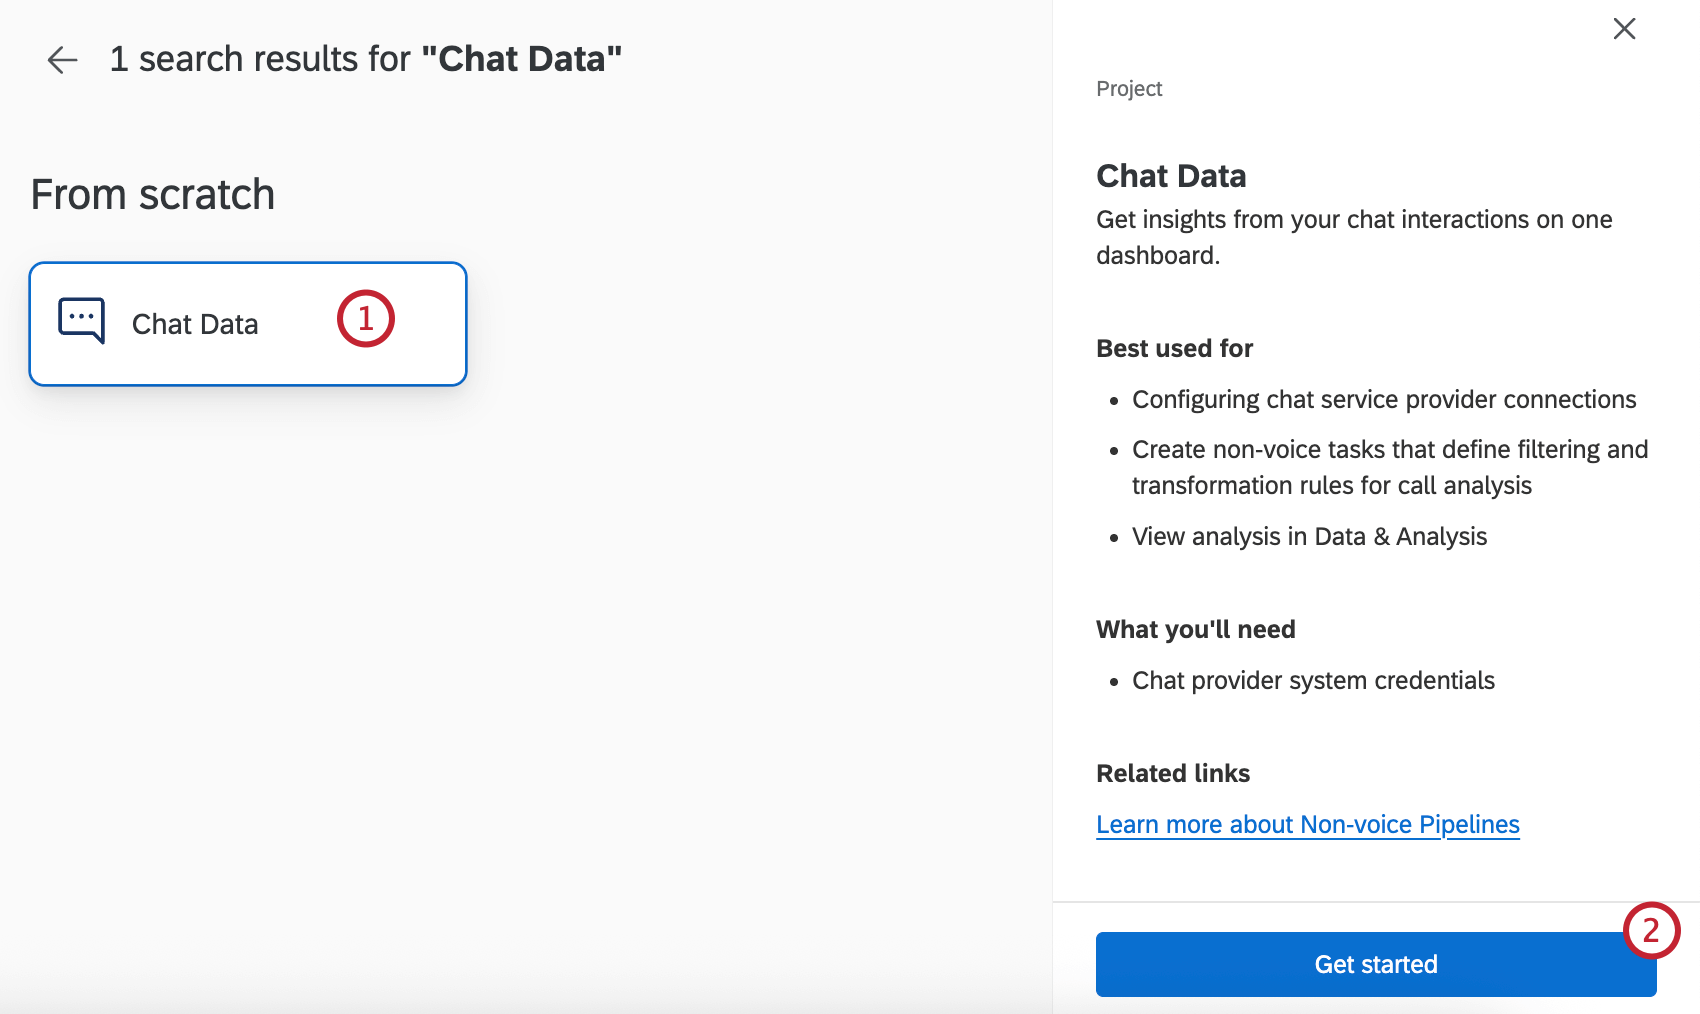
- Click Get started.
- Enter a name for your project.
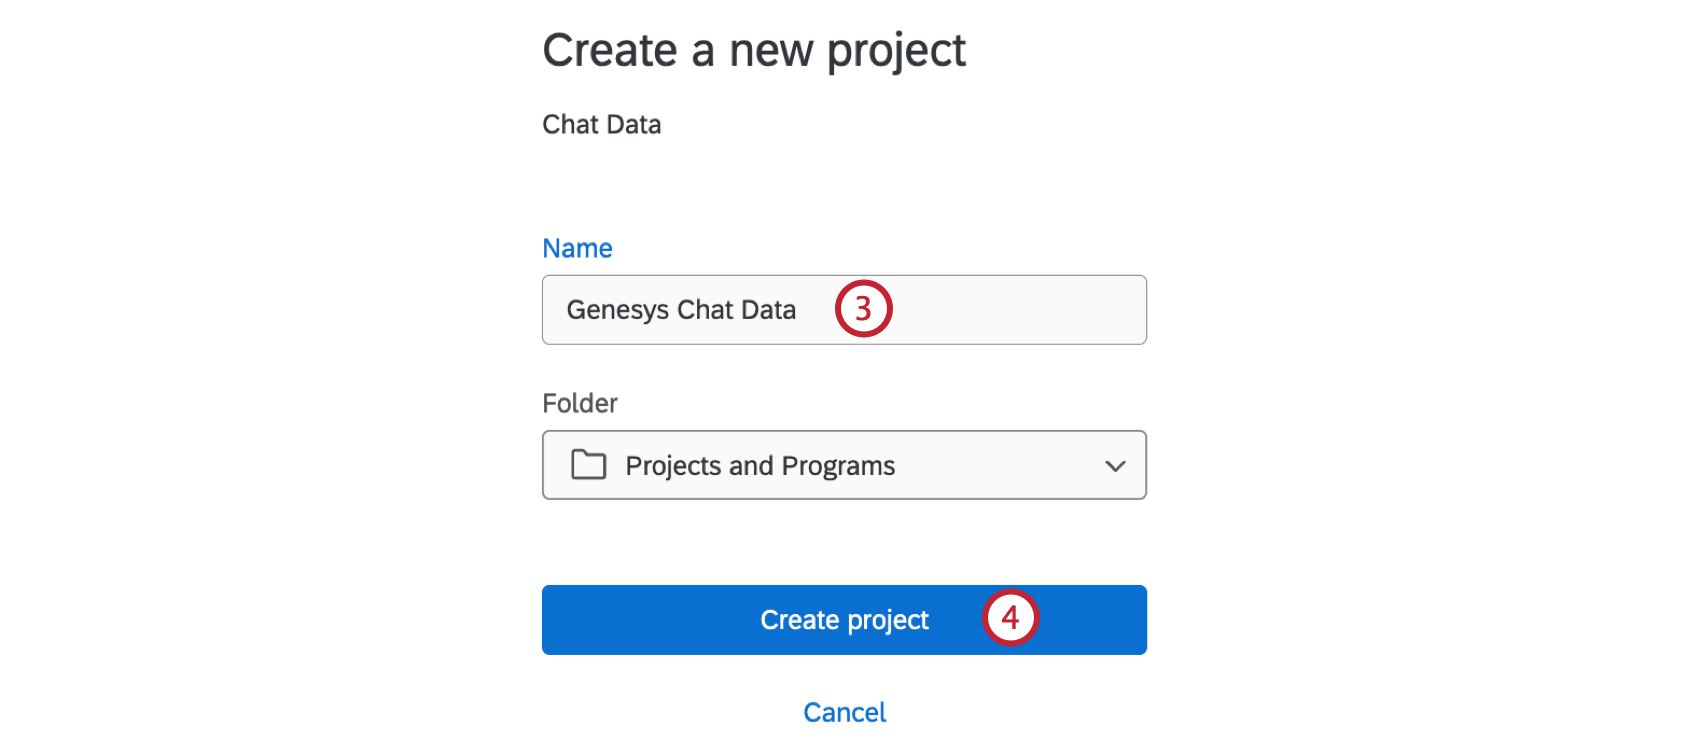
- Click Create project.
Navigating Chat Data Projects
Chat data projects have 3 main tabs:
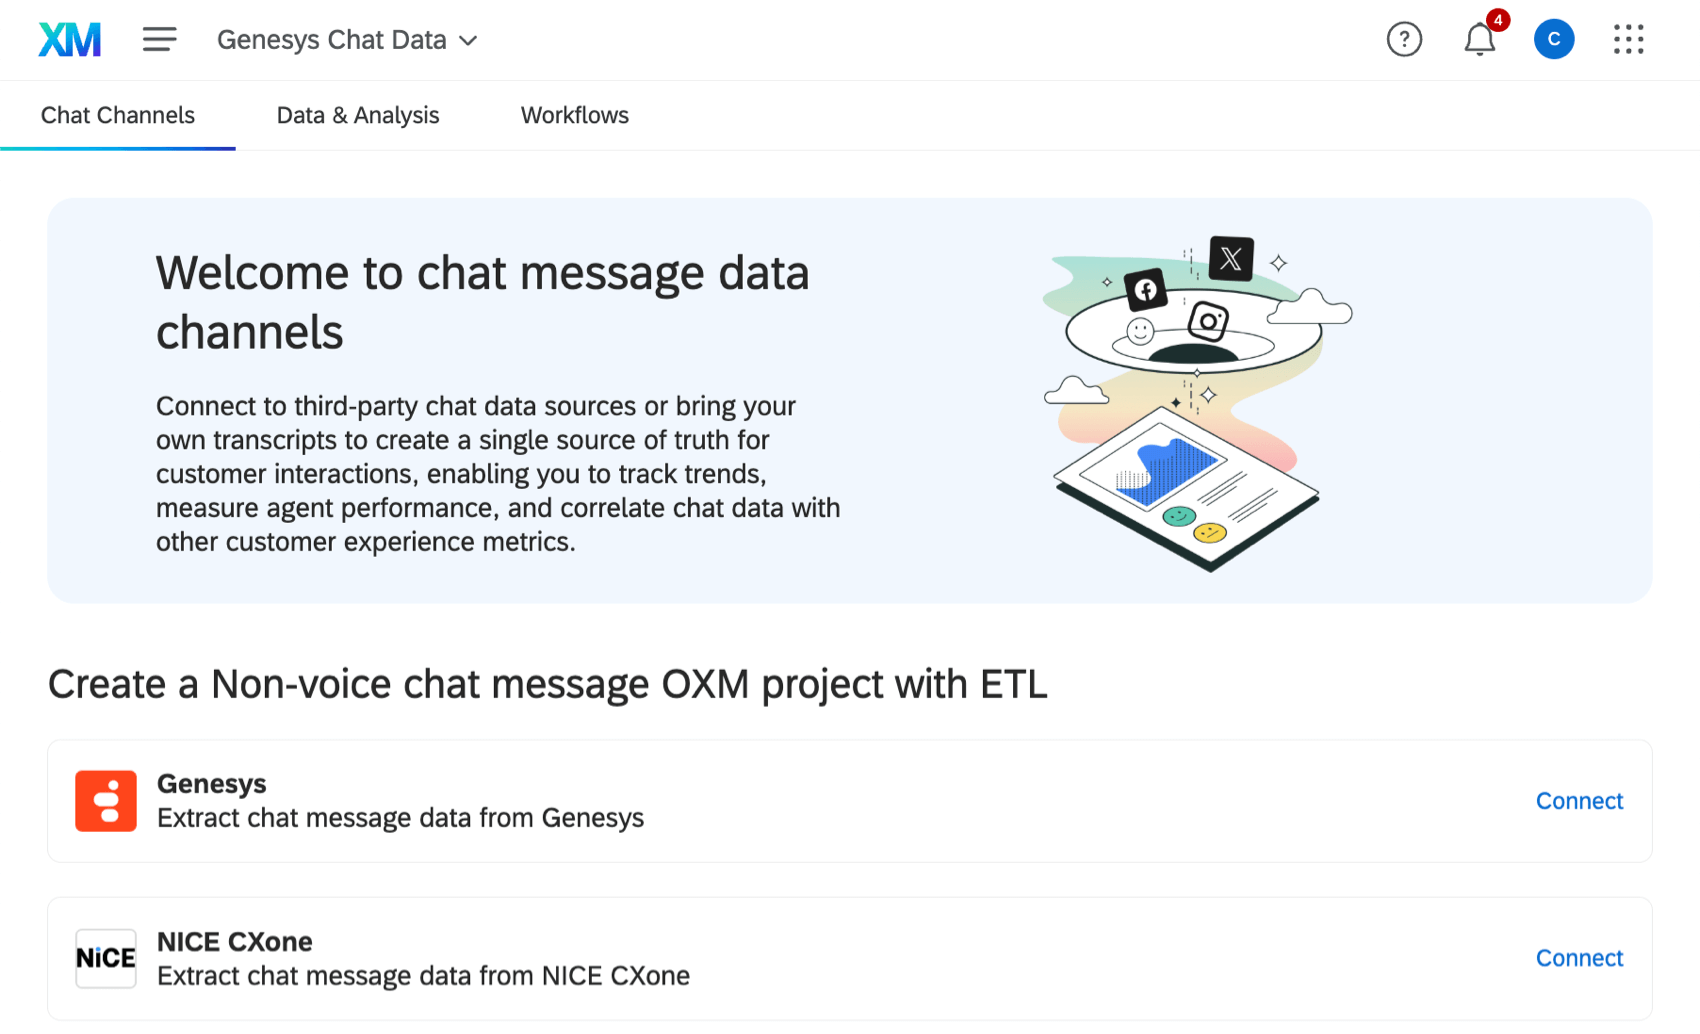
- Chat Channels: This is the homepage of your project. Here, you can connect contact center providers to ingest chat data.
- Data & Analysis: As your workflows extract chat data, this will appear in this tab. Use this space to browse data and perform introductory analysis.
- Workflows: Use this tab to set up automations called “workflows,” which work by extracting chat data from external platforms on a regular schedule of your choice.
Data & Analysis in Chat Data Projects
As your workflows extract chat data, this will appear in the Data & Analysis tab. Use this space to browse data and perform introductory analysis. While you can view and manage responses on the Data tab, deeper data analysis and reporting happens elsewhere in the platform. See our Omnichannel Listening page for how to use Text Analytics and dashboards with your conversational data.
Here’s the functionality you can expect in Data & Analysis, with links to the appropriate support pages:
- Editing Responses
- Export Data
- Re-Import Data
Qtip: The option to re-import data allows you to edit data that’s already in your project. You cannot import new social data using the Data & Analysis tab, and must instead use workflows to extract data from chat providers.
- Recorded Responses
- Filtering Responses
- Field Editor
Using the Workflows Tab
Workflows extracting chat data can be created in your chat data project, or in the stand-alone Workflows tab. Creating them within your project is recommended, as you’ll easily be able to view all relevant extractor tasks in one place.
Below, we’ll show how to create a workflow without the guided flow you see on the main Chat Channels tab of the project.
- In your Chat Data project, click the Workflows tab.
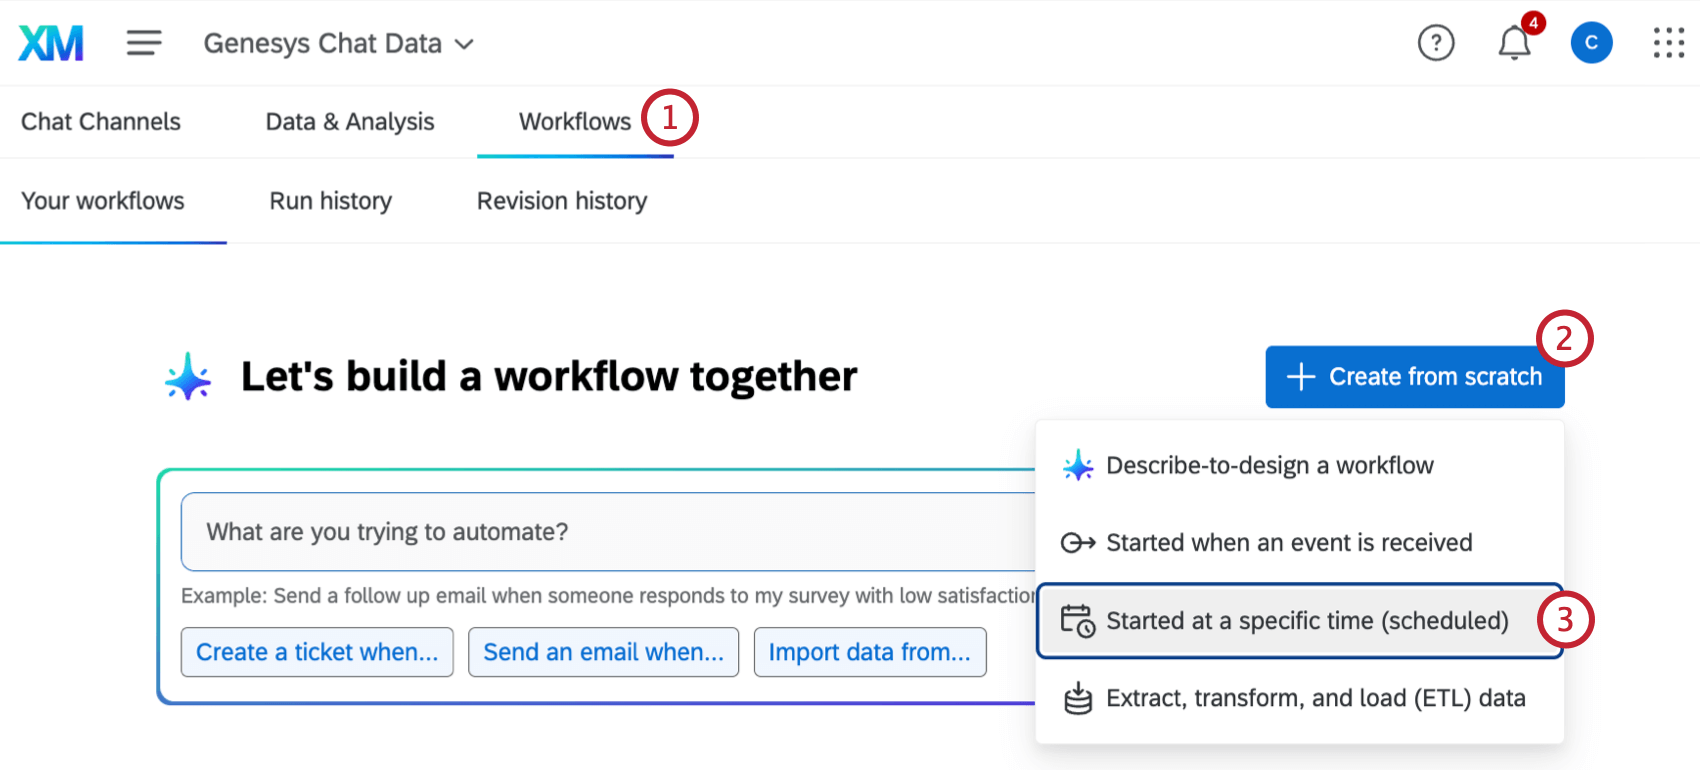
- Click Create a workflow.
- Select Scheduled or ETL.
- Set a schedule.
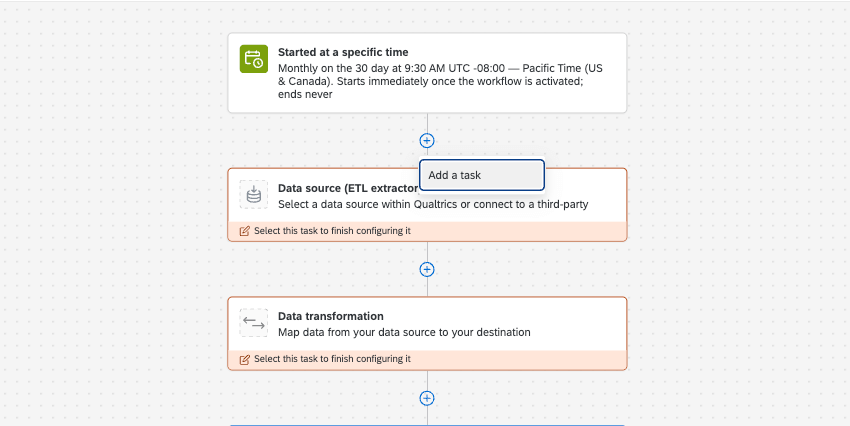 Qtip: You will also be able to immediately run the workflow after it’s created, if you choose.
 - Add one of the following tasks:
Collaborating on Chat Data Projects
You can invite other Qualtrics users to create and edit your chat data project.
Collaboration works the same with chat data projects as it does with reputation management projects, except collaborators can only have Admin access. There is no read-only access for chat data projects.. For steps, see this page on collaboration.