-

Qualtrics Platform -

Customer Journey Optimizer -

XM Discover -

Qualtrics Social Connect
Voice Project
About Voice Projects
Voice projects are designed to fulfill your omnichannel listening needs for voice data. You can create voice tasks to extract call recordings from voice providers like Genesys and NICE CXone, then store that data in your project for further analysis. While the entire, end-to-end program setup can be found on Omnichannel Listening Management, this page focuses more on how to create and navigate your voice project.
Creating a Voice Project
You can create a Voice project by going to the Catalog and searching for the project type by name.
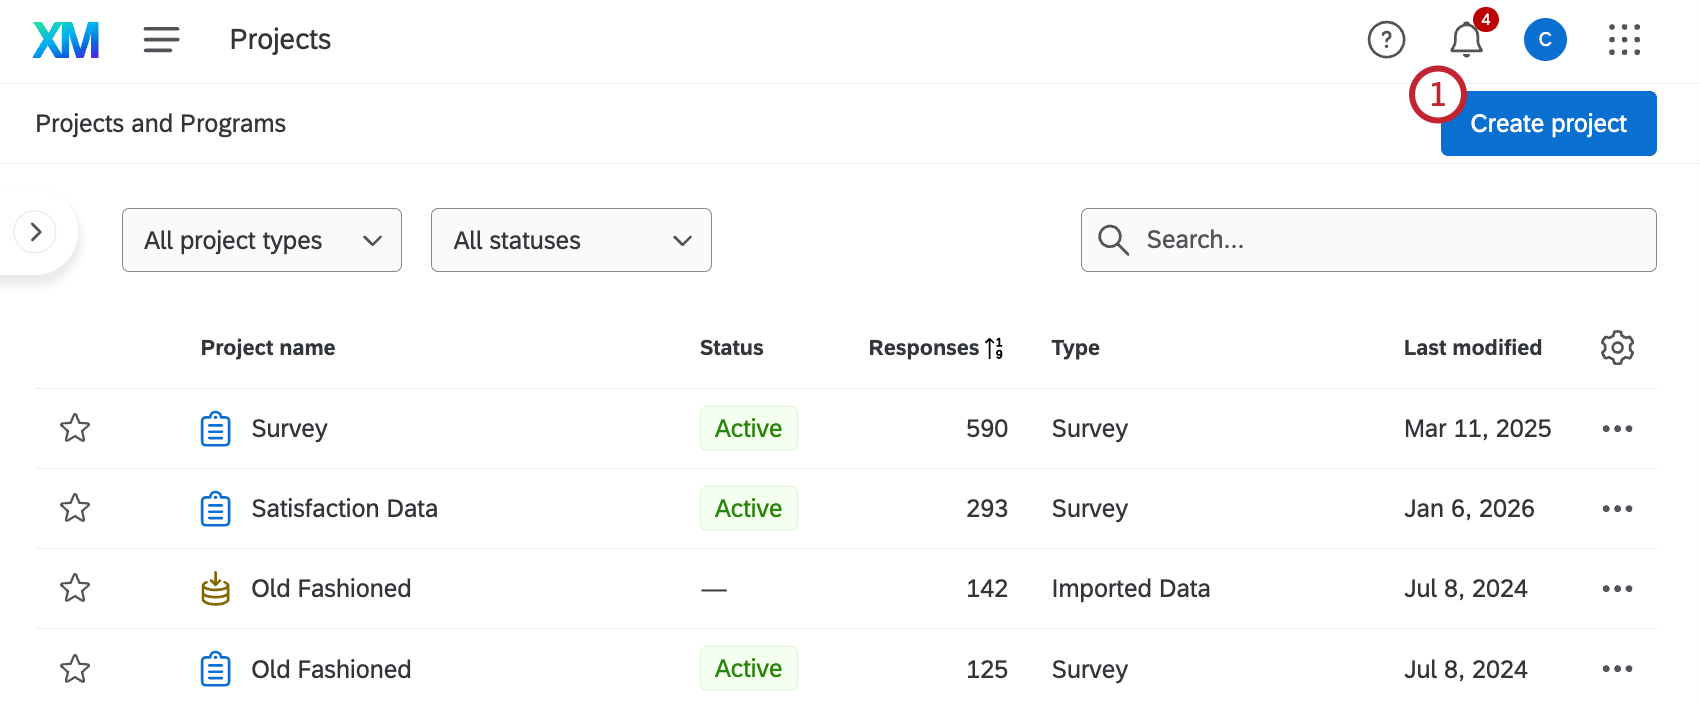
- Select Create project from the home page or projects page.
- Select Voice from the catalog.
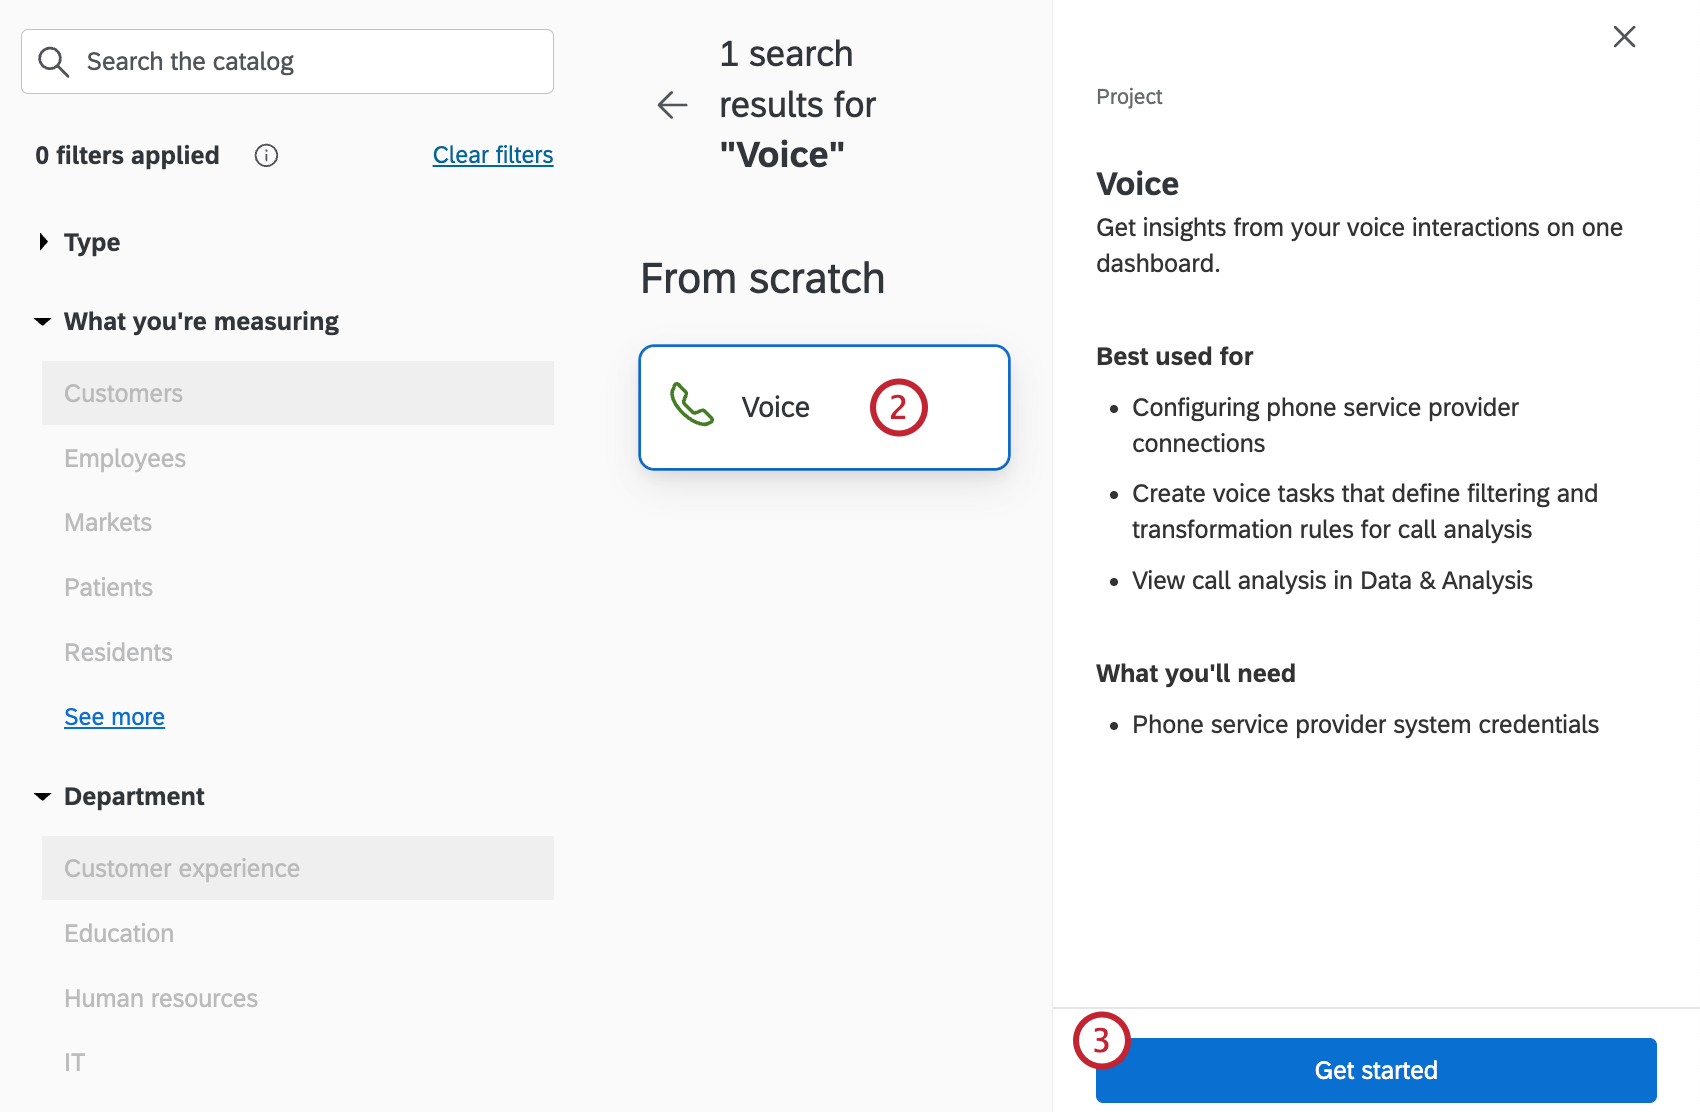
- Click Get started.
- Enter a name for your project.
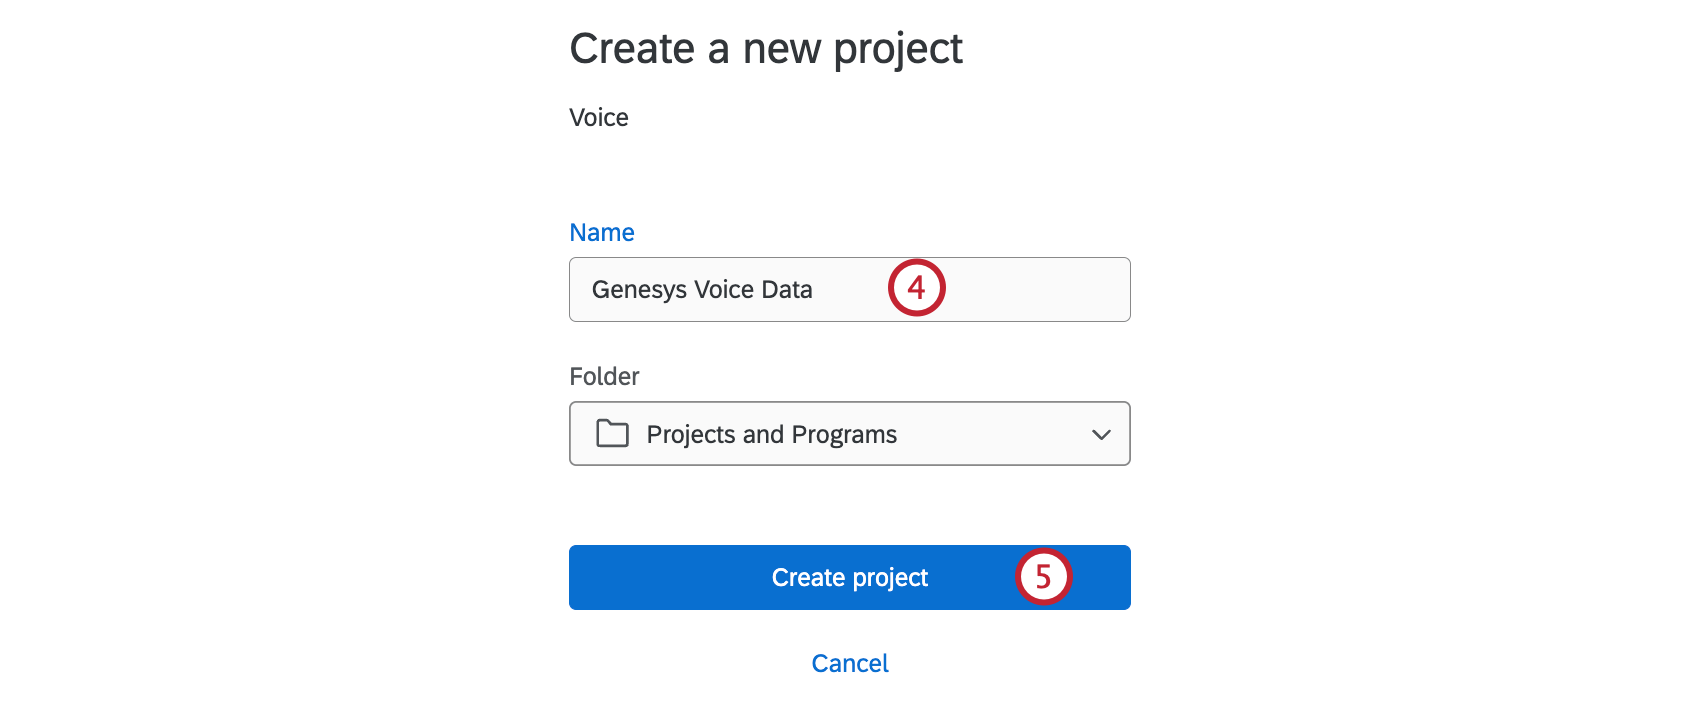
- Click Create project.
Configuring a Voice Task
After creating your voice project, you must connect your voice provider to Qualtrics so call data can be imported. You’ll then be taken through the steps to configure a voice task.
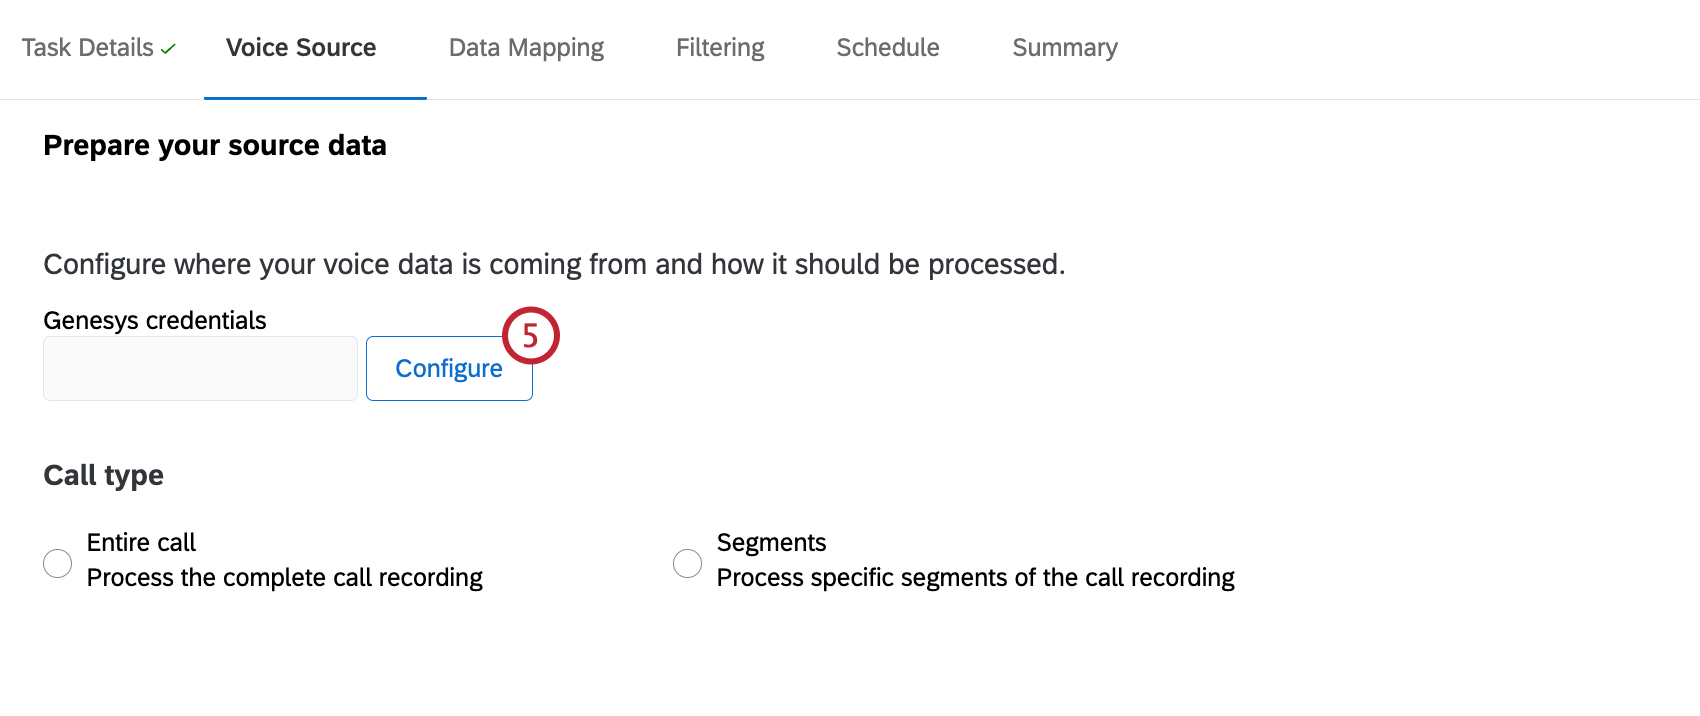
- Select your voice data source. The available sources are:
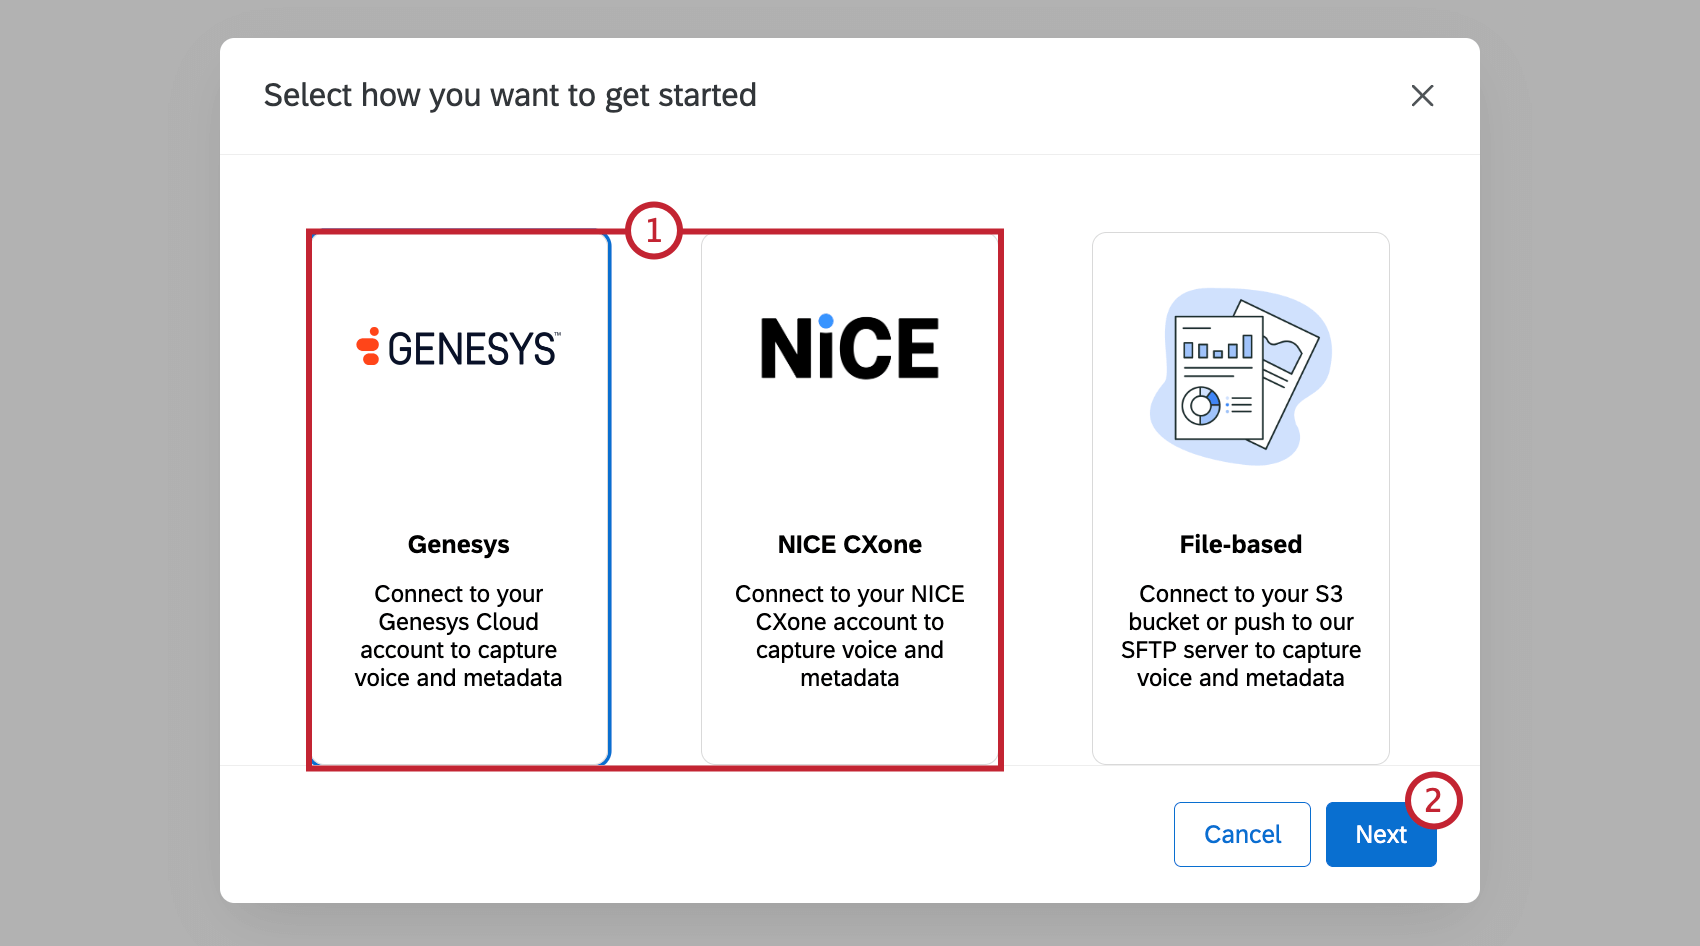
- Genesys: Capture voice and metadata from Genesys Cloud.
- NICE CXone: Capture voice and metadata from NICE CXone.
- Click Next.
- Enter a name for your voice task.
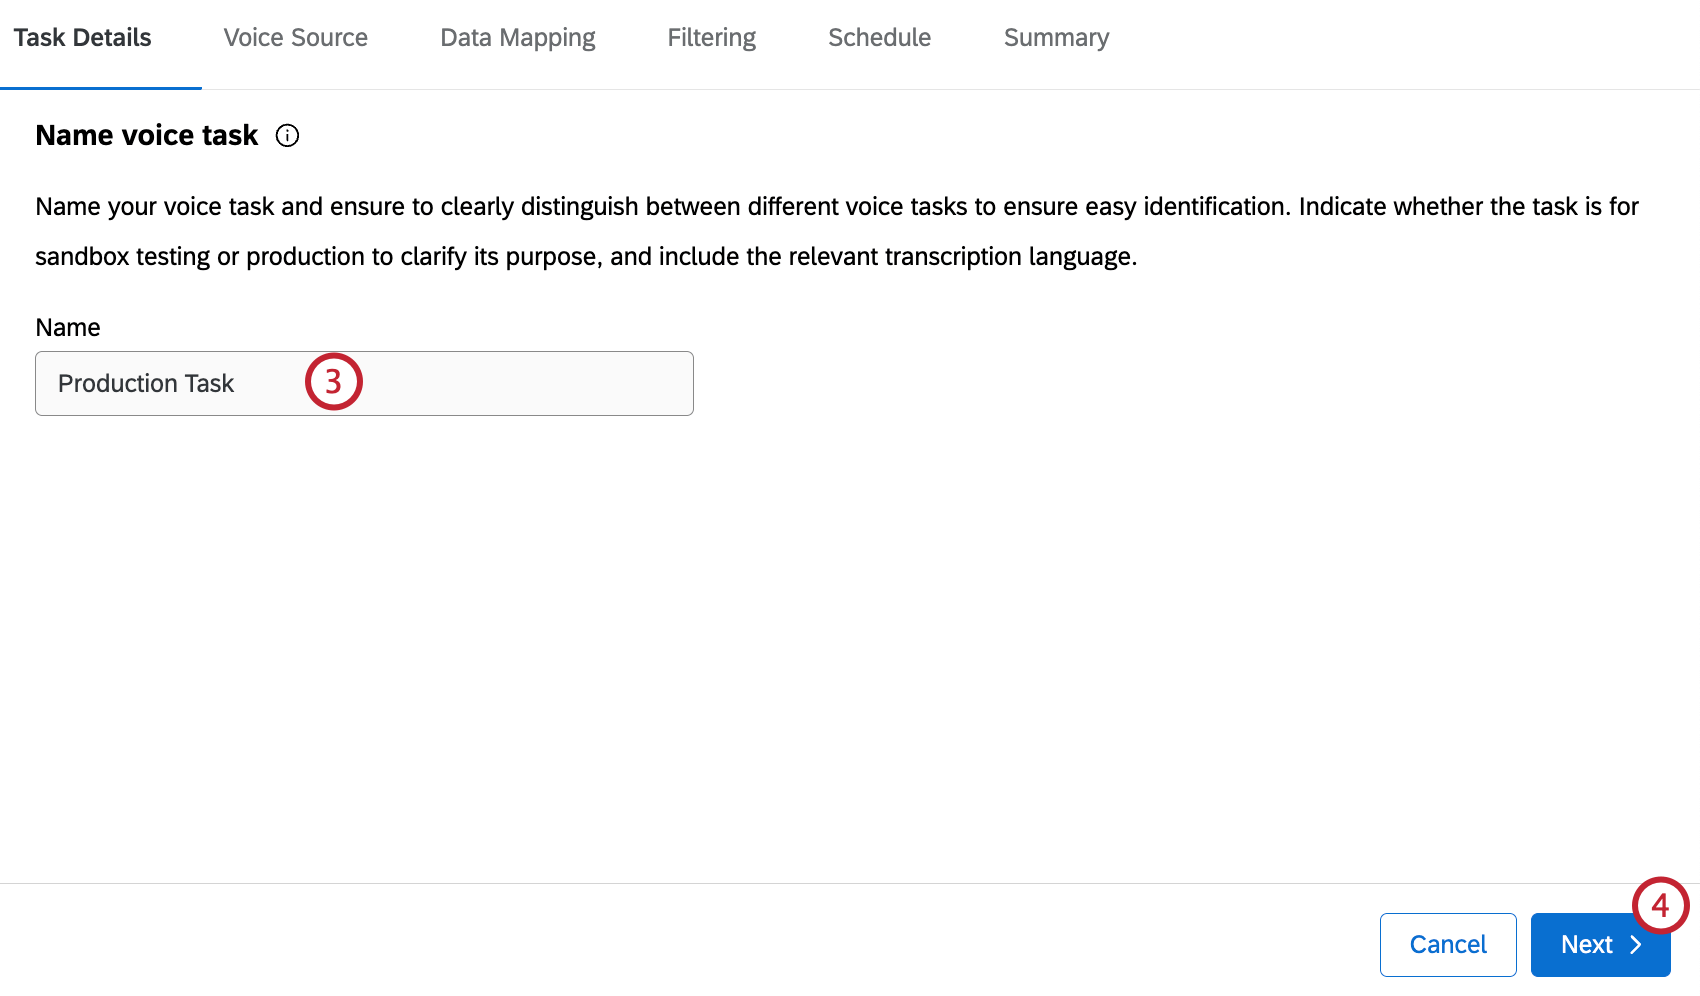
- Click Next.
- Select Configure to add and verify your credentials.
- Select the voice provider account to import data from.
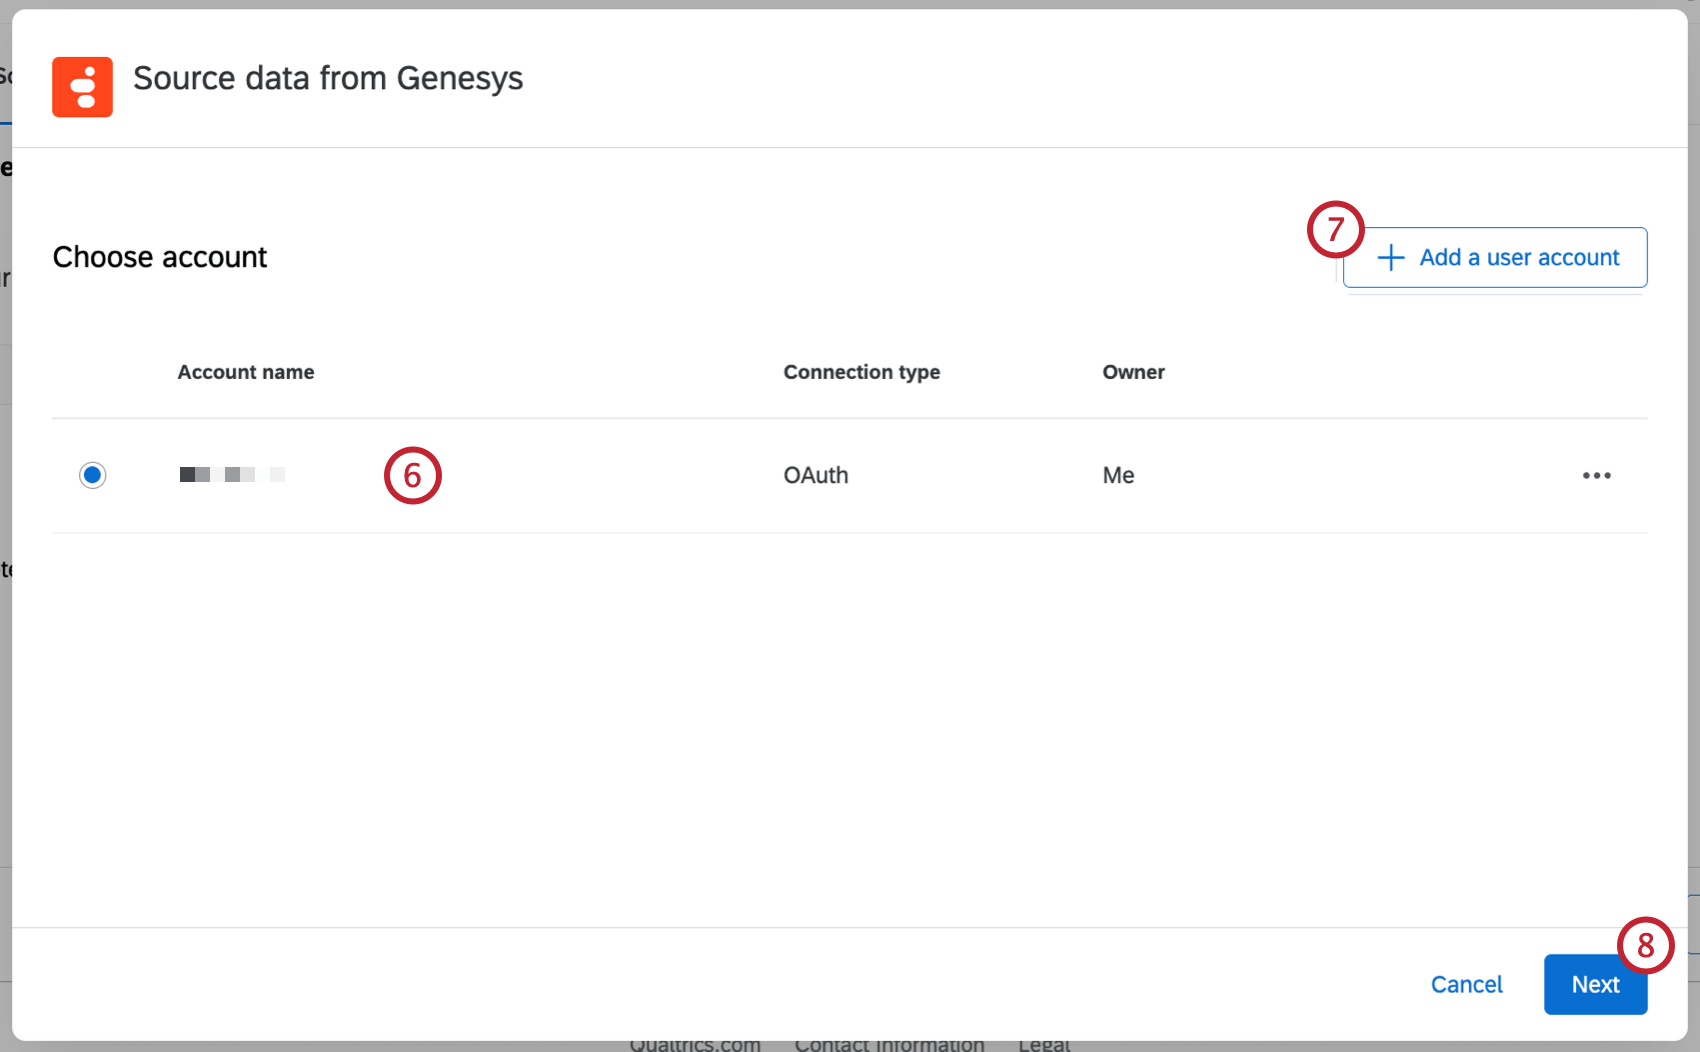 Qtip: Any accounts you’ve previously connected as well as accounts set up by Brand Administrators will be available here.
 - If you’d like to add a new account, click Add a user account. For more details on what information you need to input from your voice provider, see Permissions and Voice Provider Requirements.
Qtip: After clicking Add a user account, give the account a name and enter the account credentials, then click Connect account. After clicking Connect account, login with your provider credentials.
- Click Next.
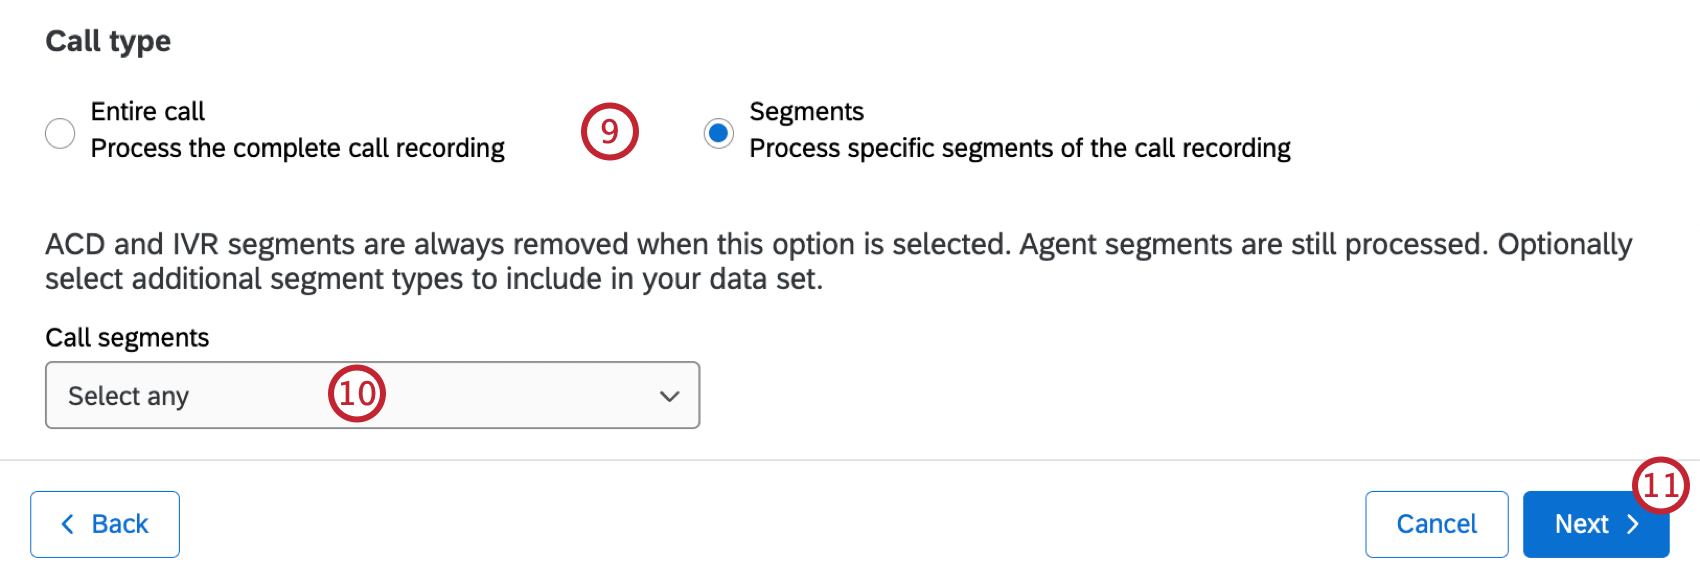
- Select the call type.
- Entire call: Process the complete call recording with all segments included. This option is recommended.
- Segments: Process only agent to customer segments of the call recording. Any other segments will need to be selected.
- If you select segments, you can also select additional segment types to include in your data set.
Qtip: Agent segments will be automatically processed, but ACD and IVR segments will be removed.
- Click Next.
- Map your contact center data to the corresponding fields in Qualtrics. See Mapping Voice Data for more information.
- Click Next.
- Indicate the minimum and maximum duration of calls to be excluded from your data set. Calls outside of this duration range will not be imported. This option is only available when you are setting up a voice task using Genesys as the voice provider and are only processing segments of the call recording.
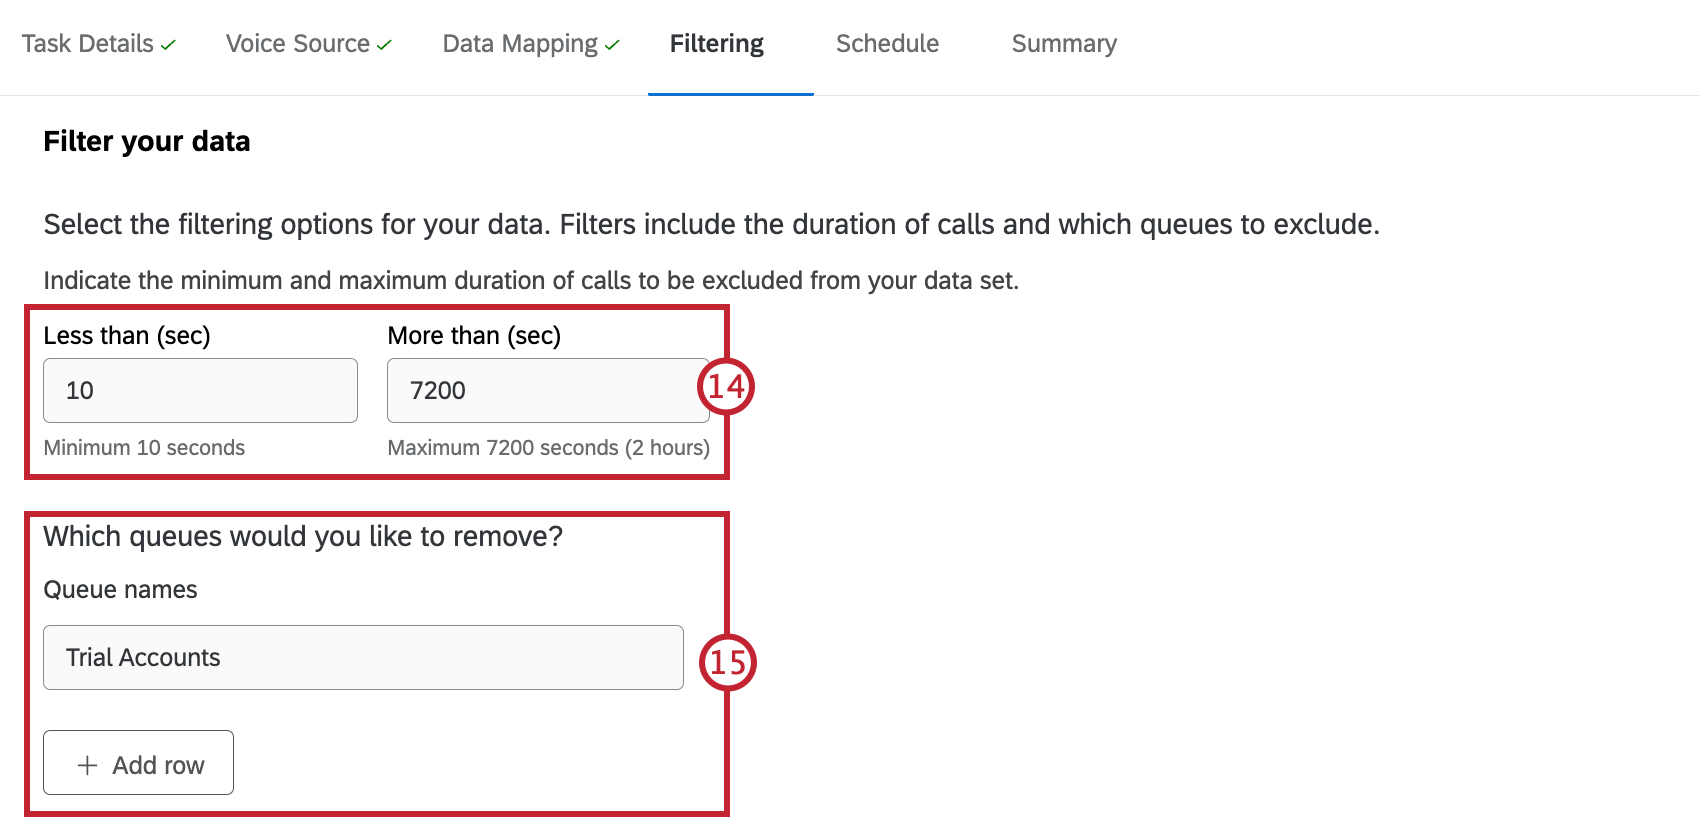
- Enter the name of any queues you don’t want to import voice data for. Click Add row to exclude additional queues. This option is only available when you are setting up a voice task using Genesys as the voice provider and are only processing segments of the call recording.
- Click Filter files by metadata if you want to filter your voice data by a specific source field.
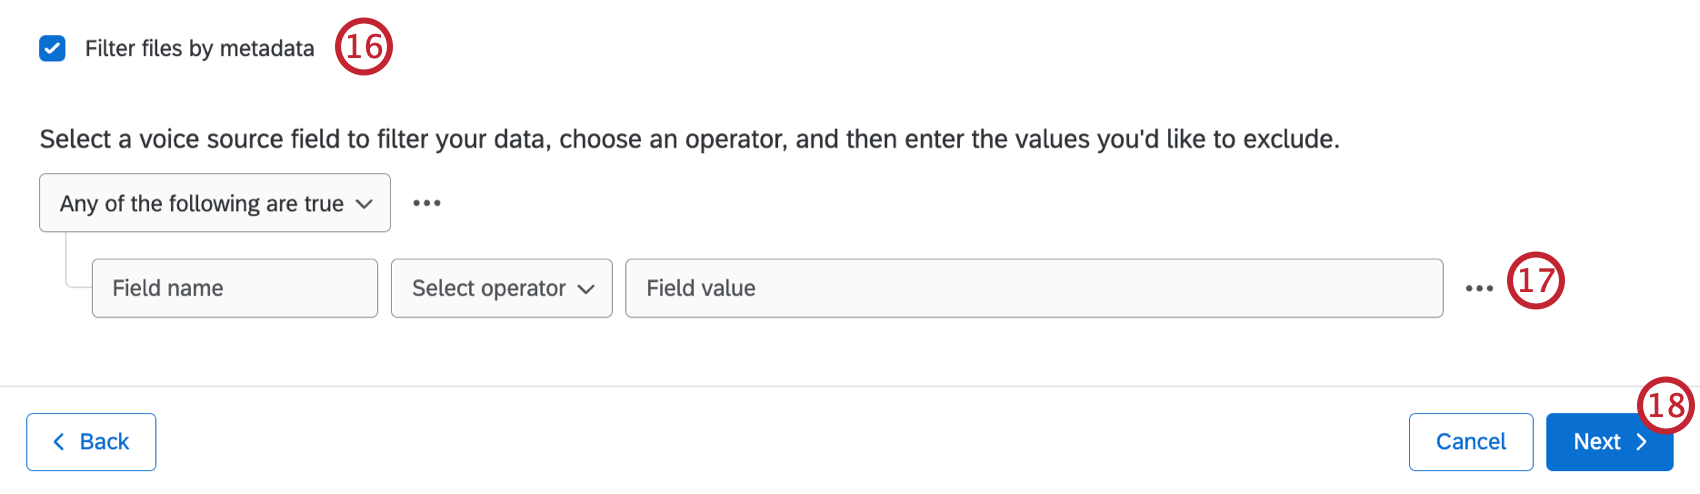
- Configure your filter. When you import data from NICECXOne, only data that meets the filter criteria will be included. When you import data from Genesys, only data matching the criteria will be excluded.
Qtip: You can add additional conditions if needed. See Conditions and Condition Sets for more information.
- Click Next.
- Use the dropdown to select how often you’d like this task to run.
- If you are ready for the task to start running, click Enabled. The task will start running according to the schedule you set.
Qtip: Scheduled tasks will only be enabled after an initial manual run has been completed. To run a task manually, go to the Voice tab and select Run task now. See Viewing and Managing Voice Tasks for more information.
- Click Next.
- Review your task details. Click Edit next to any details you want to edit.
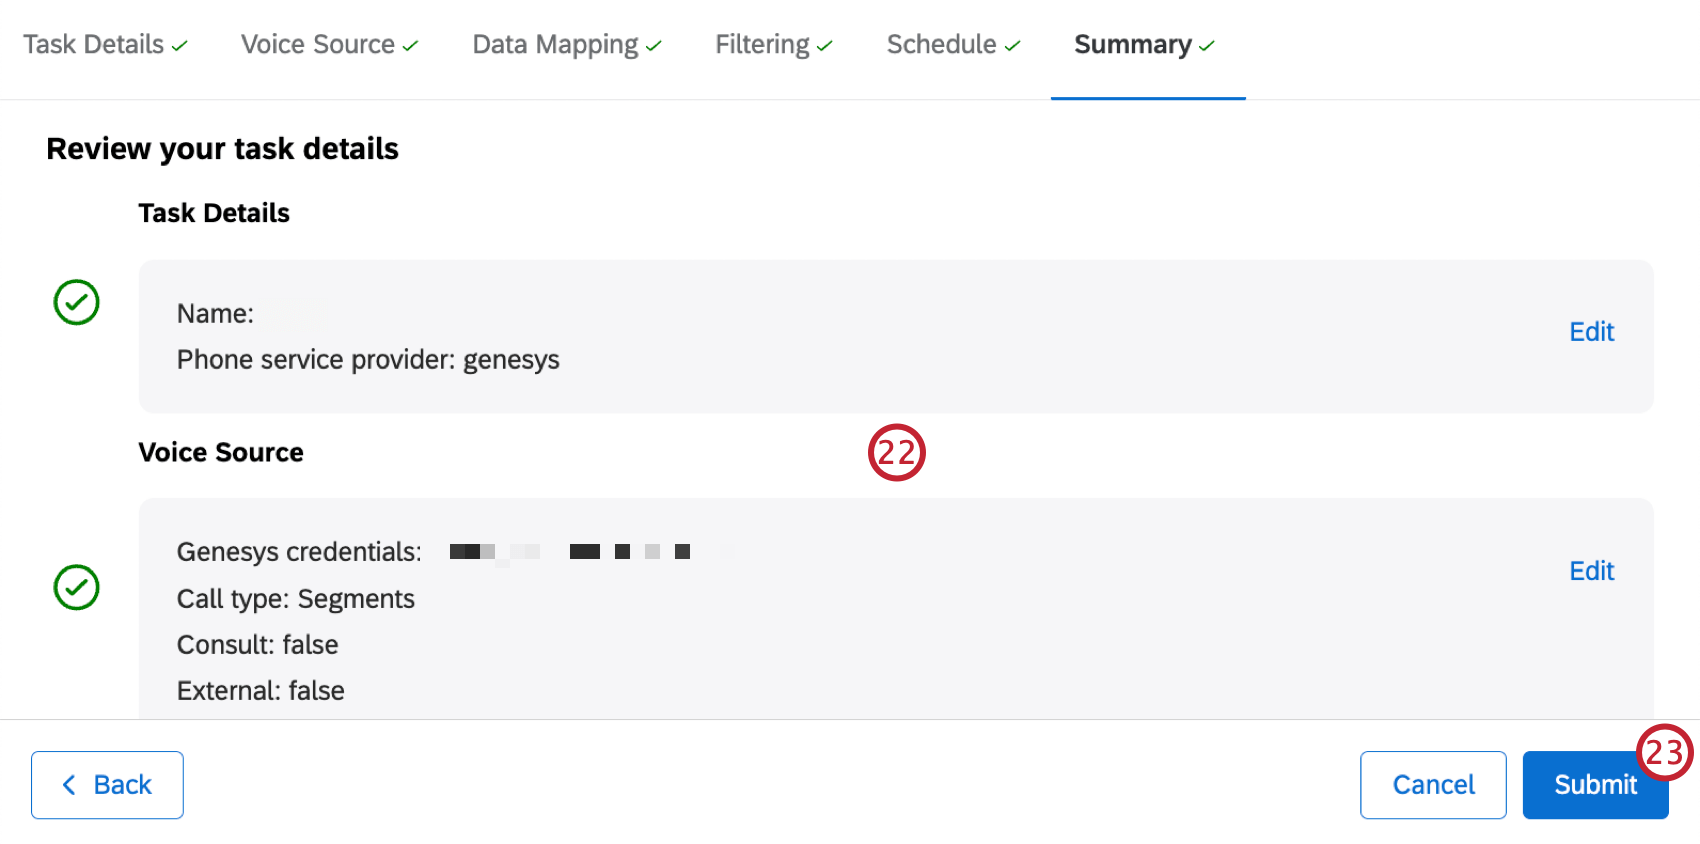
- Once you’re satisfied with your task, click Submit.
Navigating Voice Projects
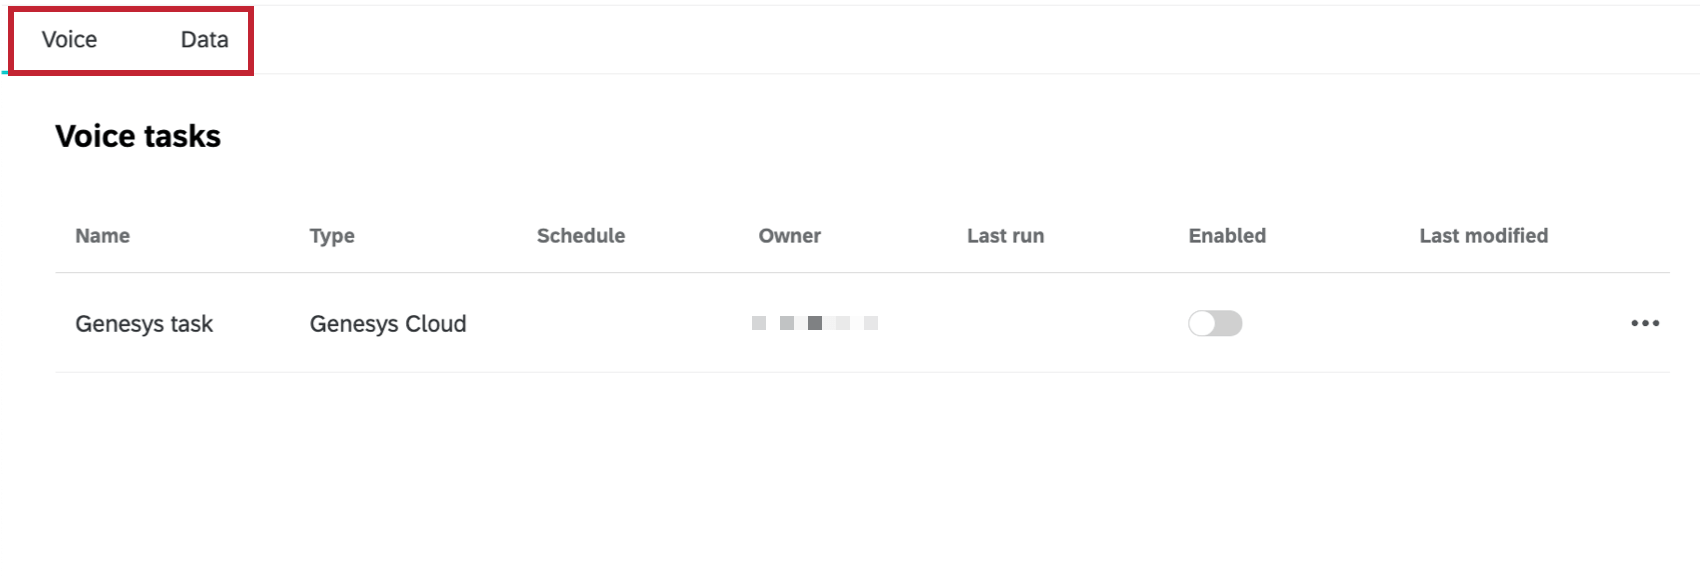
Voice projects have 2 main tabs:
- Voice: This is the homepage of your project. Here, you can see the voice tasks you have set up. You can also use the 3 horizontal dots to the right of a task to perform additional actions.
- Data: As your voice tasks pull data, those conversations will appear in this tab. Use this space to browse data and perform introductory analysis.
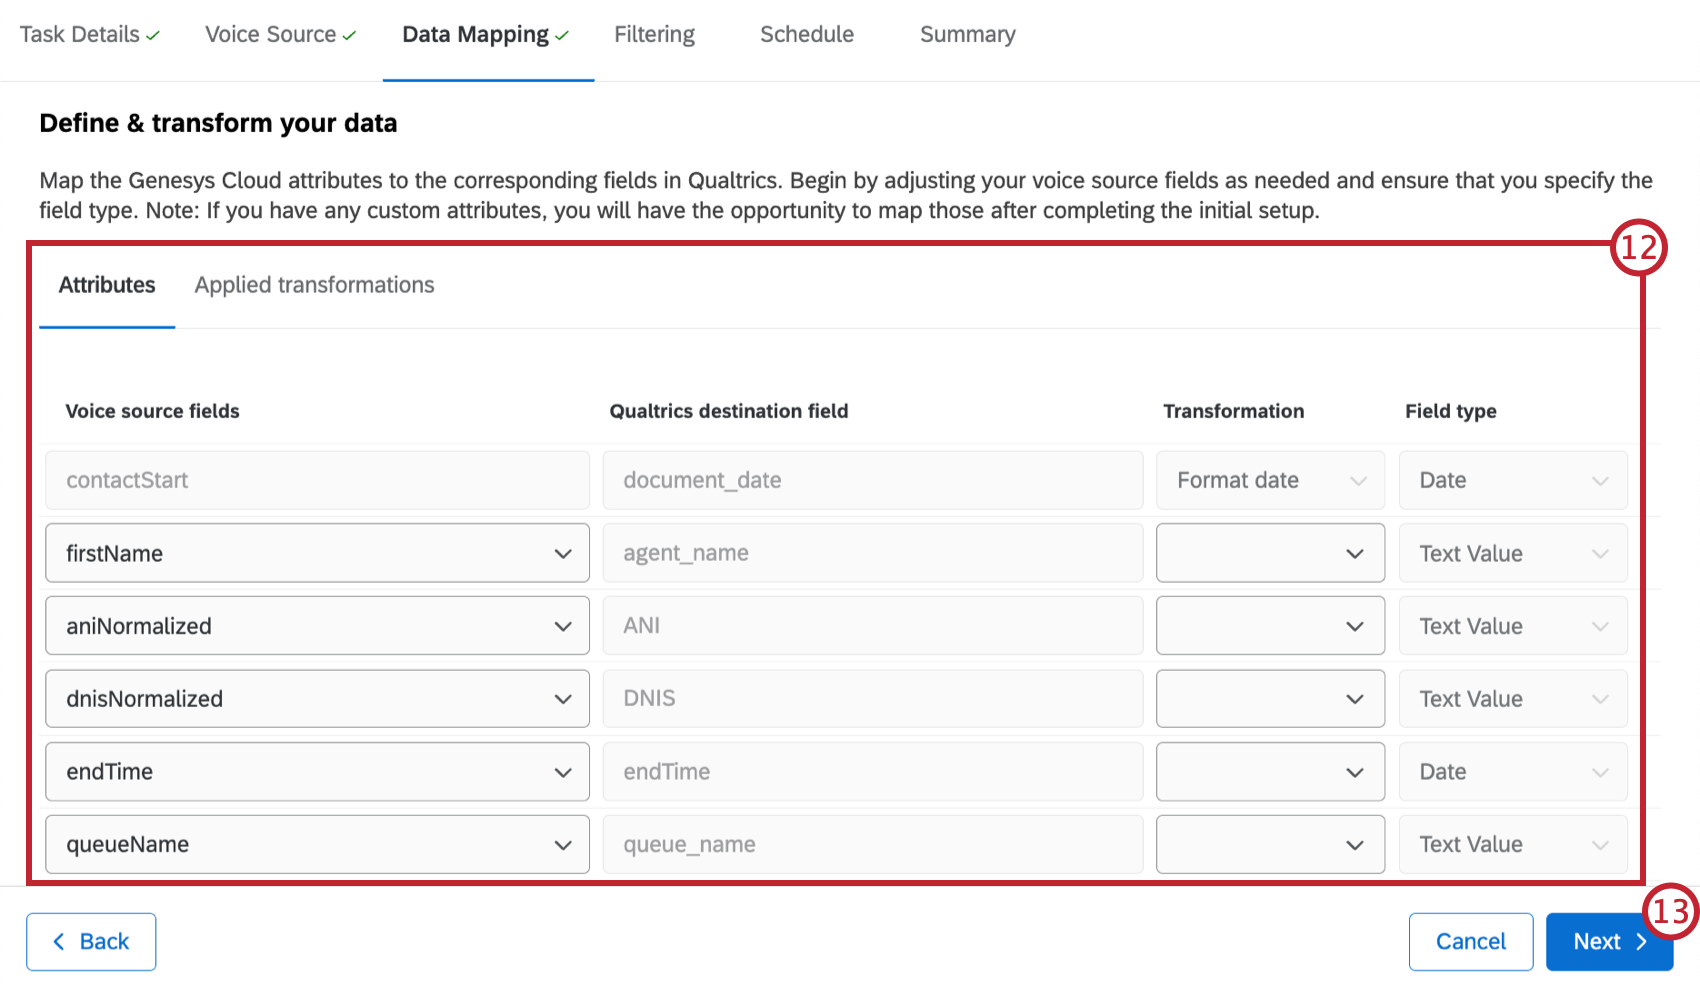
Mapping Voice Data
In the data mapping stage, you’ll map your voice provider attributes to the corresponding fields in your Voice project. You can also specify the field type for each field and apply transformations. The data mapping section has 2 tabs:
- Attributes: Here you can map voice provider attributes to a Qualtrics destination field.
- Applied transformations: Here you can view transformations that have been applied to your attributes.
Mapping Attributes
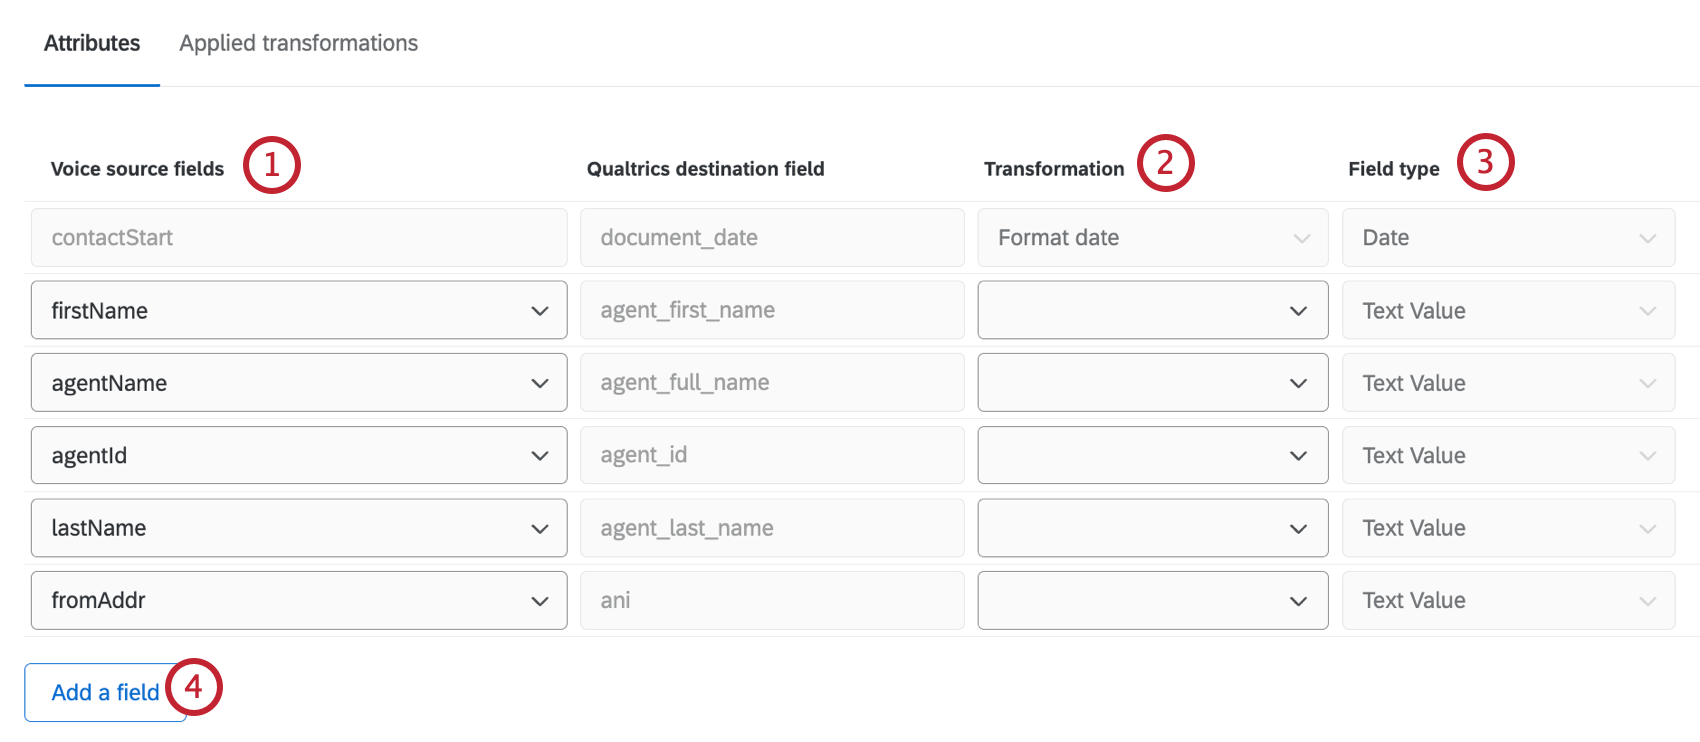
- Match fields in your data source to fields in the voice project.
- Apply a data transformation. See the section below for more information on available transformation types.
- Select each field’s field type. See Field Types for more information on available field types.
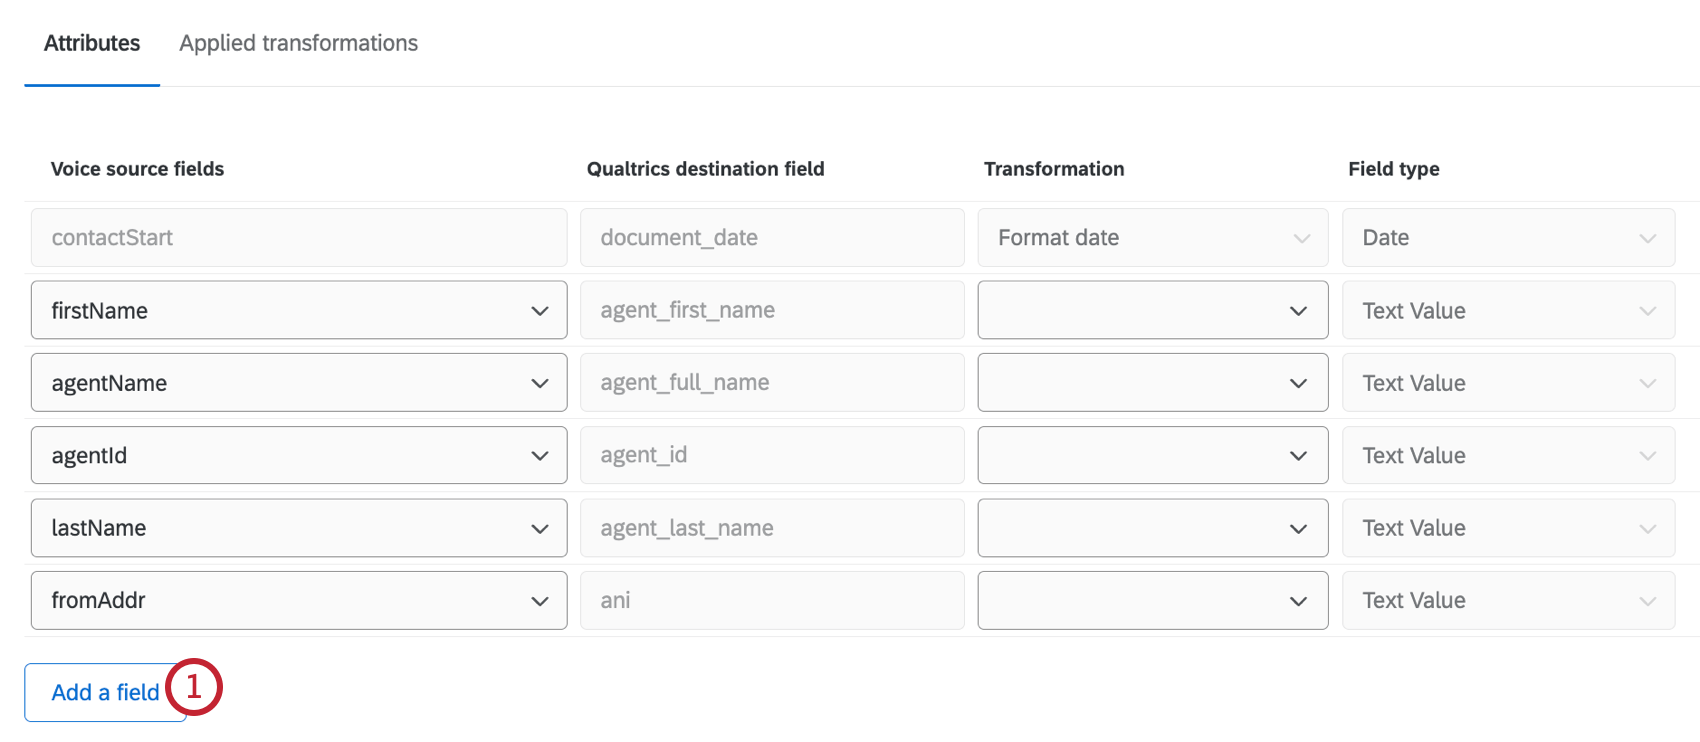
- Click Add a field to add additional fields to your mapping. You can also add custom attributes here. See the section below for instructions.
When you edit this task, you will be able to edit field mappings, but you won’t be able to choose different field types. You can apply transformations or add additional fields to map.
Custom Attributes
- To start adding custom attributes when mapping your data, select Add a field at the bottom of the data mapping page.
- Click Add custom attribute.
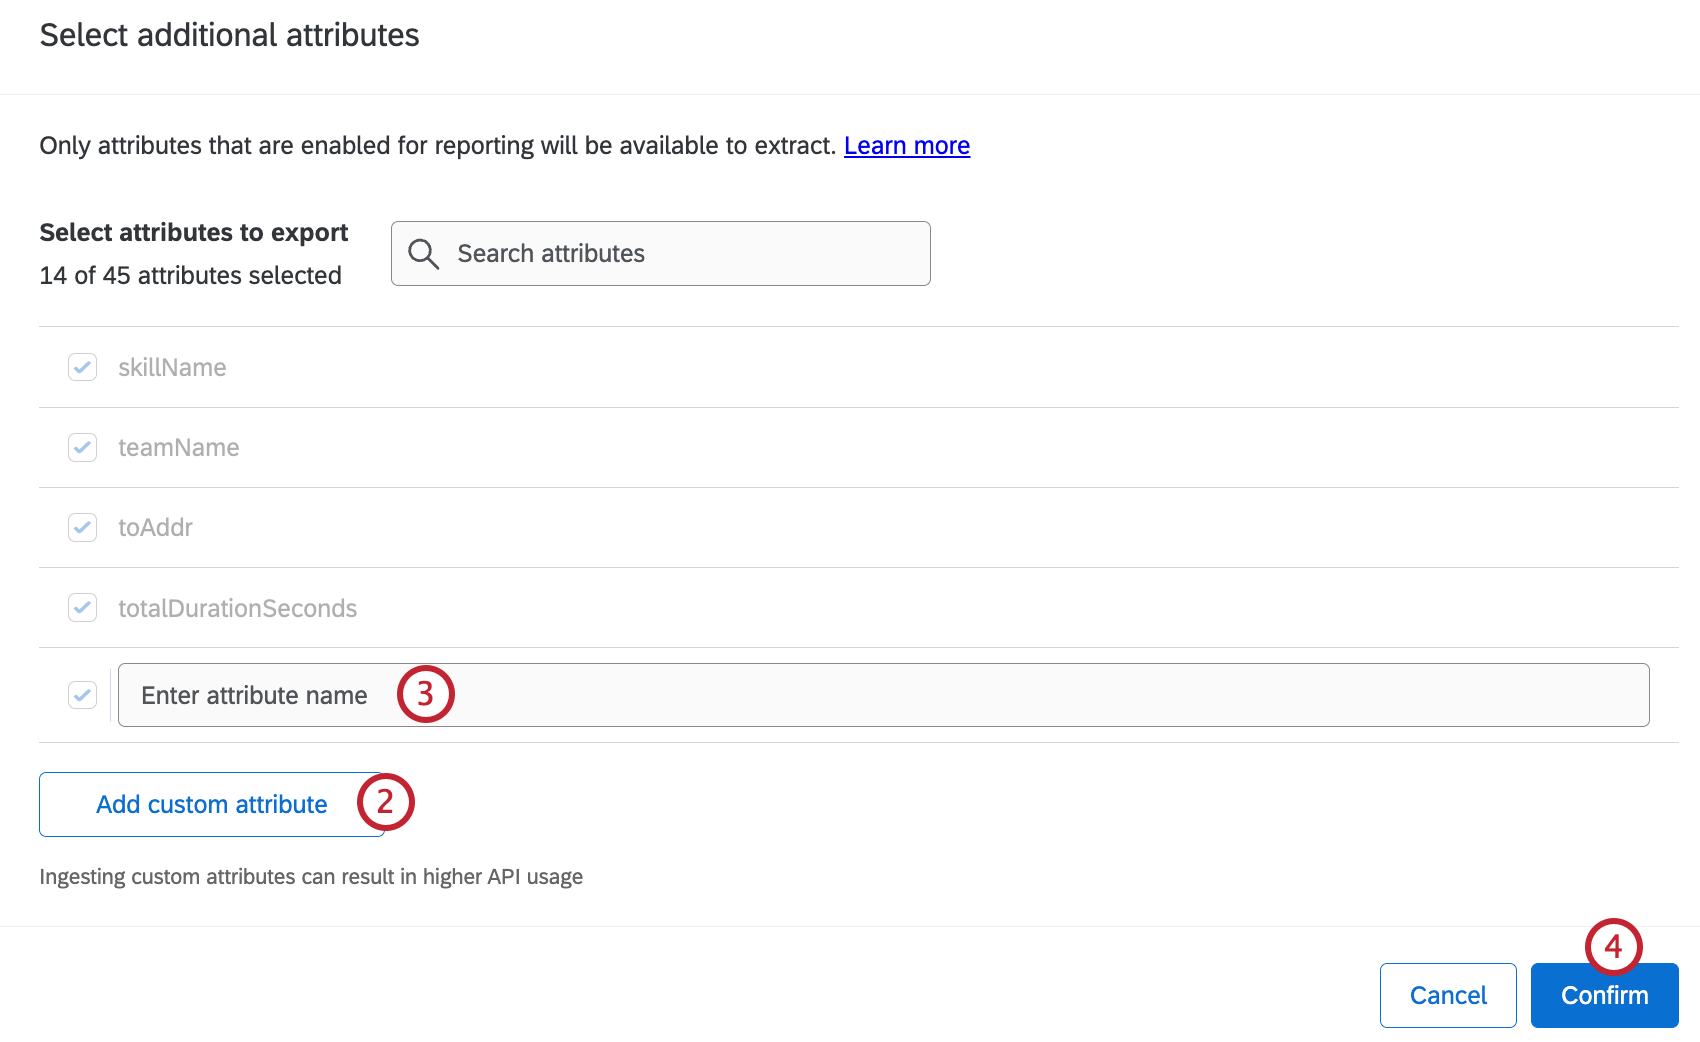
- Enter the attribute name.
- Repeat steps 1-2 for any additional attributes you want to add. When you’re finished adding attributes, click Confirm.
Applying Transformations
To apply a transformation, select the transformation type from the dropdown in the Attributes tab. The following types of transformations are available:
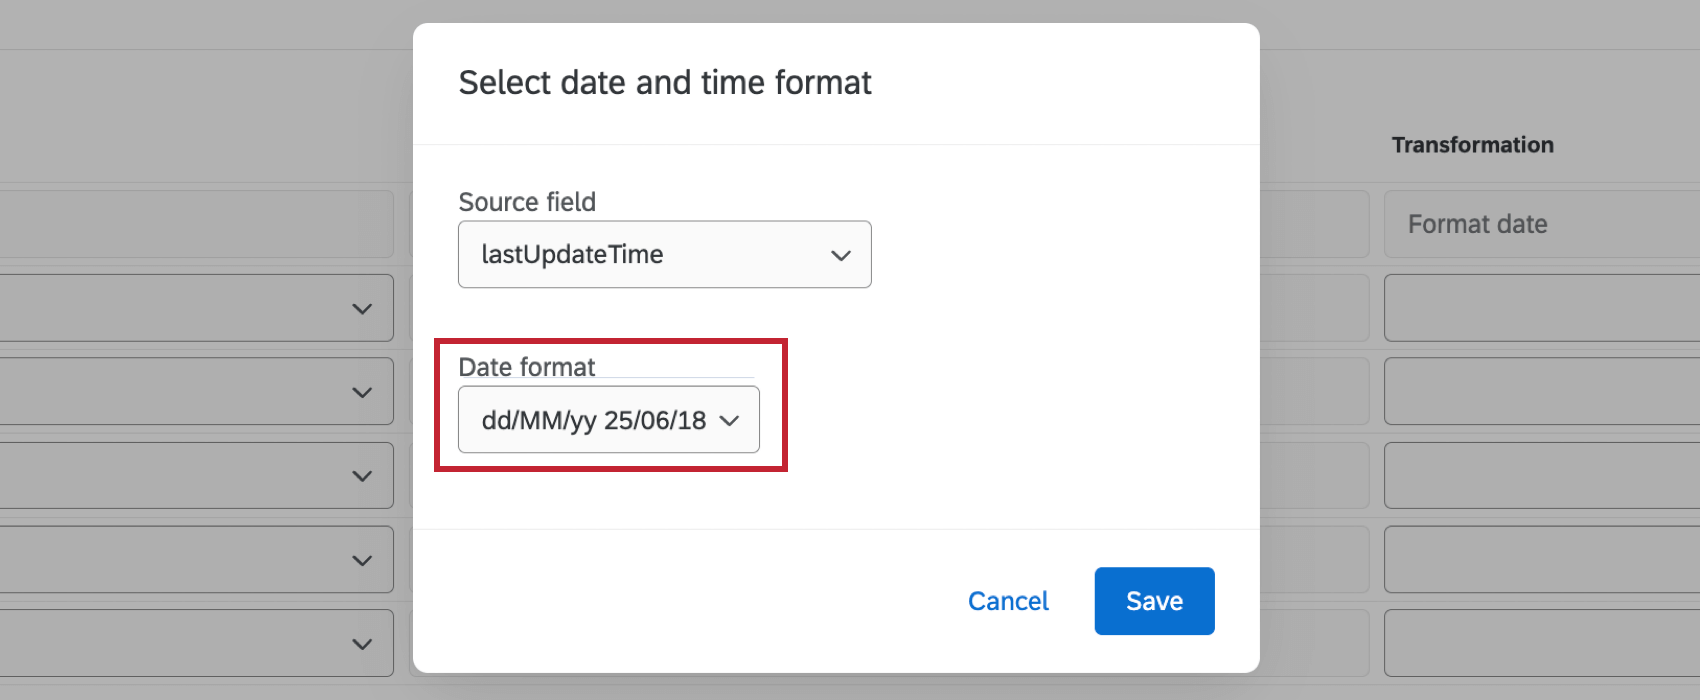
- Format date: Apply a specific date format to your source field. Select the date field you want to transform and select a date format from the dropdown.
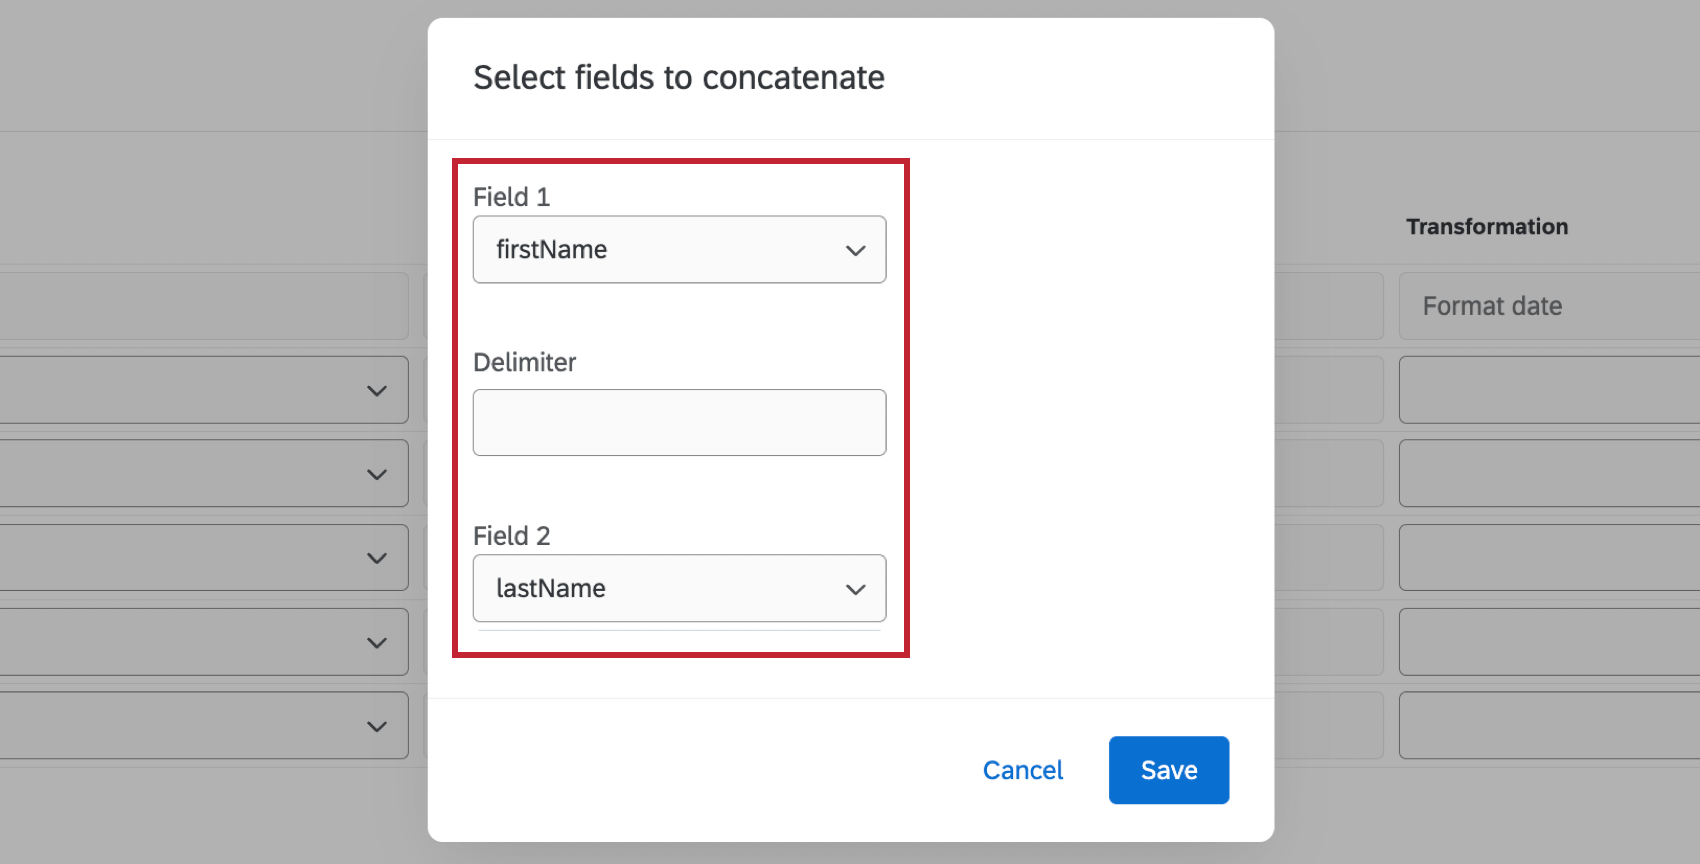
- Concatenate: Combine 2 source fields into a single field. Select the 2 fields you want to combine and enter a delimiter.
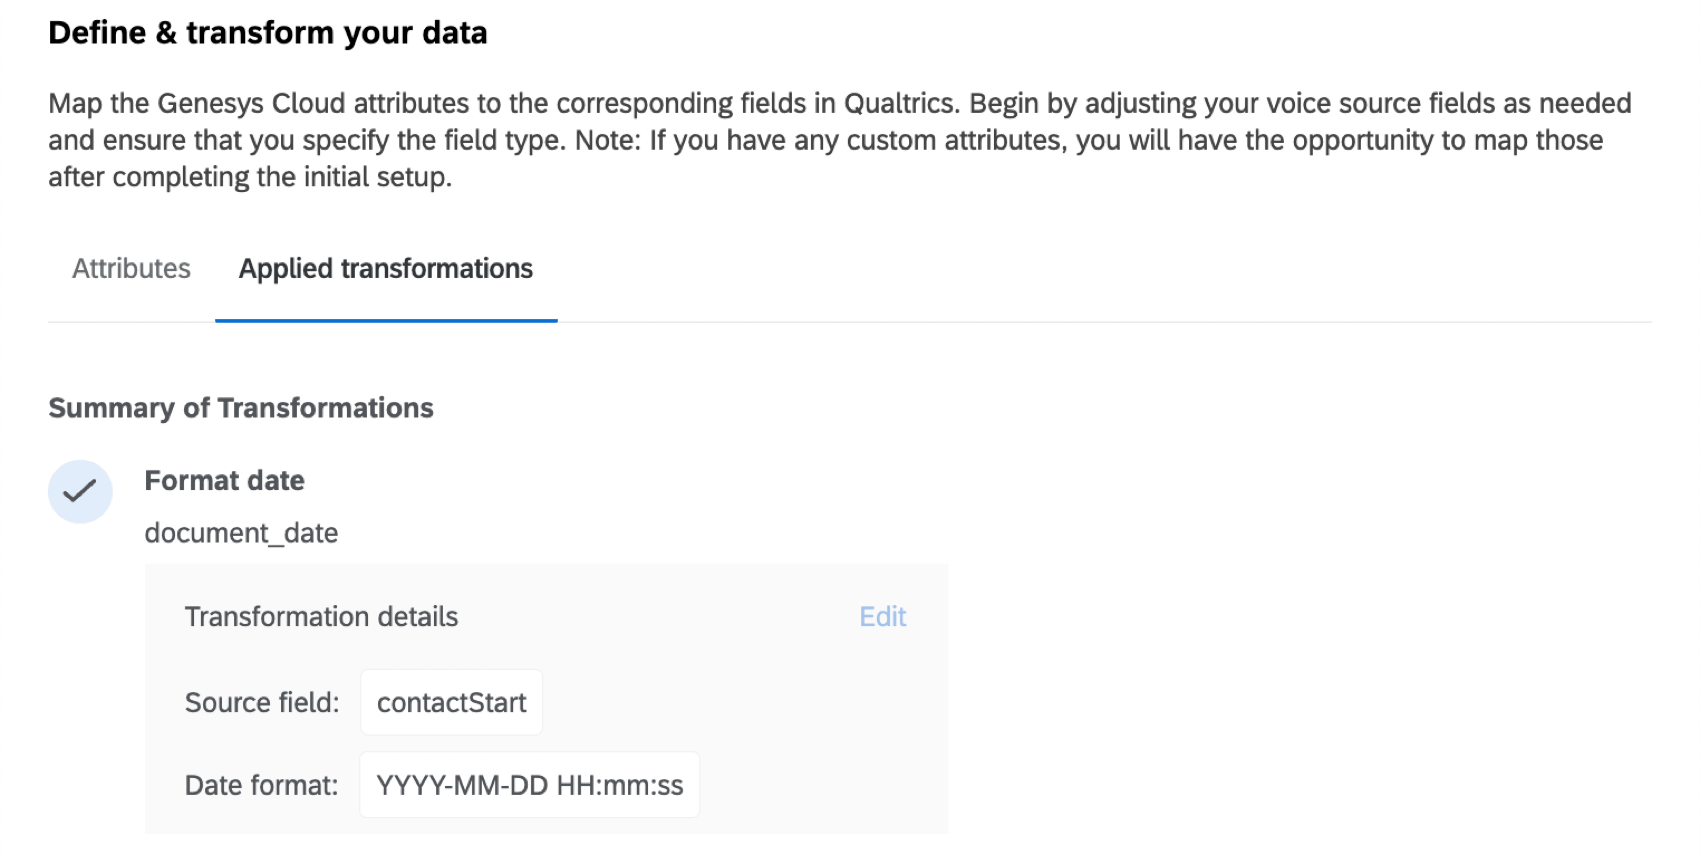
Any transformations you’ve applied will be visible in the Applied transformations tab.
Permissions and Voice Provider Requirements
Qualtrics Permissions
You will need the Manage Voice Pipelines permission enabled in the General tab.
NICE CXone Requirements
To connect NICE CXone to your Voice project, you’ll need the following:
- Admin Permissions: You’ll need the following permission enabled in NICE CXone to successfully connect your account to Qualtrics:
- Edit: This permission must be enabled for “My Access Key”. This allows you to generate access key credentials.
- Historical Reporting: This permission must be enabled for “Contact Data” This allows you to retrieve completed contact records and interaction history.
- Contact/Interaction Data Access: This permission must be enabled for “Contact Data” This allows you to retrieve completed contact records and interaction history.
- Search Interactions: This permission must be enabled for the “Interactions Hub”. This allows you to access recorded audio files.
- Play/download recordings: Play Any: This permission must be enabled for the “Interactions Hub”. This allows you to access recorded audio files.
- Access Key Credentials: This includes the Access Key ID and Access Key Secret. For instructions on how to obtain these, see the NICE CXone documentation.
- Client Credentials: This includes the Client ID and Client Secret. These fields are only necessary if you are using “Open ID Connect” as the auth protocol. To obtain your client ID and secret, fill out this CXone form. You will receive your credentials within a few days.
Genesys Requirements
- Genesys Client: After creating a client within your Genesys cloud instance you can obtain the Client ID and Client Secret. See the Genesys documentation for instructions.
Viewing and Managing Voice Tasks
Once you’ve created a voice task in your project, you can view it within the Voice tab. Click the toggle in the Enabled column to enable or disable a task. Click the 3 horizontal dots to the right of a task to perform the following actions:

- Configure task: Edit your task. You can also click on a task to begin editing it.
- Delete task: Delete your task.
- Duplicate task: Create a copy of your task. This is the only way to have more than 1 voice task in a project.
Attention: Duplicated tasks will inherit the sample file and data mapping of the parent task. Changes to the sample file or mapped fields must be made in the parent task. - Run task now: Run your task immediately if you didn’t set up your project to run on a schedule.
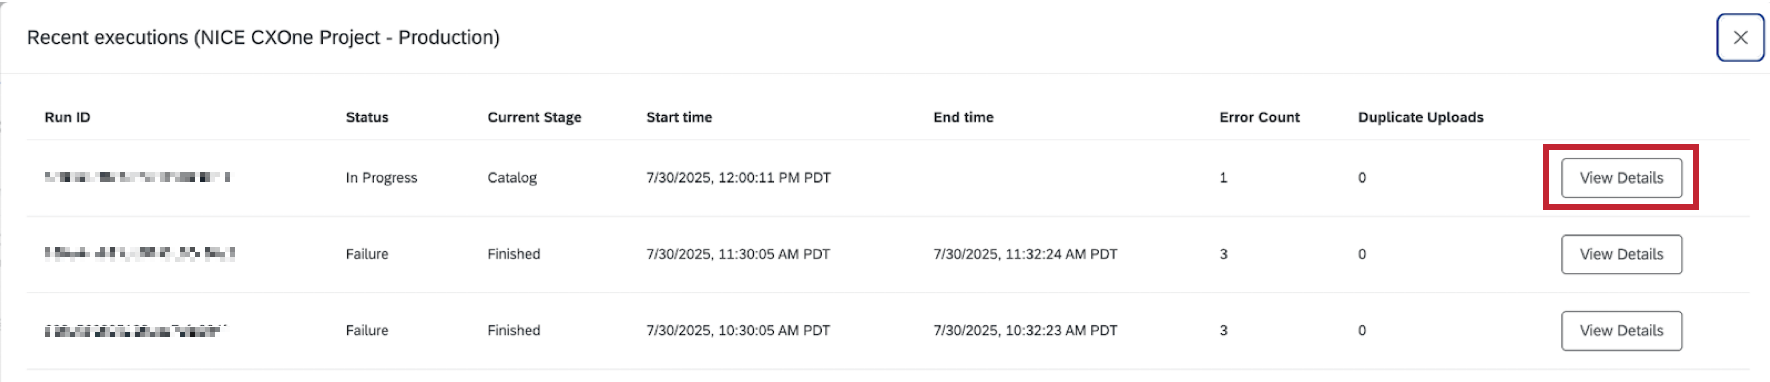
- View recent executions: See information about past runs including the Run ID, status, start and end time, and the error count.
Qtip: For further details including specific error messages and more granular information of each stage, click View Details.
Data & Analysis in Voice Projects
As your workflows extract voice data, this will appear in the Data & Analysis tab. Use this space to browse data and perform introductory analysis. Here’s the functionality you can expect in this tab, with links to the appropriate support pages:
- Editing Responses
- Export Data
- Re-Import Data
Qtip: The option to re-import data allows you to edit data that’s already in your project. You cannot import new social data using the Data & Analysis tab, and must instead use voice tasks to extract data from voice providers.
- Recorded Responses
- Filtering Responses
- Field Editor
Collaborating on Voice Projects
You can invite other Qualtrics users to create and edit your voice project.
Collaboration works the same with email data projects as it does with reputation management projects, except collaborators can only have Admin access. There is no read-only access for email data projects. For steps, see this page on collaboration.